Use Zapier
Introduction to Zapier
Zapier allows you to connect the Processes to thousands of other web applications.
By connecting your systems to document generation, you’ll get rid of repetitive work that usually slows you down. There is hardly an application you can’t connect to Plumsail Documents via Zapier. Now Zapier includes more than 3000 apps.
Zaps are automated connections between apps in Zapier. Every Zap has a trigger - an event that makes this Zap start. And after the trigger, an action or a series of actions follow to bring the desired result.
Some apps integrated with Zapier have both triggers and actions. Some have either triggers or actions.
Please find all the available Plumsail Documents actions for Zapier in the list of actions.
Start a process and generate documents from a template
Plumsail Documents includes an action Start Process.
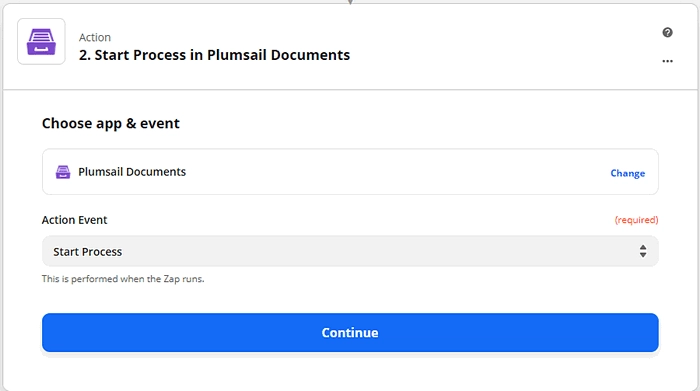
You can generate personalized documents based on data from thousands of apps in Zapier. Various events can trigger an automated connection of apps - a Zap. It can be web form entries, new rows in sheets, new events in calendars, new opportunities in CRM - the list is never-ending.
We’ll show how to handle Plumsail Documents action - Start Process - in Zapier.
Let us say you have a Google Calendar for conferences. You need to generate personalized invitations.
This is how our Zap looks:

Set trigger
The first step is a trigger. In this particular case, it’s a new event in the Google Calendar.
When a new event is added to the Google Calendar, the process of generating tickets for this event will start.
Start Process in Plumsail Documents
After setting a trigger, add an action Start process. For that, search for Plumsail Documents, choose an action Start Process.
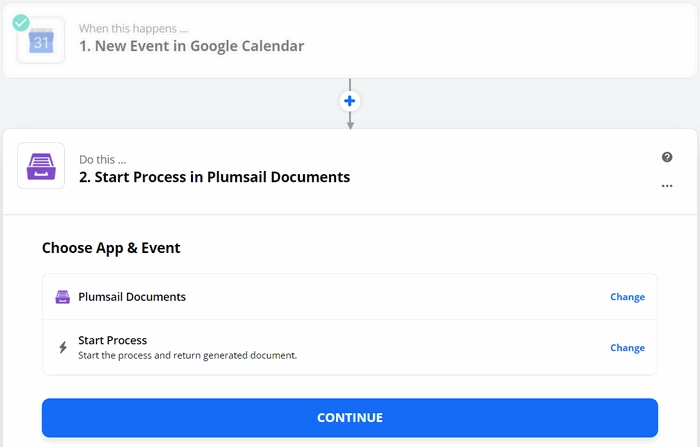
Click Continue. If this is your first Zap, at this point, you’ll need to Sign in to your Plumsail Account from Zapier to establish a connection between the app and your account. If you already have a Plumsail account tied to the app, you can add another one at this step, and use it instead.
Choose the process you want to start by this Zap from the dropdown.
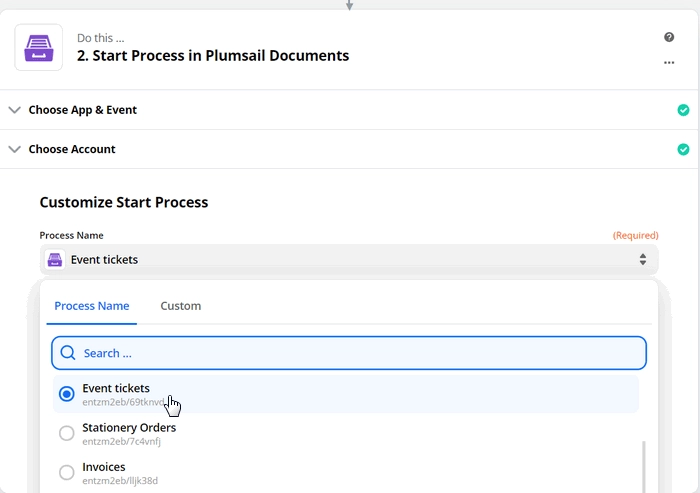
The next step is to customize Start Process.
Customize Start Process
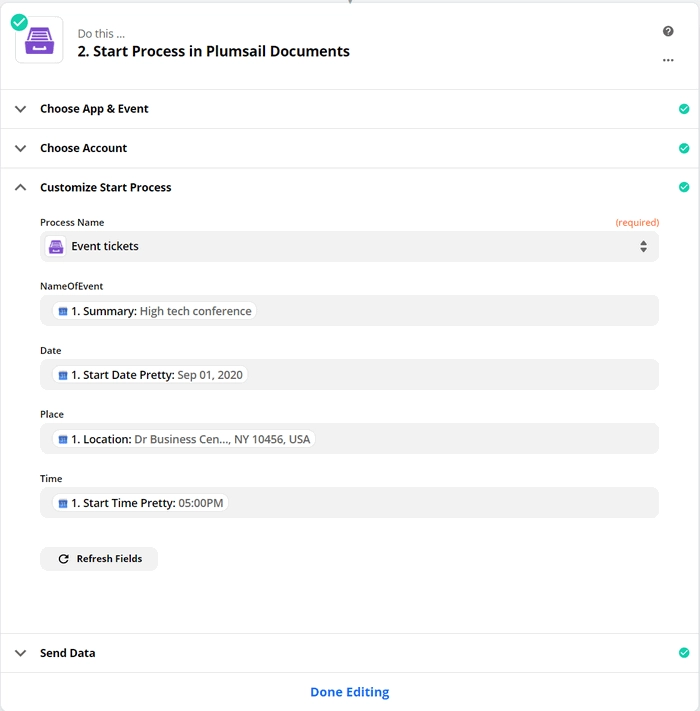
Zapier pulls data on tokens from a document template when you create a new process and save the template. All you need to do is to fill the fields to populate the template. Use the output from the trigger to specify values for populating the template:
Multiple line items
Sometimes you need to display a collection of items. For example, a collection of products in the invoice. You used nested tags with a dot operator (like {{products.name}}, {{products.cost}}, etc.) to let the process know that you want to display properties from some object.
In Zapier, the object will be outlined. As the Plumsail Documents integration supports line items, it’s possible to use the output arrays from the trigger to specify values:
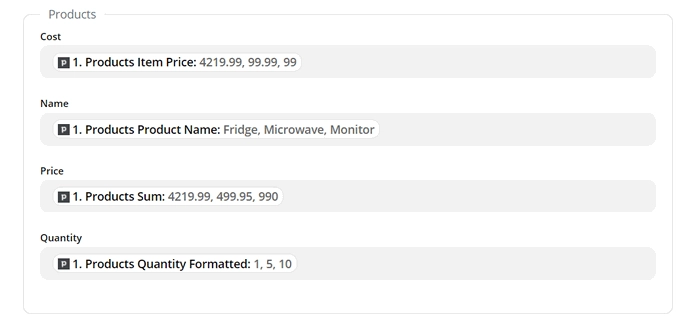
The templating engine will automatically add information for each item.

Use the result file in Zapier
It’s possible to use the output of the Start process action further in the zap.
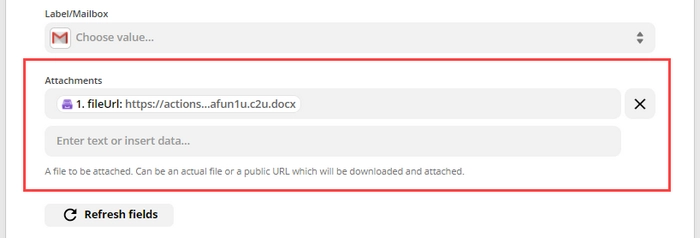
You’ll be able to add the result file as an attachment:

Trigger zap when process finished
Sometimes you need to do some actions when a process of document generation is finished.
You can use “Process finished trigger” to start your zap when the document generation process is finished.
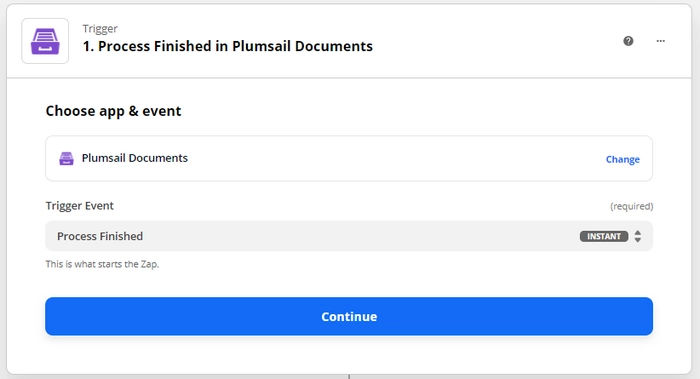
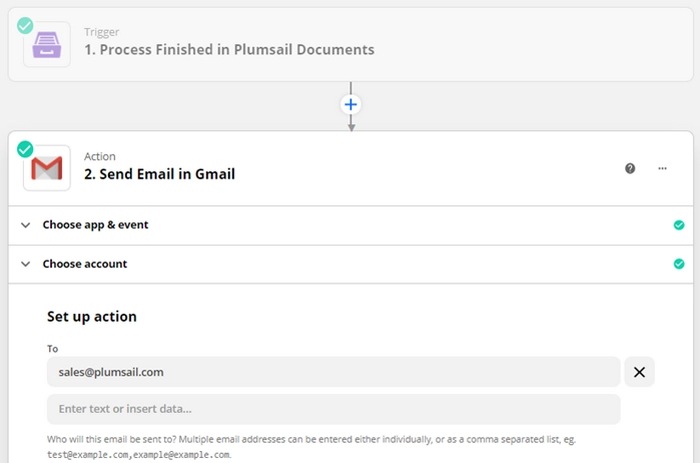
The trigger returns an URL of the generated document. You can use it to send an email with the document as an attachment.
Advanced document processing
Here you can find step-by-step examples of integrating Plumsail Documents with third-party services using Zapier. Listed below are how-to guides for just a few of the apps that can be connected to Documents. If the app you wish to connect is not on this list, you should jump to the Find Your App section.
Create documents from:
Step-by-step guides
You can find all the step-by-step guides for different scenarios on our Zapier integration page.
List of actions
The list of actions in the Plumsail Documents connector for Zapier:
- Start Process
- Generate Document from DOCX template
- Generate Document from PPTX template
- Generate Document From XLSX Template
- Generate Document From HTML Template
- Create archive
- Extract From Archive
- Fill Merge Fields in DOCX Document
- Convert to PDF
- Convert DOCX to PDF
- Convert XLSX to PDF
- Convert PPTX to PDF
- Convert DOC to DOCX
- Convert XLS to XLSX
- Convert PPT to PPTX
- Convert HTML to PDF
- Convert HTML to DOCX
- Convert JSON to CSV
- Convert JSON to Excel File (XLSX)
- Add Image Watermark to PDF
- Add PDF Watermark to PDF
- Add Text Watermark to PDF
- Split PDF
- Merge PDF
- Merge DOCX
- Merge Any Files into PDF
- Convert PDF to Text
- Convert PDF to BMP Image
- Convert PDF to JPEG Image
- Convert PDF to PNG Image
- Convert Images to PDF
- Convert Email to PDF
- Fill in PDF Form
- Get Form from PDF
- Protect PDF
- Get Information About PDF Protection
- Compress PDF
- Parse CSV
- Convert CSV to Excel File (XLSX)
- Regular Expression Match
- Regular Expression Replace
- Regular Expression Test
Find your app to connect
Start typing the name of your app in the right search box.