Create fillable PDF
You can populate fillable PDF forms using Plumsail Documents. There are at least two ways to do this:
Create a process and start it using Power Automate (Microsoft Flow), Web form or REST API
You can use Adobe Acrobat Pro or any other PDF editor to work with your PDF file. This article describes how to create a fillable PDF using Acrobat Pro. Alternatively, please see this instruction to create a fillable PDF with Nitro Pro
Note
We prepared the video, where we show how to fill in PDF forms in Power Automate (Microsoft Flow) or Azure Logic Apps with the help of Plumsail Documents.
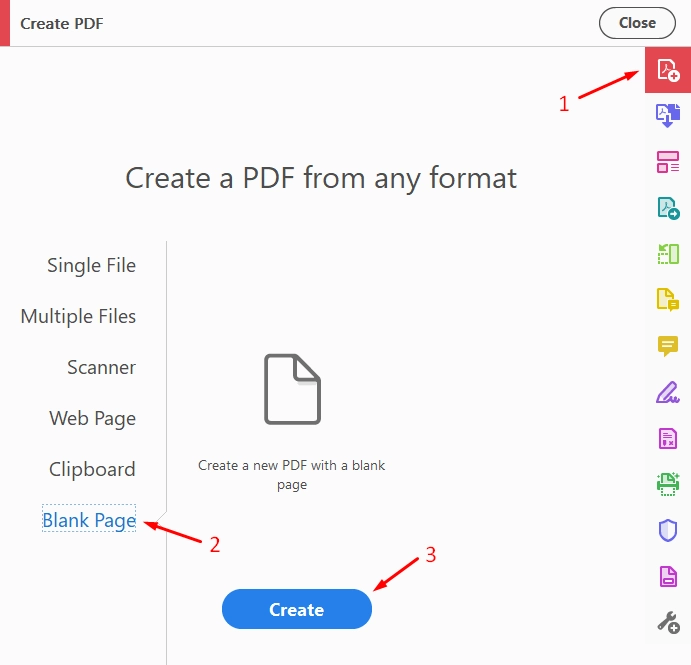
Create new PDF file
First, we need to create a new blank PDF file. Click on Create PDF button in the menu and choose Blank page.
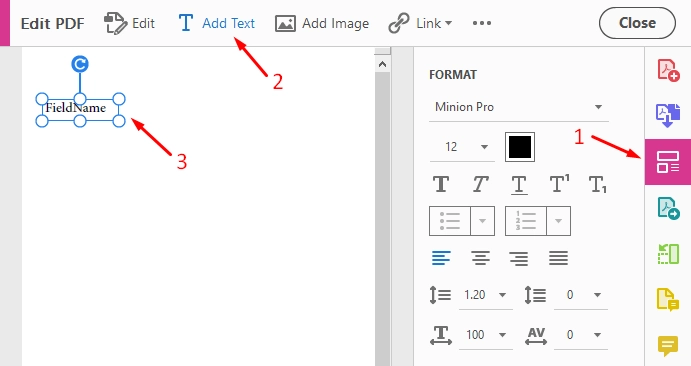
We need to add text which will indicate a field title on our form (click on Edit Pdf and then Add Text in the menu):
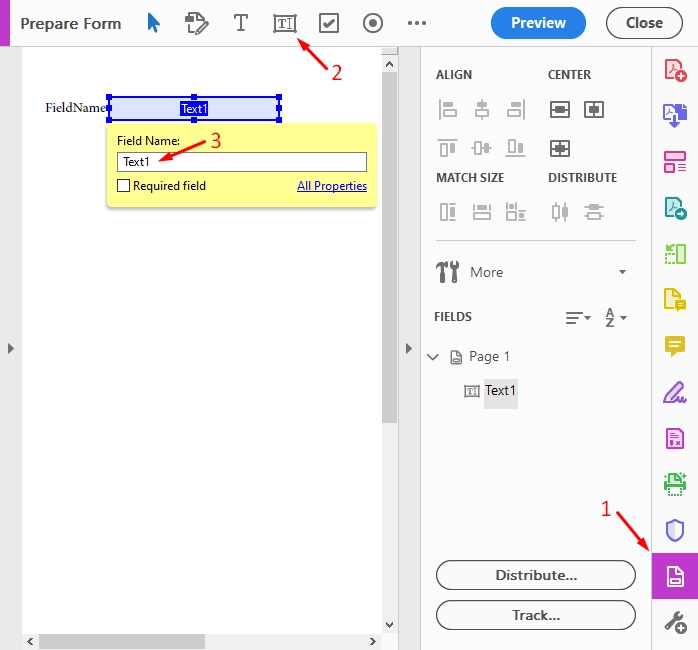
Create form fields
After that, we should add fields to our PDF file (Prepare Form button in the menu). We should specify the field’s name. Later you will want to automatically populate values to this form. That is why it is important to assign the correct field name. When populating the form you will submit some object with values. The field name has to match property names in this object.
For example, you have a field with the name “Text1”. In this case, you will need to submit an object with the structure like this to fill this field:
{
  "Text1": "Some value"
}
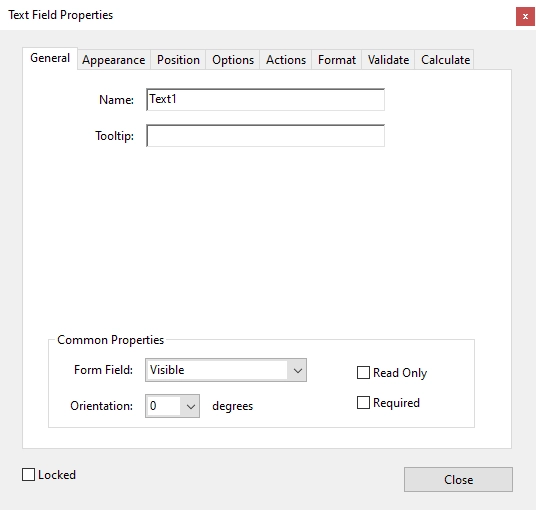
Click on the field -> Properties section to change field name:
Create checkbox field
You can add and edit specific fields like checkboxes and radio buttons the same way. To check a box, you’ll need to submit an object with a true or false value. Use the following structure:
{
  "Checkbox1": true
}
Create group of checkboxes
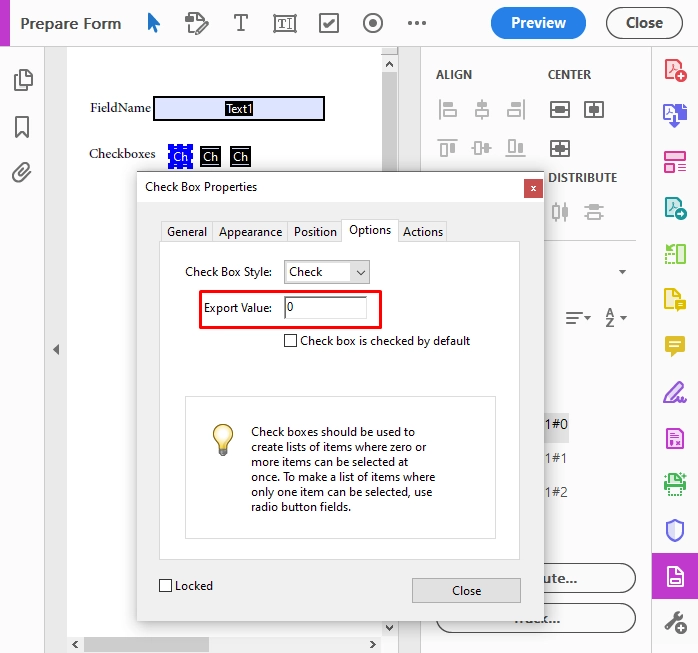
The checkbox group allows selecting only one option in it, i.e. works like radio buttons. To create the one, add several checkboxes with the same name. They will be displayed in the list of fields with their indexes after the hash character.
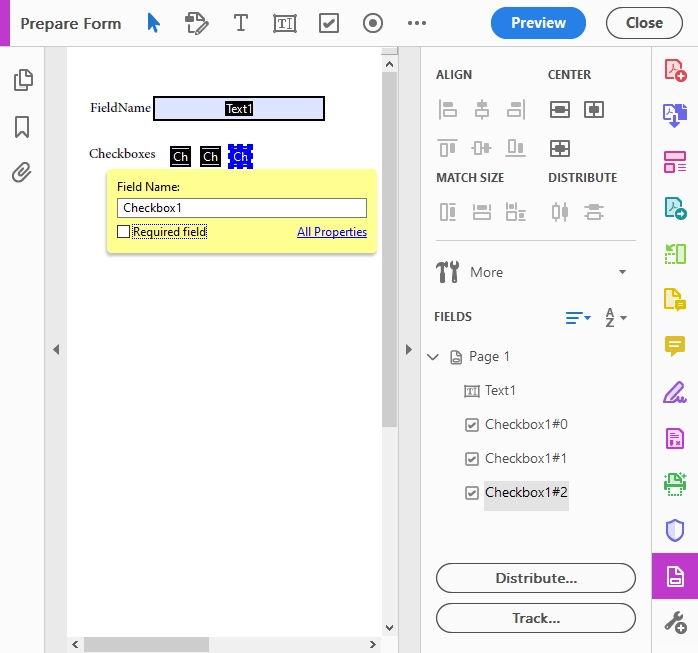
For each checkbox from the group, set a different export value in properties and submit it as a string to check the accordant box.
{
  "Checkbox1": "0"
}
Create radio-button field
To choose a radio button, you’ll need to create a radio-button group in your pdf. To do this, just give the same Name to several radio-button fields and a group will be created automatically. Then you need to specify the “Radio Button Choice” field for each option of the radio-button group. This is the value you need to submit to check the radio button. Please note that you can style radio buttons as checkboxes for a better “paper-like” visualization:

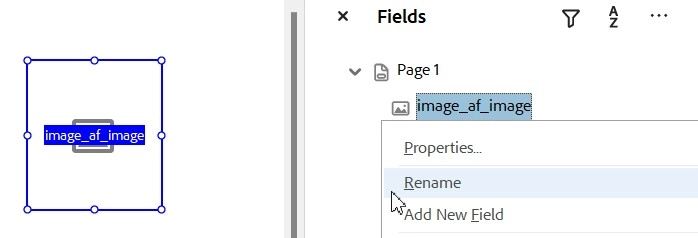
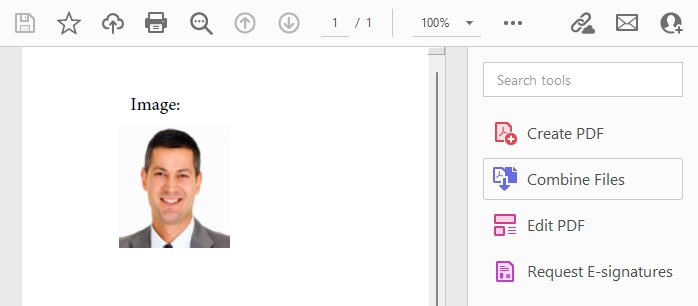
Create image field
Add an image field to the form and use its name in the data source object. In the latter, the image should be provided as either a base64 string or a URL. If you use a URL, it has to lead directly to a publicly accessible image file; otherwise, the templating engine will not be able to read it.
Note
Only PNG images are supported.

Note: when you create an image field, ‘_af_image’ is automatically added to the end of its name. The name can be changed in the sidebar in the Fields list.
For example, this JSON data source gives the following result:
Create QR code field
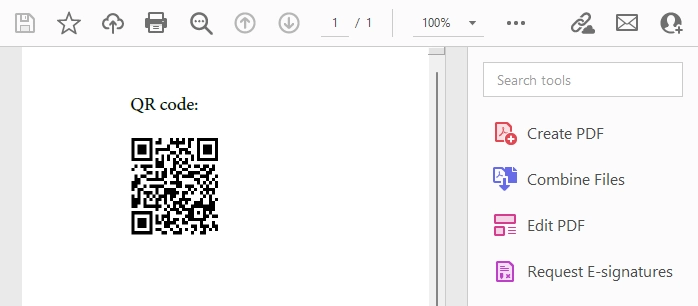
Add an image field and open its properties.
Switch to the General tab and enter #qrcode in the Tooltip field.
The string provided in the accordant data source property will be converted to a QR code.
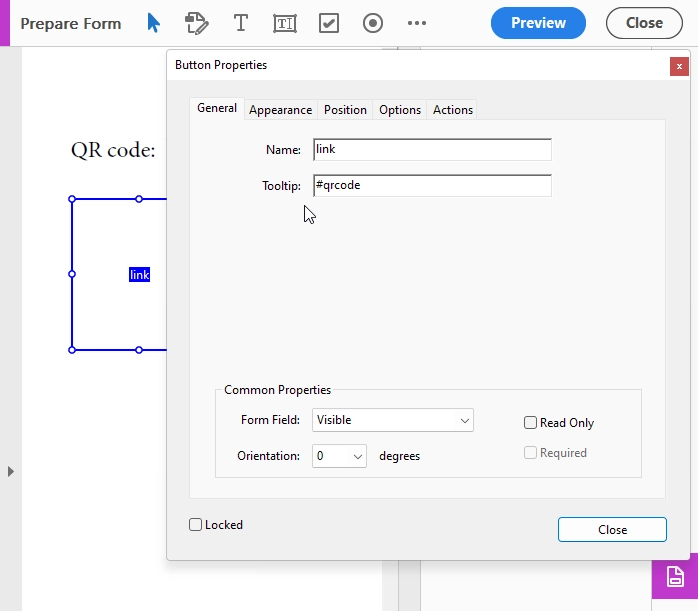
For example, this JSON data source gives the following result:
{
  "link": "https://plumsail.com/"
}
Create barcode field
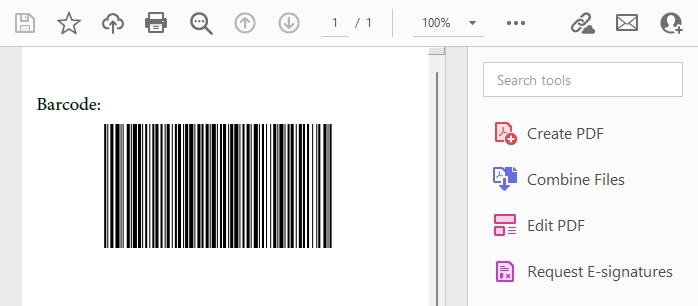
Add an image field and open its properties.
Switch to the General tab and enter #barcode in the Tooltip field and after a whitespace - its type.
The string provided in the accordant data source property will be converted to a barcode of the specified type.
The available ones are the following:
CODE128
CODE11
CODE39
UPCA
MSI
ISBN
EAN13
ITF14
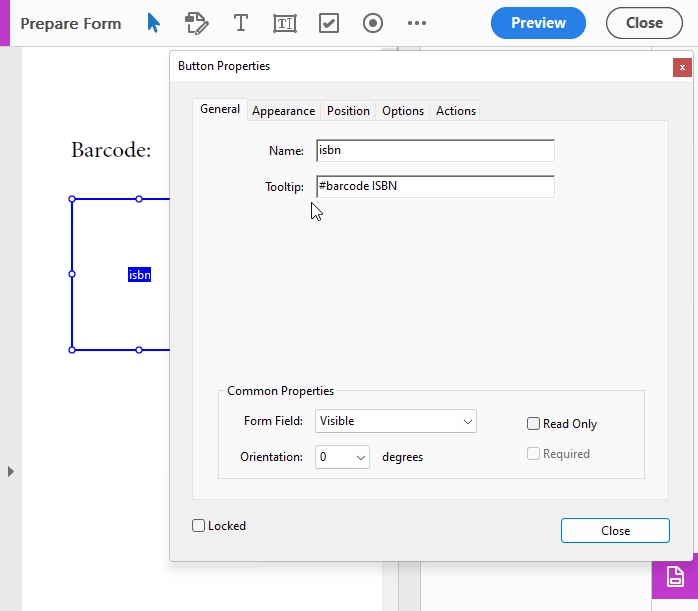
For example, this JSON data source gives the following result:
{
  "isbn": "978-3-16-148410-0"
}
Example
Download the example of a fillable PDF for this article.
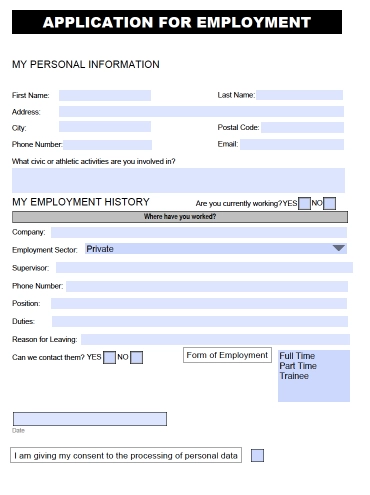
Here is the example of the data object that could be used for populating this form:
{
      "FirstName": "David",
      "LastName": "Navarro",
      "Address": "3 Main St.",
      "City": "New York",
      "PostalCode": "972013",
      "PhoneNumber": "202-555-0131",
      "Email": "david@sample.com",
      "Activities": "Sports: football, basketball, volleyball",
      "CurrentlyWorking": "No",
      "HistoryCompany": "Acme Corp",
      "HistoryEmploymentSector": "Public",
      "HistorySupervisor": "Derek Clark",
      "HistoryPhoneNumber": "555-777-9999",
      "HistoryPosition": "Marketing director",
      "HistoryDuties": "Developing marketing strategy",
      "HistoryLeaving": "Moving to another city",
      "HistoryContact": "Yes",
      "HistoryEmploymentForm": "Trainee",
      "Date": "06/30/2019",
      "PersonalDataConsent" : false
}
Use cases
Please review examples to learn how to set up an automatically Fillable pdf:
Using Microsoft PowerAutomate
Using Plumsail Processes