Generate sales agreement with Airtable data using Plumsail Documents extension
This article describes how to automatically generate a sales agreement using Airtable data with the help of the Plumsail Documents extension for Airtable. This will help you establish an effective Airtable contract management system, simplifying the creation of essential documents such as contracts, addendums, and agreements.
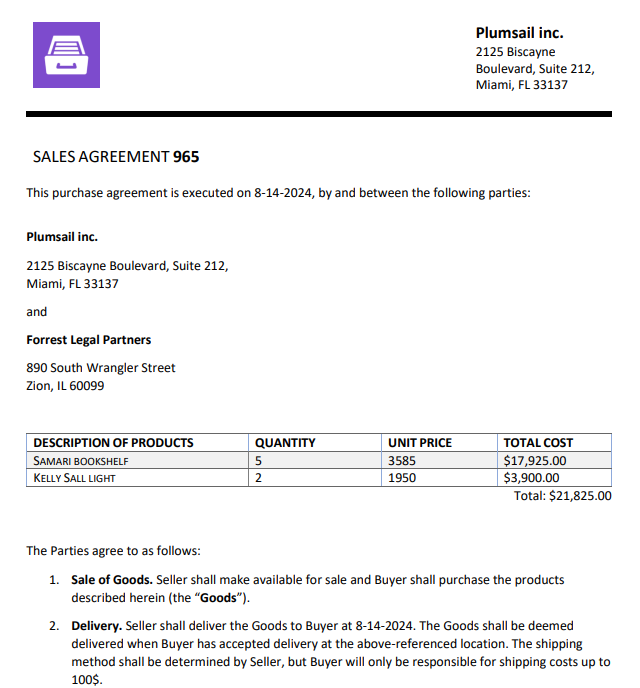
Let’s concentrate on each step individually.
Set up Airtable
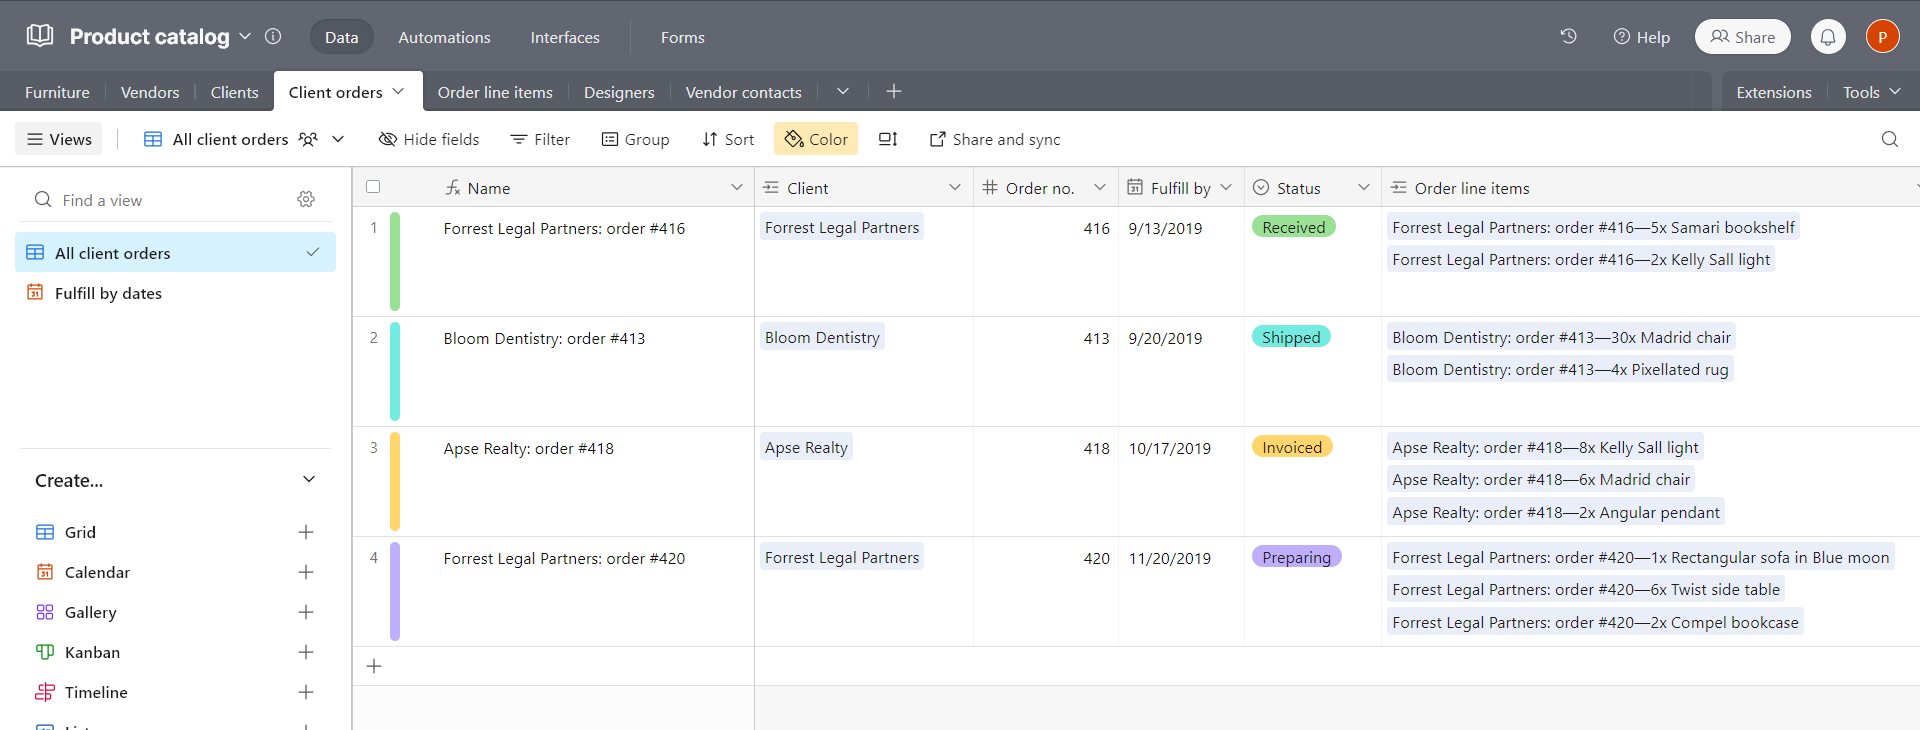
In this article, we are using the Airtable Client orders table from the Product catalog database, which is available in the Product catalog template.
Add Plumsail Documents extension to Airtable
After deploying the Product catalog database, we need to add the Plumsail Documents extension button to the Client orders table. Please follow the steps:
Go to the Extensions tab and Click Add an extension button.

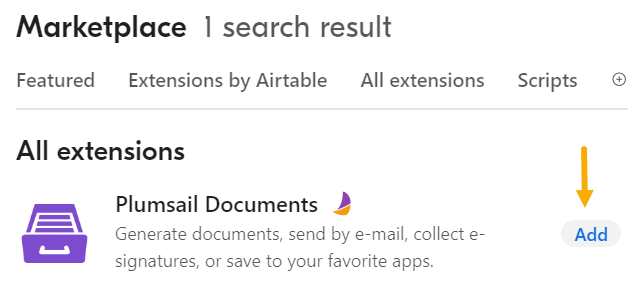
Type Plumsail in the search field and click Add button when the extension is found.
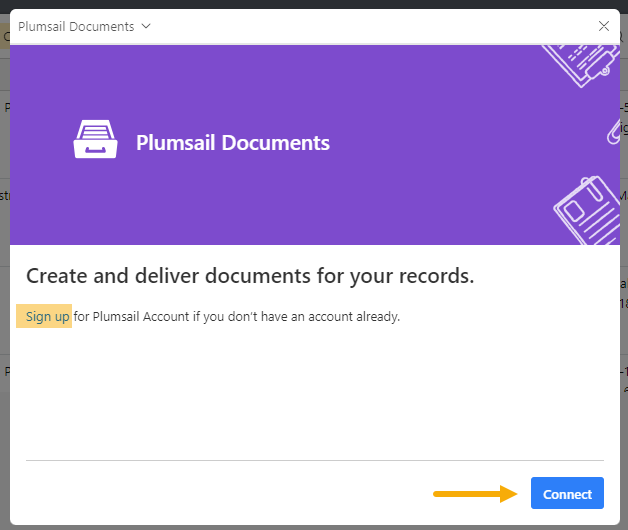
3. Then Sign up for Plumsail Account if you don’t have an account already and click Connect. You’ll need to enter your Plumsail account email and the password to complete the connection.
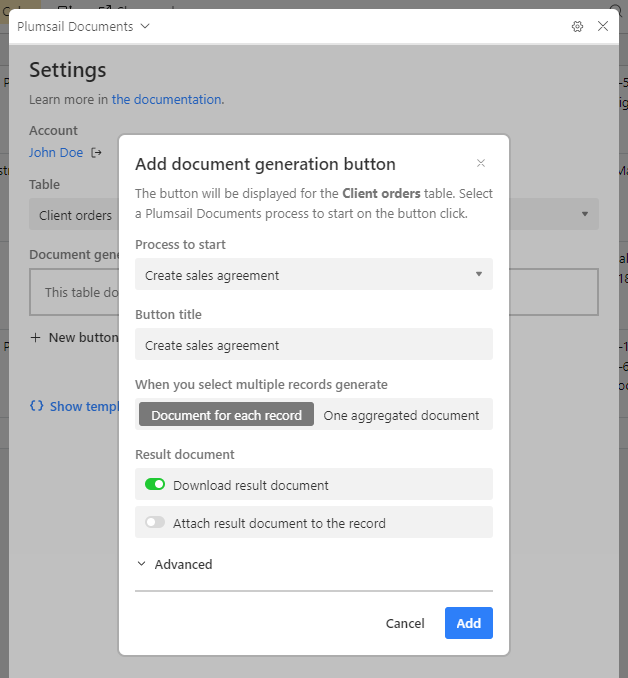
After connecting to the Plumsail account you’ll see a dialog with details to add a document generation button. You’ll need to select a Process to start. We’ll discuss the Process settings further in the article.
Set up sales agreement template in Plumsail Documents
After adding the Documents extension button, let’s move on to the next part. We’ll create a DOCX template and a Documents Process to populate the template with Airtable data.
Add a new process to create sales agreement with Airtable data
First, register or log in to your Plumsail account.
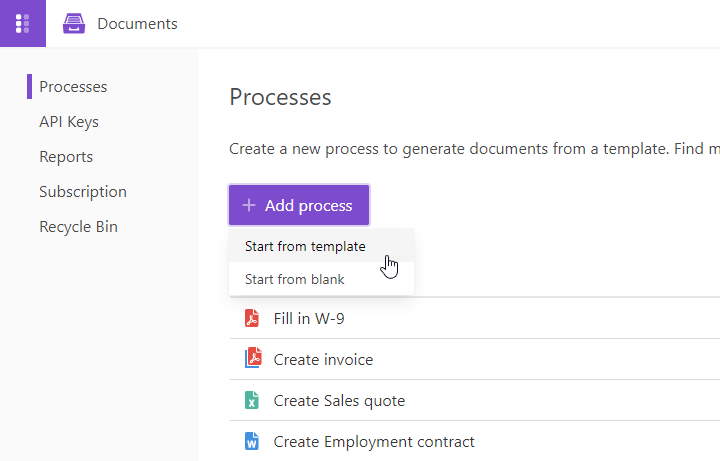
In the Processes section, click on the Add process button and select Start from template:
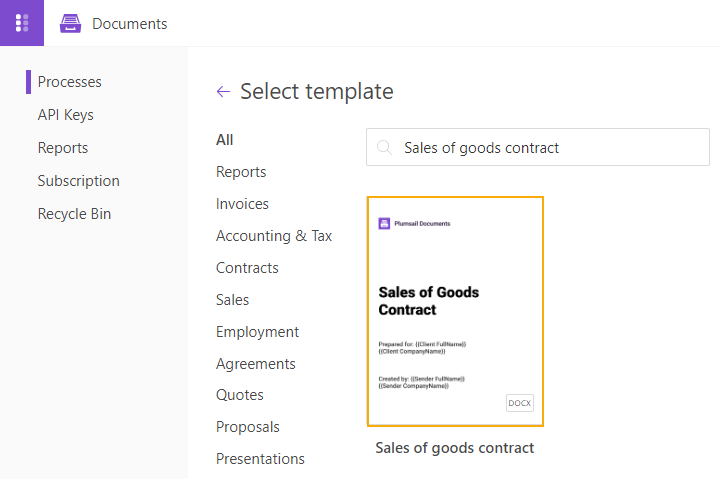
You’ll be redirected to the library of document templates. We select the Sales of goods contract template for our scenario:
Name the process and click Next to proceed. Then you’ll jump to the Configure template step.
Configure sales agreement template
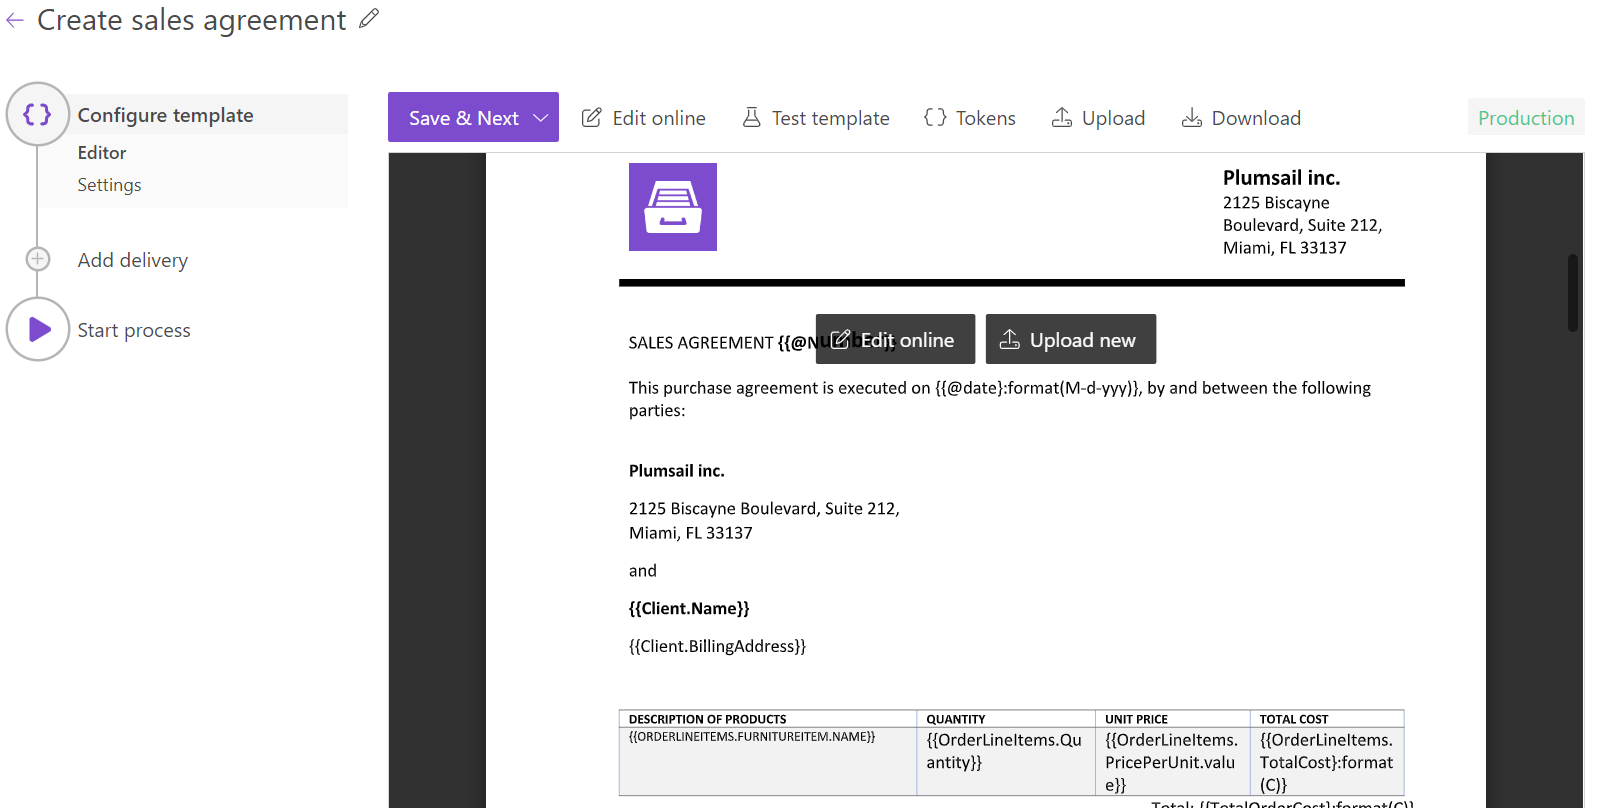
In the Editor mode, we adjust the selected document template to fit our needs. Everything in the curly brackets will be replaced with Airtable data dynamically. You can add more placeholders. They work quite simply and support even some complex logic with tables, charts, conditions, and more. Learn how Plumsail Documents Word DOCX templates work here.
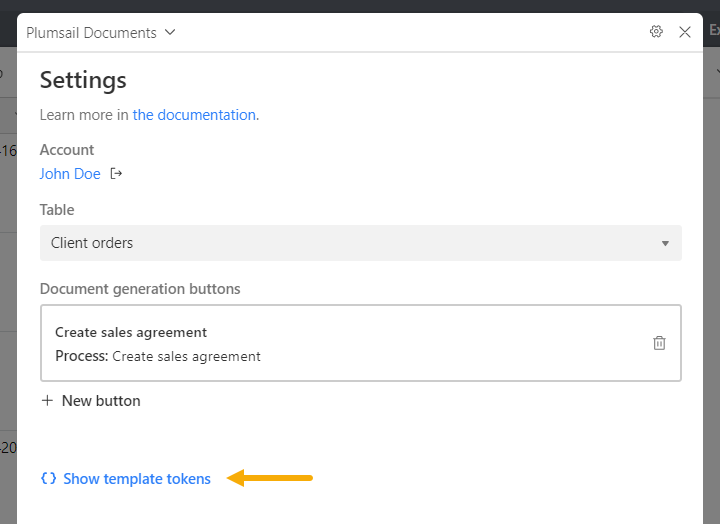
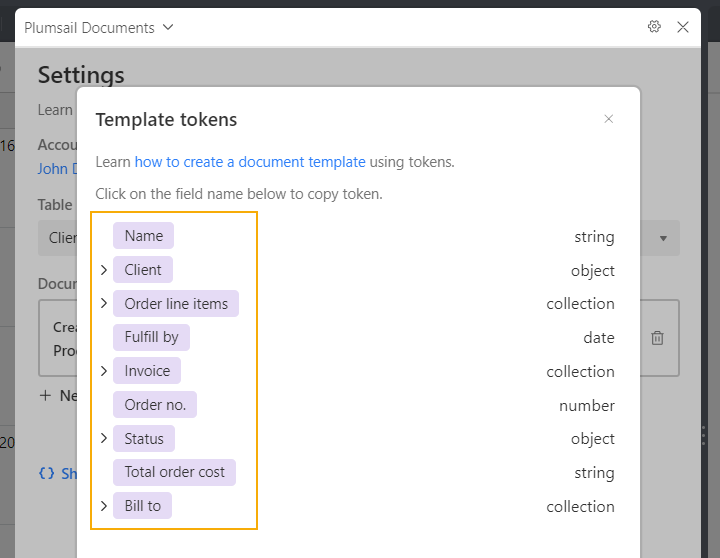
Our template tokens should match the tokens from the Airtable database. Copy the tokens from the Documents extension.
This is how the modified Sales of goods contract template looks. You can download it here.
Click Save & Next to go to the Settings substep.
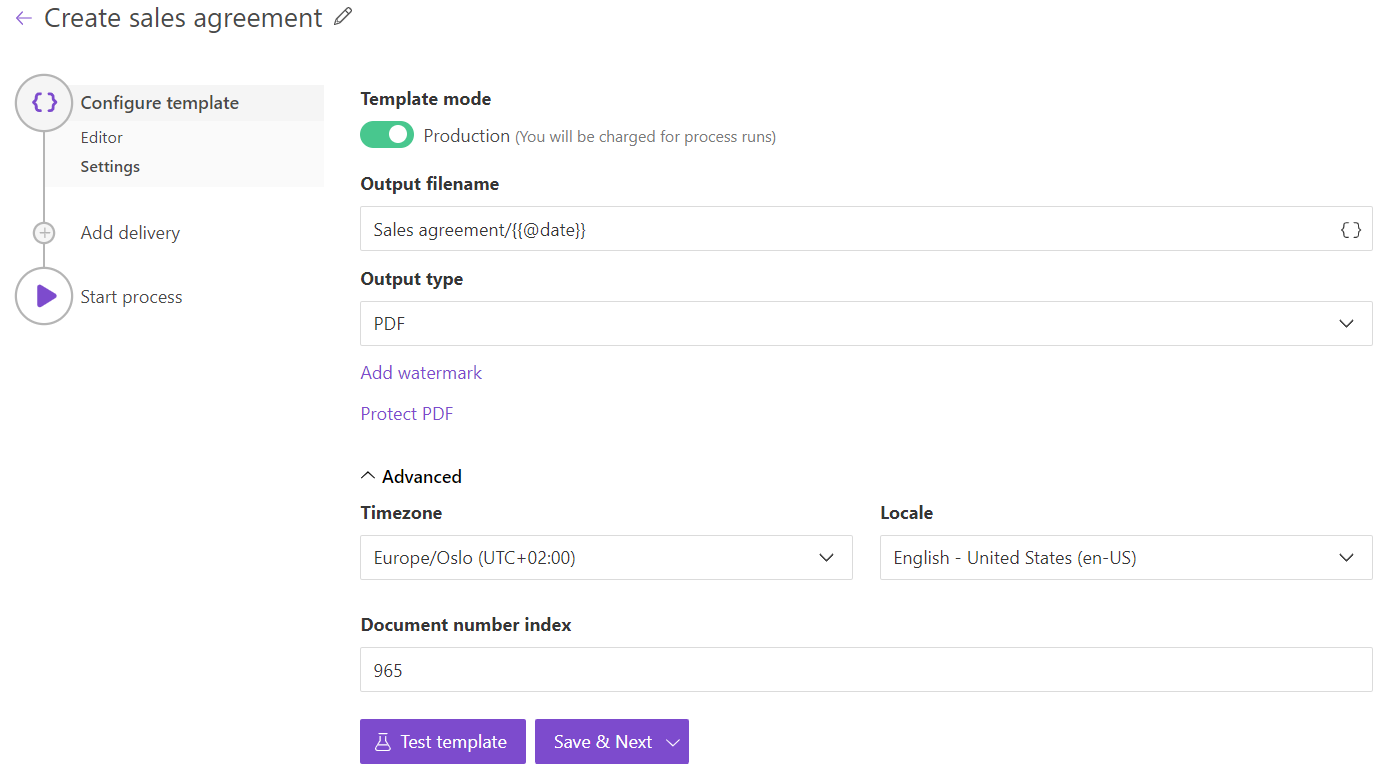
Here you’ll see the following parameters:
Template mode
It is Testing by default. It means you won’t be charged for this process runs, but result documents will have a Plumsail watermark. Change it to Production to remove the watermark.
Output filename
Use tokens to make the output filename more specific. They work the same way as they do in the template. For instance, we use the following tokens to define the output file name - {{@date}}. As a result, we’ll receive an agreement with the date of the agreement.
Output type
By default, it is the same as your template’s format. In this particular case, it’s DOCX. We’re changing it to PDF to generate PDF sales agreements from the Word template.
Hint
You can protect your final PDF document with a watermark, by setting a password, or disabling some actions.
Test template
Once you’ve customized all the settings, you can test the template to see the result.
When everything is done here, click on Save & Next to set up deliveries.
Add delivery to send sales agreement with Airtable data by email
The next step is delivery. For demonstration purpose, we’ll use Email delivery, but there are other options.
You need to connect to your Email SMTP from the Plumsail account. After that, set To, Subject, Body and other email settings to send the completed document.
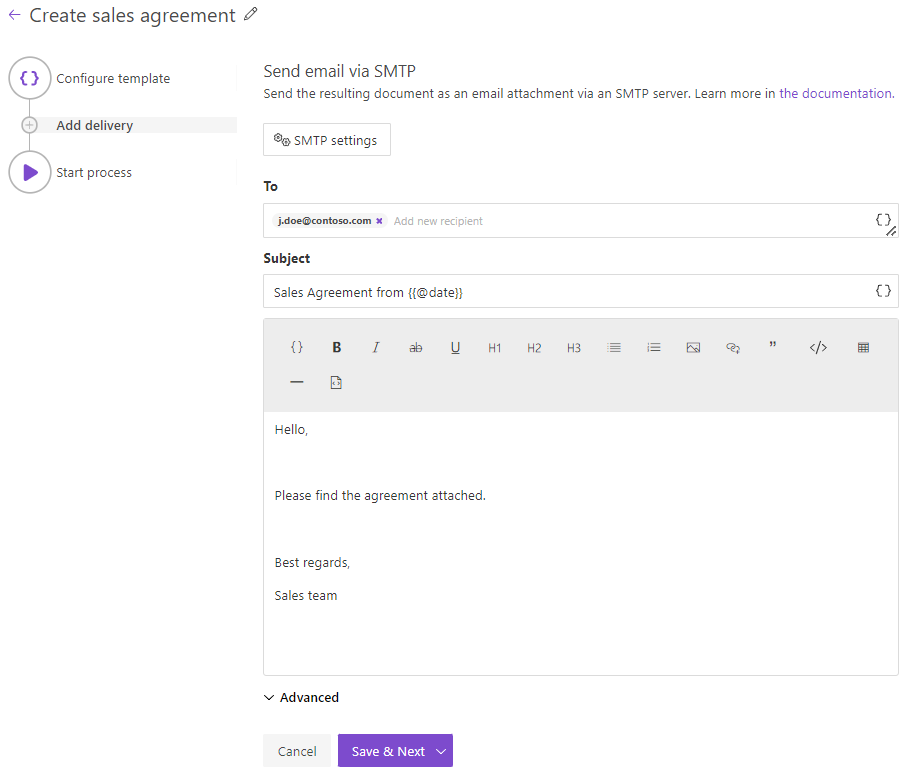
You can configure as many deliveries as you need.
Generate sales agreement with Airtable data
The only step left is to launch the process. We’ll do that from Airtable: select some records in the table and click the Documents extension button.
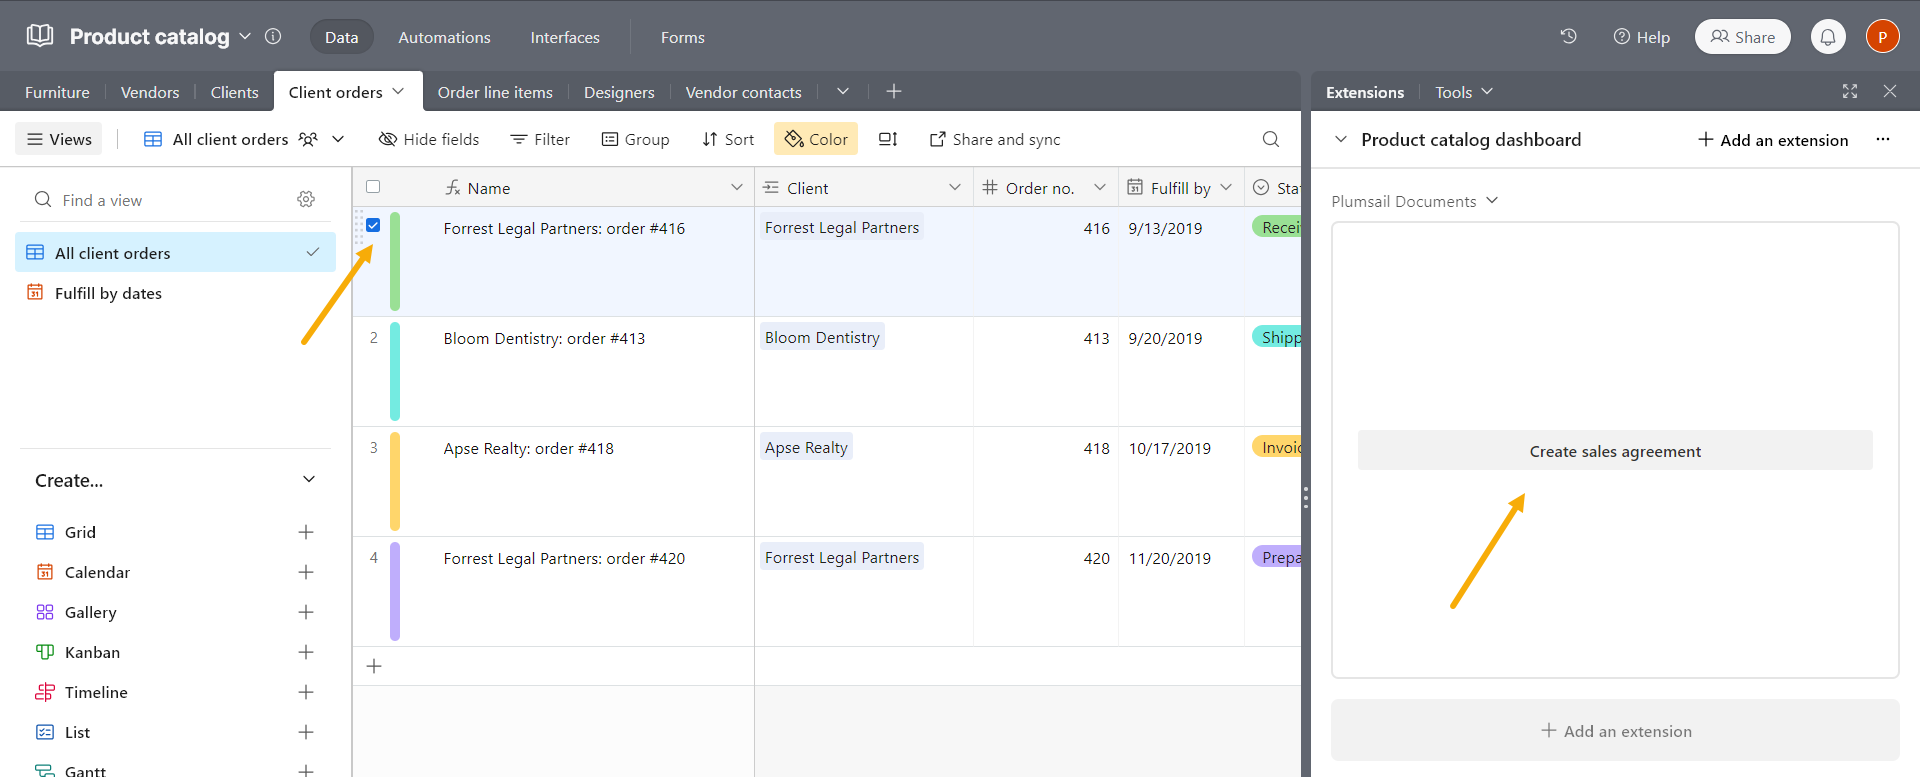
Since we set up Email delivery in the previous step, the completed document will be sent to the recipients.
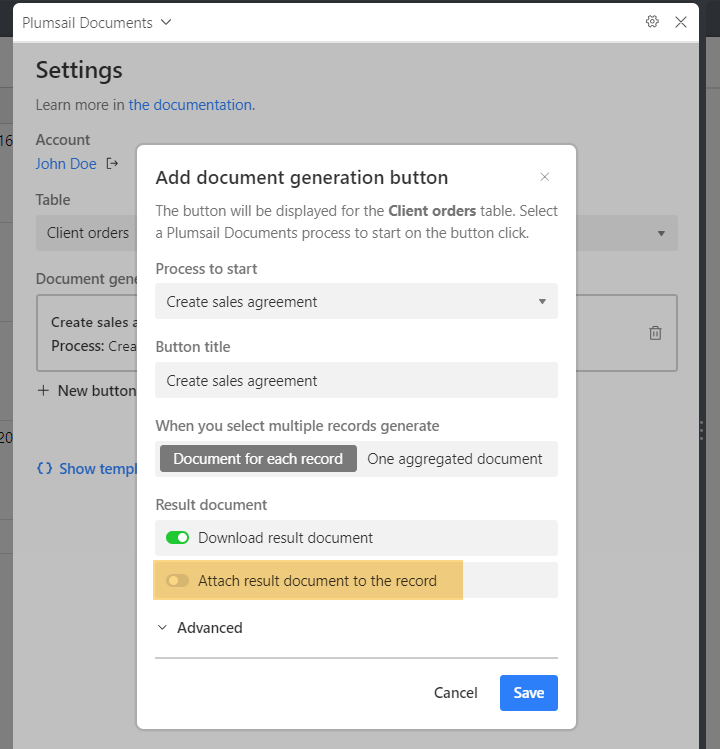
Additionally, downloading will start automatically once the sales agreement document is completed. You can also attach the result to the database by selecting this option:
