Automatically generate Word and PDF invoices for deals in Pipedrive Sales CRM
This article describes how to boost productivity by connecting Pipedrive Sales CRM to the document generation process. In this particular case, we’ll auto-generate invoices for deals in Pipedrive. The same approach is suitable for creating any documents from templates of any formats – Word, Excel, PowerPoint, or fillable PDF – based on Pipedrive data.
With the help of Zapier, we’ll connect Pipedrive to Plumsail Documents to gain the goal – to automatically fill in an invoice Word template once the Pipedrive deal is won, convert to PDF, and send to the customer.
So, let’s move step by step.
Configure document generation process
Before we proceed to connect Pipedrive to the document generation process in Zapier, we need to create and configure this process. It will generate a PDF invoice from a Word template and will send the resulting document to the customer.
Create new process
To start, go to the Processes section in your Plumsail account. If you haven’t a one yet, then register a new Plumsail account.
Click on the Add process button.
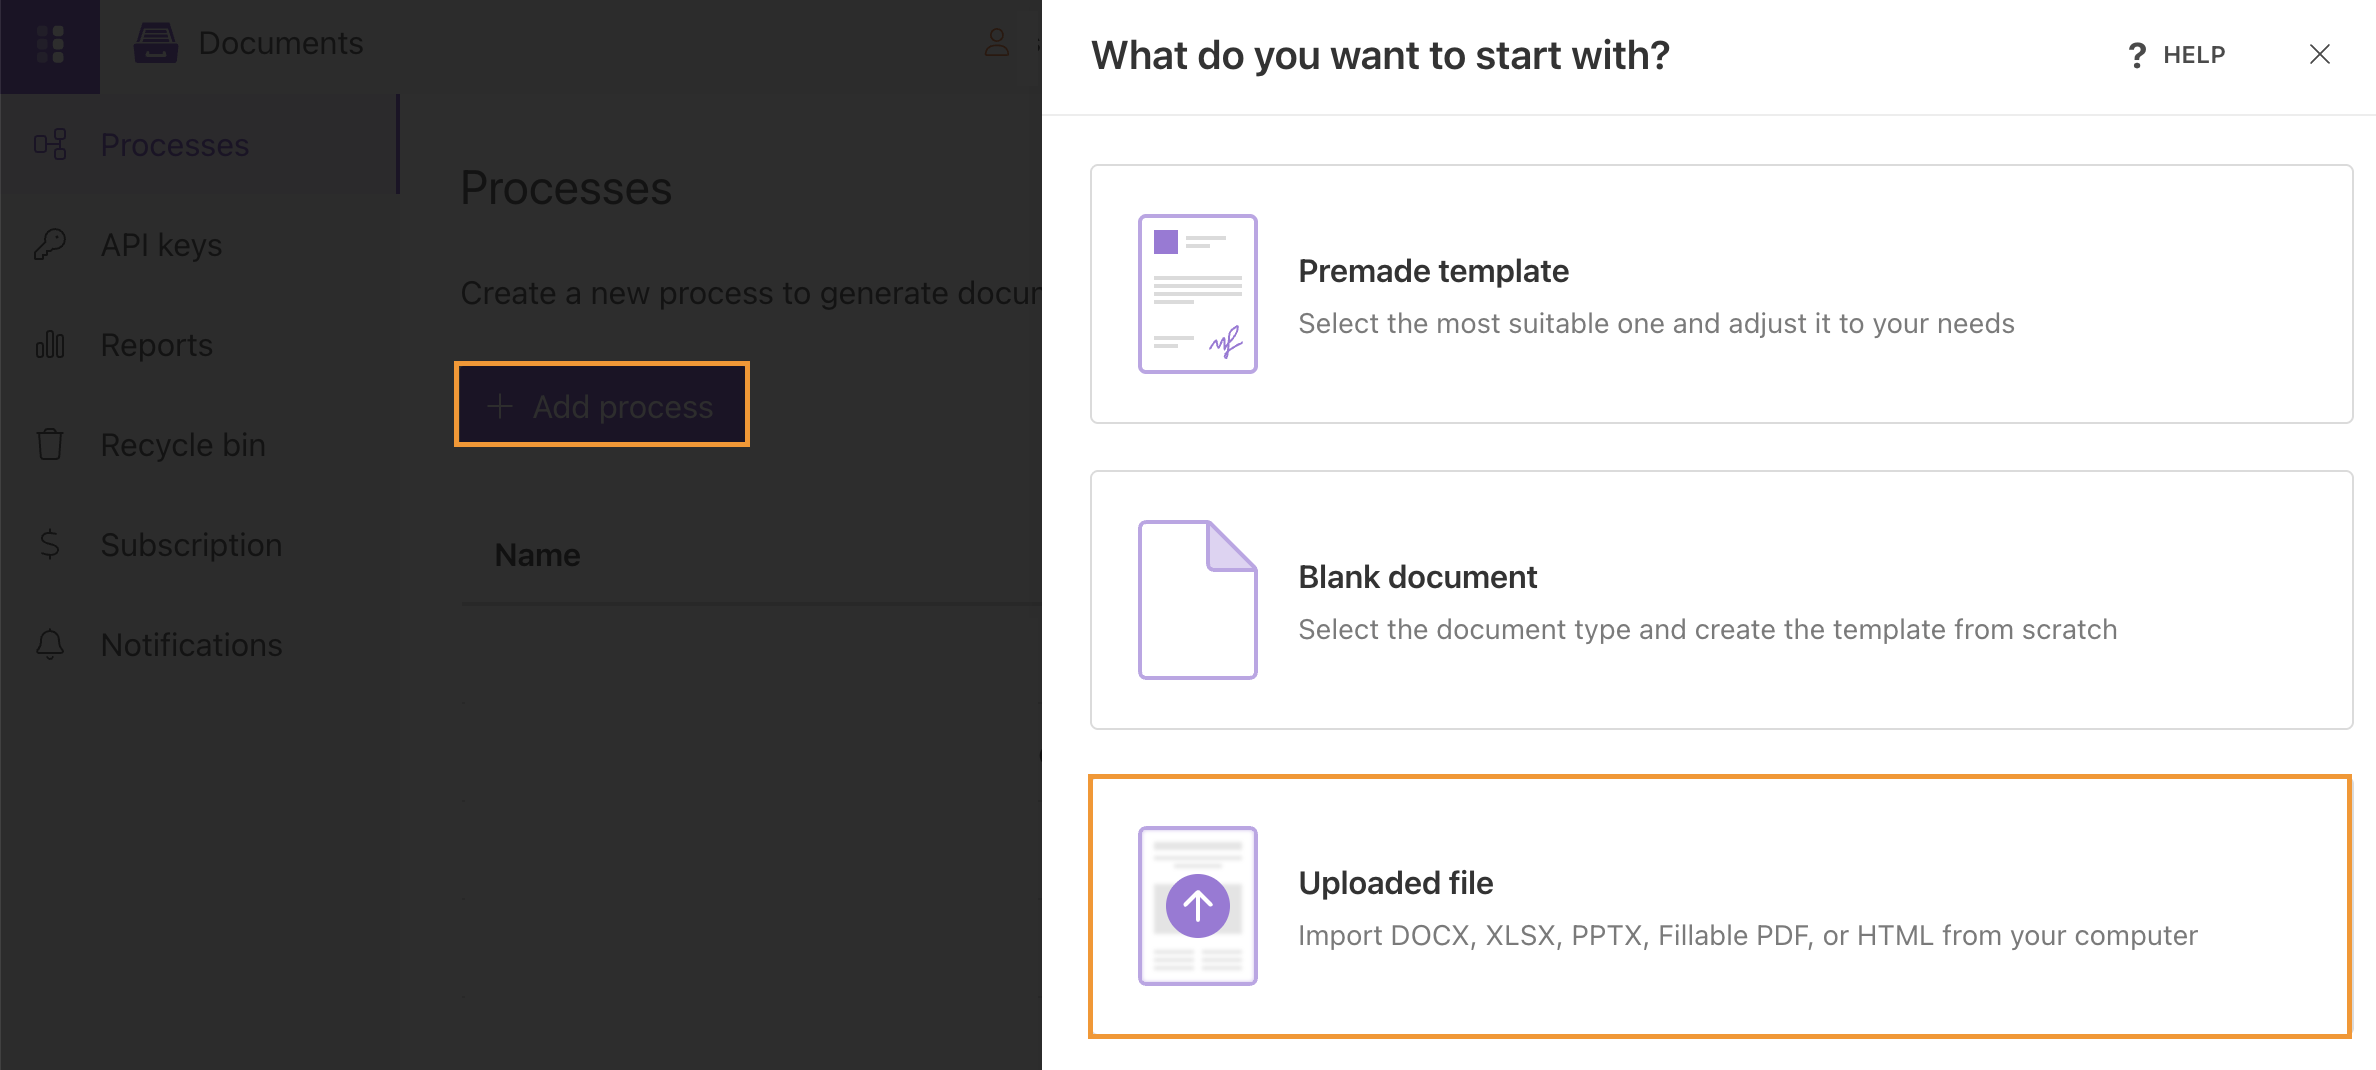
Give a name to the process. Select DOCX for a template type.

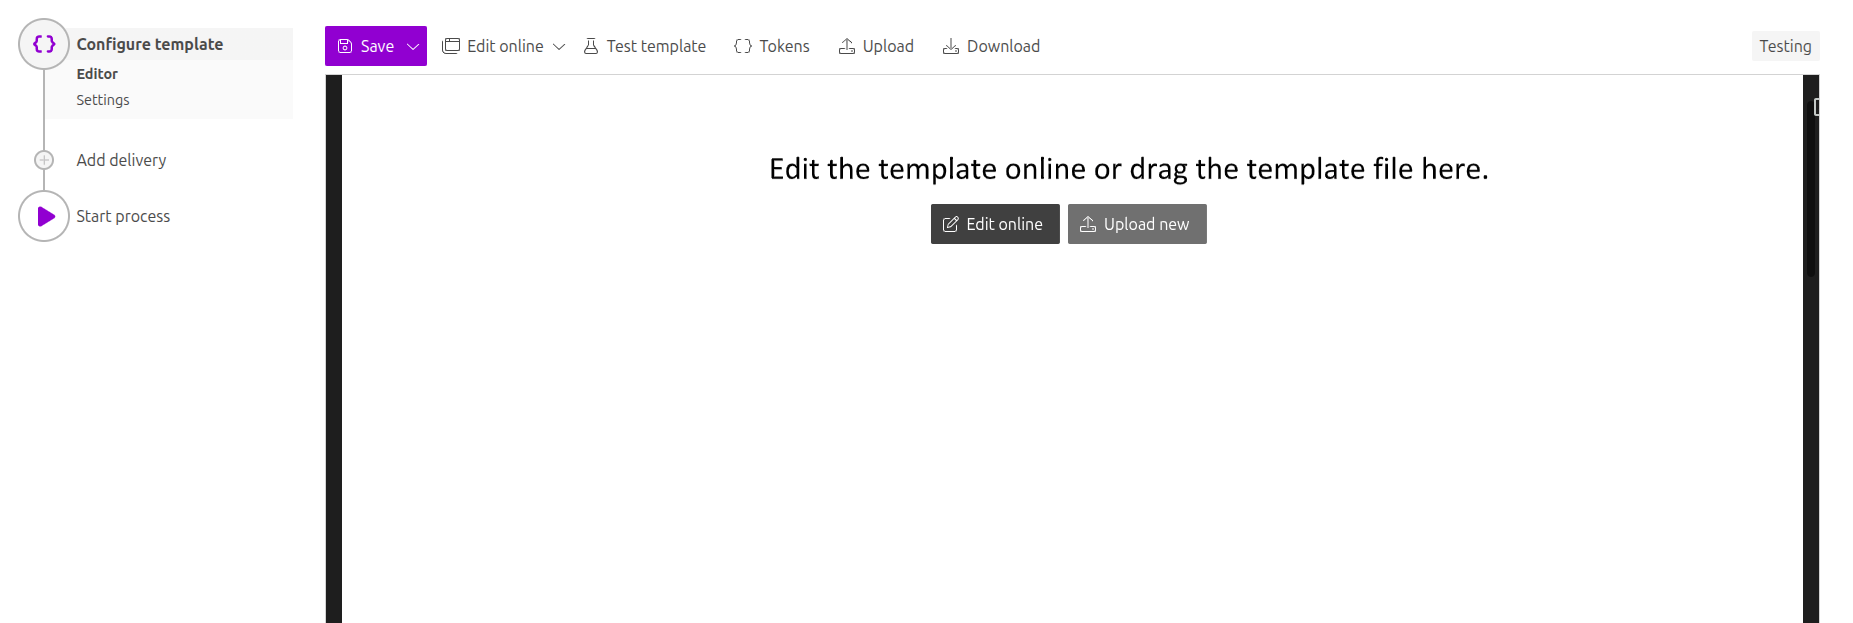
Configure template
After you’ve created the process, you find yourself on its first step - Configure template.
The step includes two substeps:
Editor;
Settings.
In Editor, you can compose the template from scratch or upload a pre-made one. It’s also possible to modify the uploaded template online.
Feel free to download an invoice template which we’re going to use.
This is how it looks:

Then upload it to the process.
Templating syntax
You may see {{tokens tags}} in the template. They let the templating engine know where to apply your specified data.
In our case, the most basic is invoiceNumber and date tags. They show to the engine that we want to render the invoice number and its date.
Sometimes you need to display a collection of items.
Like in this example, we displayed products from the Pipedrive deal in a Word table.
In such cases, consider nested tags using a dot operator - {{products.name}}, {{products.cost}}, etc.
This will let your process know that you want to display properties from some object. In our case, it will be a collection of products.
By Zapier, we will send the collection of products from the Pipedrive deal to the process.
The templating engine will automatically understand that there are multiple products and create table rows for each of them.

You can learn more about table rendering in the tables section of the documentation.
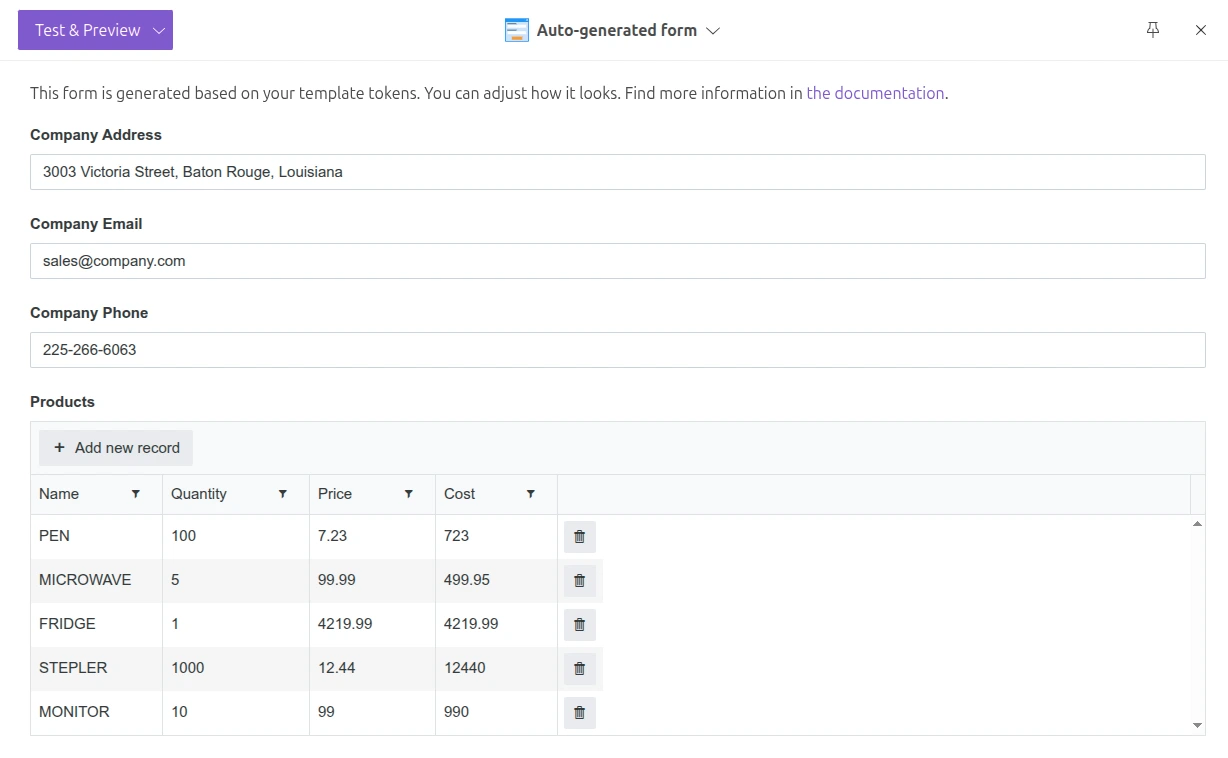
Test template
You can instantly check how the resulting file will look.
For that, click on the Test template. You will see the dialog where you can fill in the auto-generated testing form. Form fields are created based on tokens from your document template. You can adjust the look of the testing form by changing token types.
Once you’re satisfied with the result, press Save&Next to proceed further - to the Settings substep.
There you can set the parameters as described below the picture.

Template mode
It is Testing by default. It means you won’t be charged for this process runs, but result documents will have a Plumsail watermark. Change it to Active to remove the watermark.
Output filename
Use tokens to make it personalized. They work the same way as in the template.
Output type
By default, it is the same as your template’s format. In this particular case, it’s DOCX. We’re changing it to PDF to receive the resulting invoice in PDF.
Hint
You can protect your final PDF document with a watermark, by setting a password, or disabling some actions.
Test template
You can test the template from the Settings as well - to check how the customized settings will appear in the resulting document. The procedure is the same as we’ve already described above.
Delivery
The next step is delivery. In this example, we’ll set an email delivery to send the invoice to the customer. You can add as many deliveries as you need - please, check out the full list of available deliveries.
To adjust the email delivery to our needs, we put token {{customerEmail}} as a recipient’s email address. It will adjust dynamically every time according to the data pulled from Pipedrive.
We filled in the subject and email body. Additionally, it’s possible to expand Advanced settings to customize Display name and Reply-to. The default display name is Plumsail Documents Delivery. The default reply-to is the currently logged-in user’s email.

Start process
We’ll start our process from Zapier.
Create Zap
Zap is an automated connection between web services in Zapier. Every Zap has a trigger - an event that makes this Zap launch. And after the trigger, an action or a series of actions to perform.
In our case, the zap is a two-step - trigger plus action. This is how it looks:

Below is a step-by-step description.
Deal matching filter in Pipedrive
This trigger will check the status of Pipedrive deals. Once it’s won, the zap will start to generate a customized invoice and send it to customers by email.
When using the Pipedrive integration for the first time, you’ll need to login to your Pipedrive account from Zapier.
The next step is Customize Deal. We set the filter - All won deals.

Continue and test the trigger to find data to be able to use the Pipedrive output in the next step.

Start process in Plumsail Documents
Now add a Start process action from the Plumsail Documents integration.
Click Continue. If this is your first Zap, at this point, you’ll need to sign in to your Plumsail Account from Zapier to establish a connection between the app and your account. If you already have a Plumsail account tied to the app, you can add another one at this step, and use it instead.
Customize Start Process
Choose the process you want to start by this Zap from the dropdown. In our case, it’s Pipedrive invoices.
You may see fields to complete - they have the same names as tokens from the template. Actually, these fields are created based on the tokens.
To fill in them, use the output from the Pipedrive trigger. Zapier outlines nested objects and arrays.
It’s not a problem to create a document with a bunch of line items (products) as Plumsail Documents integration supports it.

Note, that for the invoice number we inserted the date. It will transform to the format we set in the template - yyMMdd. You can choose any other output field for the invoice number.
Our zap is done. In case you need some advanced logic, you can continue building the zap and use the generated invoice in the next actions.
For our scenario, that’s it. Once the Pipedrive deal is won, the customer will receive the personalized email with the invoice attached:

Try the described approach to generate other documents based on data from Pipedrive.
Sign up for Plumsail Documents
Document automation could save tons of time, human resources, ok, and even preserve your nerves 🙂
Sign-up for Plumsail Documents - it provides a 1-month free trial subscription.