Automatically create custom Teachable certificates or diplomas and send them to students by e-mail using Zapier
Conducting online courses or coaching business is much easier with such platforms as Teachable. It will serve you whatever your goal is – to educate your company’s team or provide a wide range of educational services.
To make processes even smoother, you can connect Teachable to your document generation. With the help of Plumsail Documents integration for Zapier, it’s possible to populate any custom documents with data from Teachable.
In this article, we’ll show you an example of how to create custom certificates and diplomas and send them attached to a personalized email automatically when a student completes the course.
The same approach is suitable for generating other documents with Teachable data – contracts, invoices, personalized instructions – when, say, a new student enrolls, or any other trigger event happens.
Create Teachable course
We assume that you already have a Teachable course created. If not, follow the instructions to create your Teachable online course.
We’ve created a simple course to perform the scenario for generating documents on its completion:
Configure document generation process
Now, let’s proceed to create and configure the process, which will populate Teachable data into certificate templates and email the resulting diploma to the student.
Make certificate template
We’ll create certificates from a DOCX template, then convert to PDF and send them as an email attachment to the personalized letter.
This is our Word template for the certificate of completion:
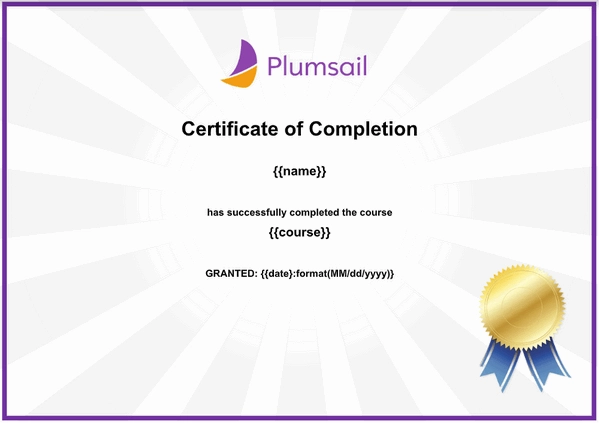
You may see double {{curly braces}}. They frame tokens that Teachable data will replace.
Download the template from this example. Or create your custom certificate template. For that, get acquainted with how Plumsail DOCX templates work.
Create new process
Register or login to your Plumsail account.
Click on the Add Process button.
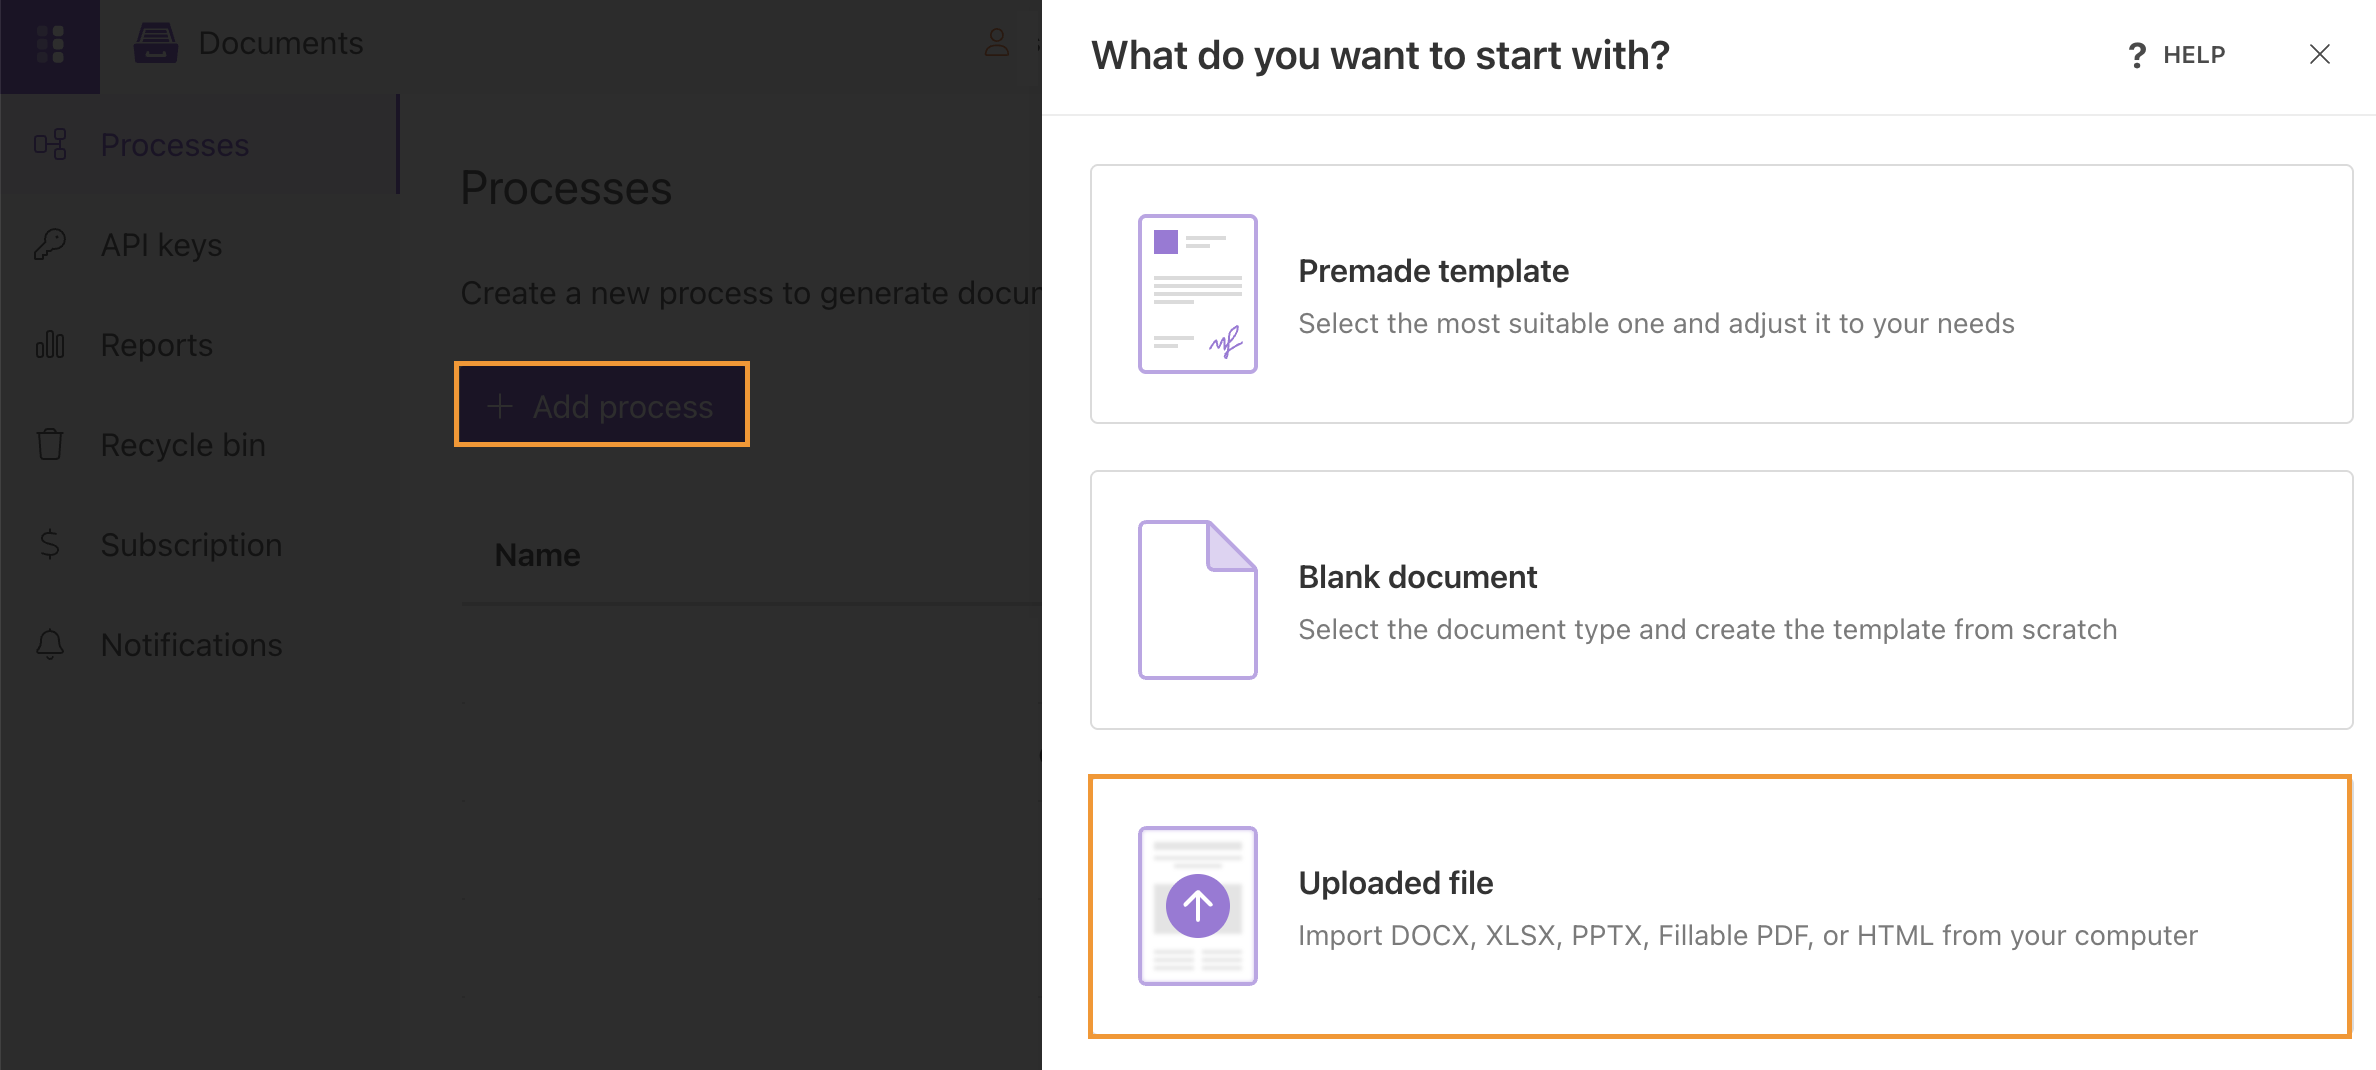
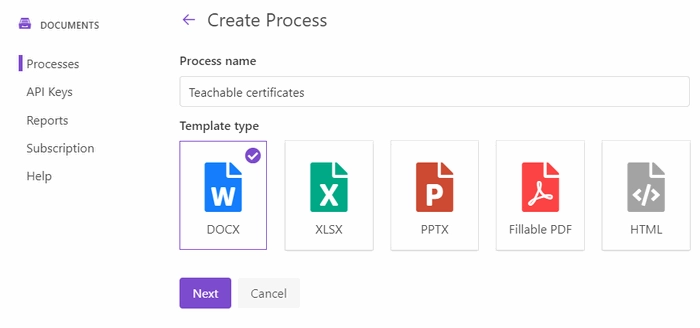
Name the process and select DOCX for the template type.
Note
Plumsail Documents supports PowerPoint PPTX templates as well. If it’s preferable for you to work out certificates in Microsoft PowerPoint, you’re welcome.
Click the Next button to proceed to the next step.
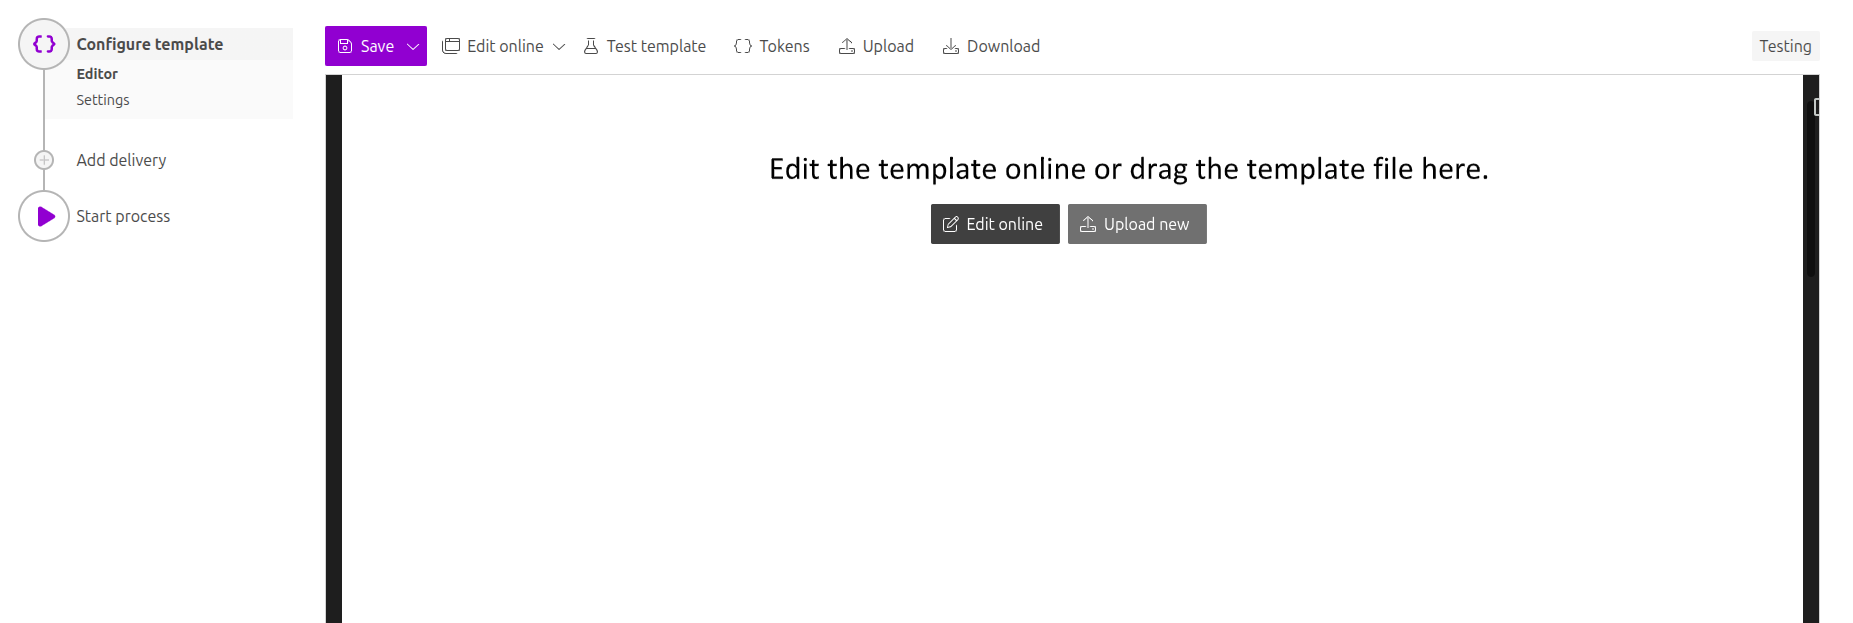
Configure template
The Configure template step includes two substeps:
Editor;
Settings.
In Editor, you can compose the template from scratch or upload a pre-made one. It’s also possible to modify the uploaded template online.
As we have already prepared the template, upload it to the process:
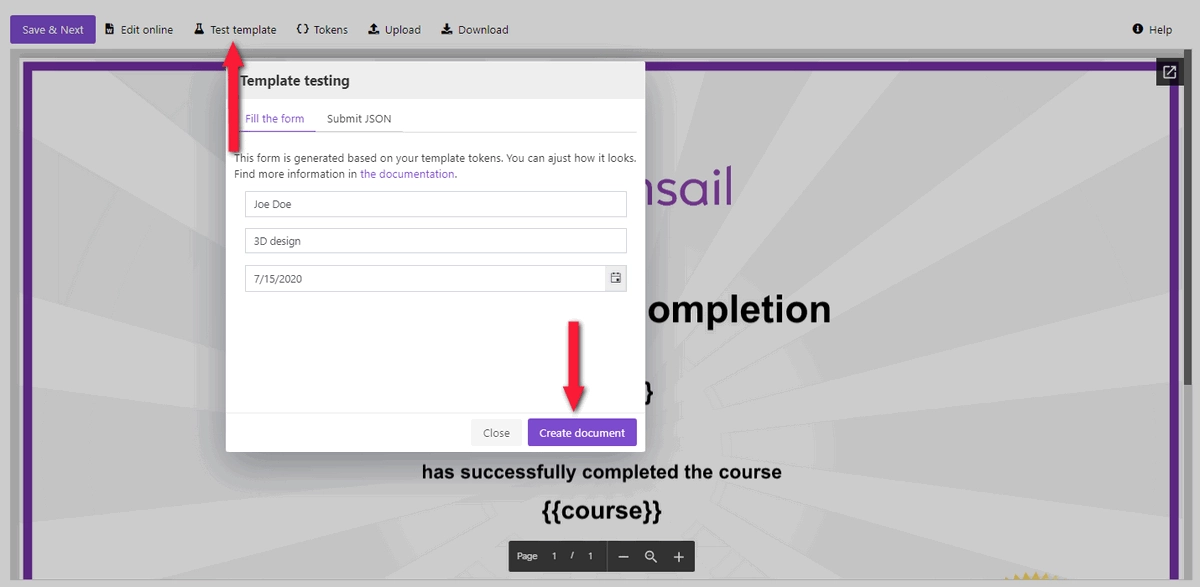
To see how the resulting certificate will look, click on the Test template.
You will see the dialog where you can fill in the auto-generated testing form. Form fields are created based on tokens from your document template. You can adjust the look of the testing form by changing token types.
Click Save & Next to go to the Settings. Here you’ll see the following parameters:
Mode. It’s Testing by default, which means runs of this process are free of charge for you, but the resulting documents will have a Plumsail watermark. To remove it, switch mode to Active.
Output filename. To personalize it, use tokens from the template. They will work the same way as for the template. For example, we have {{name}} token. The real student name will replace this token, and we’ll get the file “Joe Doe certificate”. It will change dynamically according to the data from Teachable.
Output type. The default is the same as the template’s format. It’s possible to select PDF.
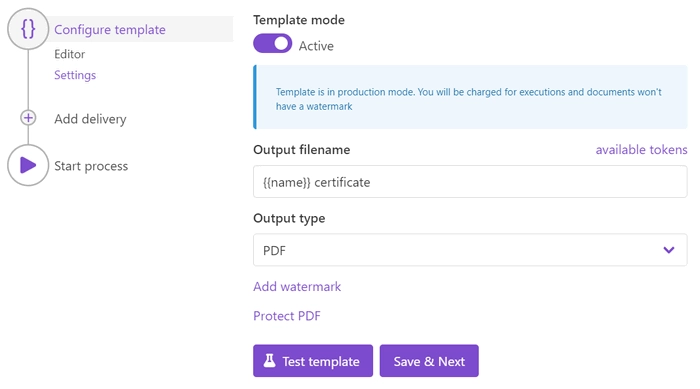
Test template. Once you’ve customized all the settings, you can test the template to see the result as we did it before.
When everything is done here, click on Save & Next to set up deliveries.
Delivery
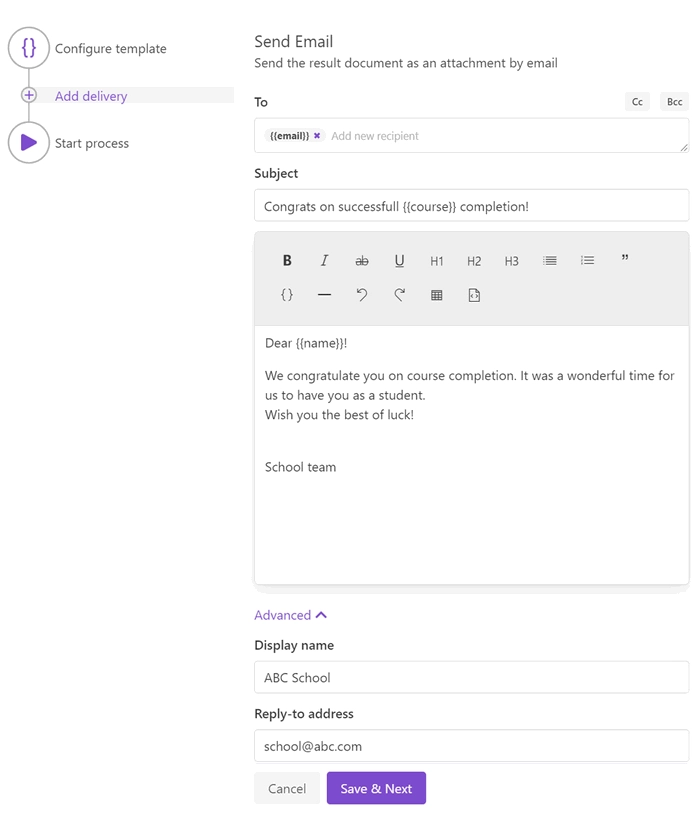
We decided to send the ready certificates and diplomas to our students by email. You can add as many deliveries as you need - check out the full list of available deliveries.
So, we add an email delivery, put token {{email}} as a recipient’s email address. It will adjust dynamically every time according to the specified data. We’ll pull it from Teachable.
We filled in the subject and email body. Additionally, you can expand Advanced settings to customize Display name and Reply-to. The default display name is Plumsail Documents Delivery. The default reply-to is the currently logged-in user’s email.
Start process
We’ll start our process from Zapier.
Create Zap
Zap is an automated connection between web services in Zapier. You can create it from scratch, following the steps explained below.
Or you can utilize the zap template. Click Use this zap, and then just customize the steps as it’s described further in this article.
This is how the complete Zap looks:
Below is a step-by-step description.
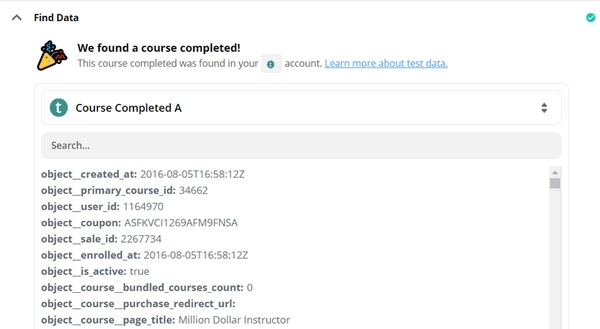
Course completed in Teachable
Once a student has completed a course, our Zap starts. For that, we have set a trigger Course completed from the Teachable integration.
If you use this integration for the first time, you’ll need to create a connection between your Zapier and Teachable accounts. You’ll be invited to sign in to your Teachable account from Zapier.
After it’s done, you need to test the trigger to find sample data that will be used in the next step.
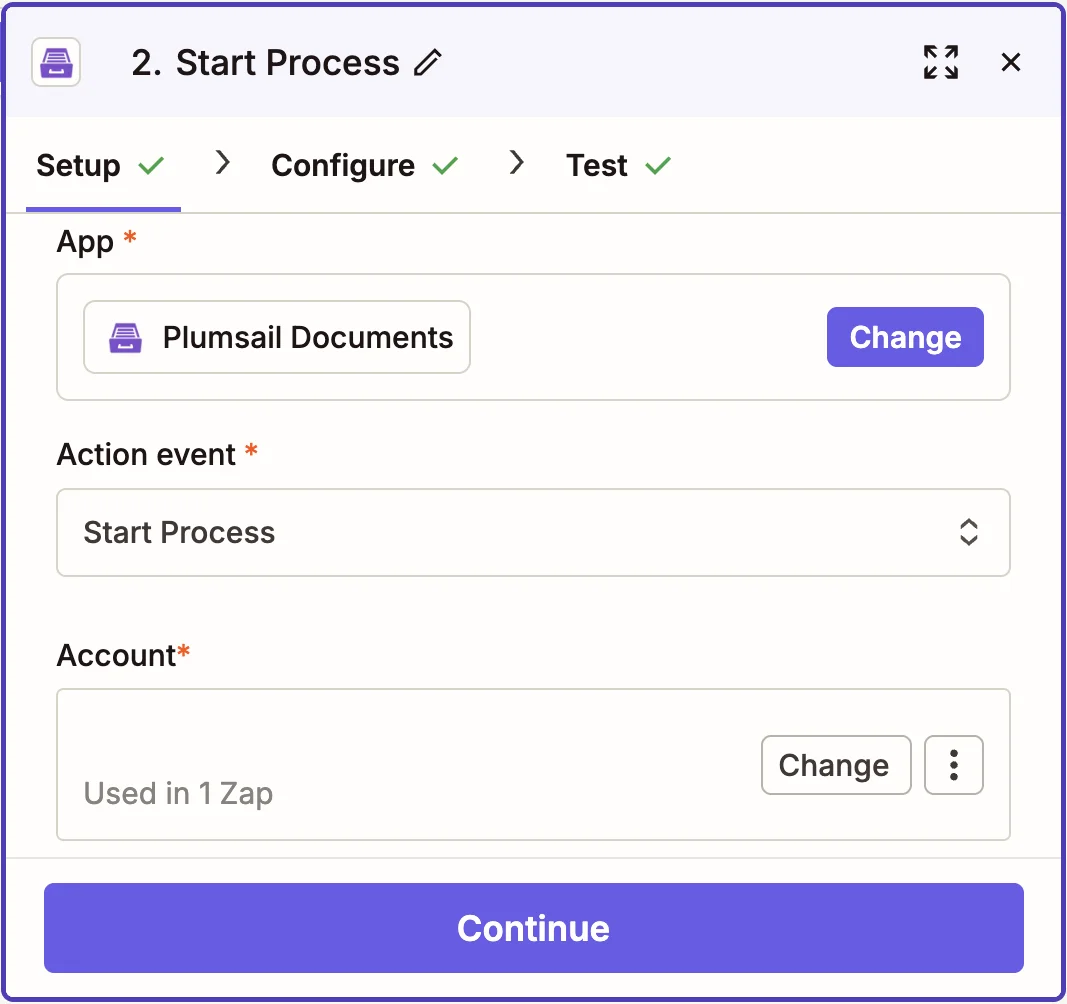
Start process in Plumsail Documents
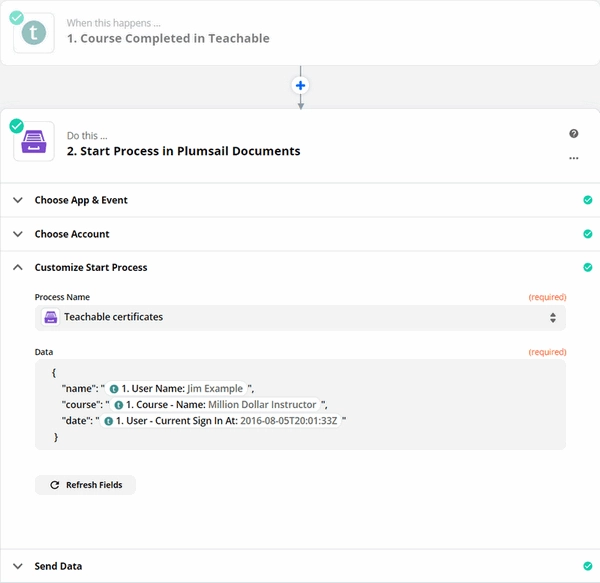
The trigger is set. Now, search for Plumsail Documents and add a Start process action.
Click Continue. If this is your first Zap, at this point, you’ll need to Sign in to your Plumsail Account from Zapier to establish a connection between the app and your account. If you already have a Plumsail account tied to the app, you can add another one at this step, and use it instead.
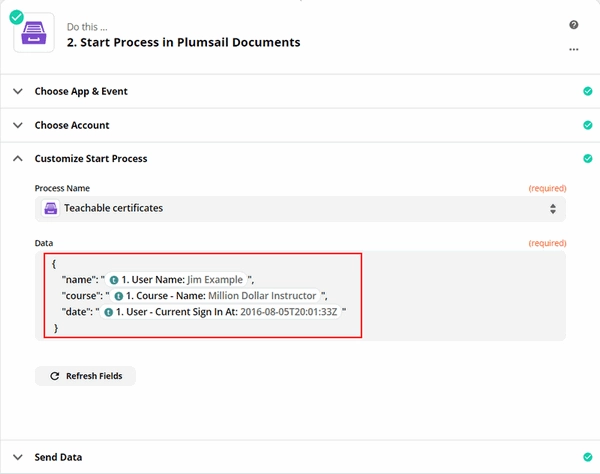
Customize Start Process
Choose the process you want to start with this Zap from the dropdown. Then, you need to map template tokens with Teachable data. This data will be applied to the template to personalize documents.
Use the output from the trigger to specify values:
Our Zap is ready. See how the resulting file looks:

Sign up for Plumsail Documents
As you can see, it’s easy to automate generating customized documents from Teachable with the help of Plumsail Documents. The approach we’ve overviewed in this article is suitable for other scenarios like creating custom contracts and invoices when a new student enrolls a course.
Sign-up for Plumsail Documents now to get your free month trial.