Automatically generate Word document from template
This article guides you through creating a document generation process in Plumsail Documents. By the end, you’ll know how to generate dynamic Word DOCX documents from a template, making your company’s document workflow more efficient.
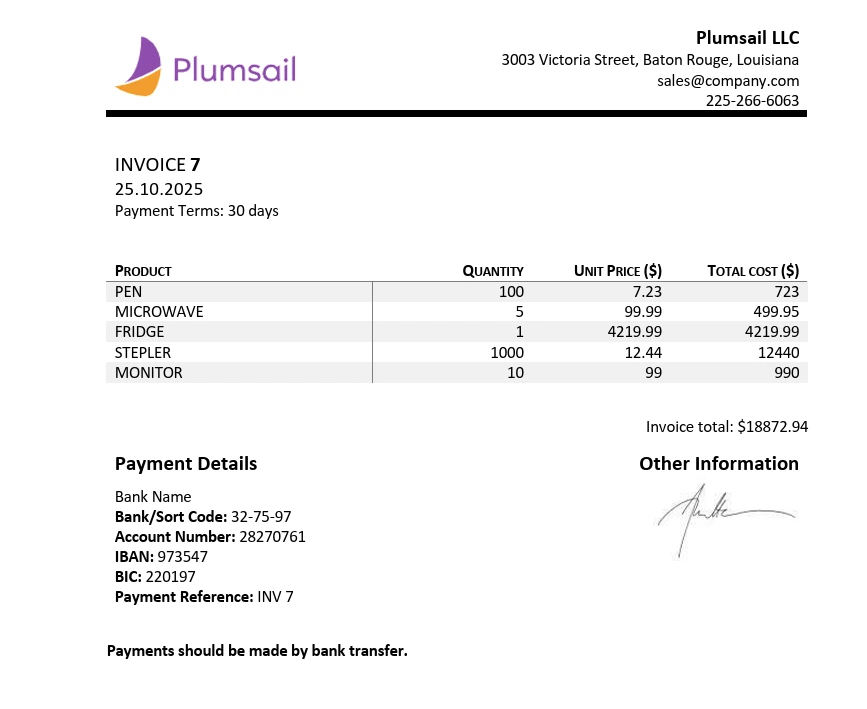
For this guide, we will focus on a practical example with an invoice. The final generated document will look something like this:
Let’s start the configuration process from the beginning:
Configure process
First, either register or log in to your Plumsail account.
Create new process
Begin by adding a new process. You have the option to start from a template or create a process from blank. To follow this tutorial step-by-step, select the last option to create a process from scratch.
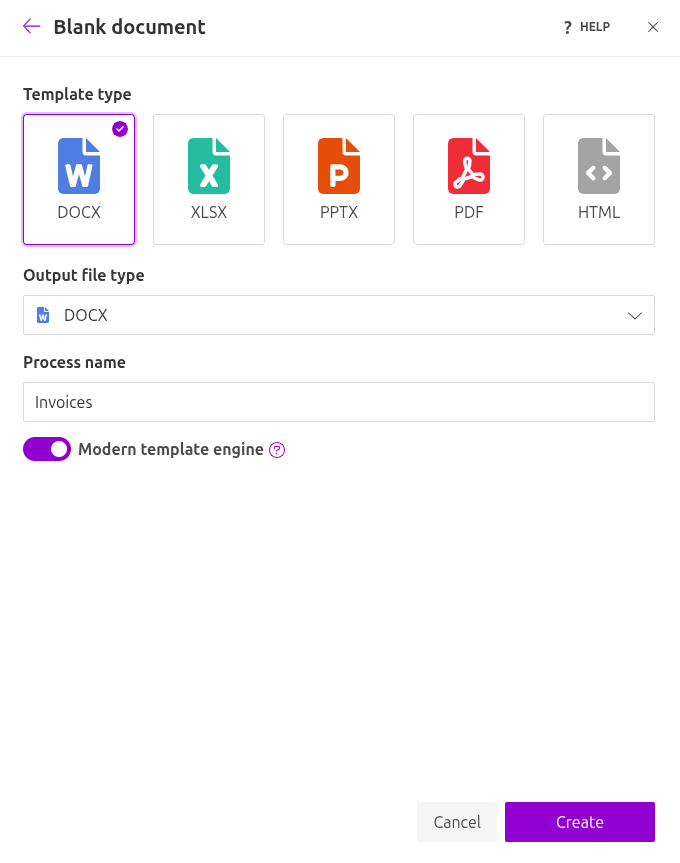
After clicking Add Process, you will be prompted to name your process and select the template and output types. In our case, select DOCX for both options.
The Modern template engine is activated by default. Press Create to finish.
Configure template
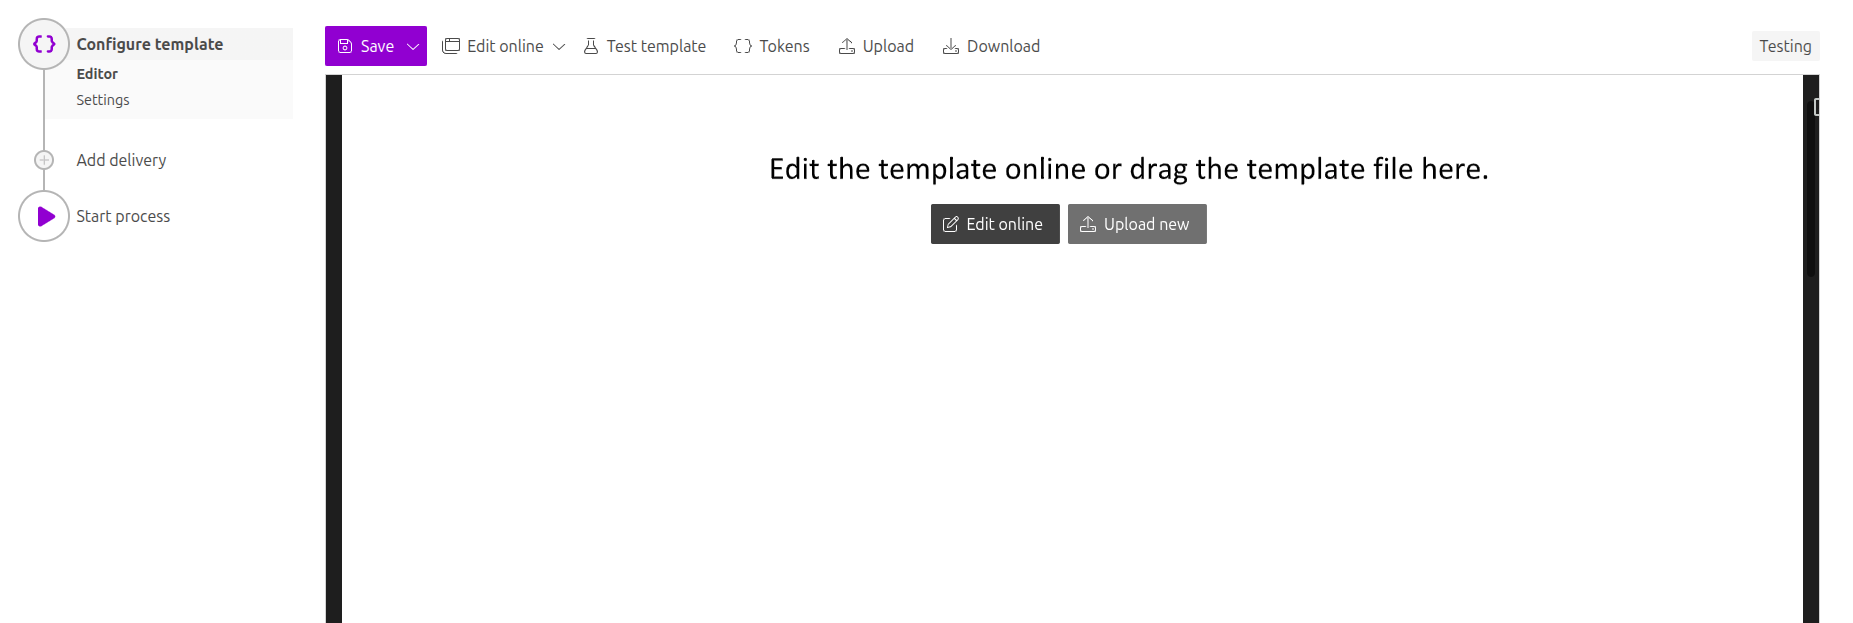
Once the process is created, you will move to the first step: Configure template.
This step is divided into two key substeps:
Editor: Where you design or upload your template.
Settings: Where you define the output format, filename, and process mode.
Editor
The Editor allows you to design a template from scratch or upload an existing one. You can also modify an uploaded template using the online editor.
For this example, you can download the invoice DOCX template we’ve prepared. Then, upload this file to your process:
Templating syntax
When creating your documents, note that Plumsail templates use a powerful, minimal-syntax approach designed for simplicity.
To understand the full capabilities of the engine, refer to the documentation article.
In short, the engine recognizes data fields, or tokens, within double curly {{ }} brackets. These tokens are placeholders where your specified data will be dynamically inserted. Basic examples include {{companyAddress}} or the date token {{@date}}.
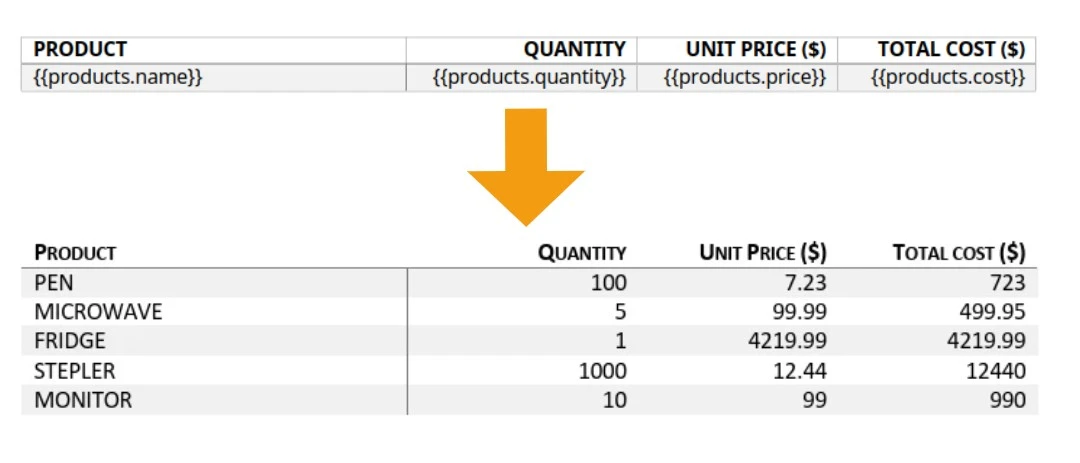
But that’s not all! The engine is smart enough to handle more complex scenarios, such as rendering tables from a item list. In our invoice template, we loop through a collection of products using nested tags with a dot operator, like:
{{products.name}},{{products.price}}, and{{products.quantity}}to access specific properties within a product object.
The templating engine identifies the table row containing these product-related tokens and automatically duplicates the row for every object in the input data array, creating a complete table.
You can learn more about how to structure tables in your templates in the tables section of our documentation.
Test template
To visualize the document before saving it, click the Test template button in the toolbox.

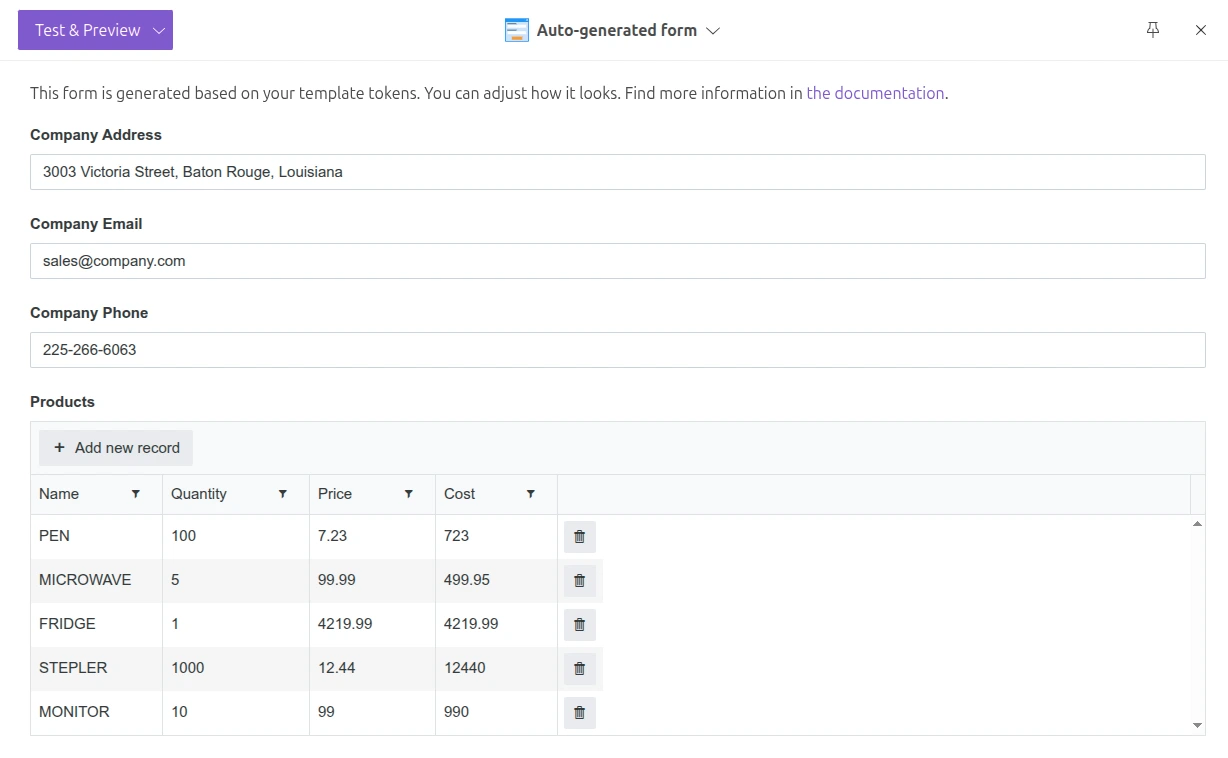
A dialog will appear with an auto-generated form based on the tokens found in your template.
You can always customize this form if needed. Using a JSON file is also possible.
Click Test & Preview to open your document in a new tab. Once you are satisfied with the result, press Save & Next to continue to the Settings section.
Settings
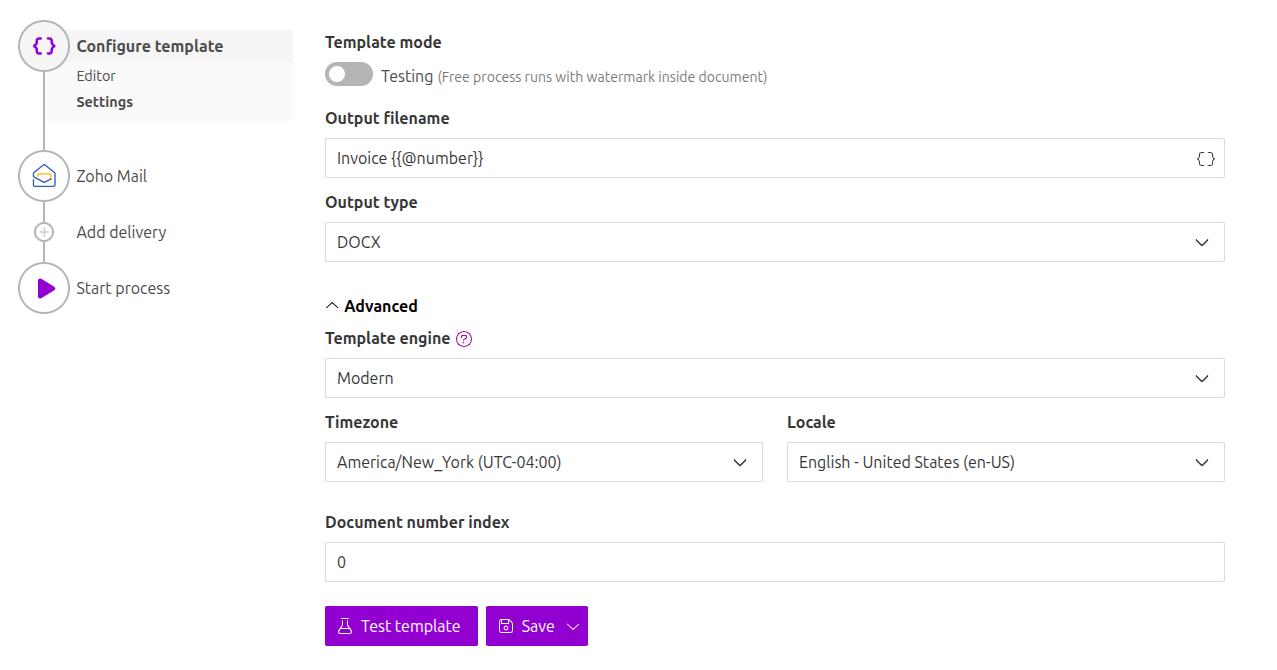
In this section, you can configure the process and output file details.
Template mode
Processes are in Testing mode by default. This means you won’t be charged for executions, but all resulting documents will have a Plumsail watermark.
To remove the watermark and generate final documents, change to Production mode. Executions in this mode will be charged.
Output filename
Make your filenames descriptive and unique using tokens.
Tokens work the same way here as they do within the document template. For example, using Invoice {{@number}} will result in a filename like Invoice 432.
Output type
By default, it is the same as your template but you can change it to PDF.
For more advanced customization, please review our full documentation. Once all settings are configured, click Save & Next to move on to setting up deliveries.
Delivery
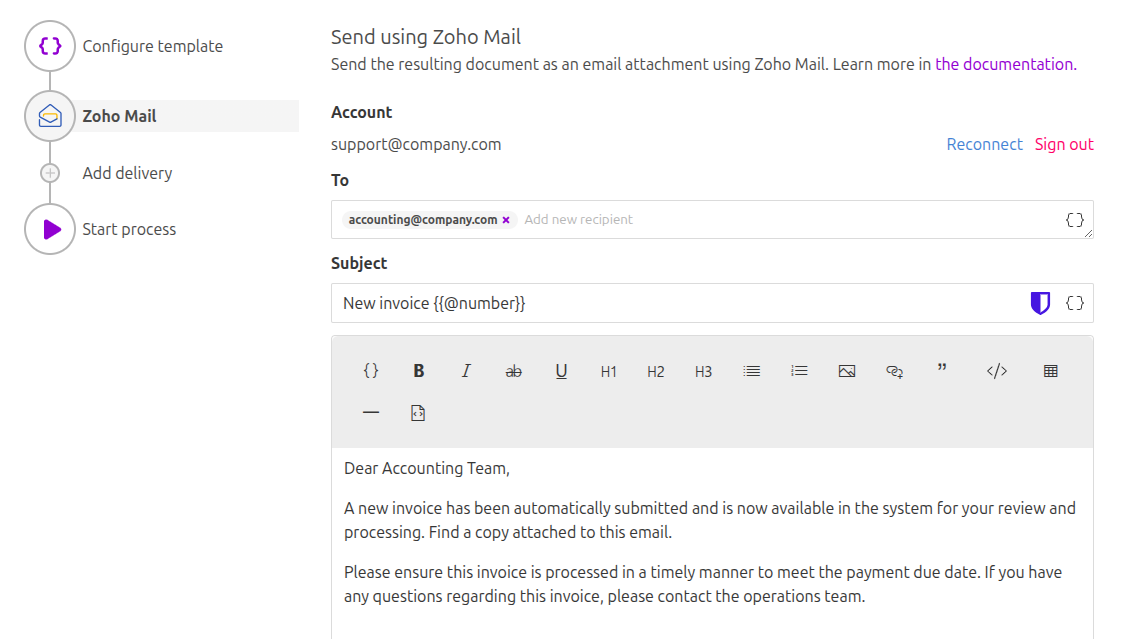
This step defines where your newly generated document will be sent or saved. You can configure multiple delivery options.
For demonstration purposes, we’ll set up an email notification using Zoho Email.
Learn more about other available delivery options.
Start process
Your document generation process is now fully configured. The final step, Start process, shows a complete list of possible integrations and triggers.
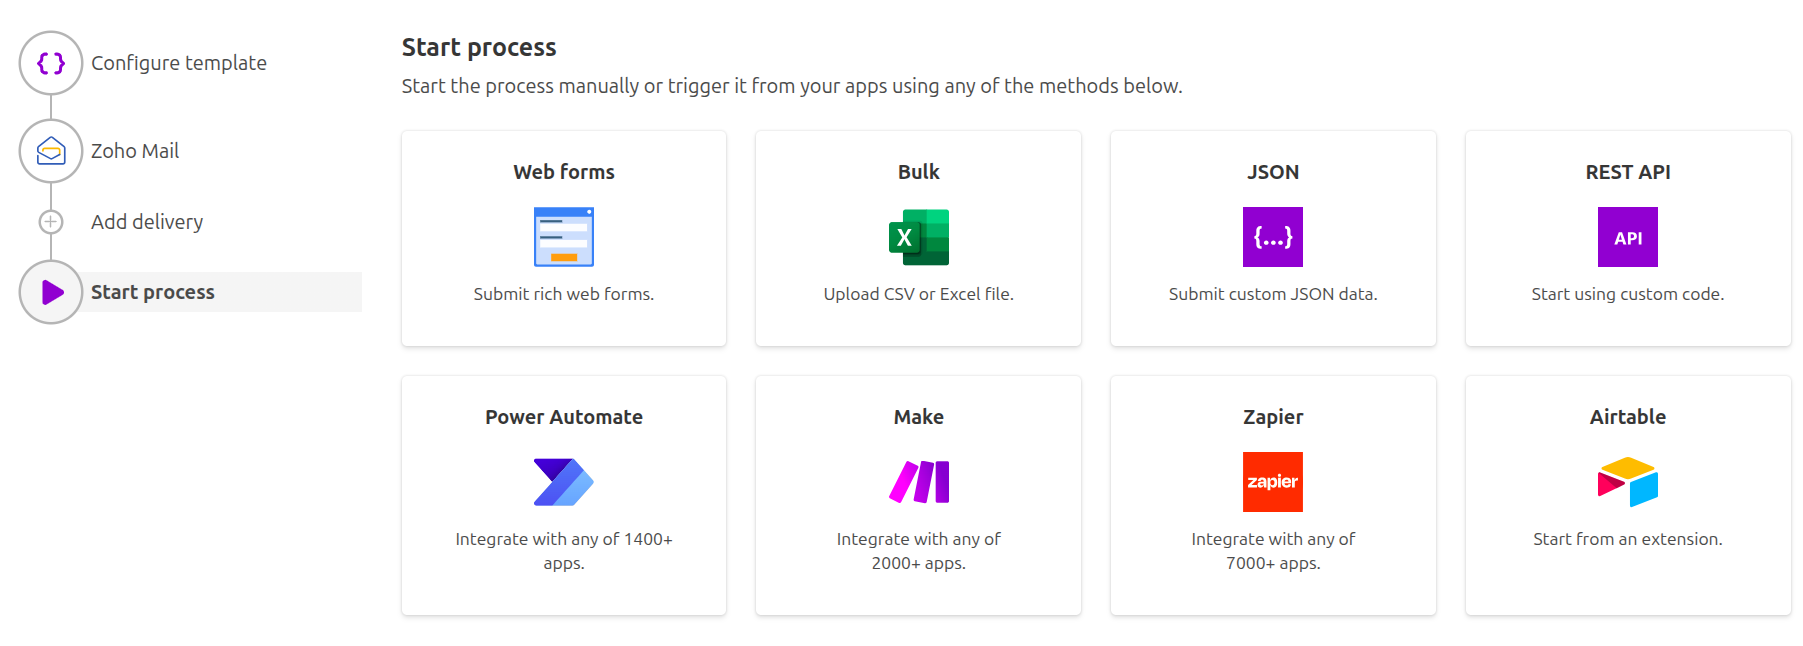
You can start the process in several ways, including: