Create HTML from template in Zapier or Power Automate
This article demonstrates how to generate HTML documents from a template with the help of Processes, a Plumsail Documents feature.
The Processes are a user-friendly intuitive interface for creating documents from templates, converting them, and delivering to different systems for further management.
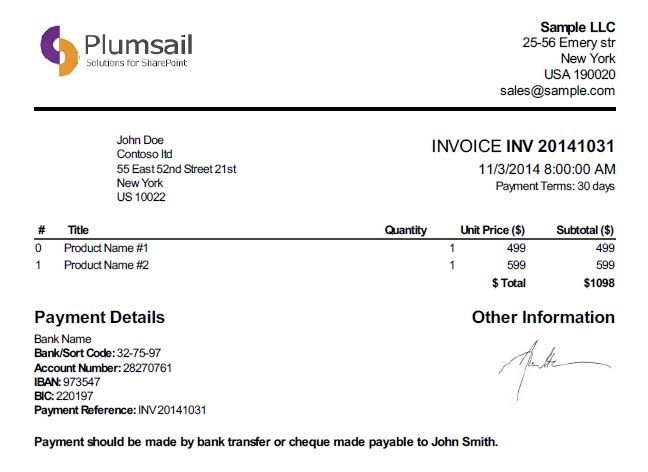
In this article, we will generate an HTML invoice based on some data. This is how our final HTML file looks:
Here is a step-by-step description on how to create such a process of generating HTML documents from a template.
Configure Process
First, register or login to your Plumsail account.
Create new process
Click on the Add Process button.
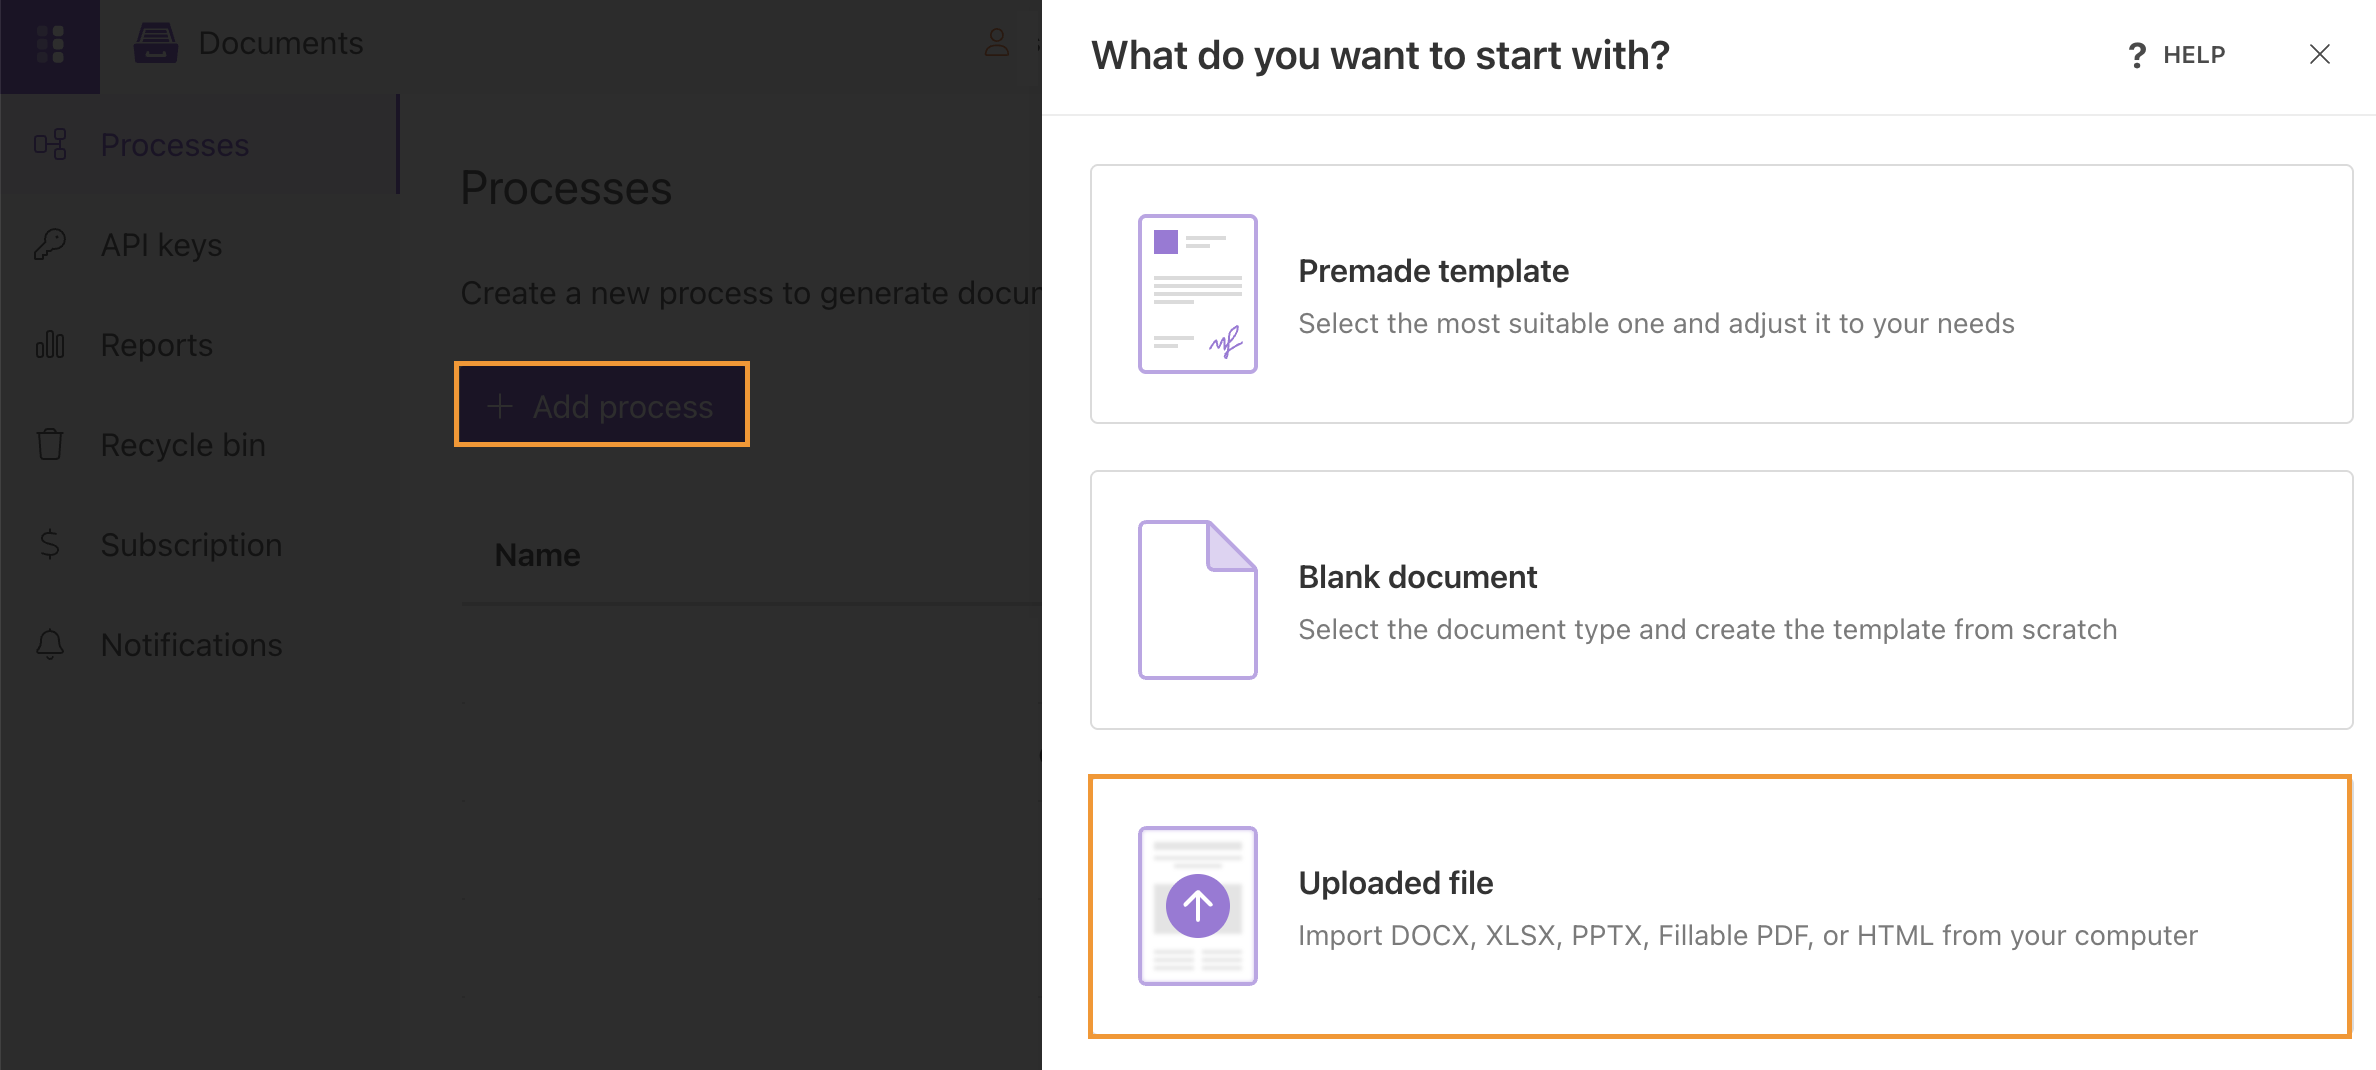
Give a name to the Process to recognize it later. As we’re going to generate invoices from an HTML template, select HTML for the template type.

Configure template
Once you’ve created the process, you’ll jump to its first step – Configure Template.
It includes two substeps:
Editor;
Settings.
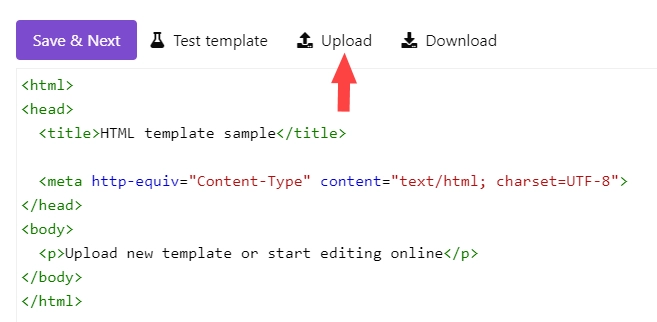
In Editor, you can compose the template from scratch or upload a pre-made one. It’s also possible to modify the uploaded template online.
Feel free to download an HTML template for invoices. We have prepared it beforehand.
Then upload it to the process.
Templating syntax
You may see that the template has placeholders like {{Total}} and {{Quantity}}. There is also #{{each}} iterator for rendering invoice items. Please read template syntax description for more information.
Test template
You can test the template to see how it will look at the end by clicking the Test template button.
After you click on the Test template button, you will see the dialog where you can insert your data in JSON format. This JSON data represents what will be pasted into {{ }} brackets instead of object names and their properties. So, it must correspond to tokens from the template.
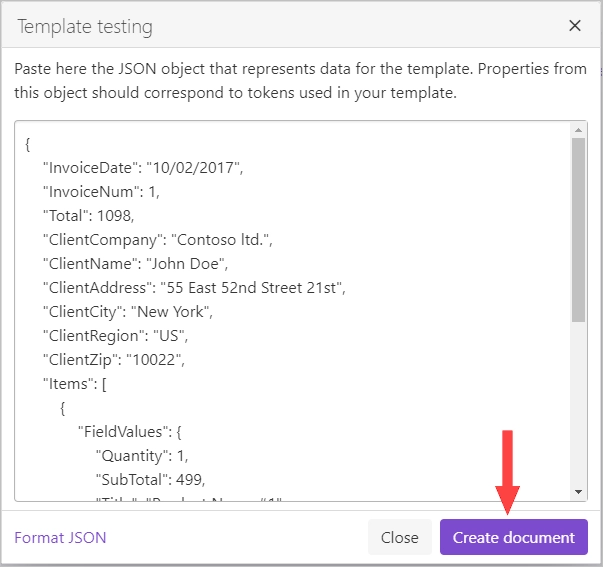
To test the template from our example, you can copy and paste the JSON data shown below.
Note
This is JSON for testing. You can pass data from an external system or web form to the process. See the Start process section.
{
    "InvoiceDate": "10/02/2017",
    "InvoiceNum": 1,
    "Total": 1098,
    "ClientCompany": "Contoso ltd.",
    "ClientName": "John Doe",
    "ClientAddress": "55 East 52nd Street 21st",
    "ClientCity": "New York",
    "ClientRegion": "US",
    "ClientZip": "10022",
    "Items": [
        {
            "FieldValues": {
                "Quantity": 1,
                "SubTotal": 499,
                "Title": "Product Name #1",
                "UnitPrice": "499"
            }
        },
        {
            "FieldValues": {
                "Quantity": 1,
                "SubTotal": 599,
                "Title": "Product Name #2",
                "UnitPrice": 599
            }
        }
    ]
}
Once you’ve tested the template, press Save&Next to proceed further - to the Settings substep.
Here you set the following parameters. Descriptions are under the picture.
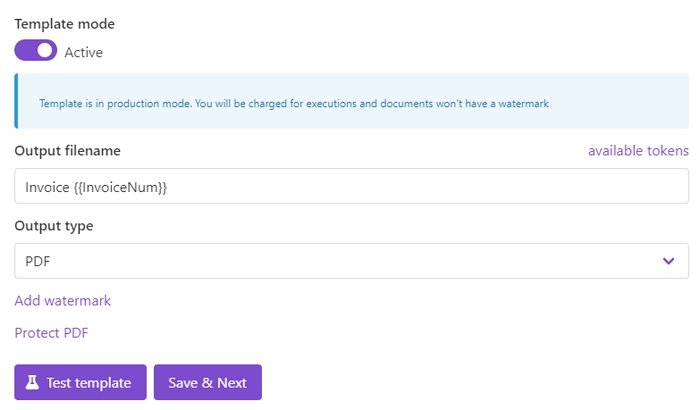
Template mode
It is Testing by default. It means you won’t be charged for this process runs, but result documents will have a Plumsail watermark. Change it to Active to remove the watermark.
Output filename
Use tokens to make it personalized. They work the same way as in the template. For instance, we use the following tokens to define the output file name - {{InvoiceNum}}. As a result, we’ll receive an invoice marked with its number - Invoice 1.
Test template
Once you’ve customized all the settings, you can test the template to see the result as we did it before.
When everything is done here, click on Save & Next to set up deliveries.
Delivery
The next step is delivery. For demonstrating purpose, we’ll store the result file in OneDrive. But there are other options.
You need to connect to your OneDrive from the Plumsail account. After that, set the folder’s name where to save the ready document. Here you can use tokens as well.
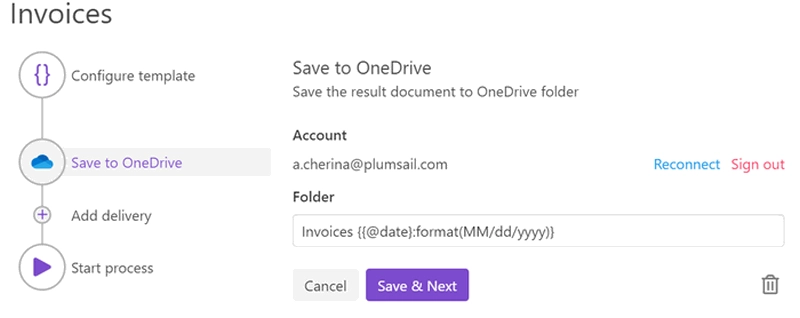
You can configure as many deliveries as you need.
Start Process
Now everything is ready, and you can start generating HTML documents. The step Start process will show available options with a description for each.
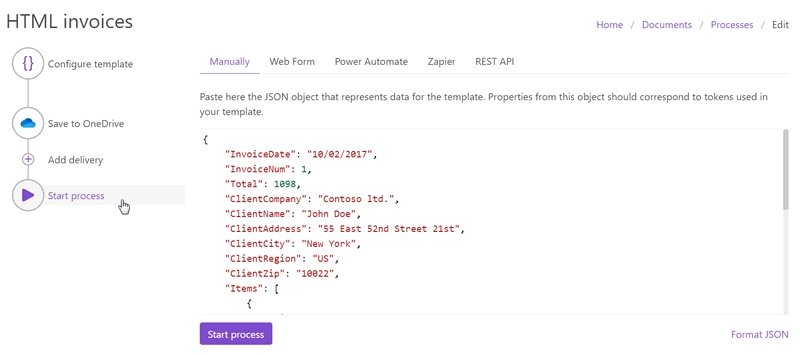
You can start the process :
manually with your JSON data;
by Plumsail Web form bound to the process;
Use Power Automate Flow and Zapier to connect the process with other apps. It enables you to gather data from one app and pass on to the process to populate a DOCX template. Thus, you can populate the DOCX template from various web forms, CRM systems, SharePoint lists, and thousands of other web applications.