How to populate Word with checkboxes using Power Automate
In this article, we’ll show how to automatically populate a Word template with checkboxes in Power Automate (Microsoft Flow). We will use the Start document generation process action and checkbox formatter from the Plumsail Documents connector.
There are four steps we need to do:
Create a delivery form using Plumsail Forms. Customers will use the form to request a delivery and specify some details for the delivery.
Create a Process to generate a delivery docx request.
Create a Power Automate flow that starts the document generation process when the order delivery form is submitted.
Let’s check the steps one-by-one.
Note
In this article we’re using Plumsail Forms but it’s also possible to trigger the same process in another system. Instead of Plumsail Forms, you can use any other forms or pull data from your own system by selecting another trigger in Power Automate.
Create a delivery form
In our example, I use Plumsail Forms and the Forms online designer to create the order delivery form.
You can download the form to repeat the steps from the article.
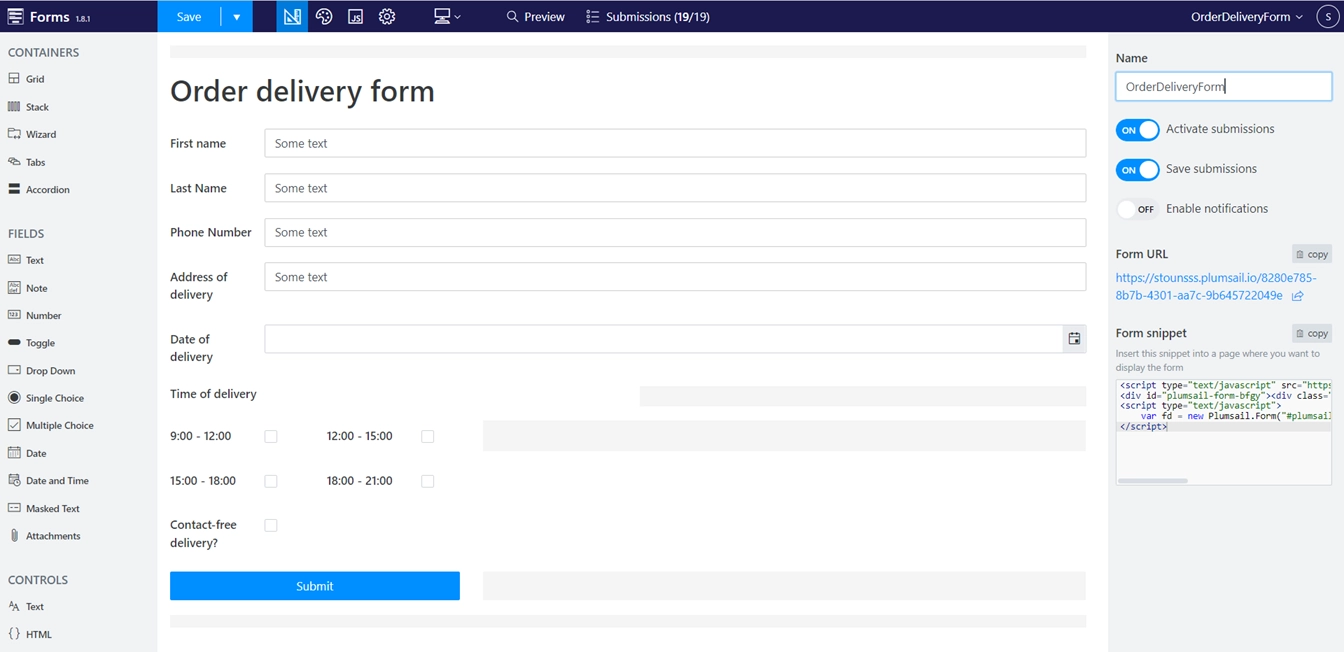
Since the focus of the article is using the checkbox formatter, the order delivery form has some checkboxes:
Time of delivery
Contact-free delivery

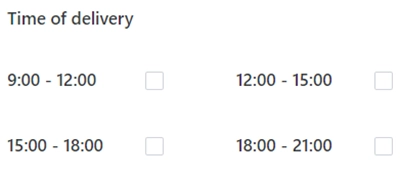
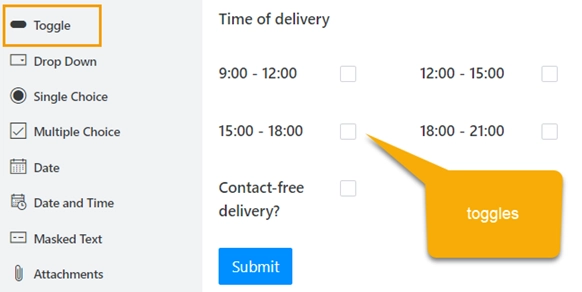
Actually, there are 2 ways of placing the checkboxes: multiple choice and toggles.
I selected toggles since each toggle returns true/false value when the multiple choice returns an array and it’s a bit difficult to extract the individual values.
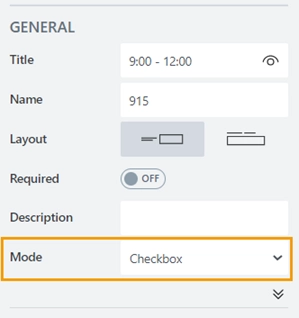
To make the toggles look as chekboxes, you need to select the mode in the options.
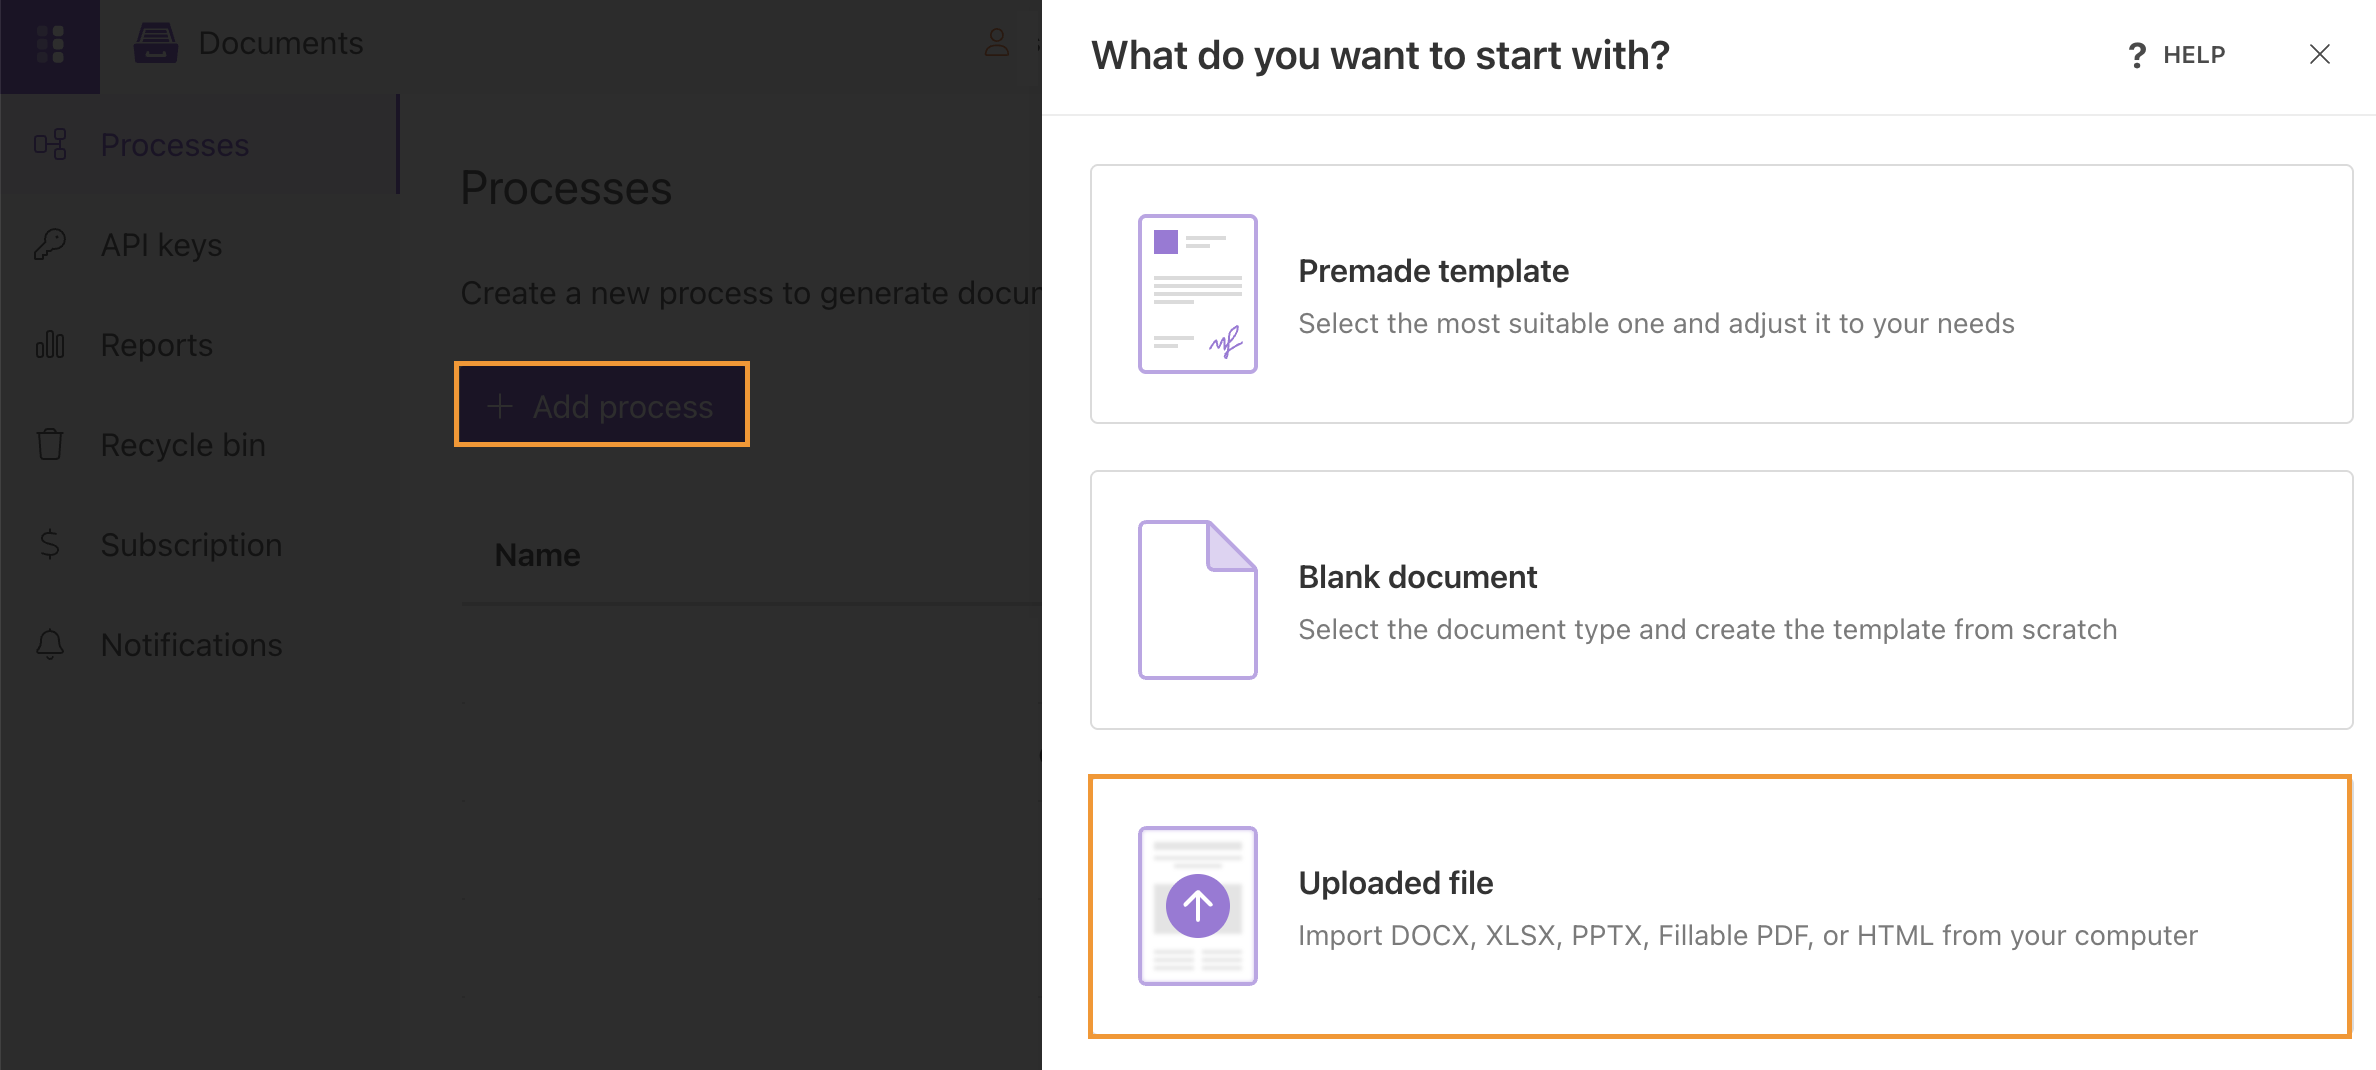
Create a Process
The next step is creating a Process that connects the order delivery form and the docx template.
You’ll need to sign up for Plumsail Documents to get into the account where you can create the process.
Click on the Add Process button. And select Start from blank.
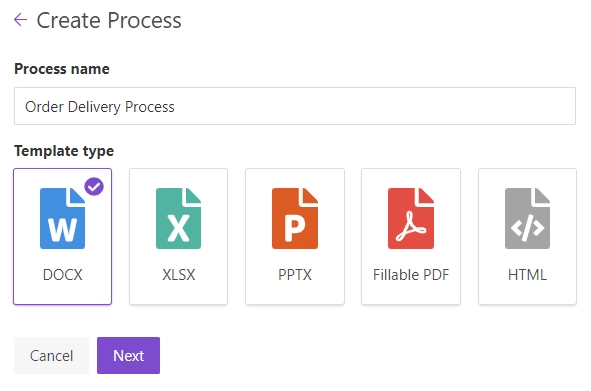
Give a name to the process and select DOCX for a template type.
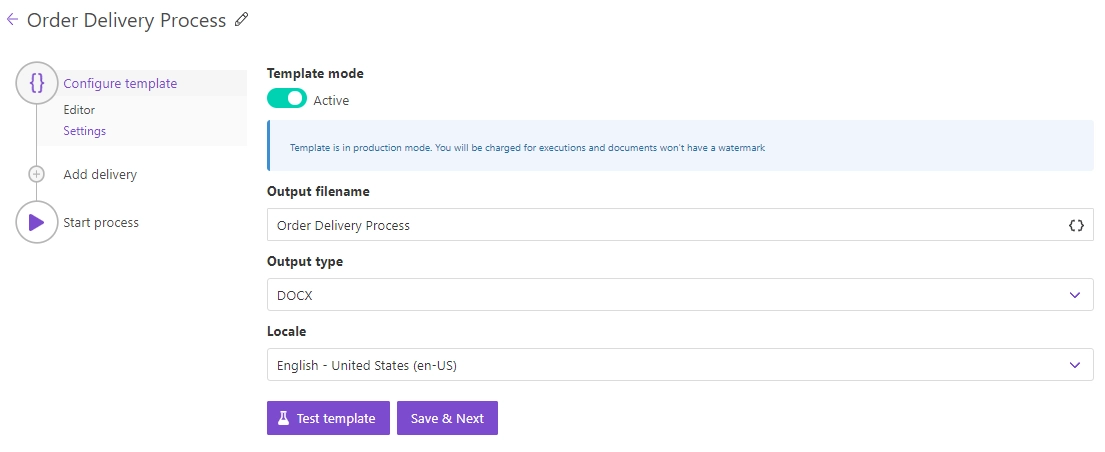
Click the Next button, and found yourself in the first step of the process - Configure template.
It includes two substeps:
Editor
Settings
In Editor, you can compose the template from scratch or upload a pre-made one. It’s also possible to change the uploaded template online. For this click Edit template.
I’ll compose our order delivery docx template from scratch right in the editor.
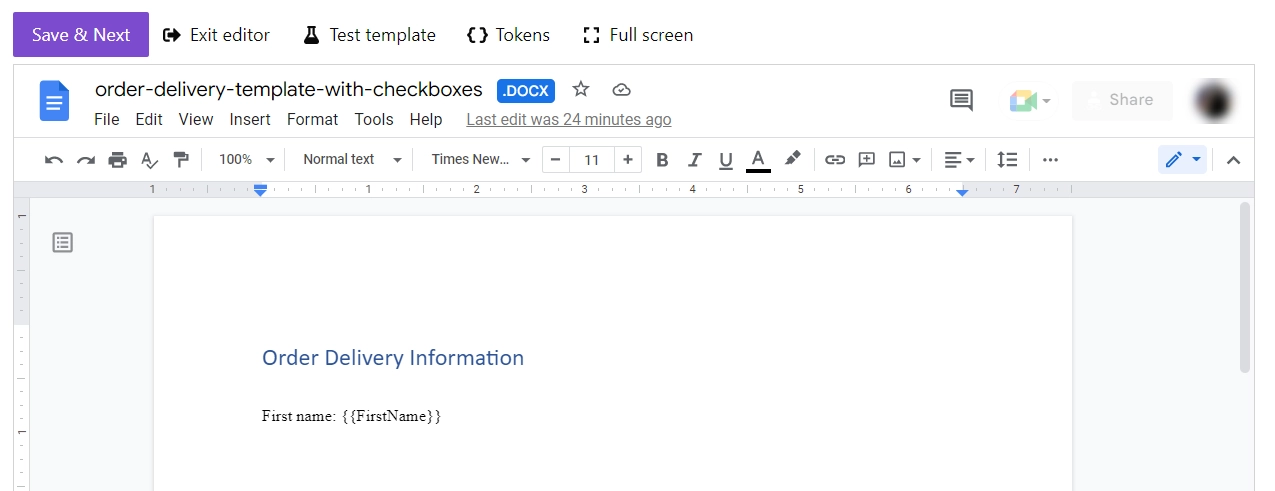
We need to add elements to the Word template that corresponds the Order Delivery Form’s fields.
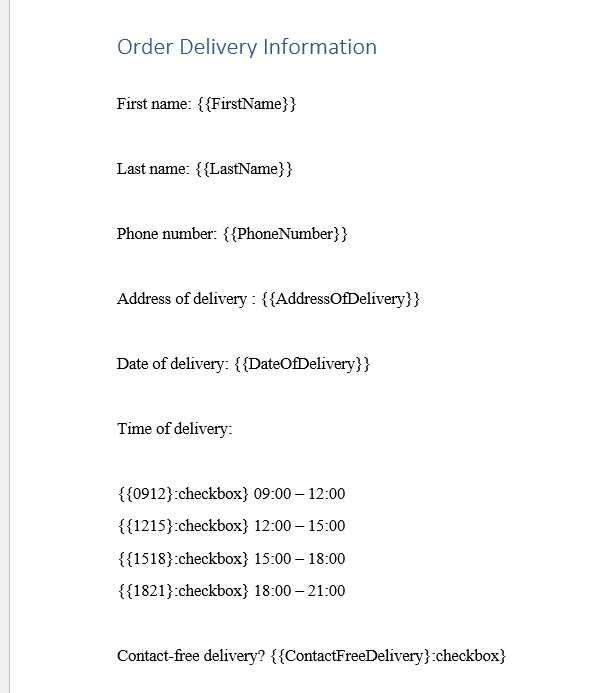
Let’s take a closer look at the checkboxes. We don’t need to place checkboxes from the development section in the word template. We just need to add tags with checkbox formatter to the document and the template engine will place the checkboxes itself.
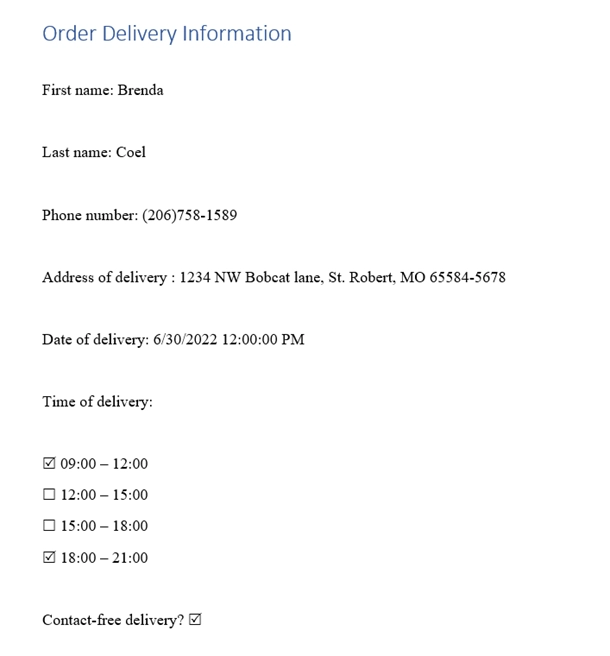
If the checkbox tags receive “true” value, they turn into checked checkbox, if “false” - unchecked.
In our case, I add 5 checkbox tags to the template. When a client selects the delivery time and “Contact-free delivery” in the delivery form, the template engine places a checkbox near the time and makes it checked or unchecked, depending on the choice.
You can download the template I’ve composed.
This is our template:
Click Save & Next button. I’ll leave the default settings, you can change it depending on your needs.
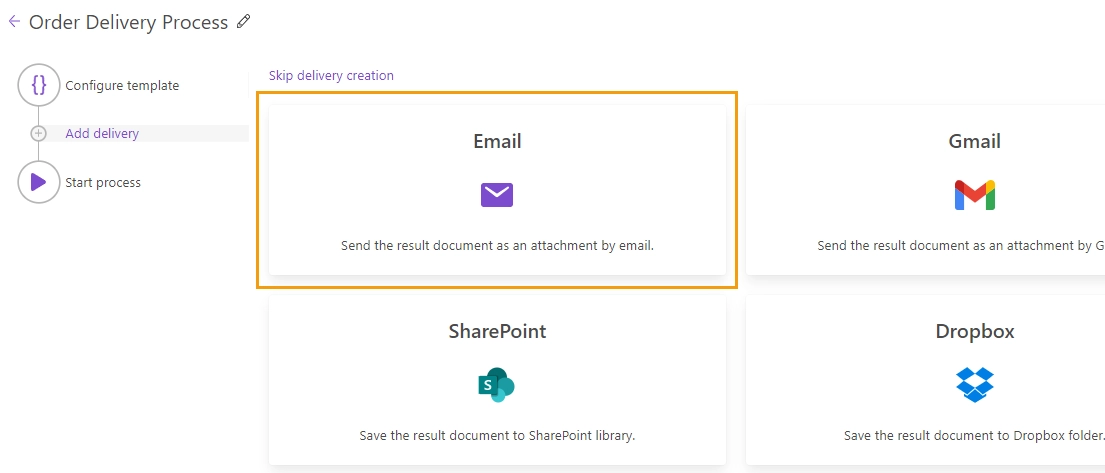
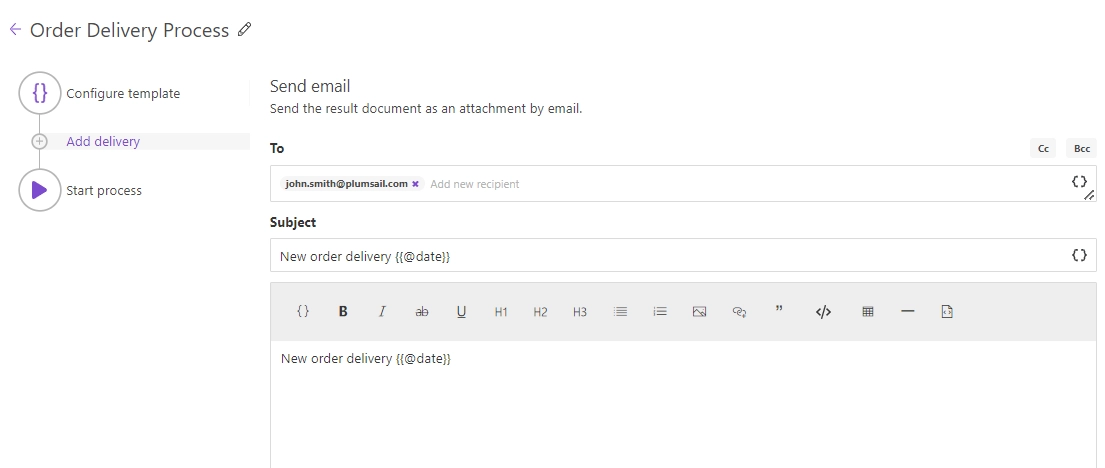
Click Save & Next button and select a delivery on the next step. I’ll use email delivery.
We created a process that will be triggered by a Power Automate flow. Let’s move on to the final step.
Create a Power Automate flow
The entire flow looks like this:
Let’s check each step of the flow.
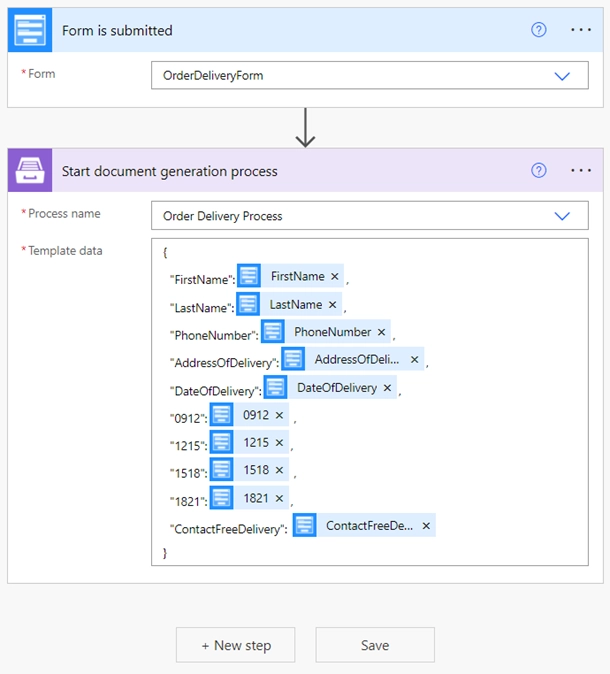
The flow starts when our Order Delivery Form is submitted:

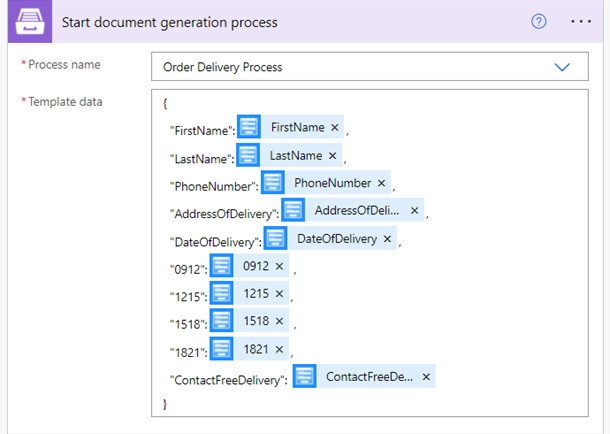
Once the form is submitted, we start our Order delivery process with this Power Automate action Start document generation process:
This is the result Word document:
Conclusion
Now you should have an idea how to use the checkbox formatter and generate Word documents with Start document generation process action from Plumsail Documents connector for Power Automate (Microsoft Flow). If you haven’t used it yet, registering an account would be the first step. It is quite easy to get started.