Getting started
- Introduction
- Create a new process
- Configure template
- Configure output settings
- Add deliveries
- Start process
- Runs history
- Processes examples
- Create DOCX from template
- Create XLSX from template
- Create PPTX from template
- Create HTML from template
- Create PDF from DOCX template
- Create PDF from HTML template
- Auto-populate fillable PDF
- Batch generate event tickets from HTML template based on CSV rows
- Plumsail Forms
- DocuSign
- signNow
- Adobe Sign
- Xodo Sign
- Airtable
- Shopify
- SharePoint
- Stripe
- Smartsheet
- Microsoft Forms
- Dynamics CRM
- Typeform
- Teachable
- Pipedrive
- HubSpot
- Cognito Forms
- Trello
- ClickUp
- FreshBooks
- Google Forms
- Google Sheets
- Gravity Forms
- JotForm
- Kommo
- PayPal
- Wufoo
- Zoho CRM
- Power Automate
- Make
- Zapier
- Integrately
- viaSocket
- Training videos
Integrations
Templates syntax
- Word DOCX templates (Modern)
- Word DOCX templates (Classic)
- Excel XLSX templates
- PowerPoint PPTX templates
- Fillable PDF
- HTML templates
Forms
General
- Licensing details
- Release notes
- Data protection and security
- Data center location
- Service level agreement
- Status page
Account management
PDF processing and more
Automatically populate fillable PDF based on data from SharePoint list in Power Automate
In this article, you will learn how to automatically populate fillable PDF forms in Power Automate (Microsoft Flow) or Azure Logic Apps. We will use Processes - a Plumsail Documents feature for creating documents from templates.
In our case, we will fill in an Application for Employment form based on the data from a SharePoint list. Actually, you can get data from any other source. We use the SharePoint list here as an example.
This is how the final PDF document with the form will look in our case:
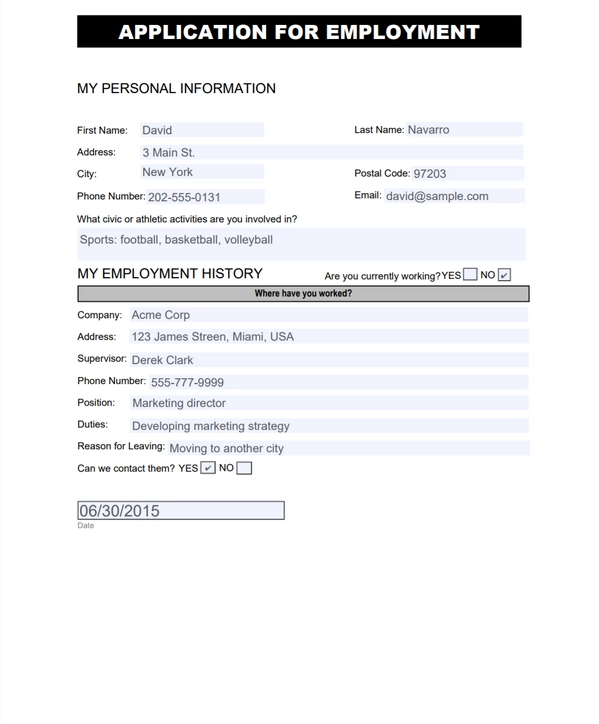
Here is a step-by-step description.
Create a fillable PDF
Follow this instruction to create a fillable PDF. Download the template file for this article.
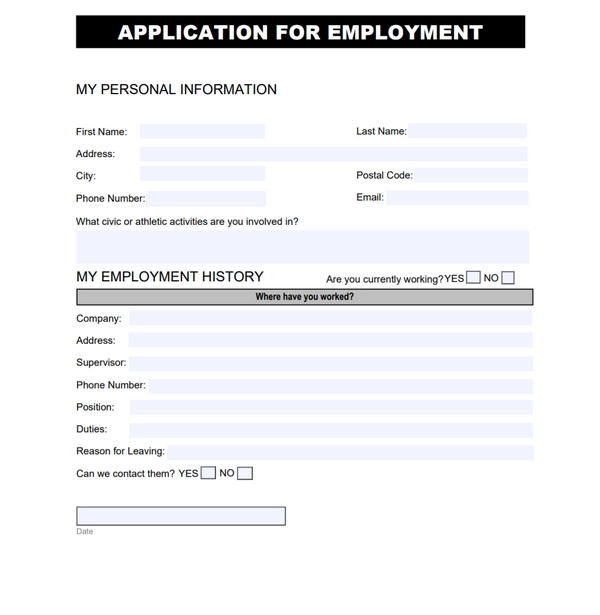
Configure the Process
To create a process, which will populate our PDF form of application for employment, go to the Processes section in your Plumsail account.
Create a new process
Click on the Add process button.

Set the Process name and Select a Fillable PDF for a template type.
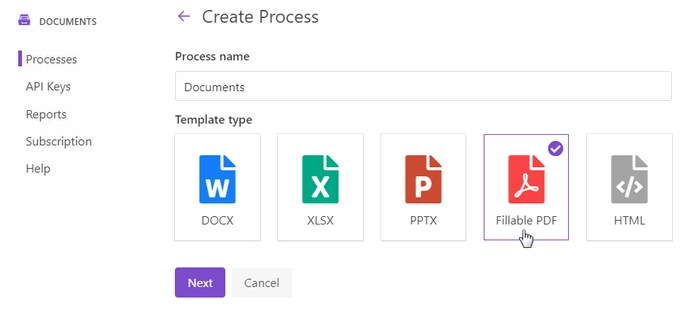
Click the Next button. You’ll be offered to upload a fillable PDF template.

Configure a template
After you’ve provided the template file, you’ll jump to the next step - Configure template.
It includes two substeps:
Editor;
Settings.
In Editor, it’s possible to upload a new fillable PDF template. And download it to your PC.
Another feature here is testing the template. It helps you to get a sight of the resulting document and decide if you’re satisfied with it.
Just click the Test template. You’ll see the dialog where to put the source data in JSON format.
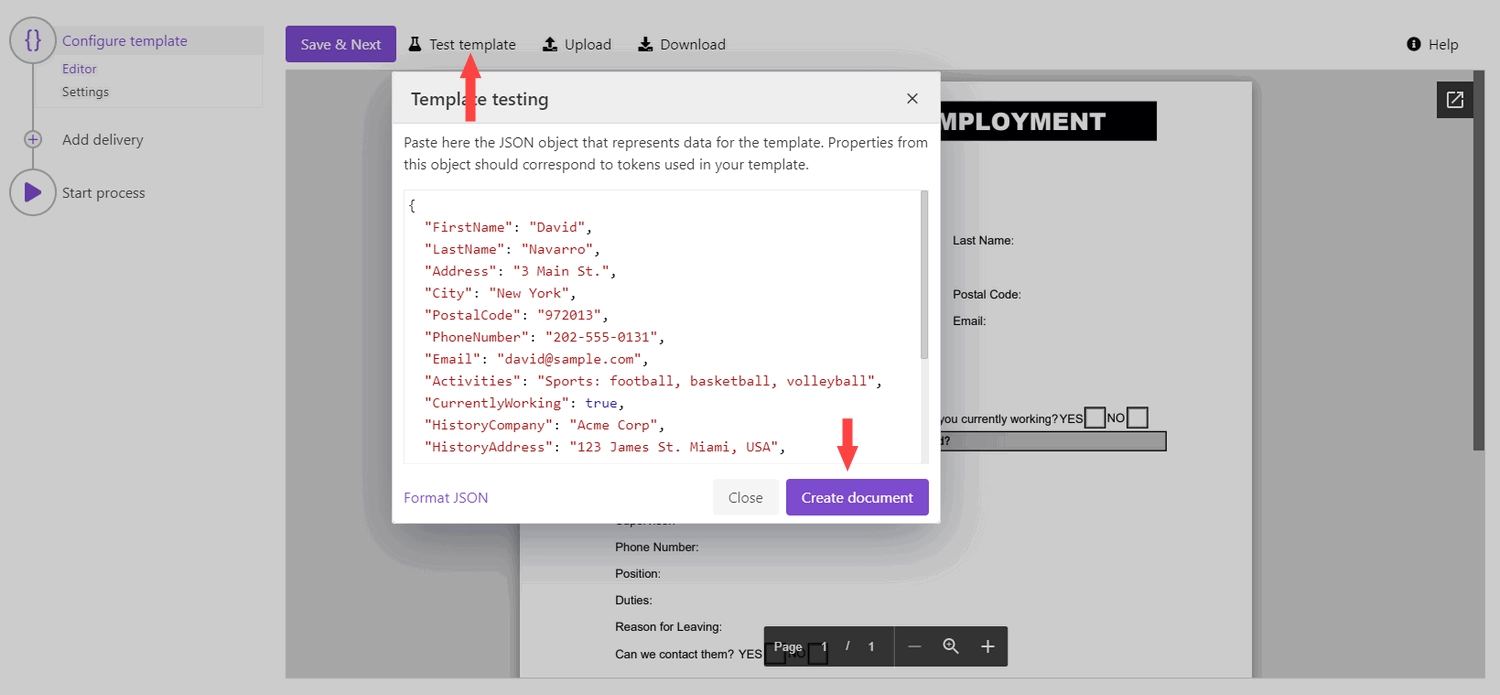
To test the PDF form template from this example, copy and paste this JSON data:
{
"FirstName": "David",
"LastName": "Navarro",
"Address": "3 Main St.",
"City": "New York",
"PostalCode": "972013",
"PhoneNumber": "202-555-0131",
"Email": "david@sample.com",
"Activities": "Sports: football, basketball, volleyball",
"CurrentlyWorking": true,
"HistoryCompany": "Acme Corp",
"HistoryAddress": "123 James St. Miami, USA",
"HistorySupervisor": "Derek Clark",
"HistoryPhoneNumber": "555-777-9999",
"HistoryPosition": "Marketing director",
"HistoryDuties": "Developing marketing strategy",
"HistoryLeaving": "Moving to another city",
"HistoryContact": true,
"Date": "06/30/2020"
}
Note
It’s testing, we’ll pass data from the SharePoint list to the process to populate the template. See the Start process section.
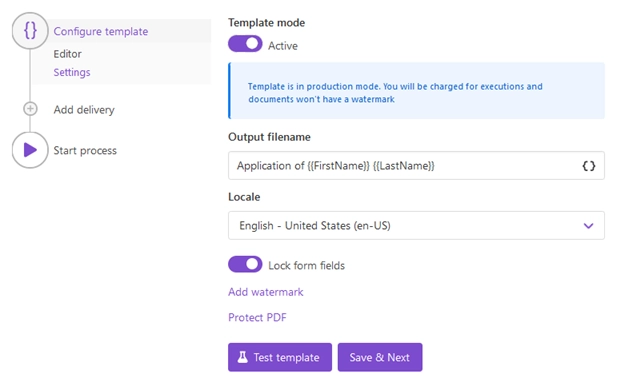
In the Settings substep, you customize the following settings:
Template mode
It is Testing by default. It means you won’t be charged for this process runs, but result documents will have a Plumsail watermark. Change it to Active to remove the watermark.
Output filename
Use tokens to make it personalized. They work the same way as in the template.
Hint
You can protect your final PDF document with a watermark, by setting a password, or disabling some actions.
Test template
You can test the template from the Settings as well - to check how the customized settings will appear in the resulting document. The procedure is the same as we’ve already described above.
Note
Lock form fields option is activated by default. If you want to edit fields in the result PDF file - disable the option.
Delivery
The next step is delivery. For demonstrating purposes, let us set an email delivery.
Fill-in a recipient email. Add recipients for a copy or blind copy if you need. Define the subject of the letter. And write an email body.
You can use tokens from your template to specify details in the email subject as we did, or in the body. The submitted data will be applied to them as well. Learn more by following this link.
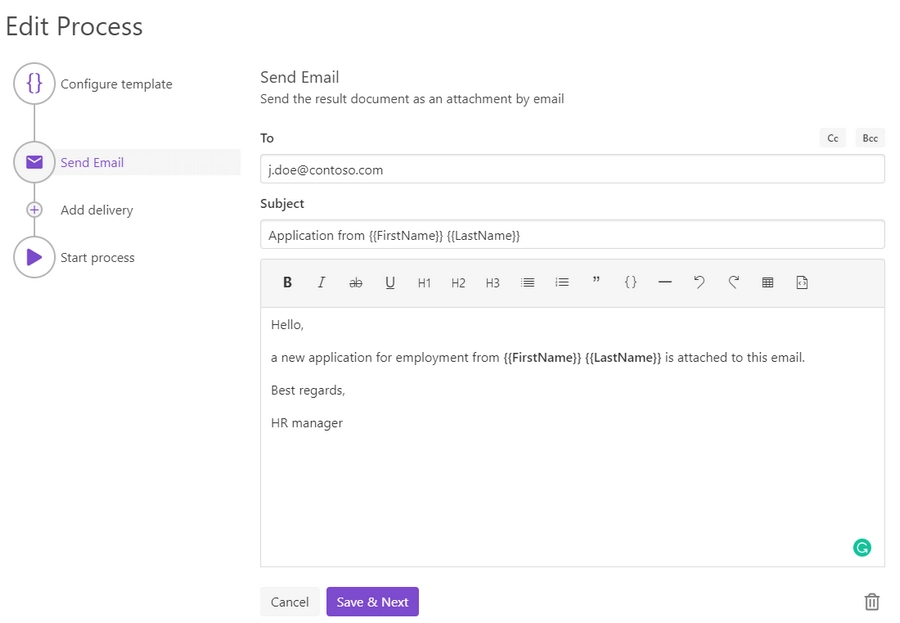
You can configure as many deliveries as you need, or even skip the step. Check all the available options and how to handle them here.
Start the Process
We will start our Process from Power Automate (Microsoft Flow).
Create a Flow
This is how our Flow looks:
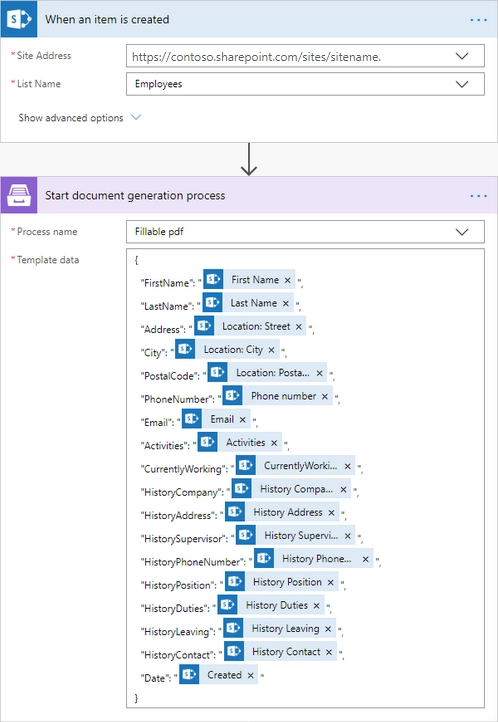
Flow trigger
You can pick any trigger. For example, you can start your Flow on form submission. We use “When an item is created” trigger to get data of the latest created item from the SharePoint list.
Our SharePoint list has the same columns as fields in our fillable PDF file.
Start document generation process
This is the action from Plumsail Documents connector. This action is suitable for starting the Process of generating documents from a template. You can find more information about this action by visiting this page.
Mind, If you use the Plumsail documents action for the first time, you’ll be asked for ‘Connection Name’ and ‘Access Key’. You can type any name for the connection. For example, ‘Plumsail Documents’.
Then create an API key in your Plumsail Account page, copy and paste it to the ‘Access Key’ field.
The Start document generation process action has two parameters:
Process name. Select the process you need from available ones.
Template data. Specify source data in JSON format.
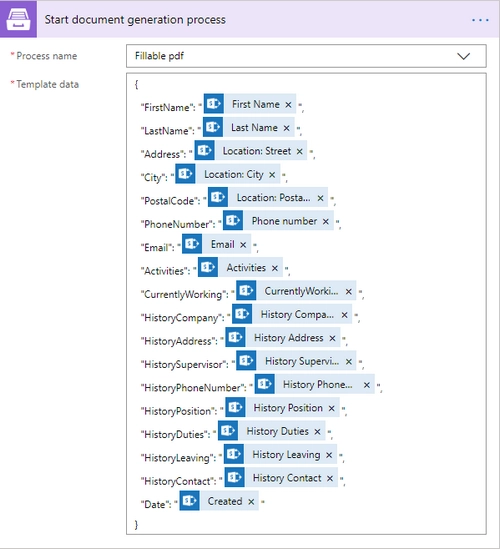
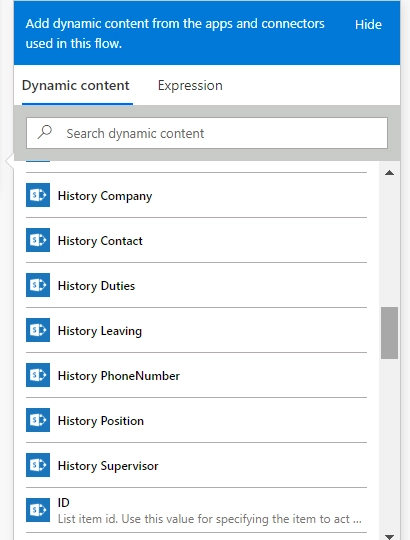
This object contains information from an item newly created in the SharePoint list. We selected the dynamic content from the output of SharePoint - When an item is created:
Use the ready PDF in Flow
Now we upload our ready and filled-in PDF to the SharePoint document library to see how to use the output of the Start document generation process action right in the Flow.
Add a Create file action from the SharePoint connector.
For the File content, select Result file in Dynamic content from Start document generation process.
Please notice how we specified the File name with .PDF. It is essential to specify the file name with the correct extension.

Our Flow is ready. Now you know how to automatically populate fillable PDFs with the help of Plumsail Documents in Power Automate (Flow). If you’re new to Plumsail Documents, register an account and follow the steps described in the article. To get started is easy.