Create Excel document from template
If you’re looking to save time on routine tasks by auto-generating purchase orders, this article will guide you through the process. We’ll provide a step-by-step approach to creating an Excel document from an XLSX template using Processes, a Plumsail Documents tool for document generation.
The Processes are a user-friendly intuitive interface for creating documents from templates, converting and delivering them to different systems for further management.
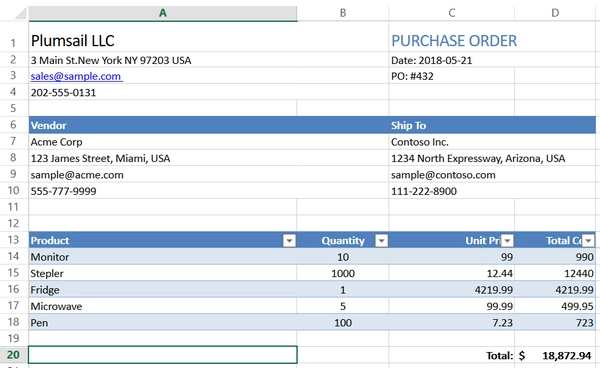
In this article, we will generate a purchase order from a template, and this is how the final document will look:
Let’s go through the following steps and create a process for generating Excel documents from a template:
Configure Process
First, login or create your Plumsail account.
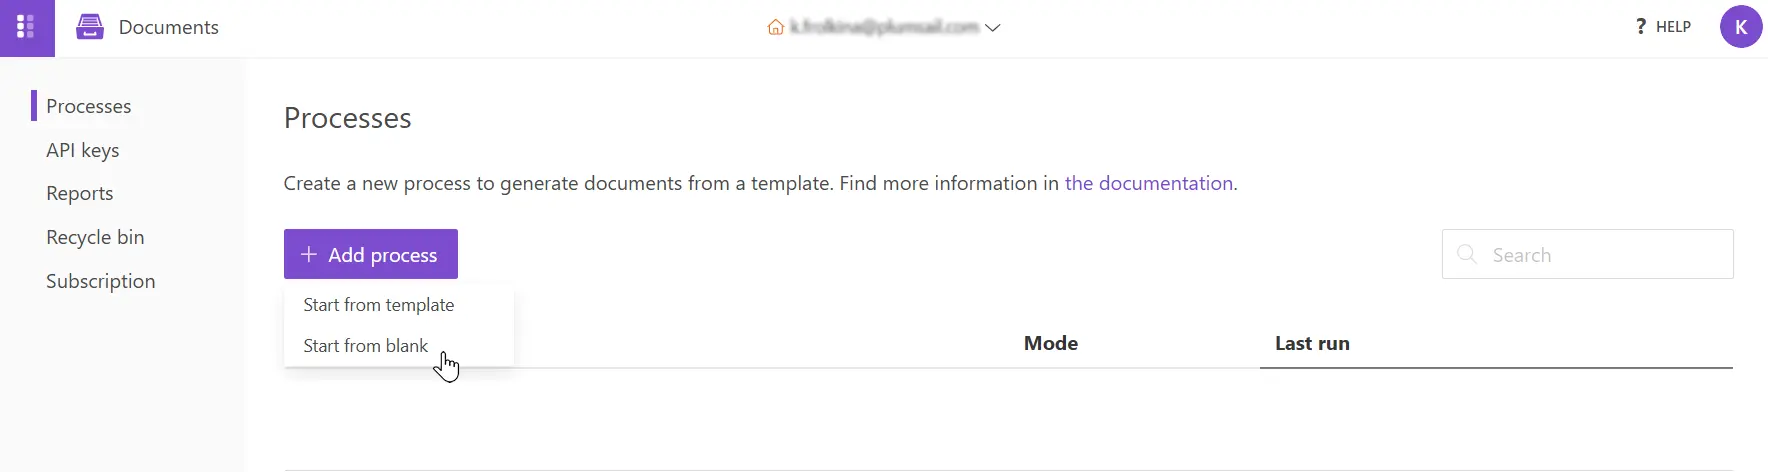
Create new process
Click Add Process button and choose either to start from a template or from blank. We’ll start from blank.
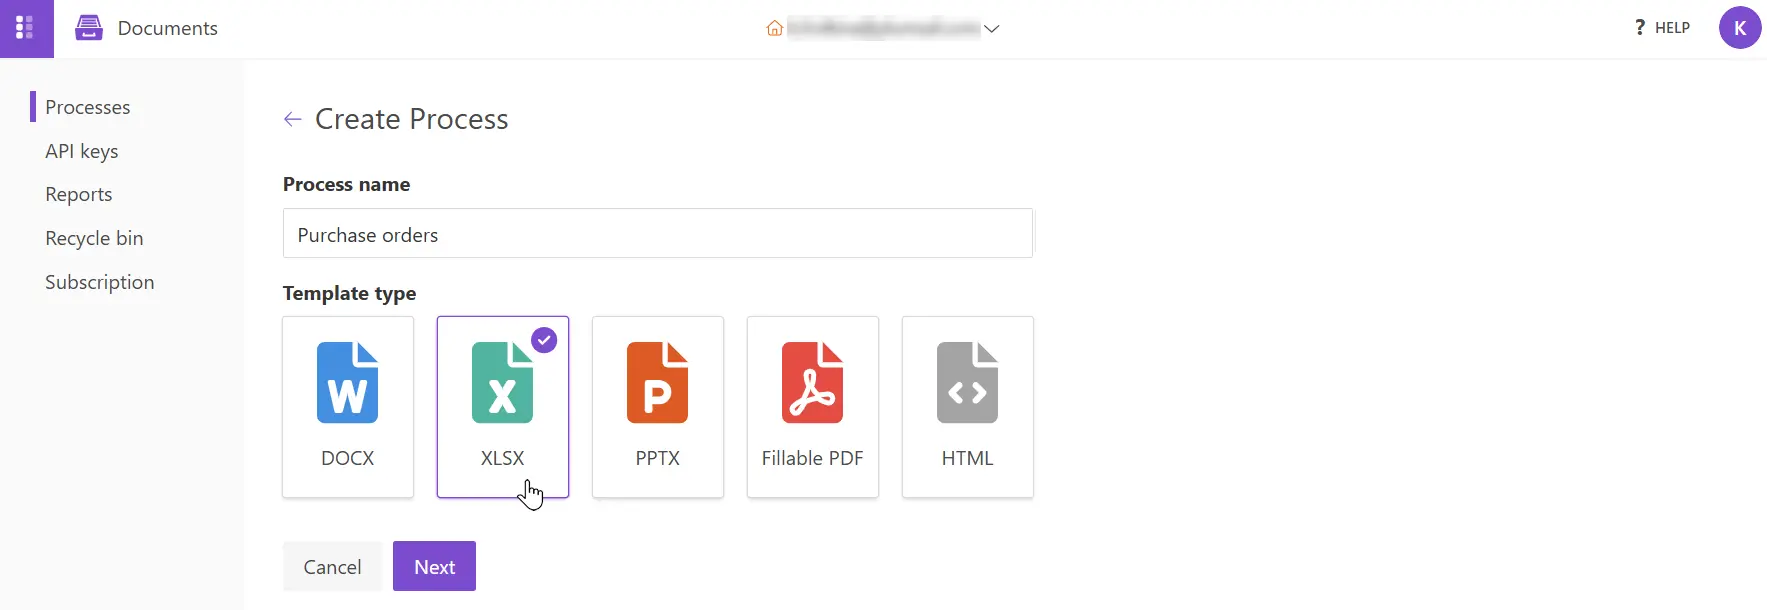
Next, give your process a name and select XLSX for the template type.
Configure template
Once you’re done with the first step Create Process, press the Next button, and you’ll proceed to the next step - Configure Template.
This step includes two sections:
Editor;
Settings.
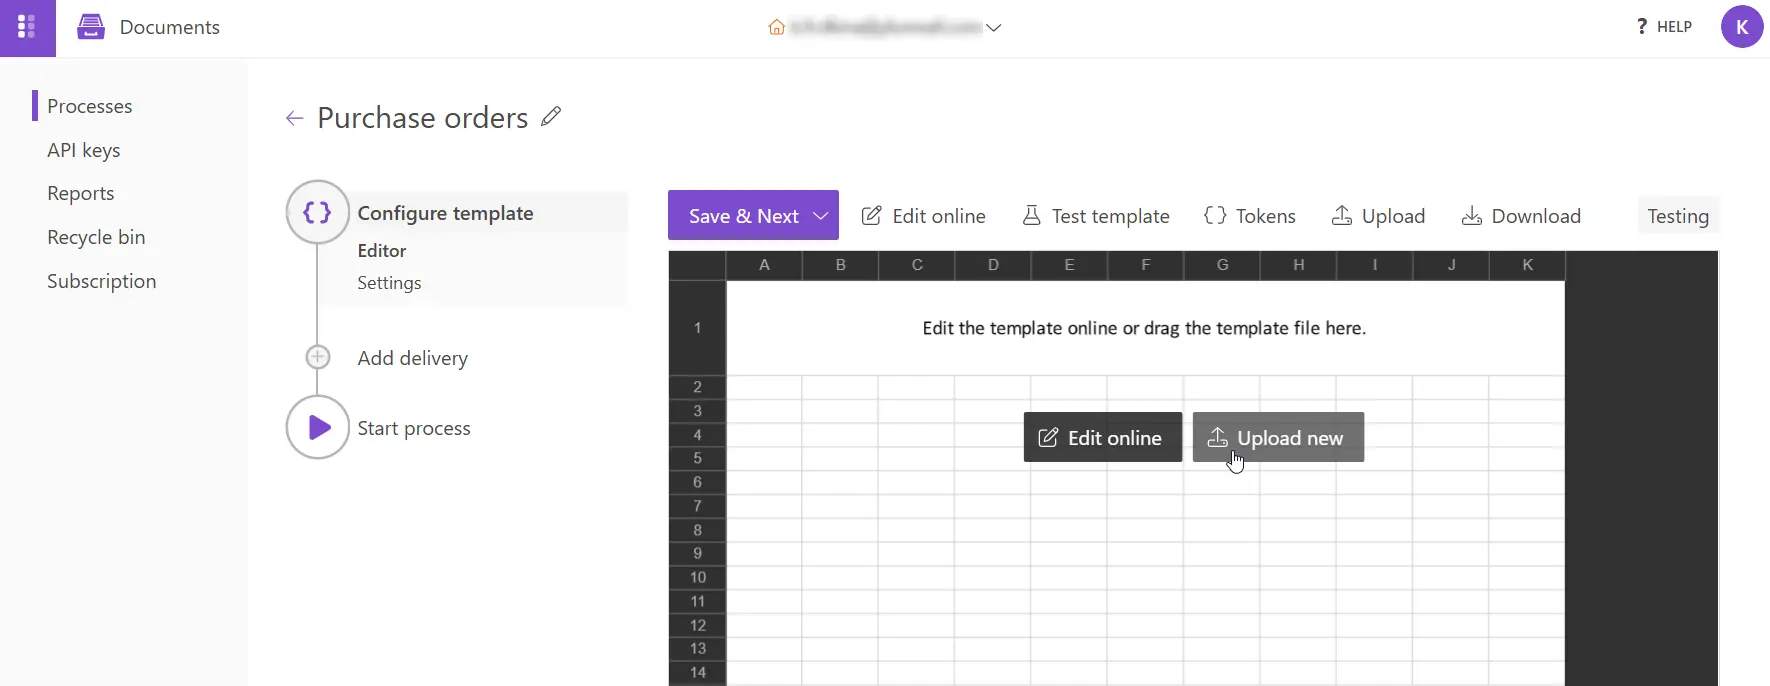
In Editor, you can either create a template from scratch or upload a pre-built one. You can download an XLSX purchase order template used in this example. Additionally, it is possible to modify the uploaded template directly in the Editor step.
Then upload it to the process.
Templating syntax
When designing your own template from scratch, start by reviewing the templating language used in Plumsail Documents. Plumsail Excel templates use a different approach compared to other templating solutions, utilizing minimal syntax to get the job done.
To learn more about the templating engine, you can read this documentation article.
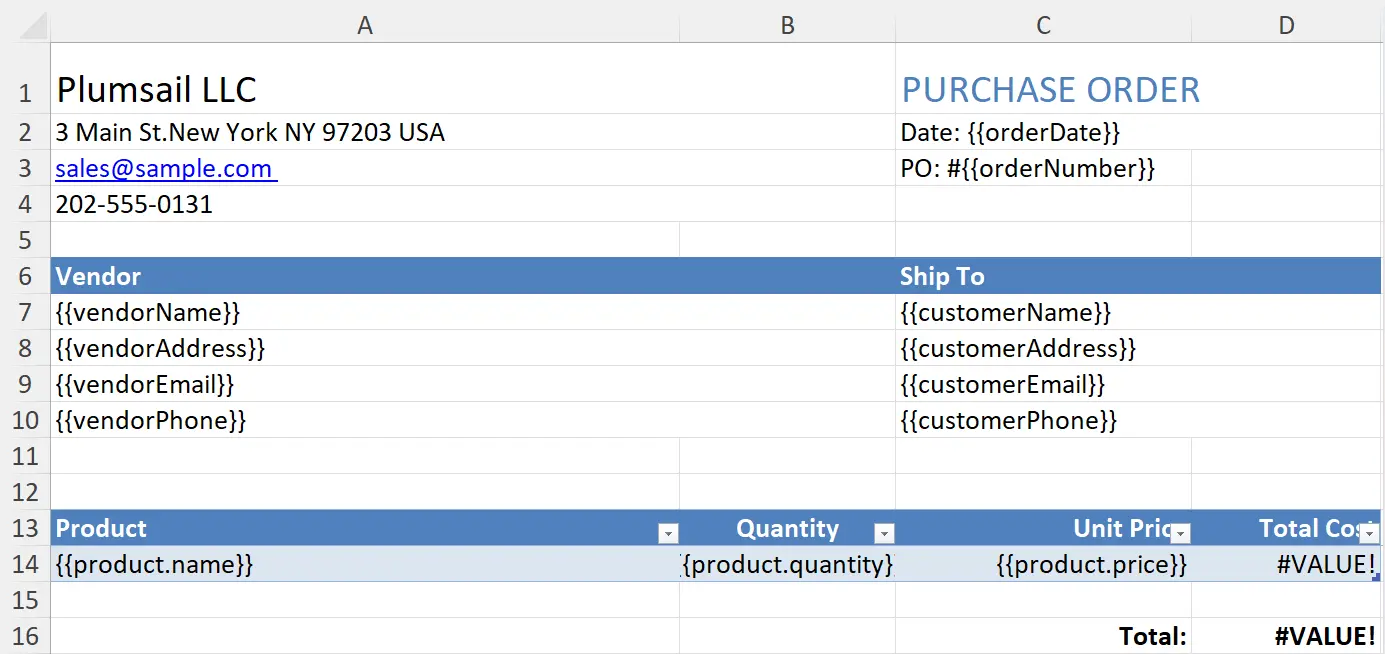
Essentially, the templating engine interprets everything between the curly {{ }} brackets as a variable, dynamically applying your specified data.
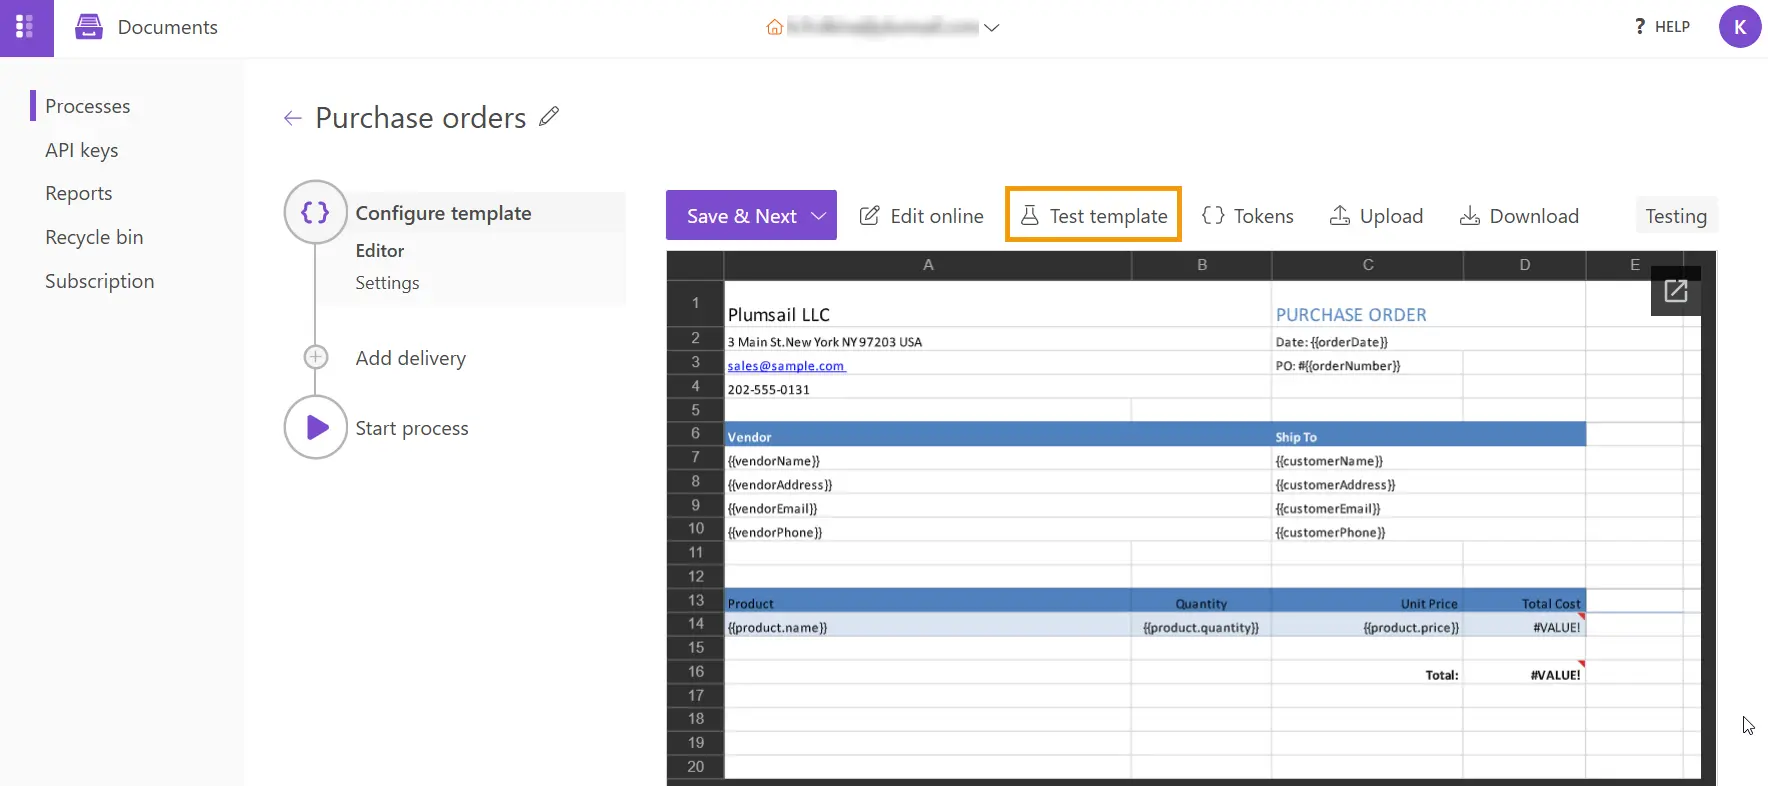
In our case, the simplest tokens would be {{orderDate}} and {{orderNumber}}. They let the engine know that we want to render the invoice number and its date.
However, we can also implement more complex scenarios. In our template, we reference properties within a collection of products using nested tokens with a dot operator:
The
{{product.name}},{{product.quantity}},{{product.price}},{{product.cost}}tokens retrieve the name, quantity, price and cost properties of a product.
The templating engine is smart enough to identify which content needs to be duplicated. It iterates through all objects in the array, rendering each one and automatically adding the necessary rows.
You can learn more about table rendering here.
The advantage of using an Excel template is the ability to add formulas. We’ll use the following formulas to calculate the total cost for each item individually and for all items combined:
=[Quantity]*[Unit Price]- for each item=SUM(D14)- for all the items
Test template
To check how the final document will look, click on the Test template button. A dialog window will pop up where you can fill in the auto-generated testing form. Form fields are created based on the tokens from your document template. You can adjust the look of the testing form by changing token types.
Once the template is ready and you’re satisfied with the results, click Save & Next to proceed to the Settings step.
In this step, you can set the Template mode to testing or production, customize the Output file name with tokens from the template and select the Output type.
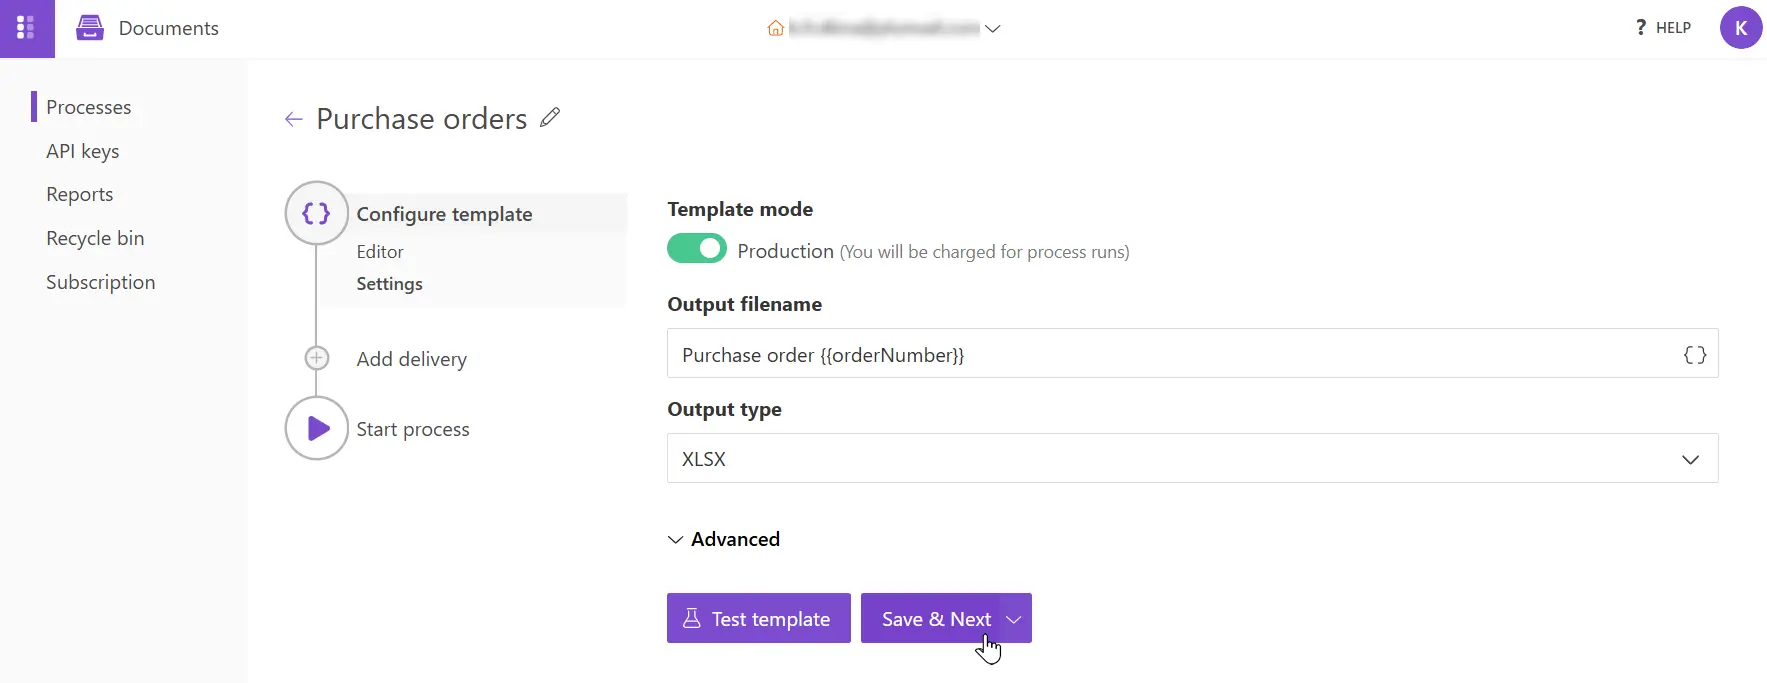
Template mode
It is set to Testing by default. This means you won’t be charged for process runs, but the resulting documents will have a Plumsail watermark. Switch to Production to remove the watermark.
Output filename
You can add tokens to personalize the Output Filename. They function the same way as they do in the template. For example, by adding {{orderNumber}} token, the generated purchase order will be named Purchase order 432.
Output type
By default, the file format will match that of your template, which in this example is XLSX. We will keep working with this format for our purposes. However, if you prefer to receive the final purchase order as PDF files, you can easily switch to PDF format.
Test template
You can also test the template in the Settings step. The testing process is identical to the one described above.
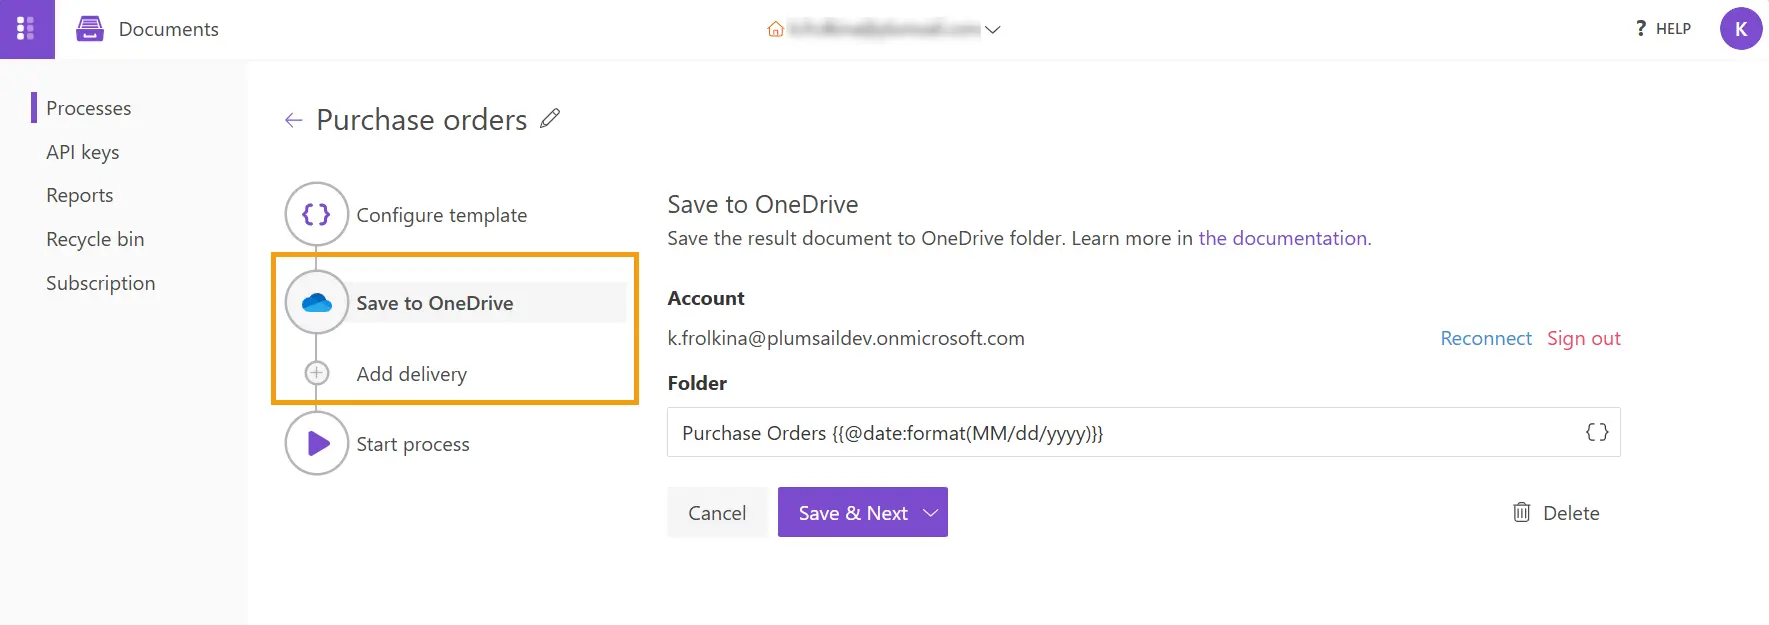
Add Delivery
The next step is Delivery. In our example, we’ll store the generated purchase orders in OneDrive, but there are many other options, such as Dropbox, DocuSign, SharePoint, email, and more.
First, you will be prompted to connect your OneDrive account to Plumsail. Then, create a folder where the generated purchase orders will be saved. Tokens can be used here as well.
You can add as many deliveries as needed.
Start Process
Everything is now ready for you to begin generating Excel documents from an XLSX template. In the Start process step you have several options to trigger document generation, which are listed below.
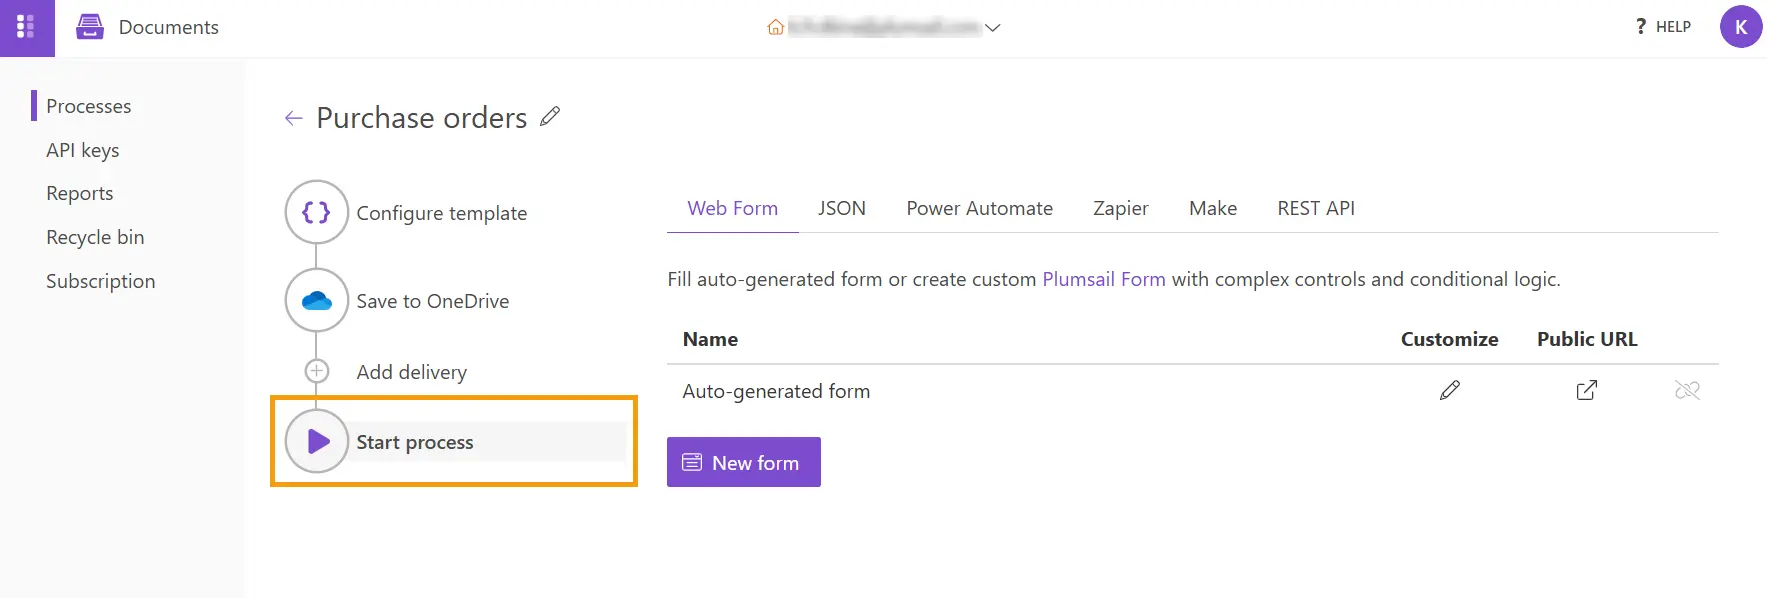
You can start the process:
submitting JSON corresponding to template tokens;
Hint
Use Power Automate Flow, Zapier and Make to integrate the Documents Process with other apps. This allows you to collect data from one application and pass it into the process to populate an Excel (XLSX) template and generate a document. You can use data from various web forms, CRM systems, SharePoint lists, and thousands of other web applications to complete your XLSX template.