Batch generate PDF tickets from HTML template based on CSV records in Power Automate
This article describes how to batch generate tickets from an HTML template for conference visitors or any event attendees based on CSV rows data. Let’s imagine you have a CSV file with conference visitors’ information. You need to generate personal invitations to the event for every attendee and send them by email.
We’ll show you how to automize this case using Processes and Parse CSV action by Plumsail Documents in Power Automate (Microsoft Flow).
Processes are an intuitive interface for creating documents from templates.
Parse CSV is an action for MS Flow which parses a CSV file into an array of objects with properties.
Configure the Process
First, we will configure the Process and after that will create a Flow.
Create a new Process
Go to the Processes section in your Plumsail account.
Click on the Add process button.

Set the Process name. Then select HTML for a template type.
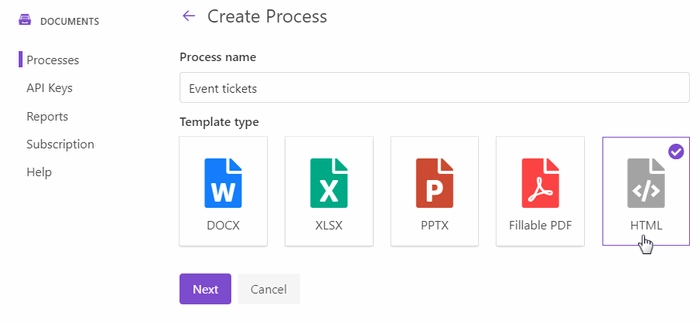
Click on the Next to continue.
Configure a template
Once you’ve created the process, you’ll jump to its first step – Configure Template.
It includes two substeps:
Editor;
Settings.
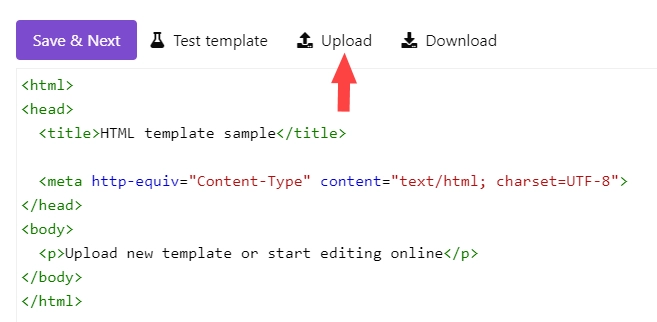
In Editor, you can compose the template from scratch or upload a pre-made one. It’s also possible to modify the uploaded template online.
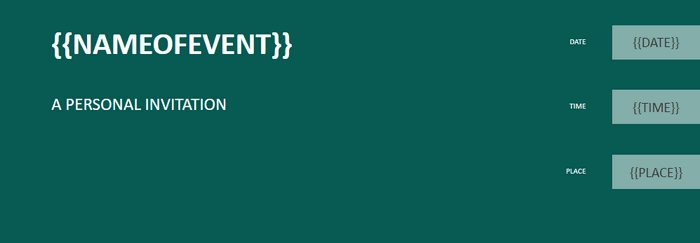
Feel free to download an HTML template of event tickets for conference visitors. We have prepared it beforehand.
Then upload it to the process.
Templating syntax
Our HTML template is very simple. We have a few tokens: {{NameOfEvent}}, {{date}}, {{time}}, and {{place}}. They will be replaced by information about the conference.
To get familiar with the template syntax, read this description.
Test template
To check how the final document looks, click on the Test template button.
You’ll see a form with fields from your template tokens. You can adjust the default form. Find more information in the documentation.
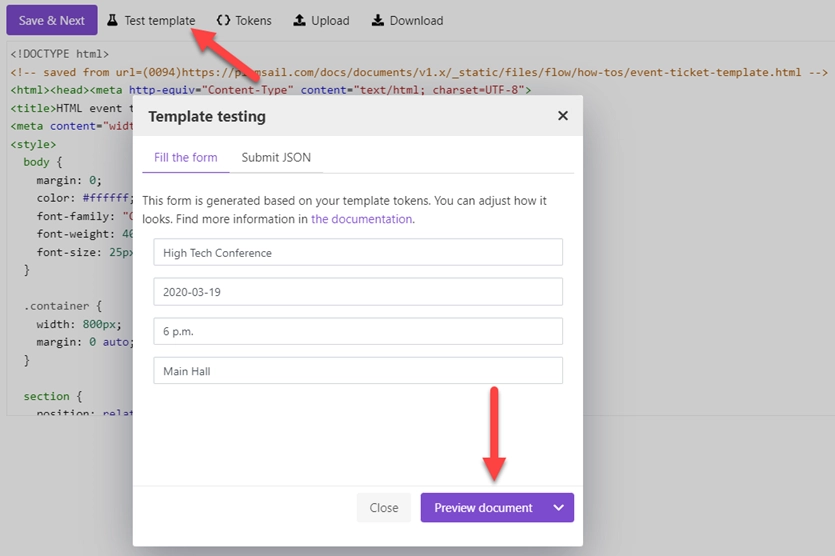
To test the HTML template, enter some data into the fields.
Note
It’s testing. We’ll pass data from the parsed CSV file to the process.
Once you’ve tested the template, press Save&Next to proceed further - to the Settings substep.
Here, please:
Switch to an active mode to remove Plumsail watermarks from resulting documents
Fill in the name of the result file
Select PDF format for the output file
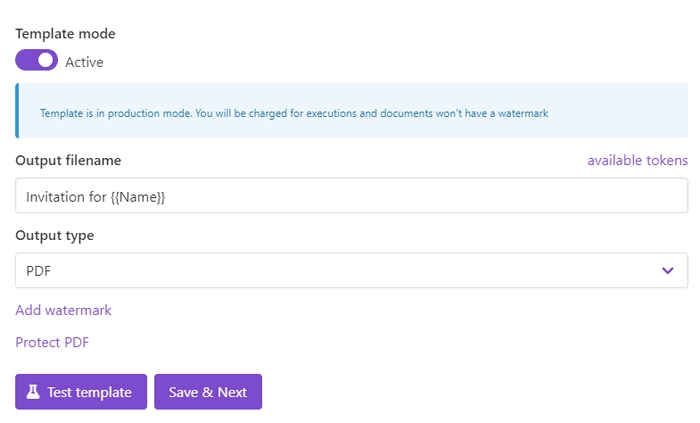
Once you’ve customized all the settings, you can test the template to see the result as we did it before.
When everything is done here, click on Save & Next to set up deliveries.
Delivery
The next step is delivery. We select Email delivery to send event invitations to conference visitors.
Enter {{email}} to the email field. The Parse CSV action will retrieve every conference visitor’s email. We will pass it to the Process to send personalized emails automatically.
Define the message’s subject and body. Inside them use tokens as well to make invitations personalized. For instance, we put {{Name}} at the beginning of the email body. This token will be replaced by real conference visitors’ names from the CSV file.
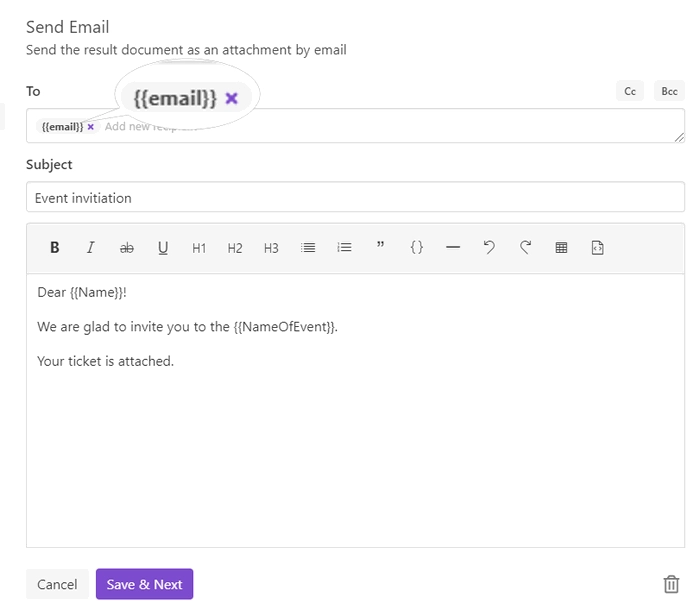
You can configure as many deliveries as you need. Check out other options as well.
Start the Process
We will start our Process from Power Automate (Microsoft Flow).
Create a Flow
This is how our Flow looks:
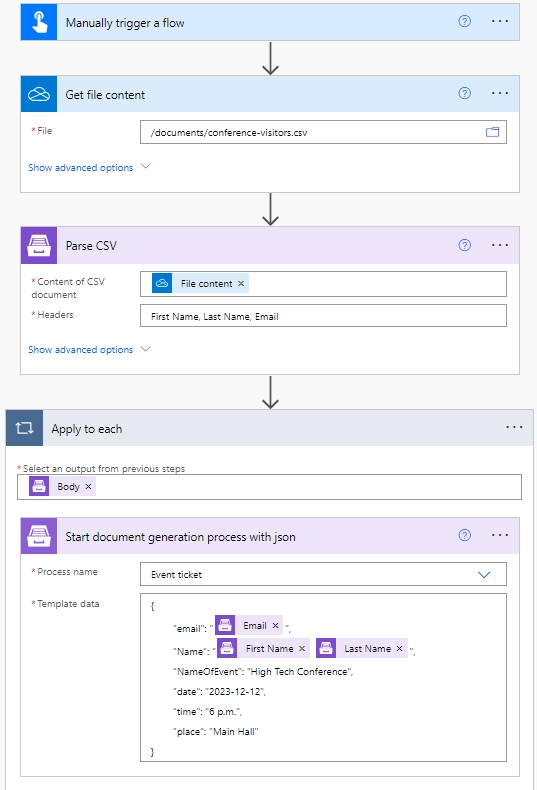
Flow trigger
You can pick any trigger. For example, you can start this Flow on event creation in the Office 365 Outlook calendar. We use Manually trigger a flow here for simplicity.
Get file content
We store our CSV file sample in OneDrive. To read its content, we assign the action Get file content from the OneDrive connector. This action gets content of the file in the OneDrive folder. You just need to specify the path to it.

It’s possible to assign Get file content action from other connectors. It depends on where you store the source file.
For you to try the same case as in the article, our sample CSV is available for download by this link.
Parse CSV
This is an action from Plumsail Documents connector. It parses a CSV file into an array of objects with properties in Power Automate (Microsoft Flow).
Using the action for the first time, you’ll be asked for ‘’Connection Name’’ and ‘’Access Key’’.
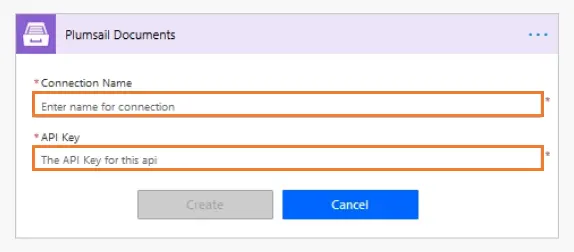
You can type any name for the connection. For example, ‘’Plumsail Documents’’.
Then create an API key in your Plumsail Account page, copy and paste it to ‘’Access Key’’ field.
Parse CSV action has two mandatory parameters:
Content of CSV document. Select an output from the previous step File content in Dynamic content.
Headers. List all the headers you will use, separate them by commas. We need the following information about the conference visitors - First Name, Last Name and Email.

You can find more detailed information about Parse CSV action here.
Start document generation process with json
Before adding this action, set Apply to each control. It will help to generate as many tickets as many rows the CSV file has; and send email to each event attendee from the CSV file.
Start document generation process with json is an action from Plumsail documents connector for Power Automate as well. It will start the process which we have already created and configured on the step Configure the Process.
The action has two parameters:
Process name. Select the process you need from available ones.
Template data. Use the output of Parse CSV to specify JSON data. We use First Name and Last Name for token
{{Name}}and Email output for{{email}}to pass all the emails from CSV to the Process.
Do not forget to set values for tokens from the HTML template - the conference details.
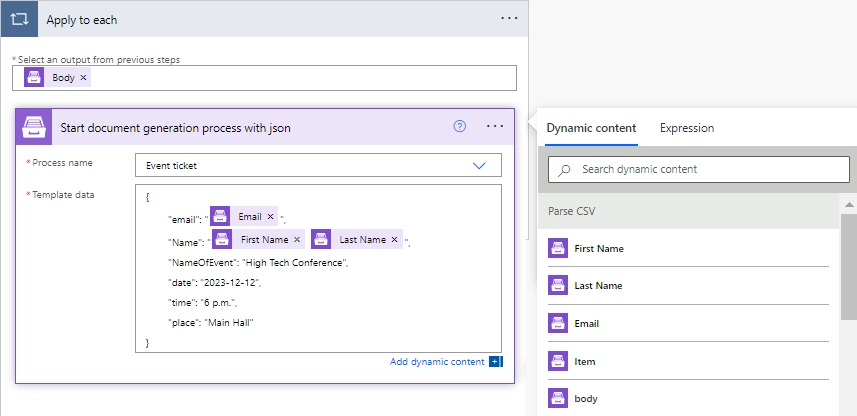
Our Flow is ready. It will apply data from CSV rows to the HTML template to batch generate personal invitations in PDF and send them by email.
Each event visitor will receive a personalized email with the conference ticket attached:


It’s one example of many others. You can use the same logic for your own scenarios.
Sign up for Plumsail Documents
To start optimizing processes, register a Plumsail account and follow the steps described in the article to batch generate event tickets from HTML templates based on CSV rows data.