Create documents from template in Power Automate and sign them using signNow
In this article, we will show you how to create documents from a template using processes and sign them with the help of signNow.
Processes are a Plumsail Documents feature with an intuitive interface for creating documents from templates.
signNow is an electronic signature cloud-based software which allows to sign and manage documents on any device. If you have not tried it yet, you can register a free signNow trial account.
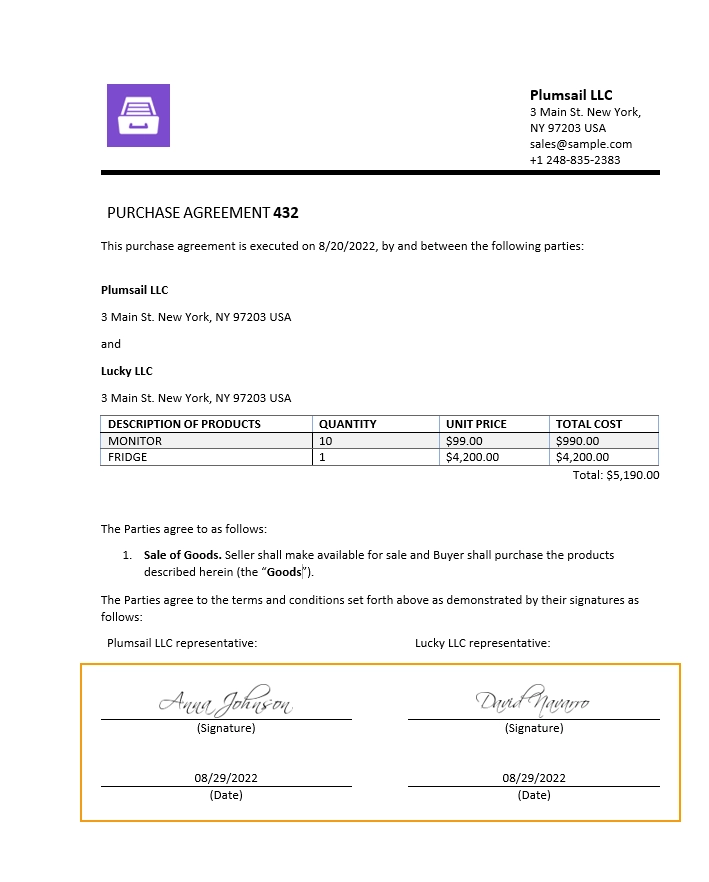
We will connect these tools in Power Automate (Flow) to automize the documents exchange and signing. As a result, we will get the sales contract signed electronically:
Configure process
Before creating a flow, we need to set a process that will create a PDF purchase agreement from a DOCX template.
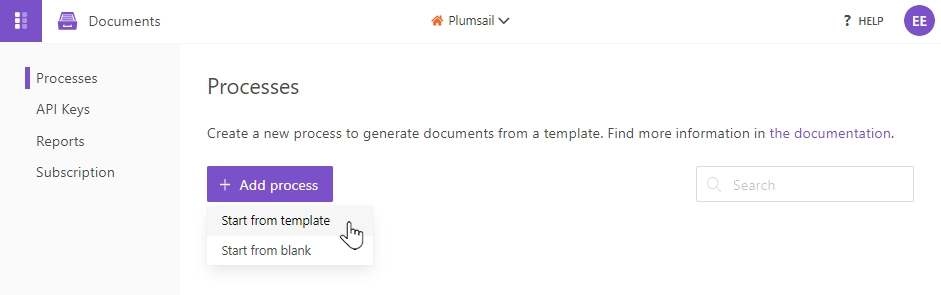
Create new process
Go to the Processes section in your Plumsail account. Click the Add process button and start from a ready template.
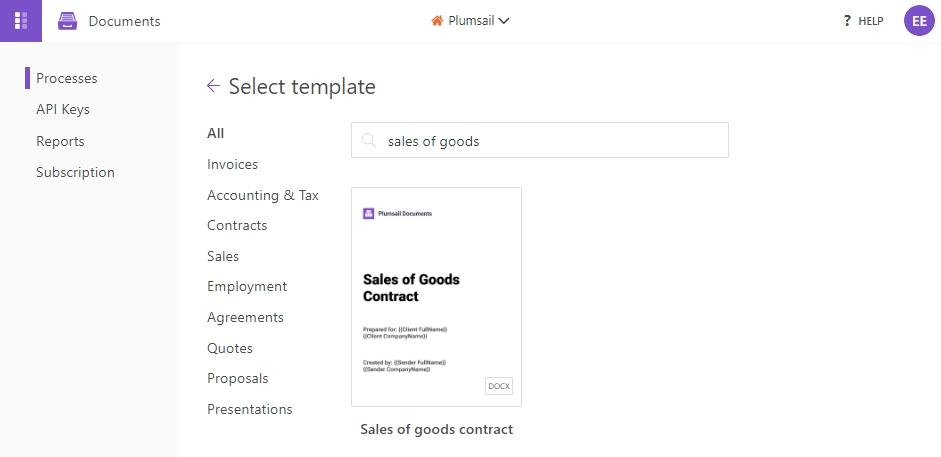
Find the sales of goods contract as on the screenshot below, it suits the approach described in this article.
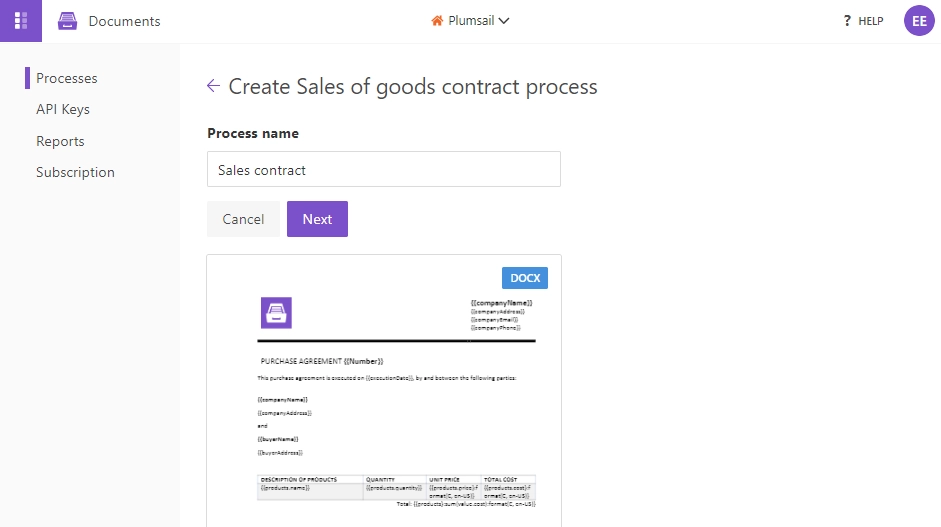
Name the process and go to the next step.
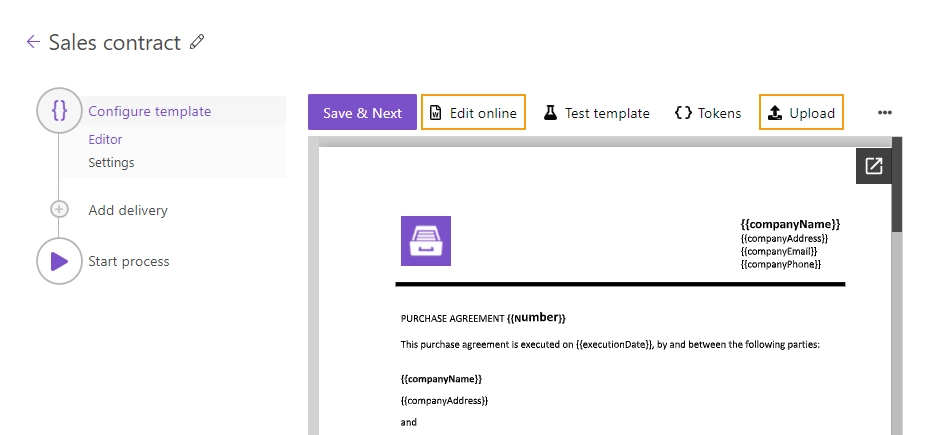
Configure template
Once you are done with the first step Create process, press the Next button and you will jump to the next step – Configure Template. There you will find two substeps:
Editor and
Settings.
In Editor, you can compose document templates online, or upload pre-made ones and modify them in case of need. It is also possible to modify the current template online if you wish to change the logo or adjust it to your use case.
Templating syntax
When creating your own templates, mind the templating language. Plumsail Word DOCX templates use a different approach than most other templating solutions. It uses a minimal amount of syntax to make your work done.
In short, the templating engine thinks that everything between {{curly}} brackets is variables where it will apply your specified data.
Read this article to get familiar with the templating engine.
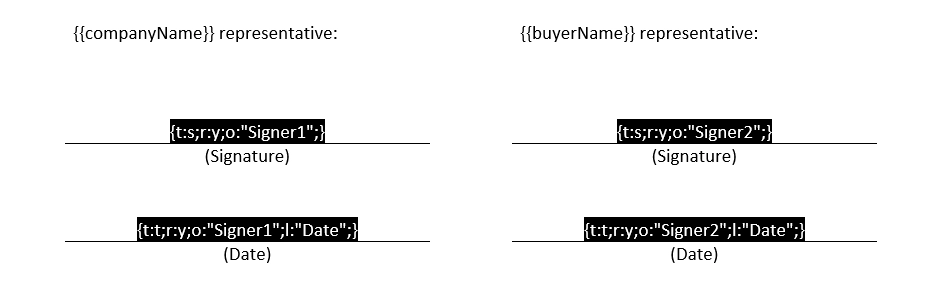
Insert signing tags into the template
At the end of the sales contract template, we put special tags to define the location of signatures and other related fields for signers. These tags are from signNow; they ease the process of signing. Each signer will see where to place his signature and what fields are required to complete.
This is how tags should look in the document template. Color them white to hide the tags. For demonstrating purposes, they are highlighted black on the screenshot below:
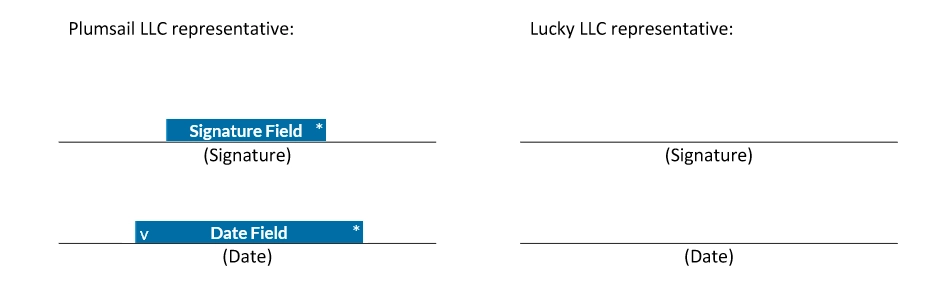
This is how they will appear for a signer:
It is easy to compose such signature tags.
The logic is that they include a series of options in a specific order, divided with a ; symbol, and the whole tag is wrapped by {curly brackets}.
For instance, the option going first is a field type.
In our template, we have such types as s (for signature) and t.
Learn more about using signNow signature and other related tags.
Test template
After you have uploaded the template to the process, you will see the template preview. To get a sight of the resulting document, click the Test template button. You will see a form that is based on your template tokens. You can adjust the default form. Find more information in the documentation.
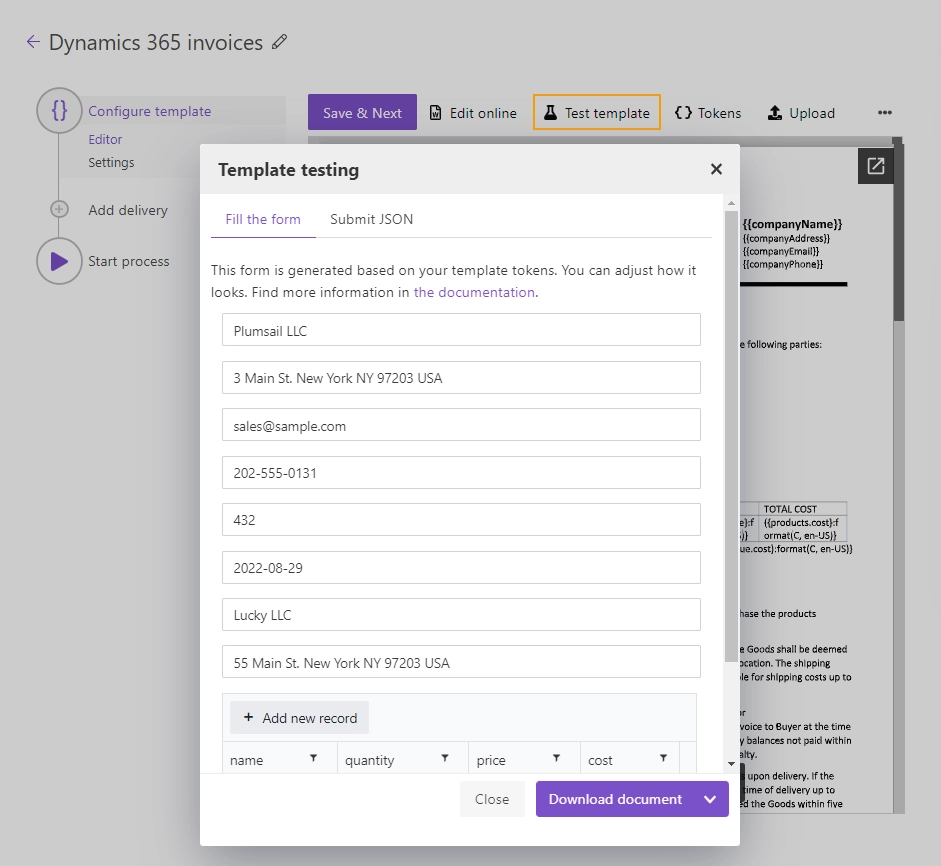
To test the DOCX template from the example, fill the fields with some data.
Note
This is testing. You can pass data from an external system or web form to the process. See the Start process section.
Customize output file
On the Settings substep, you customize parameters of the output file.
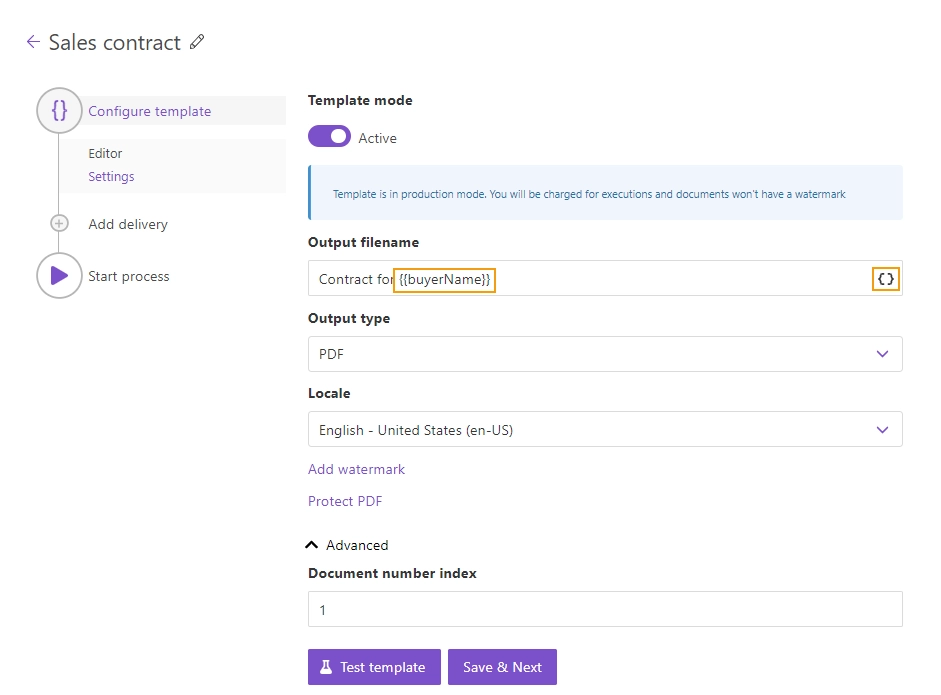
Mode. It affects whether the resulting file will have a Plumsail watermark or not. In the Testing mode, it will, but you will not pay for executions. In the Active one, it will not have the watermark; each process run will spend one credit.
Output filename. Use tokens from the document template to personalize the document name. They will work exactly the same way as in the template.
Output type. By default, it is the same as the template’s. You can change it to PDF like we did.
Additionally, it is possible to set a locale, protect the resulting PDF file with a watermark or other security settings, and manage the document numbering.
Delivery
The next step is delivery. For demonstrating purpose, we will store the result file in OneDrive. But there are other options.
Select the folder where the ready document will be saved.
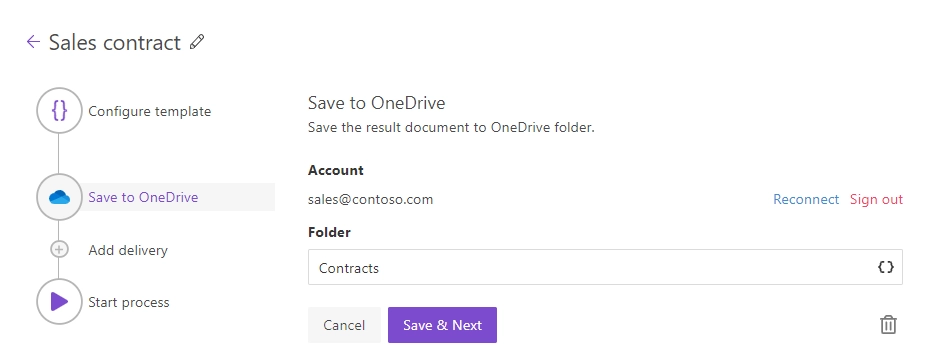
You can configure as many deliveries as you need.
Start process
We will start our process from Power Automate (Microsoft Flow).
Note
Instead of adding the signNow actions to your Power Automate flow, you can use a direct integration on the previous step - a signNow delivery.
Configure flow
This is how our flow looks:
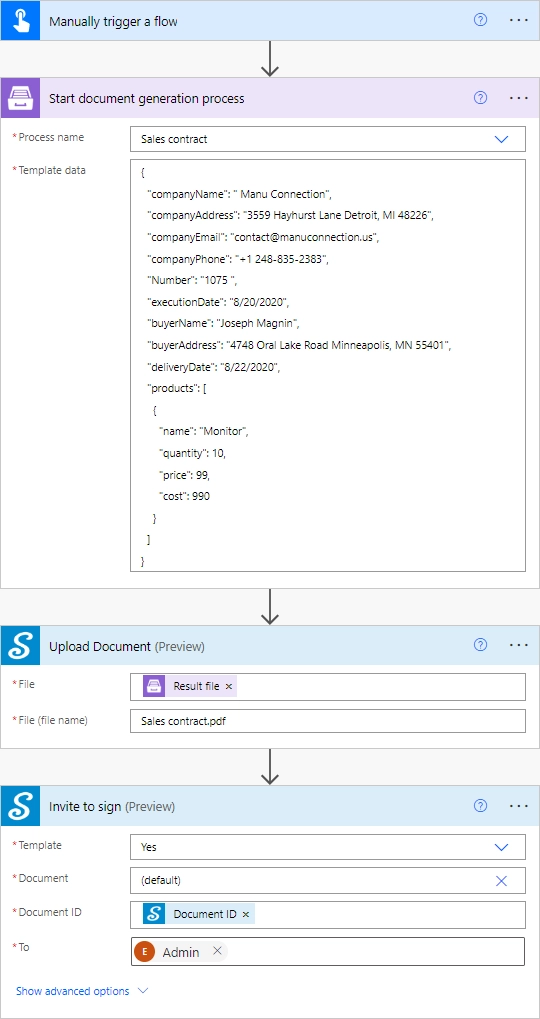
Check out the flow steps described below.
Flow trigger
After you have opened My flows, create a new one, and select a trigger. You can pick any, for example, trigger a flow when an opportunity in CRM is closed, or a new item is added to SharePoint list, or some others. We will pick Manually trigger a flow just for demonstration purposes.
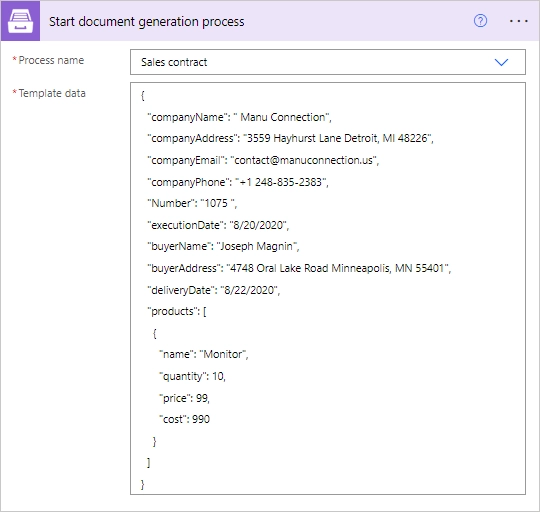
Start document generation process
This is the action from Plumsail Documents connector. This action is suitable for starting the process of generating documents from a template. You can find more information about this action by visiting this page.
Mind, If you use the Plumsail Documents action for the first time, you will be asked for Connection Name and Access Key. You can type any name for the connection. For example, Plumsail Documents.
Then create an API key in your Plumsail Account page, copy and paste it to the Access Key field.
The Start document generation process action has two parameters:
Process name. Select the process you need from available ones.
Template data. Specify source data in JSON format.
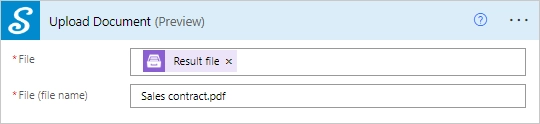
Upload document
This action is from the signNow connector for Power Automate.
It will upload the agreement to the signNow account.
After that, we can send the document for signature.
In the File field put Result file – the dynamic content output of the Start document generation process step.
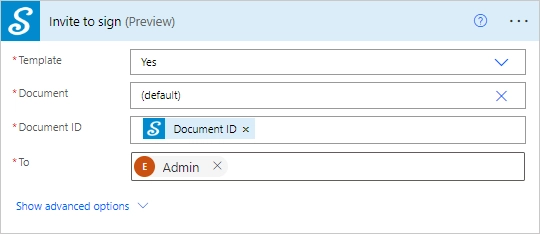
Invite to sign
The last action is from the signNow connector too.
It sends the contract for signing.
Just type in an email address of a recipient and select Document ID in the dynamic content.
Once the agreement has been signed, you will receive a notification email with the signed document attached.
