Automatically generate documents from template and send to Xodo Sign (formerly eversign) for e-signing
This how-to guide describes a way to create a document from a template and send it for electronical signing to Xodo Sign.
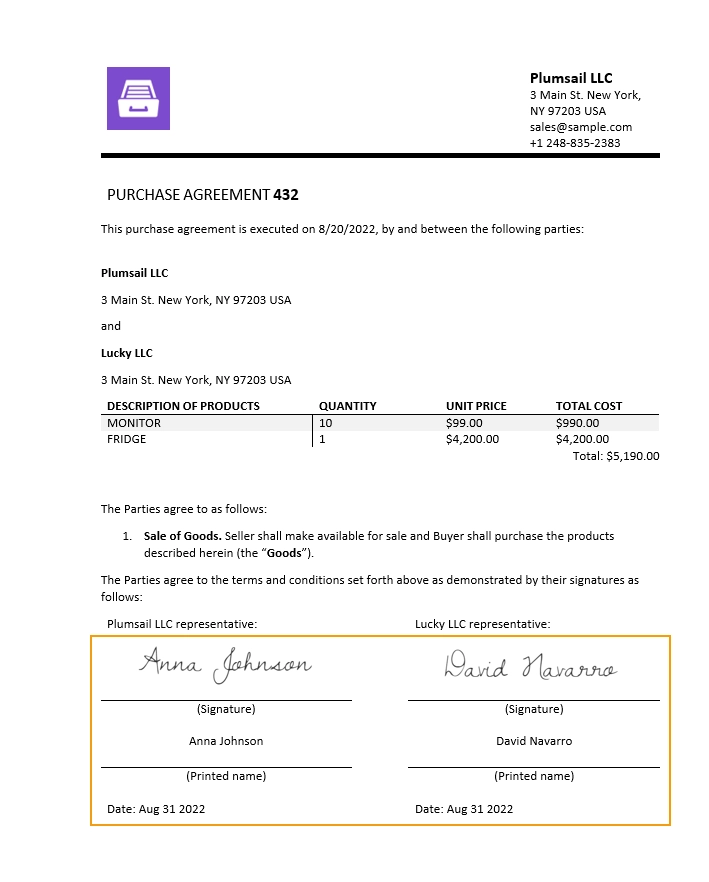
We will create a sales contract in PDF from a Word template and send to Xodo Sign using Xodo Sign delivery in Plumsail Documents processes.
As a result, we will get the sales contract signed electronically:
To build the following automation, you need to have a Plumsail account. If you do not have one yet, register to get a 30-day free trial.
Create new process
Go to the Processes section in your Plumsail account. Click the Add process button and start from a ready template.

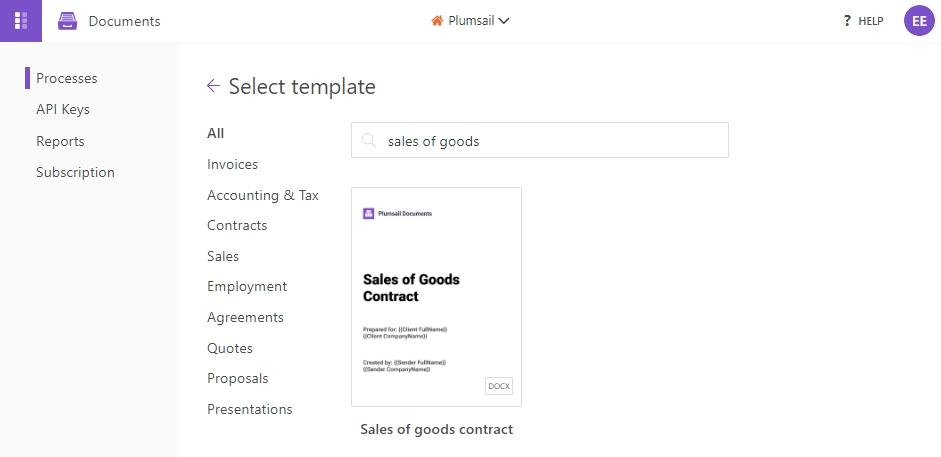
Find the sales of goods contract as on the screenshot below, it suits the approach described in this article.
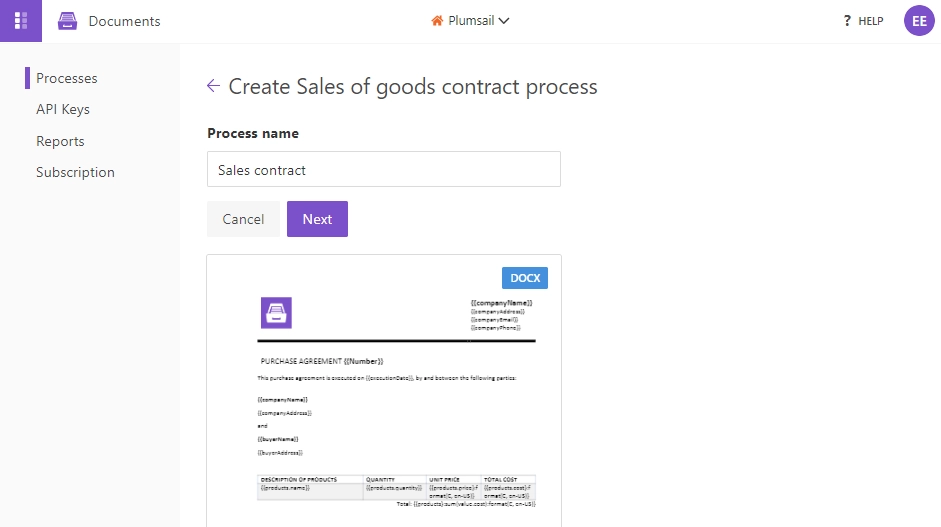
Name the process and go to the next step.
Configure template
You have created the process and jumped into its first step, Configure template, consisting of two substeps:
Editor and
Settings.
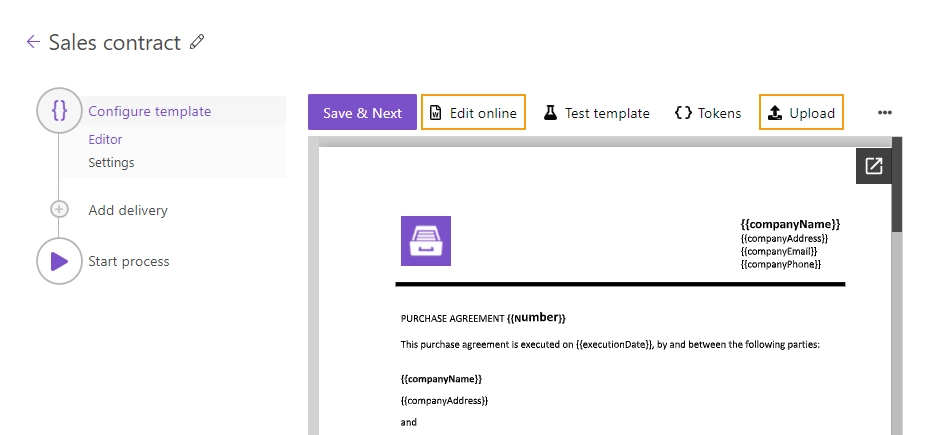
In Editor, you can compose document templates online, or upload pre-made ones and modify them in case of need. It is also possible to modify the current template online if you wish to change the logo or adjust it to your use case.
Templating syntax
You may notice {{tokens}} in the document template.
Everything in {{curly braces}} is variables that the templating engine will replace by specified data.
Also, in our template there are nested tags referring to products - {{products.name}}, {{products.quantity}}, {{products.price}}, and {{products.cost}}.
They let the process know that we want to display properties from some object.
In our example, it is a collection of products.
The templating engine will automatically understand that there are multiple products and create table rows for each of them.

Find out more information on Plumsail Documents Word templates in the documentation.
Test document template
You can test your template to check how the resulting document looks. For that, click the Test template button. You will see a form with fields from your template tokens. You can adjust the default form. Find more information in the documentation.
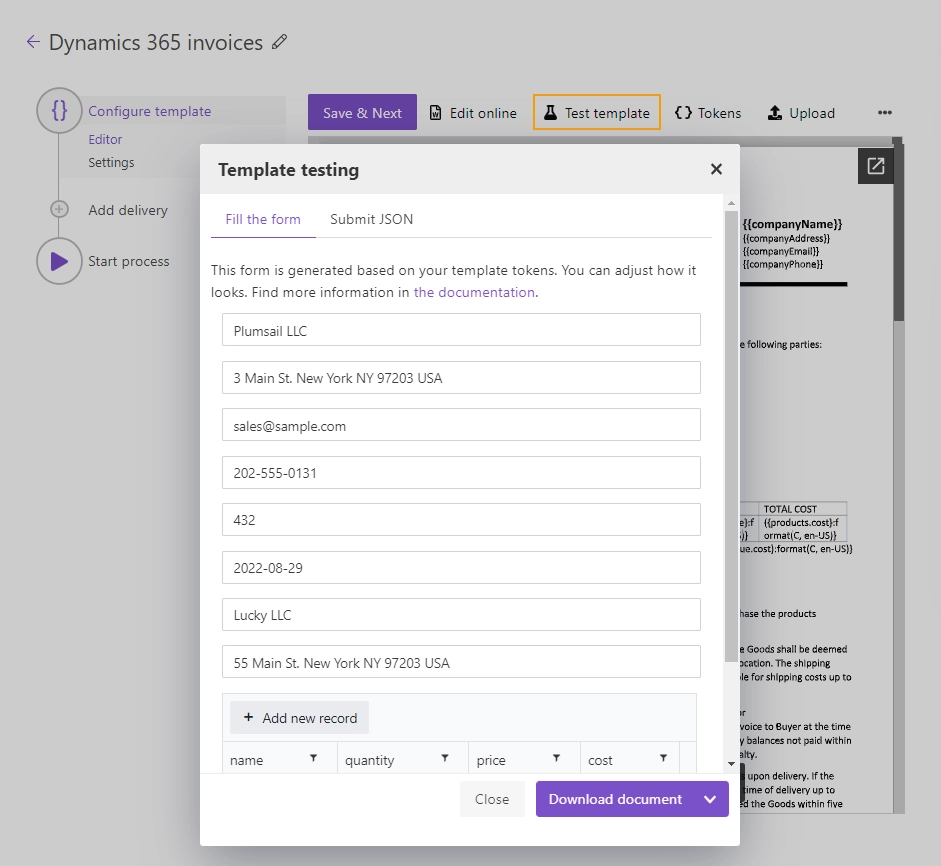
To test the contract template from our example, enter some data into the fields.
Note
This is testing. You can pass data from an external system or web form to the process. See the Start process section.
Once you have tested the template, press Save & Next to proceed further - to the Settings substep.
Customize output file
On the Settings substep, you customize parameters of the output file.
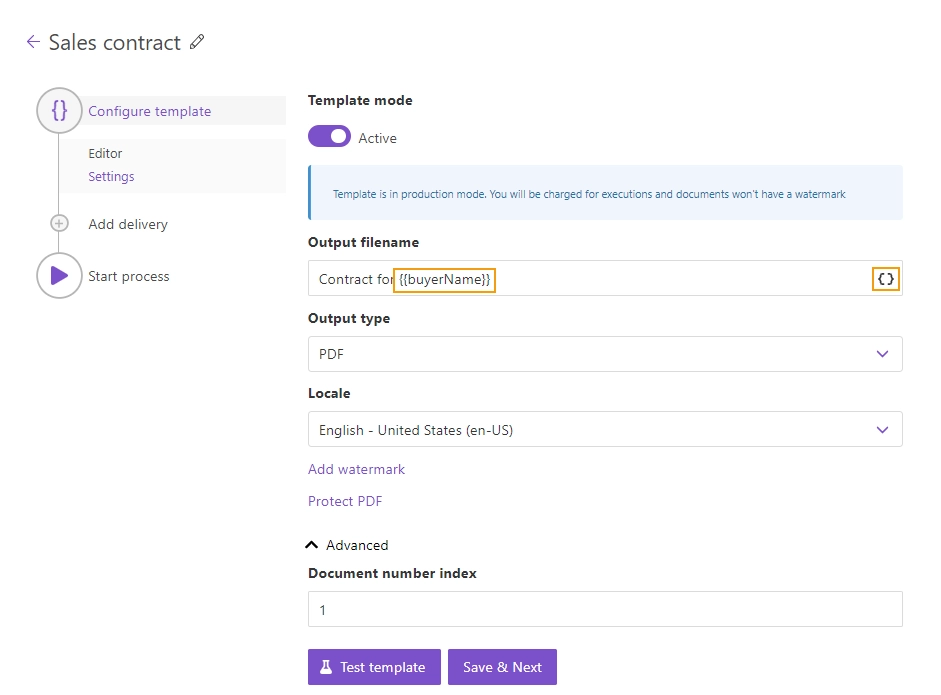
Mode. It affects whether the resulting file will have a Plumsail watermark or not. In the Testing mode, it will, but you will not pay for executions. In the Active one, it will not have the watermark; each process run will spend one credit.
Output filename. Use tokens from the document template to personalize the document name. They will work exactly the same way as in the template.
Output type. By default, it is the same as the template’s. You can change it to PDF like we did.
Additionally, it is possible to set a locale, protect the resulting PDF file with a watermark or other security settings, and manage the document numbering.
Send document to Xodo Sign for signing
Now we set the process to send documents to Xodo Sign for collecting electronic signatures. For that, we will add the Xodo Sign delivery.
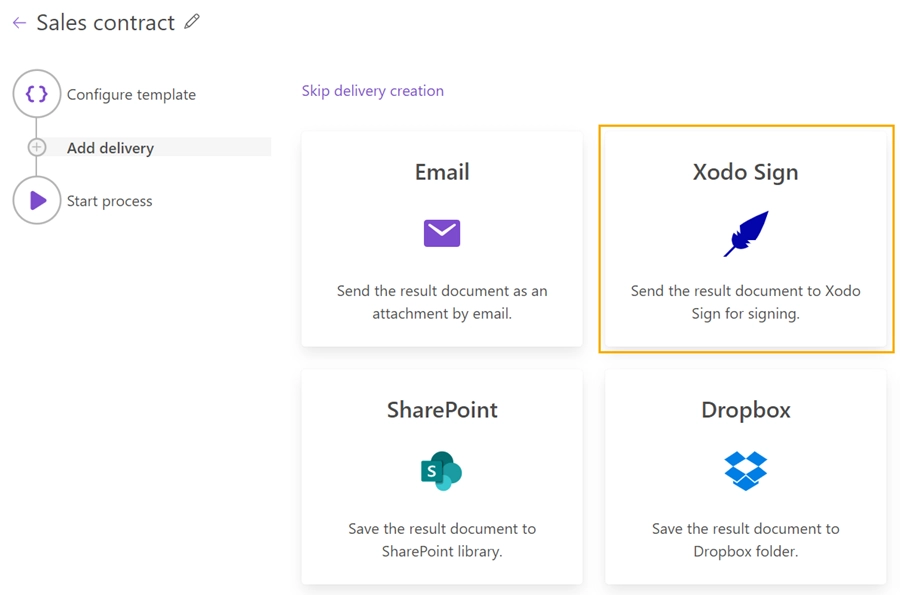
Connect to your Xodo Sign account:

After the connection between Plumsail and Xodo Sign accounts established, you will be able to customize the Xodo Sign delivery settings under your requirements.
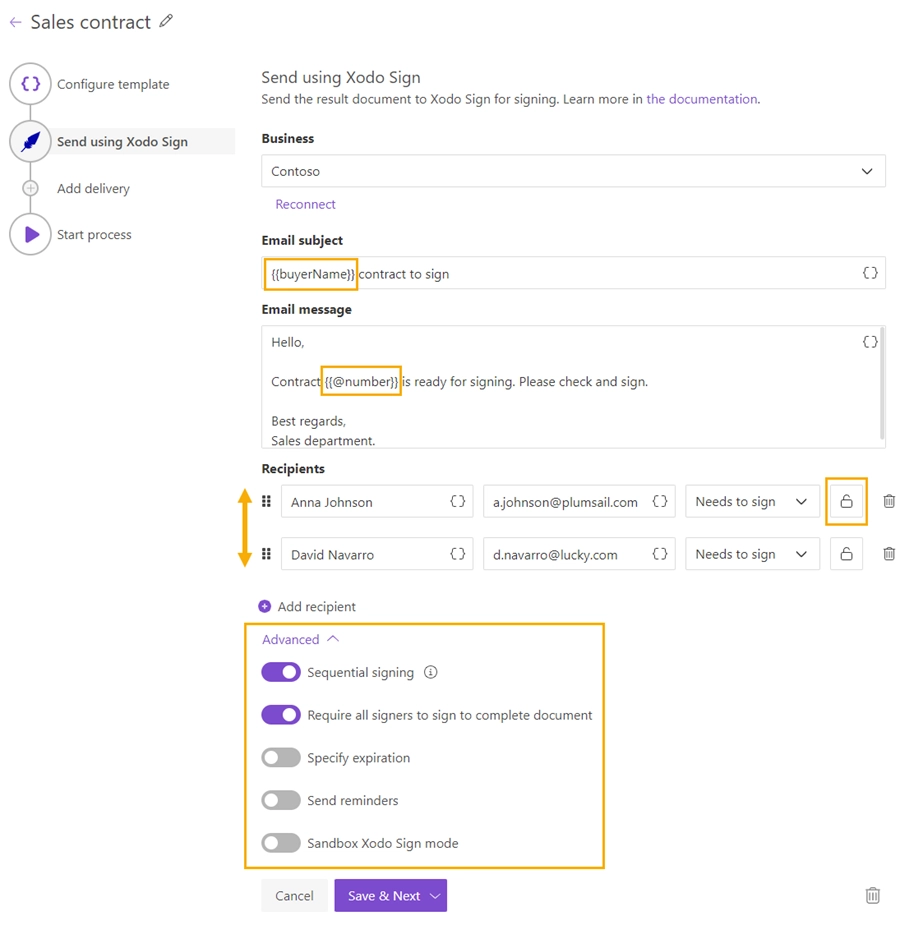
Fill in the email subject and message. Here you can use tokens from the document template too.
Add recipients. It is possible to add as many as you need.
Set their roles. The role may be either Needs to sign or Receives a copy. In our example, we have two recipients required to sign the document.
To add an extra level of security, you can enable PINs for each signer. Click on the lock button, then set the PIN value.
Expand Advanced to customize more settings. We enabled Sequential signing to set the strict order in which signers must sign the document. To change the order, drag and drop recipients. And also, we enabled to Require all signers to sign to complete the document. If one of the signers rejects to sign, the document will be canceled.
The Xodo Sign delivery is set. It is possible to add as many deliveries as you need. Check out the full list of deliveries and how to set them.
Start process to generate documents and send them for signing
There are several ways of launching the process. We will start our process from the Plumsail web form.
Each form’s submission will trigger the process to create sales contracts and send them to Xodo Sign for signing.
Here is how our pre-made Plumsail form looks:
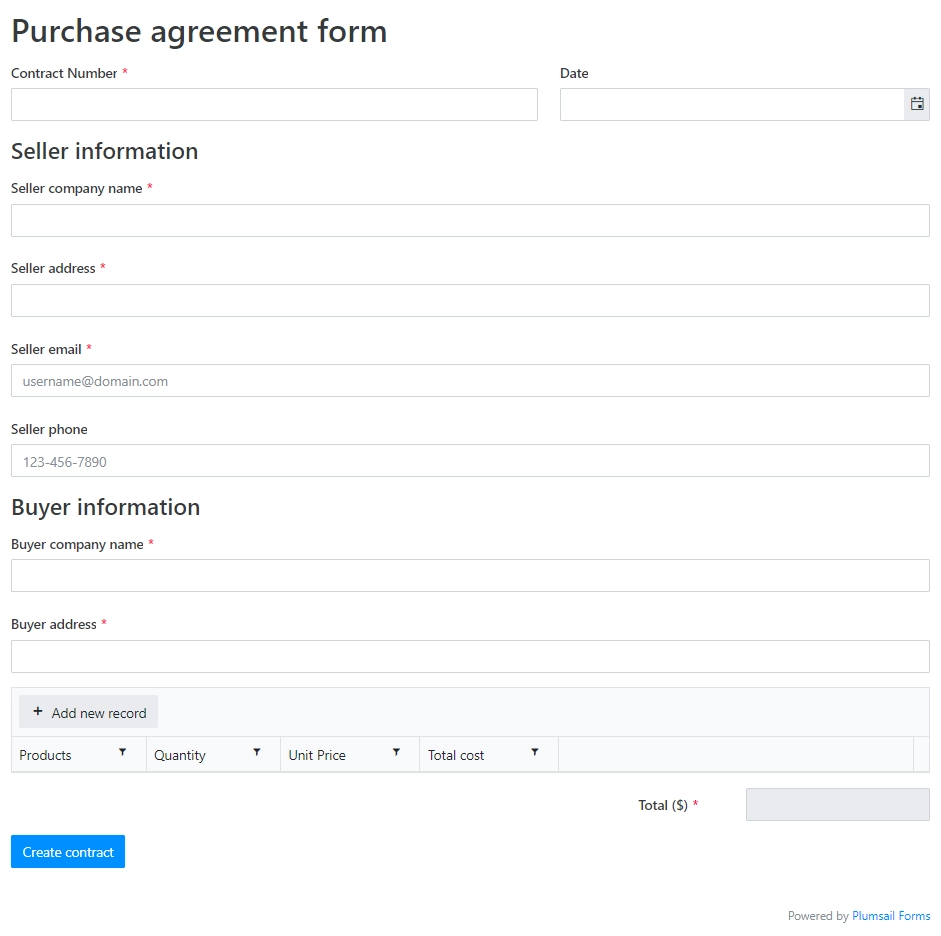
Feel free to download the web form for creating sales contracts we have prepared. Then go to Forms in your Plumsail account. Click on Create form, and you will move to a web designer of Plumsail Forms. There you can import the JSON file you have recently downloaded:
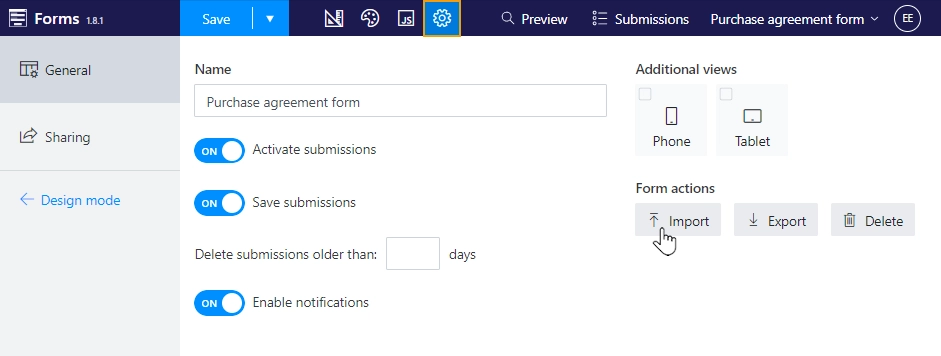
Save, and that is it - you have the required form.
We will not go into much detail here on how to create Plumsail web forms. You can learn how to design web forms from the documentation.
Bind web form to process
Now you need to bind this web form to the process. On the step Start process, switch to a tab Web Form. Click New form and then select Bind form.
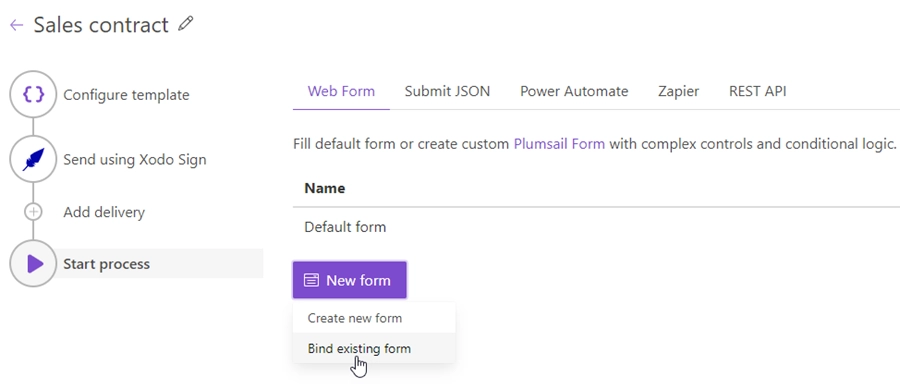
You will see the dialog with the dropdown showing all your Plumsail forms. Select the form for creating purchase agreements. Press Bind.
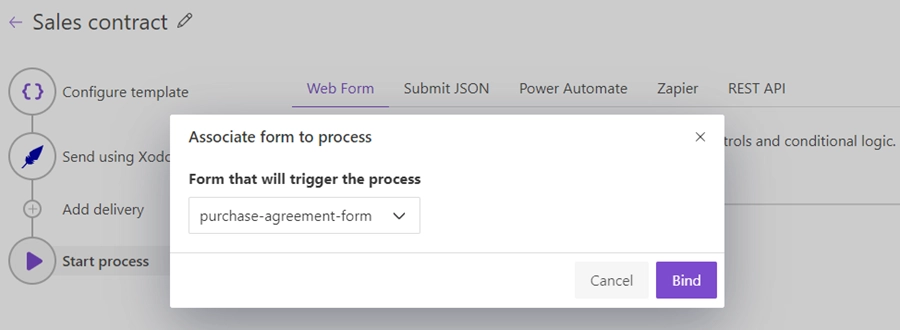
From now submissions of the bound form will launch the process. Submission data will populate the DOCX template, the process will convert it to PDF and send it to Xodo Sign for digital signing.
Integrate with your services
It is possible to trigger the process from your favorite services and pass their data to populate the template and send the result to eversign. For that, you can use such integration platforms as Zapier and Power Automate.
For instance, you can start the process of creating and sending contracts for eSignatures in Xodo Sign:
It is just a couple of ideas out of many for you to get inspired. Find more in the integrations section.
Drop us a line to support@plumsail.com in case you encounter any difficulties or get any questions.

