Generate PDF shareholder agreements from template and sign it using DocuSign
This article shows you how to generate PDF shareholder agreements from a template and sign them using DocuSign.
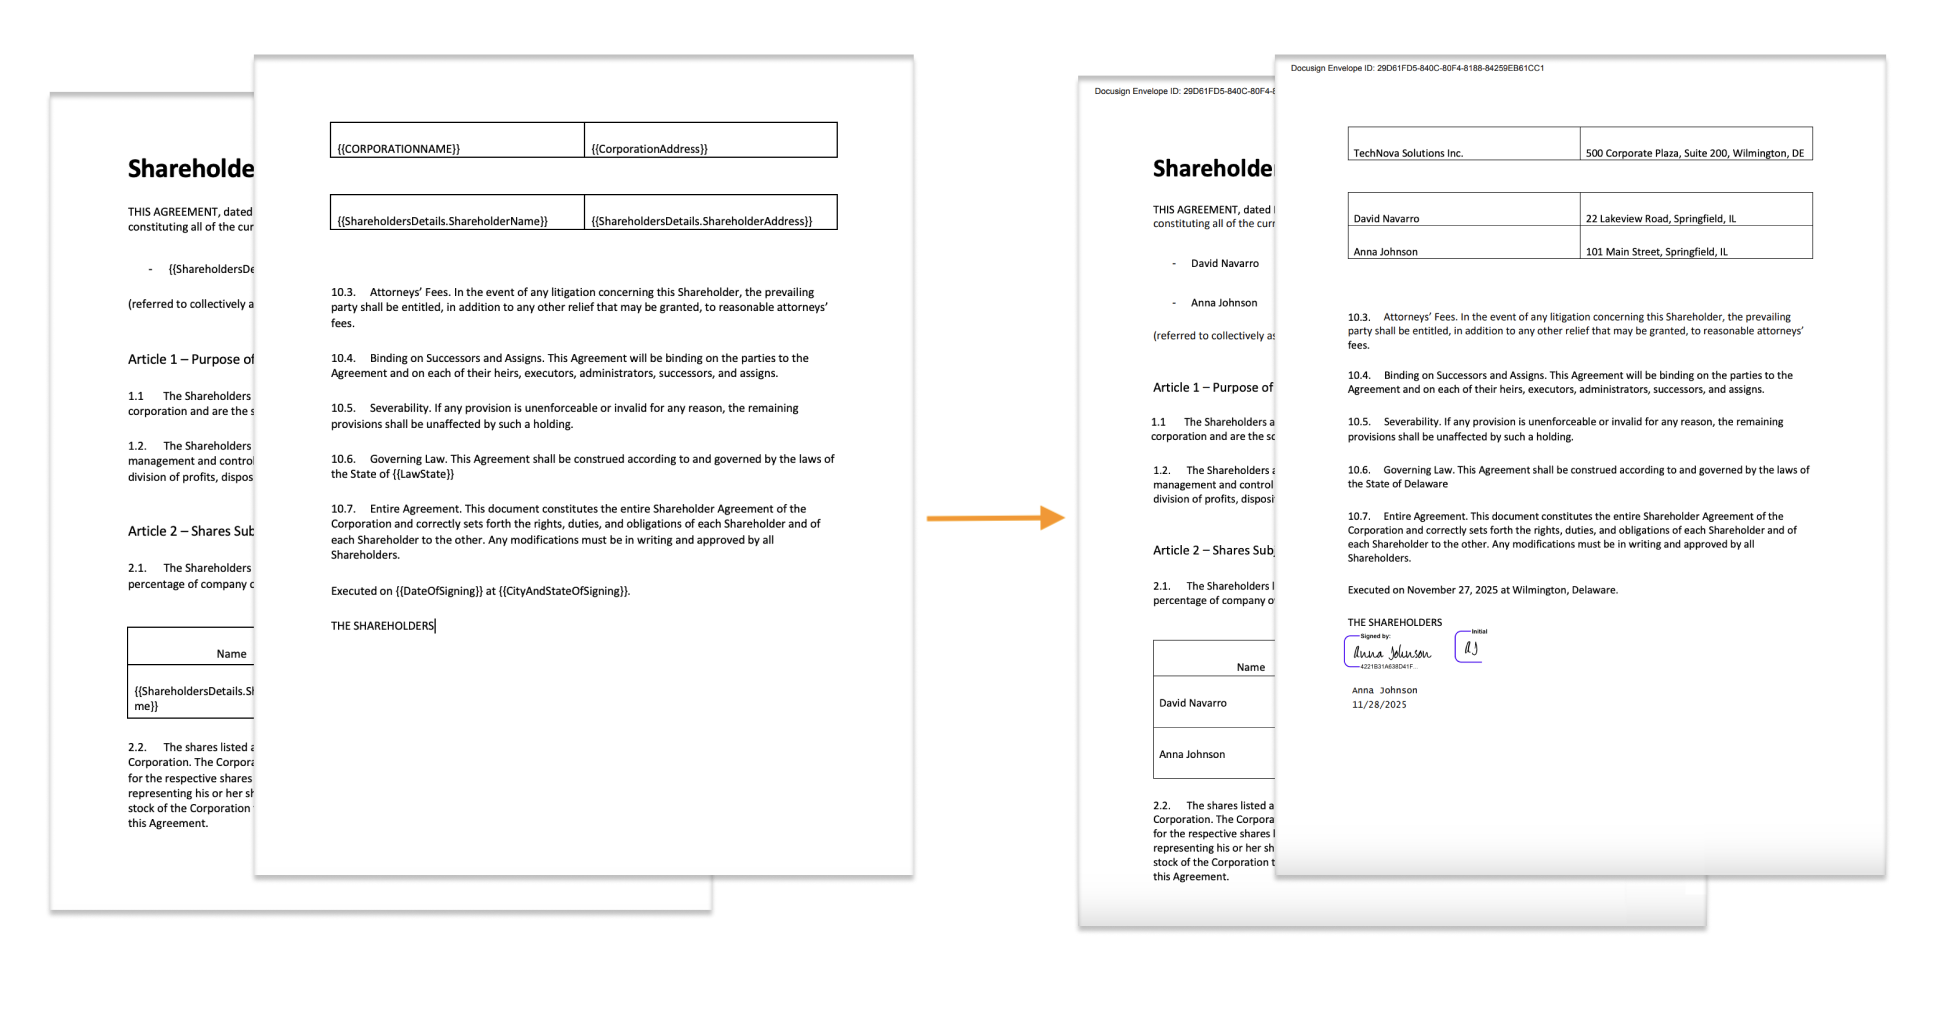
You’ll learn how create a PDF contract from a Word template, map form data, insert DocuSign tags, and send the document for signing using DocuSign delivery in Plumsail Documents processes.
This is how the signed agreement will appear as a result:
Get the template
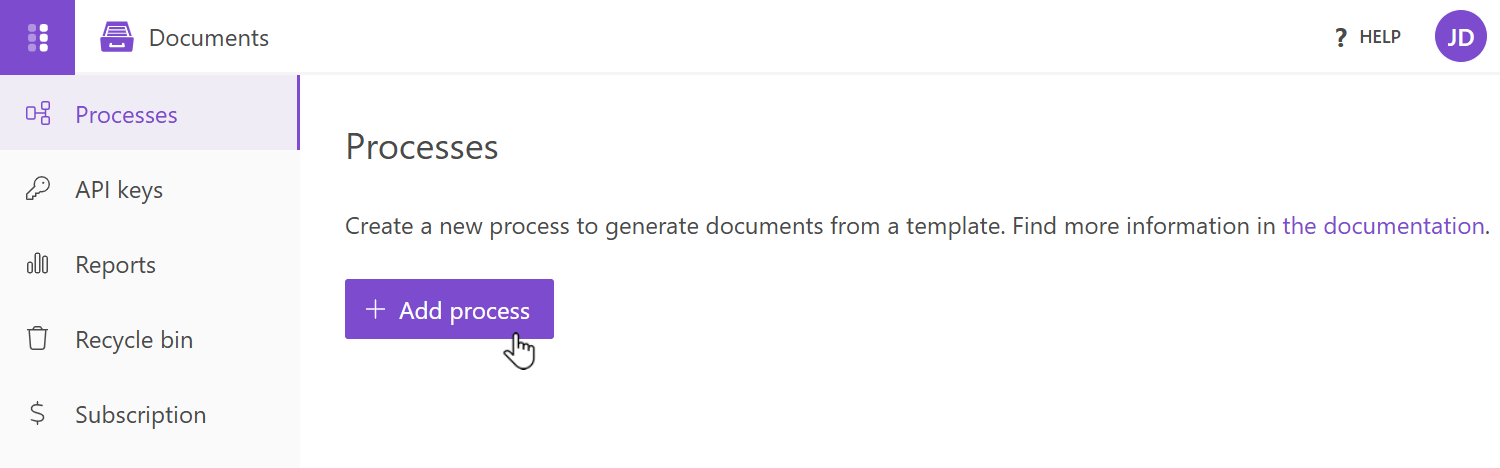
To start with, go to the Processes section in your Plumsail account.
In Processes, click the Add process button:
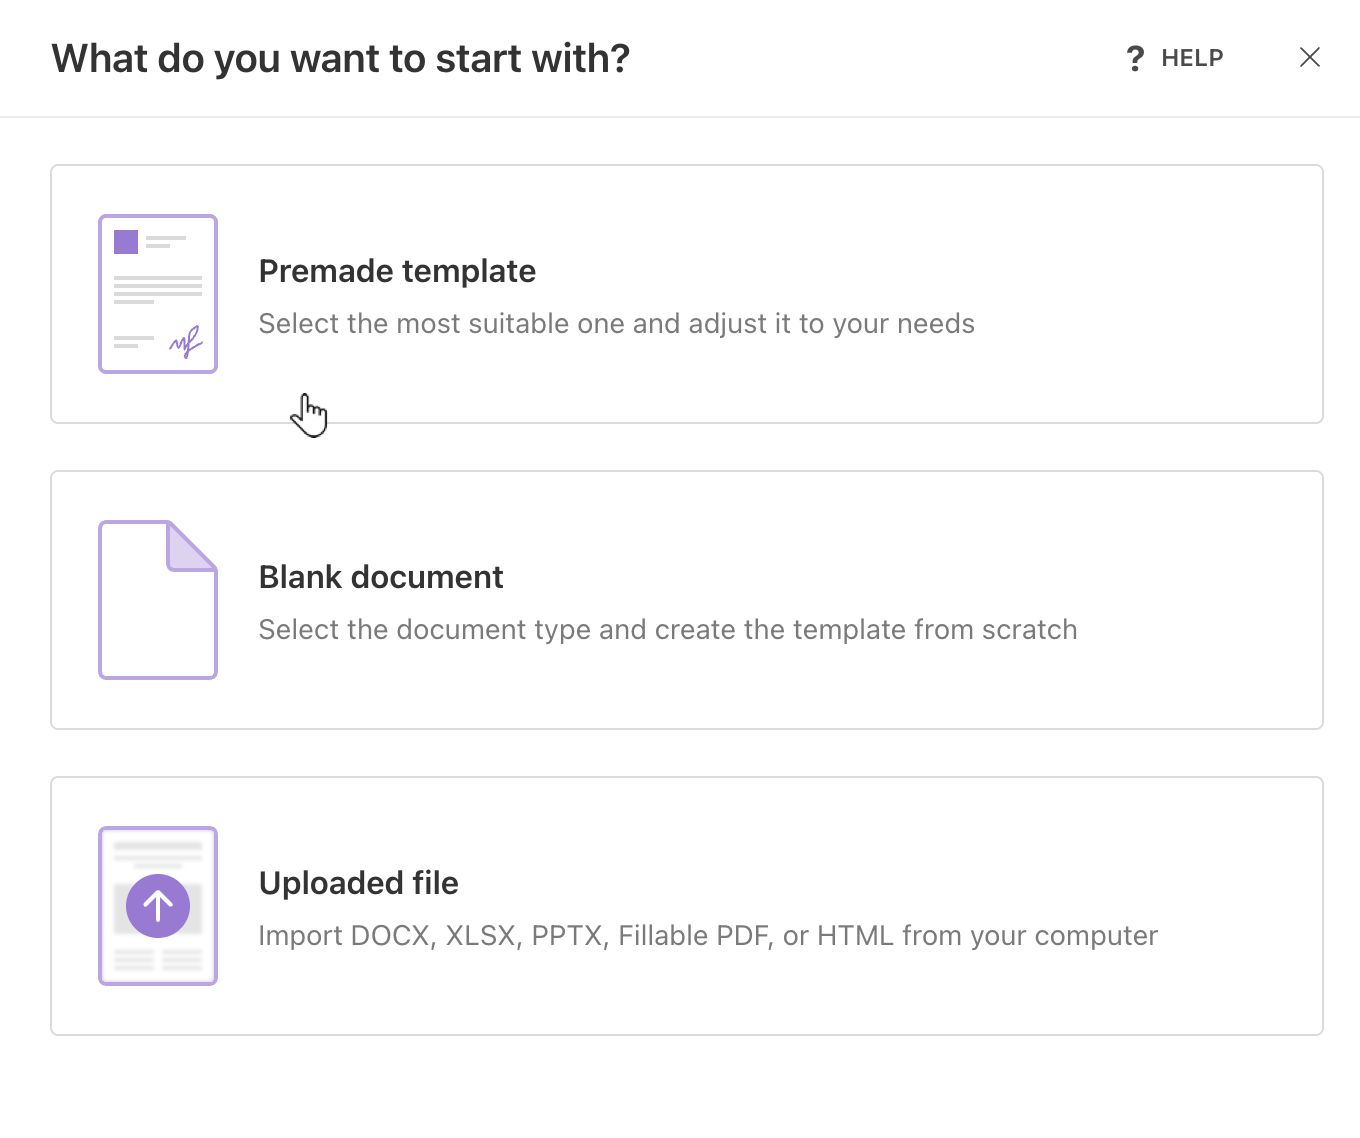
And select Premade template:
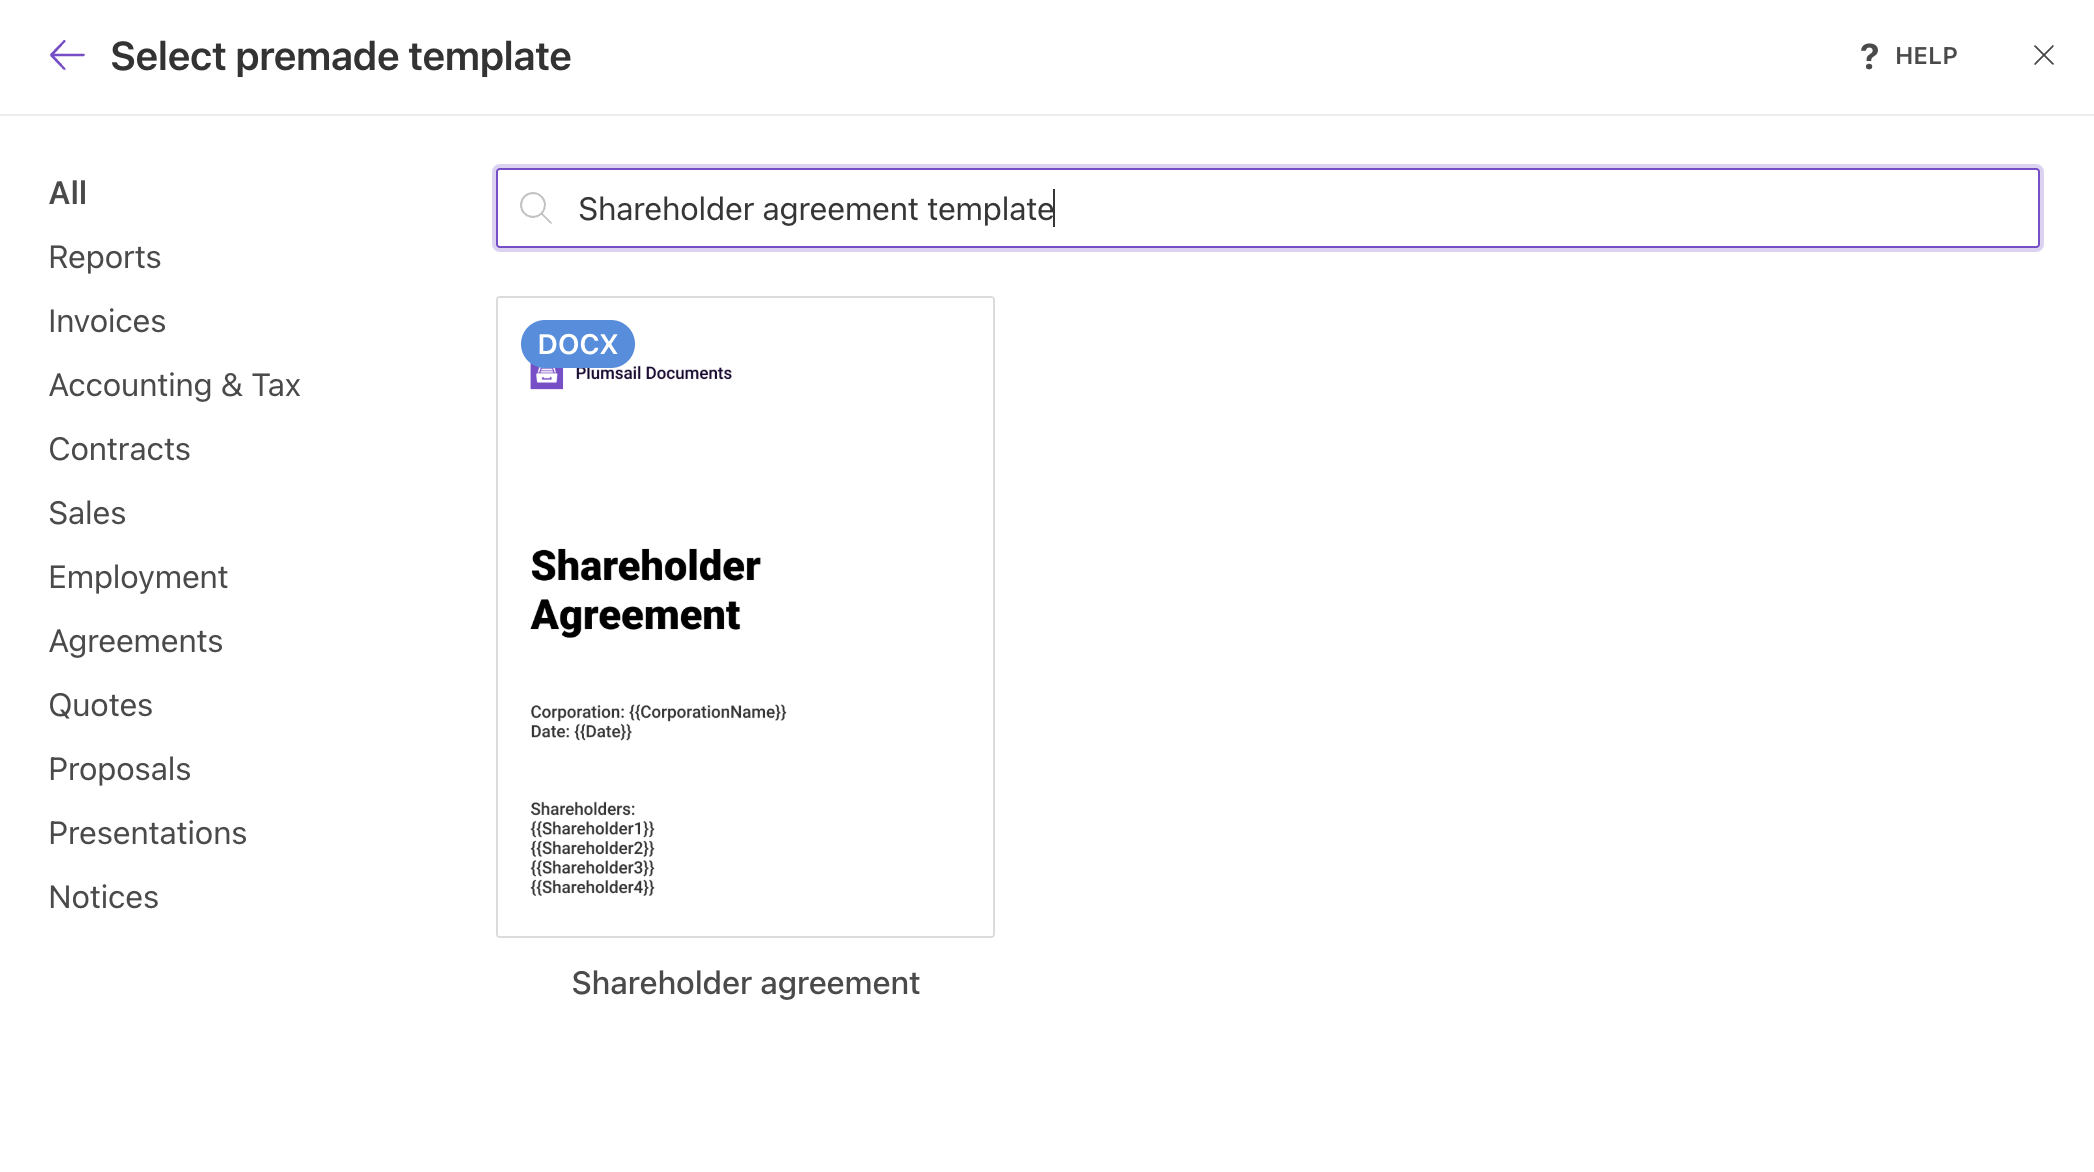
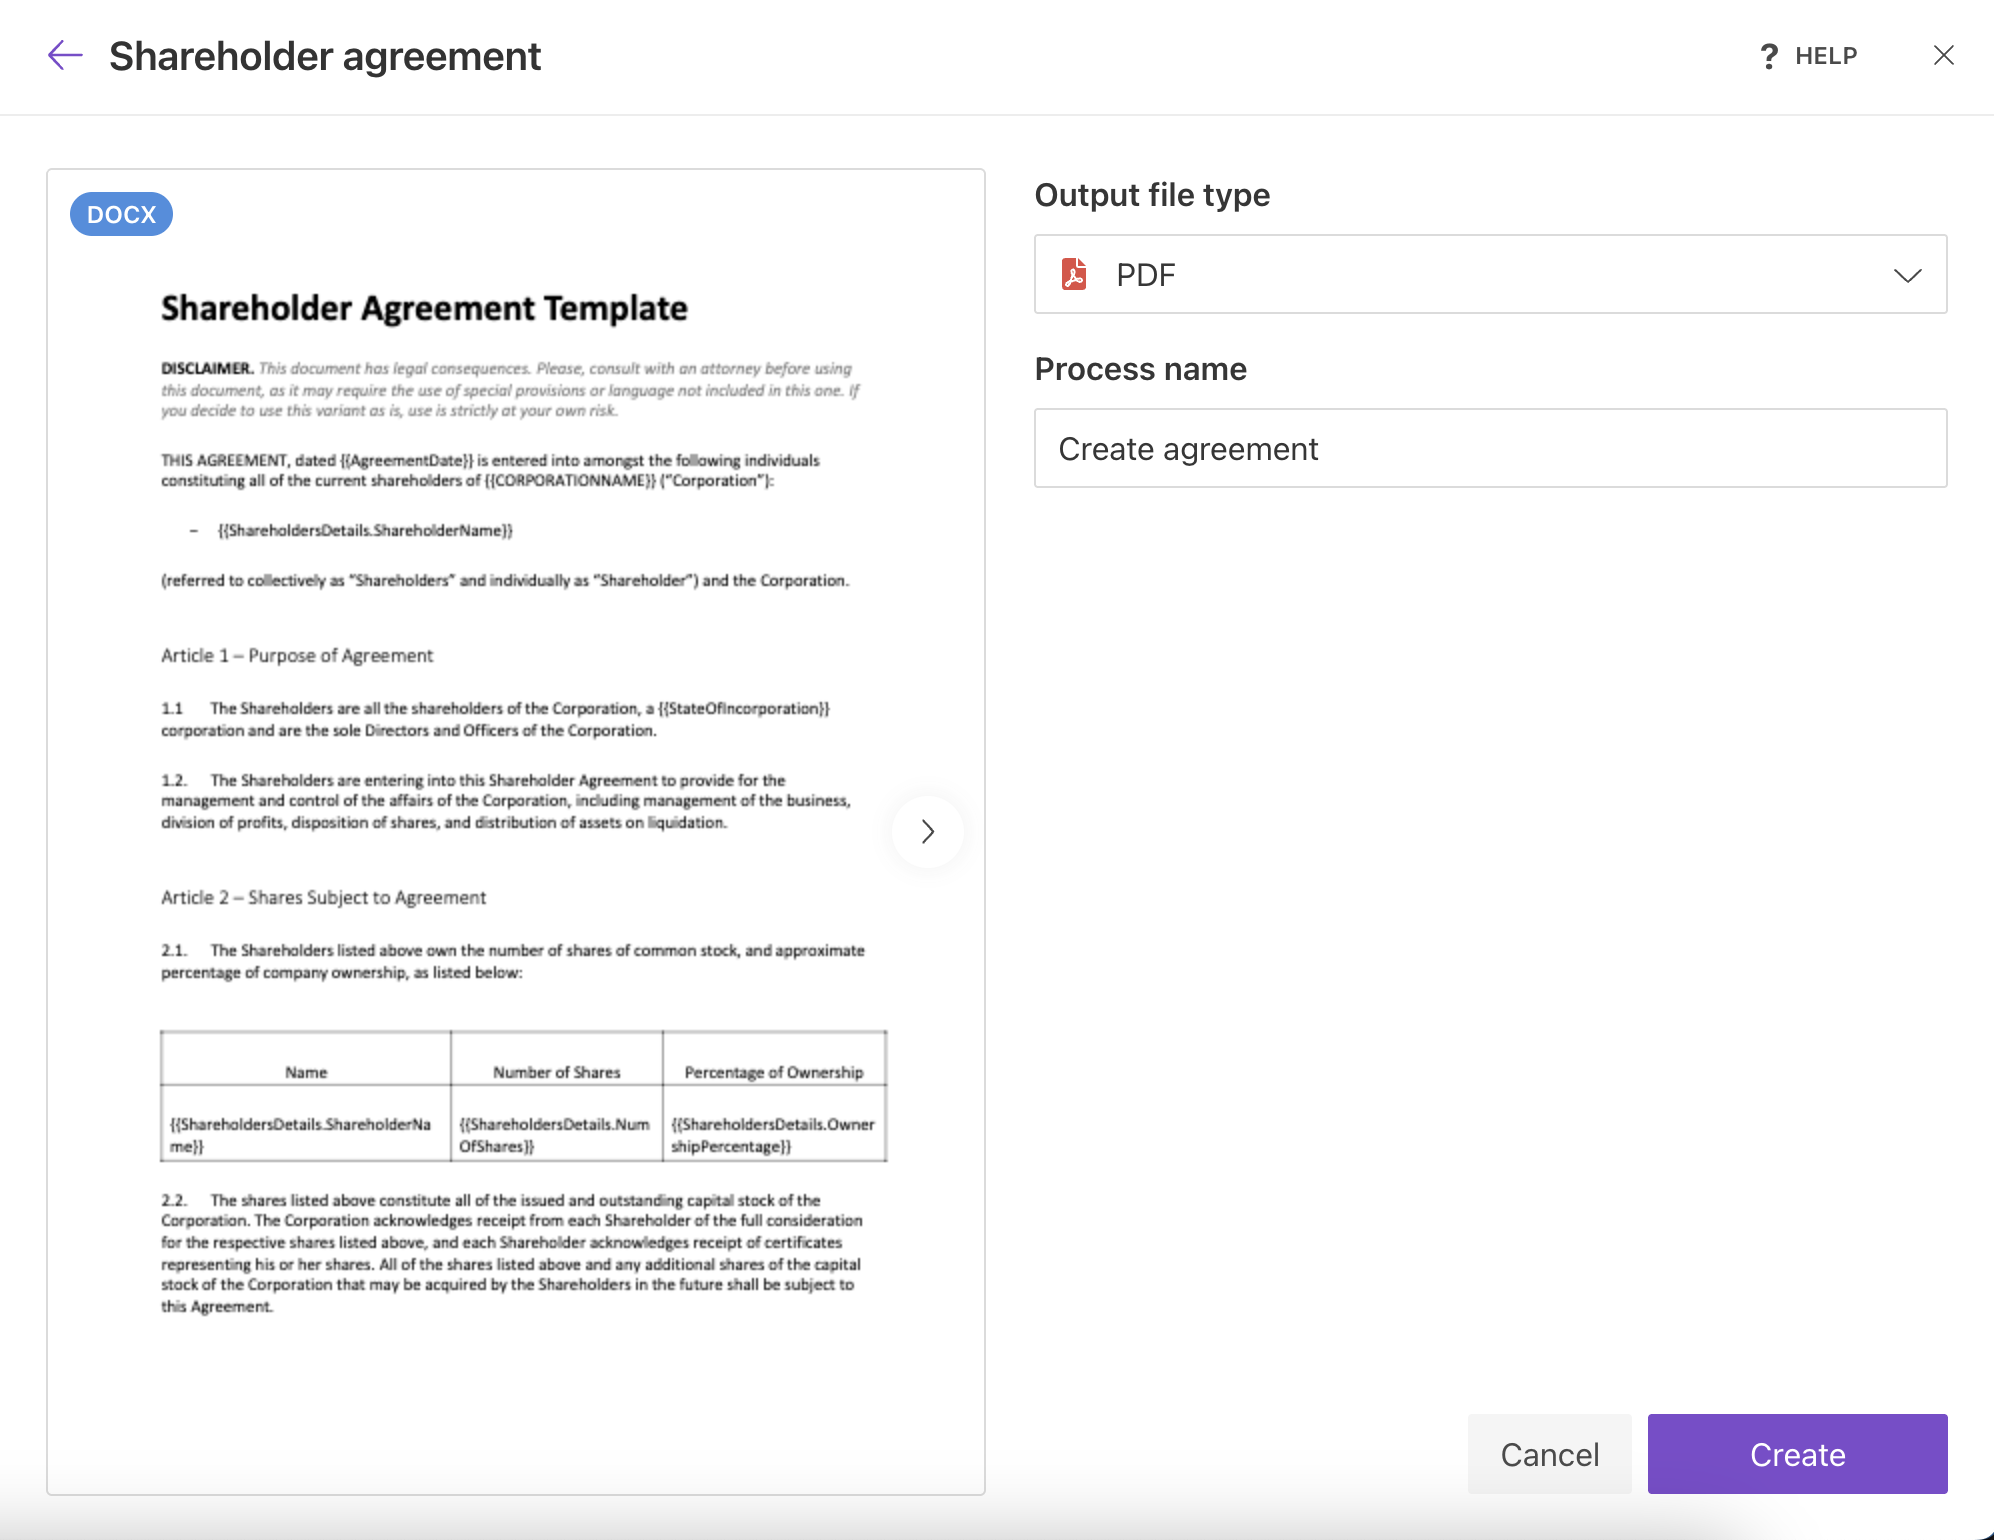
You’ll be redirected to a library of document templates. Select the Shareholder agreement template:
Name your process and select an Output file type. Let’s switch this to PDF to generate shareholder agreements and electronically sign them via DocuSign.
Then click Create to proceed:
Configure document template
After creating your process, you can add DocuSign tags, adjust the template to your needs, and configure the output type along with other settings.
In the Editor mode, you can tweak your document template.
Content within curly brackets (e.g. {{ShareholdersDetails.ShareholderName}}) will be dynamically replaced with form data.

Token types
Customize the token types as needed. To do this, click Tokens on the top panel to open the settings.

The process will pull all tokens from the document template. By default, all single-part tokens are assigned the string type. Now let’s update the following tokens:
Change the
{{AgreementDate}}and{{DateOfSigning}}token types to date to ensure the date is formatted correctly in the final document;Change the
{{RetainedIncomeThreshold}}and{{RetainedIncomeAmount}}token types to number;For
{{NumOfShares}}and{{OwnershipPercentage}}in the{{ShareholdersDetails}}collection, select number and set the Decimal places to 2 to display percentages properly.
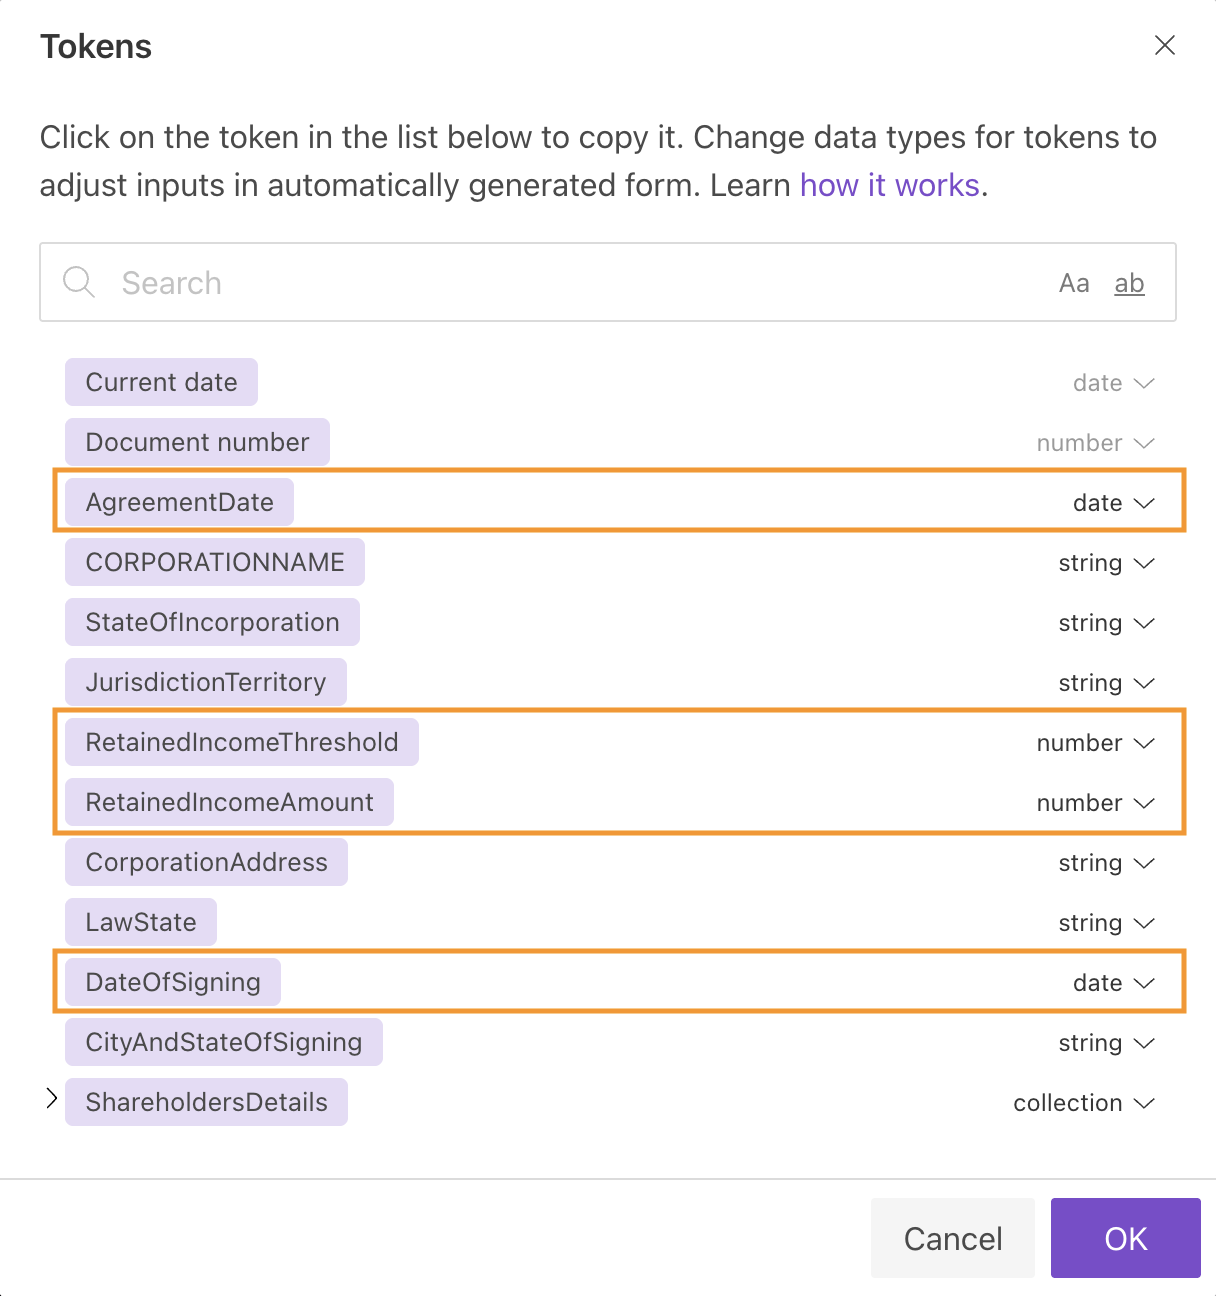
Click OK to save the changes.
When we test or use the form later, we’ll have a date field with the ability to select a date from a calendar. Quantity and amounts will only support numbers.
DocuSign tags
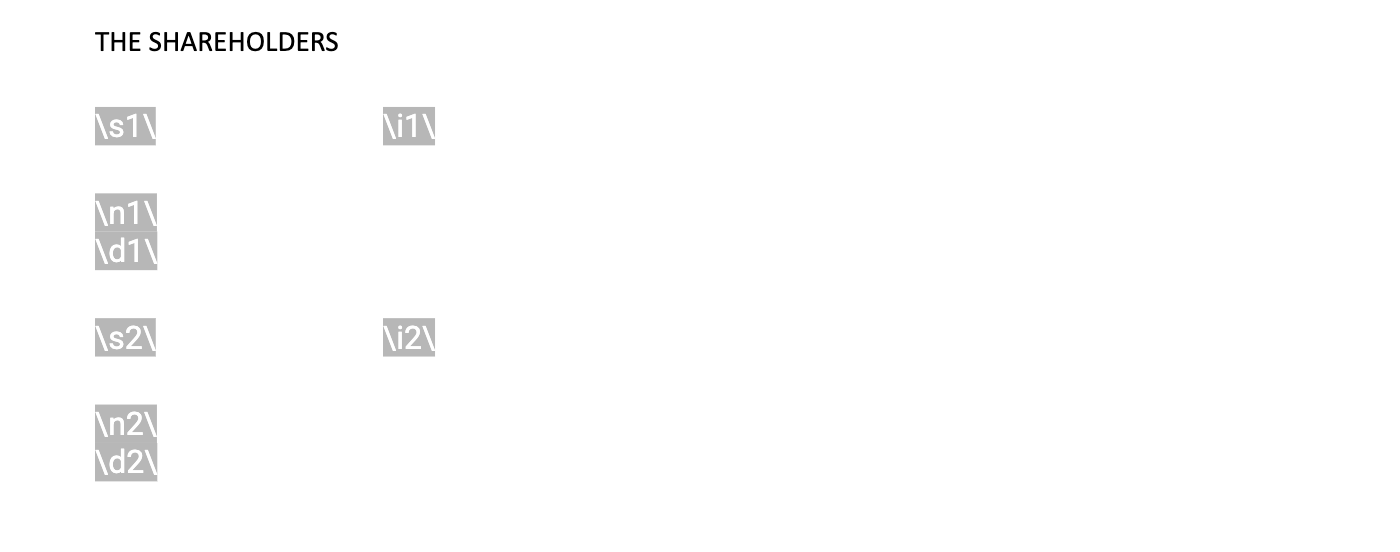
Insert DocuSign signing tags to define where signature, initial, and date fields should appear. When the generated PDF is sent to DocuSign, these tags are automatically converted into interactive fields that recipients can fill out during the signing process.
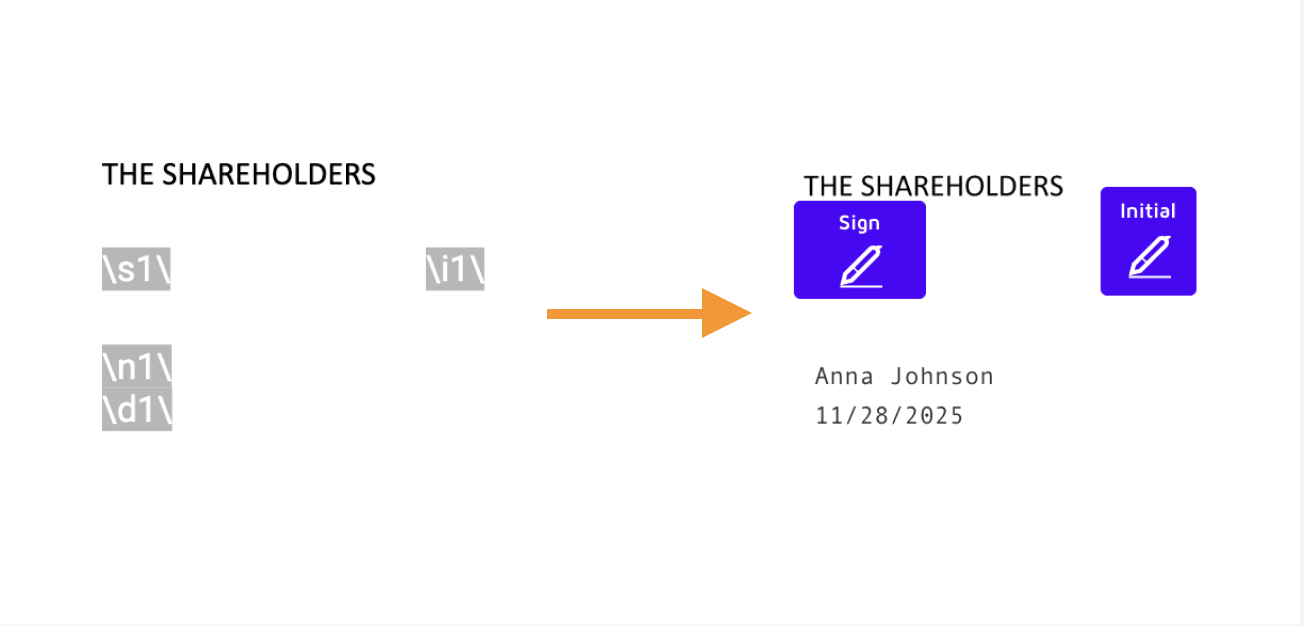
In our template, we’ve added DocuSign tags at the end for two signed and formatted them with white text so they’re visible in the final document but are still processed by DocuSign:
Here’s how they appear to signers (auto-filled with names and dates):
See more information on DocuSign signature and other related tags in our documentation.
Once you’re satisfied with the template, click Save & Next to go to the Settings substep.
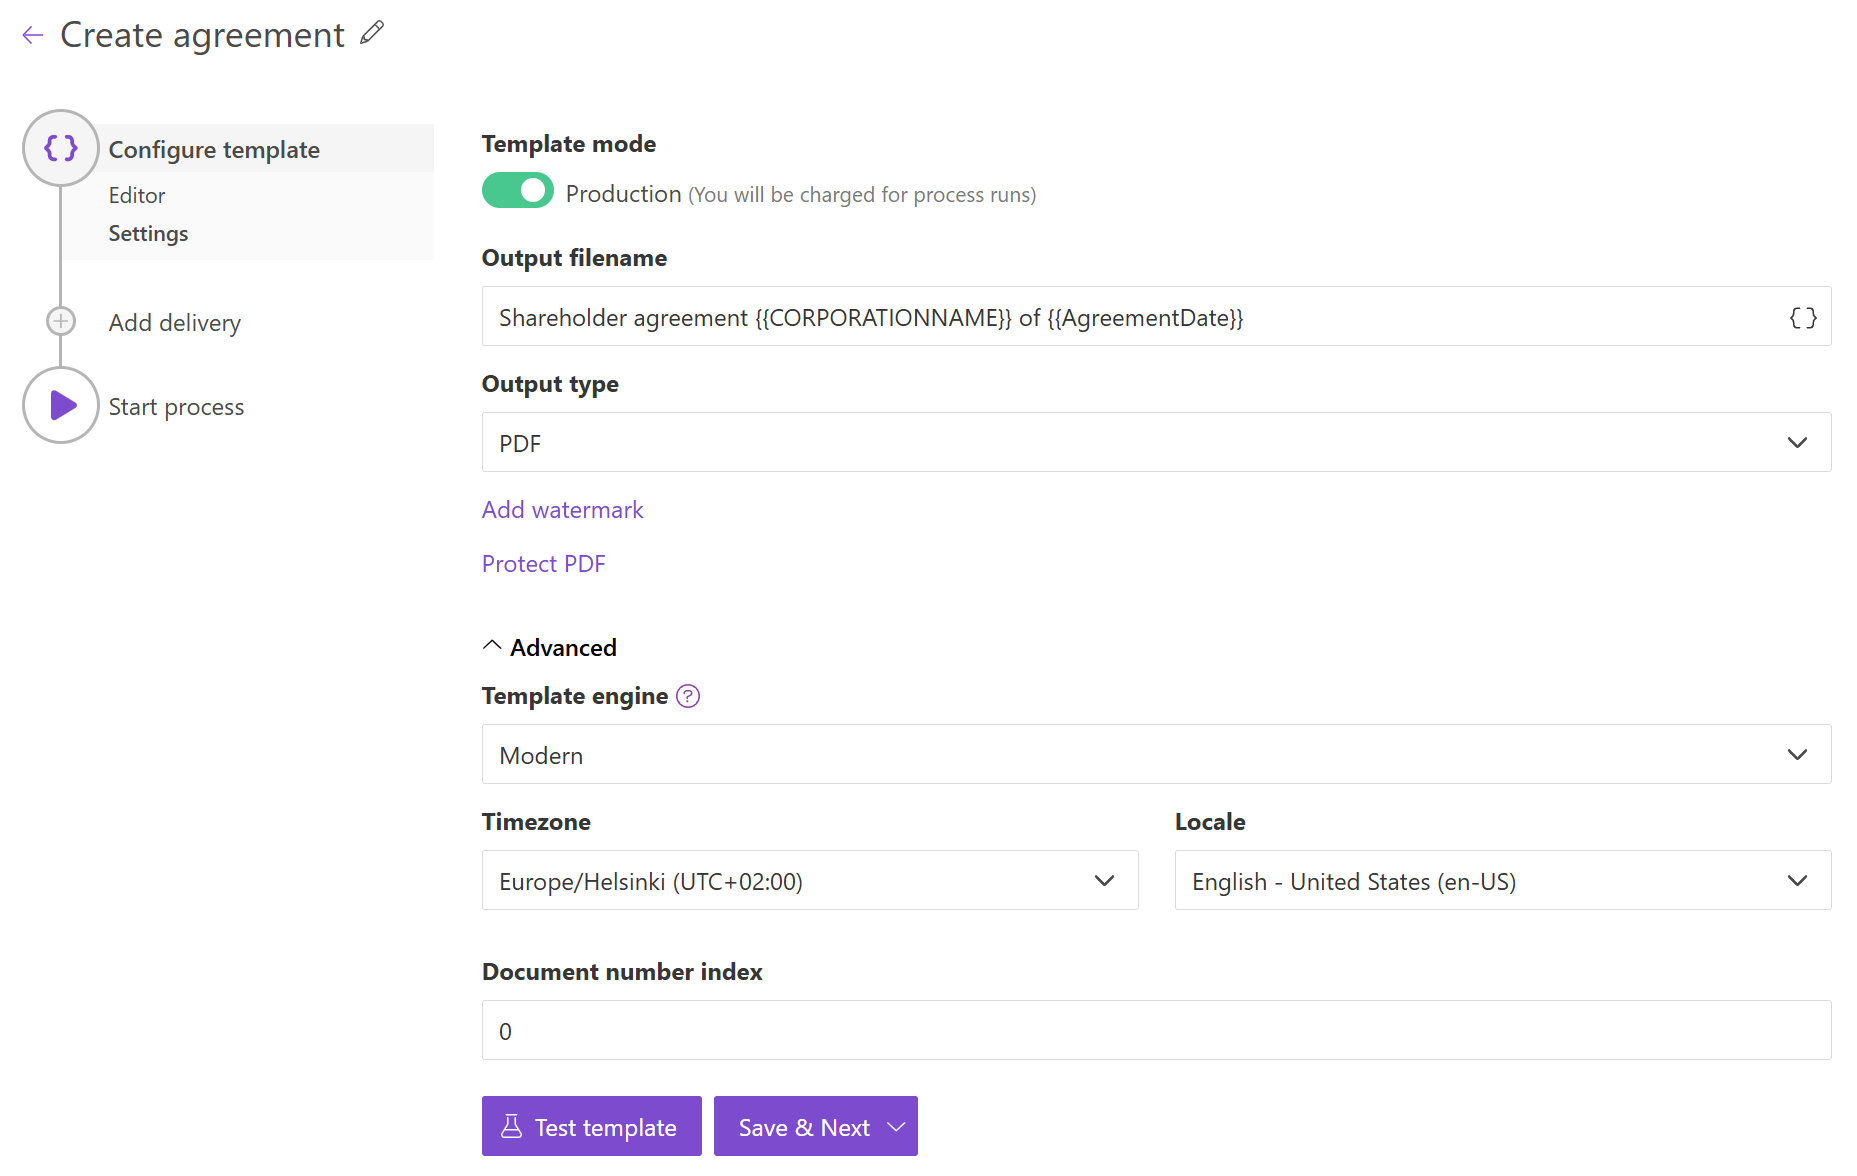
Configure output settings
In Settings you define how the final document is produced and named. Key options:
Template mode
Testing (default): free test runs; generated documents include a Plumsail watermark.
Production: removes the watermark and enables billable runs.
Output filename
Use tokens to generate meaningful, repeatable filenames. Tokens use the same syntax as template placeholders.
For example: {{AgreementDate}} inserts the agreement date into the filename.
Output type
The default output type matches the template format (e.g., DOCX). We’ve already switched this to PDF.
Optionally, select Template engine, Timezone, Locale and specify Document number index.
Test template
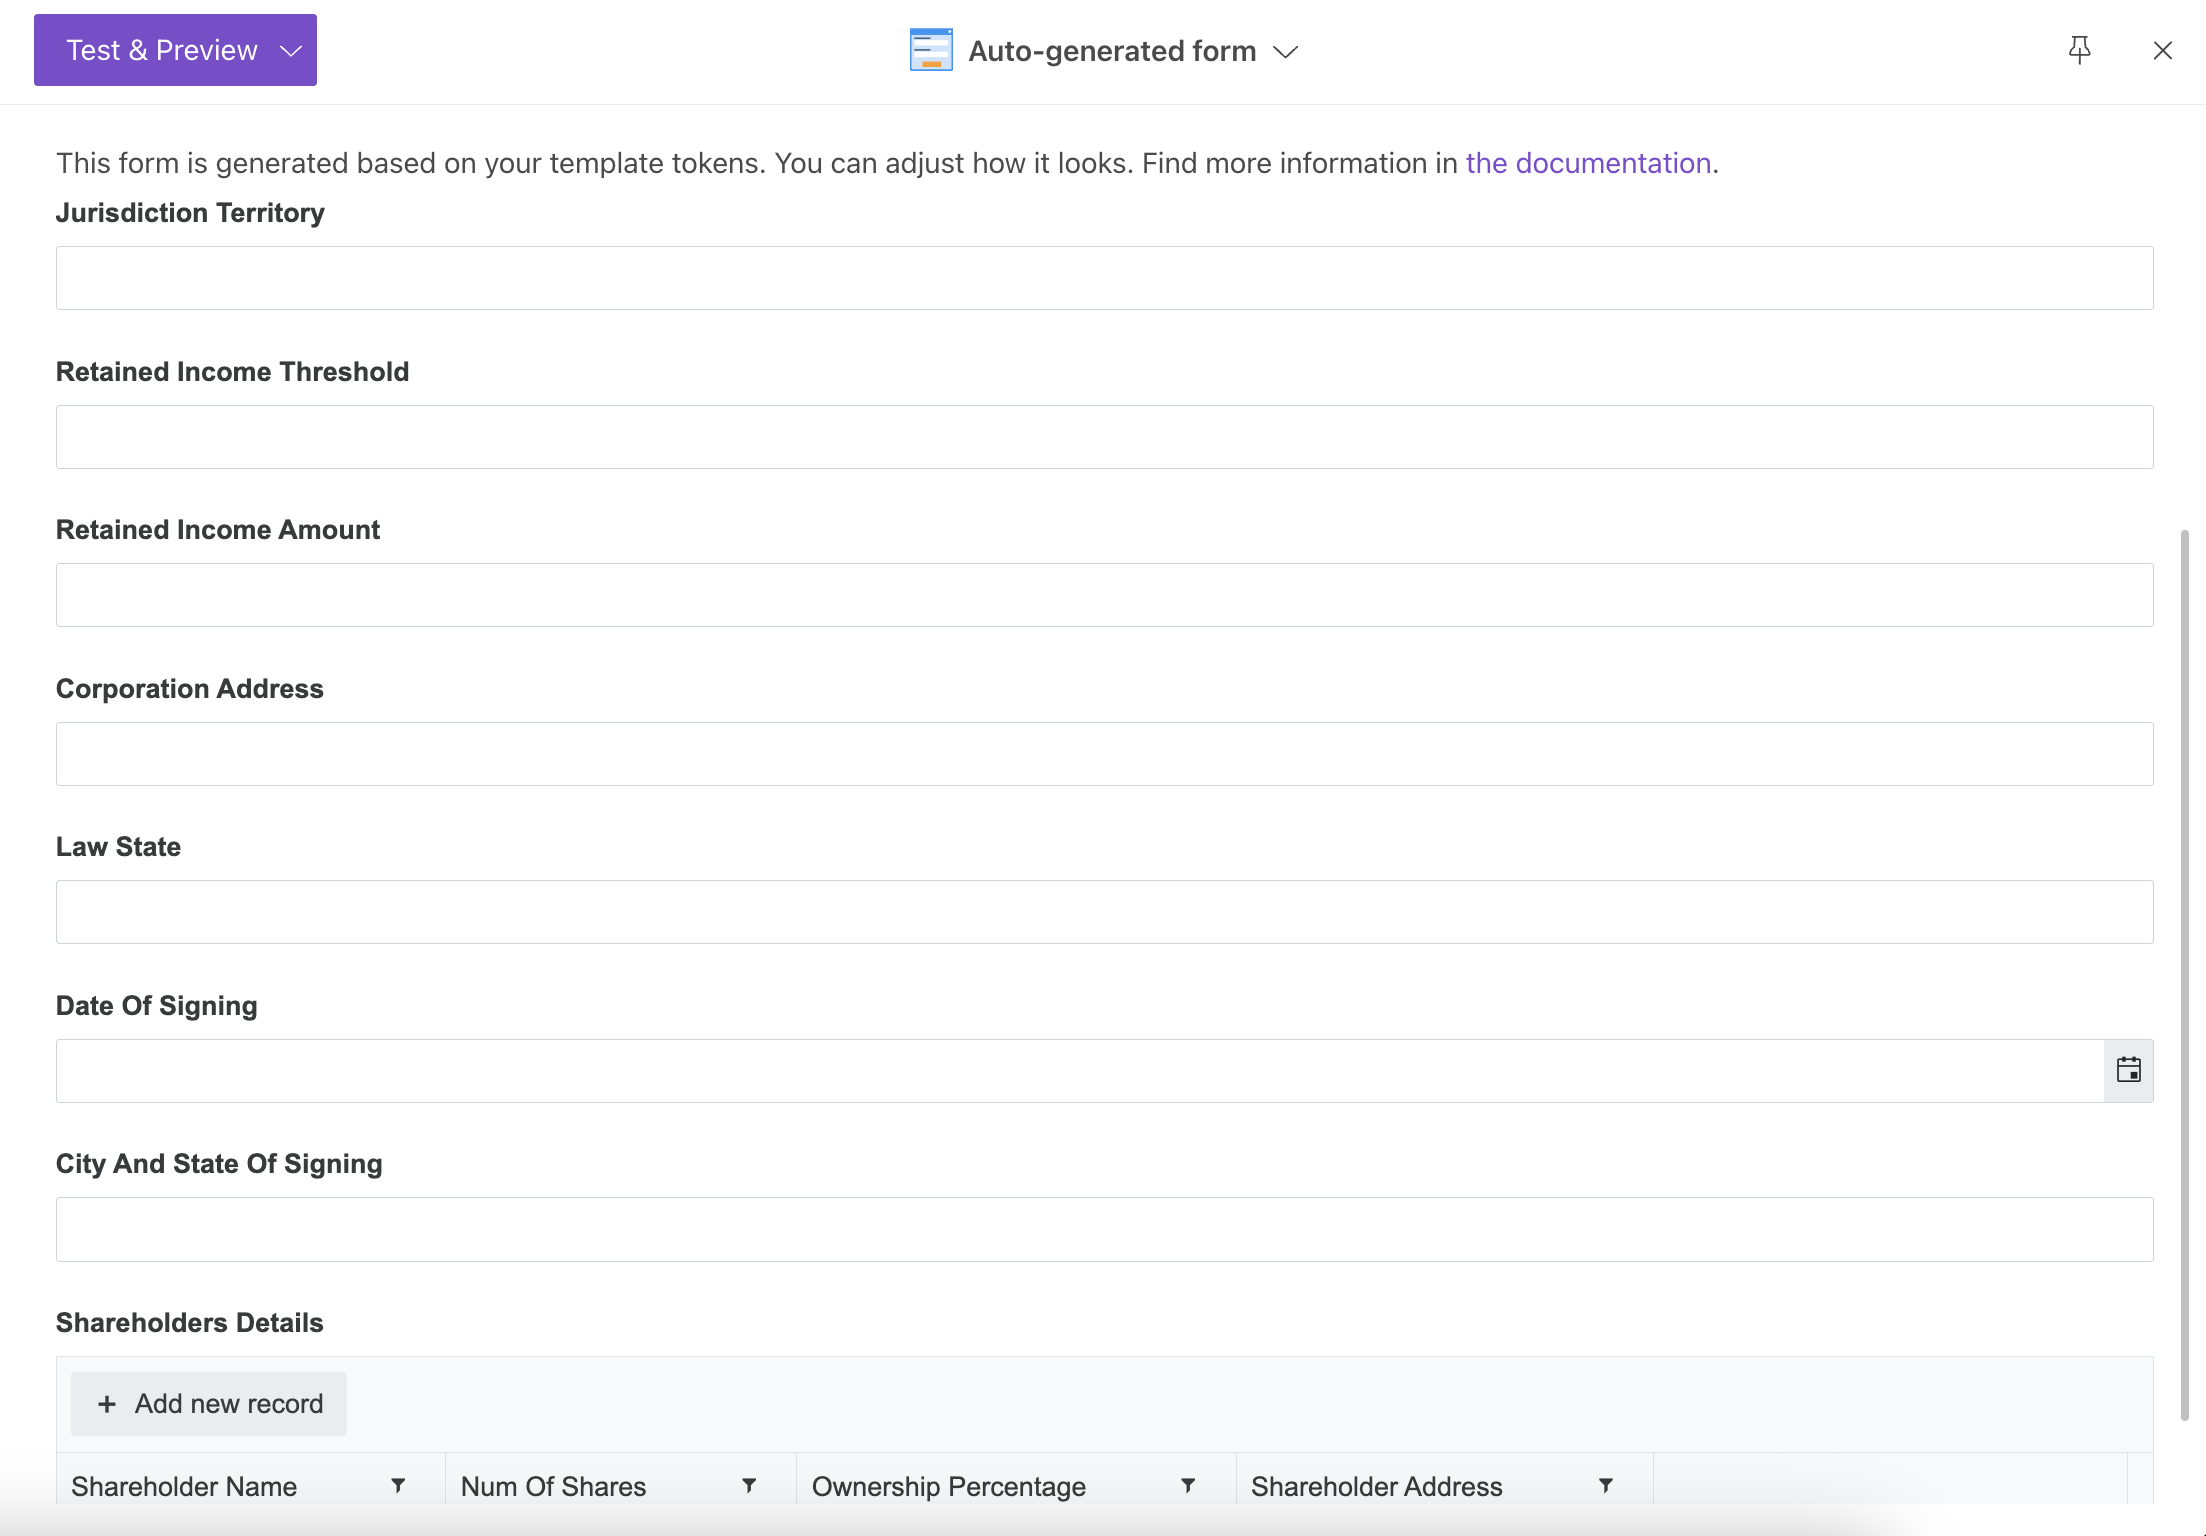
Once you’ve customized all the settings, you can test the template to see how the final document will look. For that, click the Test template button.
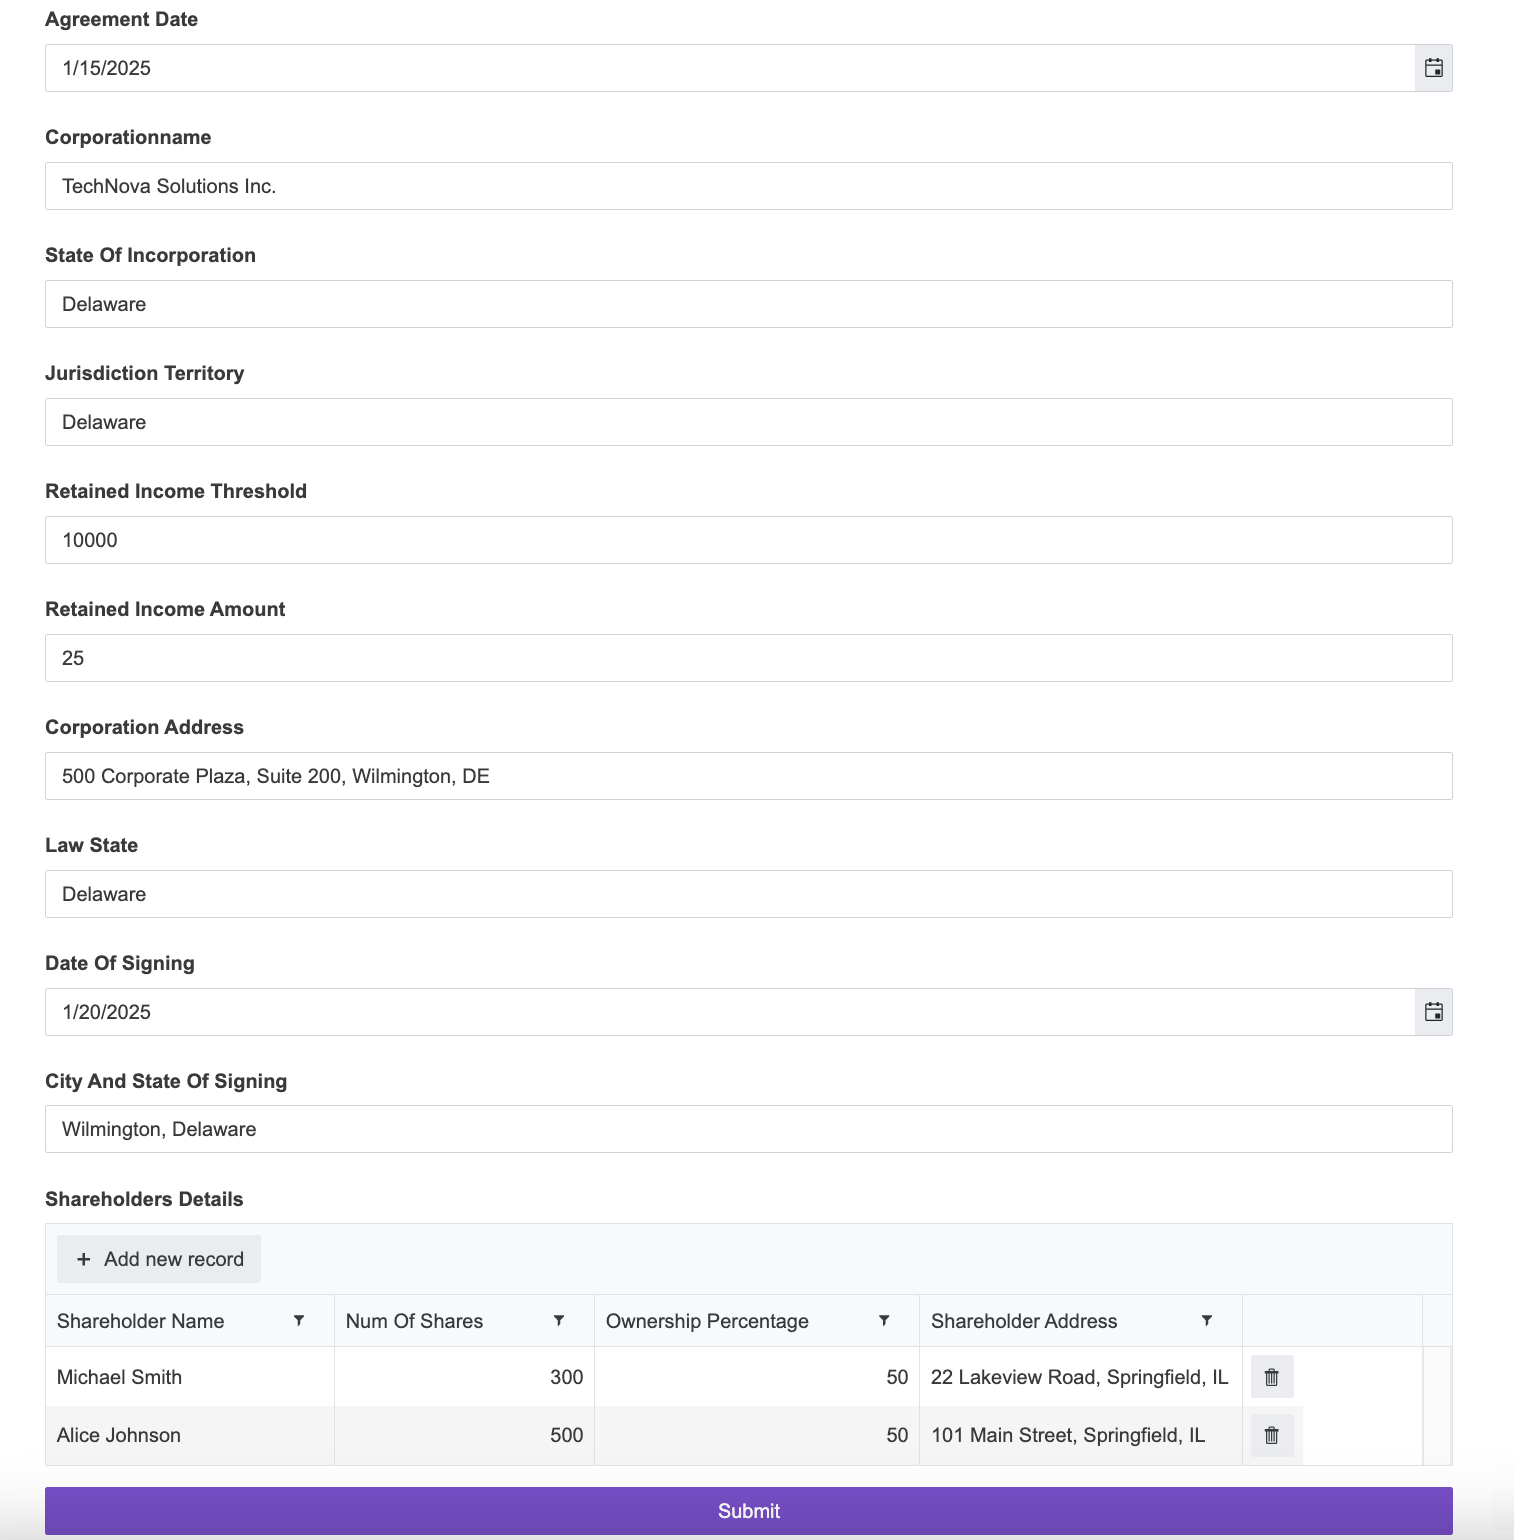
You will see a window where you can fill in the auto-generated testing form. Form fields are created based on tokens from your document template. You can adjust the look of the testing form by changing token types.
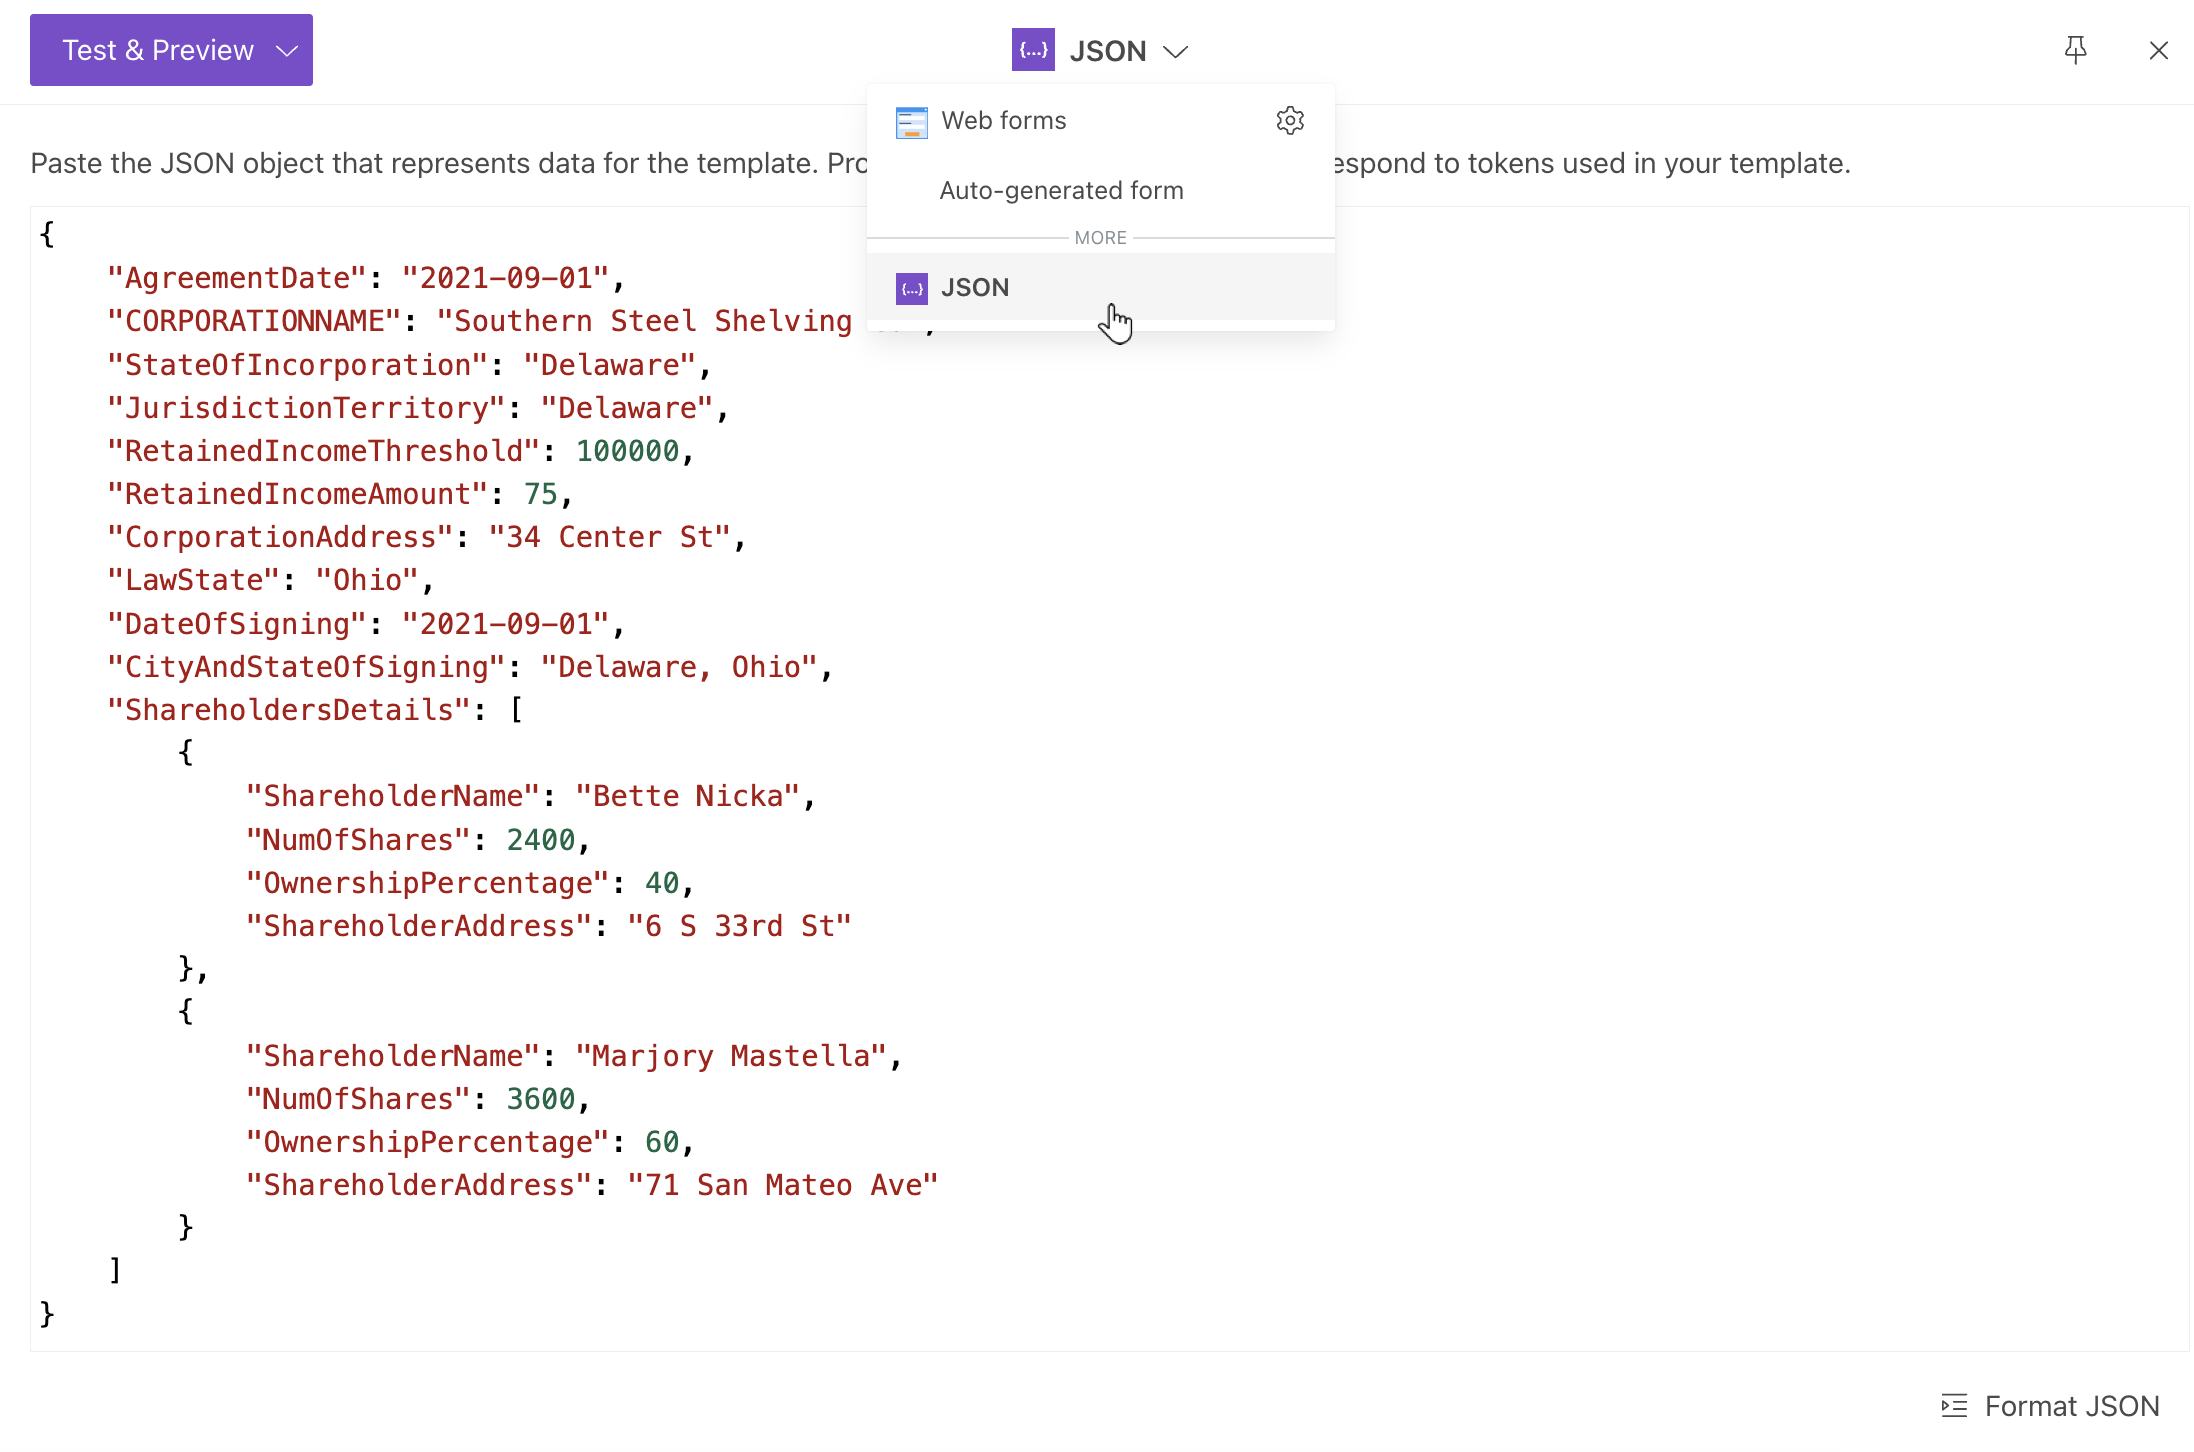
Alternatively, you can submit a JSON. Select the option on the top of the testing window.
Note that the DocuSign tags won’t activate yet since we haven’t connected to DocuSign - we’ll do that in the next step.
Once you’ve tested the template, close the window, click Save & Next to set up deliveries and connect your process to DocuSign.
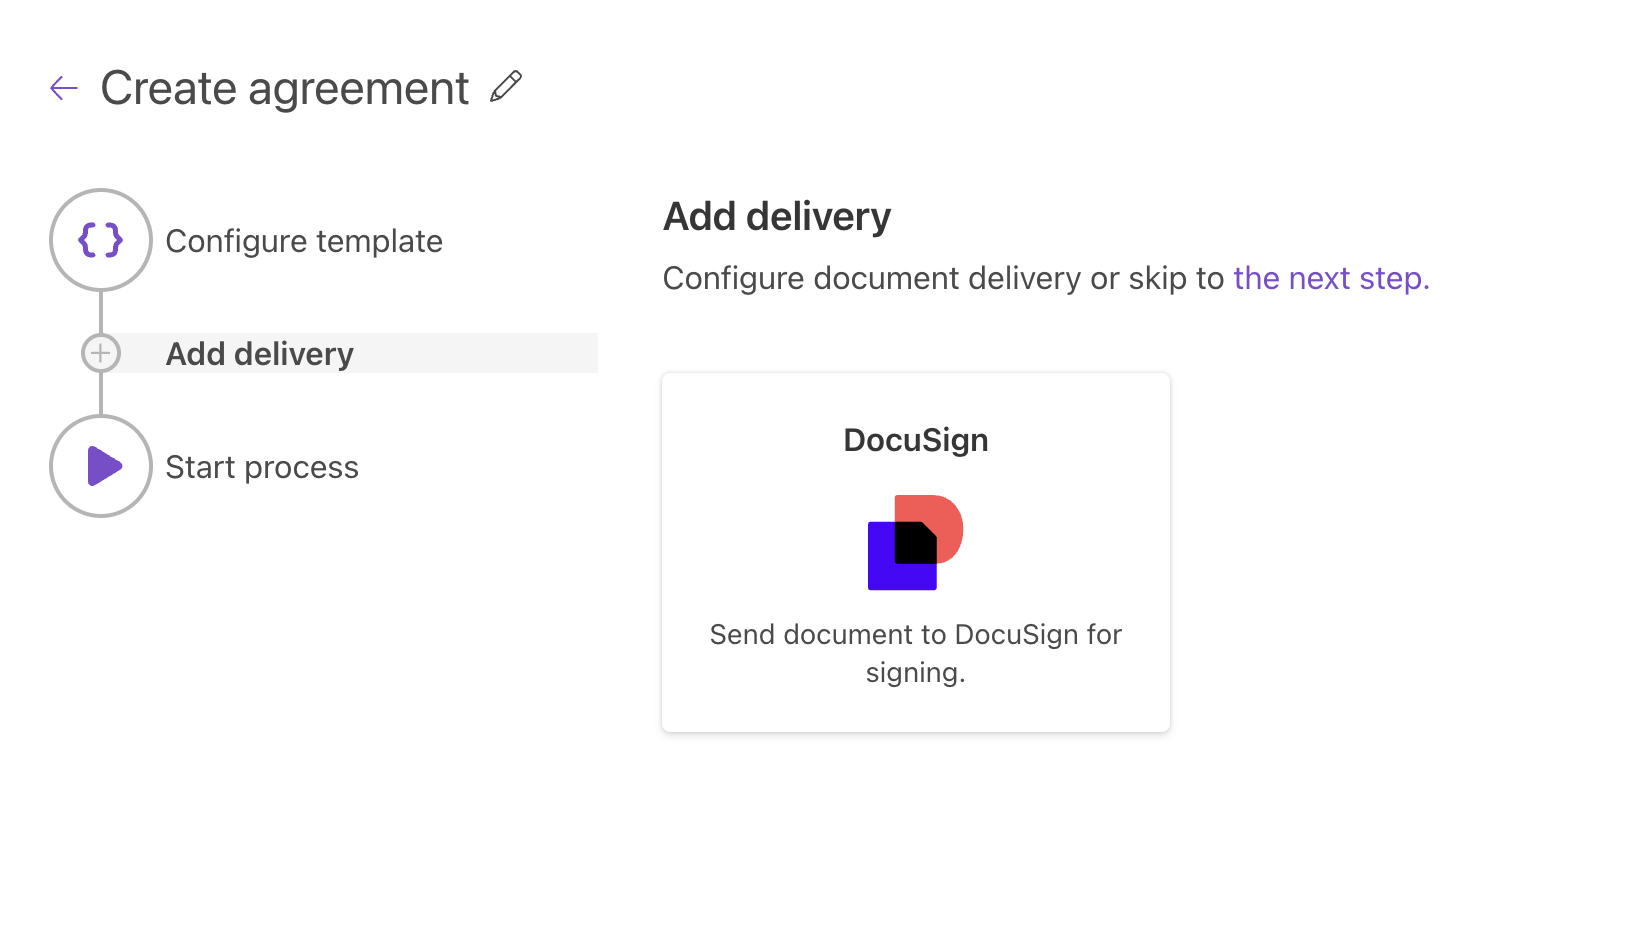
Send document to DocuSign for eSignatures
Select DocuSign to send the completed agreement for signing.
Connect your DocuSign account and choose Production for live documents or Sandbox for testing. Note that Sandbox and Production environments require separate DocuSign accounts.

Once connected, you’ll be able to customize DocuSign settings according to your needs.
Email subject and message
Use template tokens to make the email subject and body dynamic.
Tokens work the same as in the template and are replaced with form data at send time.
For example {{ShareholdersDetails.ShareholderName}}, {{CORPORATIONNAME}}, and {{AgreementDate}} will populate the signer name, company, and agreement date.

You don’t need to edit each message manually - insert the tokens once, and they will be filled in automatically.
Recipients
Add as many recipients as required and assign each a role, for example, Needs to sign. Roles control what each recipient can do during signing. There are other options you can select.
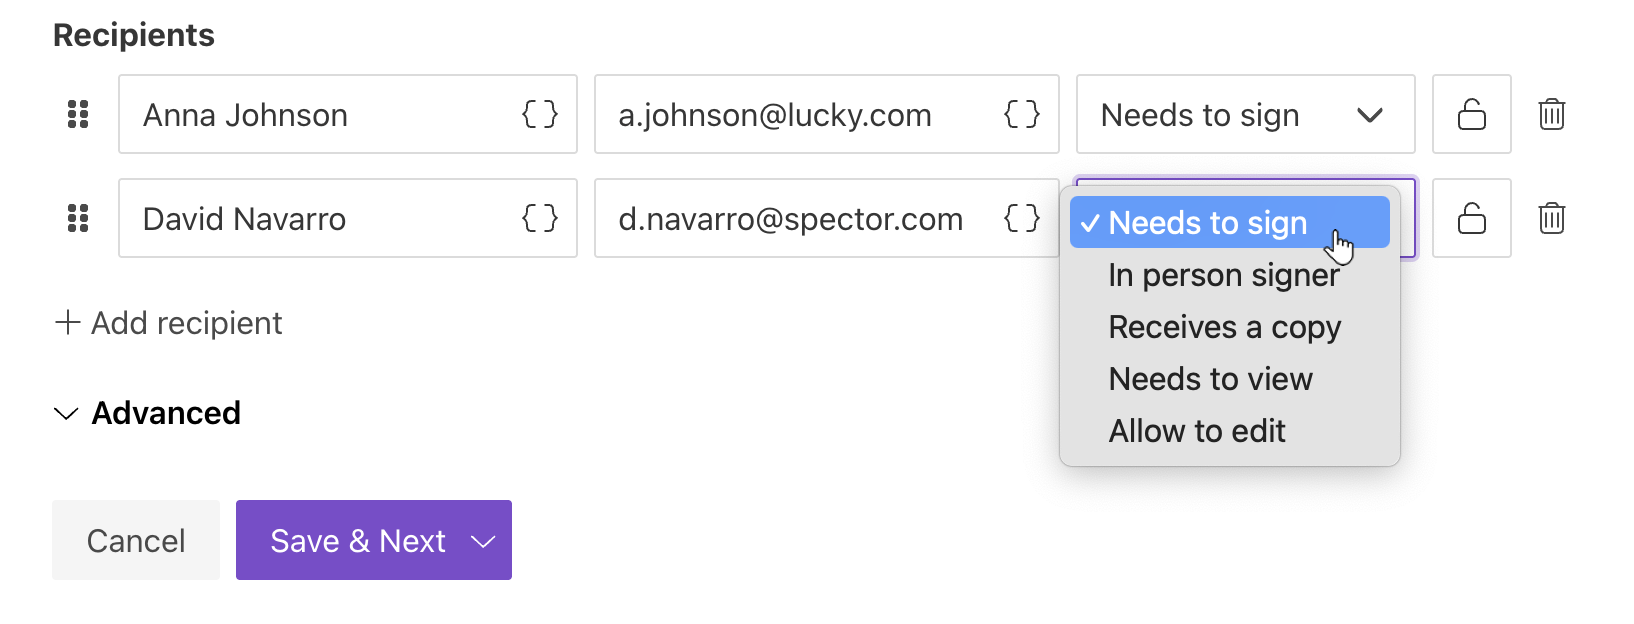
To change the order, you can drag and drop recipients like this:

Additionaly, you can add access code for each recipient to enhance security. Recipients will need to enter this code to view and sign the document. To do this, click the lock icon next to the signer.
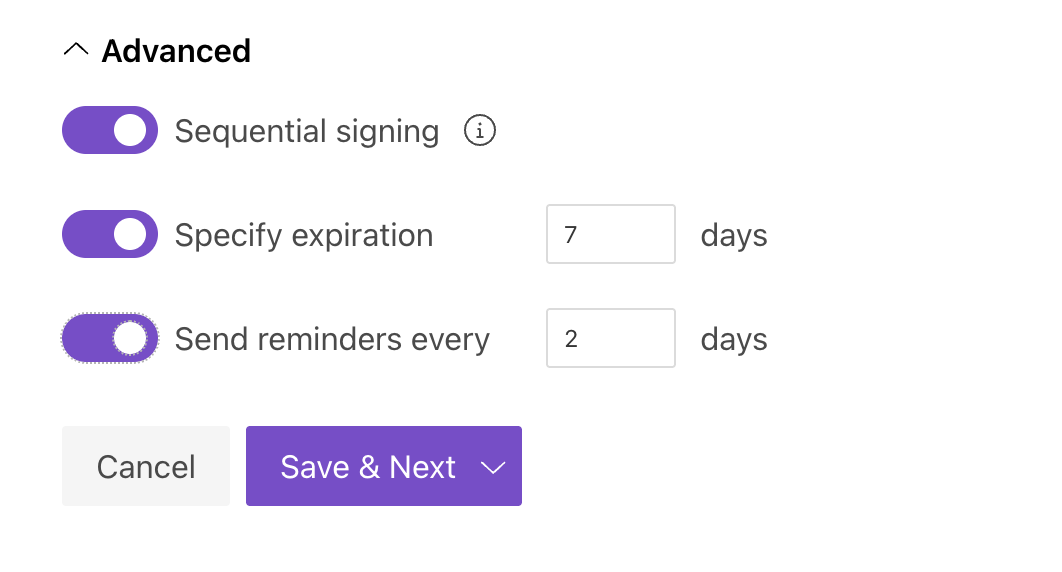
Advanced settings
Expand Advanced to customize more settings:
Sequential signing enforces a strict signing order (useful when, for example, the CEO must sign before the counterparty).
Specify expiration allows you to set how long the envelope remains valid.
Send reminders lets you configure automatic email reminders for signers who haven’t completed signing.
For more details on each setting, refer to the DocuSign delivery documentation.
Once your DocuSign delivery is configured, click Save & Next to continue.
You can add multiple deliveries to your process. For example, to store signed contracts in cloud storage, add deliveries like OneDrive, Google Drive, or Dropbox alongside your DocuSign delivery. Check out the full list of deliveries and how to manage them.
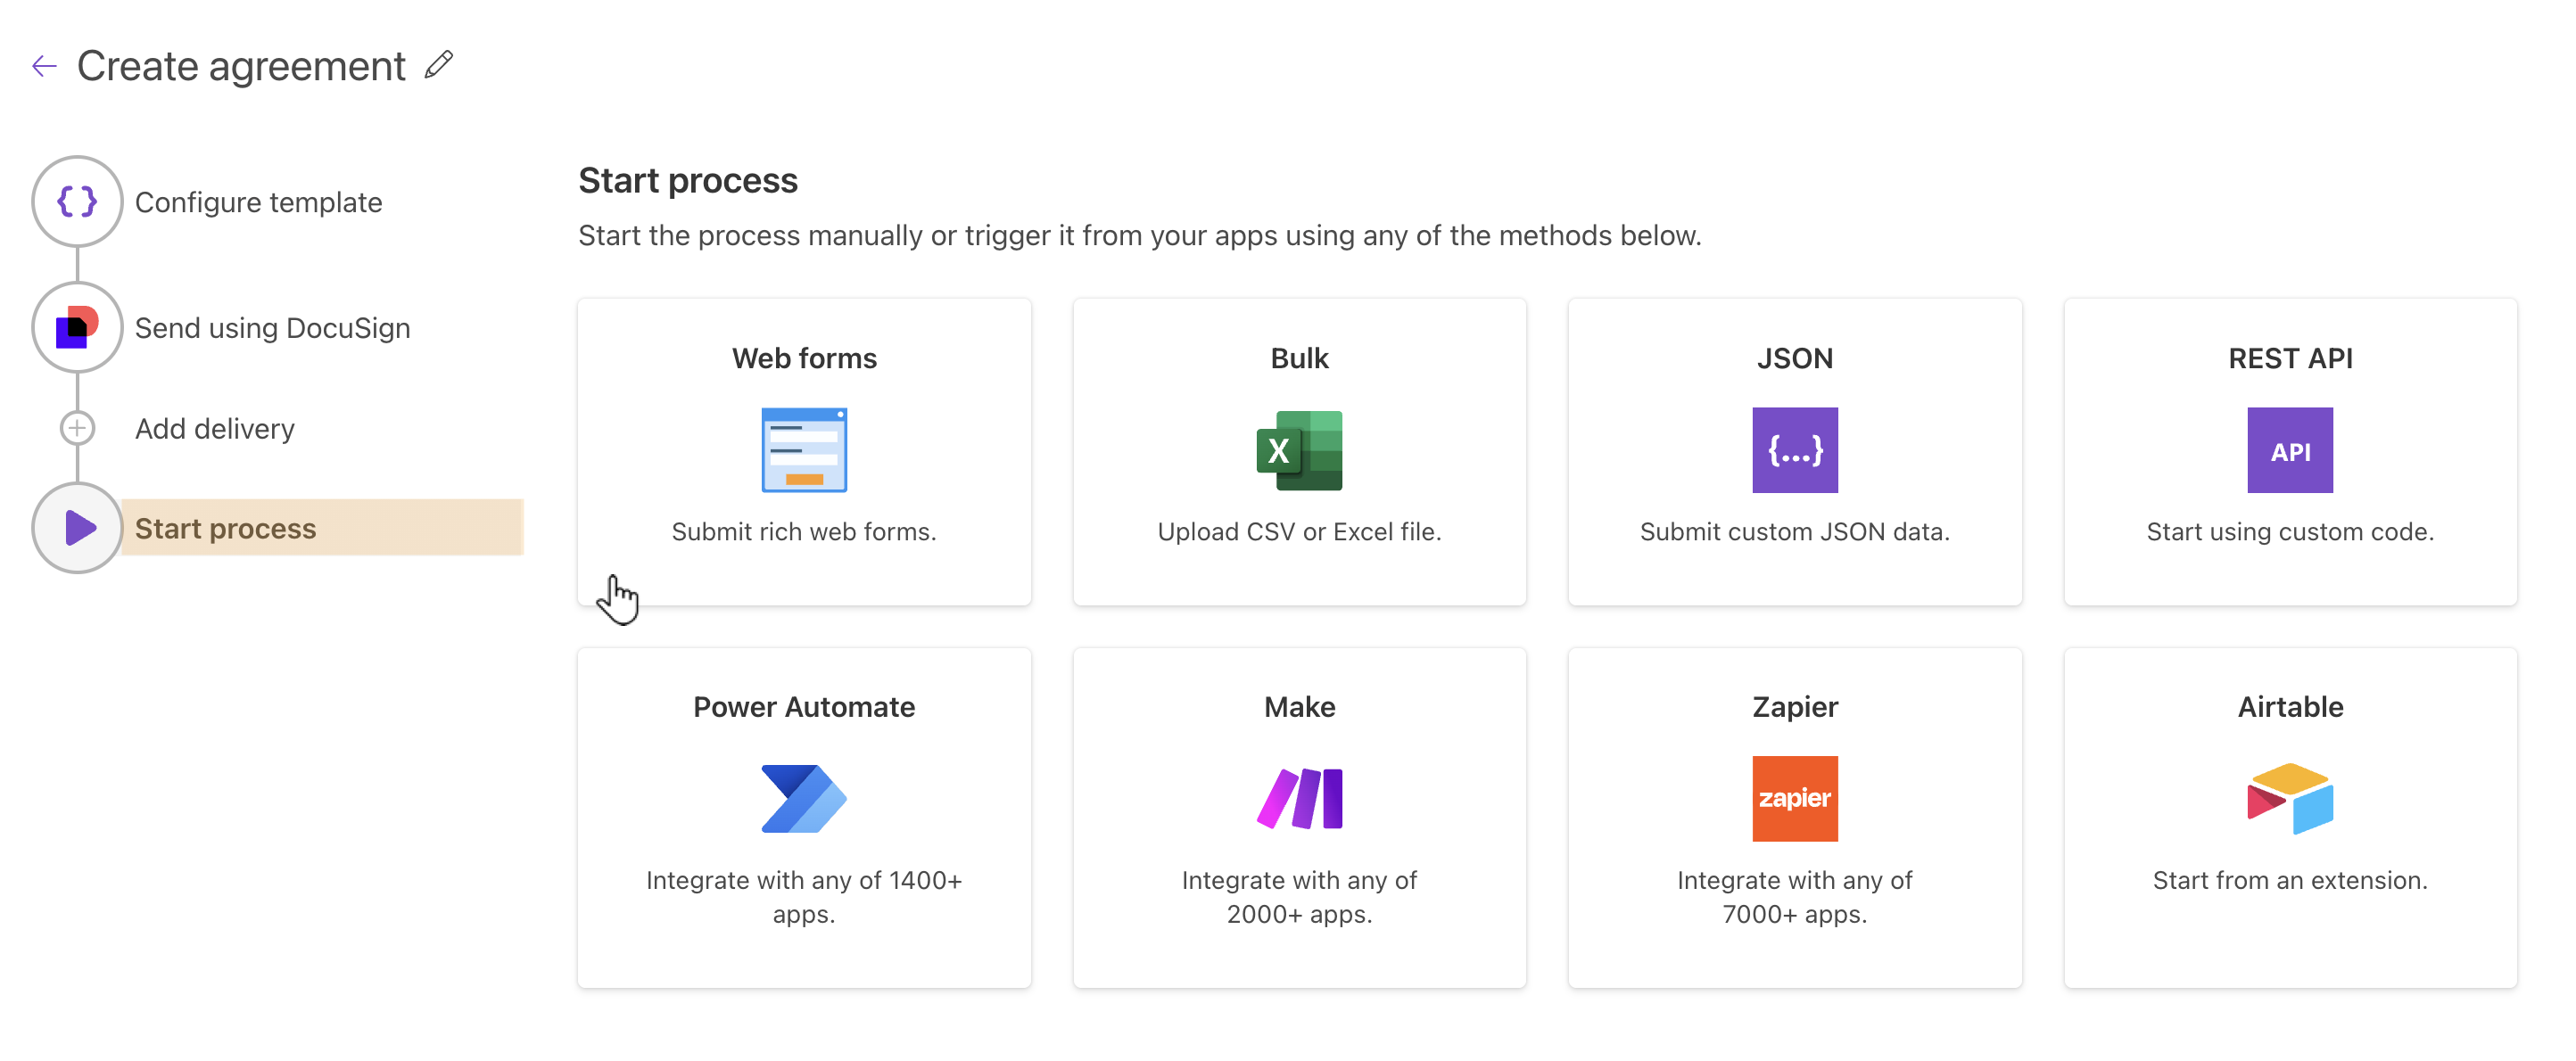
Start process to generate documents with our pre-built form
You can launch the process in several ways. In this guide, we use an auto-generated web form as the trigger. It’s a very simple method where each form submission automatically generates an agreement and sends it to DocuSign for signing.
In the Start process step, select Web forms as the starting point:
You’ll see an auto-generated web form, along with options to create a new form or bind an existing one:
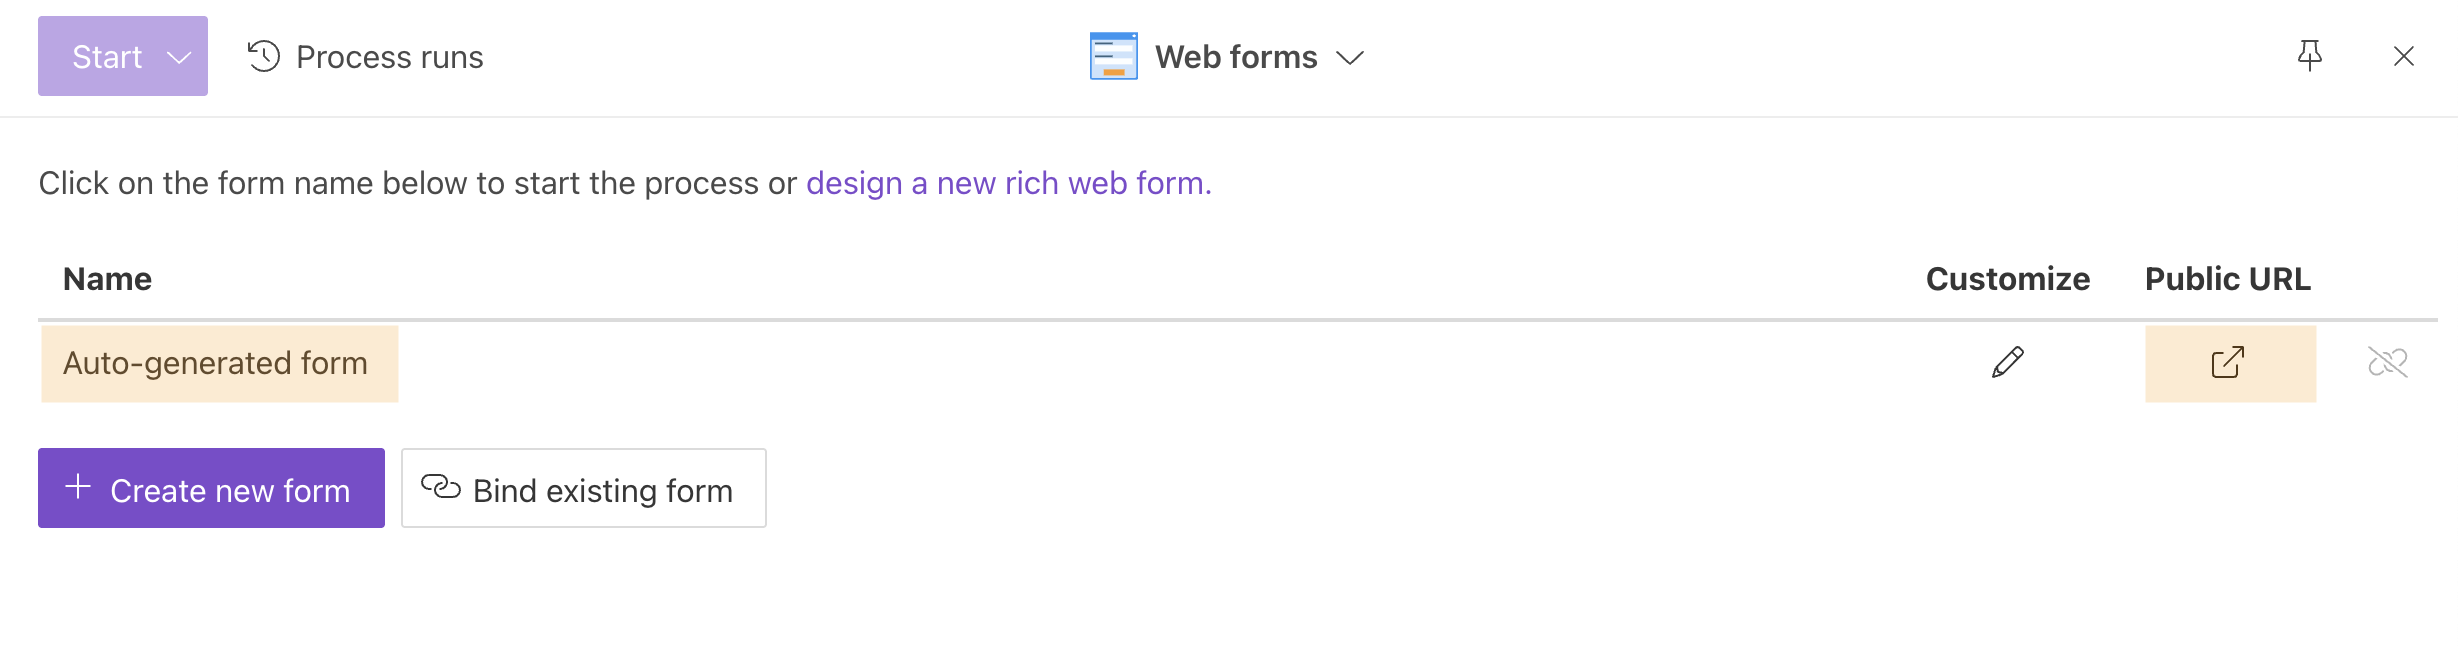
If you click on the form name, you will start the process. From that moment on, any submission of this form will automatically trigger the process. The submitted data populates the DOCX template, which is then converted to PDF and sent to DocuSign for e-signature.
You can also use the Public URL to share the form with others:
Integrate with your services
You can also trigger this process from other platforms to pass data and send documents to DocuSign.
Integration platforms like Zapier and Power Automate let you start the process from a variety of sources, including:
Find more integration options in our Integrations section.
If you encounter any issues or have questions, feel free to drop us a quick message at support@plumsail.com.