Fill in a W-9 tax form and sign it securely using DocuSign
When working with contractors or freelancers, you need to collect a completed and signed IRS W-9 tax form from them. You may want to automate the paperwork and make the process transparent, fast, and convenient.
Plumsail Documents can help with this. It provides a ready-to-use web form. After the contractor submits the form, the process generates a completed PDF and sends it for signing through DocuSign. Once the contractor signs it, the signed PDF is available in your DocuSign account:
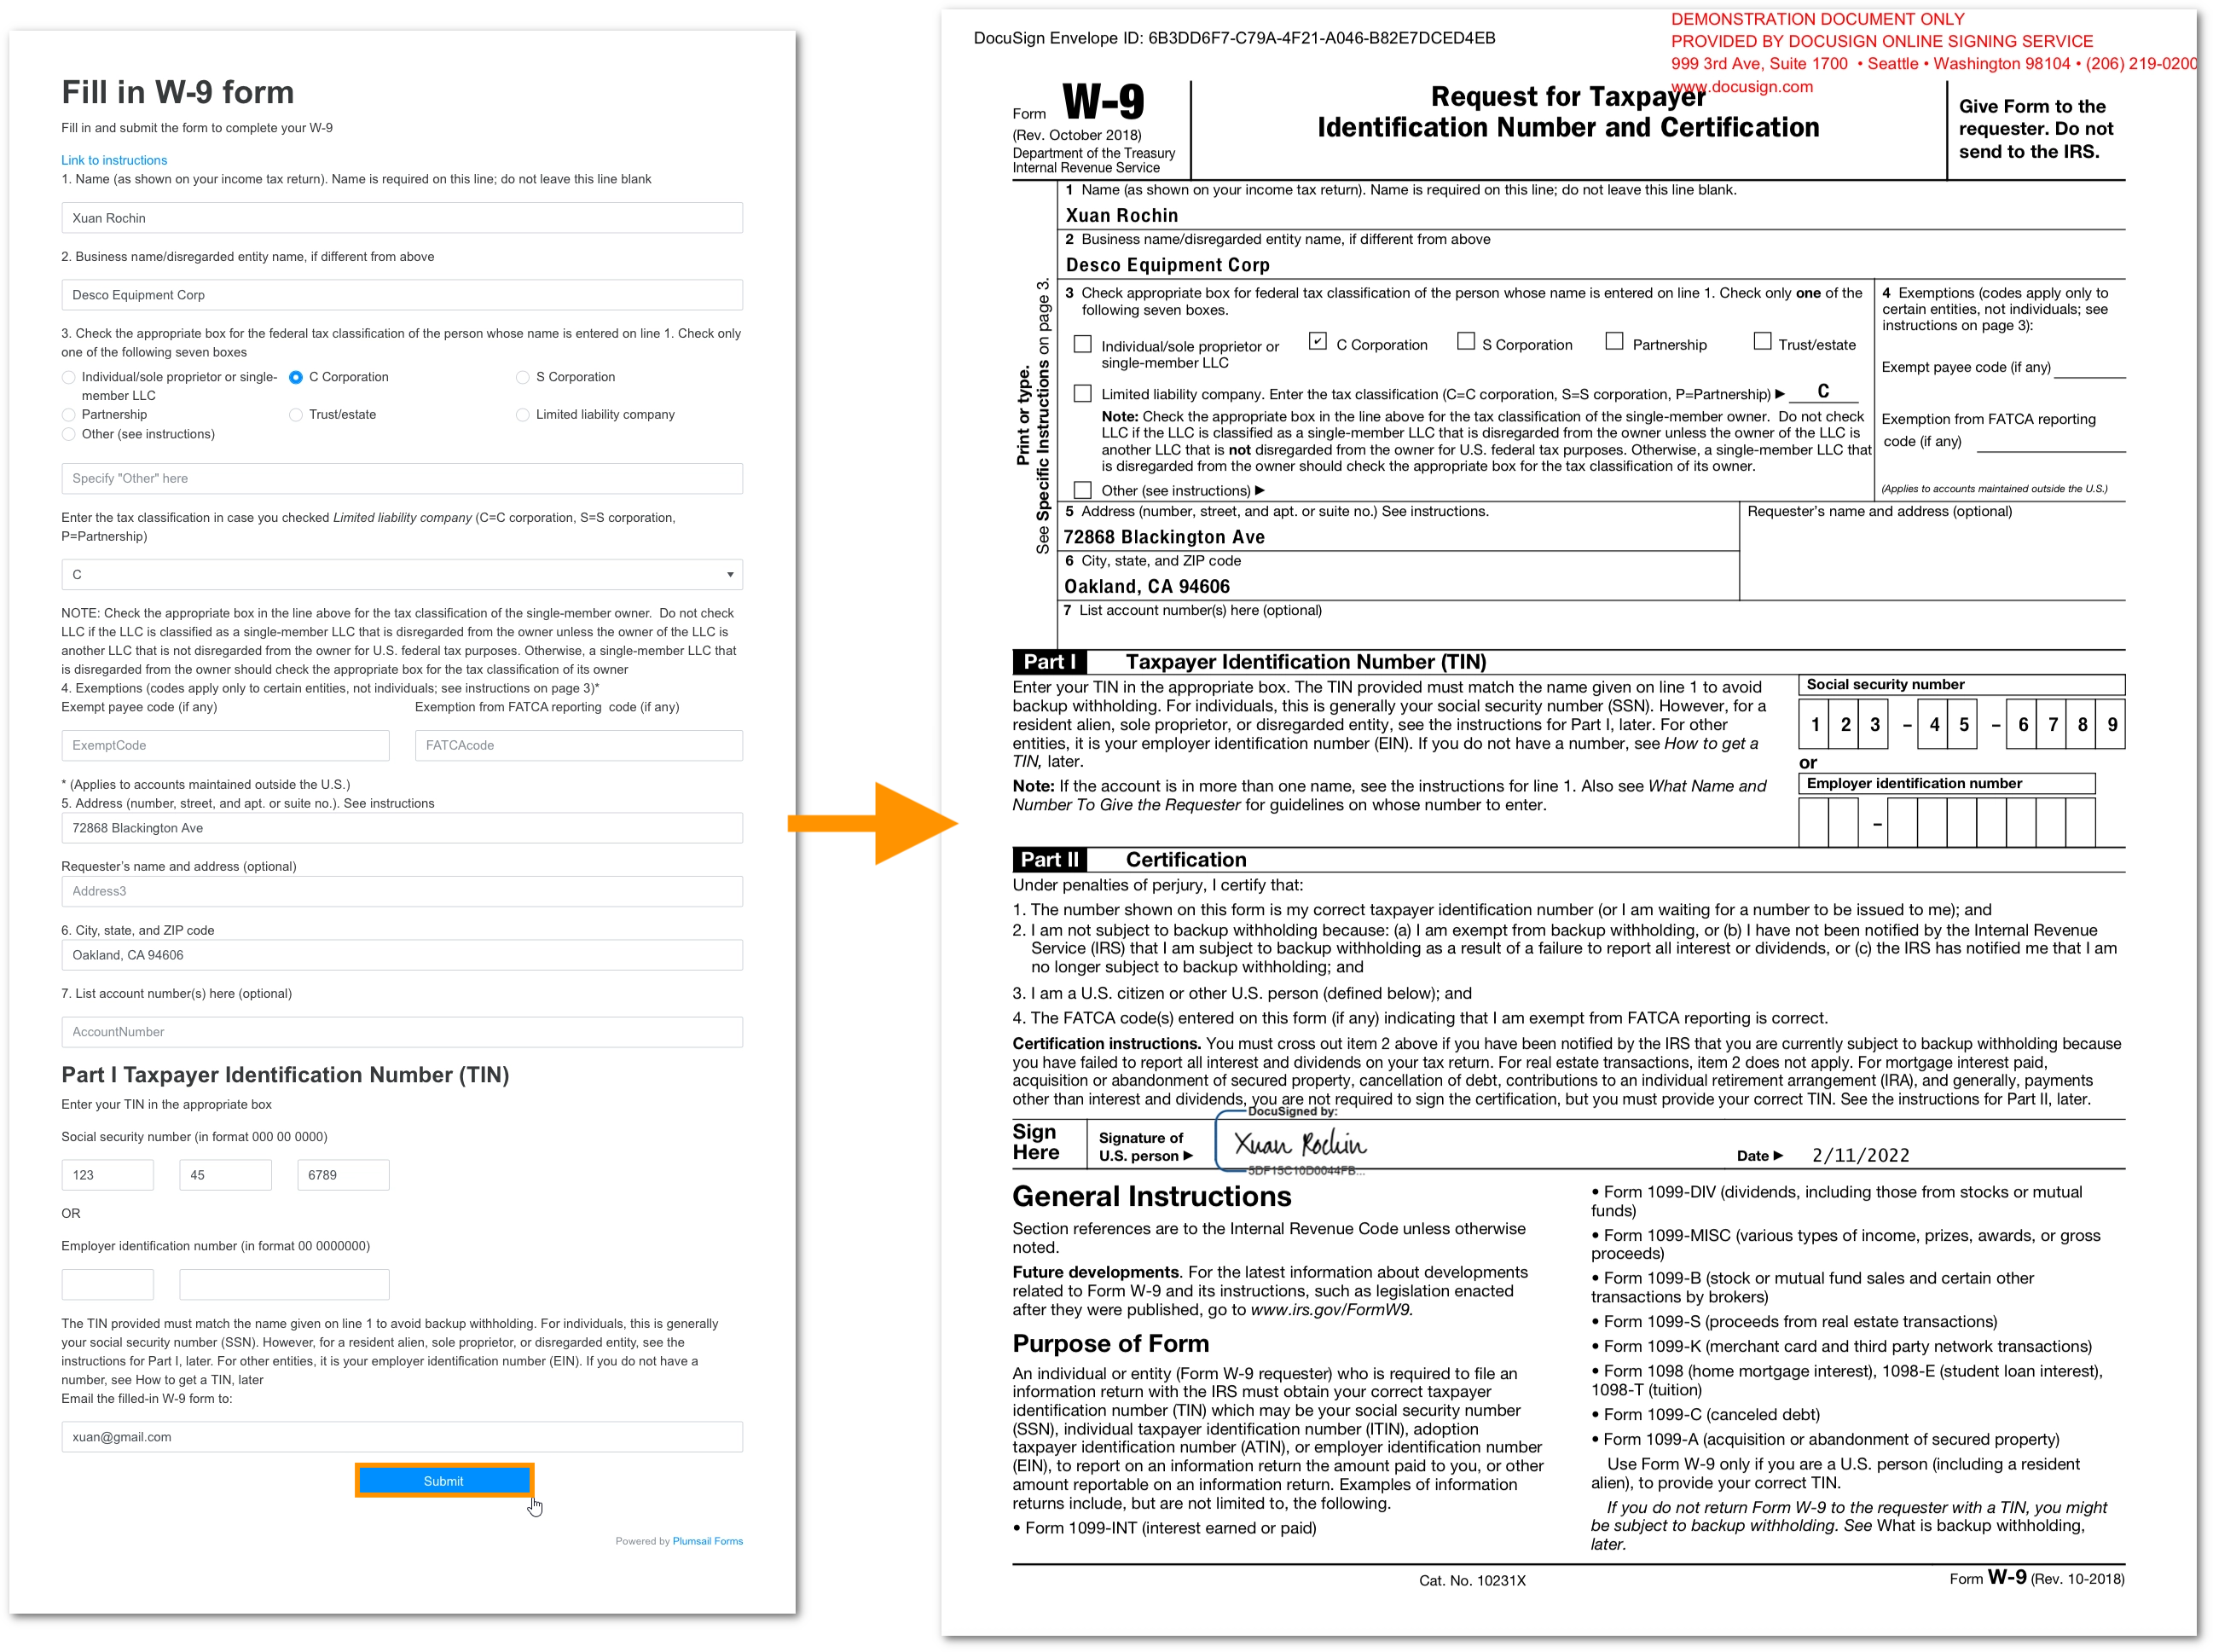
In this article, we will show you how to do this using the DocuSign service.
You only need to complete three steps:
Get the template
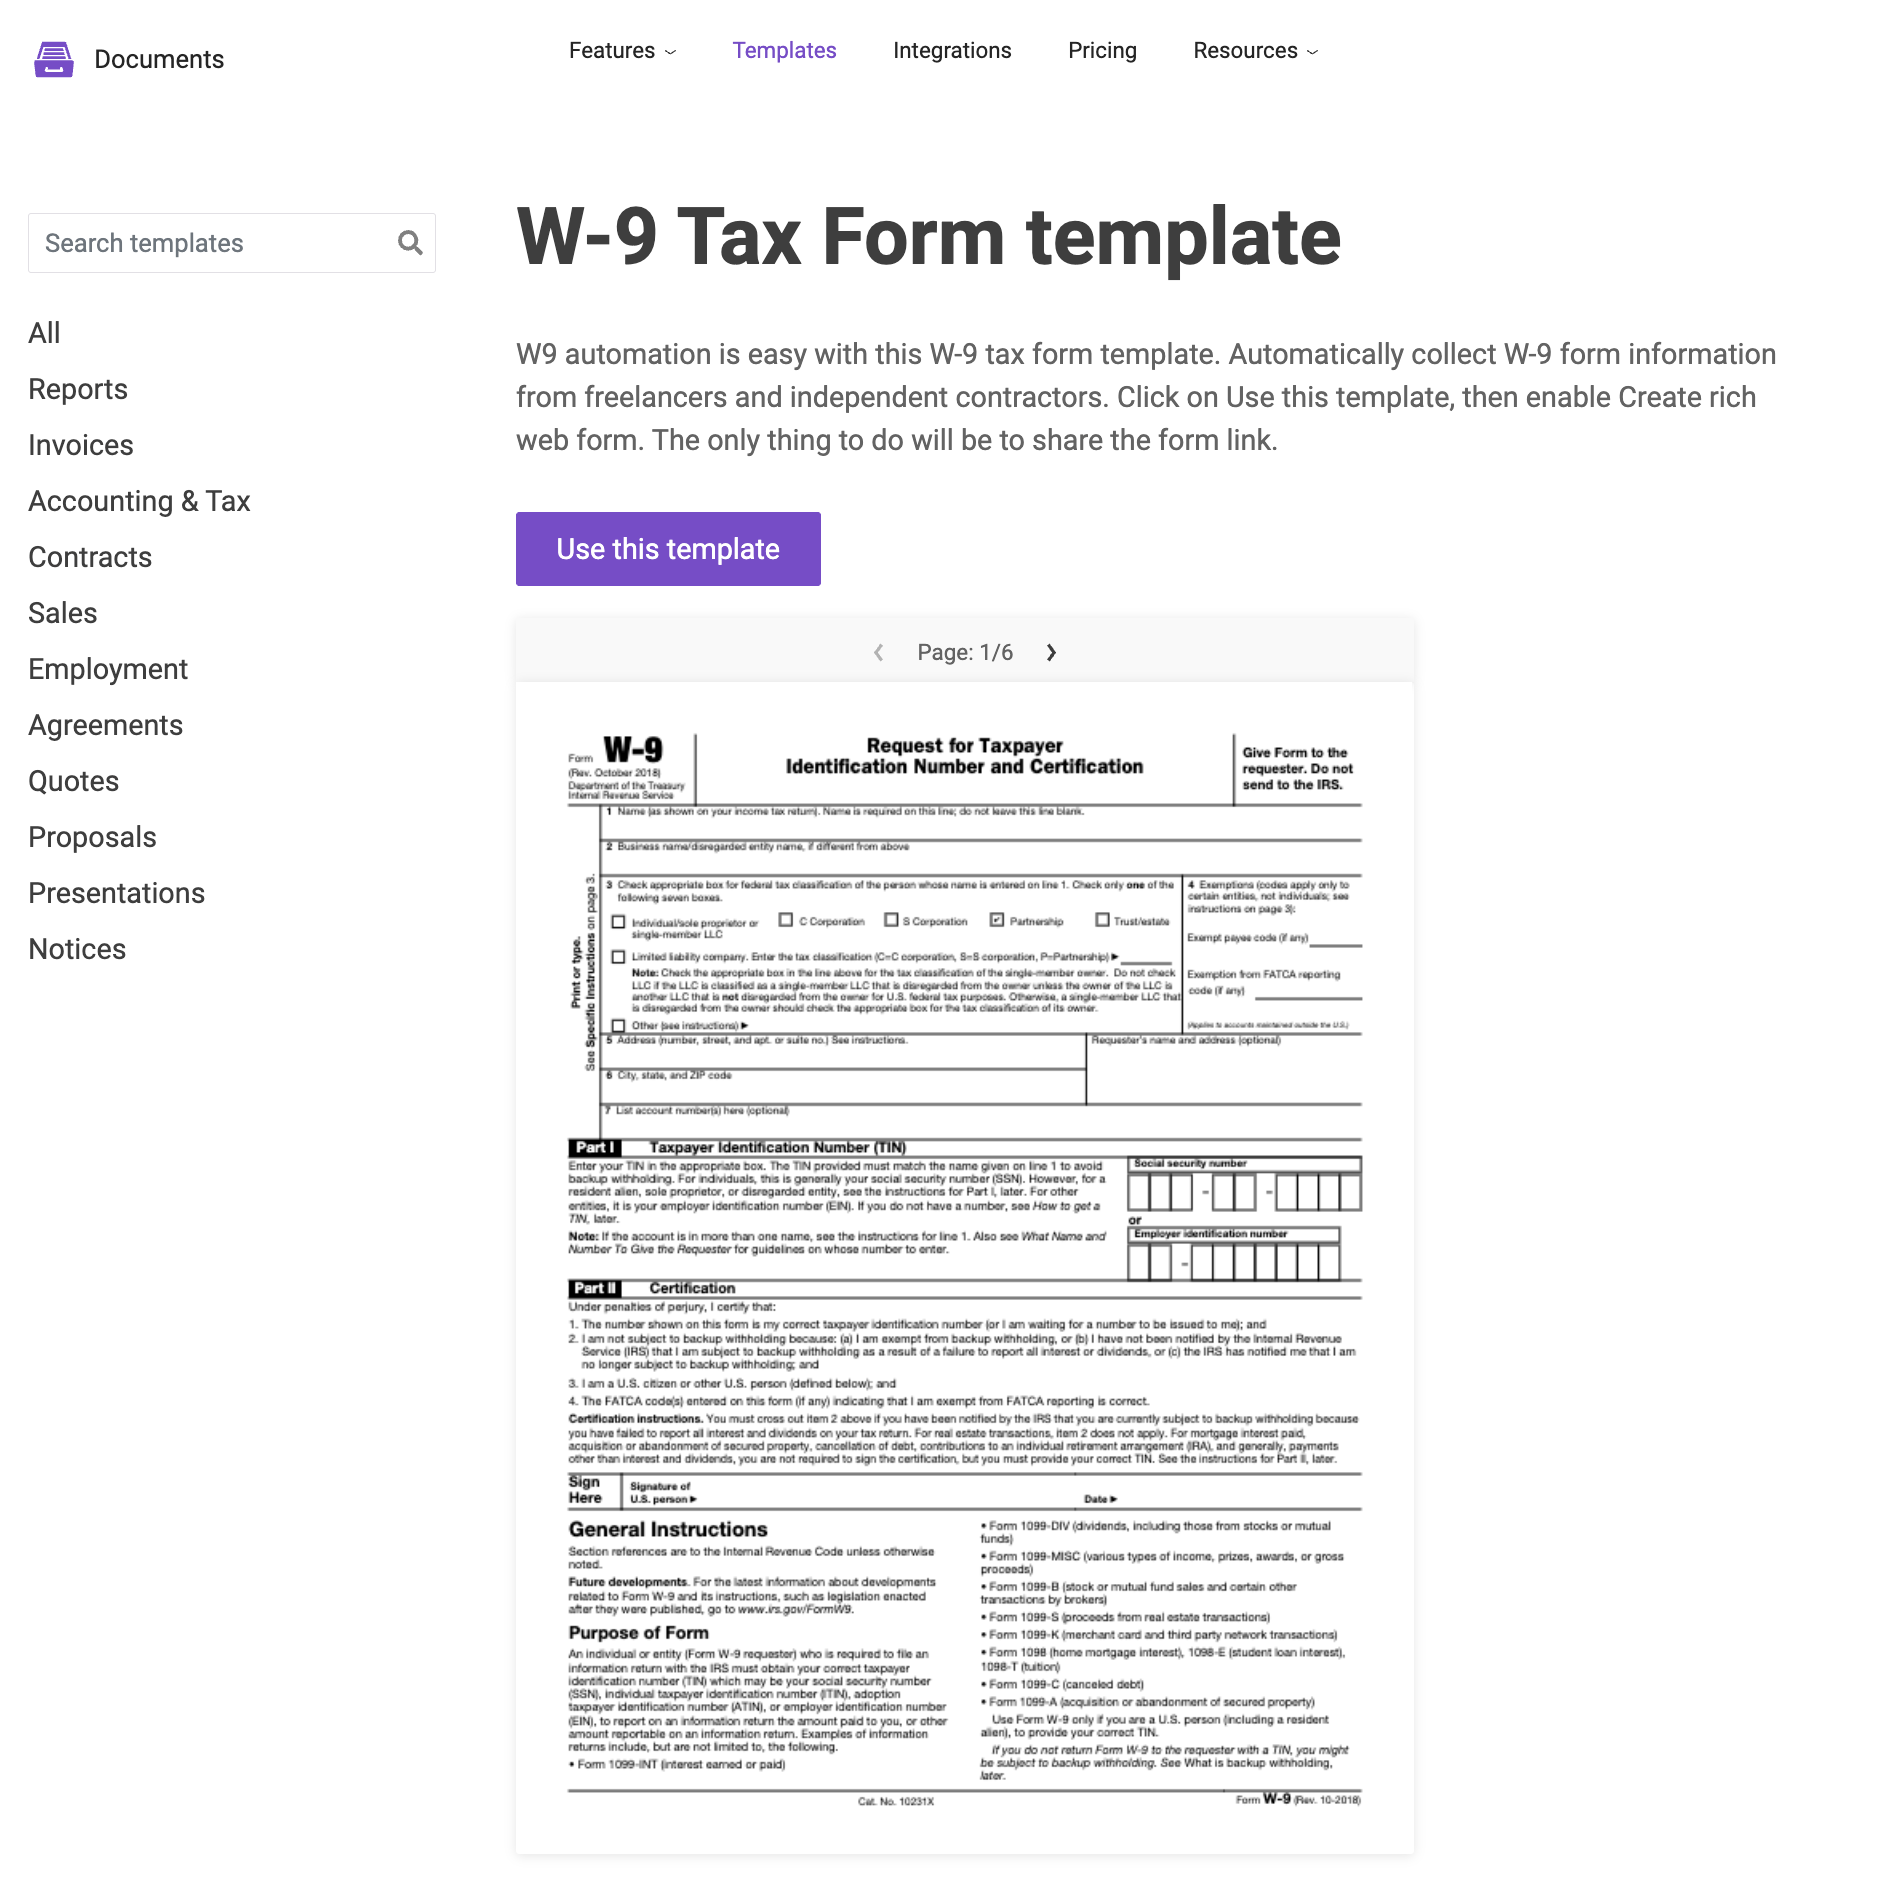
Choose the W-9 form in the Plumsail template gallery and click the Use this template button.
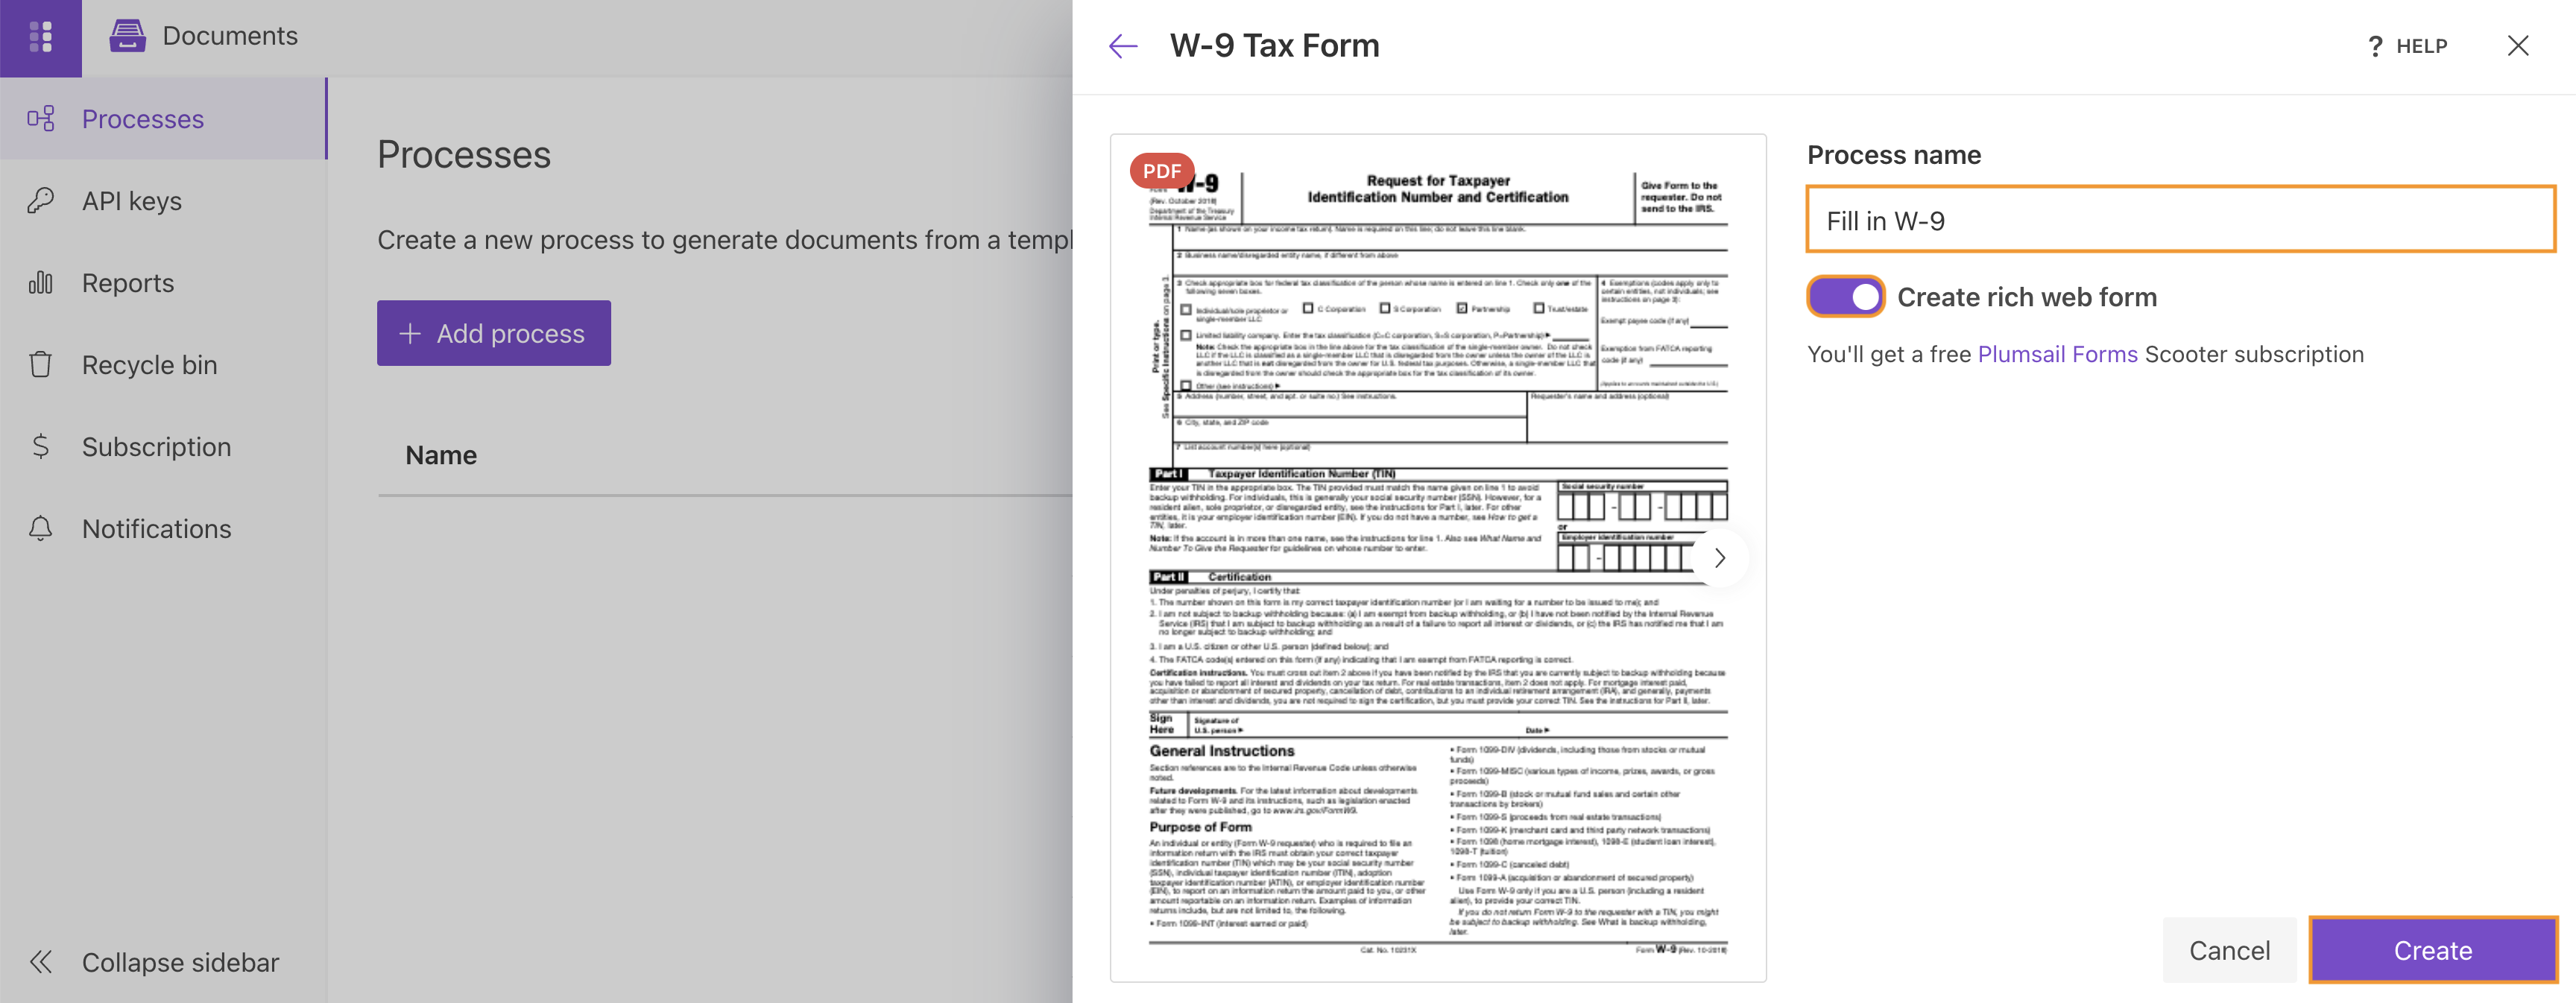
Set the process name and turn on the toggle to create a rich web form.
Plumsail Documents provides multiple delivery options. In this example, we use the DocuSign delivery, but you can choose another service provider and configure the template accordingly.
The form does not include tags for DocuSign that indicate where the signature and date should appear (\s1\ and \d1\ respectively).
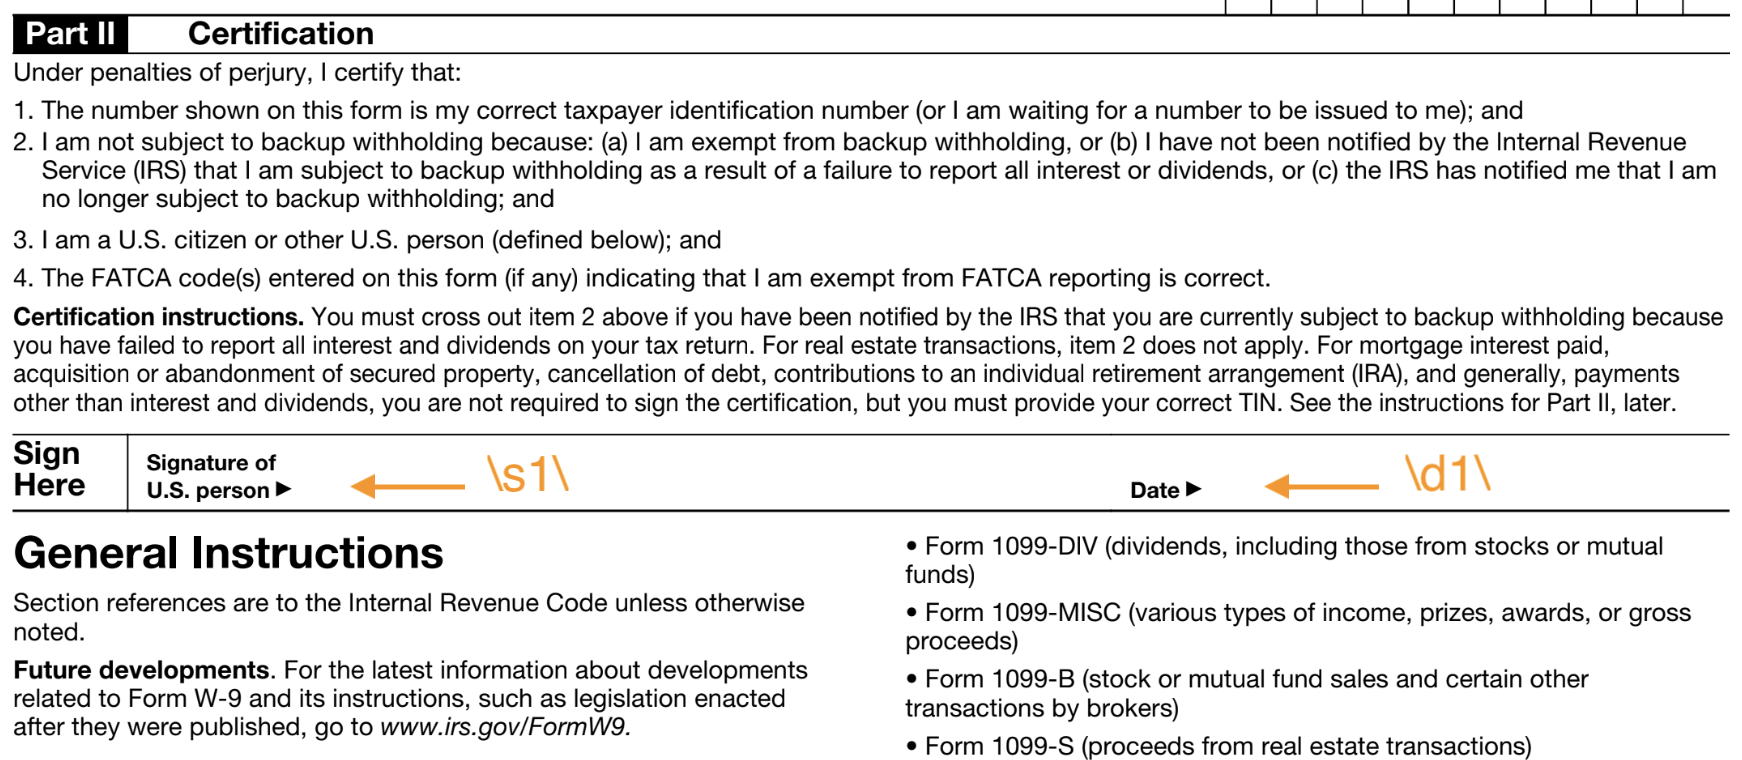
Download the template, add the tags, and upload the file back to the process. To hide the tags, set their color to white.
See the e-signature section for details about the delivery.
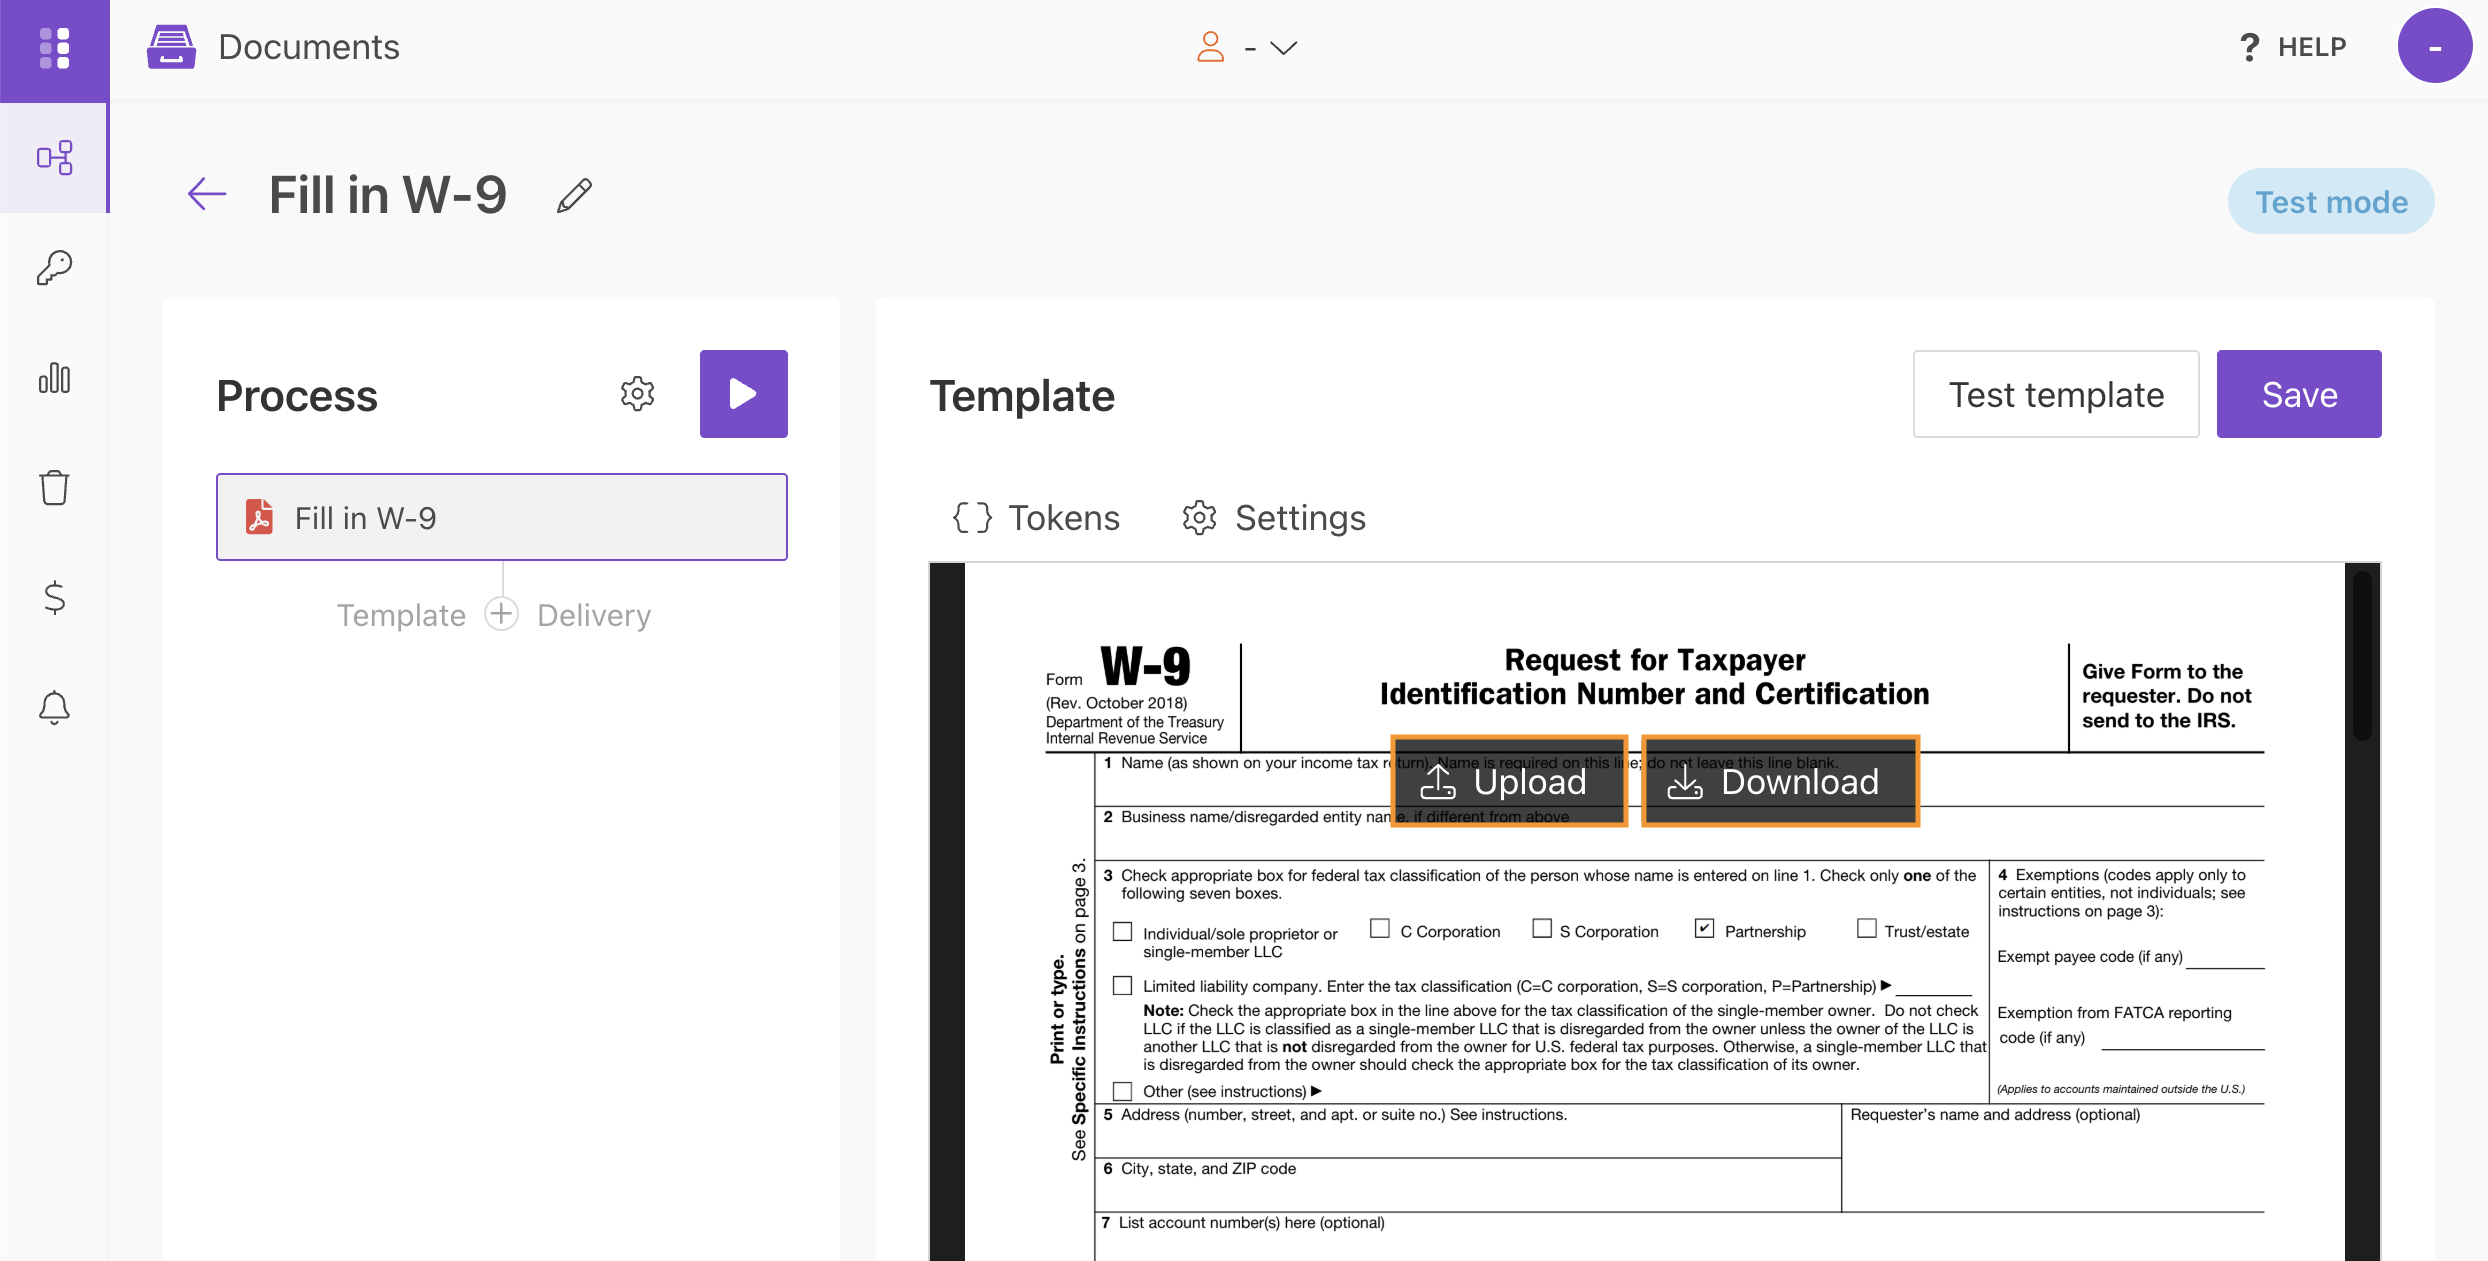
Once you have finished preparing the template, click Save.
Hint
To generate several documents from a single form submission, add multiple templates to your process. Learn more about using multiple templates.
Test template
To preview the document before saving it, click Test template.
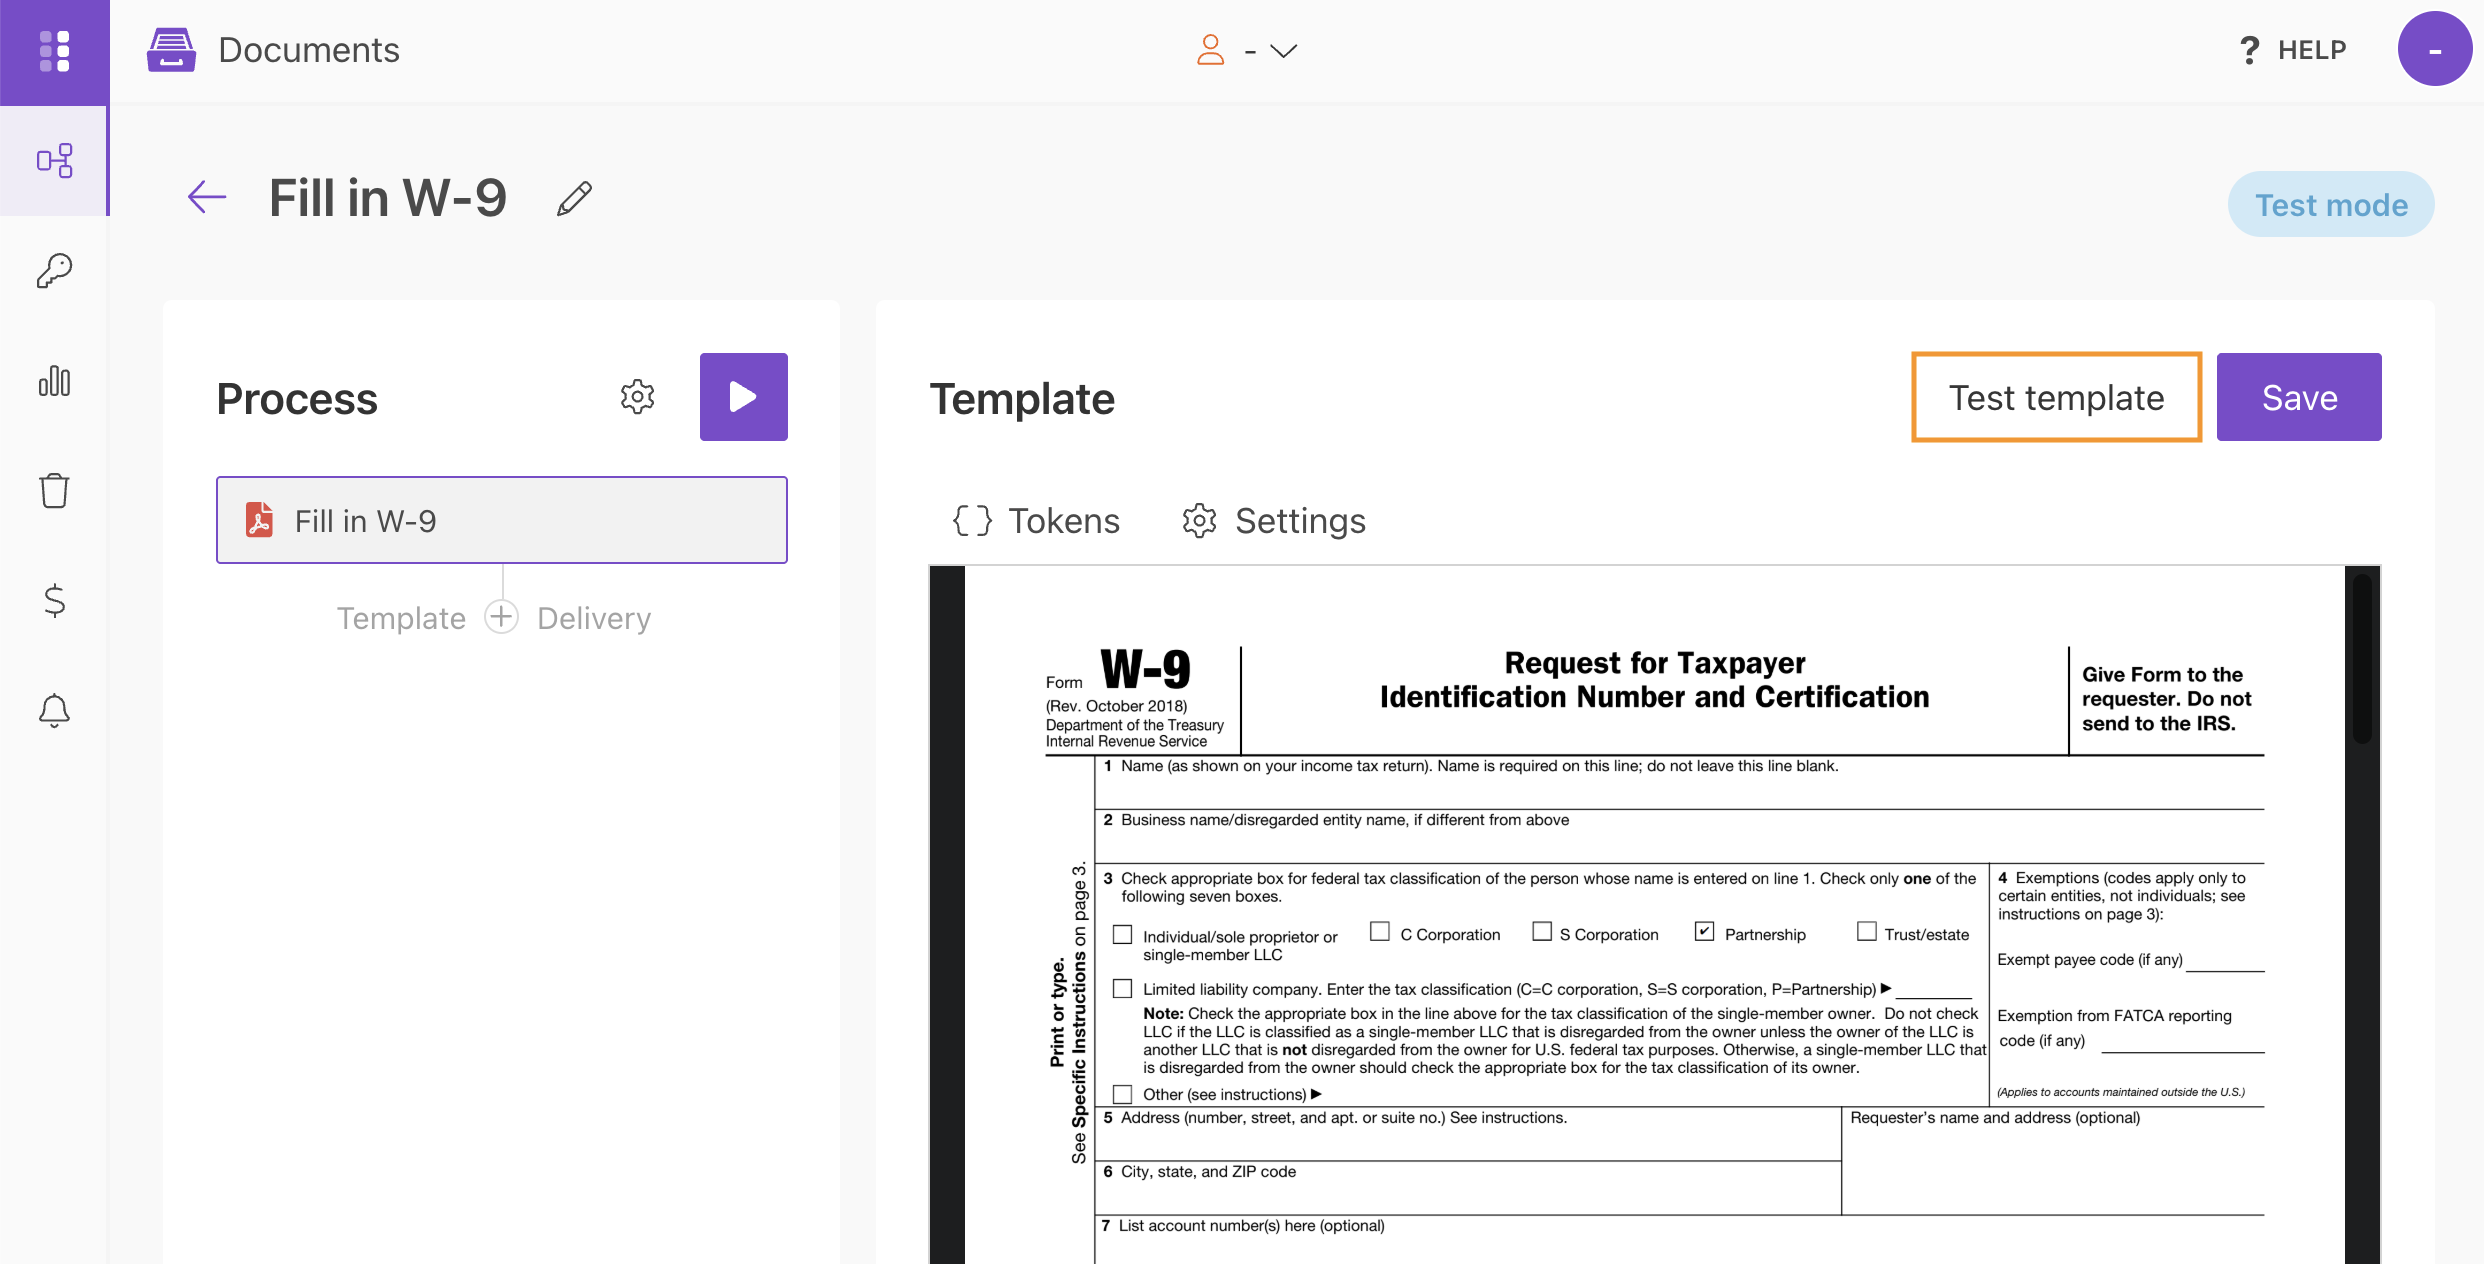
A dialog will open with an auto-generated form based on the tokens in your template.
You can customize this form as needed.
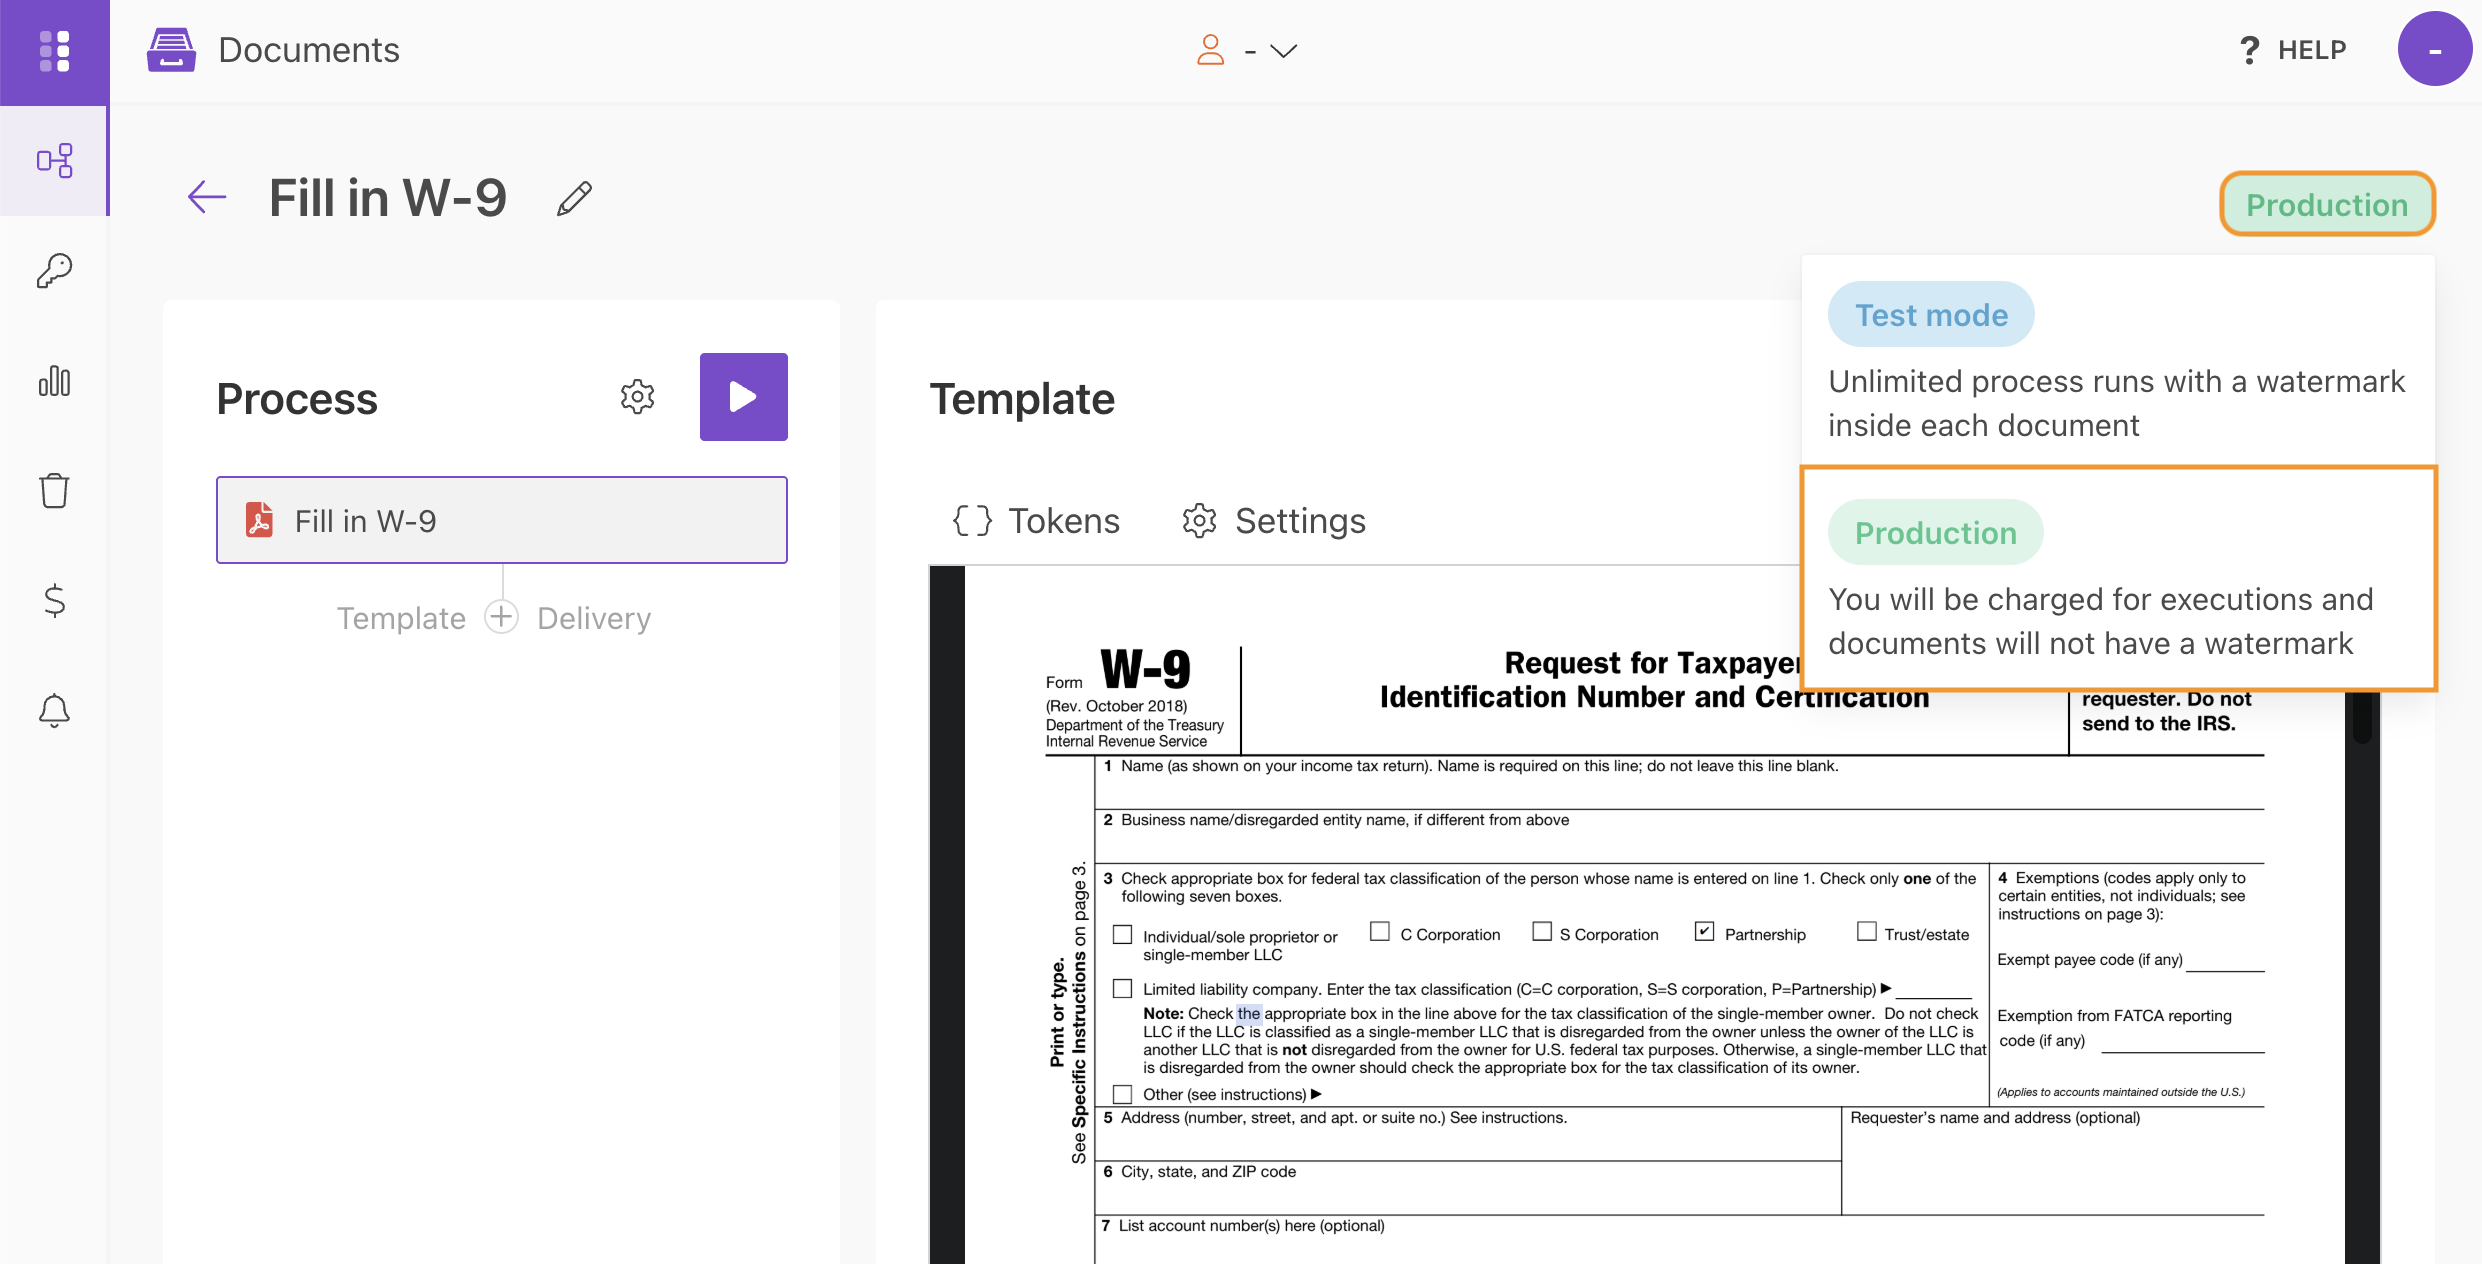
Switch the process to Production mode to remove Plumsail watermarks from the resulting documents.
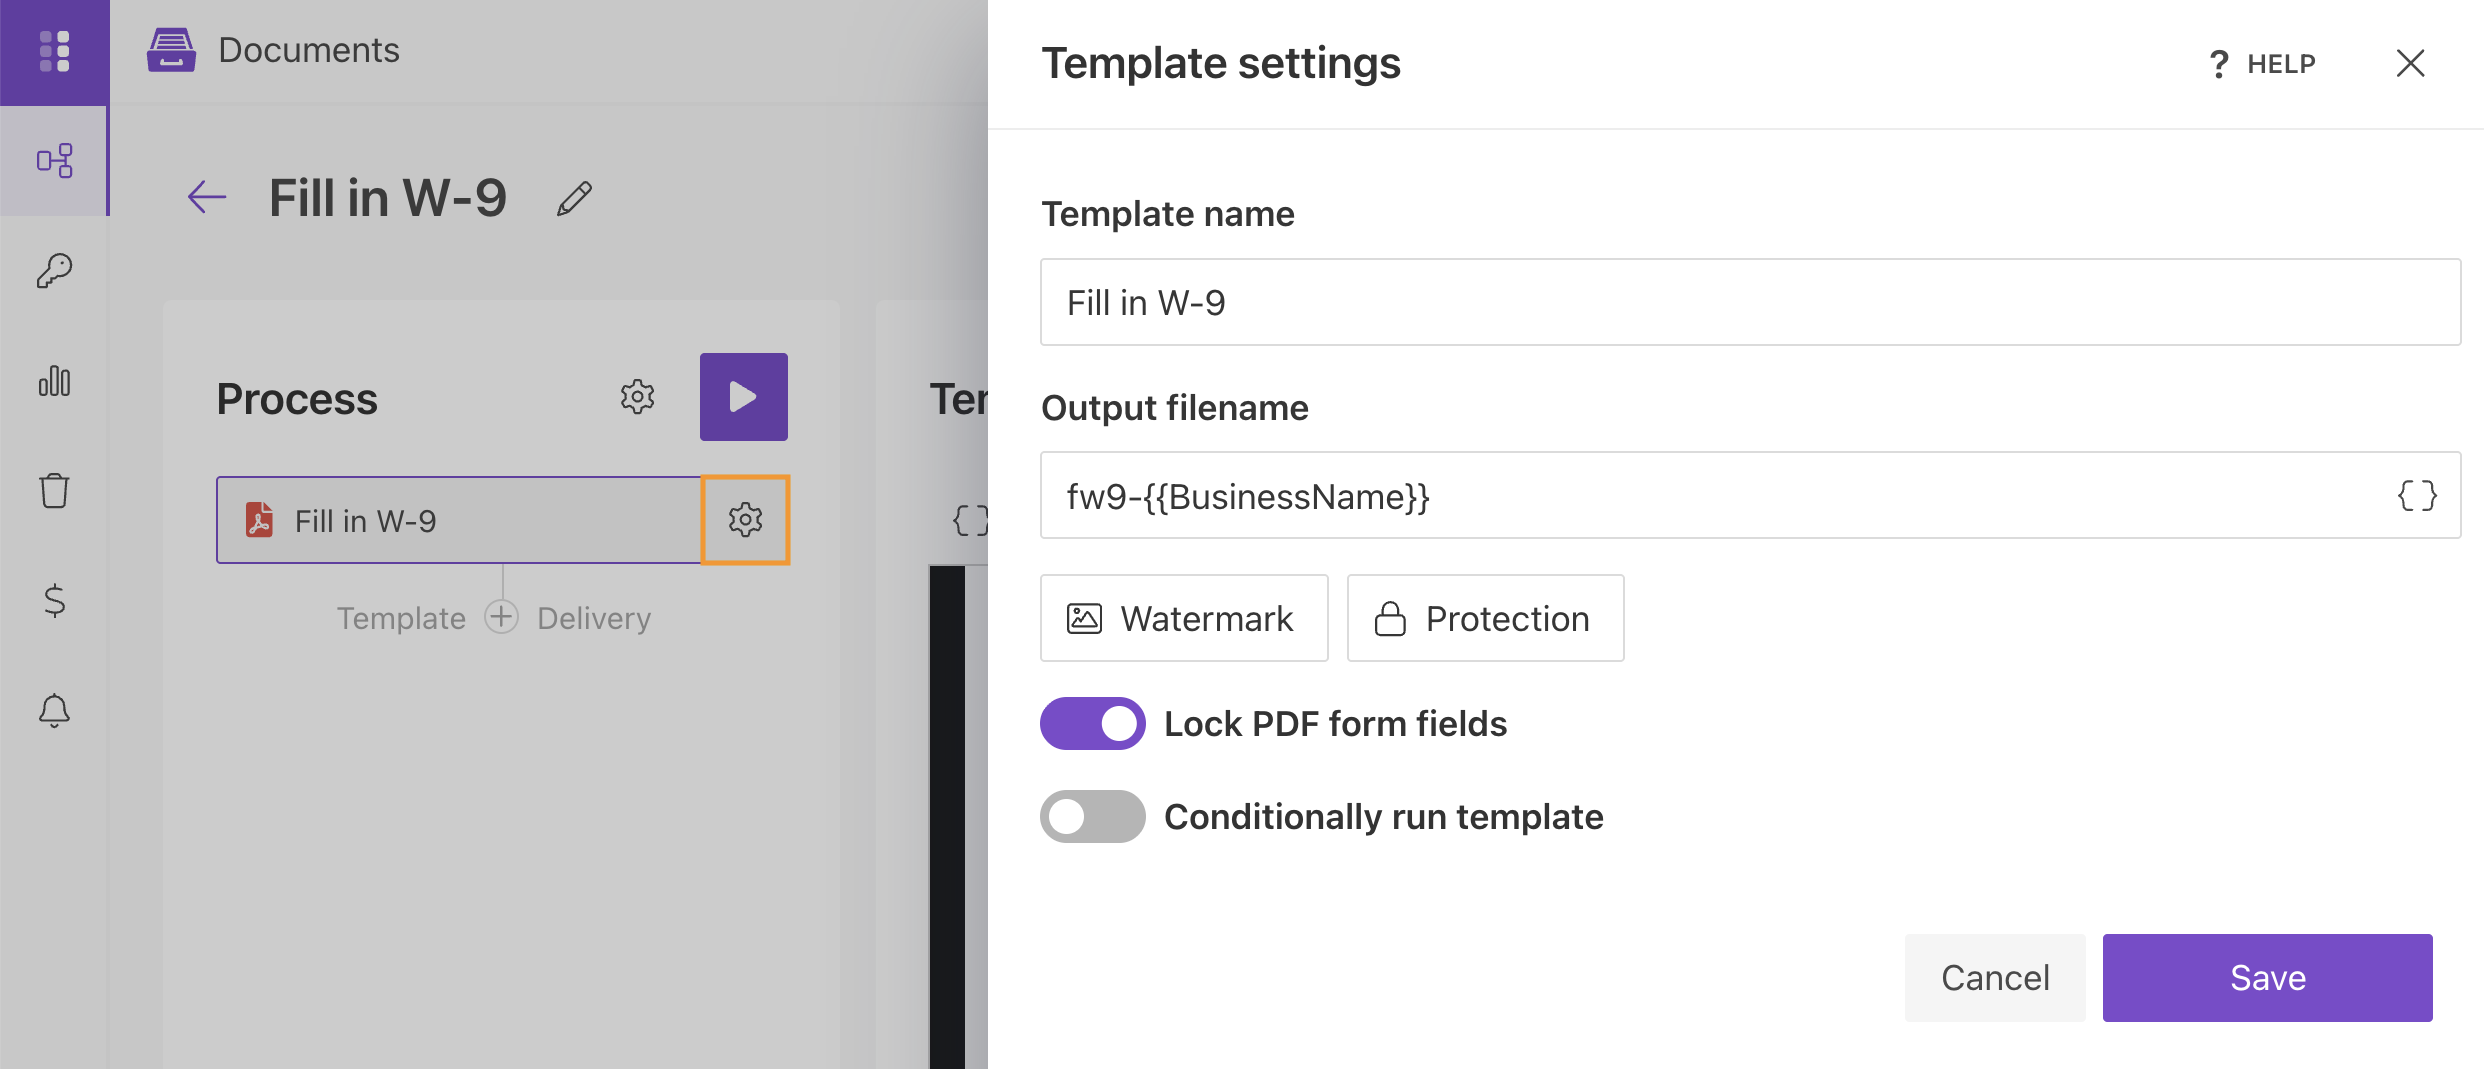
Template settings
Open the template settings to configure the output filename and PDF options:
Enter an Output filename for the generated document. You can insert values from your data using tokens.
Add a watermark if needed.
Protect the resulting PDF if you wish.
Use e-signature
To enable e-signing, add a DocuSign delivery or another delivery. In this step, you can insert dynamic values from both the PDF form and the web form connected to the process.
You can access this information through tokens in the drop-down list that appears when you click { }. The tokens are replaced with unique values for each submission.
The web form contains an email field. Insert the {{email}} token into the recipient’s email field.
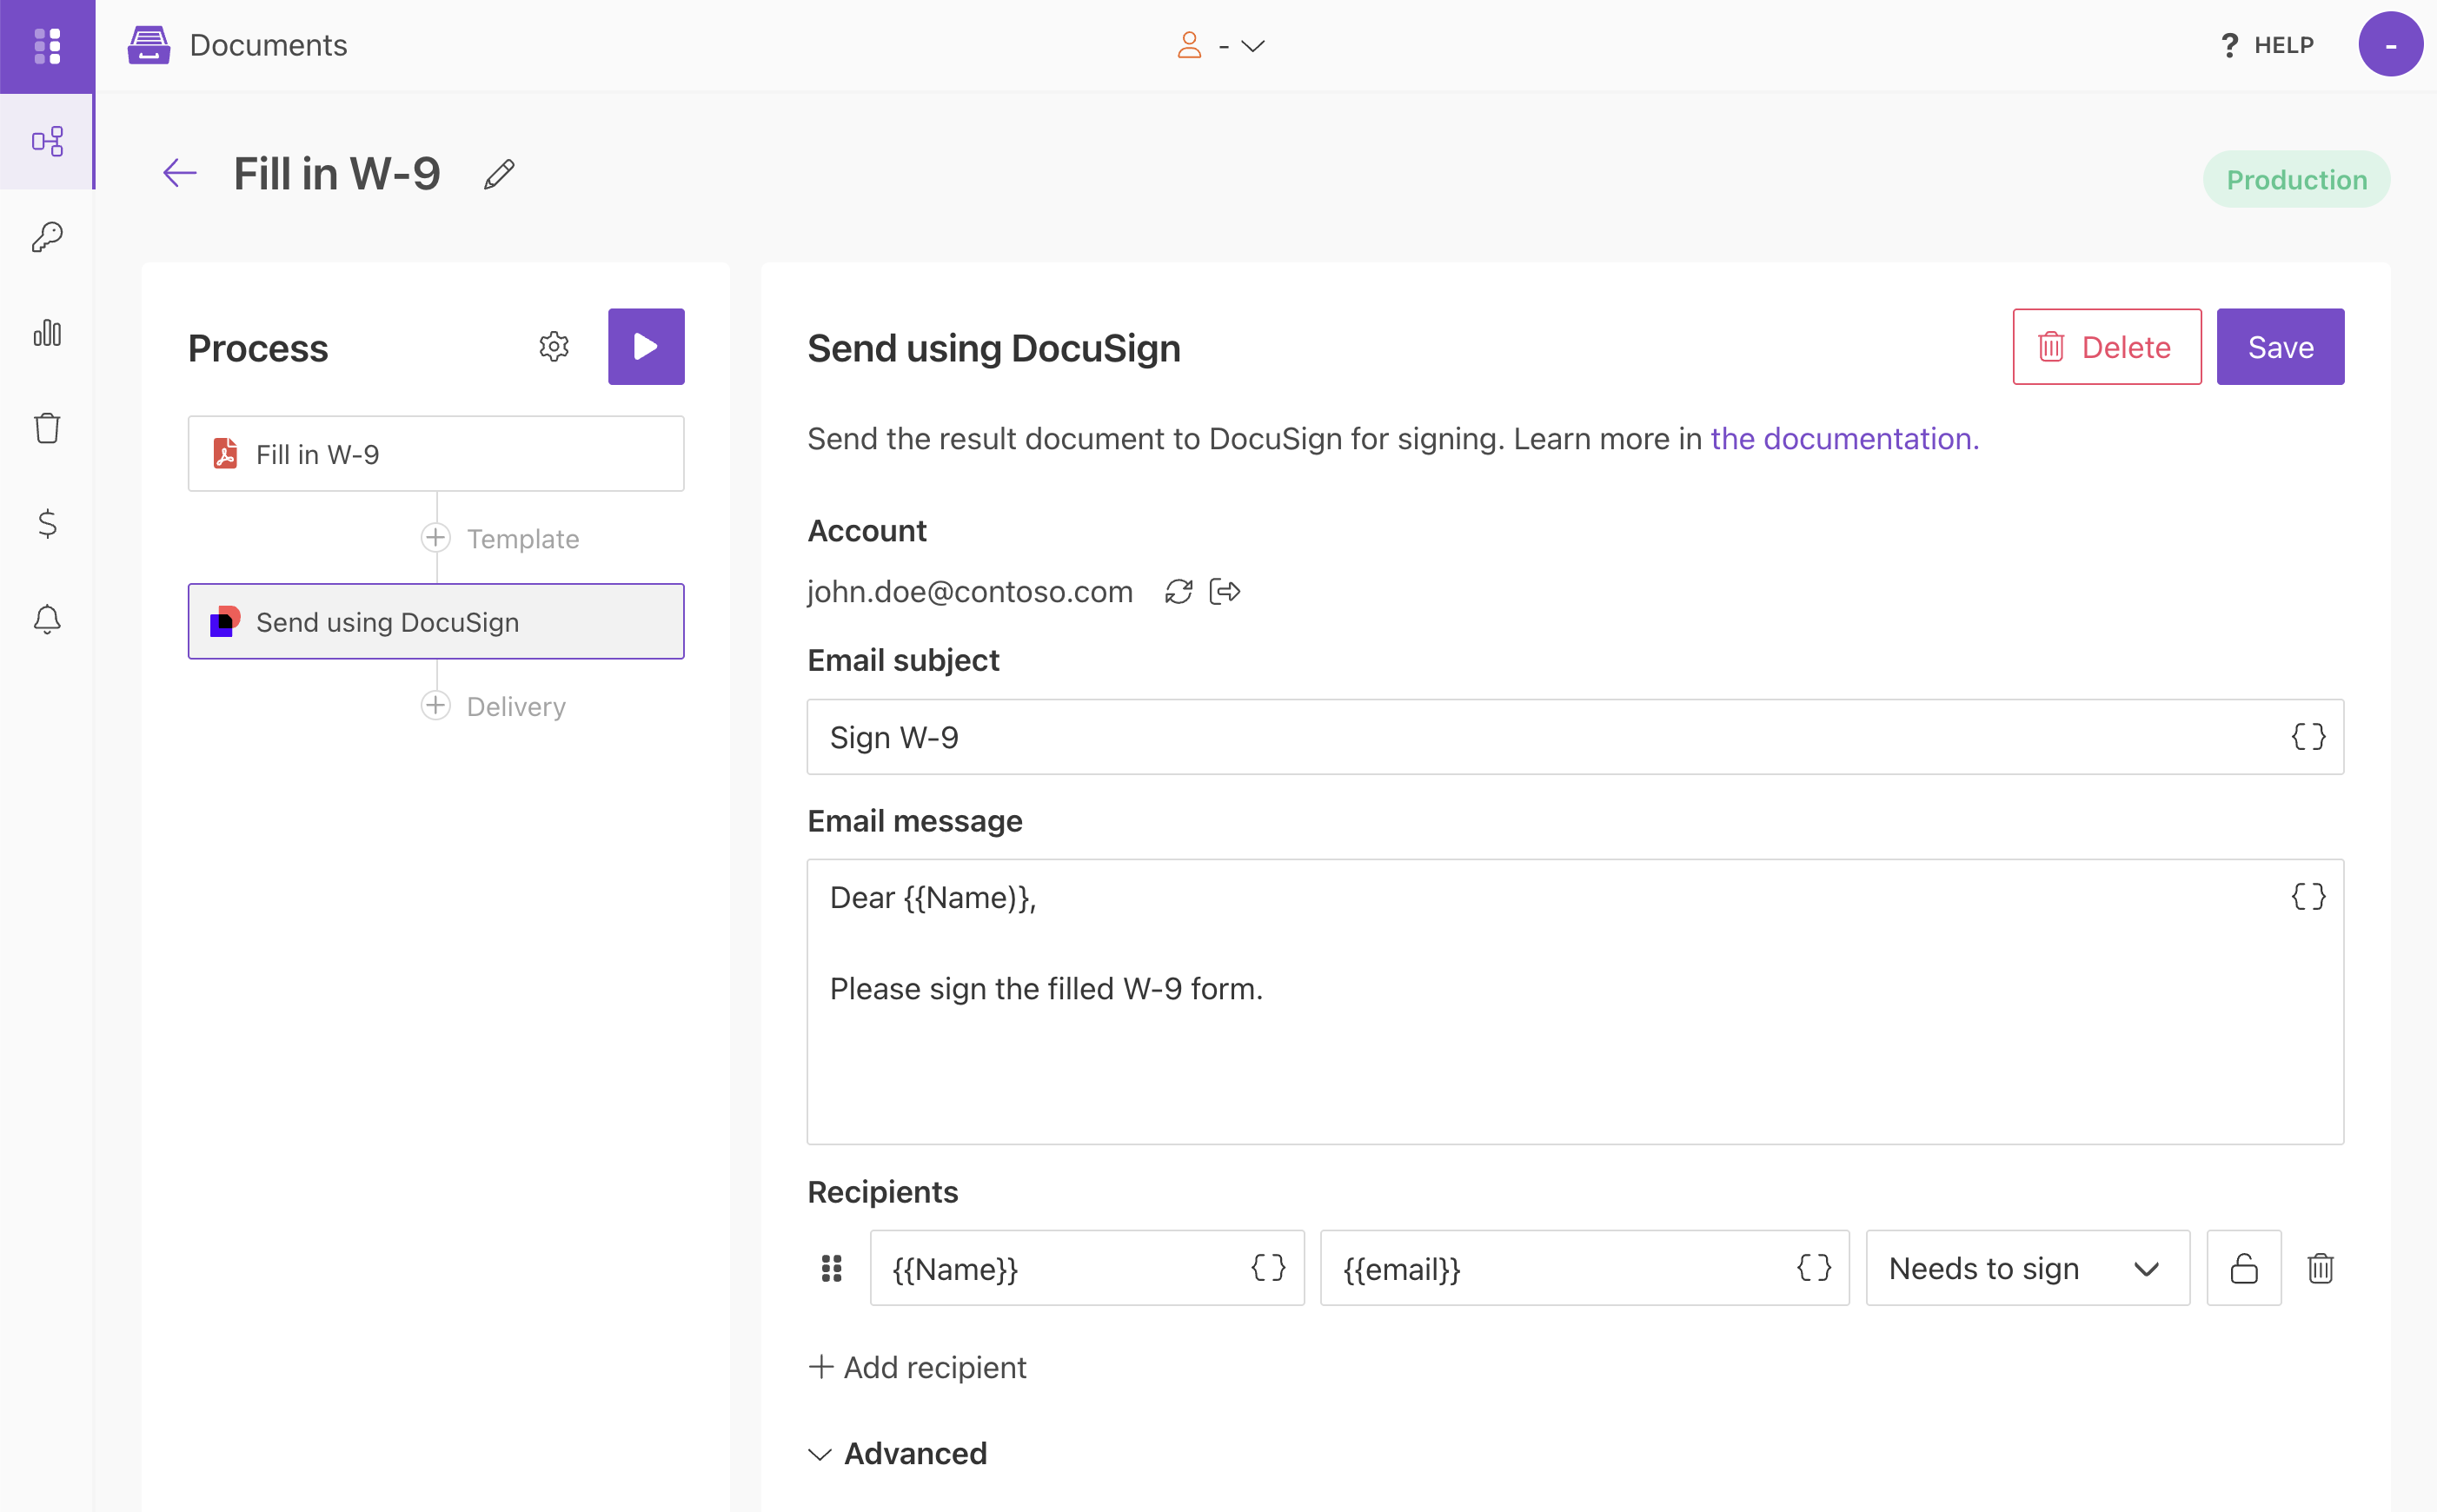
Click Save to save the delivery settings.
Use web form
To start the process when a Plumsail Form is submitted, go to Run process and select Web forms.
The rich web form mentioned earlier will be named after the process, with the suffix form added.
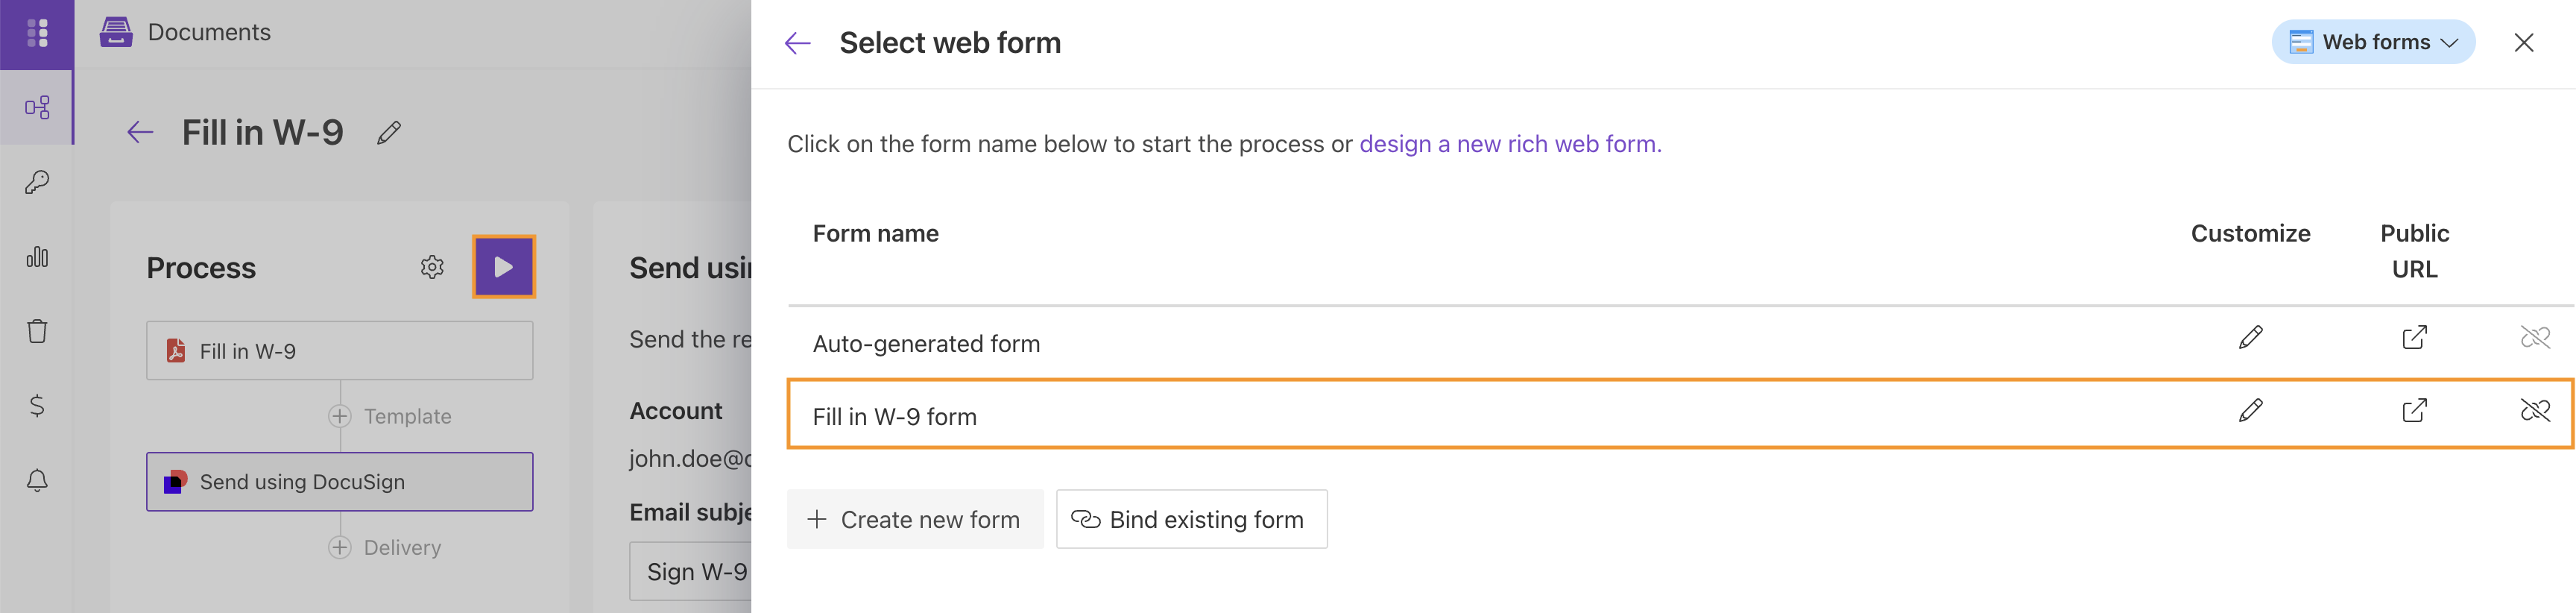
Click the Public URL icon next to the rich web form to open it. Copy the link from your browser’s address bar and share it with your contractors. You can also embed the form on your website using its widget.
Submitting the completed form starts the process and generates a PDF file. The process then sends the contractors a link to sign the W-9 form in DocuSign. The signed documents will be available in your DocuSign account.