Track DocuSign envelope status, save documents to SharePoint, and update file properties in Power Automate
Suppose you generate contracts, send them to DocuSign for signing, and save the signed files to a SharePoint library. When the envelope status changes, you also want to update the matching file in SharePoint and send a notification.
The DocuSign connector for Power Automate does not return enough information to match an envelope document to the correct file in SharePoint. Because of that, you cannot reliably update the right file in the library.
It also makes it difficult to send clear notifications about which document was completed, declined, or voided.
You can work around this limitation with Plumsail Documents and two Power Automate flows:
Plumsail Documents generates the contract and sends it to DocuSign.
The first flow saves envelope documents to a SharePoint library.
The second flow tracks envelope status changes and updates the matching file properties in SharePoint.
Below is the basic flow structure used in this example:
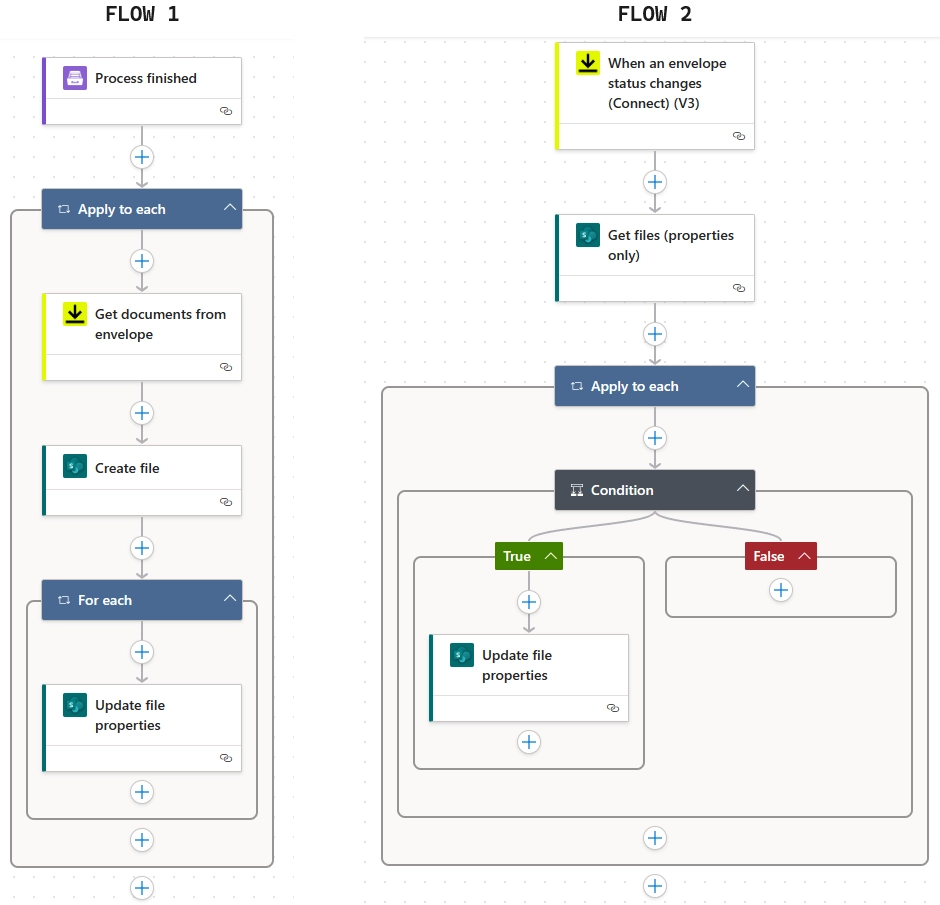
First flow: Save envelope documents to SharePoint
This first flow allows you to automatically upload DocuSign documents to a designated SharePoint library using Plumsail.
Process finished trigger
Use the Plumsail Documents Process finished trigger. It runs when the document generation process is completed.
Create Plumsail Documents process
Log in to or register a Plumsail account, and navigate to the Processes section.
Click Add process and select one of the available starting options.
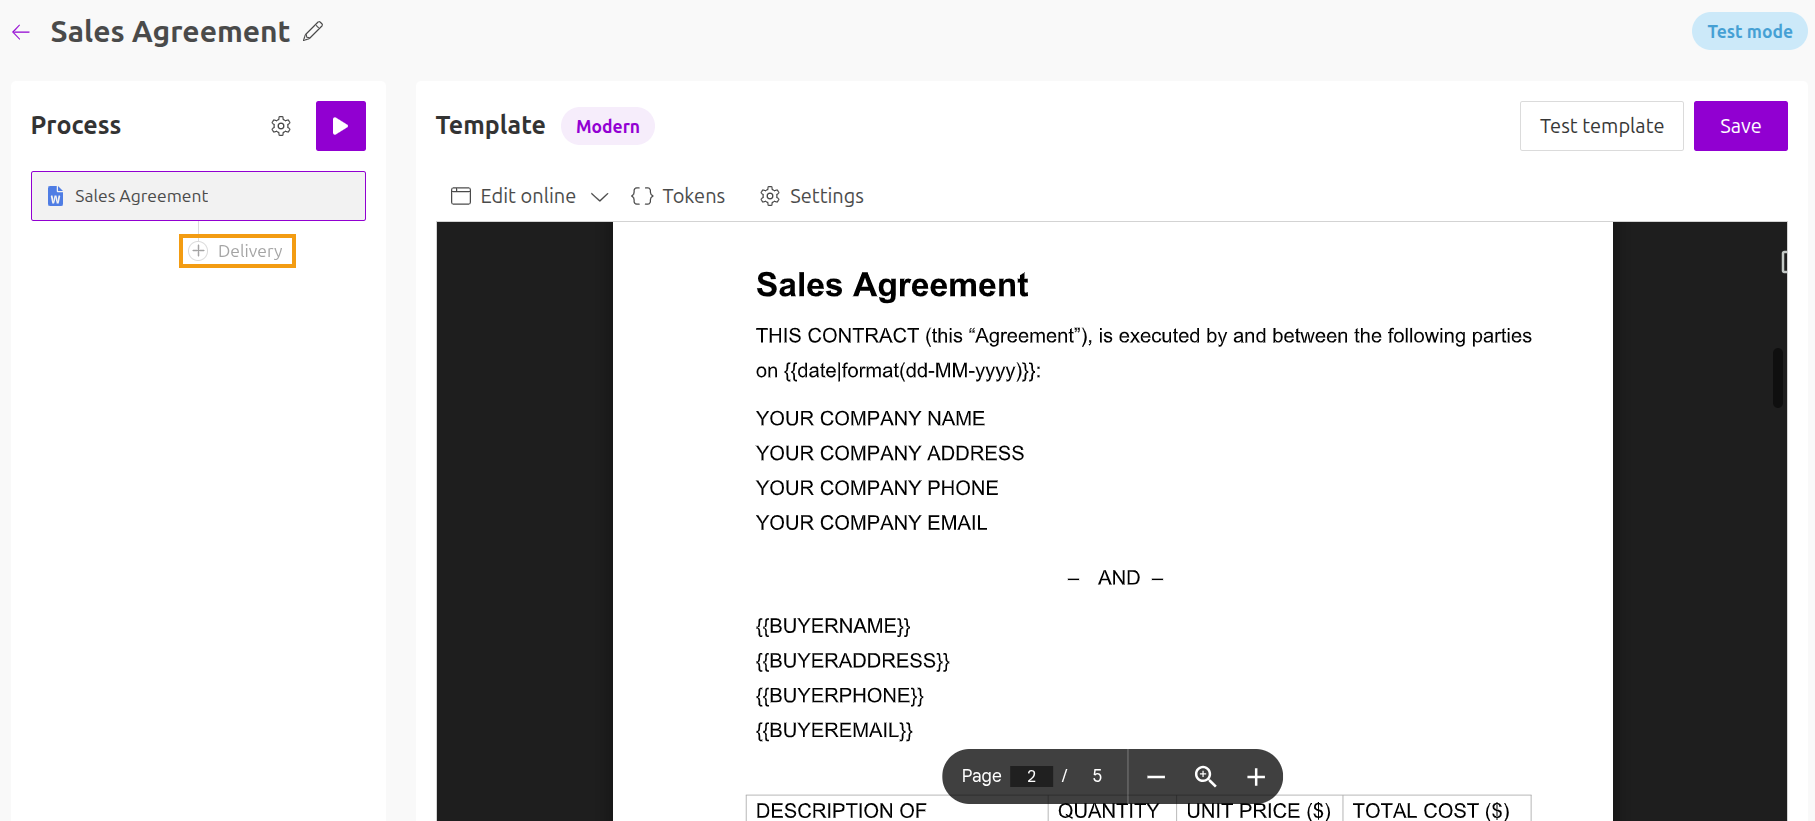
For now, select Premade template, and then search for our Sales agreement example.
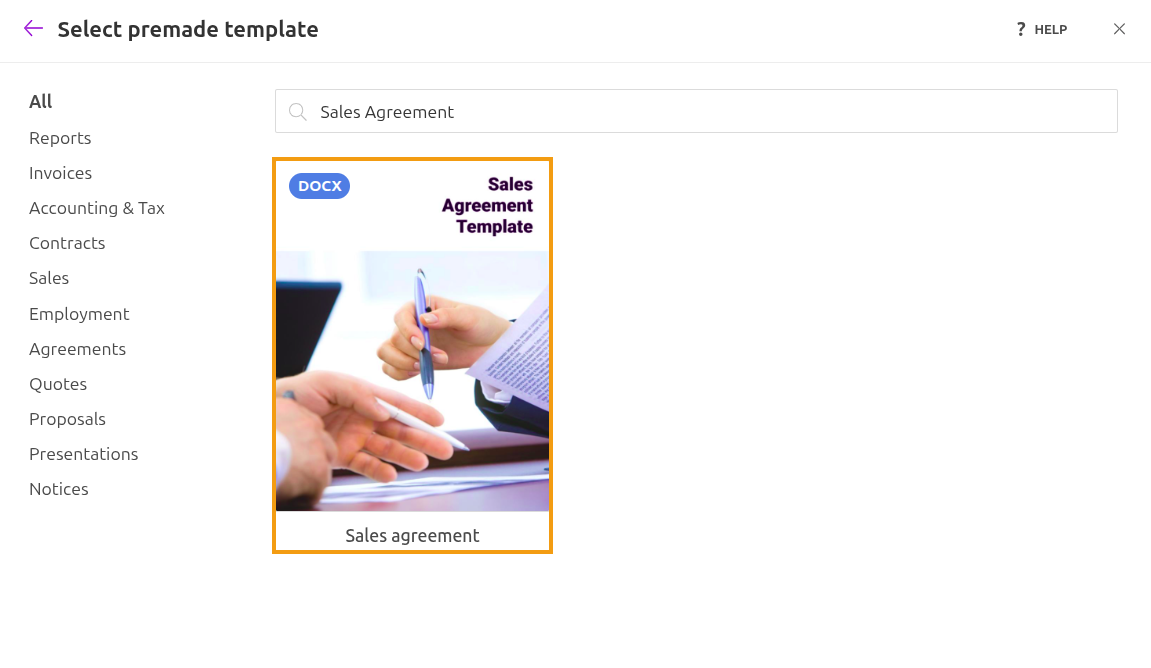
This template lets you fill in customer details and contract terms dynamically.
You can use a different template or customize this one.
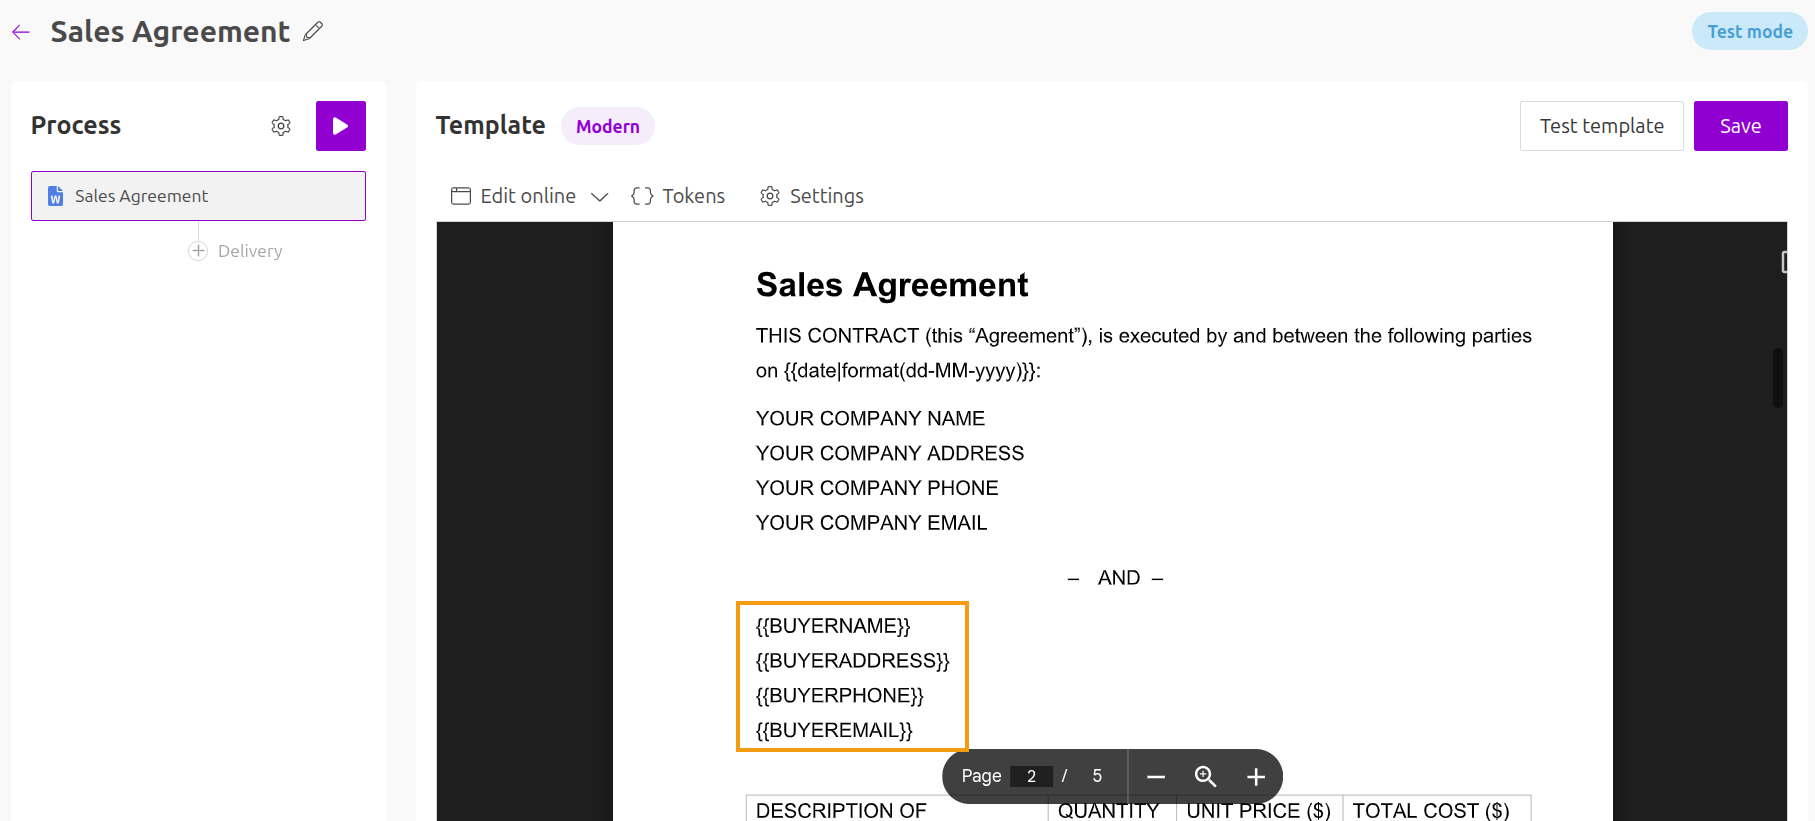
For example, if your client’s name is included in a different variable than {{BUYERNAME}}, you can modify your template to use another reference, like {{customerName}}.
We won’t go into much detail on how Plumsail Documents templating syntax works. You can learn it from the documentation.
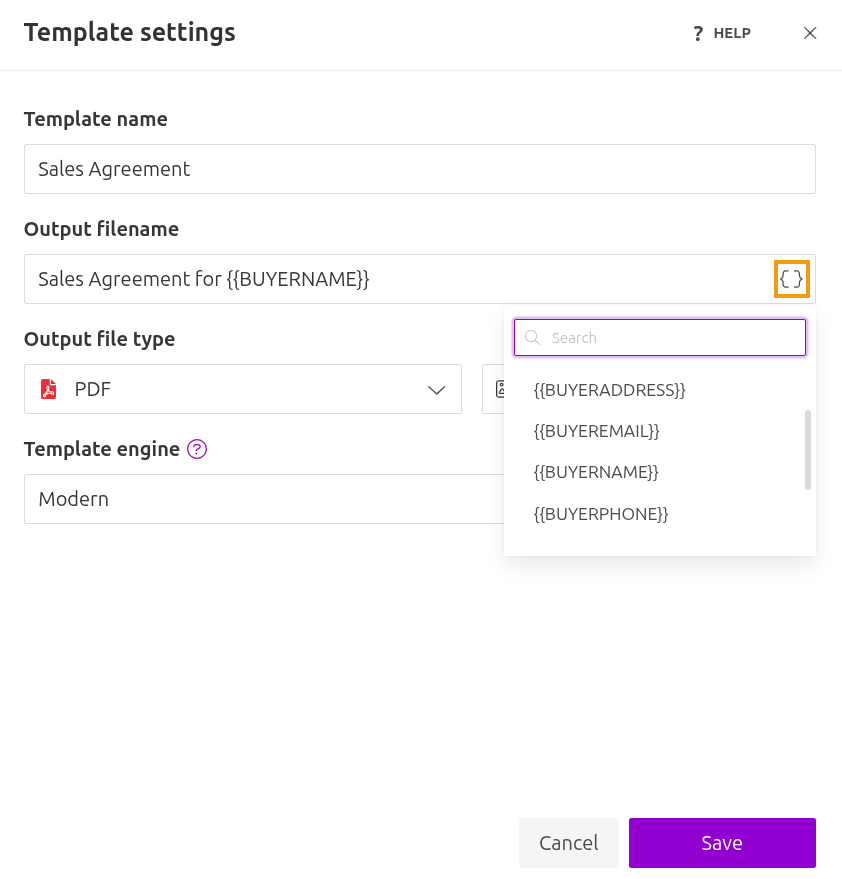
Configure template settings
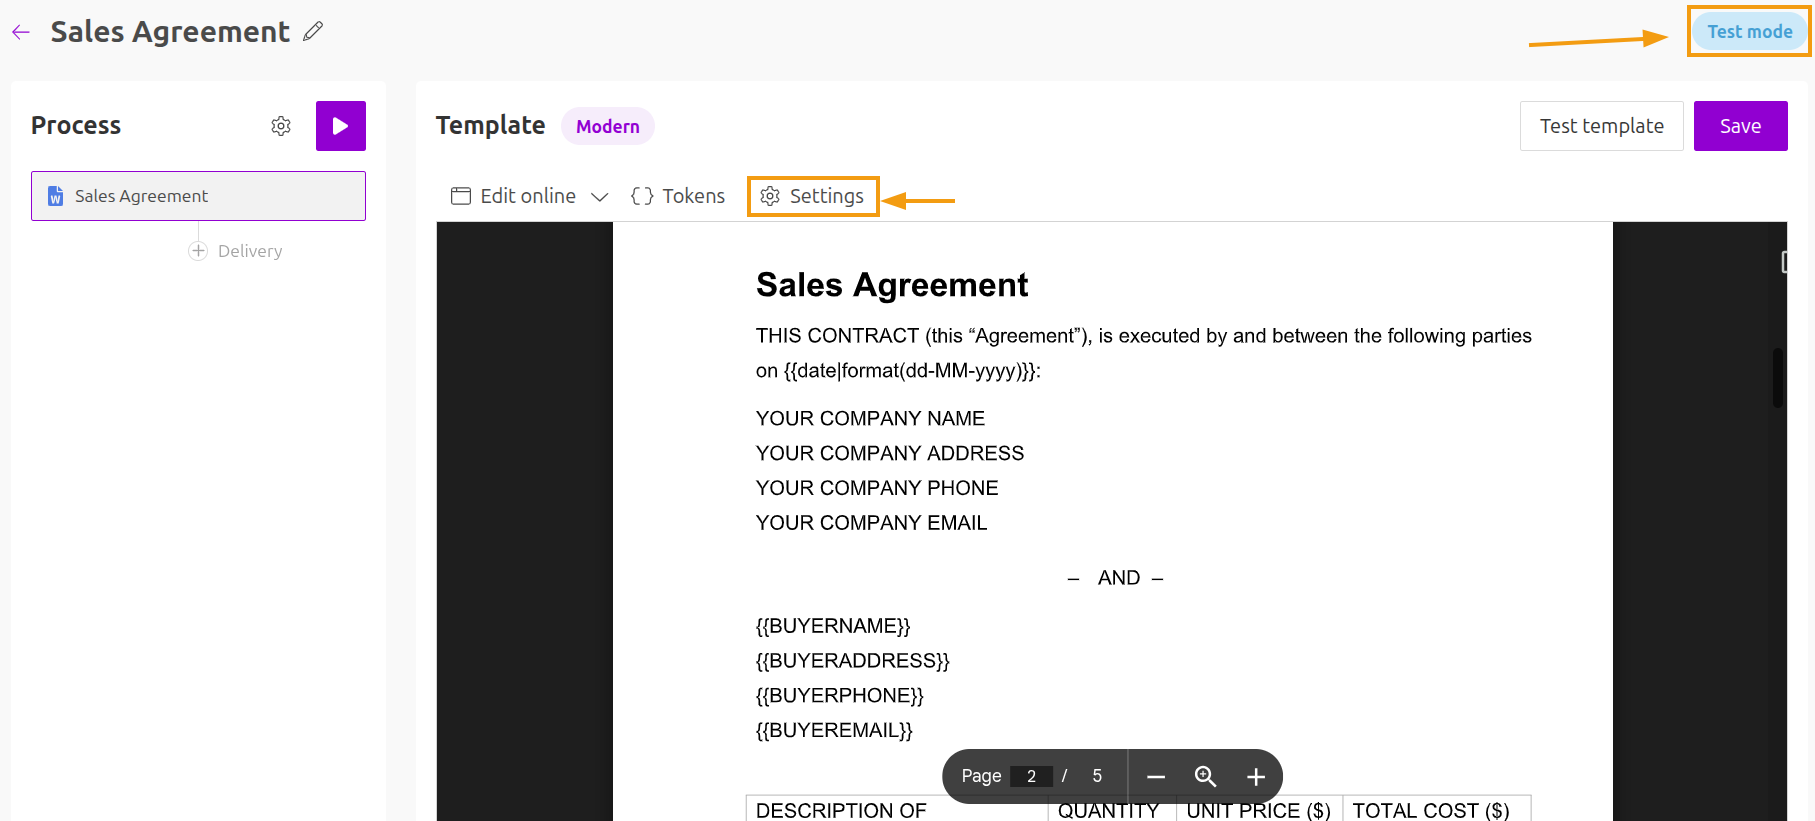
In the editor, configure the template settings.
For example, the process mode: during the initial setup process, you can keep it in Test mode. However, once everything is ready, you should switch the mode to Production to remove the watermark from the resulting files.
In the Template settings panel, choose the output format: PDF or DOCX. We will select PDF for this example. The template settings also offer more advanced options, such as adding your own watermark or protecting your PDF.
You can also use {{placeholders}}, such as the customer’s name, in the output filename to make your files easier to identify later.
Connect DocuSign delivery
Add a DocuSign delivery. You can add more deliveries later if needed.
Select DocuSign from the list of deliveries, and then connect to your account. Then configure the delivery settings, such as notification content and recipient roles.
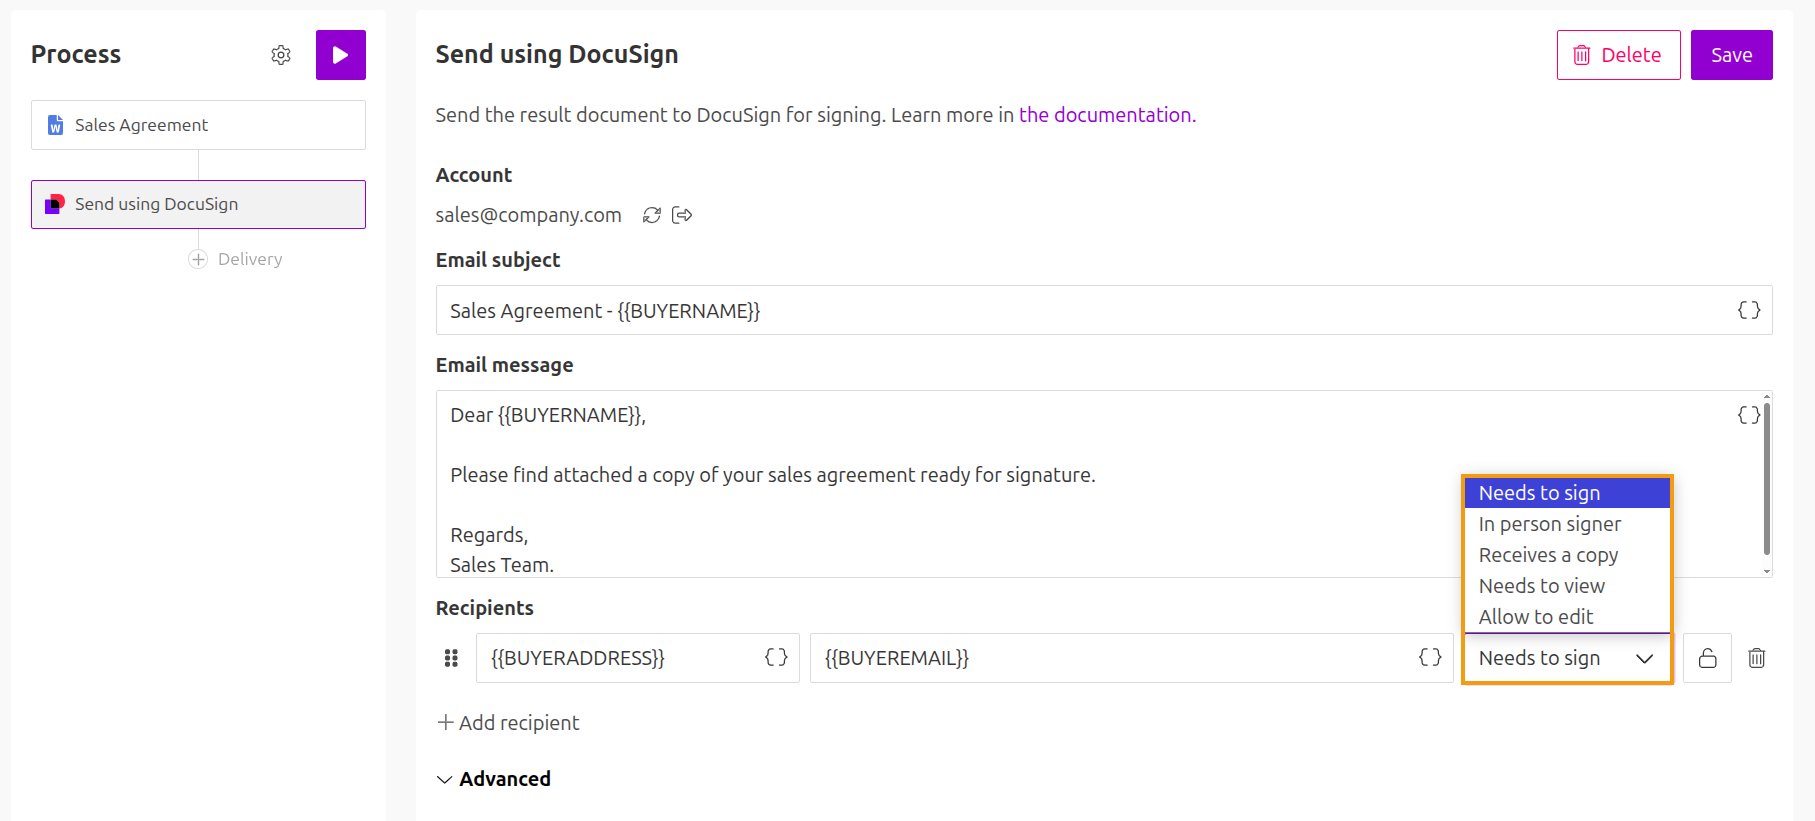
More details in the DocuSign delivery documentation.
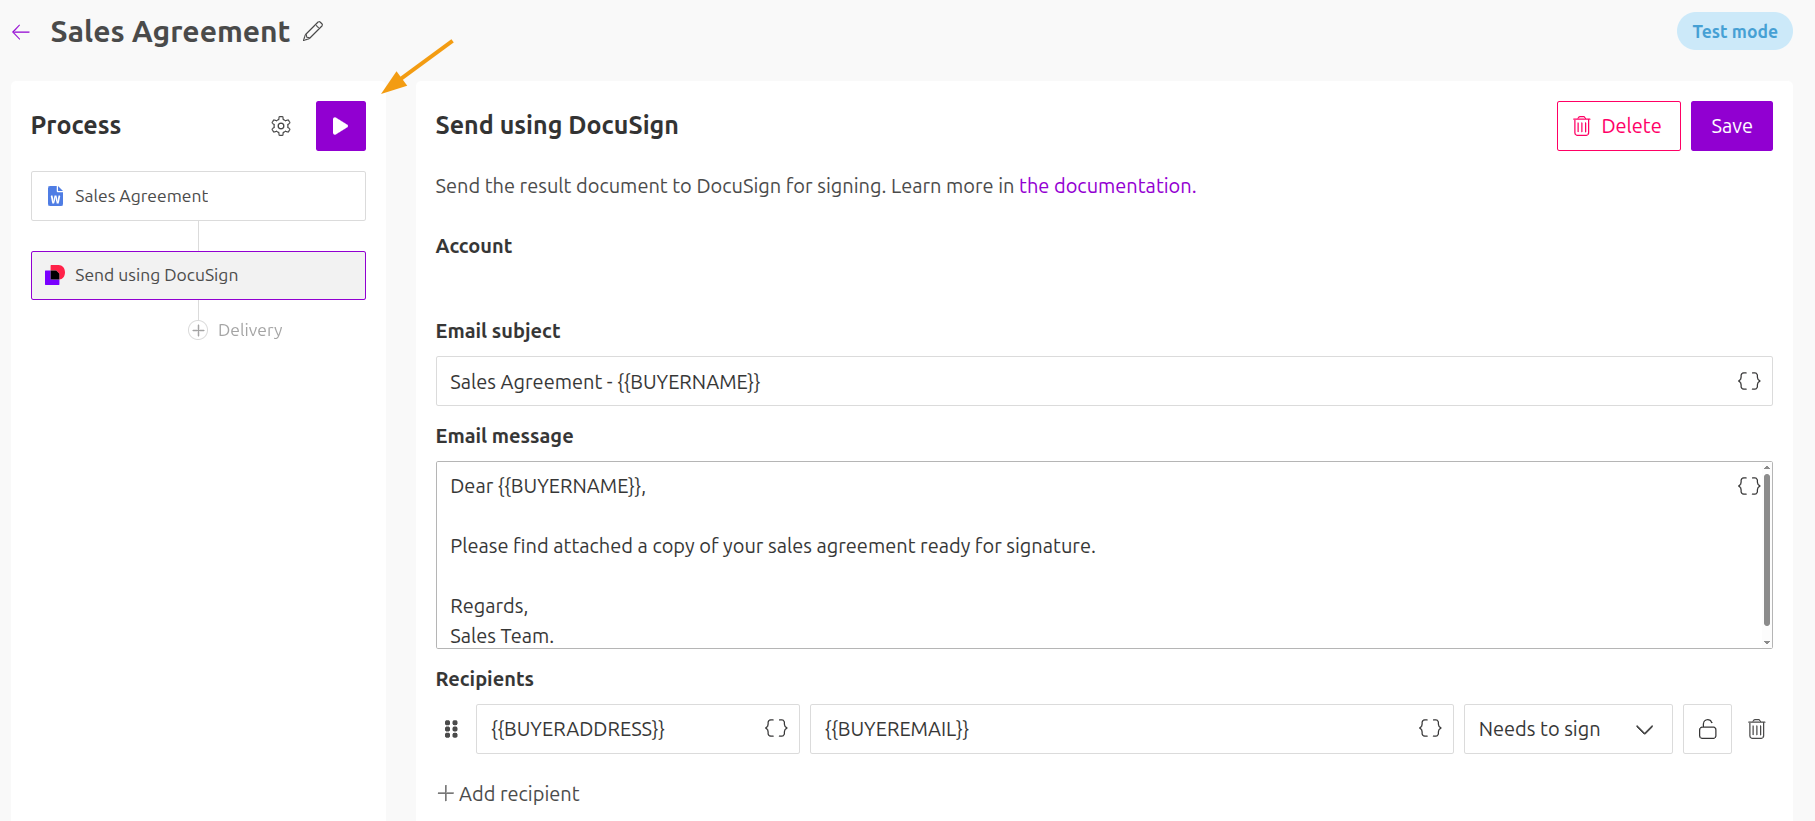
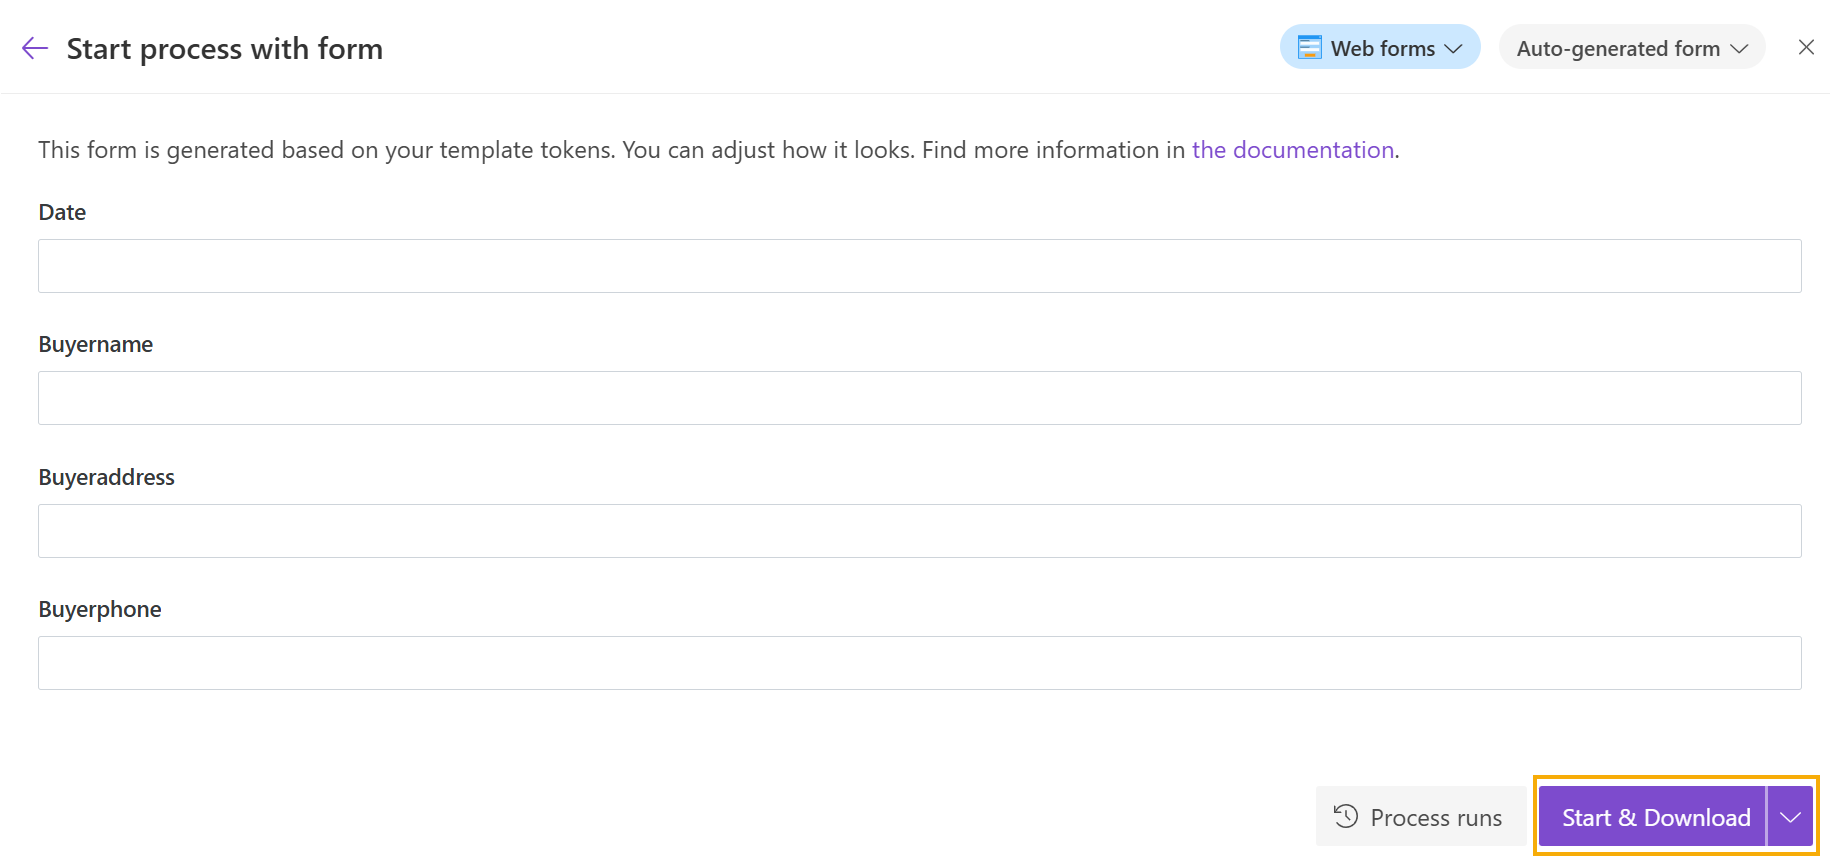
Run Plumsail Documents process
When the setup is ready, run a test.
You can choose from several trigger options.
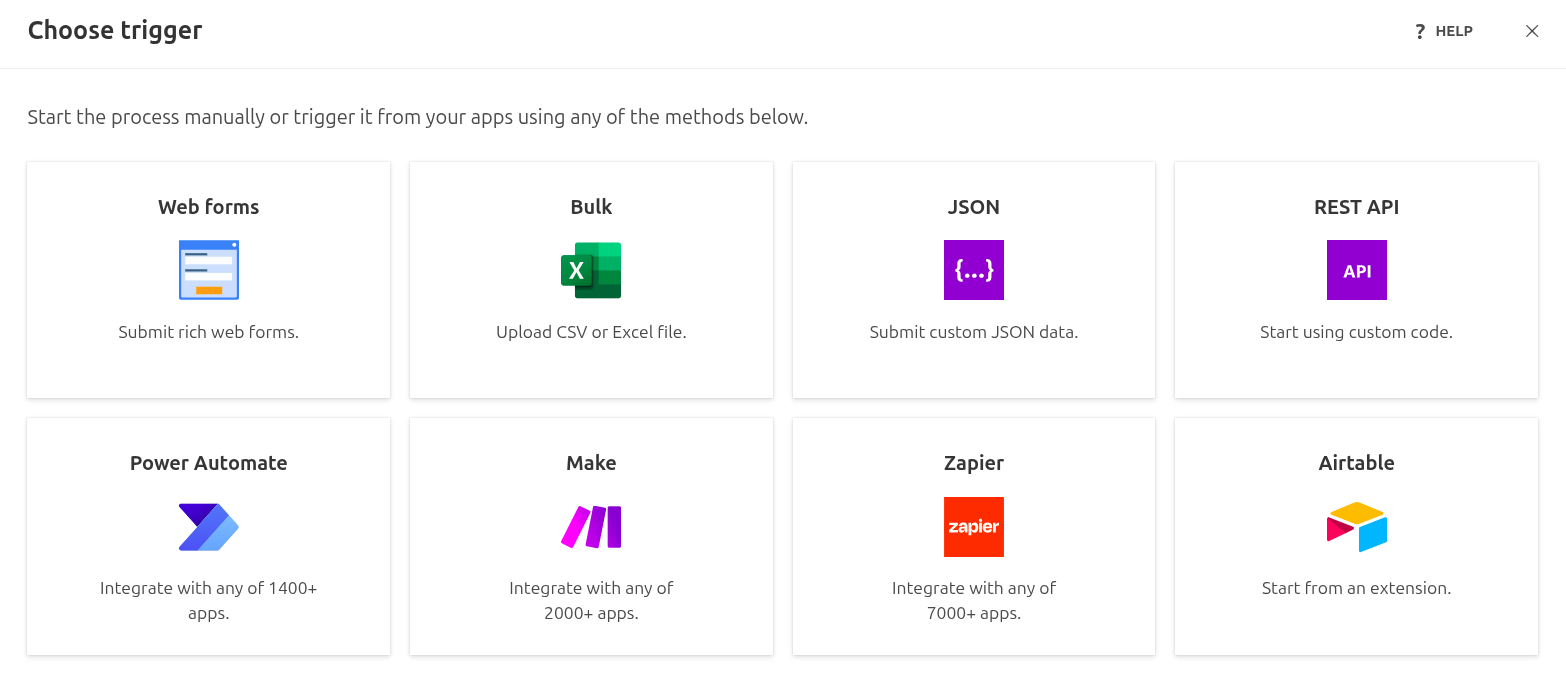
In this case, to keep things simple, we’re using the auto-generated form from the Web forms option.
Once you complete all information, just press Start & Download to start the process.
Hint
Launch the process using Power Automate or Zapier to populate your custom data from third systems into documents. See the corresponding tabs on the Start process step. They include ready-to-go workflow templates.
Now create the first Power Automate flow.
Add Process finished trigger
Go to your flows in Power Automate. Add a new Automated cloud flow. Find and select Plumsail Documents trigger Process finished.
If this is your first time using Plumsail Documents in Power Automate, you’ll be asked to create a connection:
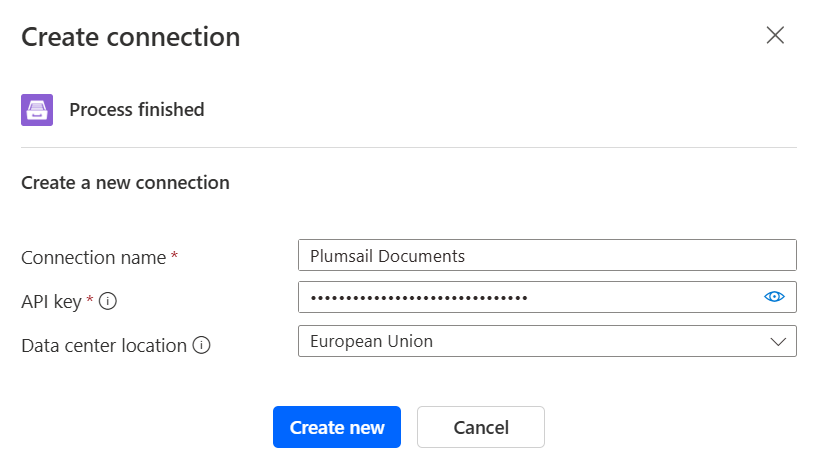
Assign any name to the connection. As for an API key, you need to create it inside your Plumsail account.
Select a process you’d like to associate with this Flow from the dropdown.

The trigger is set.
Get documents from envelope and save them to SharePoint
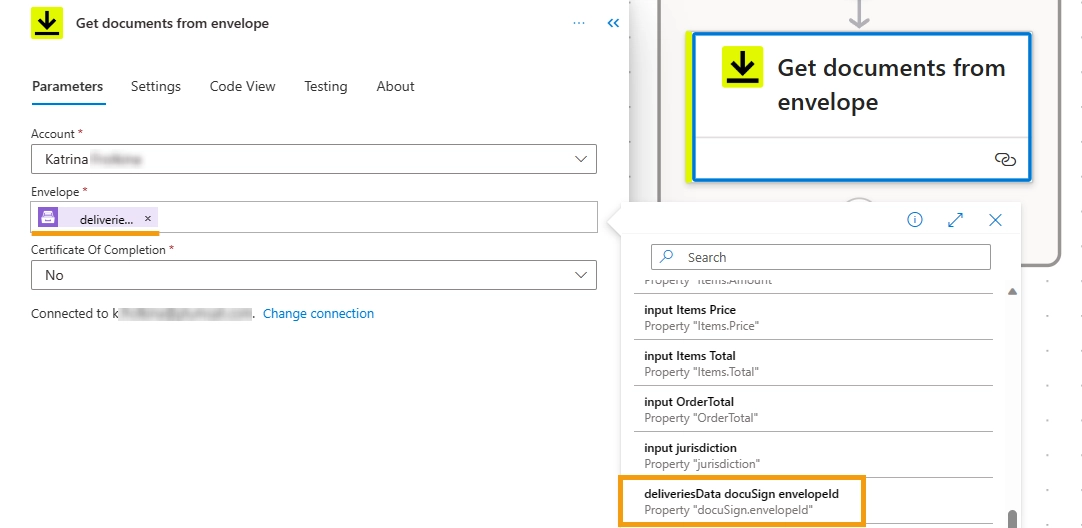
Add the DocuSign Get documents from envelope action.
If this is your first time using DocuSign in Power Automate, you’ll be asked to sign into your DocuSign account from Power Automate. Once signed in, proceed to configure the action.
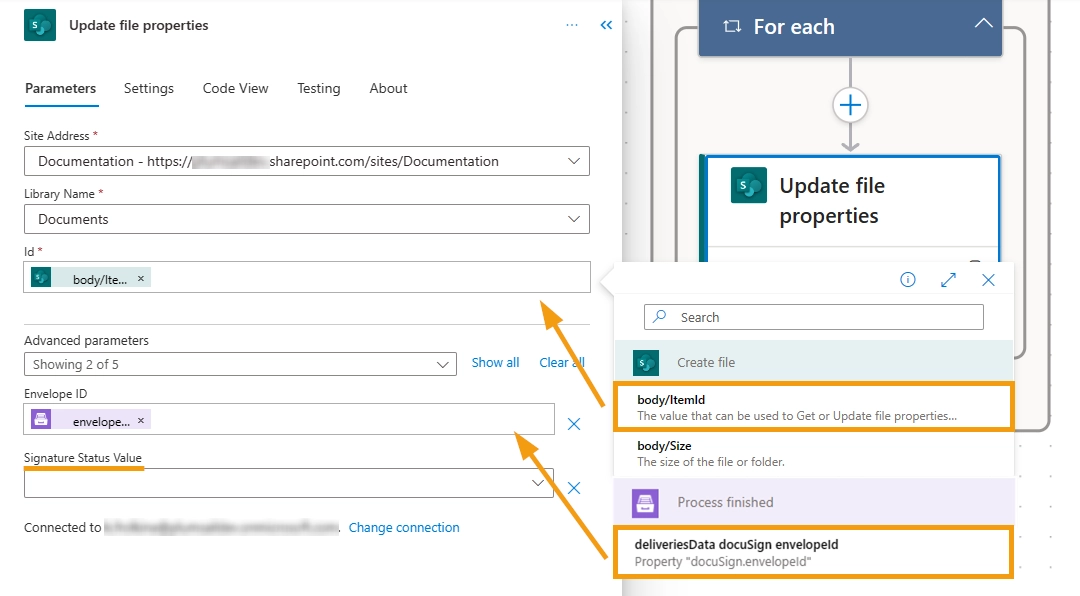
For Envelope, use the envelope ID returned by the Plumsail trigger: deliveriesData docuSign envelopId.
This value contains the IDs of envelopes created by the DocuSign delivery in Plumsail Documents.
Power Automate adds an Apply to each loop automatically. Add the next steps inside that loop.
The next step is to save documents to a SharePoint library. We use the action Create file from the SharePoint connector in Power Automate.

For File Name, use the fileName value from the Plumsail trigger and add the file extension.
Since we selected ‘PDF’ as the ‘Output type’ when setting up the process in Plumsail Documents, we type .pdf.
If you decide to keep the file in DOCX, then type .docx.
For File Content, we select dynamic output from the DocuSign Get documents from envelope action.
This saves each generated document to the selected SharePoint library.
Store Envelope ID in the SharePoint library
The last step in this flow is the SharePoint Update file properties action.
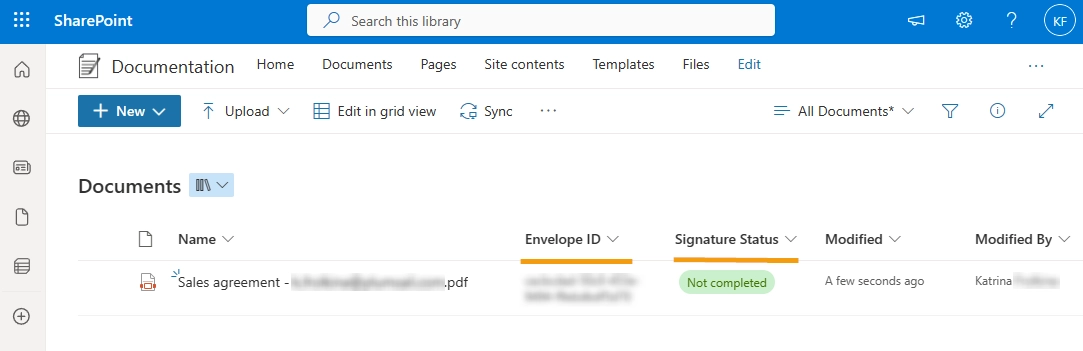
Before you continue, add the Envelope ID and Signature Status Value columns to the SharePoint library. Use Update file properties to store the DocuSign envelope ID in the SharePoint file properties.
The second flow uses this value to find the matching file and update its status. Leave Signature Status Value blank. In the SharePoint column settings, set its default value to Not completed.
After the process is initiated, the document will be emailed to the signee and concurrently saved to the SharePoint library.
Second flow: Sync envelope status to SharePoint
The second flow runs when the DocuSign envelope status changes. In this example, it updates the Signature Status Value field in SharePoint when the document is completed.
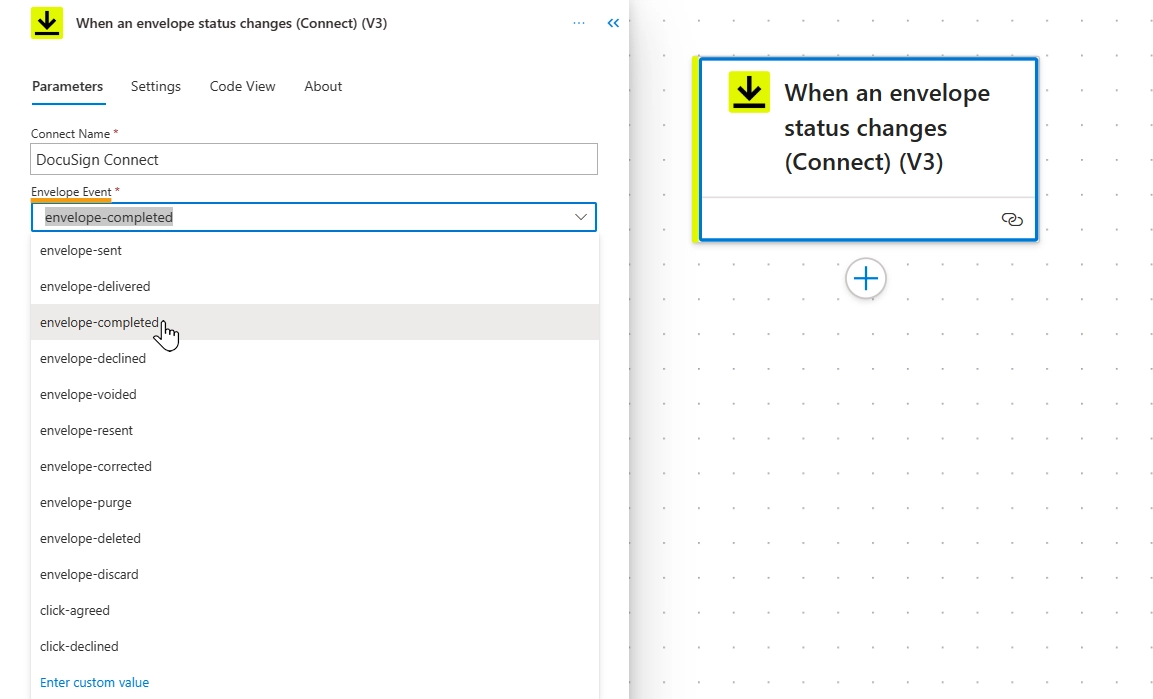
Create an Automated cloud flow and add the DocuSign When an envelope status changes trigger.
Enter any connection name. For Envelope Event, select envelope-completed. You can track other envelope statuses the same way.
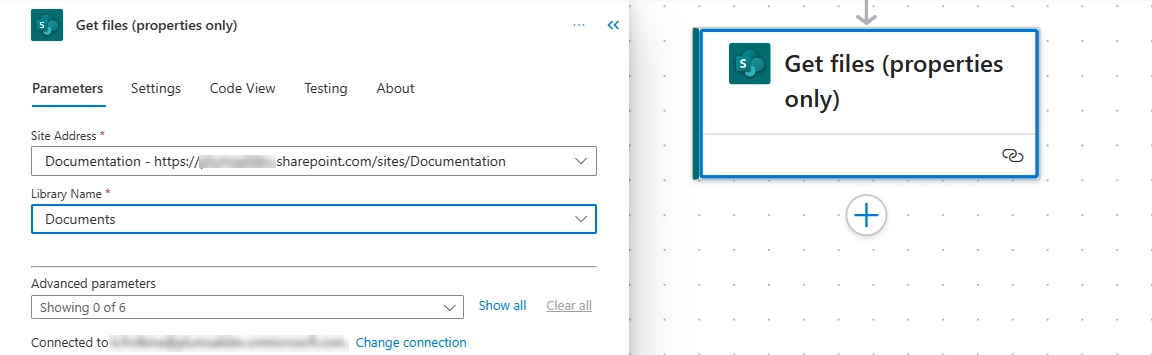
Get files (properties only)
Next, add a SharePoint action Get files (properties only). Select your SharePoint site and library.
Condition control
Add a Condition control to compare the DocuSign Envelope ID with the SharePoint Envelope ID.
This lets the flow find the matching file and update its status.
Power Automate adds an Apply to each loop automatically so the flow can check each SharePoint item.

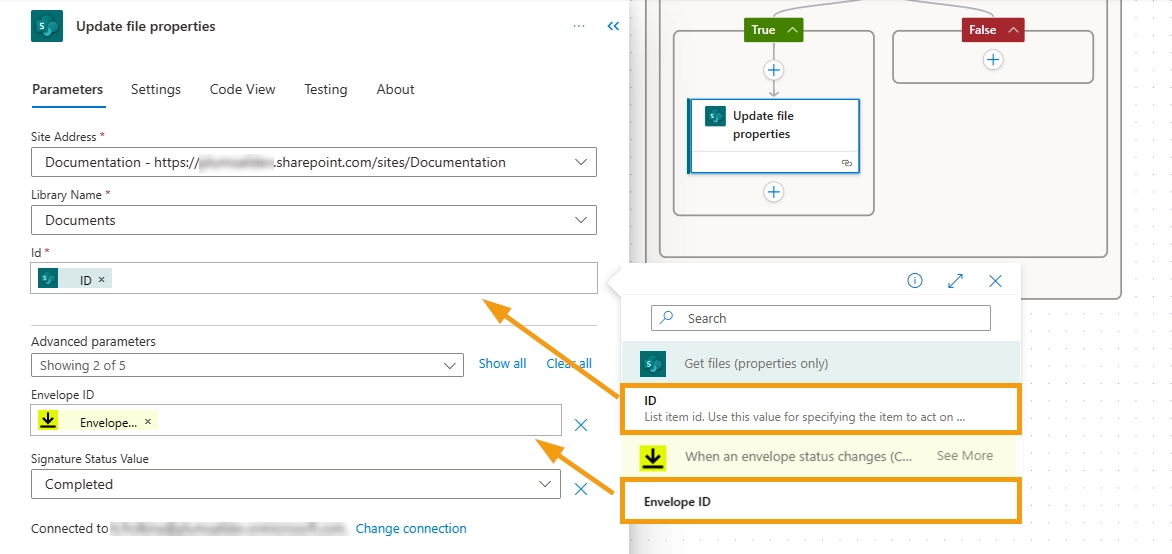
In the True branch, add the SharePoint Update file properties action. Leave the False branch empty.
Select the same SharePoint site and library. For ID, use the ID value from Get files (properties only).
Then use the Envelope ID value from the DocuSign When an envelope status changes trigger, and set Signature Status Value to Completed.
Upon the signing of the document, the Signature Status value in our SharePoint library will be automatically updated to ‘Completed’.

This setup is enough to save envelope documents and keep their status updated in SharePoint. You can extend it further by adding notifications that include the file name instead of a generic message such as ‘An envelope was signed’.
If you have questions or ideas, join our community.