Convert Microsoft Forms responses to Word or PDF
This article shows how to generate Word or PDF documents from Microsoft Forms responses using Plumsail Documents and Power Automate. You can use this approach to automate certificates, applications, requests, and other documents.
To follow the steps in this article, you need these accounts:
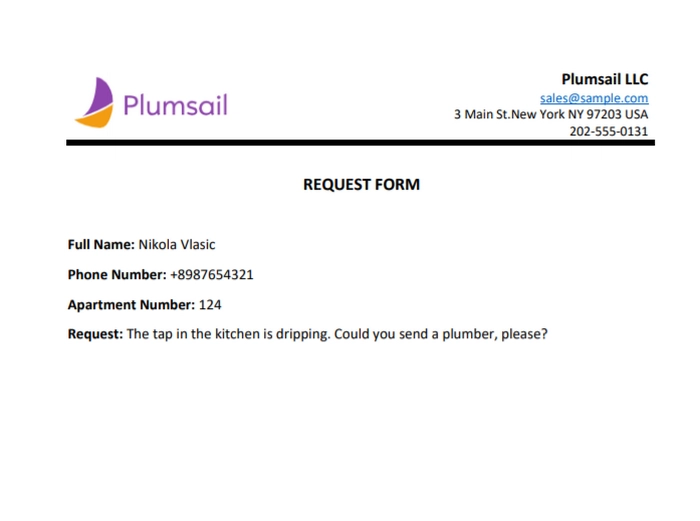
This example uses a DOCX template, generates a PDF file, and saves the result automatically.
If your form includes image uploads, see advanced case.
You can also watch the video below for an overview of the process.
Create Microsoft Form
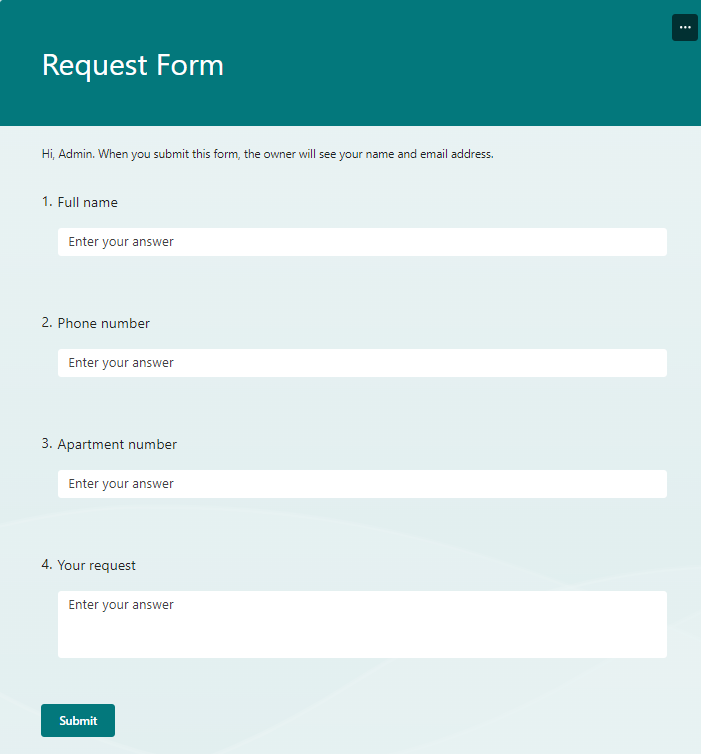
First, create a Microsoft Form. In this example, we use a guest request form and generate a document from its submission.
If you are new to Microsoft Forms, see how to create a form.
You can also use the form from this example. After you sign in to Microsoft Forms, click this link to duplicate the form.
Configure Plumsail Documents Process
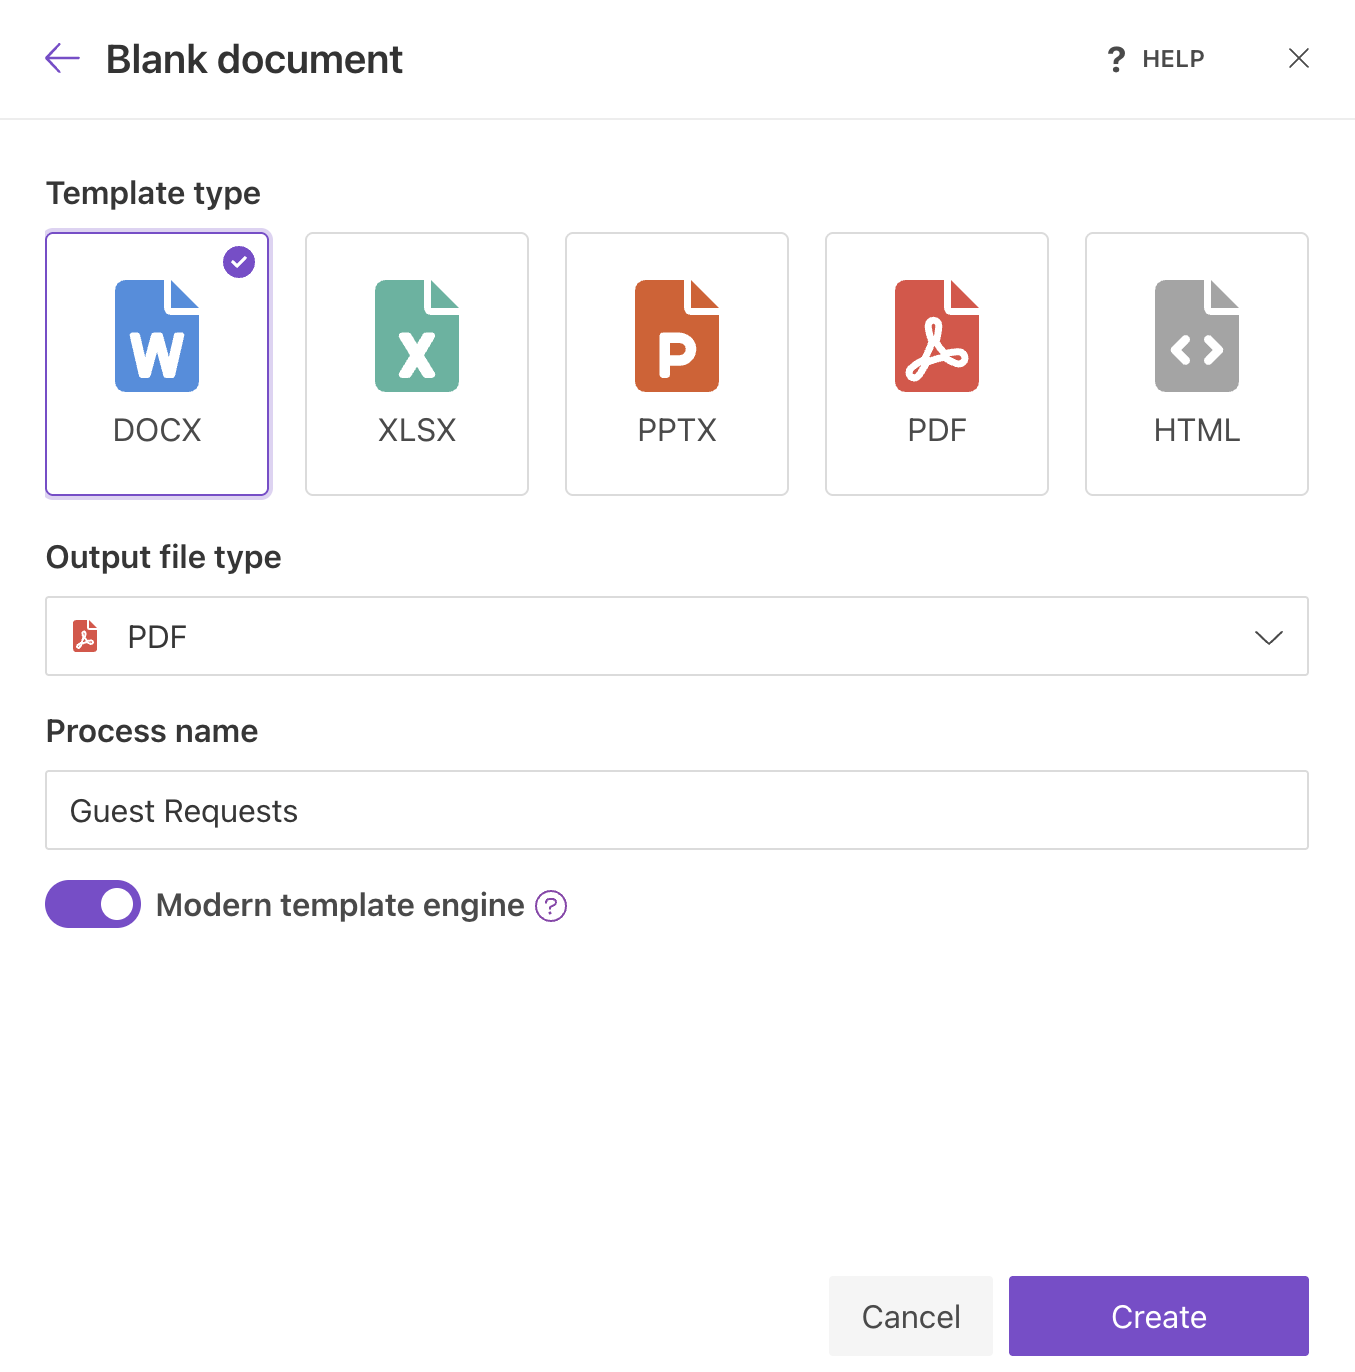
Next, go to the Processes section in your Plumsail account and click Add process.
In the list of templates, choose Blank document, select DOCX as the template type, and set the process name.
Configure Word template
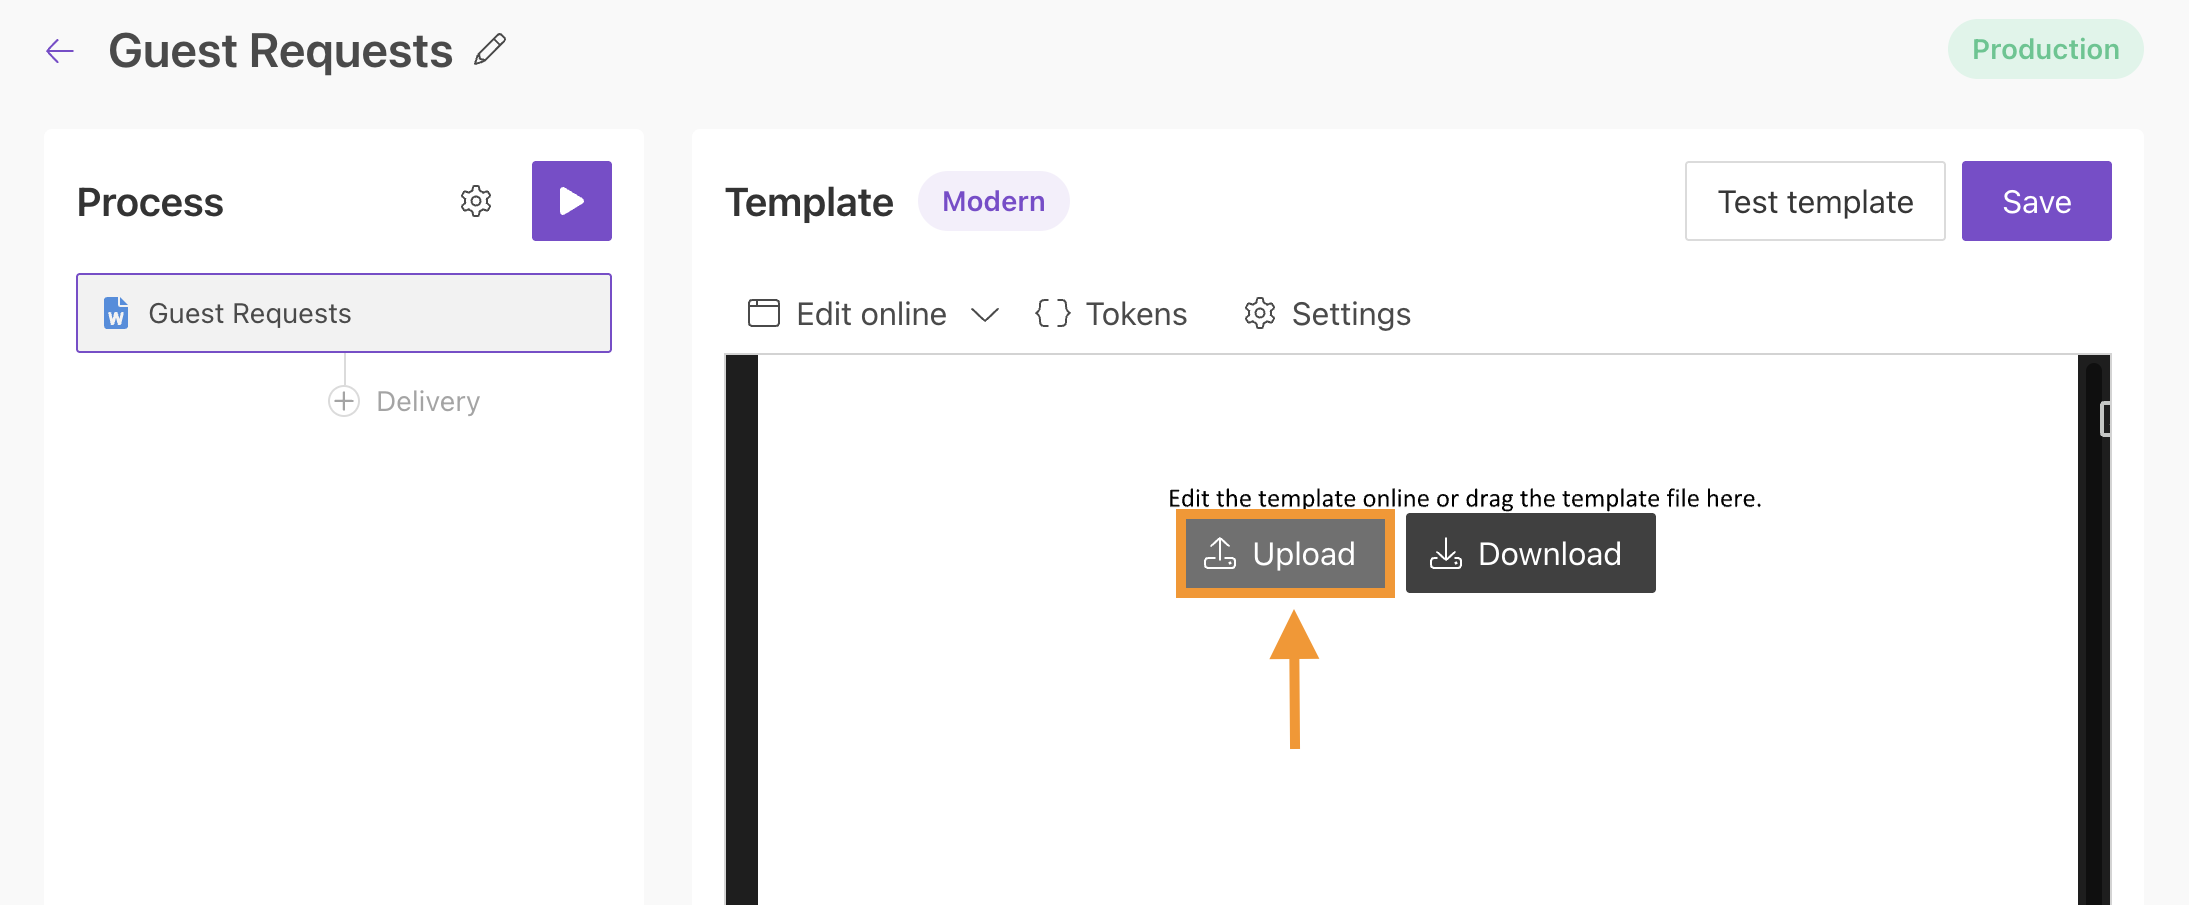
Once the process is created, configure the template.
In the Editor, you can create a template from scratch or upload an existing one. You can edit the uploaded template online or in Word desktop.
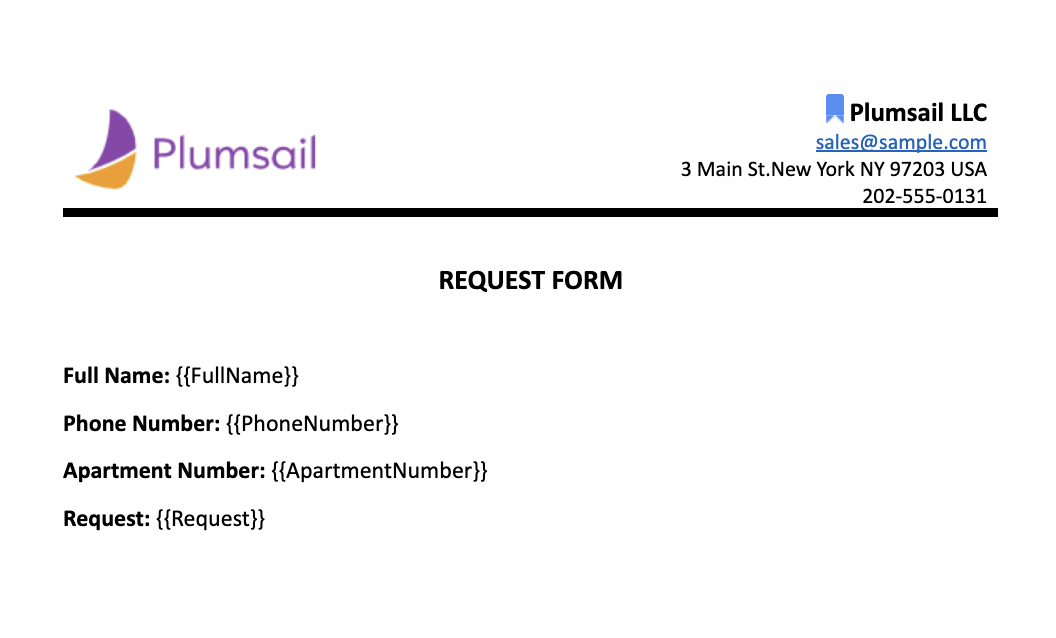
You can also download the sample DOCX template used in this example.
Then upload the template to the process.
Templating syntax
If you create your own template, use DOCX template tokens to insert values from the form. Plumsail Documents uses a simple token syntax inside {{ }}.
Learn more in DOCX templating syntax.
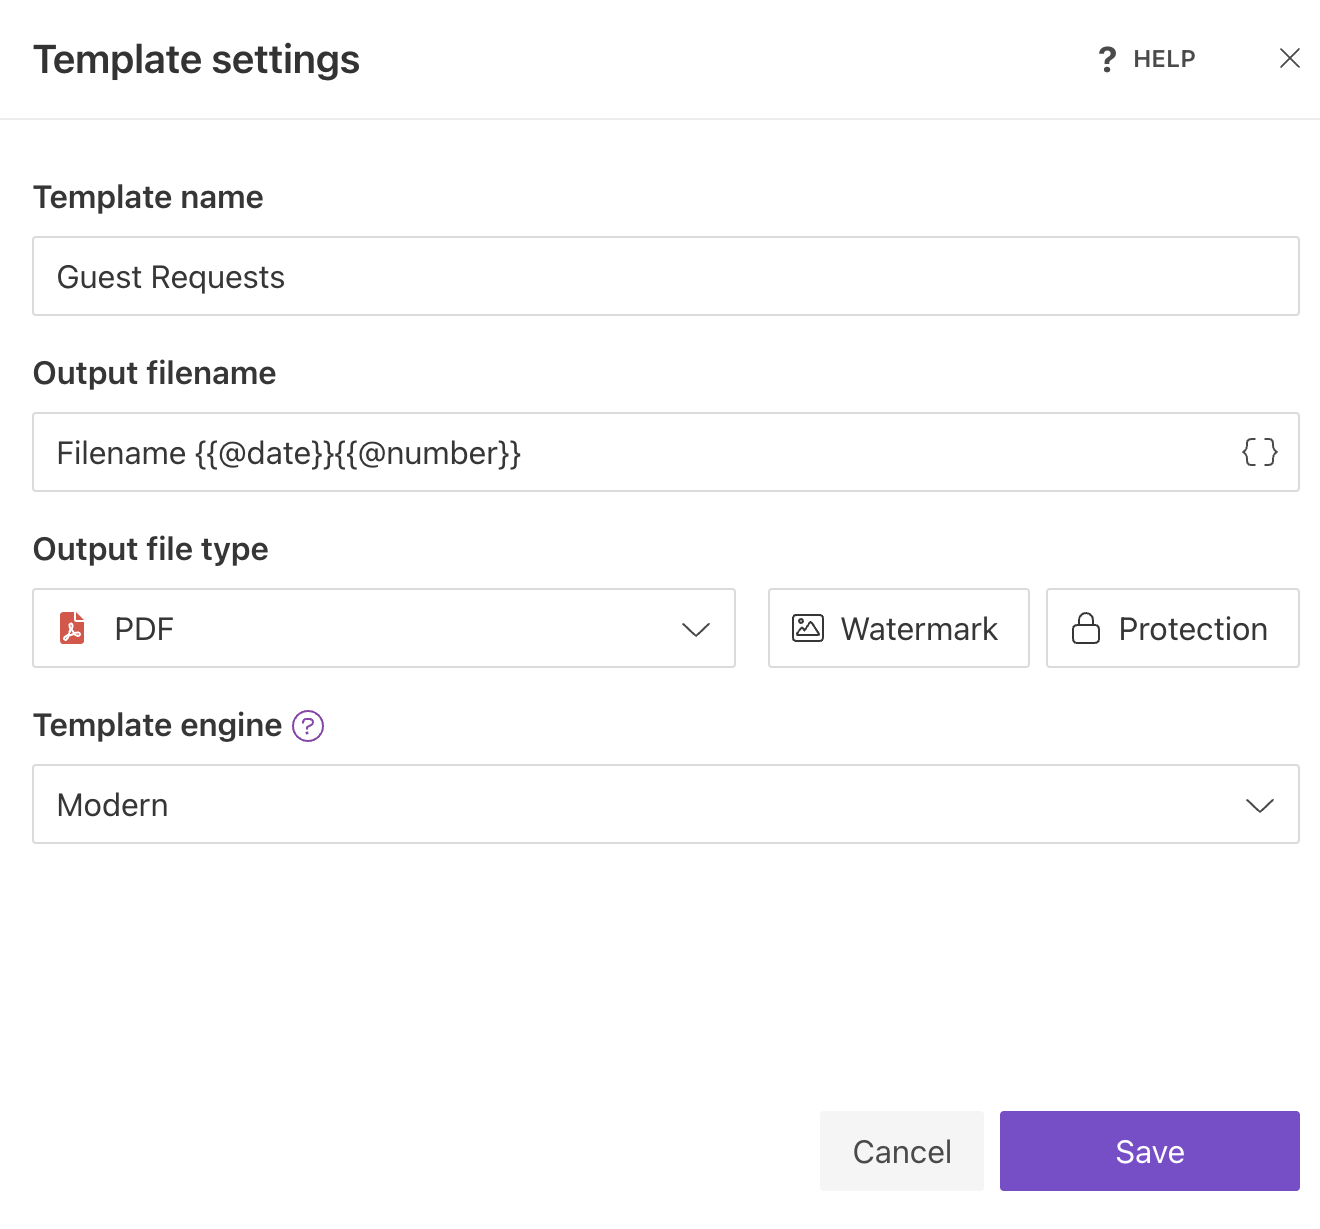
Click Settings to configure the output file name, output format, watermark, PDF protection, and template engine.
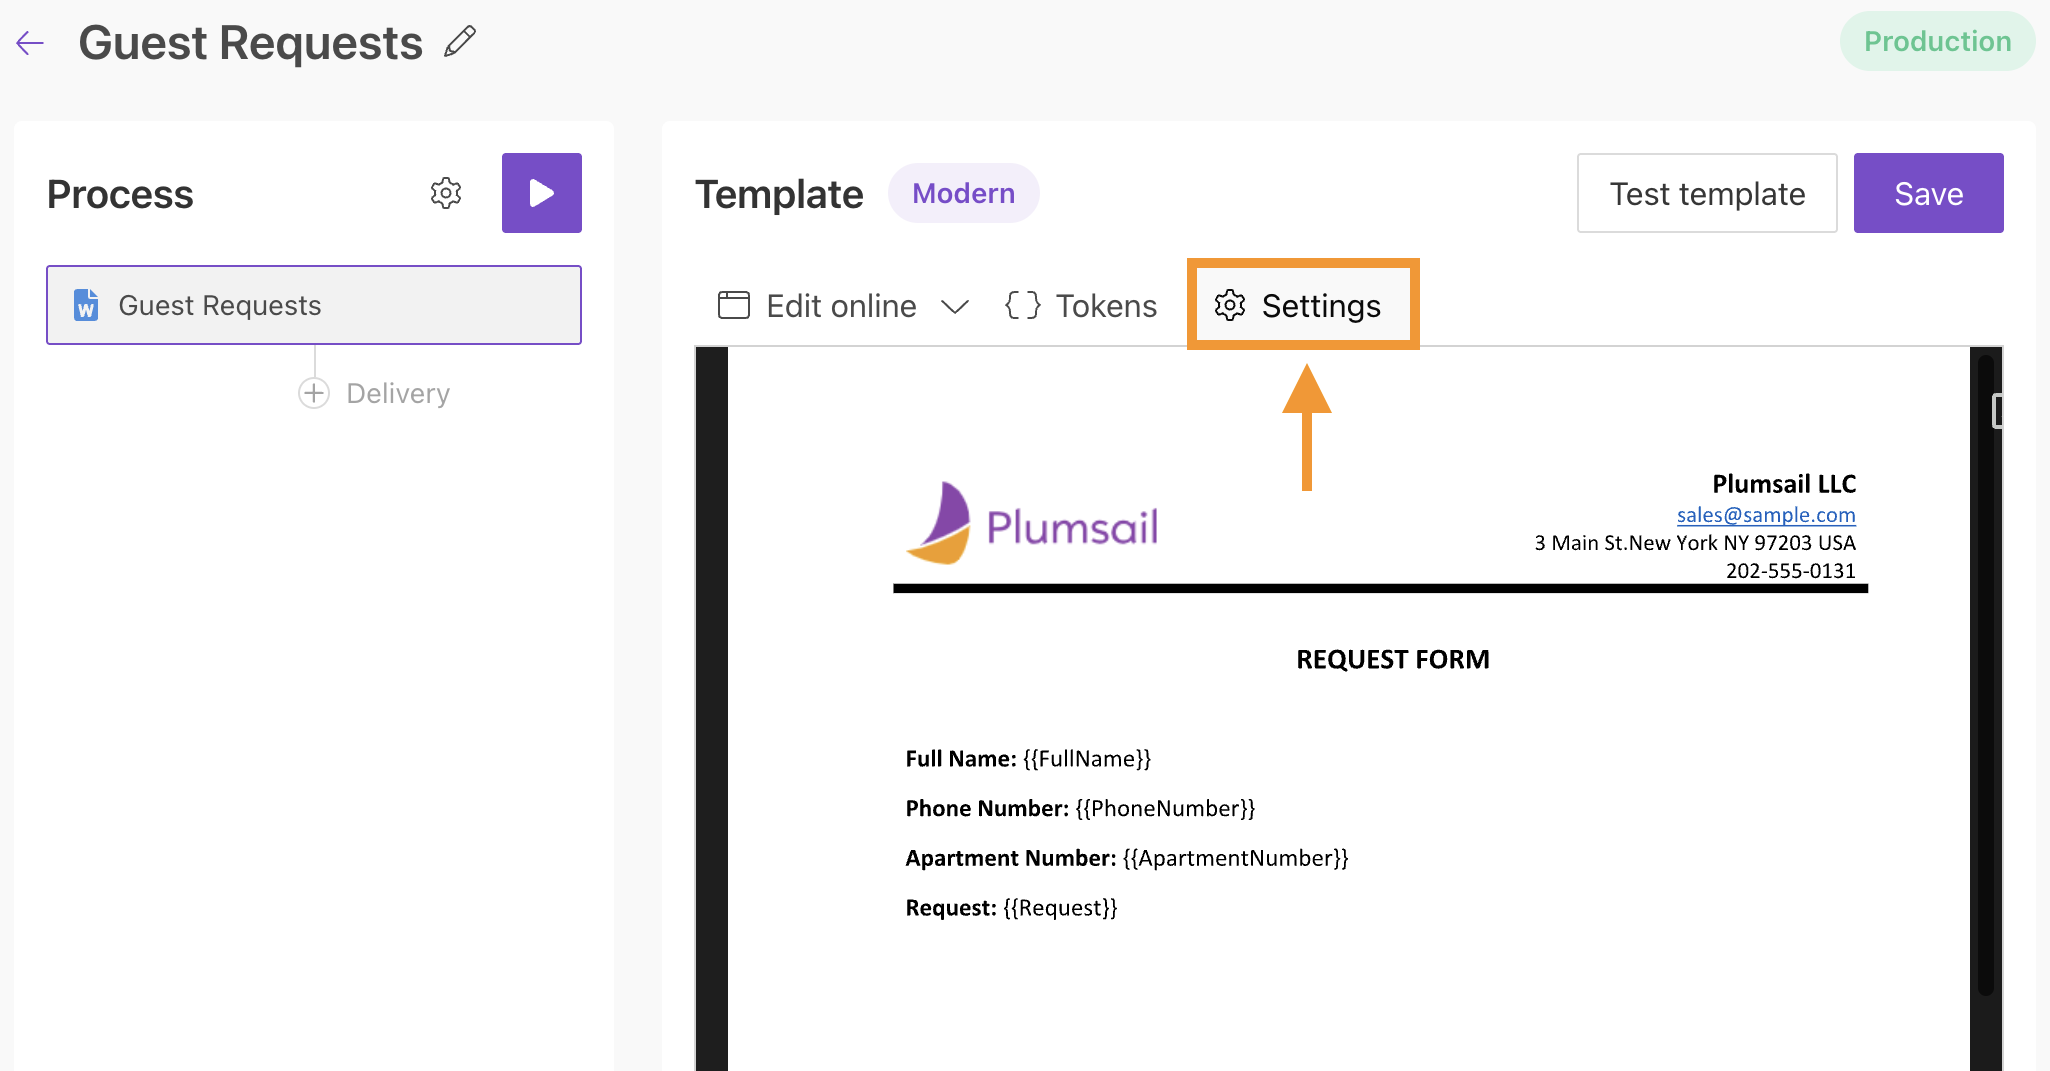
In Template settings, you can:
Set the result file name
Select PDF as the output format
Add a watermark
Select the template engine
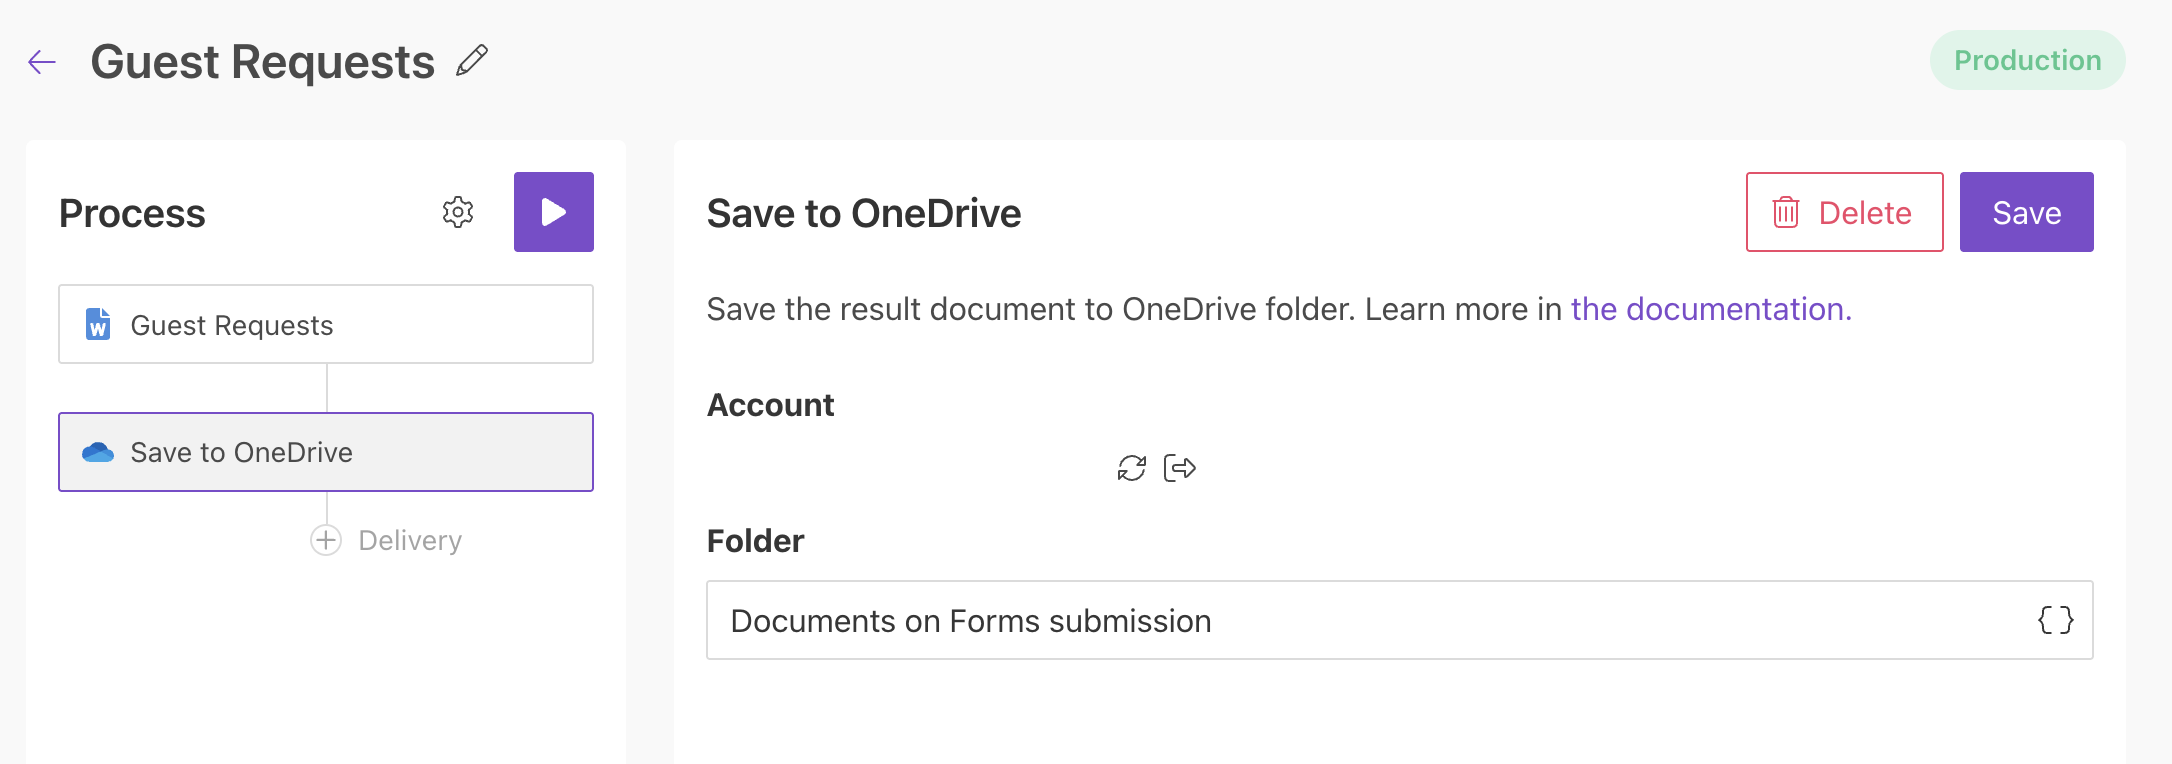
Delivery
The next step is delivery. In this example, we save the result file to OneDrive, but you can also use other delivery options.
Select the target folder and enter the file name.
You can configure multiple deliveries if needed. For example, you can also save the resulting PDF to SharePoint.
Start Process
We will start the process from Power Automate.
Create Flow
This is the completed Power Automate flow:
Now configure each step.
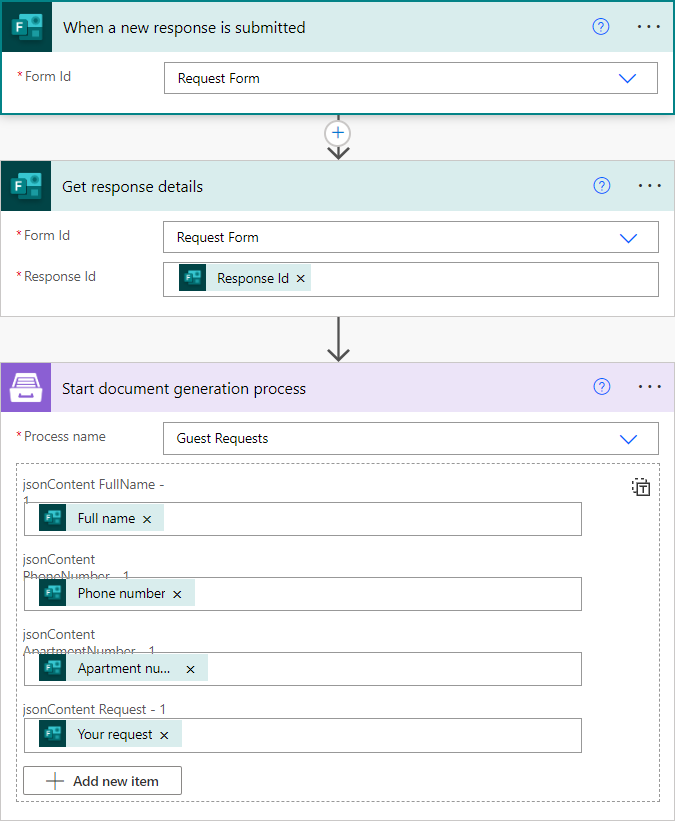
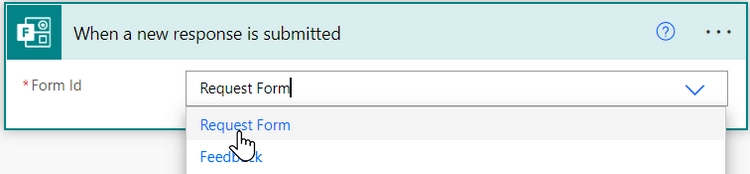
Form is submitted
To start the flow when someone submits the form, add the When a response is submitted trigger from Microsoft Forms.
If this is your first time using Microsoft Forms in Power Automate, sign in to your account when prompted.
Then select the form you want to track.
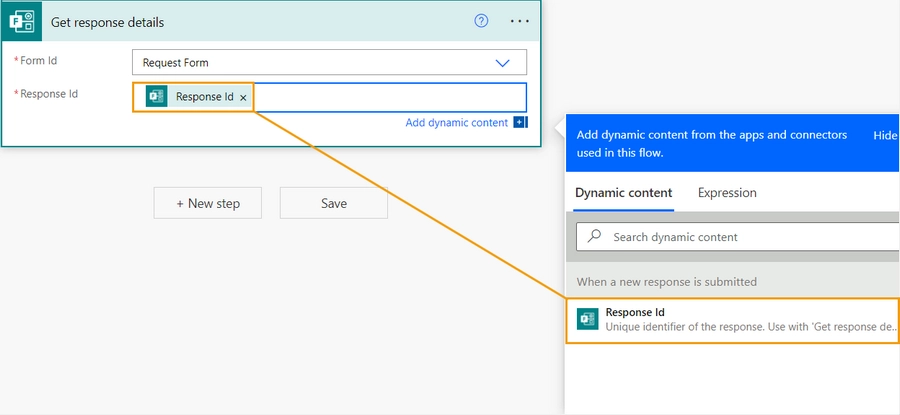
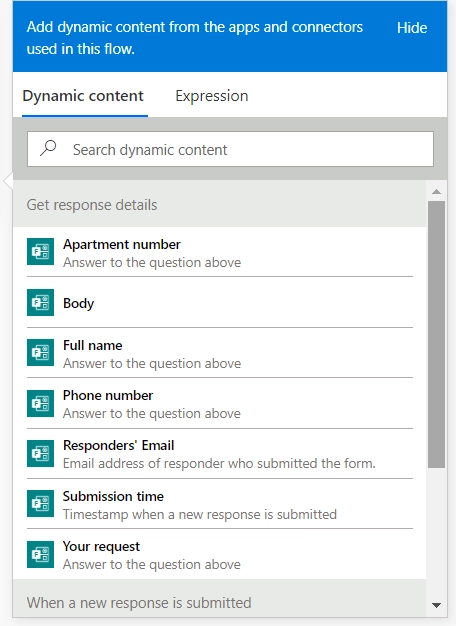
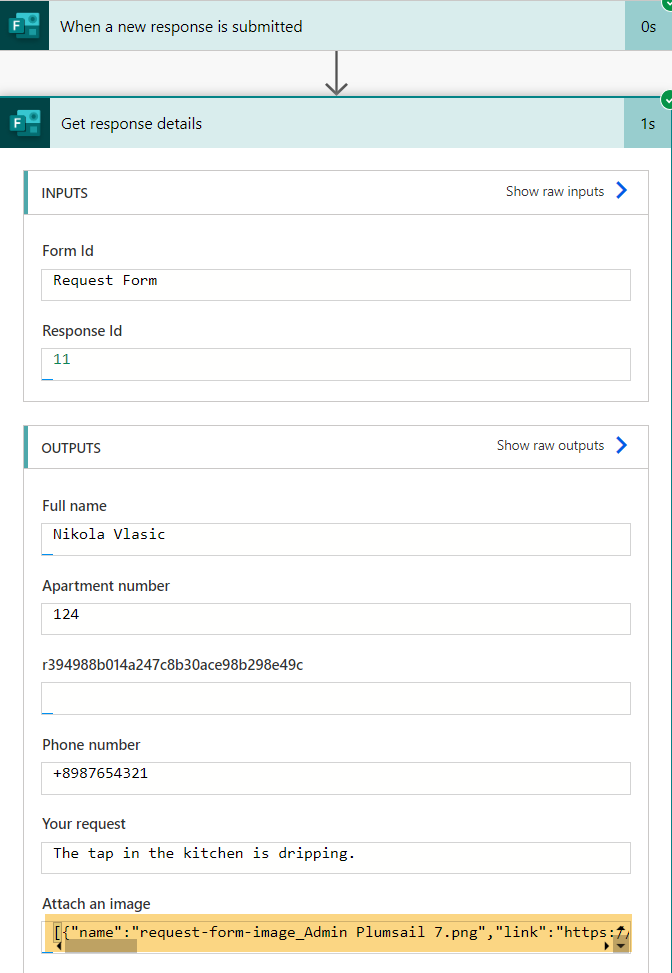
Get response details
Next, add the Get response details action from Microsoft Forms.
Select the same Form Id as in the trigger. Then click the Response Id field and choose List of response notifications - Response Id from Dynamic content.
Start document generation process
This is the action from Plumsail Documents connector. This action is suitable for starting the process of generating documents from a template. You can find more information about this action by visiting this page.
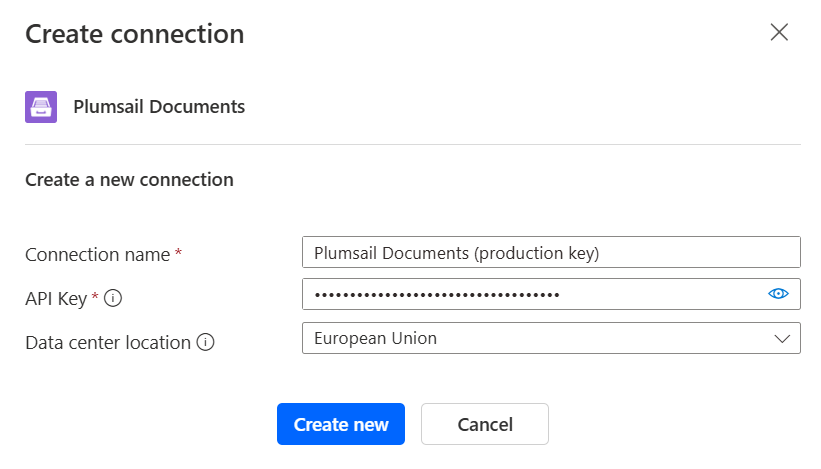
If this is your first time using the Plumsail Documents connector, Power Automate will request you to create a new connection. Provide the following details and then click Create new:
Connection name - you can type any name for the connection, for example Plumsail Documents (production key);
API Key - create an API key in your Plumsail Account, copy it, and paste it into the API Key field;
Data center location - make sure the selected data center location matches the location of your account.
Then configure the action:
Process name: select the process you created earlier
Fields for entering data: map Microsoft Forms fields to the DOCX template tokens
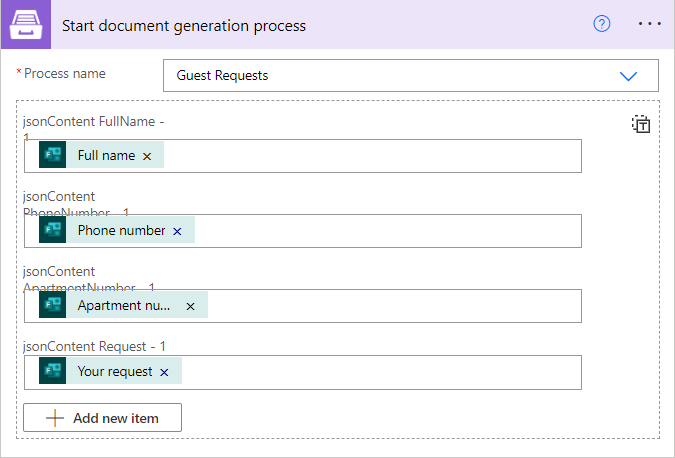
Use the dynamic content from Get response details to populate the template fields in the action.
Use the generated document in the flow
At this point, the flow is already complete. The generated PDF will be saved to OneDrive.
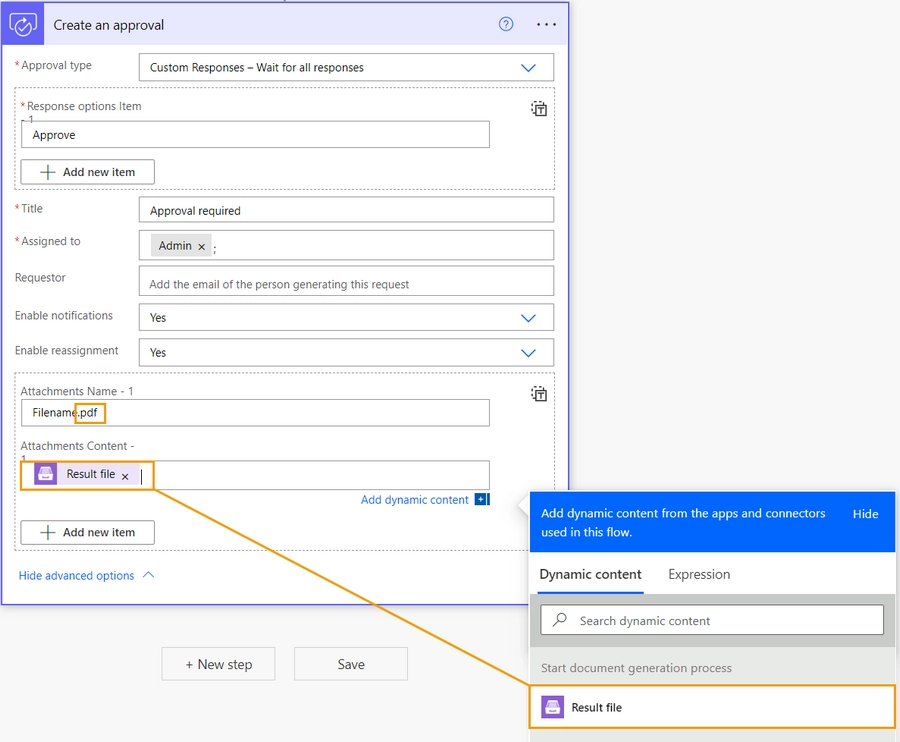
If needed, you can also use the generated file in later flow steps. For example, you can send it for approval with the Create an approval action from the Approvals connector.
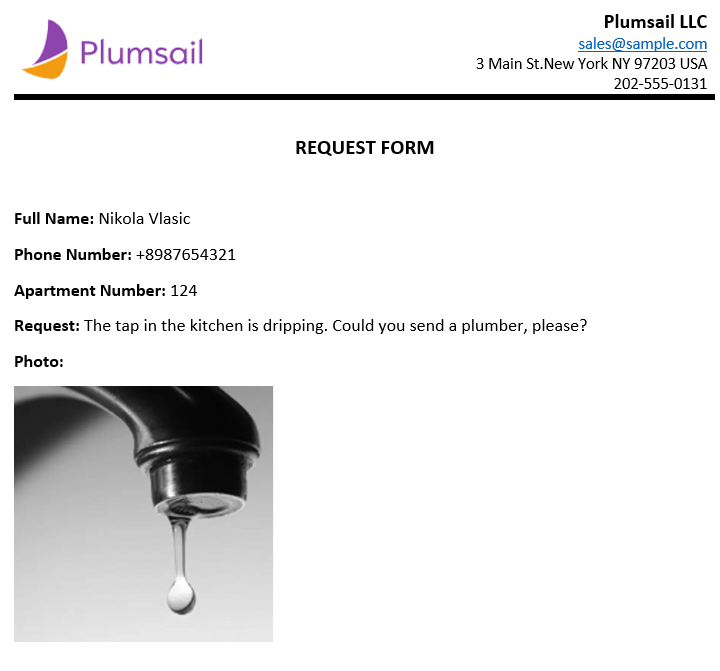
Advanced case: Microsoft Forms with image upload
If your form includes image uploads, you can also pass the uploaded image to the DOCX template and include it in the generated PDF.
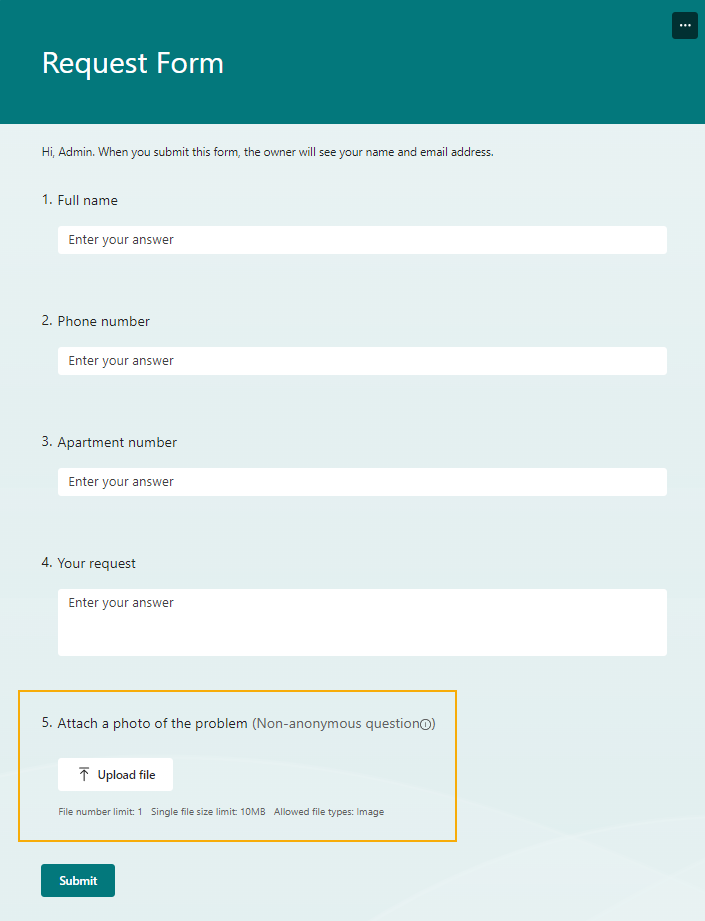
For example, the requester can upload a photo:
The form may look like this:
Add a new token {{#picture imageData}} with the picture formatter to insert the image into the DOCX template.
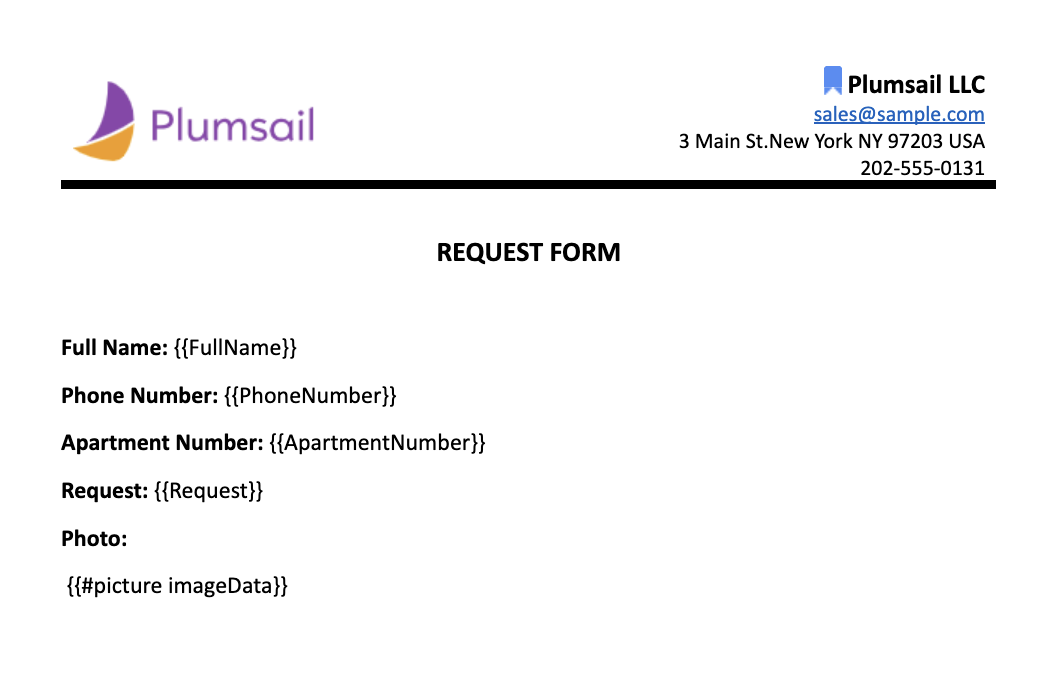
Download the DOCX template with the image token.
To process the uploaded image, add these steps to the flow:
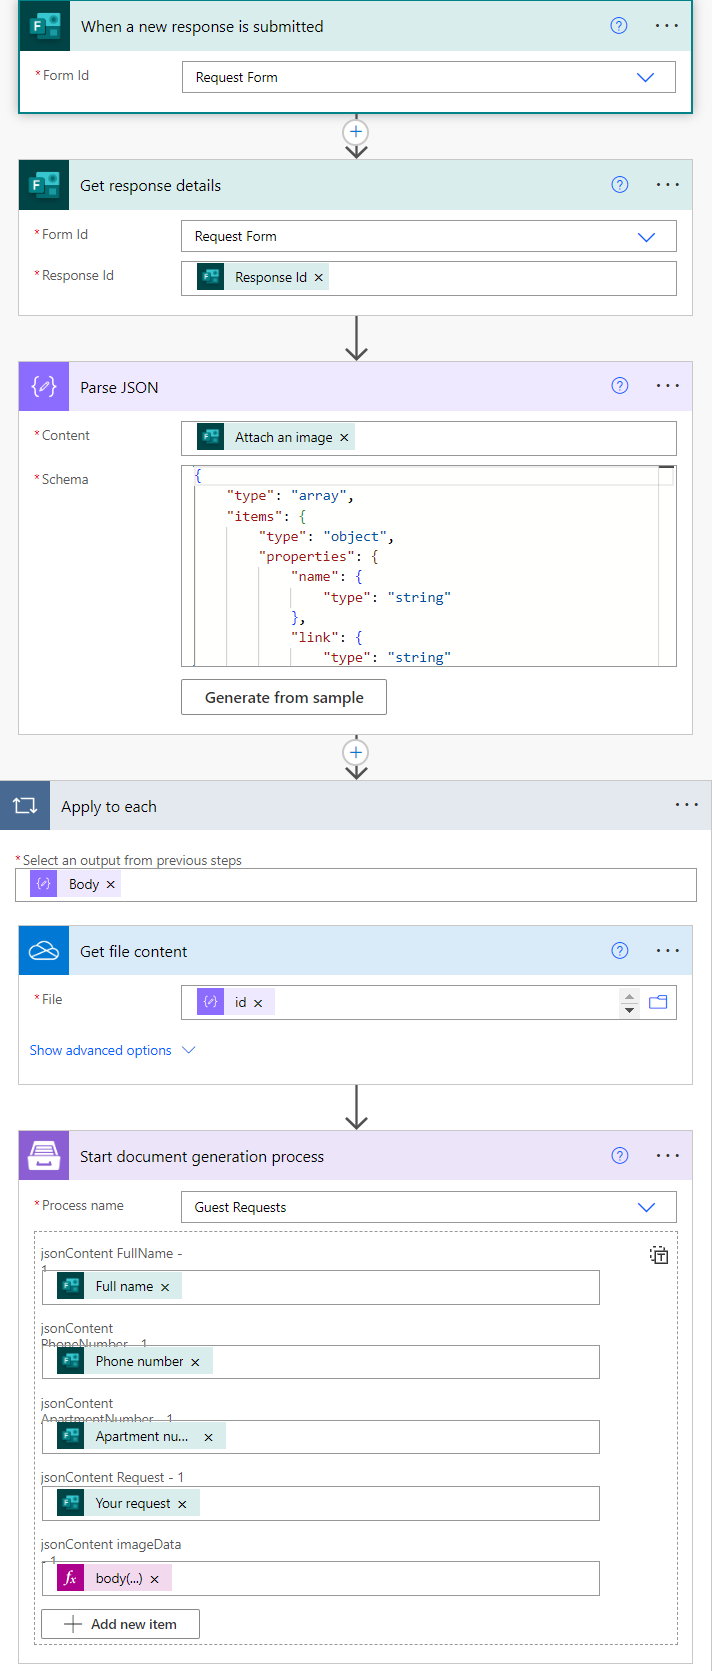
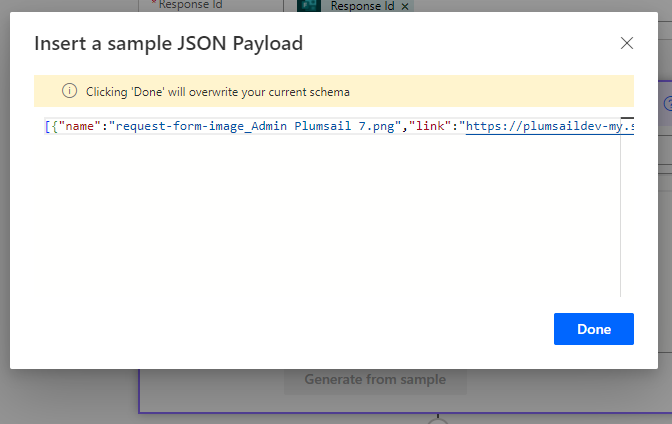
Add the Parse JSON action to get the image dynamic content.
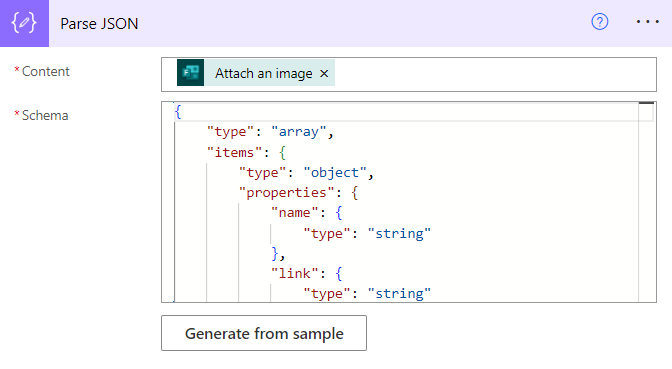
Generate the schema from a sample. To get the sample payload, run the flow with only the Get response details action and copy the value of the image field.
Then click Generate from sample in the Parse JSON action and insert the copied sample JSON payload.
Next, add the OneDrive for Business action to get the image file content. Use the id value from Parse JSON.

Note
Power Automate automatically adds Apply to each action.
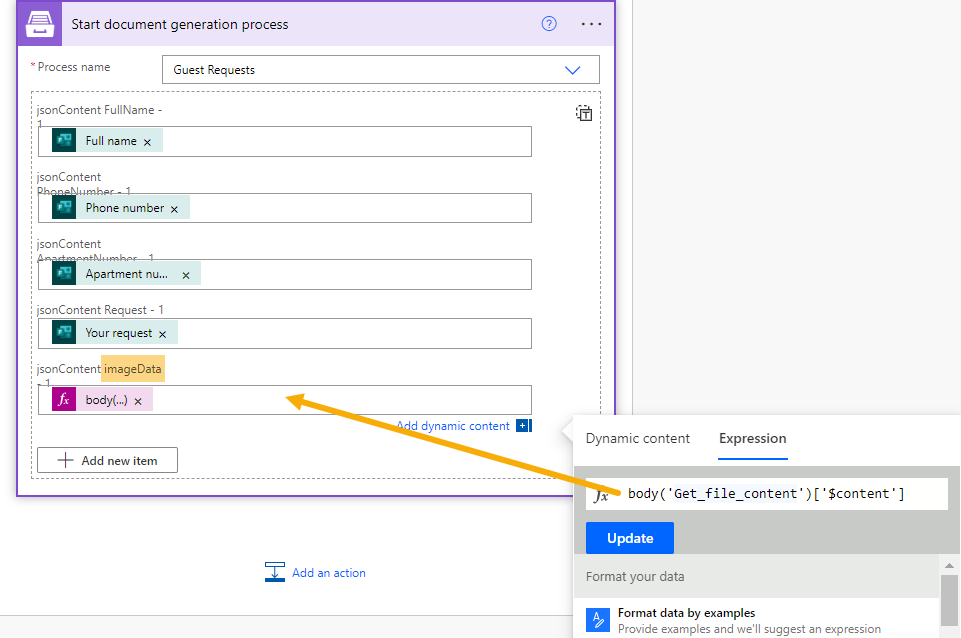
Finally, add the Start document generation process action and pass the file content from OneDrive for Business.
Use this expression:
body(‘Get_file_content’)[‘$content’]
The flow is now ready to generate a PDF from a Microsoft Forms response and include the uploaded image.
Sign up for Plumsail Documents
You can use this approach to generate documents automatically from Microsoft Forms submissions. If you are new to Plumsail Documents, register an account and try the steps from this article with a free 30-day trial.