Create Word and PDF documents from JotForm in Power Automate
This article demonstrates how to create PDF documents from a DOCX template on a JotForm submission with the help of Processes in Power Automate (MS Flow). It may help you to automate the generation of different documents like applications, requests, orders, etc., in your company.
Processes are a Plumsail Documents feature with an intuitive interface for creating documents from templates.
JotForm is an online form builder that allows you to create forms with a drag and drop creation tool and an option to encrypt user data.
We’ll connect them in Power Automate (Flow) to automatically collect data from a JotForm, apply the data to our template, and generate a new PDF document.
Create a Form
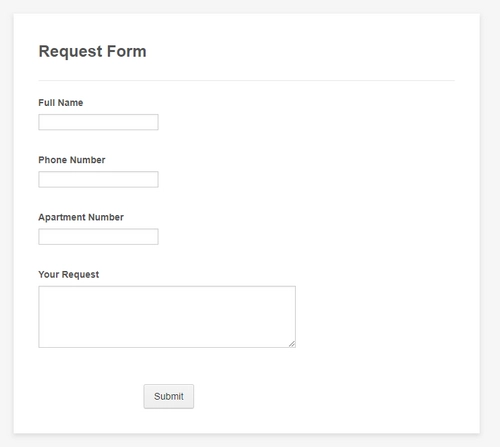
We’ve already created a JotForm with a guest’s request. We will use data from its submission. If you haven’t created JotForms before, follow this link to learn how to do it.
It’s possible to use the Form from this example. After you’ve clicked on the Create Form button in your JotForm account, select Import Form -> From a web page -> insert this URL https://form.jotform.com/200634544724351. And you’ll have our form in your account.
Below is a screenshot of the form:
Configure the Process
Before creating the Flow, we also need to set a Process, which will generate PDF documents from a DOCX template.
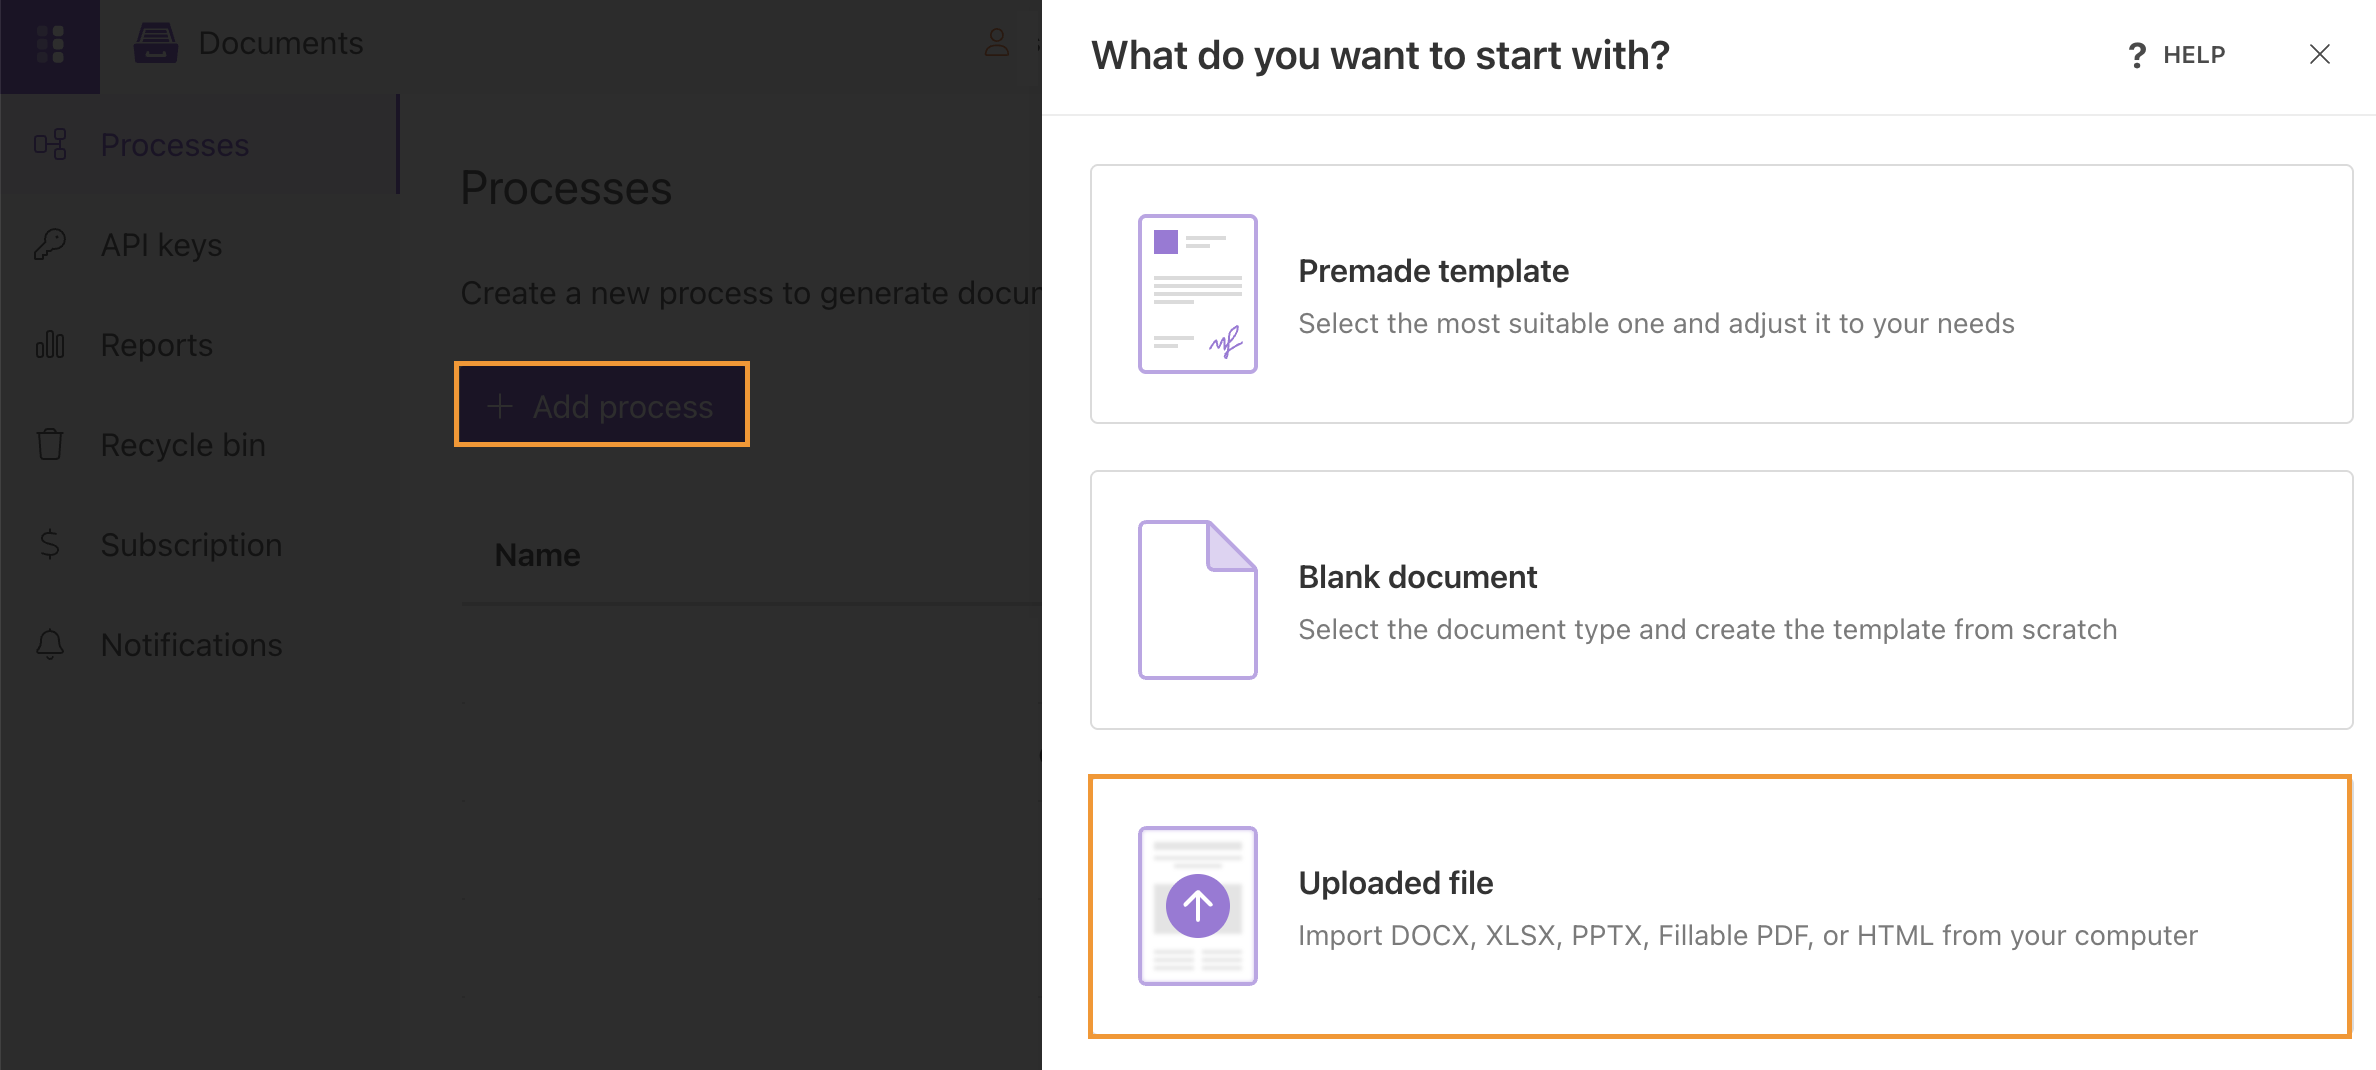
Create a new process
Go to the Processes section in your Plumsail account.
Click on the Add process button.
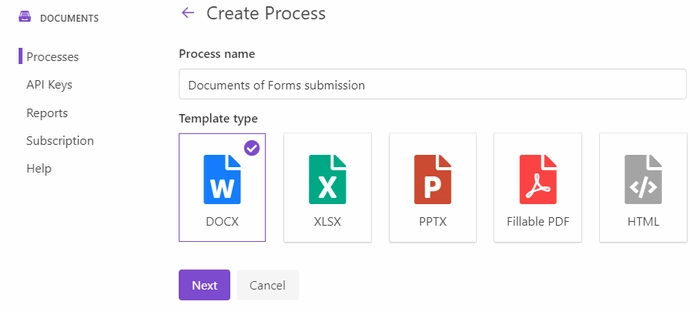
Set the Process name. Select DOCX for a template type.
Configure a template
Once you’re done with the first step Create Process, press the Next button, and you’ll proceed to the next step – Configure Template.
It includes two substeps:
Editor;
Settings.
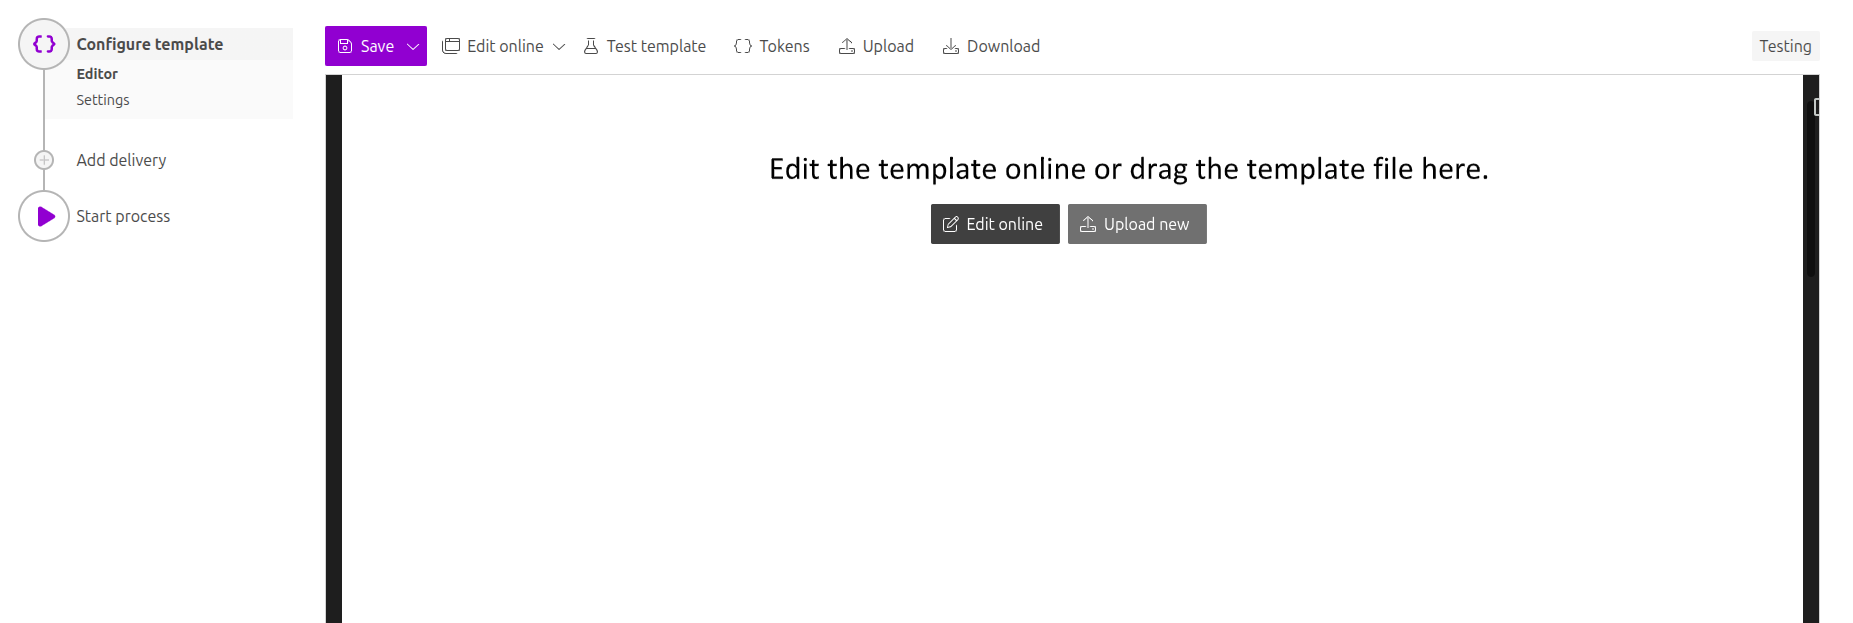
In Editor, you can compose the template from scratch or upload a pre-made one. It’s also possible to modify the uploaded template online.
Feel free to download a DOCX template we have prepared beforehand. It’s a guest’s request:
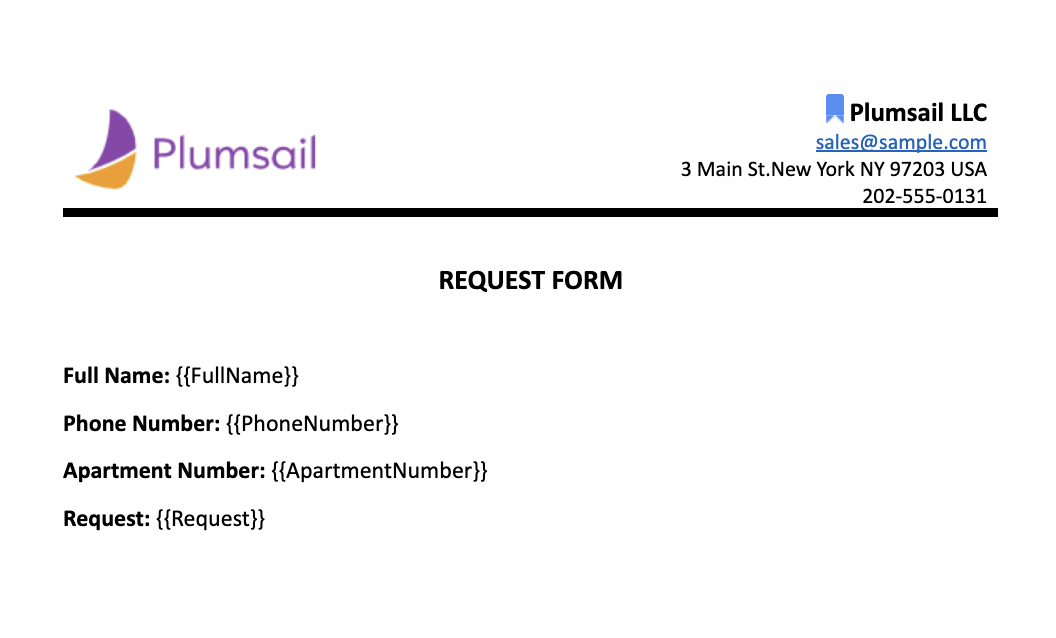
Then upload it to the process.
Templating syntax
When creating your own templates, mind the templating language. Plumsail Word DOCX templates use a different approach than most other templating solutions. It uses a minimal amount of syntax to make your work done.
In short, the templating engine thinks that everything between curly {{ }} brackets is variables where it will apply your specified data.
Read this article to get familiar with the templating engine.
Test template
You can test a template as well, to see how it will look at the end. After clicking on the Test template button, you’ll need to fill in the auto-generated testing form. Fields of this form are created based on tokens from your document template. You can adjust the look of the testing form by changing token types.
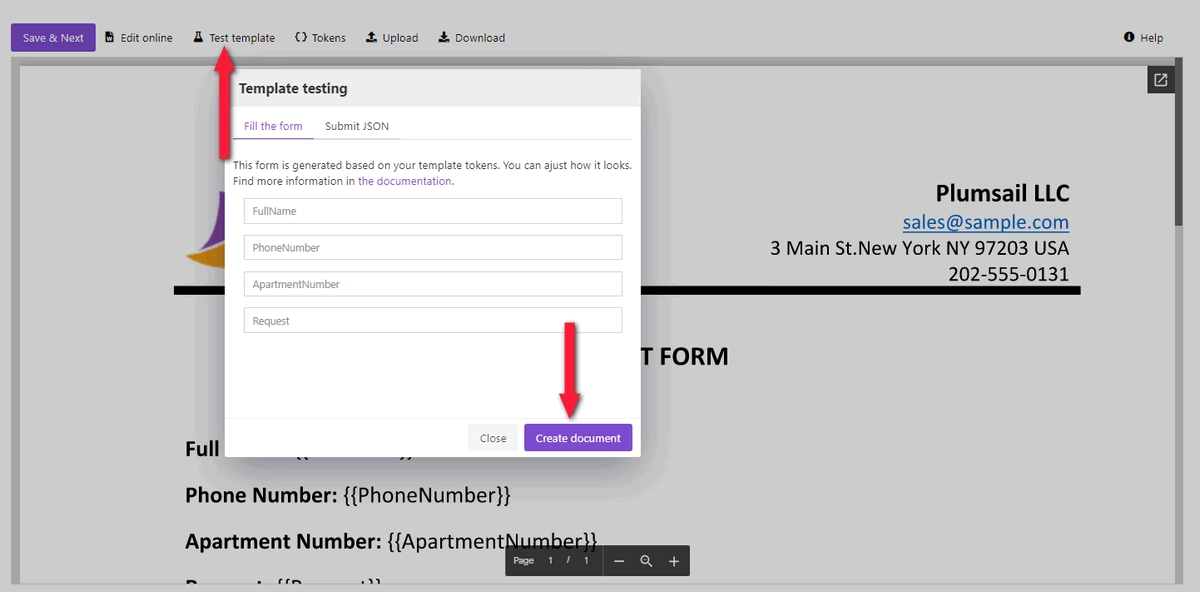
It’s testing. We’re going to apply the data from the JotForm to our template.
Once you’ve tested the template, press Save&Next to proceed further - to the Settings substep:
Switch to an active mode to remove Plumsail watermarks from resulting documents
Fill in the name of the result file
Select PDF format for the output file
Protect the result PDF if you wish

Delivery
The next step is delivery. For demonstrating purpose, we’ll store the result file in OneDrive. But there are other options.
Select the folder where the ready document will be saved. Fill in the file’s name.
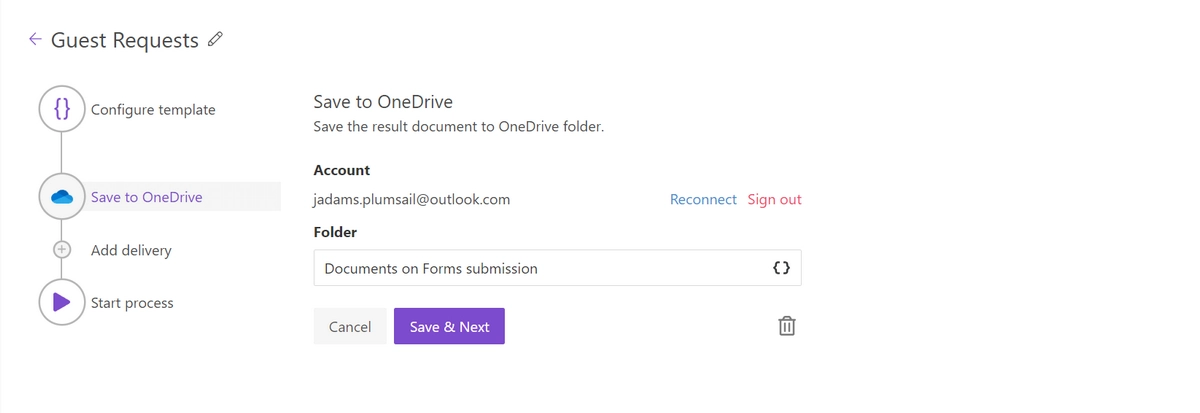
You can configure as many deliveries as you need.
Start the Process
We will start our Process from Power Automate (Microsoft Flow).
Create a Flow
This is how our Flow looks:
Check out the Flow steps described below.
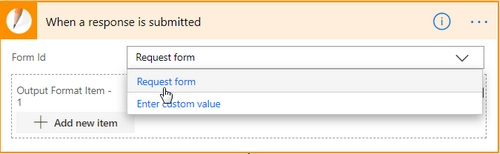
Form is submitted
We need to start the Flow every time somebody submits our JotForm. For that, search for JotForm in Power Automate and set JotForm - When a response is submitted as a trigger.
If this is your first Flow with JotForm, on this step, sign in to your JotForm Account from MS Flow to use your forms inside Flows.
Then, you’ll need to pick the form you want to track in the dropdown.
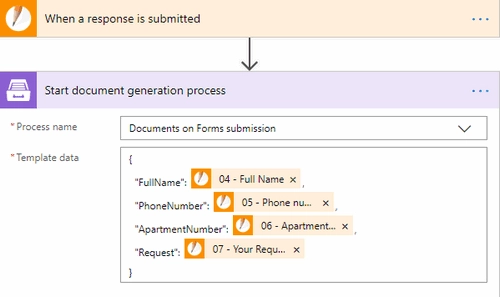
Start document generation process
This is the action from Plumsail Documents connector. This action is suitable for starting the Process of generating documents from a template. You can find more information about this action by visiting this page.
Using the action for the first time, you’ll be asked for ‘’Connection Name’’ and ‘’Access Key’’.
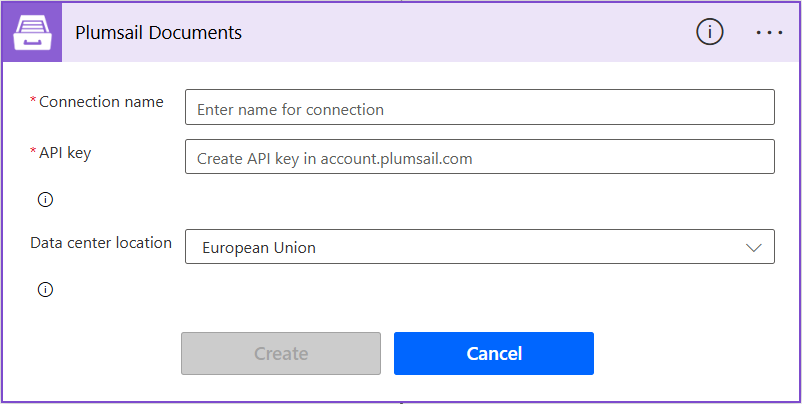
You can type any name for the connection. For example, ‘’Plumsail Documents’’.
Then create an API key in your Plumsail Account page, copy and paste it to ‘’Access Key’’ field.
The action has two parameters:
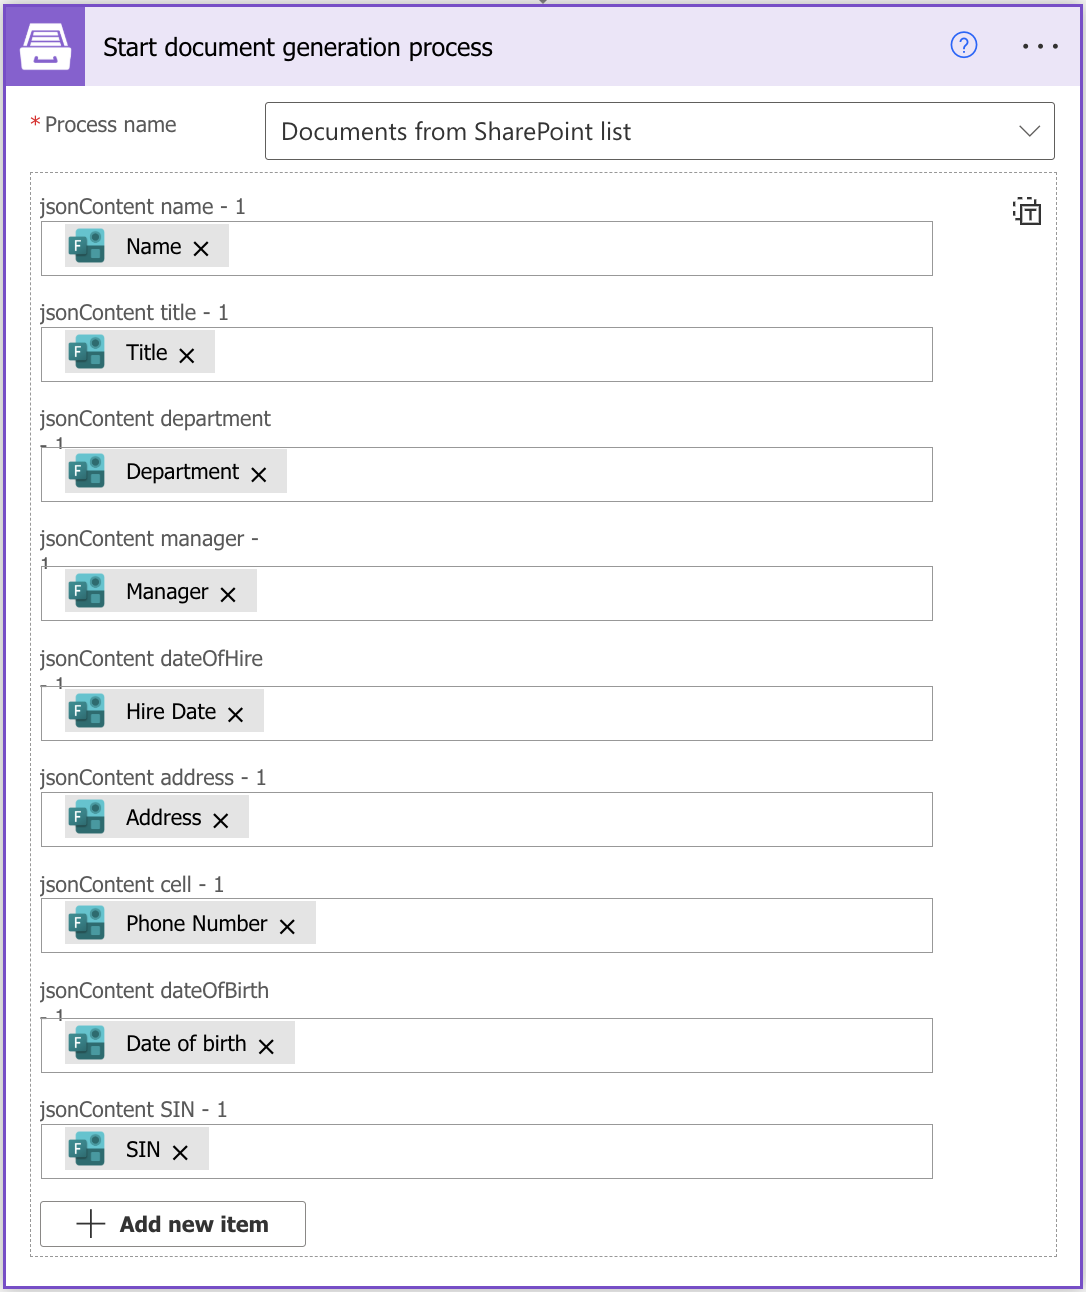
Process name. Select the process you need from available ones.
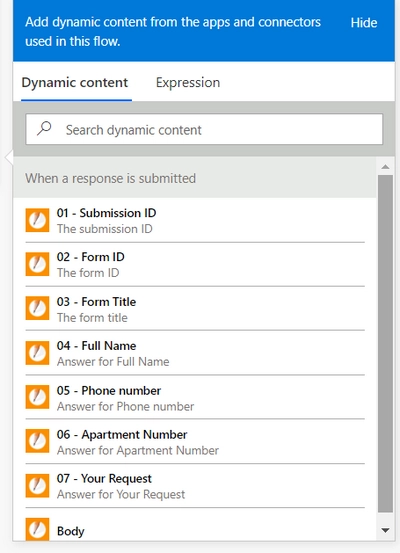
Template data. Specify source data in JSON format:
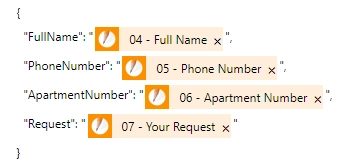
This object contains information from our form. We selected the dynamic content from the output of JotForm- When a response is submitted action:
Use the ready document in Flow
You can stop on the step Start document generation process.
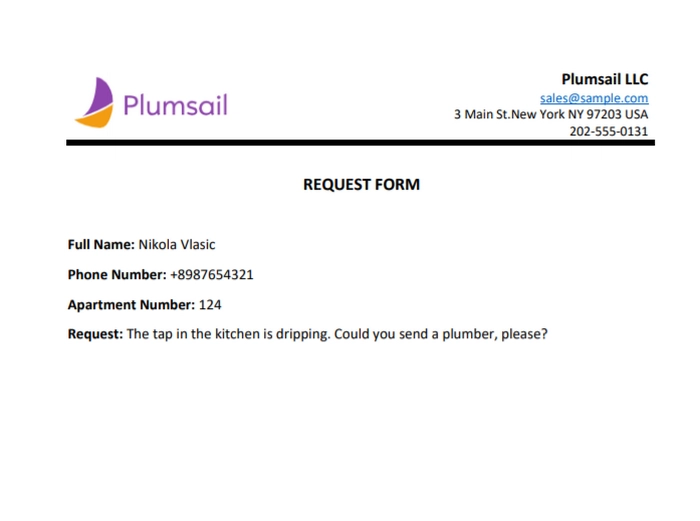
Steps described above are enough for generating PDFs from a DOCX template based on the JotForm submission. Your result file will be saved to OneDrive in this case. See how it will look:
But if you need an advanced logic, it’s possible to work with the result file right in the Flow.
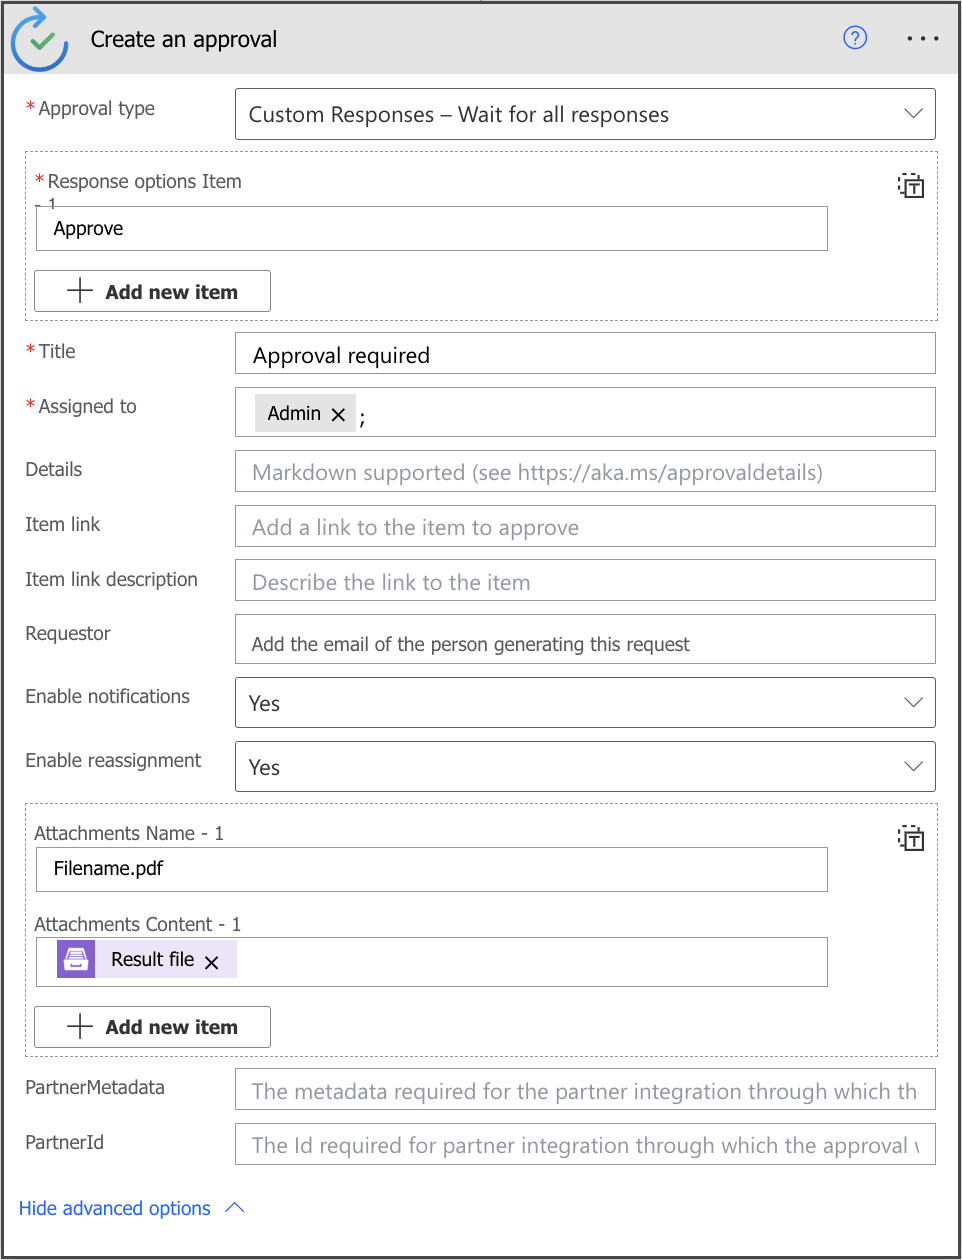
Here is an example of how you can send the ready document for approval.
Add an action Create an approval from the Approvals connector. Select an output of the previous step for an attachment.
Sign up for Plumsail Documents
As you can see, it’s simple to automize the generation of documents on JotForms submission. If you’re new to Plumsail Documents, register an account and follow the steps described in the article to set the process for automatic creation of PDFs from JotForms. A 30-day trial is free.