Convert Microsoft Forms with attachments to PDF
In this article, we will explore how to automate the creation of a single, consolidated PDF document from a Microsoft Form responses that include multiple PDF attachments. To accomplish this, we’ll leverage the capabilities of Plumsail Documents processes as well as actions within Power Automate. We will be using the following two actions: Start document generation process and Merge any files into PDF.
Note
There is a quicker and simpler way to convert Microsoft Forms responses to PDF if your form doesn’t allow sending attachments. Refer to this article for more details.
Microsoft Forms now allows users to upload files as part of their form responses, though currently limited to respondents within the same organization.
For this article’s purpose, we will focus on expense reports submitted through Microsoft Forms, where employees attach PDF files with receipts related to business expenses. The primary goal is to merge these form responses with their respective attachments into a single, cohesive PDF document. This ensures an efficient consolidation of information and keeping records in one place.
Watch the video below for an in-depth tutorial on this process and more or continue reading the article.
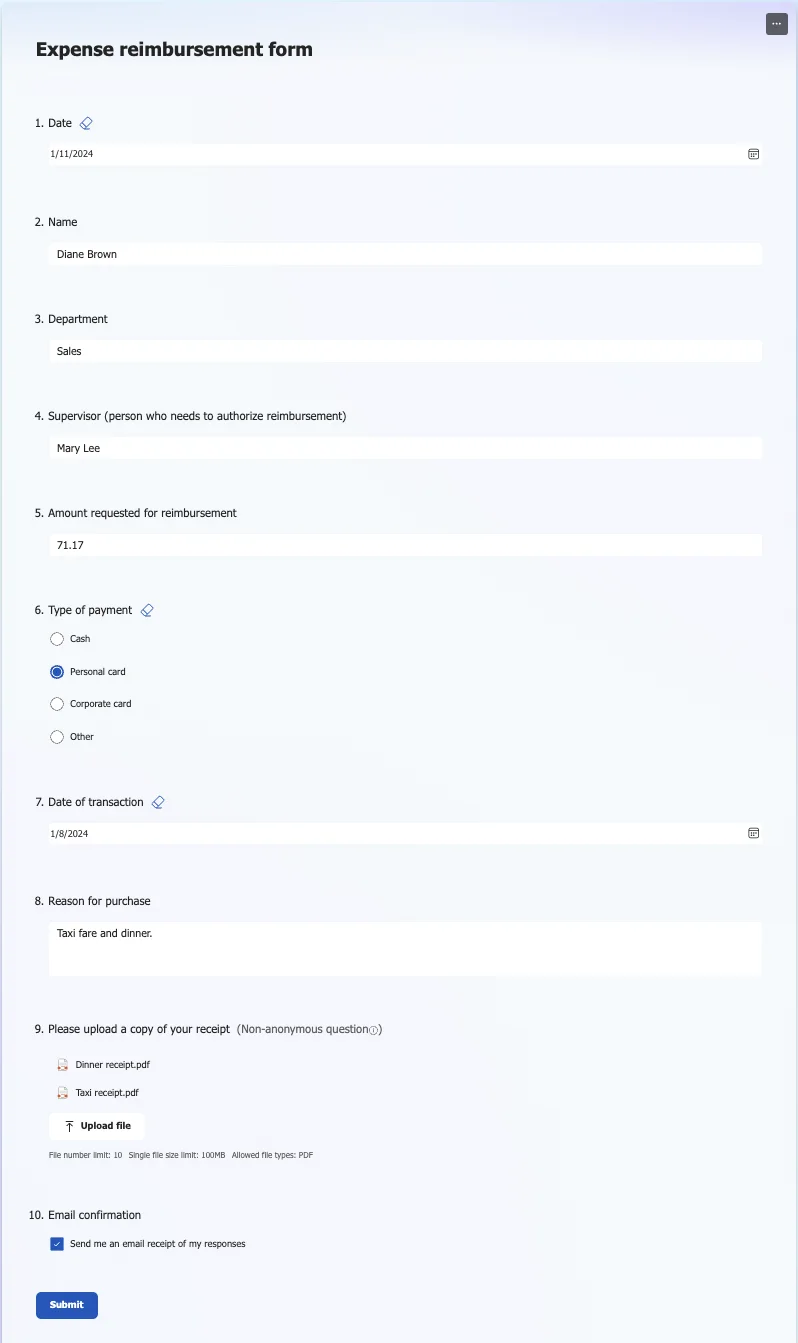
Prepare Microsoft form
Before we proceed with creating the Power Automate flow, let’s take a moment to review the form prepared for this demonstration. Here is how it looks:

The form can handle up to 10 attachments in PDF format.
Feel free to use this pre-made form template available from the Microsoft Forms library by duplicating it in your account. If you prefer creating Microsoft Forms from scratch, follow the instructions.
Set up a Documents Process
Now, let’s proceed to set up the process in Plumsail Documents.
We’ll configure the template to generate a PDF document from the Microsoft Form submission. This involves creating a document from a template that corresponds to the previously created Microsoft Form.
The connection will be established later in the Power Automate flow as data from the form is passed to the PDF document, and the resulting PDF along with attachments is saved in a SharePoint Library.
If you haven’t registered yet, you can sign up now and enjoy a free 30-day trial.
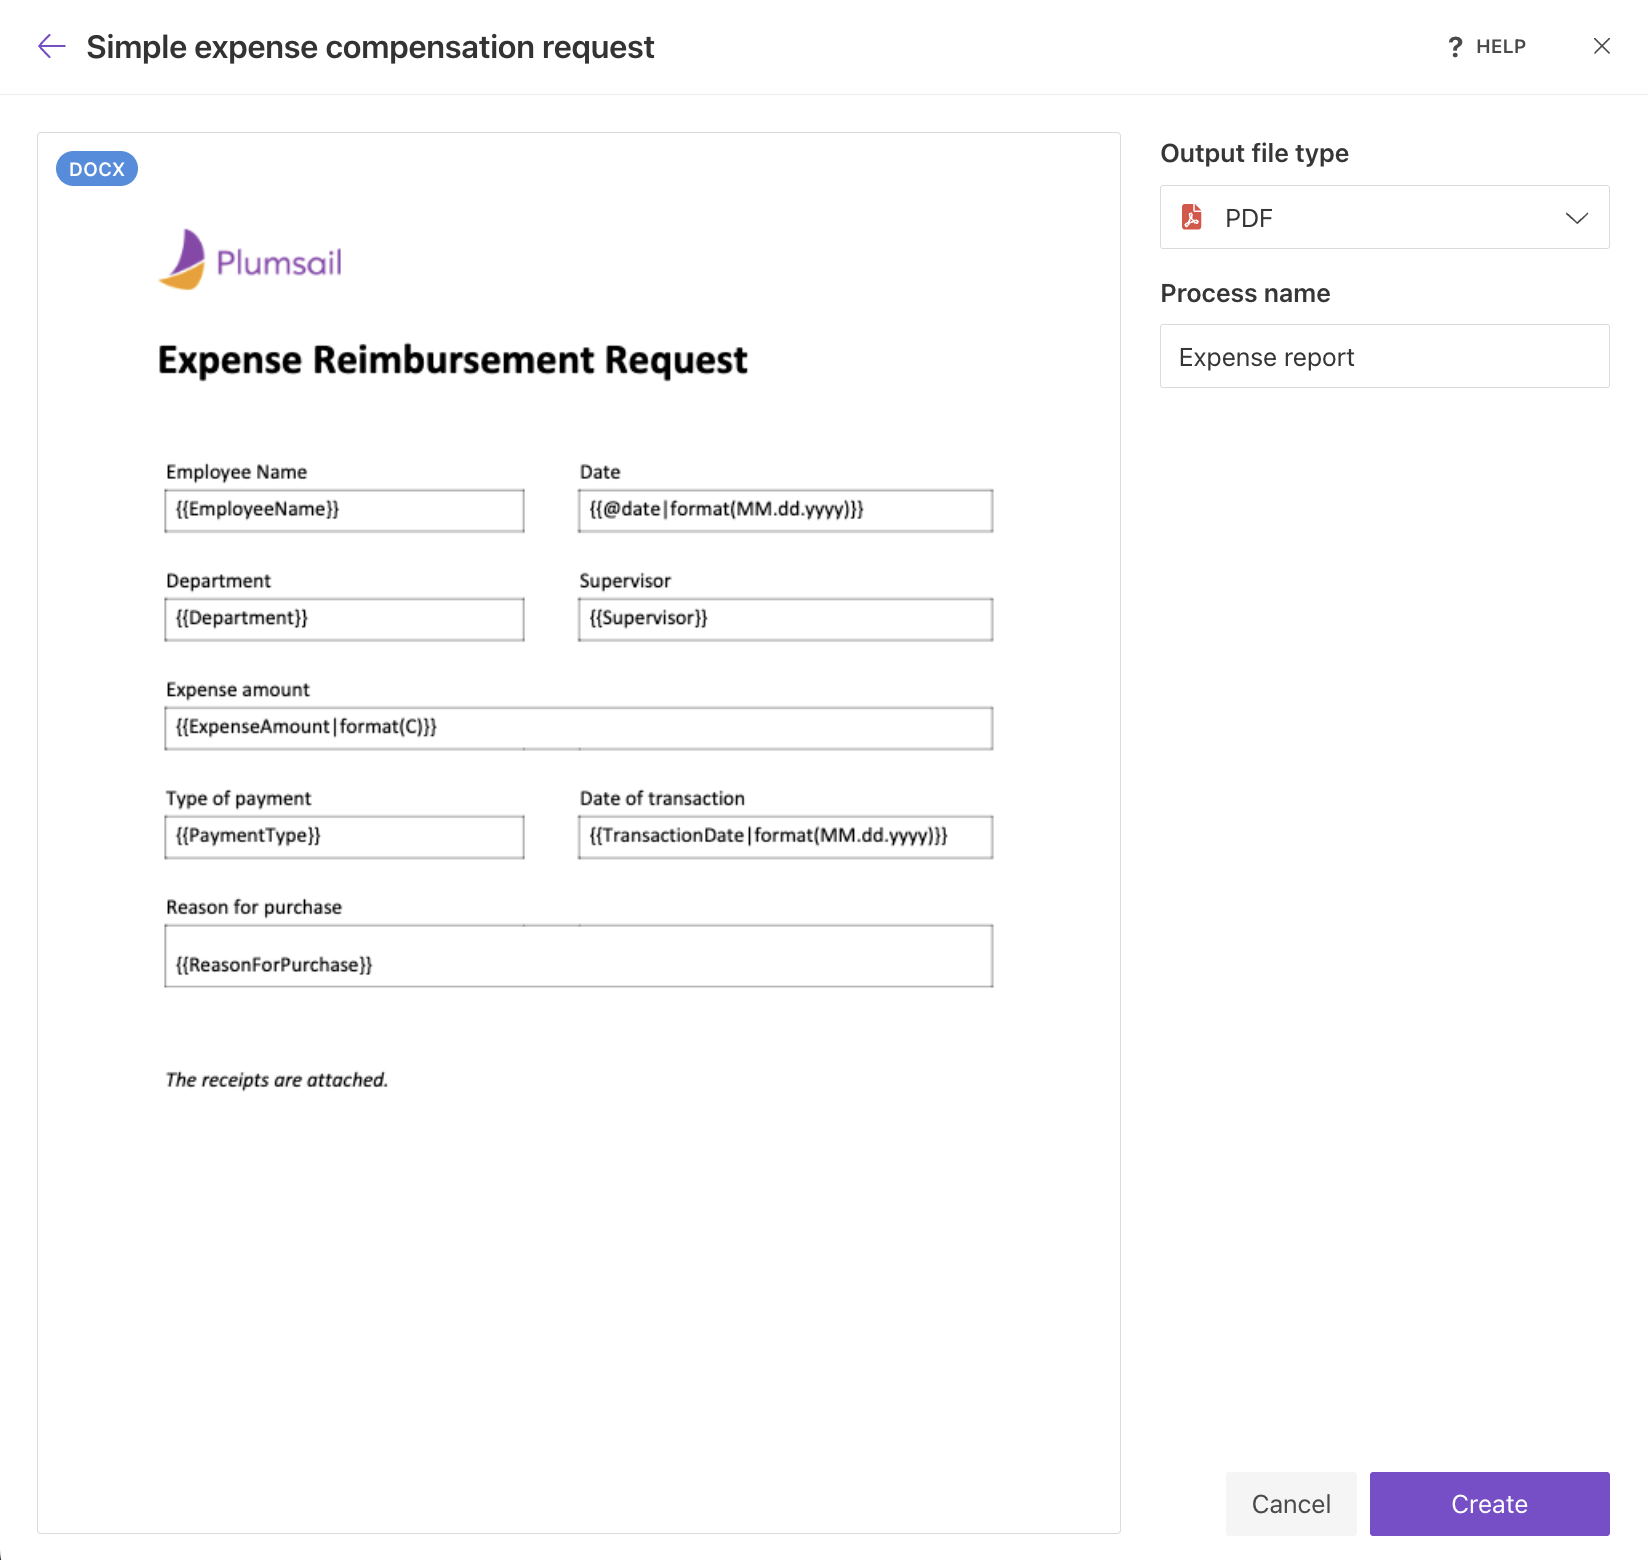
After registering your account, navigate to Add Process and choose Premade template. Alternatively, you have the option to begin from scratch. Find the Simple Expense Compensation Request template under Reports. Provide a name for the process and click Сreate.
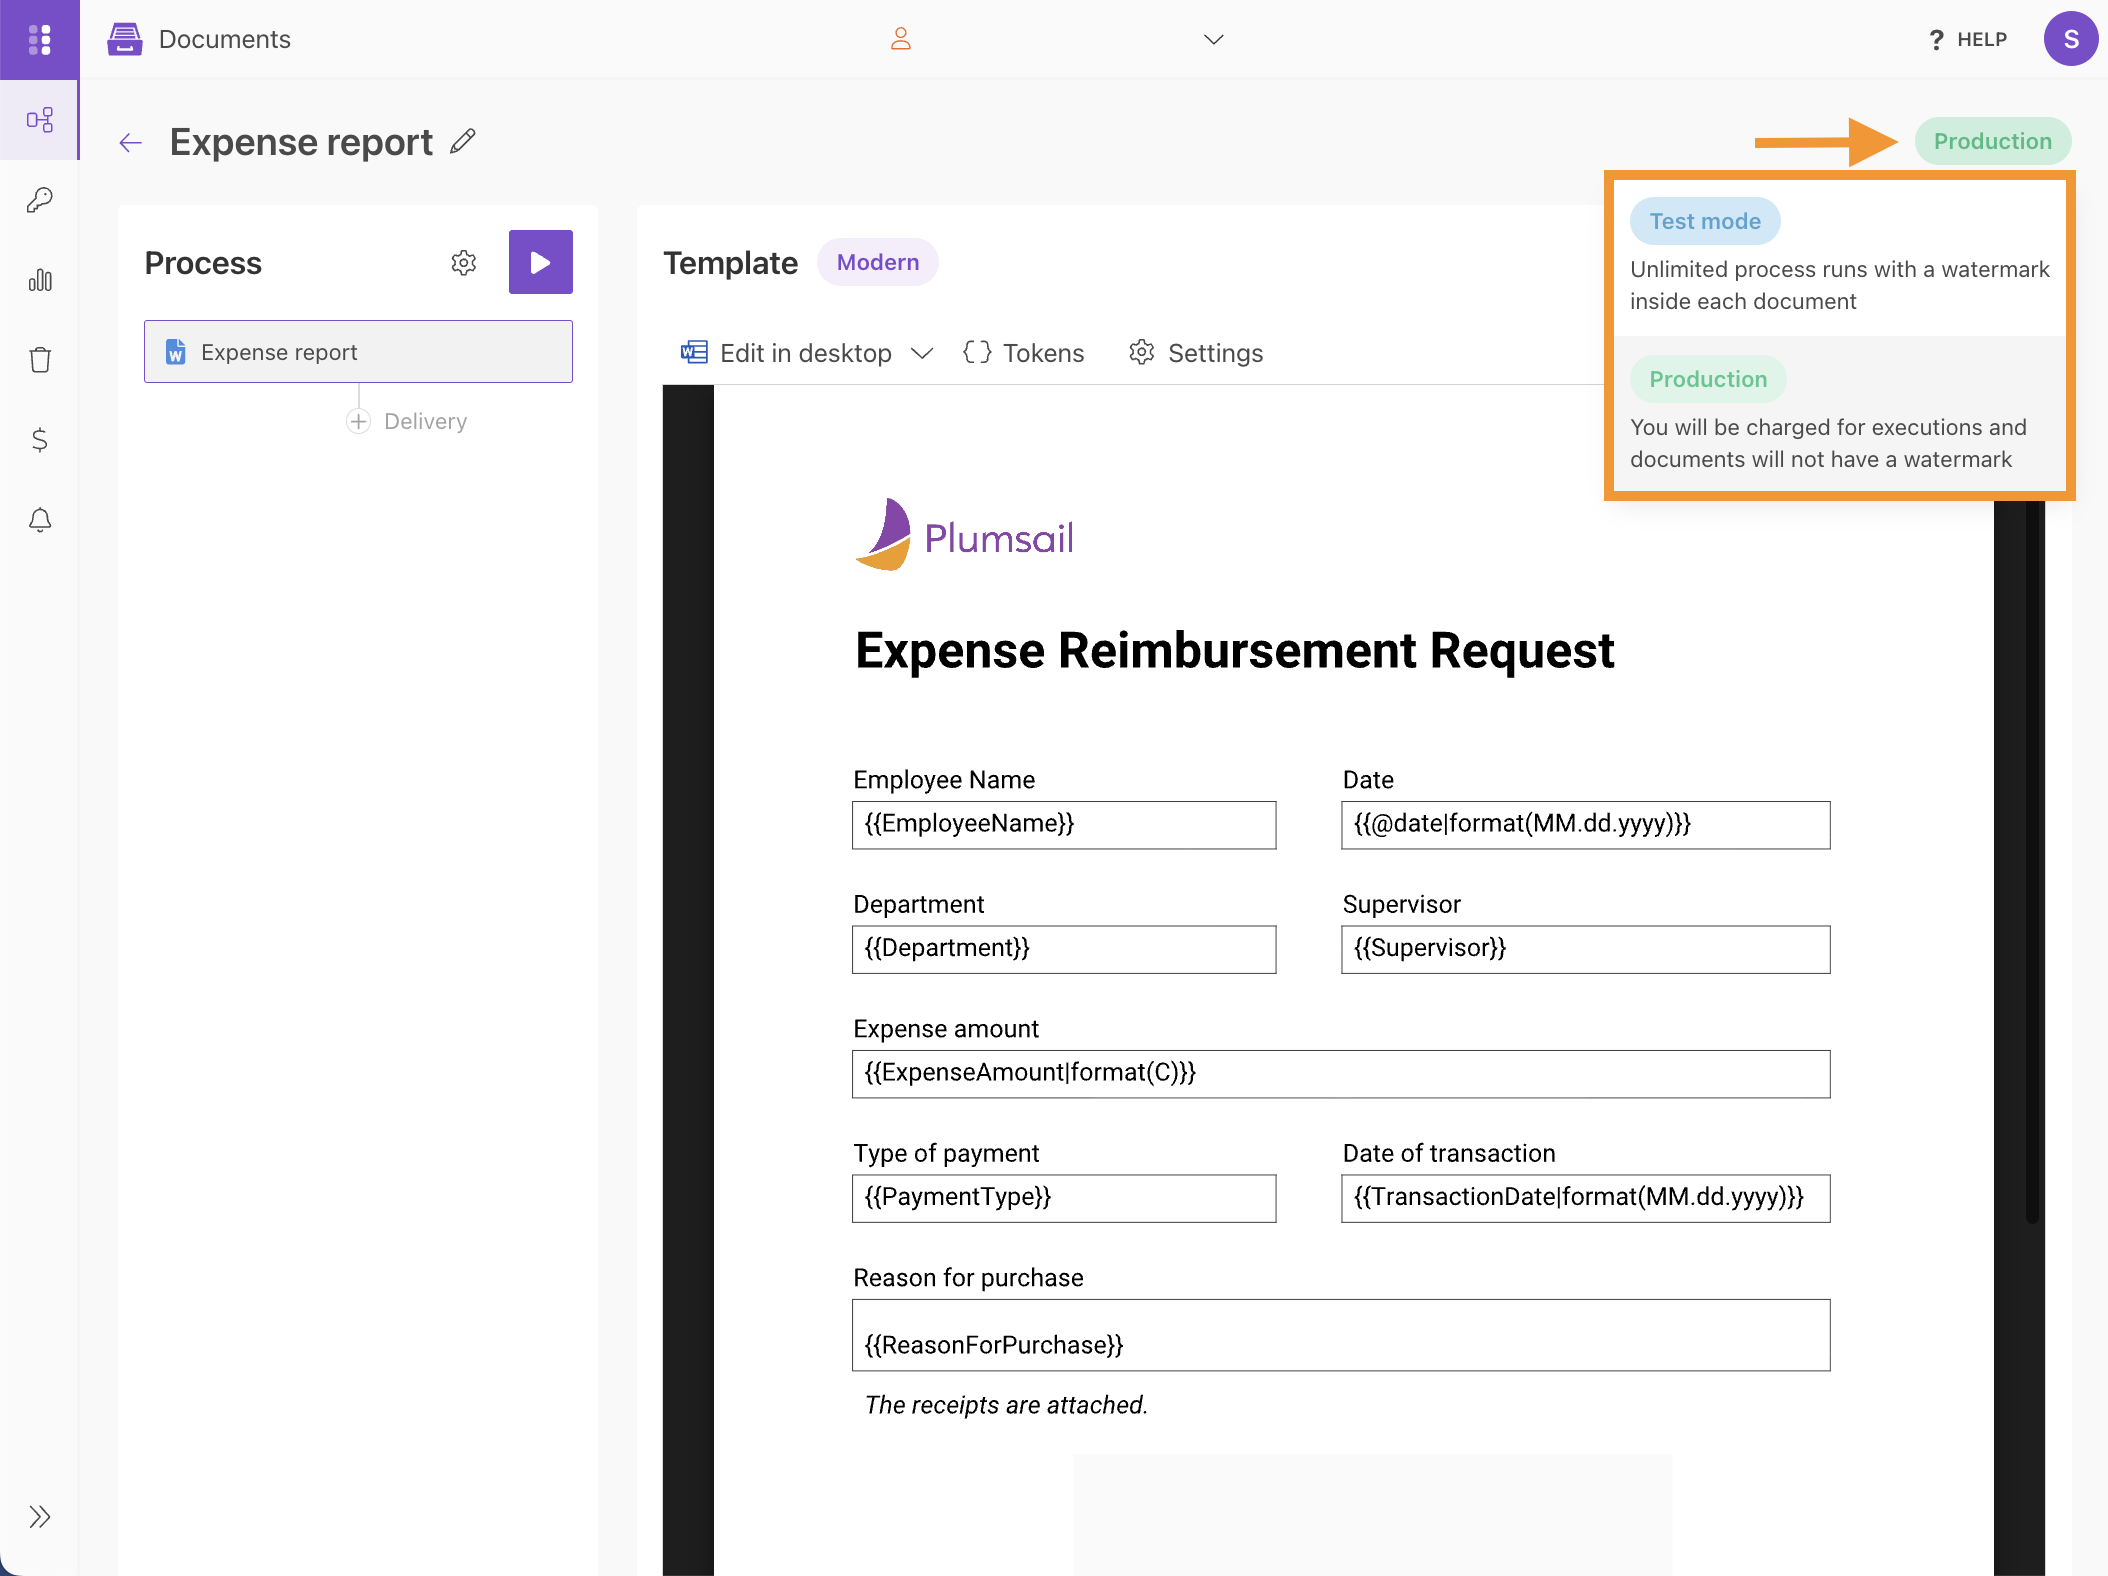
You can choose the Template mode to control how your process runs (Test mode or Production).
In the Editing step, you can edit online, test the template, adjust the tokens, and either upload a new template or download the existing one.
A token is a special placeholder enclosed in double curly brackets that applies data entered in a Microsoft Form to the document template with the help of Power Automate Flow. If you want to learn more about tokens, you can find additional information in the How Word templating syntax works article.
Please note that the document template is a Word DOCX file, and we will be able to switch the output format to PDF in Settings.
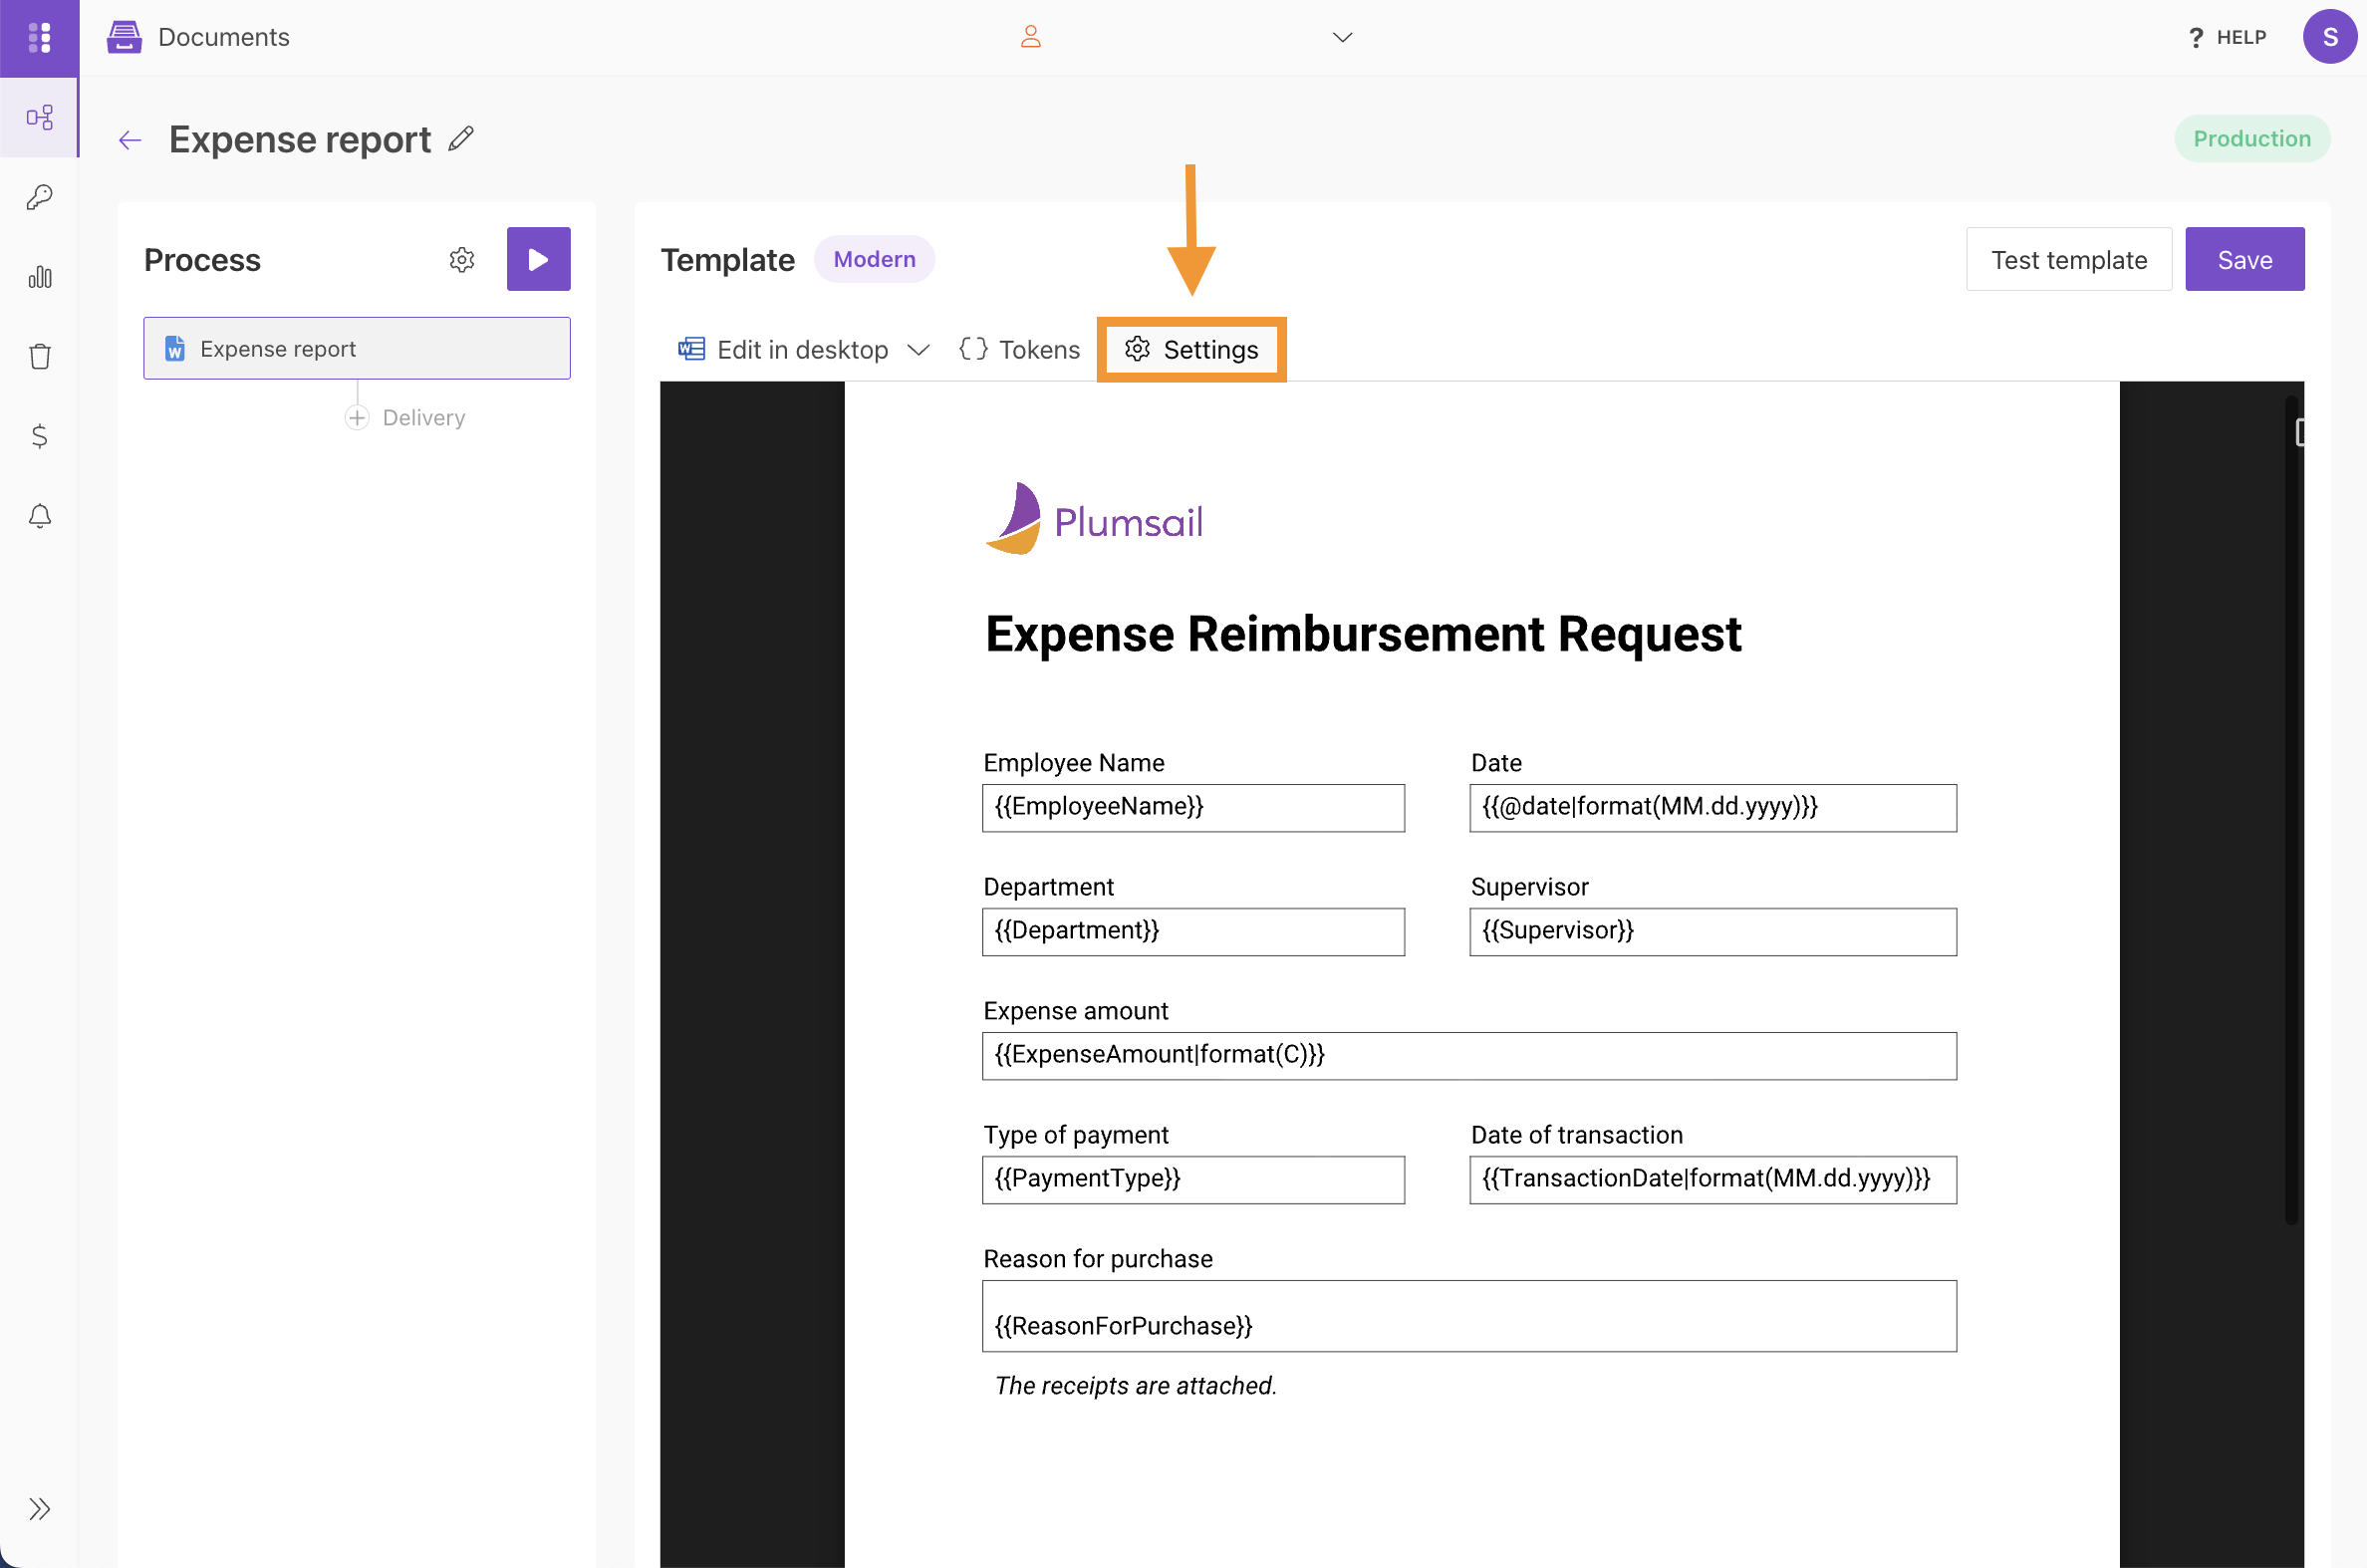
You can set an Output file name and use tokens to customize it. You can also choose a Template name and select the Template engine (Modern or Classic). Finally, choose the Output type. In this example we will use PDF.
Additionally, you have the option to add a Watermark to your document or protect it with a Protection, along with more advanced choices. Once configured, click Save.

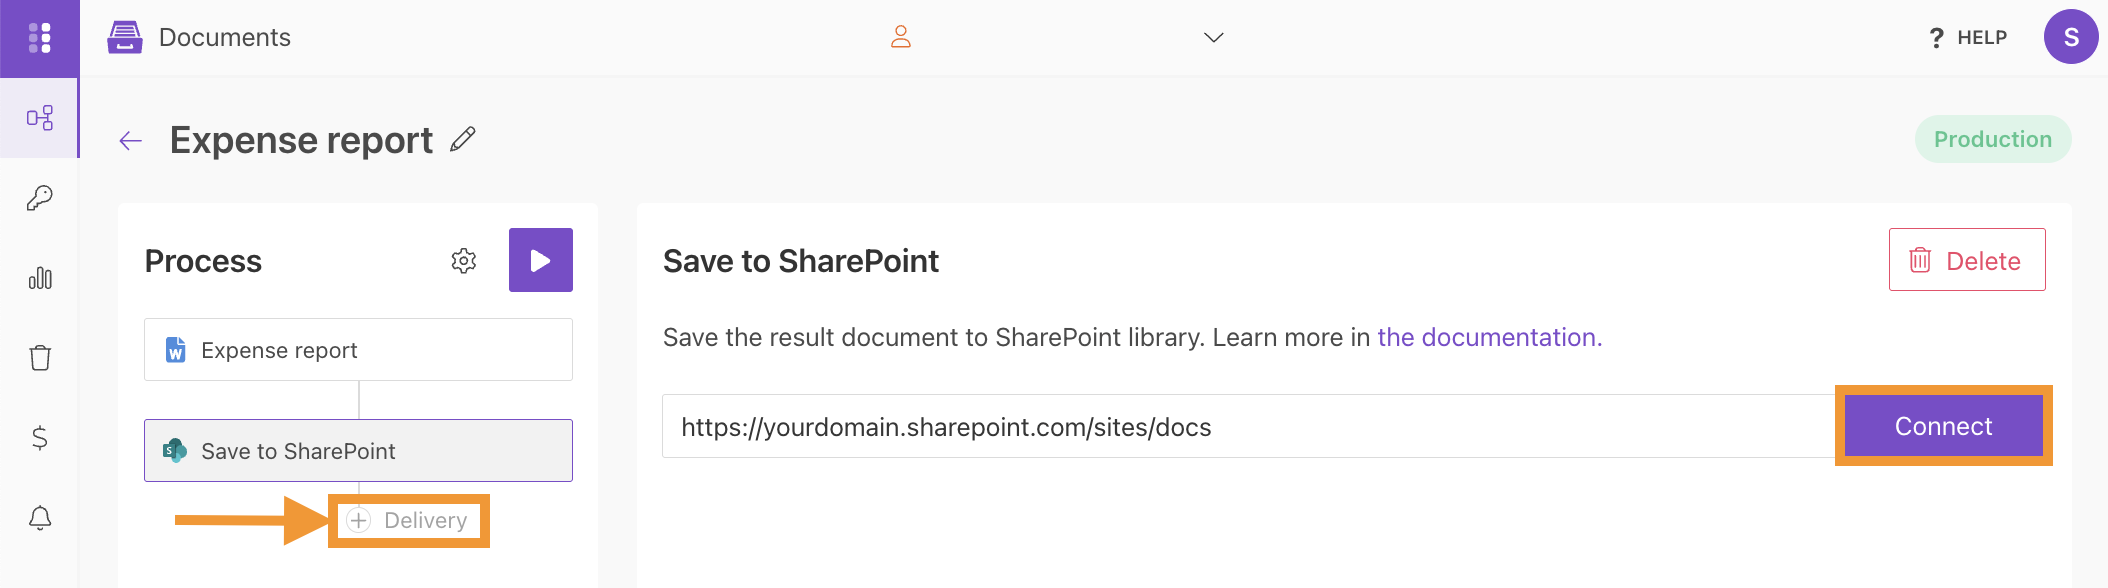
Moving on to the next step, Delivery. For demonstration purposes, we’ll store the result file in a SharePoint folder. However, there are other options, or you can skip this step if you only want to use the document template in the Power Automate flow.
Simply fill SharePoint site URL and click Connect.
Specify the library and folder where the final document will be saved. Feel free to customize the folder name by adding tokens as needed.
Now, when you configured the document template and delivery you can Run process to generate documents.
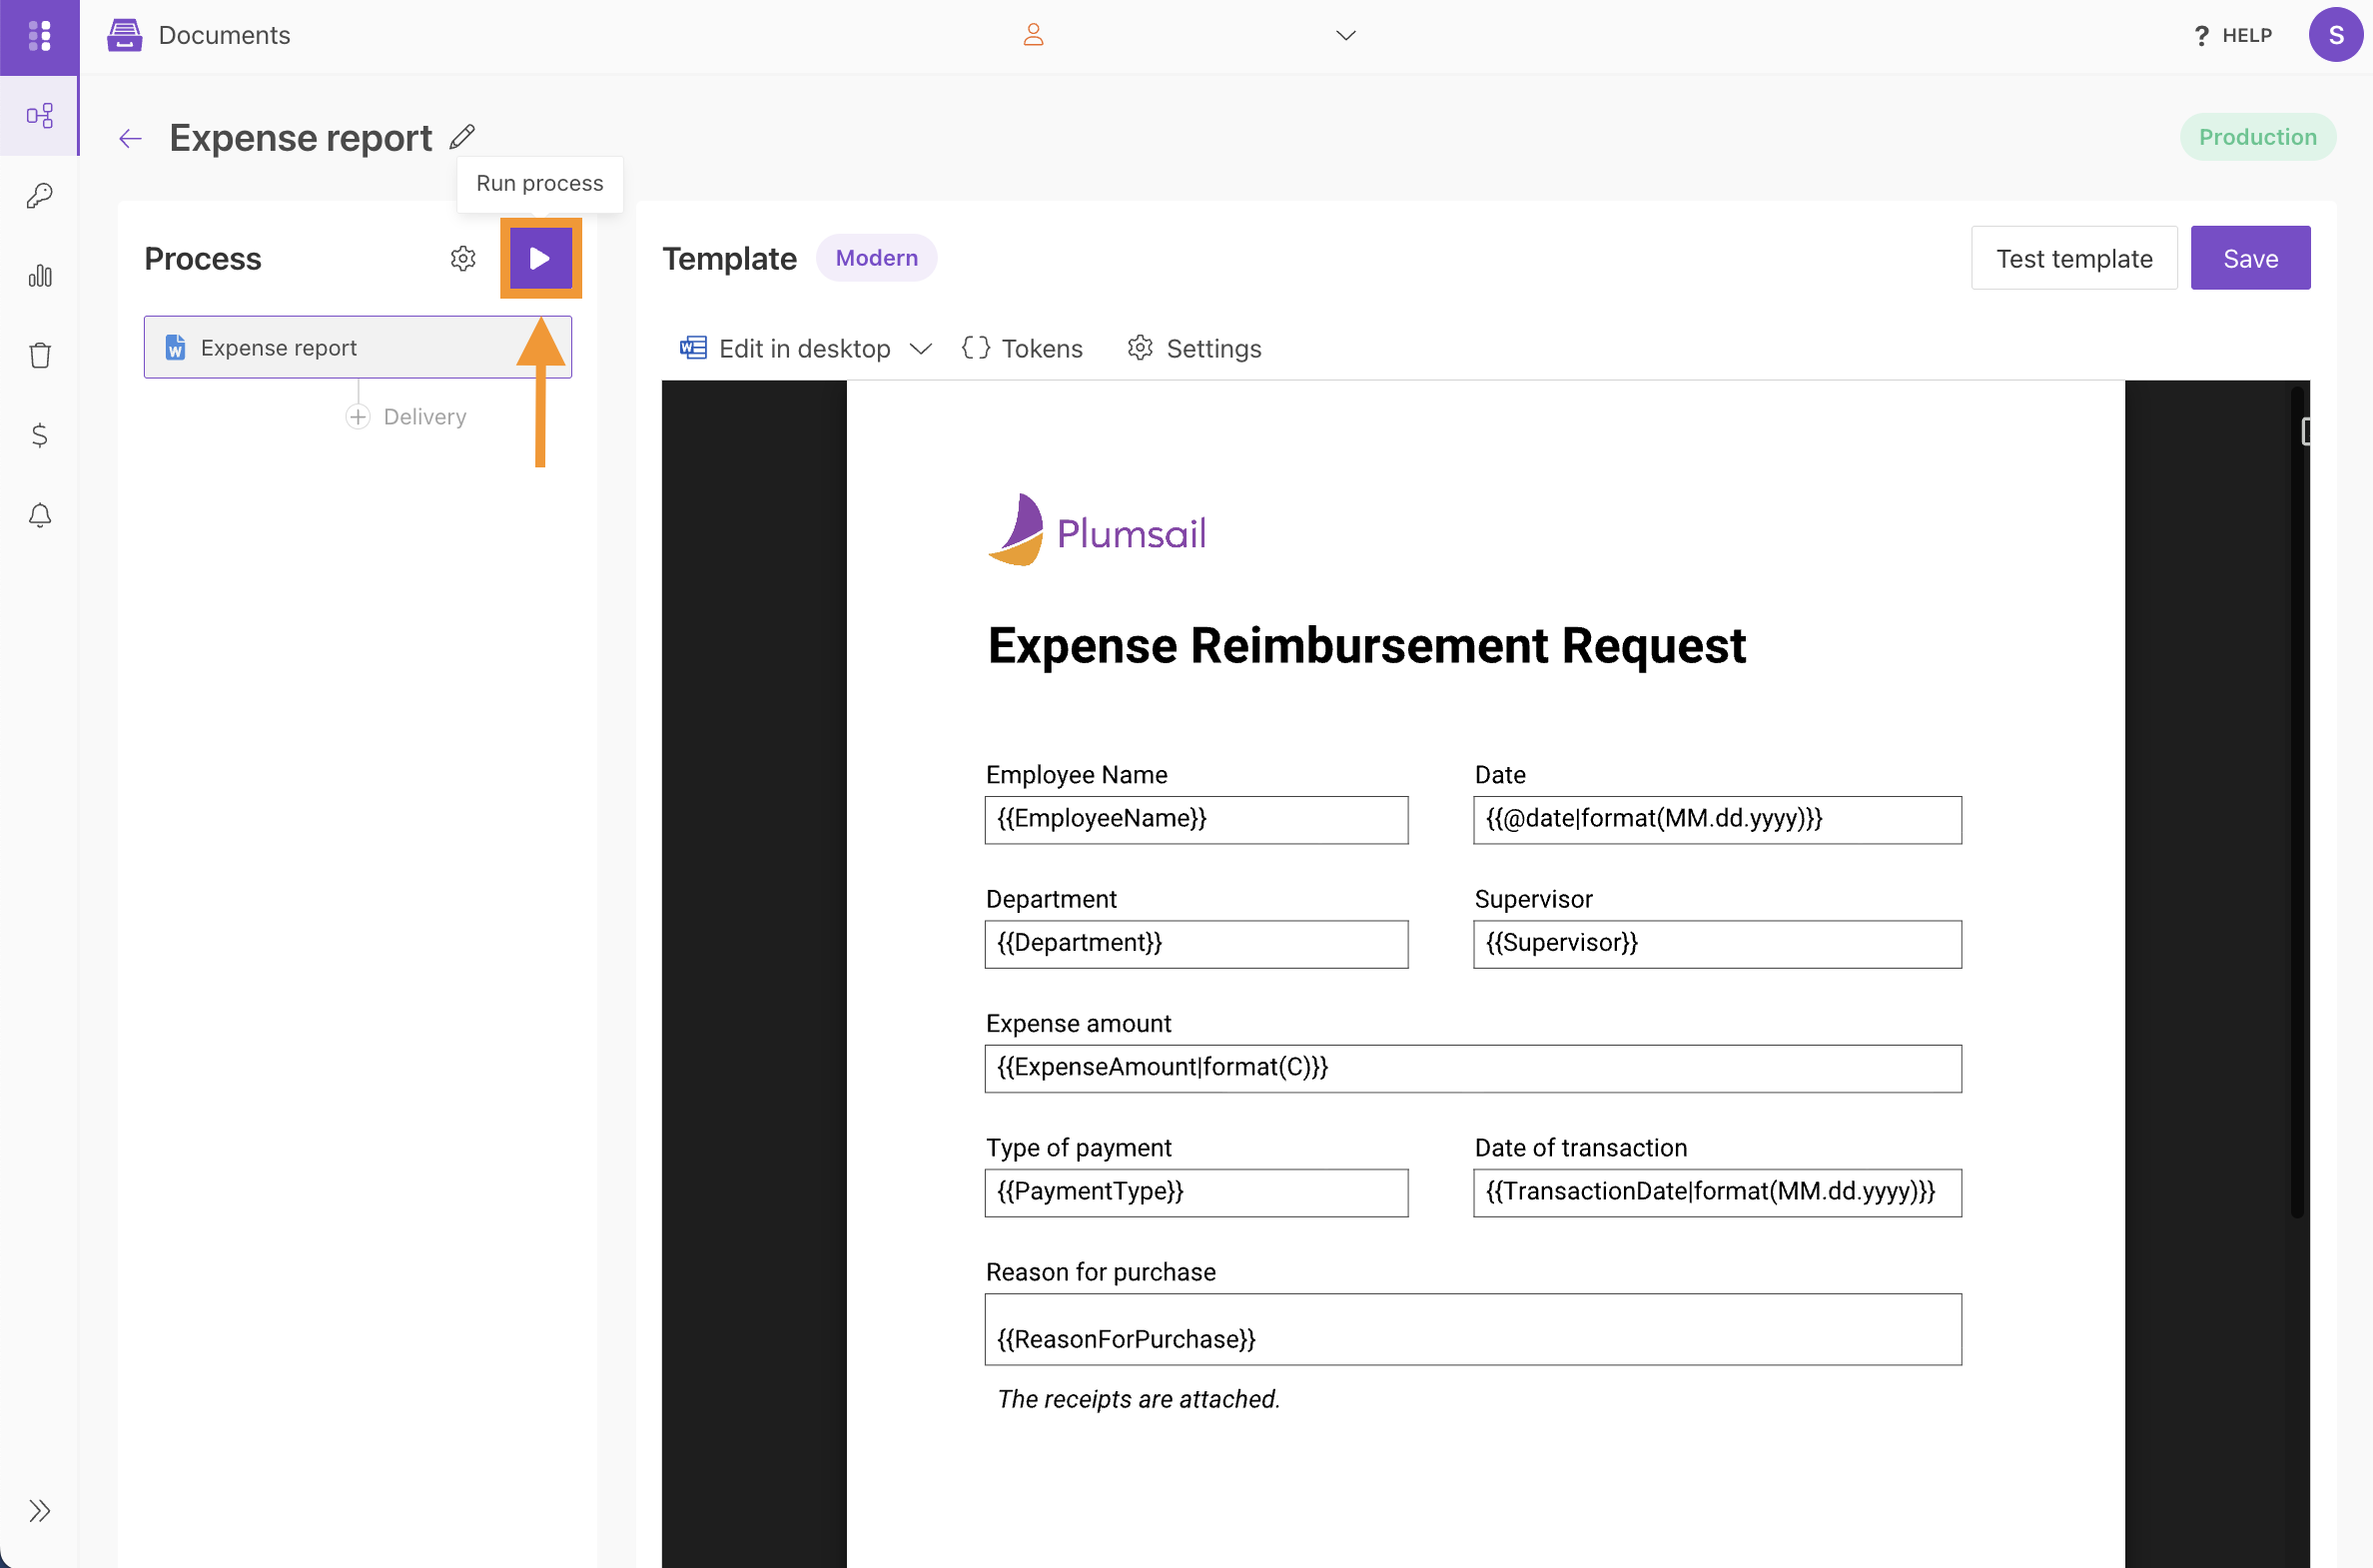
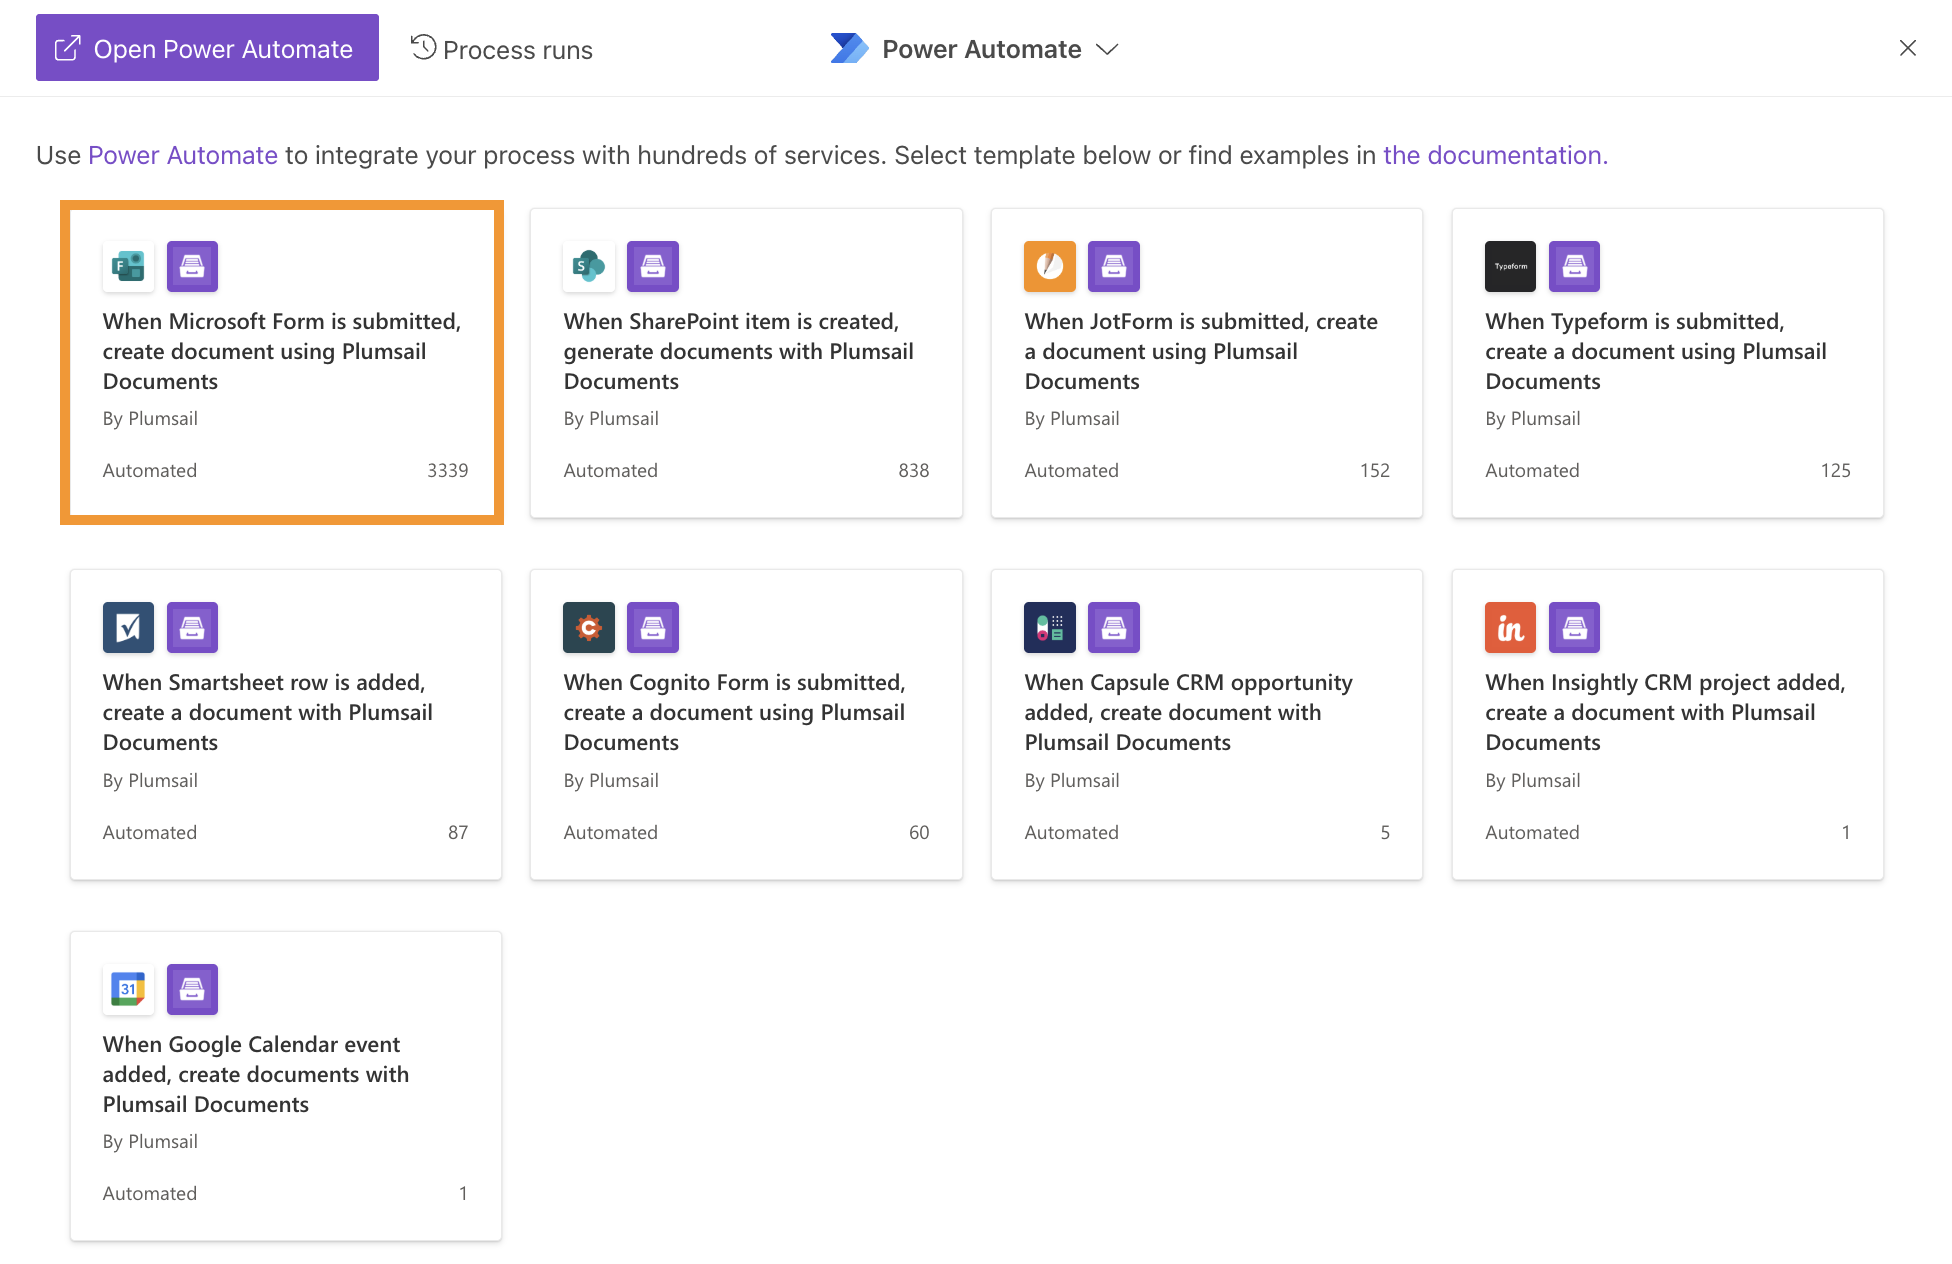
There are several options available on how to start the process. However, for our goal in Power Automate, this page already provides a few pre-built flows that we can utilize. Simply click on When Microsoft Form is submitted, create document using Plumsail Documents, and it will take you directly to Power Automate. From there, you can further customize and build on the flow.
Create a Power Automate flow
Below, you’ll find the complete Power Automate flow along with step-by-step instructions on how it works:

When a new response is submitted
This is an Automated Cloud Flow with the trigger When a new response is submitted. If this is your first time creating a flow using Microsoft Forms, you’ll be prompted to sign into your Microsoft Forms account from Power Automate:

Get response details
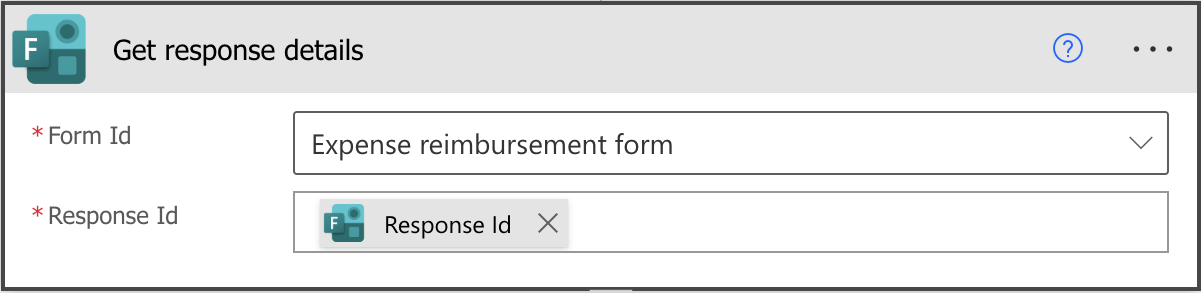
Next, add a Microsoft Forms action - Get response details to use the submitted data further in the flow.
For the Form Id, select the same form as in the trigger. Regarding the Response Id, choose the Response Id available from the trigger dynamic content:
Compose
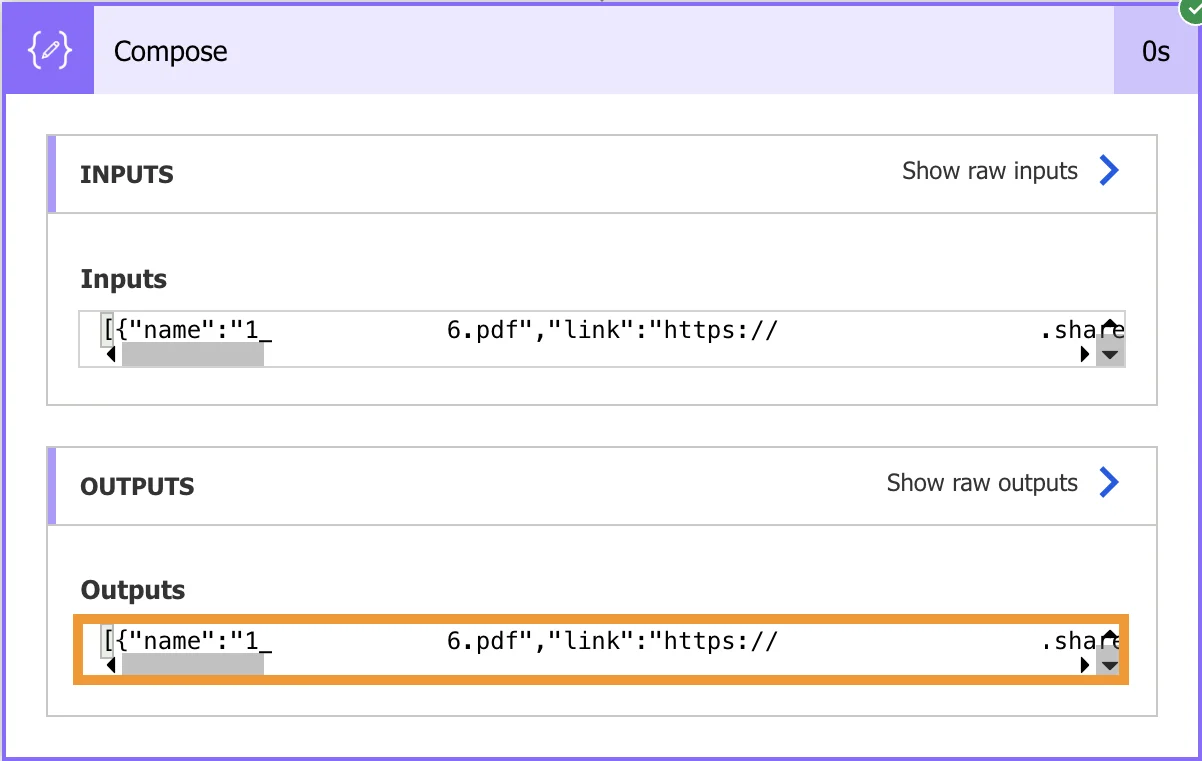
This action is necessary to get the sample JSON payload for the next step - Parse JSON. In the Inputs field, place the dynamic content representing the attachment field in the Microsoft Form. In our case, it’s Please upload a copy of your receipt:

You can delete this action once you’ve obtained the sample payload. To retrieve the payload, run the flow by submitting the Microsoft Form with attachments. After the flow runs successfully, copy the Outputs section:
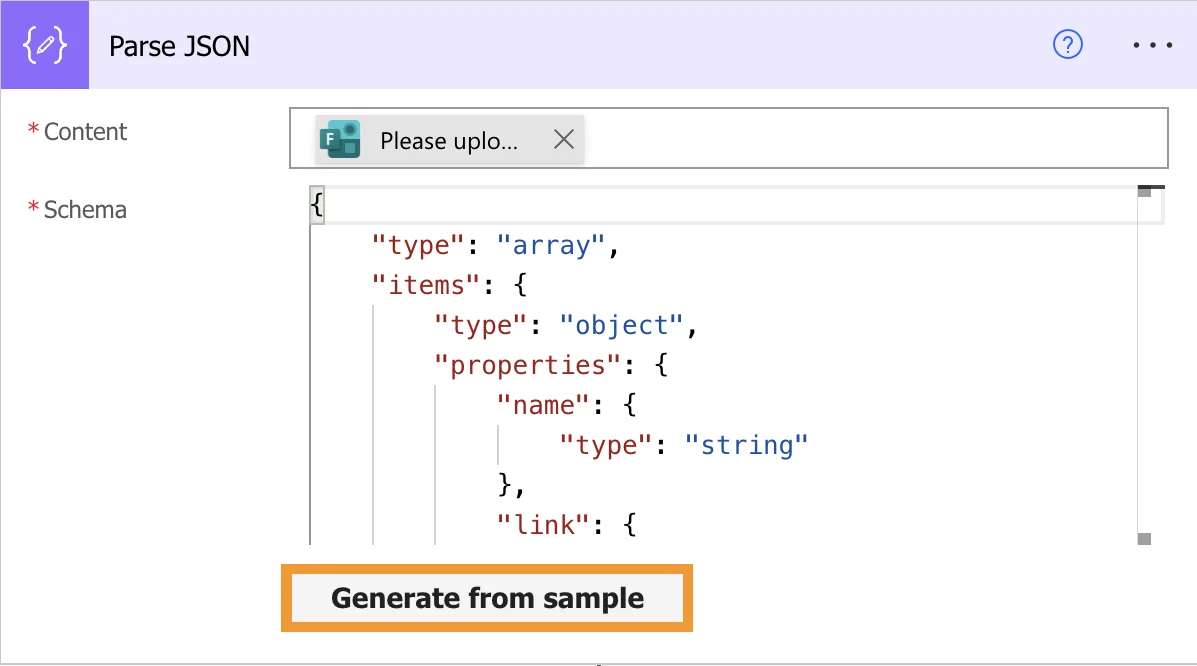
Parse JSON
Now, let’s add the Parse JSON action, which has two parameters:
Content - select the attachment output Please upload a copy of your receipt from the Get response details action.
Schema - click Generate from sample and paste the Outputs that you copied from the Compose action. You should receive the schema similar to the example below:
{
    "type": "array",
    "items": {
        "type": "object",
        "properties": {
            "name": {
                "type": "string"
            },
            "link": {
                "type": "string"
            },
            "id": {
                "type": "string"
            },
            "type": {},
            "size": {
                "type": "integer"
            },
            "referenceId": {
                "type": "string"
            },
            "driveId": {
                "type": "string"
            },
            "status": {
                "type": "integer"
            },
            "uploadSessionUrl": {}
        },
        "required": [
            "name",
            "link",
            "id",
            "type",
            "size",
            "referenceId",
            "driveId",
            "status",
            "uploadSessionUrl"
        ]
    }
}
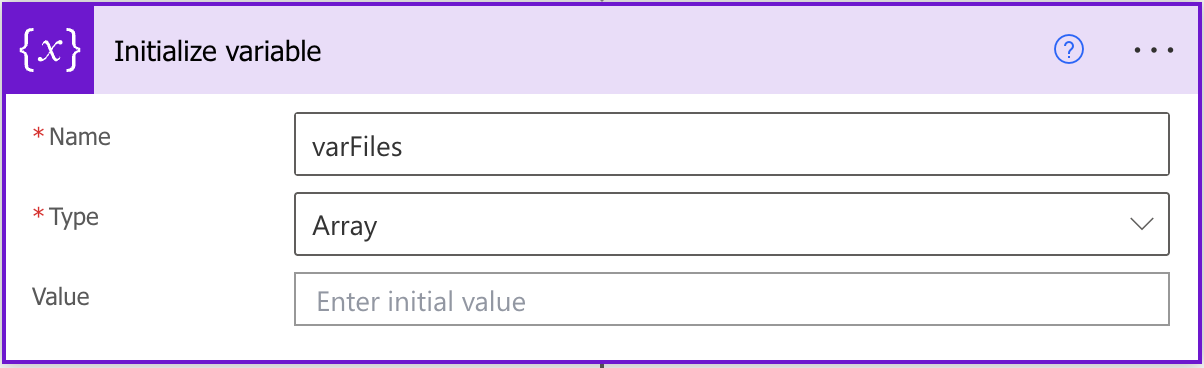
Initialize variable
We need to build an array of files that will be included in Merge PDF action from Plumsail. This array will consist of the attachment PDF files from the Microsoft form and the Expense Report Document template populated with data from the form fields.
Enter a variable name varFiles and select the Array type for it:
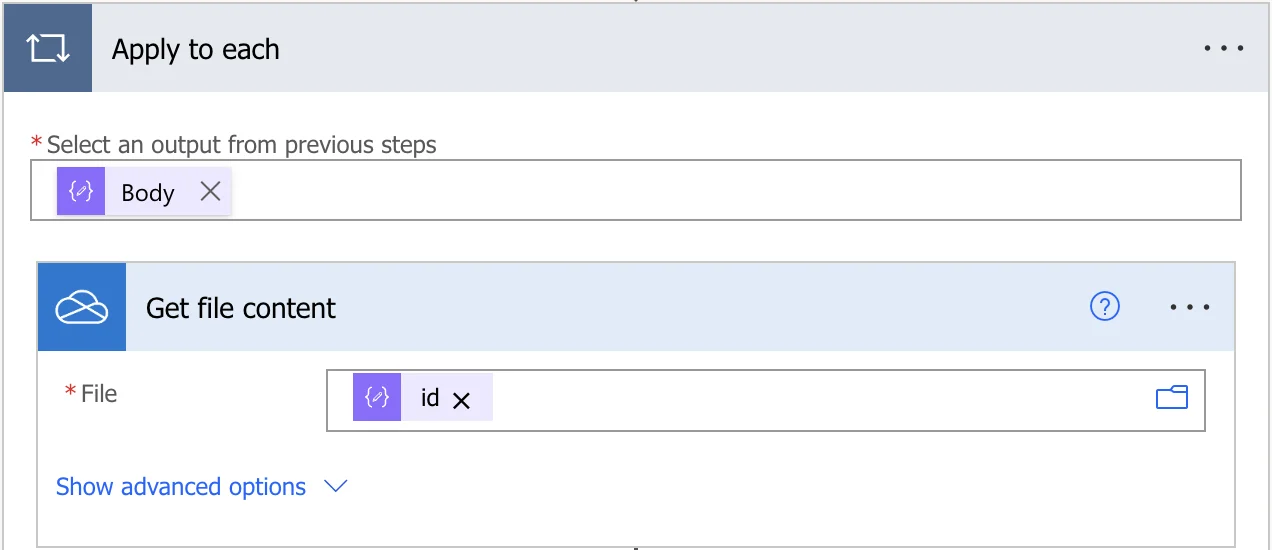
Get file content
The next step is to retrieve the attachments’ content for further conversion to PDF. This involves using the Get file content action from OneDrive for Business. We are using this action because the attachments submitted with the Microsoft Form are automatically stored in OneDrive.
Add the id output from the Parse JSON action. The Apply to each loop will automatically appear:
Append to array variable - Attachments
Now, add Append to array variable action inside the Apply to each loop. In the Name field, select varFiles from the Initialize variable action, and in the Value field, select File content from the output of the previous action. The File content dynamic data represents PDF files attached to the Microsoft form:

Start document generation process
Next, we’ll use a Plumsail action, Start document generation process. This action establishes the connection between the Microsoft Form and the Document process we’ve earlier set up in the Plumsail account.
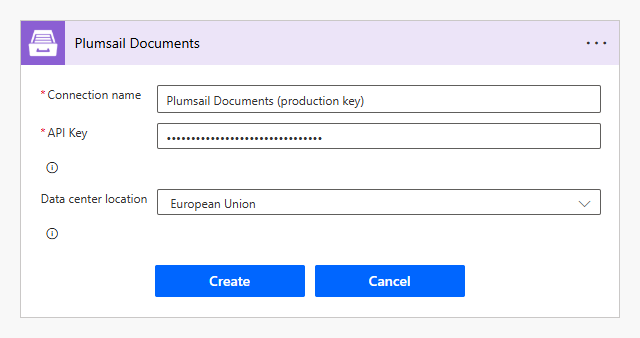
If this is your first time using the Plumsail Documents connector, Power Automate will request a Connection name, an API Key, and Data center location.
You can type any name for the connection, for example Plumsail Documents (production key). Ensure that the selected data center location matches one of your account.
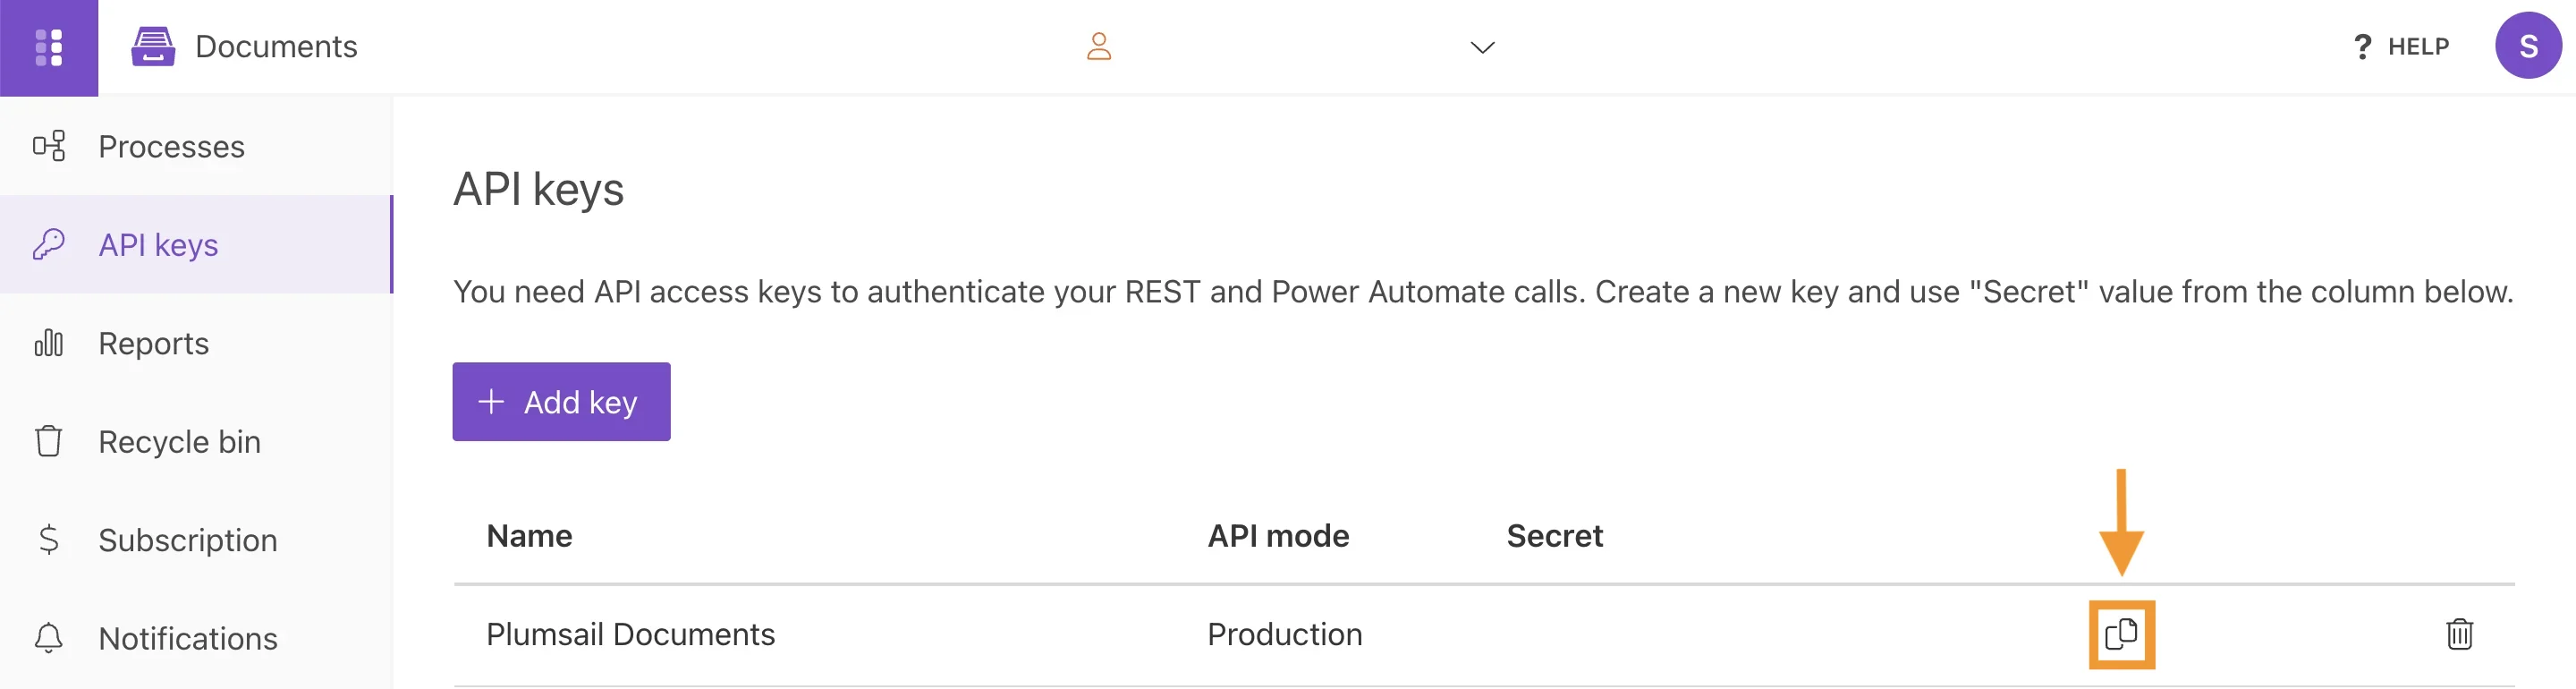
Then, create an API key in your Plumsail Account, copy and paste it into the API key field, and click Create.
To proceed, go back to your Plumsail account and navigate to API Keys. Select Add key and provide a name for the connection, for example, ‘Plumsail Documents.’
Once the connection name is filled out, create an API key in your Plumsail account, copy it, return to Power Automate, paste it, and then click Create.
Now, let’s configure the Start document generation process action. In the Process name field, select Expense Report. The subsequent fields, as you can see, are the ones we marked with tokens. Here, select the corresponding dynamic data outputs from the Microsoft Form:
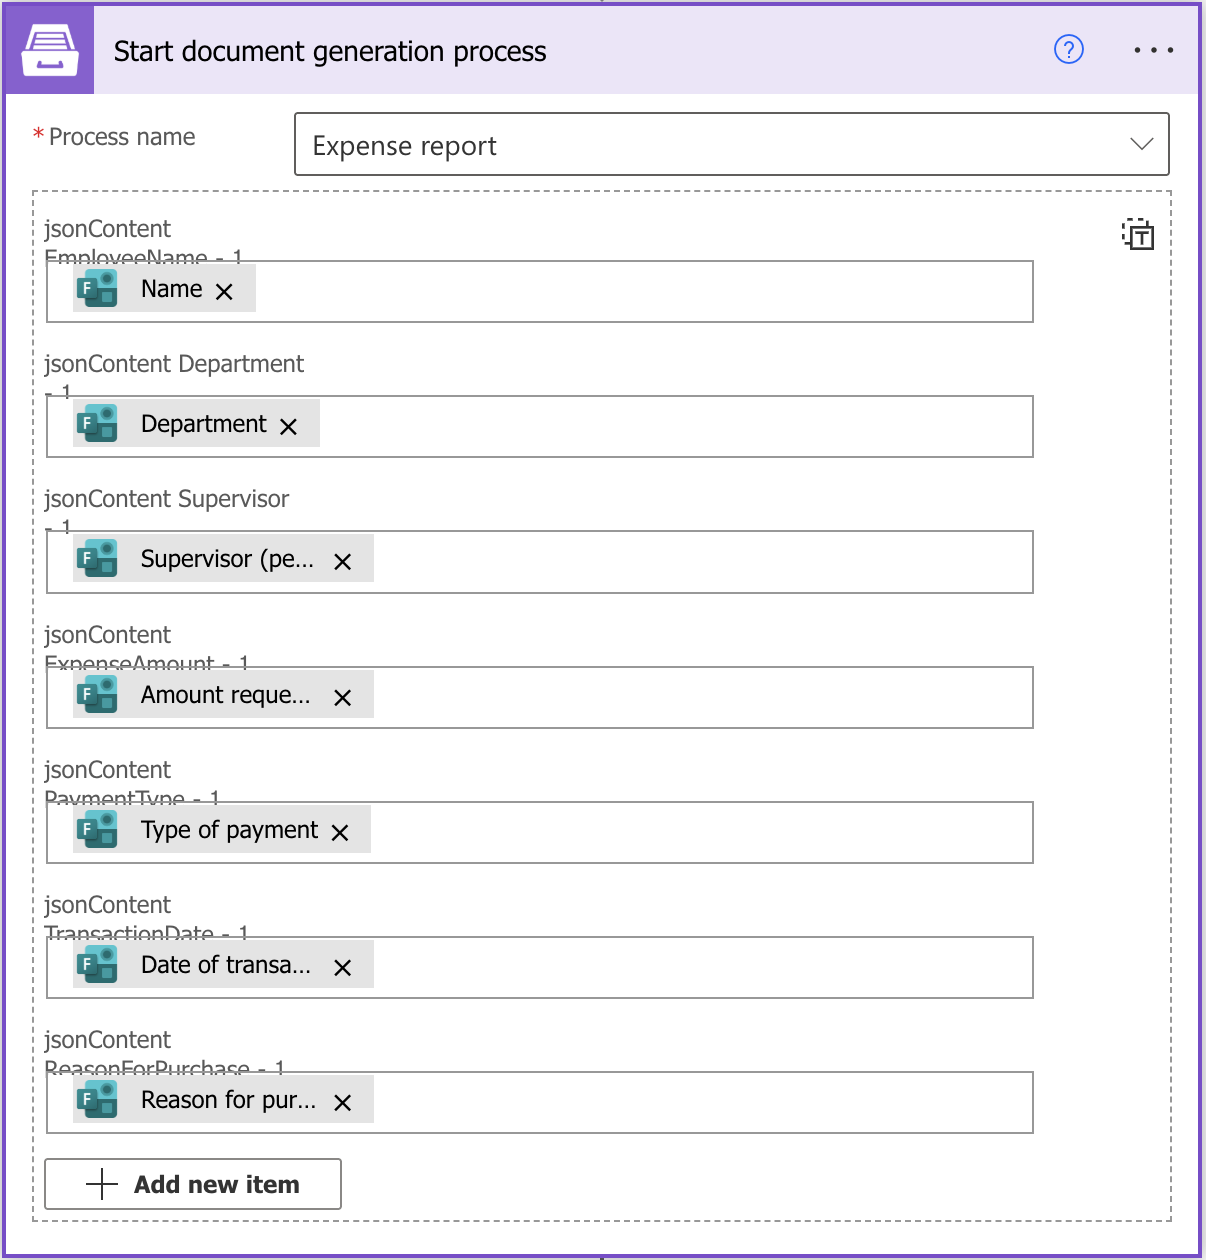
There’s also an option to switch to input the entire array by clicking on T in the upper right-hand corner.
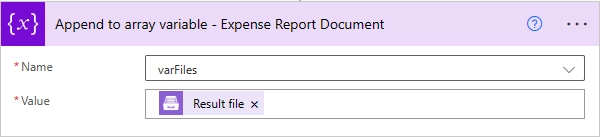
Append to array variable - Expense Report Document
Next, locate Append to array variable action. Select varFiles, and in the Value field, choose Result file from the previous Plumsail action. The Result file represents the Expense Report Document generated from the Microsoft form:
Merge any files into PDF
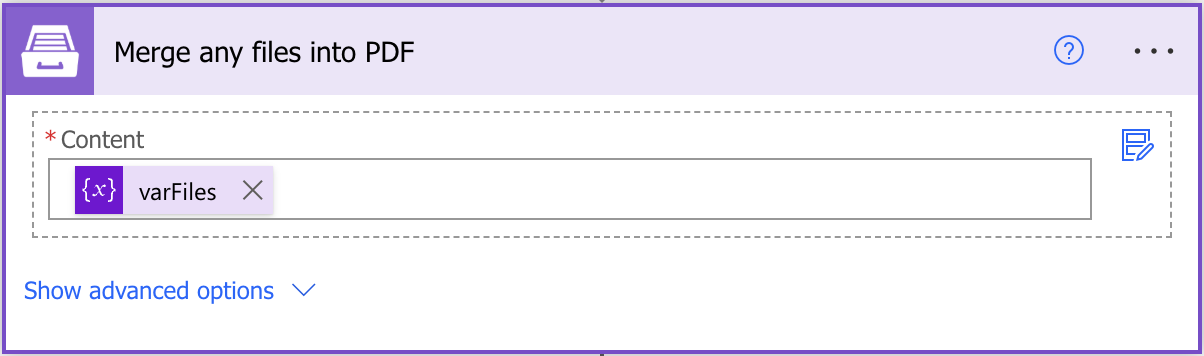
Our second-to-last action is Merge any files into PDF from Plumsail, and it will perform the task as implied by its name. In this action, we’ll input the entire array.
Select varFiles under Variable. This will consolidate attachments and the Expense Report document into one PDF file. We can achieve this because earlier we initialized variables and used Append to array variable action twice. The first time to gather the PDF attachments and the second time to obtain the generated PDF document:
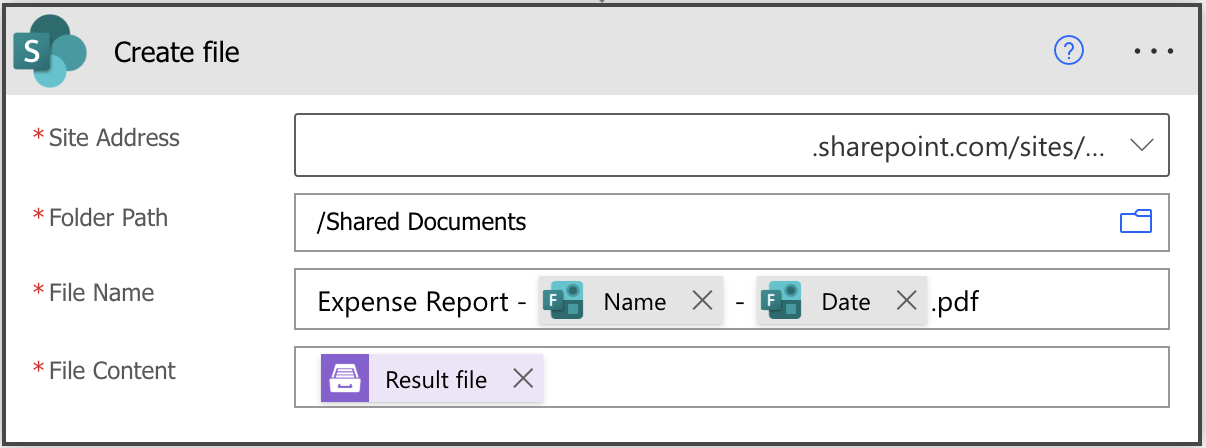
Create file
This is the last action of our flow. We’ll save the resulting merged PDF to the SharePoint folder. You can choose to save the result file to any other storage system or, for example, send an email with the file attached.
Select the SharePoint site and folder where you’d like to save the files. In the File name field, we added dynamic content Name and Date from the Get response details action, ensuring each file name is unique. Don’t forget to include the .pdf extension in the file name.
For the File Content, select Result file from the Merge PDF action. Click Save, and the flow is complete!
Now, let’s put the flow to the test by filling out and submitting the Microsoft Form:
Let’s check the specified SharePoint folder to verify if the PDF document with attachments was successfully saved. As you can see, the receipts and the document are all consolidated into one PDF file:
Conclusion
While the flow may seem a bit long, all the steps are simple to understand and configure. As a result, you’ll have the Microsoft Form, including attachments, converted into one PDF file.