Create Excel and PDF documents from Microsoft Forms in Power Automate
This article shows how to generate Excel and PDF documents from Microsoft Forms submissions using Processes and Power Automate (MS Flow).
When a user submits a form:
Power Automate captures the response.
The data is passed to a Plumsail Documents Process.
The Process populates an Excel template.
The generated document is saved and optionally converted to PDF.
This approach can be used to automate employee forms, requests, applications, orders, reports, and other business documents.
Create a Form
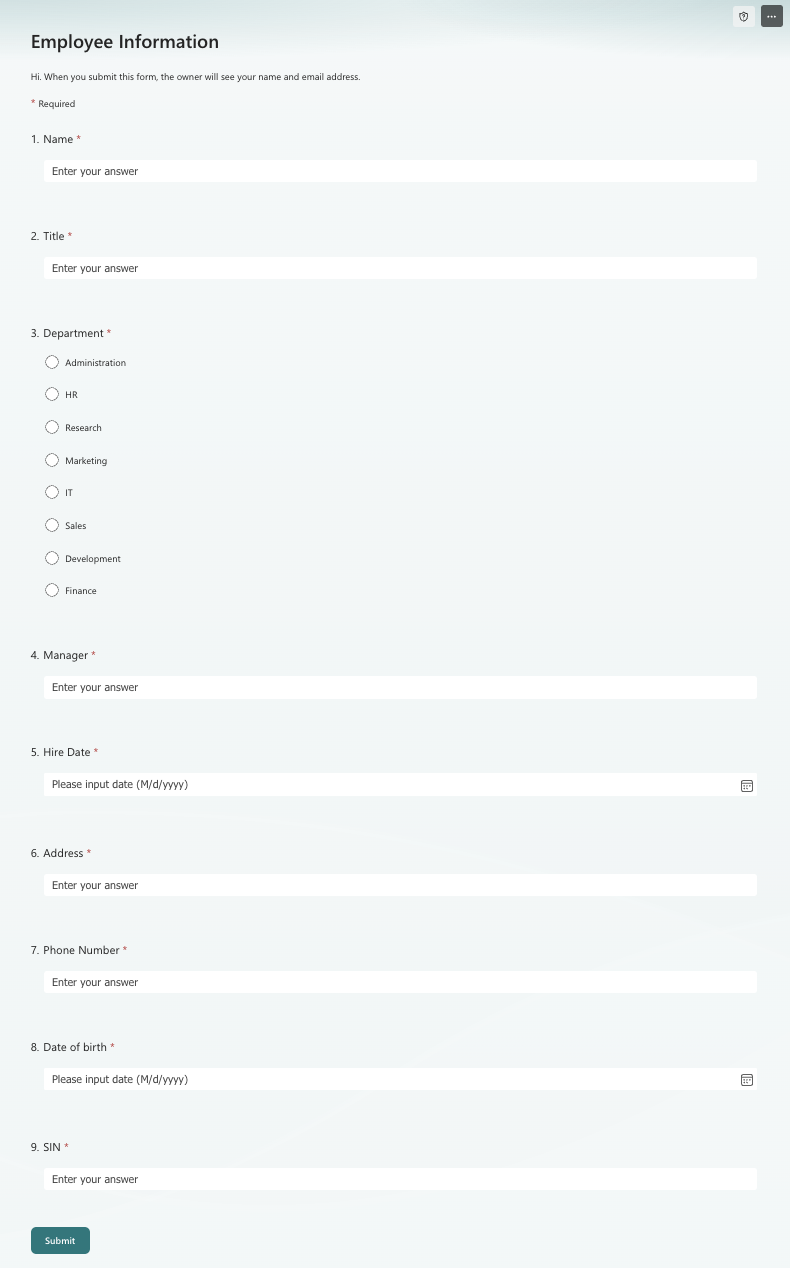
For this example, we will use a Microsoft Form that collects employee information. If you are new to Microsoft Forms, see Microsoft’s guide on creating forms.
You can also use the sample form from this tutorial. After signing in to Microsoft Forms, duplicate the form and save a copy to your account.
The form used in this example looks like this:
Configure the process
Before creating the Flow, we need to create a process, which will generate PDF documents from an XLSX template.
Create a new process
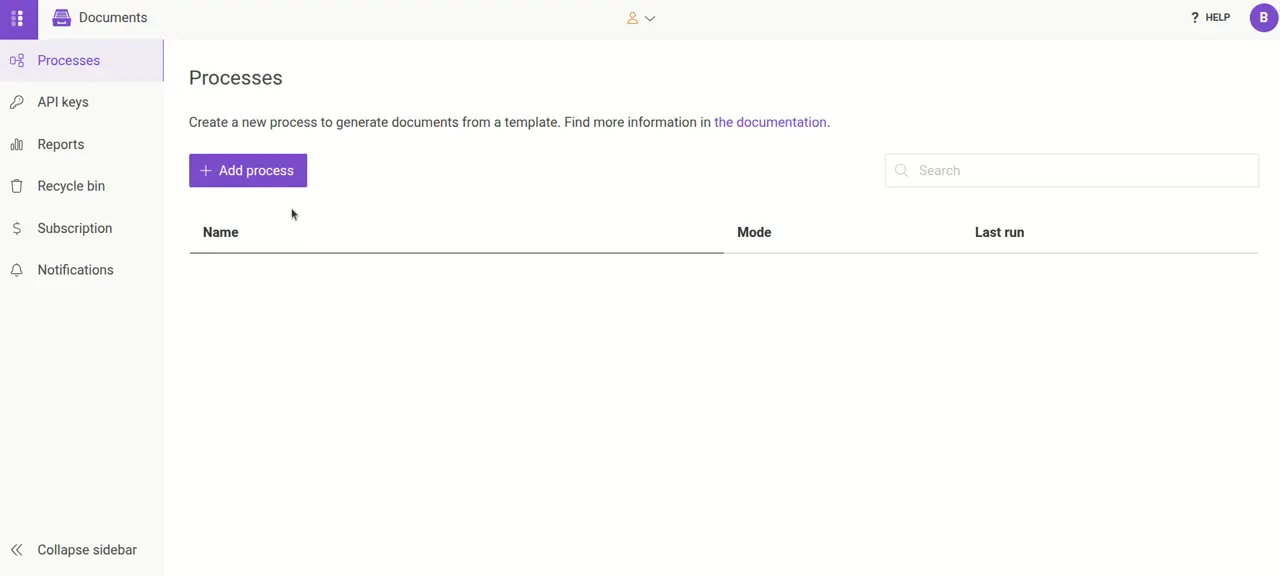
Open Processes in your Plumsail account and click Add process.
Then, select Uploaded file in the side panel to import your Excel template. You can use your own template or download the sample template from this example.
Enter a name for the process, select PDF as the output format, and choose the templating engine. Finally, click Create
Configure a template
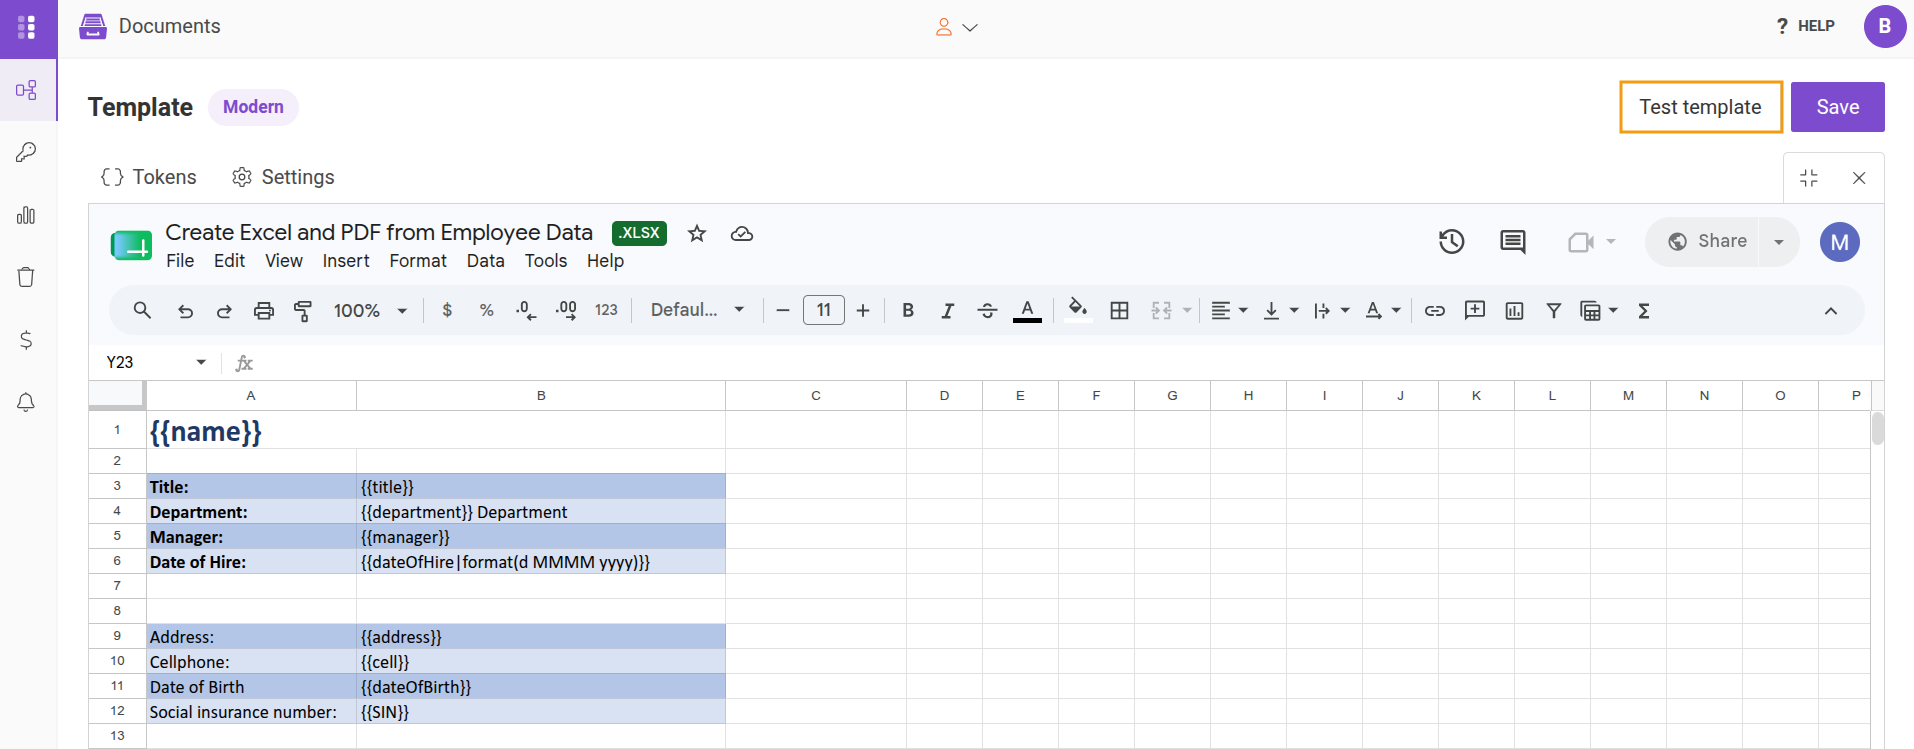
After creating the process, the template opens in the online editor.
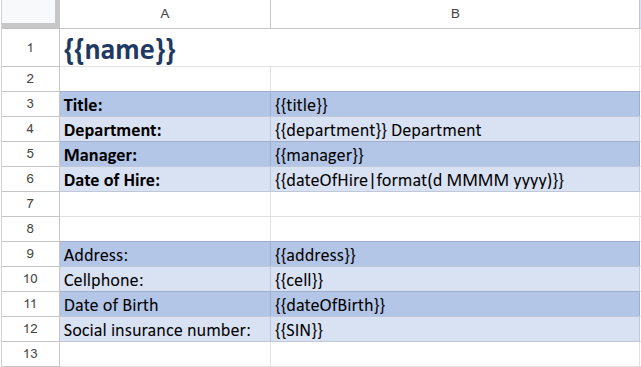
The template used in this example looks like this:
Templating syntax
When creating your own templates, mind the templating language. Plumsail Excel XLSX templates use a different approach than most other templating solutions. It uses a minimal amount of syntax to make your work done.
Template placeholders are enclosed in {{ }} brackets, and when the document is generated, these placeholders are replaced with data pass to the process.
Read this article to get familiar with the templating engine.
Test template
Before building the automation flow, test the template to verify that it generates the expected document.
Click Test template and the editor will automatically generate a test form, based on the placeholders found in the template.
You can adjust the look of the testing form by changing token types. Alternately, you can use a JSON example.
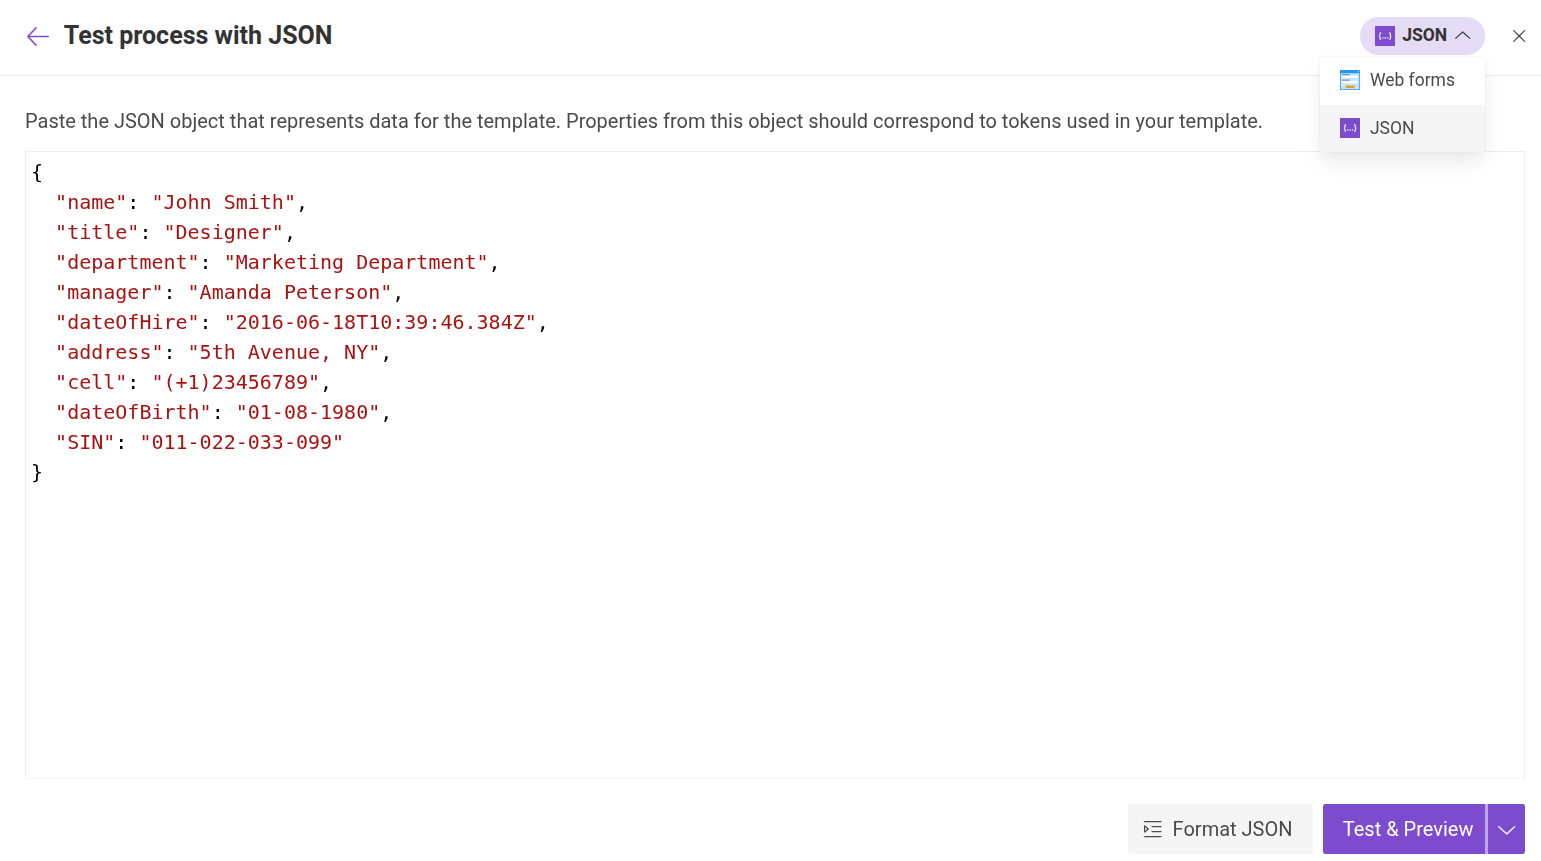
Verify that the generated document looks correct before continuing.
Settings
Use the Settings option to further customize your process.

You can:
Name your template
Change the output filename dynamically
Select the output file type
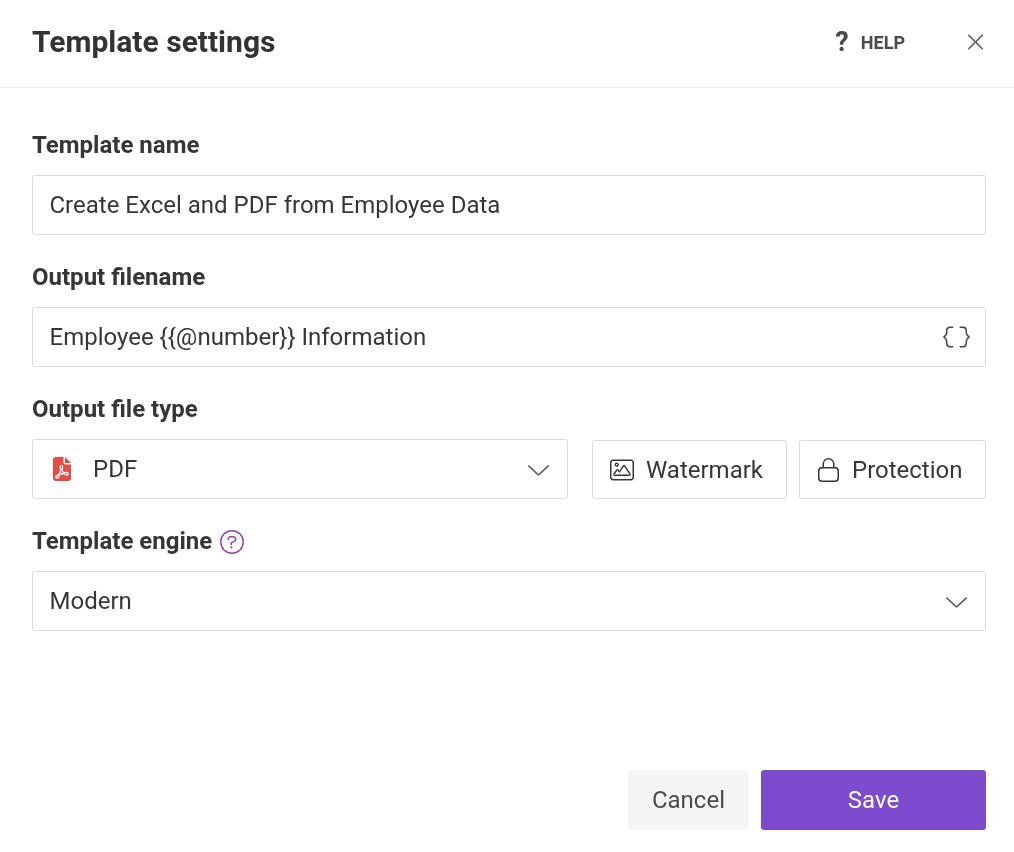
After updating the settings, run another test to verify the output. When everything is configured correctly, click Save.
Start the Process
This example uses Power Automate to start the document generation process when a form is submitted.
Create a Flow
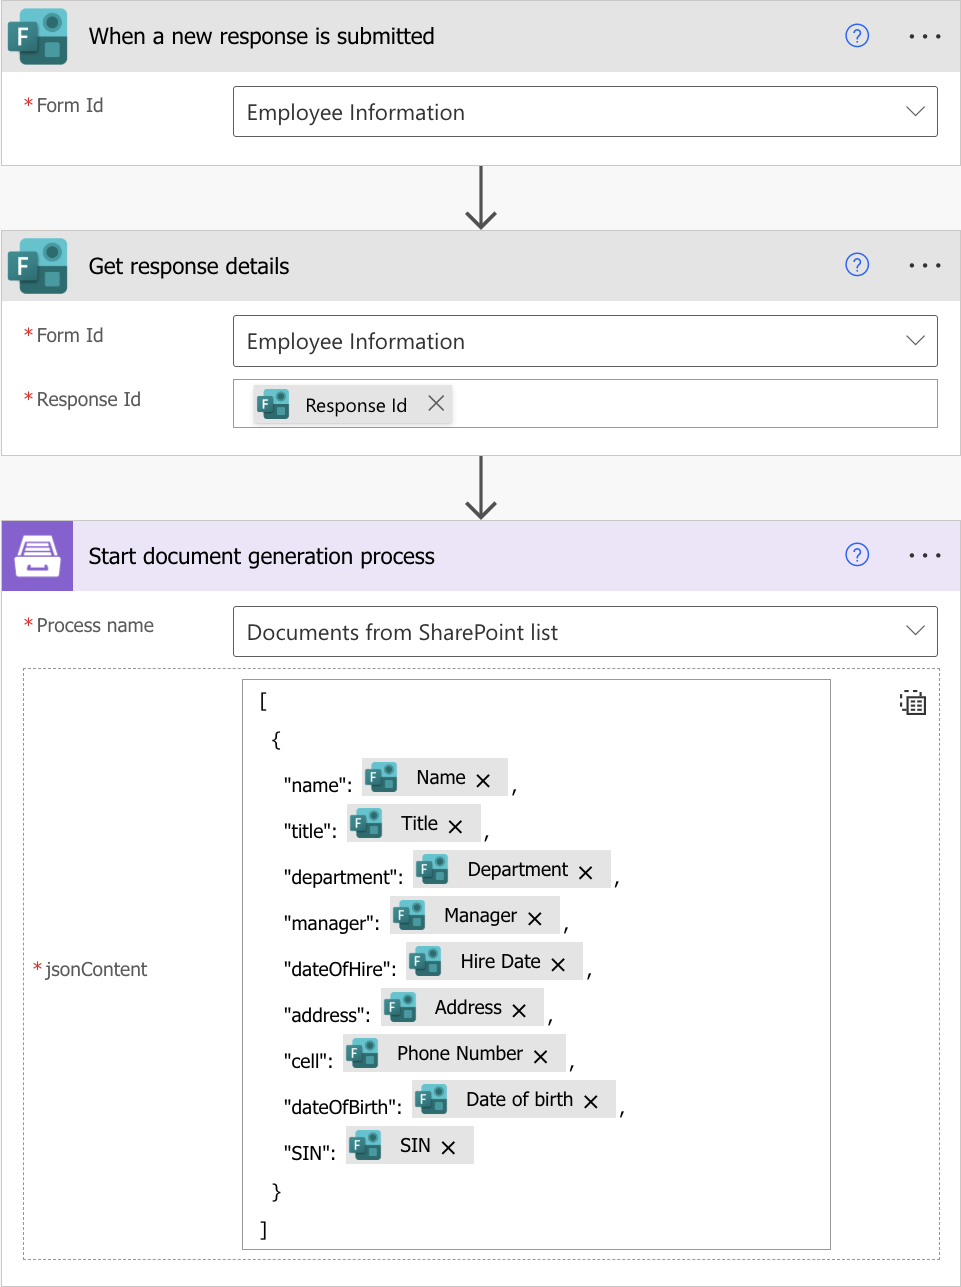
The completed flow contains three main steps:
Trigger when a form response is submitted.
Retrieve the submitted response data.
Start a Plumsail Documents Process.
The following sections explain how to configure each step.
Form is submitted
Add the When a new response is submitted trigger from the Microsoft Forms connector.
Note
If this is your first time using Microsoft Forms in Power Automate, you will be prompted to sign in and create a connection.
After signing in:
Add the trigger.
Select the form you want to monitor from the Form Id dropdown.

The flow will now start automatically whenever a new response is received.
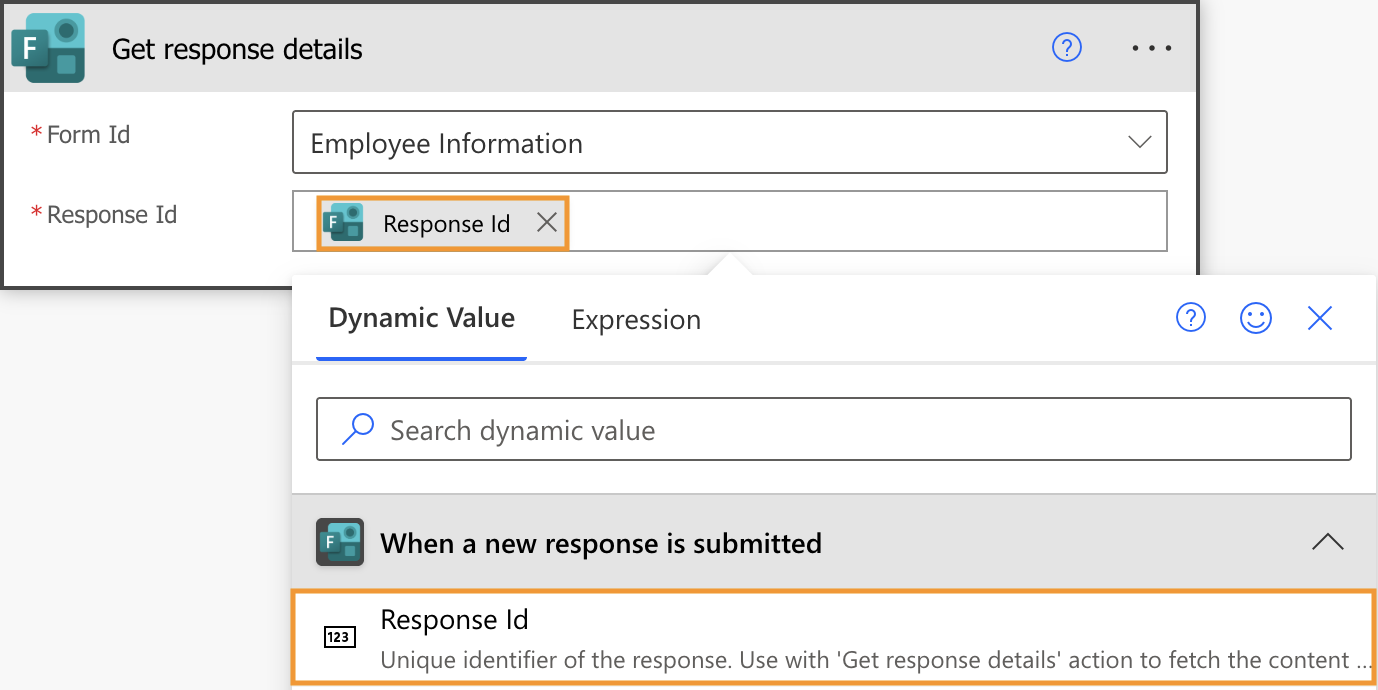
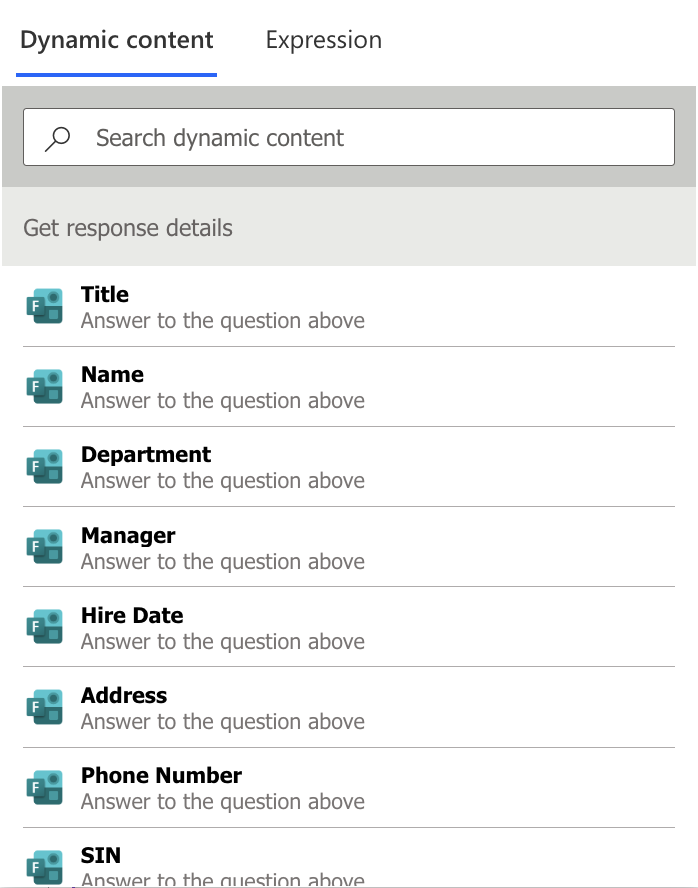
Get response details
Next, add the Get response details action from the Microsoft Forms connector. You should configure the action as follows:
Select the same Form Id used in the trigger.
Click inside the Response Id field.
Select Response Id from the dynamic content panel.
This allows Power Automate to retrieve the answers submitted in the form.
Start document generation process
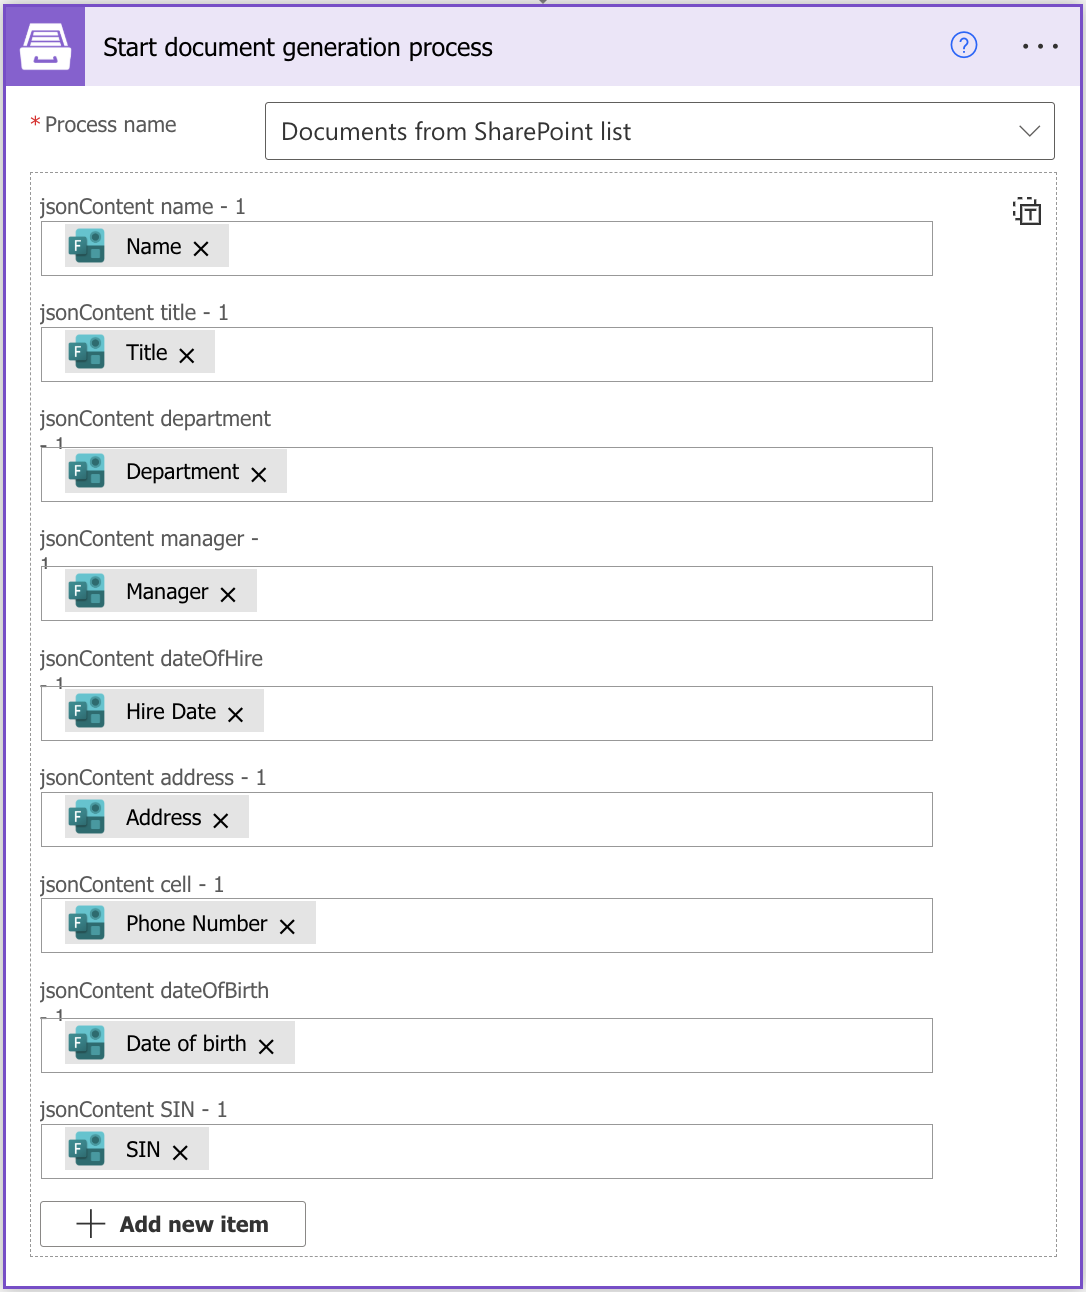
Add the Start document generation process action from the Plumsail Documents connector.
This action sends the form data to a process, generates documents from the configured template, and returns the generated files to Power Automate.
Note
For details about this action, see Start document generation process.
If you are using the connector for the first time, you will be prompted to create a connection.
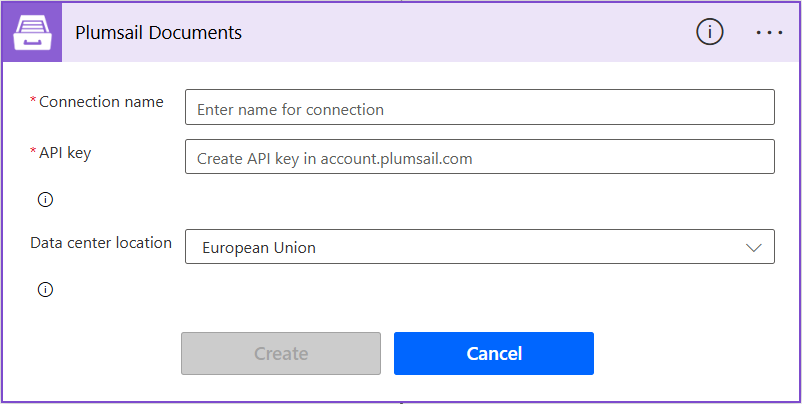
You will need to configure the connection with the following parameters:
Connection Name: Any descriptive name.
Access Key: An API key from your Plumsail account. To obtain one, create an API key in your Plumsail account and paste it here.
Data center location: It shows the location of the data center that was selected when the Plumsail account was created.
The action requires two parameters:
Process name: Select the process created earlier.
Template data: Provide the source data in JSON format.
For this example, map the values returned by Get response details into a JSON object:
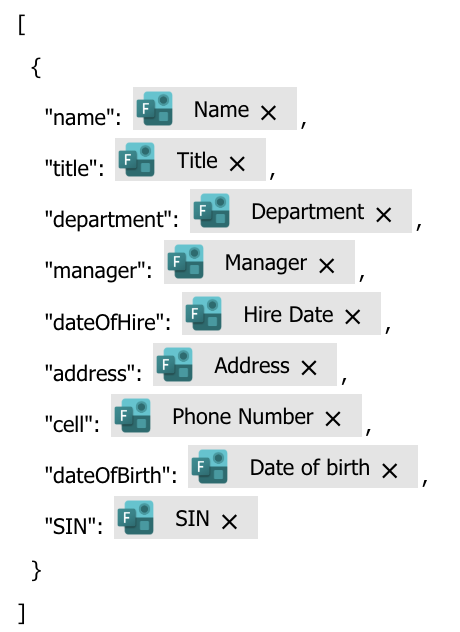
The JSON object contains the values submitted through the form. Use the dynamic content picker to insert fields from the Get response details action.
Once configured, your process will be ready to receive the form data and generates the document.
Use the ready document in Flow
At this point, your flow is fully functional, and for many scenarios, no additional steps are required.
The generated document will look like the following:

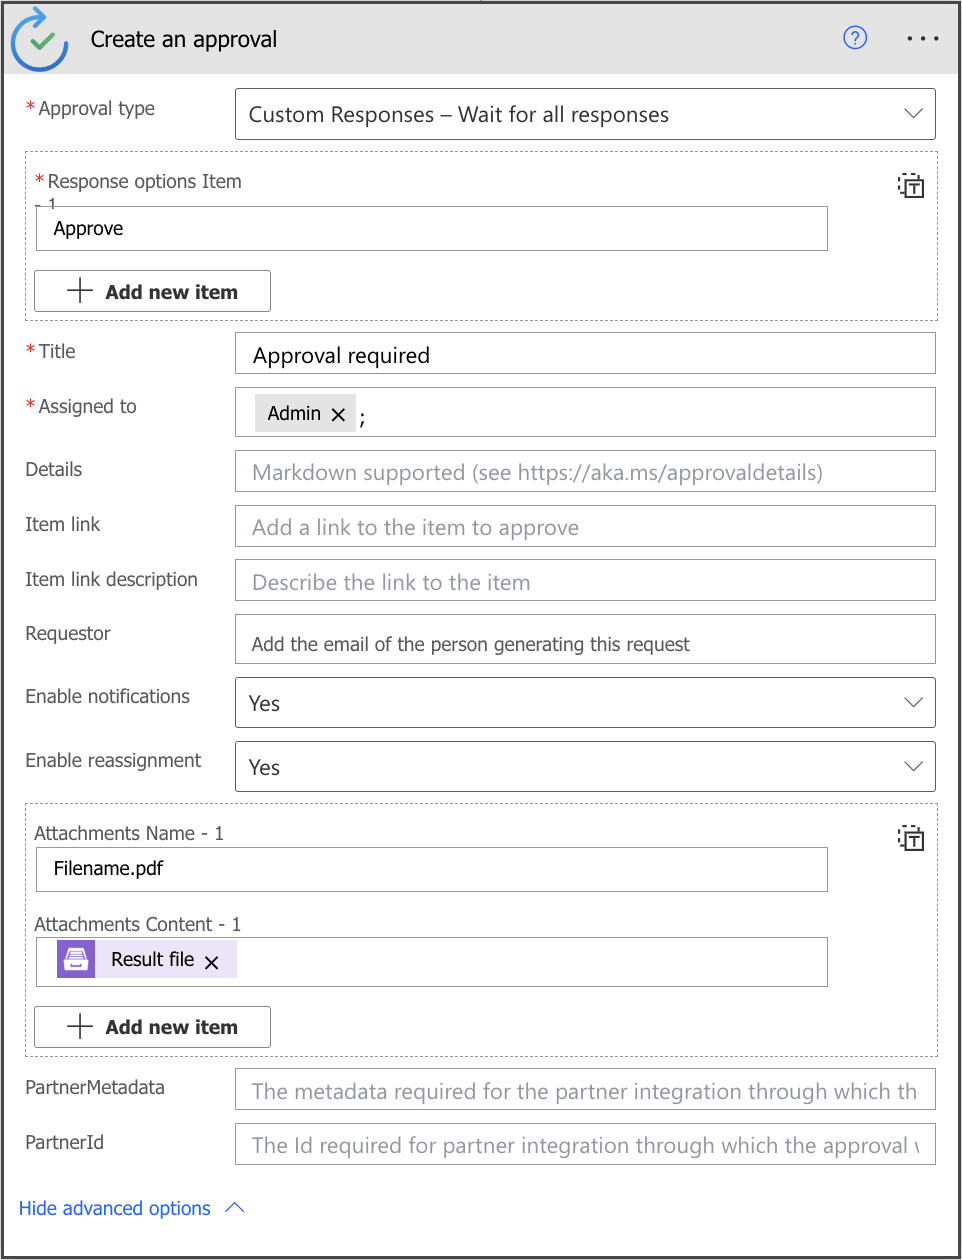
However, you can also use the generated document in additional Power Automate actions. For example, you can start an approval workflow and attach the resulting PDF.
Add the Create an approval action from the Approvals connector and use the file returned by Start document generation process as the attachment.
Sign up for Plumsail Documents
If you are new to Plumsail Documents, create an account and follow the steps in this article to automate document generation from Microsoft Forms submissions.