Convert Excel to PDF in Power Automate
This article describes how to achieve a pixel-perfect XLSX Excel document to PDF conversion in Power Automate (Microsoft Flow). Watch the video that describes all the steps, or skip it to continue reading.
You can use the pre-built Flow templates for SharePoint or OneDrive for Business, or follow the steps outlined in the article to create your Flow from scratch.
Preparation
We will take a purchase order as a sample Excel document:
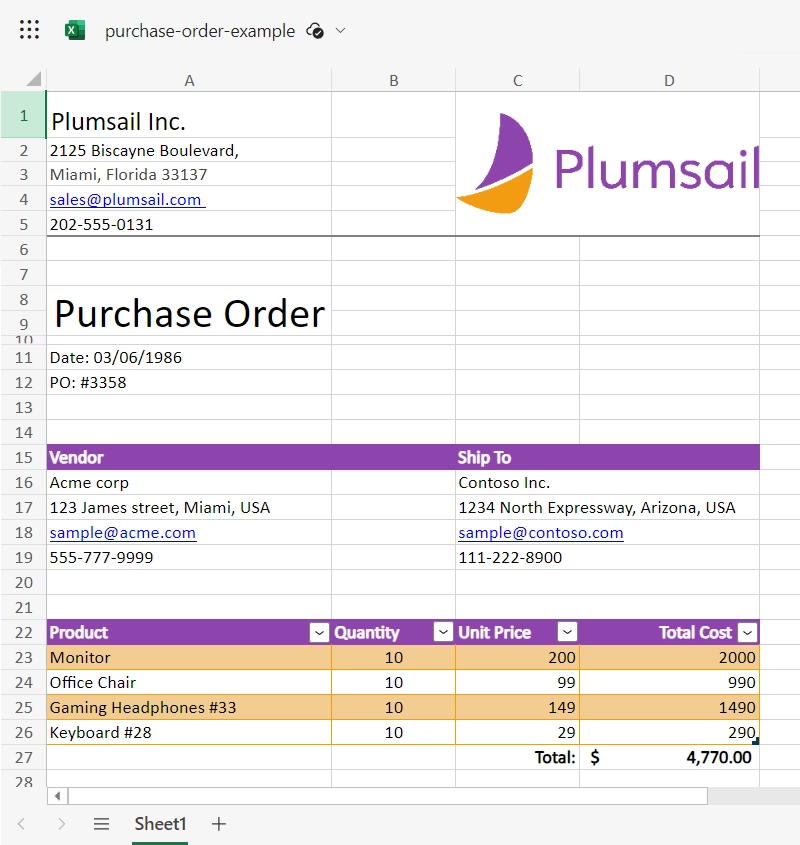
Use this link to download it.
Our document has to be stored somewhere. Power Automate (Microsoft Flow) has a lot of connectors for different systems. Here are just a few of them:
SharePoint
Salesforce
Box
OneDrive
Google Drive
Dropbox
SFTP
File System
You can store your source file anywhere. In this example, we will store our document in OneDrive for Business. Our Flow will automatically generate a PDF file, once XLSX file is stored in the specified folder in OneDrive.
Setting up the Flow
This is what the complete flow should look like:
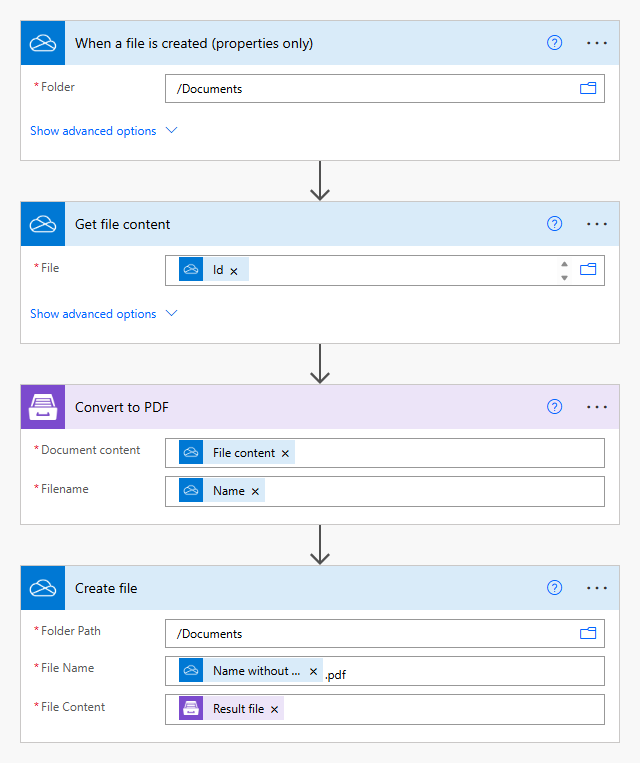
Flow trigger
We used an Automated cloud flow trigger, particularly When a file is created from the OneDrive for Business connector. But you can use any other trigger, for example, run it on file creation on a SharePoint library, or any other.
Once you save the file in the OneDrive in the specified folder, the flow will automatically run.
Get file content
Choose Id to dynamically select the newly added files in the specified folder. This action gets the file content of the specified file from the OneDrive folder each time a new file is added.
You can use other connectors to get files from your system, depending on which one you use to store files.
Convert to PDF
This flexible action from the Plumsail Documents connector automatically detects and converts various file types – Word, Excel, PowerPoint, HTML, images, and more – into PDF. You don’t need to worry about checking the file formats and applying separate actions for each one – everything is handled seamlessly. Learn more about the Convert to PDF action and supported formats here.
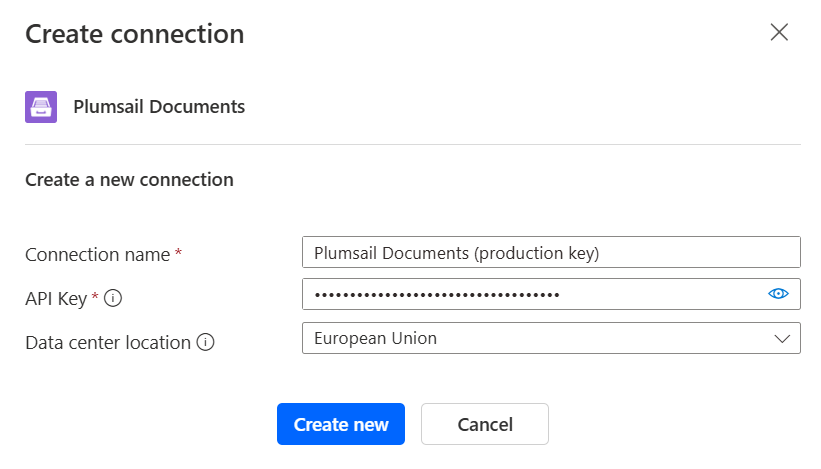
If this is your first time using the Plumsail Documents connector, Power Automate will request you to create a new connection. Provide the following details and then click Create new:
Connection name - you can type any name for the connection, for example Plumsail Documents (production key);
API Key - create an API key in your Plumsail Account, copy it, and paste it into the API Key field;
Data center location - make sure the selected data center location matches one of your account.
Just put XLSX File content from the previous action and the Filename from the trigger. The action will define a source file format automatically and convert it to PDF.
Create file
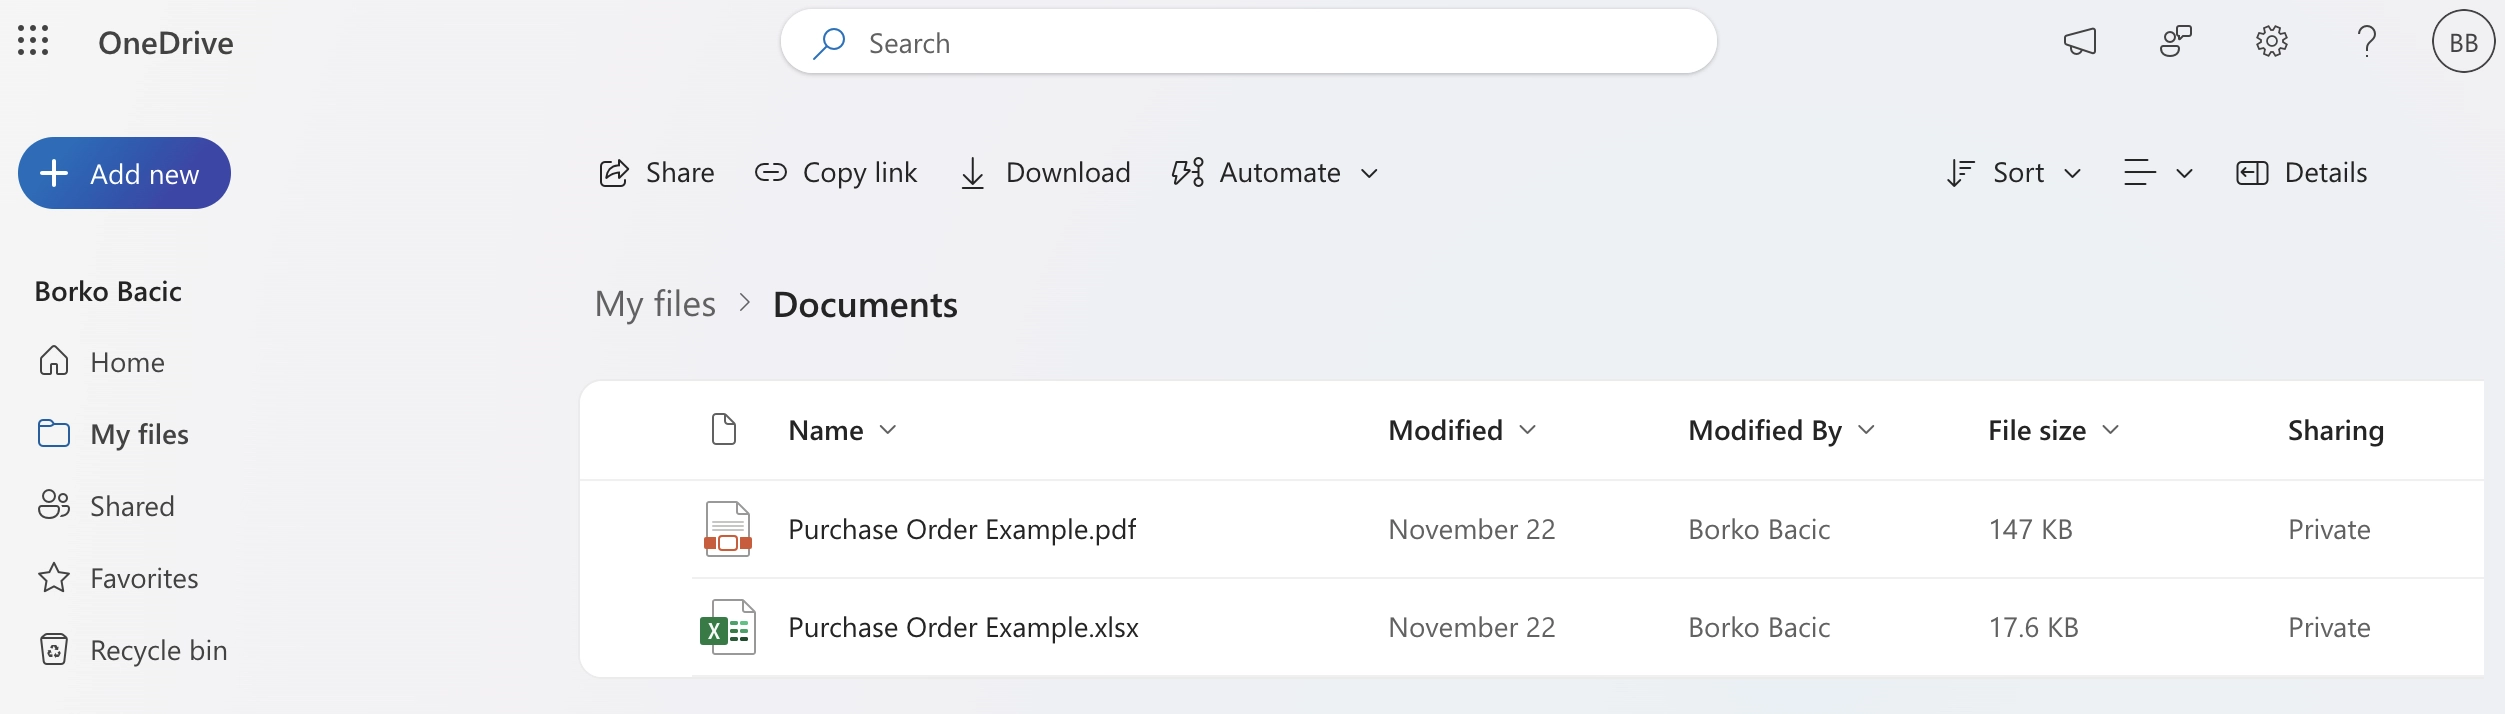
Now you need to store PDF files somewhere. In our example, we use “Create file” action for OneDrive connector to store the PDF document to the specified Folder Path. We can select to keep the same file name by selecting Name without extension and add PDF extension in the end.
You can use any other connector to store PDF document into your system.
Ready-to-use Flow templates
We have simplified the process of Flow configuration for you. Below is a clickable widget of the templates that you can start from: