Batch convert Word documents to PDF using Power Automate
This article demonstrates how to batch convert multiple DOCX files to PDF with the help of the Plumsail Documents connector for Power Automate (Microsoft Flow). Let’s say you have a SharePoint library containing Word documents. You need to pick all of them up and bulk convert to pixel-perfect PDFs.
Setting up the Flow
This is what your Flow would look like:
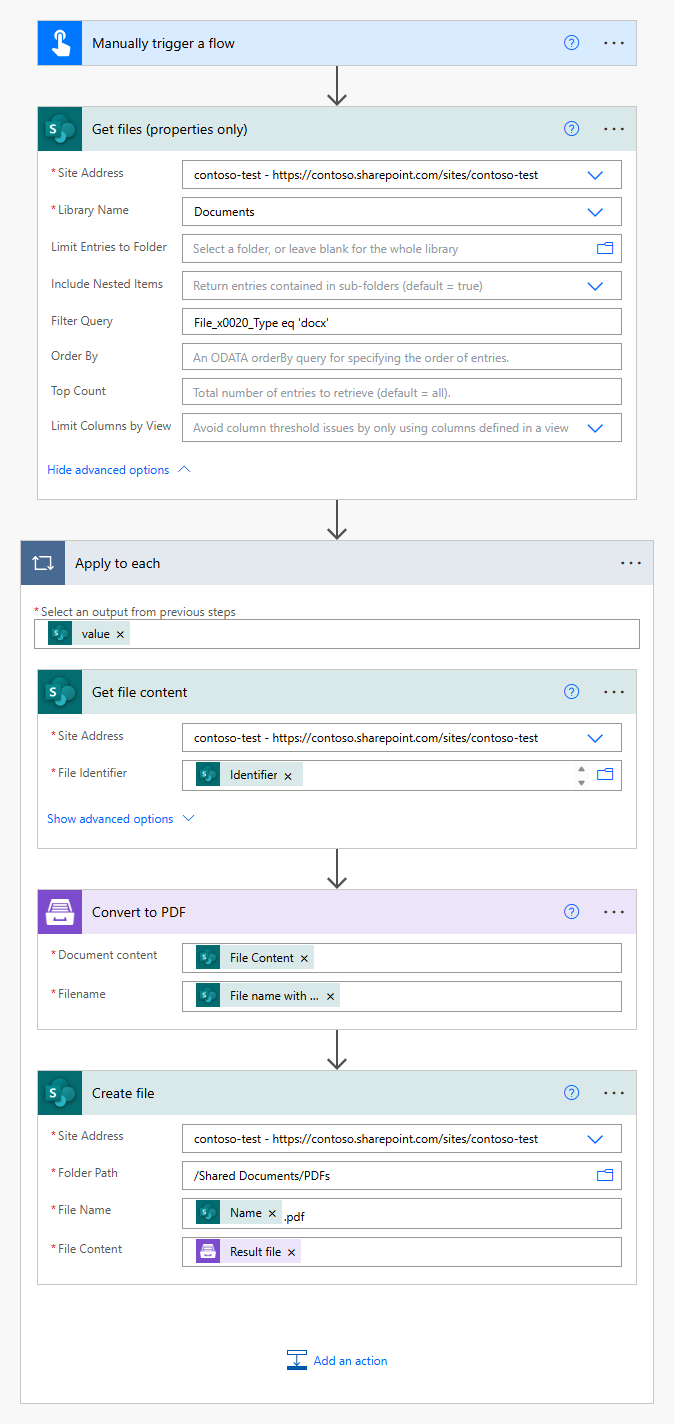
Below is a detailed explanation of each of the steps.
Flow trigger
Choosing a trigger is up to you. For example, you can start Flow on file creation in a SharePoint document library. We’ll use the Manually trigger a flow trigger here to simplify the Flow:

Get files
Our first step is to add the Get files action. It will retrieve all the required for conversion files from a SharePoint document library.
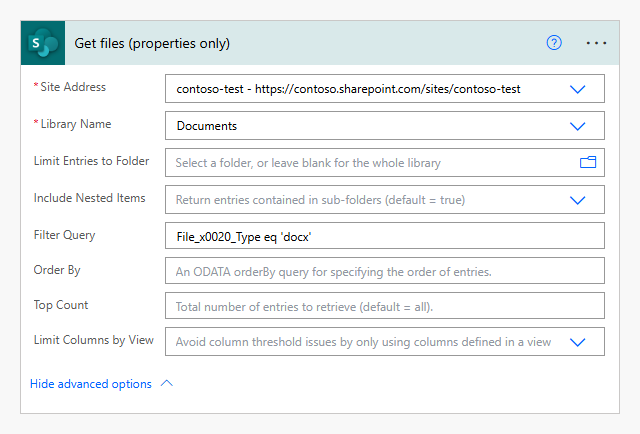
Note
We also added an OData filter File_x0020_Type eq 'docx' to get only DOCX files from the library that may contain files of other formats.
Apply to each
Next, we’ll add the Apply to each control and use the output from the Get files action:
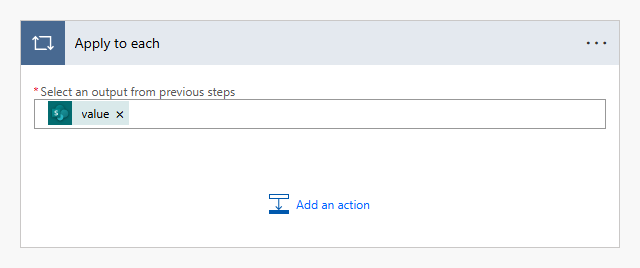
The loop will process each document received from the action.
Get file content
Let’s add a Get file content action to the loop:
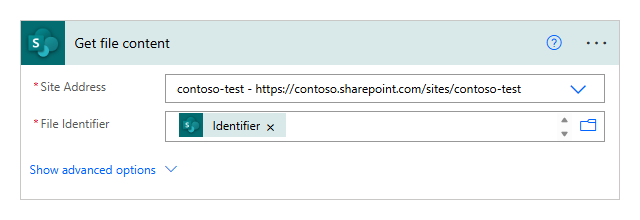
It will get the file content and pass it to the Convert to PDF action.
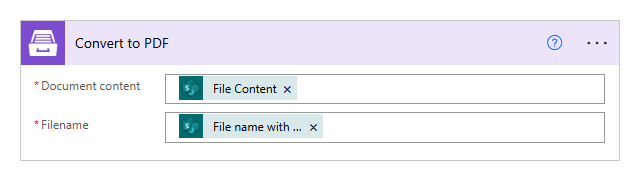
Convert to PDF
This flexible action from the Plumsail Documents connector automatically detects and converts various file types – Word, Excel, PowerPoint, HTML, images, and more – into PDF. You don’t need to worry about checking the file formats and applying separate actions for each one – everything is handled seamlessly. Learn more about the Convert to PDF action and supported formats here.
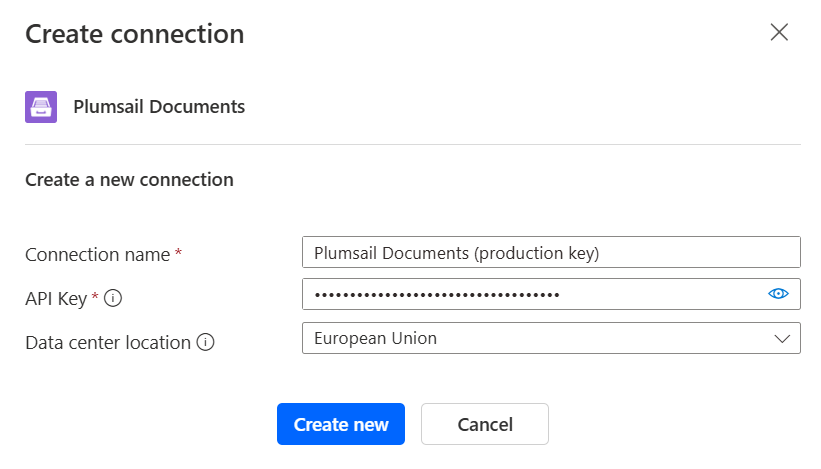
If this is your first time using the Plumsail Documents connector, Power Automate will request you to create a new connection. Provide the following details and then click Create new:
Connection name - you can type any name for the connection, for example Plumsail Documents (production key);
API Key - create an API key in your Plumsail Account, copy it, and paste it into the API Key field;
Data center location - make sure the selected data center location matches one of your account.
We will use the file content received from the Get file content action. Also it is necessary to pass the file name with extension from the Get files one. The extension is used for defining the conversion logic.
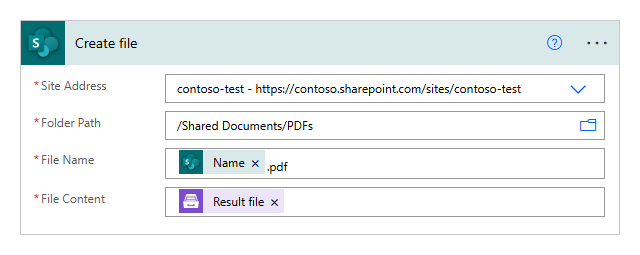
Create file
Our final step is to save the converted file to SharePoint using the Create file action. Feel free to choose any other action to export the file.
Note
Make sure to specify the .pdf extension in the File name field.
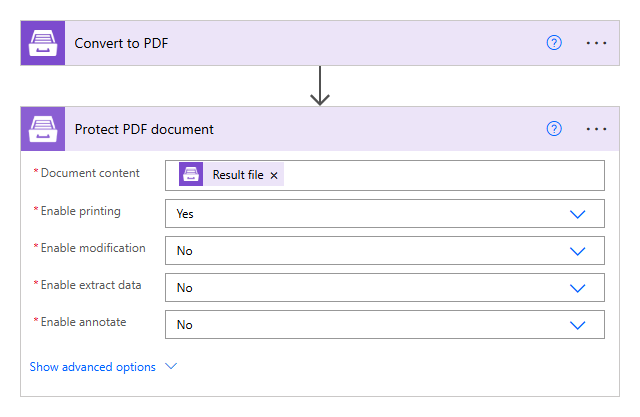
Protect the resulting PDF files
Additionally, you can protect the resulting PDF files using the Protect PDF Document action:
Conclusion
That’s it. These few simple steps will help you work with your documents more efficiently.