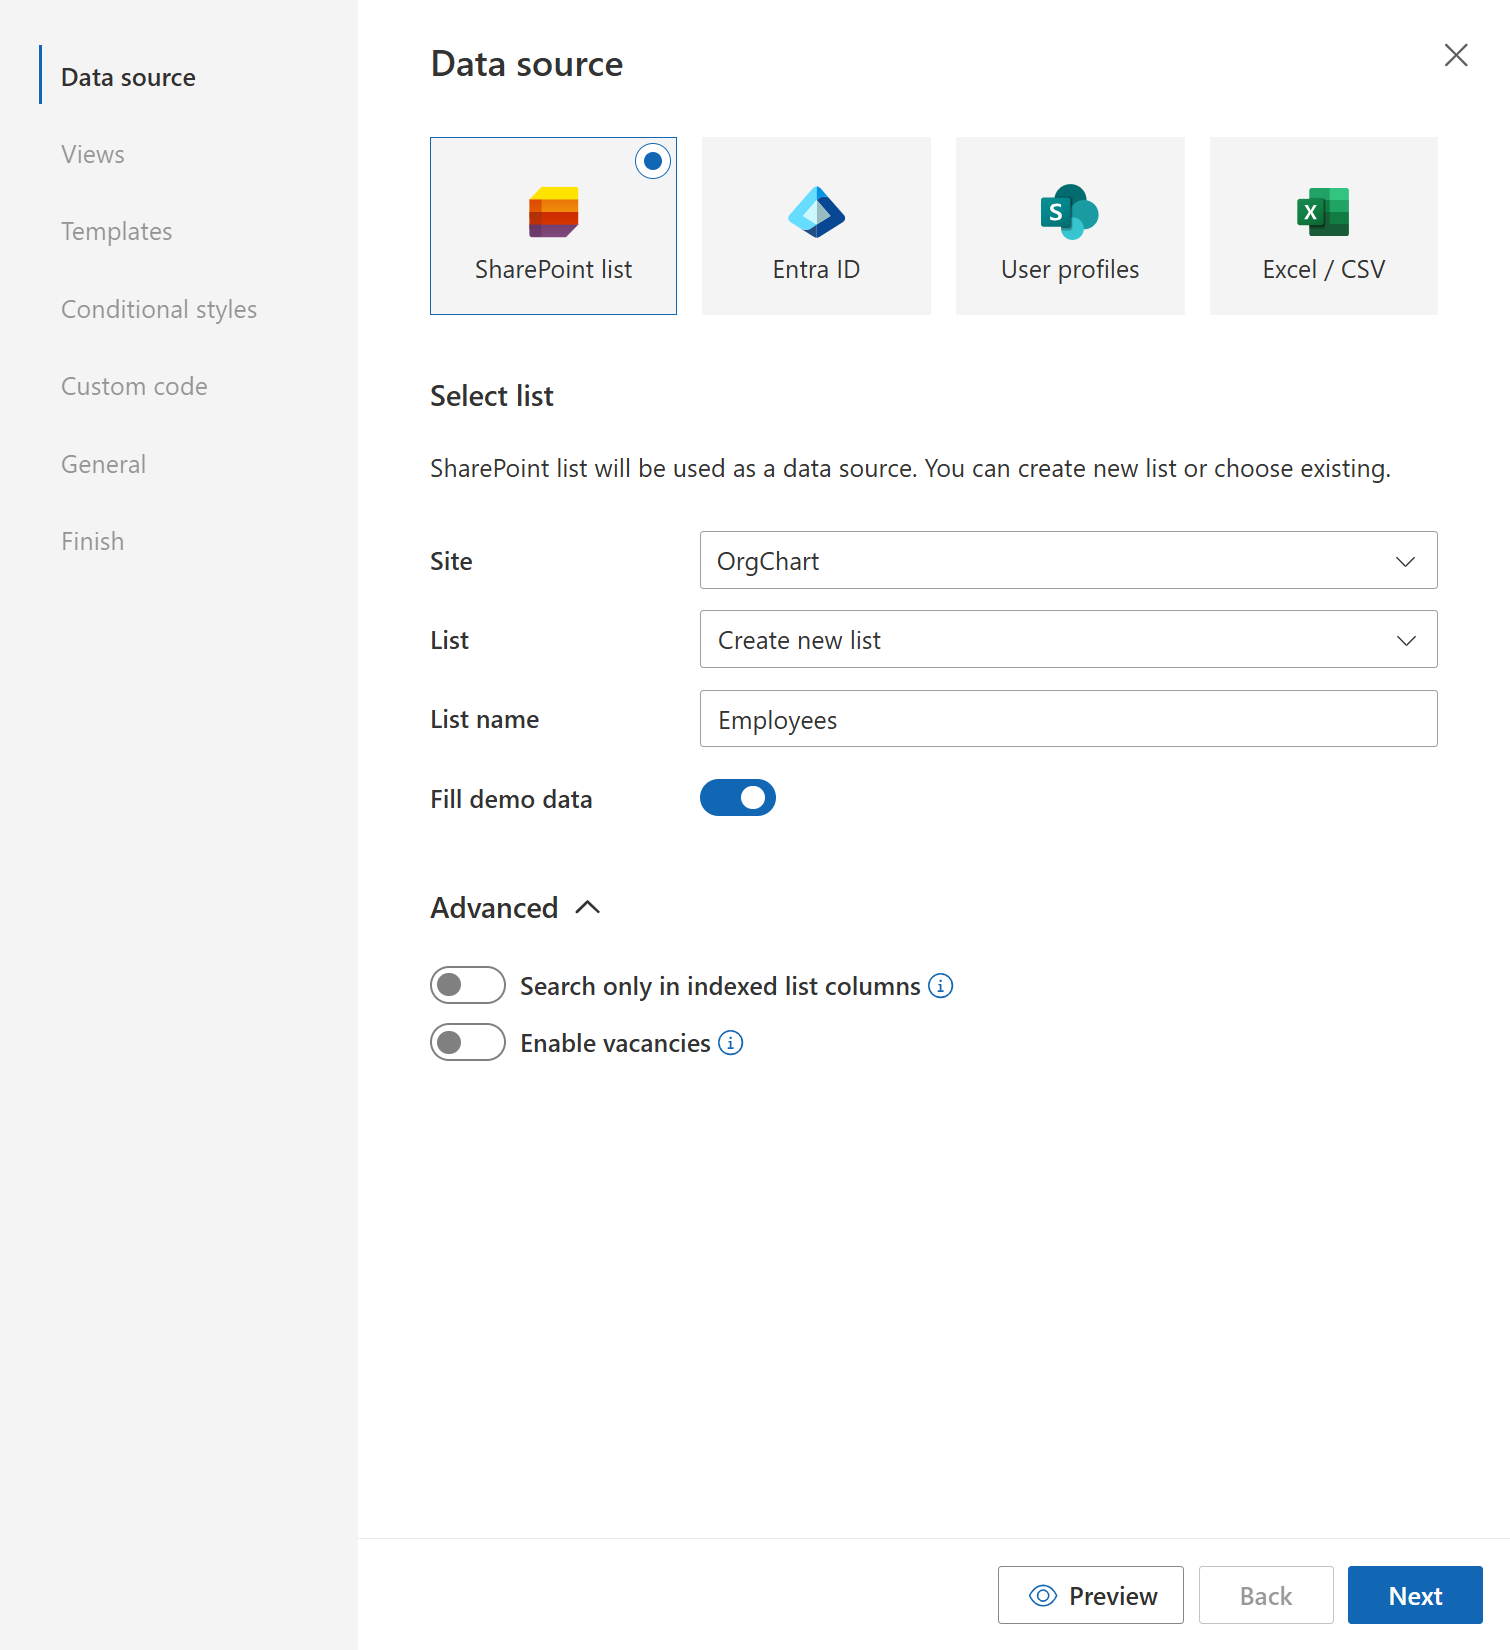
Data source

Note

For the versions earlier than 4.x.x (including on-premises ones), please follow this instruction.

Data source

Org Chart can pull employee information from three data sources:

  • SharePoint list

  • Entra ID (formerly Azure AD)

  • User profiles

Let’s review them.

SharePoint list

If you choose SharePoint list as a data source, it will be configured to create a new list with demo data by default. You only need to fill the List name.

OrgChart configuration wizard

If you want to use an existing SharePoint list, you can choose it from combo box. Then you will have to specify mapping for list fields required for building correct hierarchy. The interface for mapping looks like this.

OrgChart configuration wizard

Mapping defines the connection between Organization Chart field and List field. Data from the corresponding list field will be used by the Organization Chart, for example you can specify mapping between Employee ID and list item ID.

Employee ID, Manager ID and Display text mappings are required, you can leave other mappings empty. Once you configured it, you can go through the wizard and click the finish button.

Employee ID and Manager ID are used to build hierarchy. Display text is used as display text for entities in the org chart. For example you will see “Display text” in the breadcrumb.

Description of mappings

Name

Description

Employee ID

This is unique ID of an employee. It can be list item ID, user login or any other unique identifier of the person.

Manager ID

This is unique ID of an employee manager. For example it could be ID of manager or login of manager. We need it to build a well-structured tree.

Display text

Display text is displayed in the breadcrumbs of the Org Chart.

Assistant ID

This mapping defines where information about assistant is stored for current item. This is optional mapping. Please read this instruction to learn how to configure assistants.

Dotted manager ID

This is unique ID of dotted-line manager. For example, it could be ID of manager or login of manager. Type of this field should be the same as type of Manager ID. Please read this instruction to learn how to configure dotted-line managers.

Entra ID (formerly Azure AD)

Note

The data source is available starting from Org Chart version 4.1.0. Please check the update details.

If you choose Entra ID (formerly Azure AD) as a data source, OrgChart will create the chart based on employee information from the Entra ID (formerly Azure AD) service.

OrgChart configuration wizard

Before using the data source, you need to approve an API access request, allowing the Plumsail OrgChart SPFx package to access users’ accounts in Entra ID (formerly Azure AD). These are the steps.

  1. Log in to the Microsoft 365 admin center (https://admin.microsoft.com/) with your admin account. Then go to the SharePoint Admin Center.

Microsoft administrator console
  1. In the SharePoint admin center expand the “Advanced section” and click on “API access”. You’ll see a pending request for Plumsail Org Chart.

OrgChart configuration wizard
  1. Select the pending request and approve it.

OrgChart configuration wizard

These features are not supported in the data source:

Note

If you need those features for the Entra ID (formerly Azure AD) provider, please contact us at support@plumsail.com.

User profiles

If you choose User profiles as a data source, no additional configuration of data source is needed, just go through the wizard until the end. Unless you want to configure dotted-line managers or configure assistants.

OrgChart configuration wizard

To understand how Org Chart communicates with the User profiles service, read this article.

Search only in indexed list columns

SharePoint has a standard restriction on SharePoint list item queries in 5000 items. To be able to use search in such list you need to index the columns on the list level and also enable option Search only in indexed list columns in OrgChart settings. You can find more information about it here.

Search in indexed columns

Vacancies

Note

If vacancies don’t appear in your web part try to clear cache. Also, vacancies are not supported in SharePoint 2010 version.

Vacancies are stored in a separate SharePoint list. The list will be created automatically at specified Vacancies list URL.

Enable vacancies

Once you enabled vacancies, a Manage vacancies menu item will appear:

Manage vacancies menu

This menu item redirects a user to the vacancies list. To create new vacancies, create a new list item and specify Manager. It can be account name for User Profiles data source and list item ID for SharePoint list data source:

Create vacancy

Note

Go to the next step of the configuration wizard Filtration.