Getting started
Configuration wizard
- Open configuration wizard
- Data source
- Views and filtration
- Design
- Templates
- Custom code
- General
- Reset configuration
HTML templates
JavaScript framework
Additional resources
- Video: Introducing Plumsail Org Chart
- Data caching
- How Org Chart pulls data from AD On-Premises
- Exclude disabled users in On-Premises
- Make sure that SharePoint has enough data
- Configuring profiles sync in On-Premises
- Exporting properties to a directory service
General
- Version history
- Licensing details
- Data protection and security
- Custom code security measures
- Billing and subscription management
Printing & Reports
- Printing organizational structure
- Generate multi-page PDF report
- Export to CSV and analyze in Excel
- Custom styles for printed Org Chart
Microsoft Teams
Display different types of employees
- Display dotted-line managers (SharePoint list)
- Display dotted-line managers (Entra ID)
- Display dotted-line managers (User Profiles)
- Display dotted-line managers (Excel/CSV)
- Display assistants (SharePoint list)
- Display assistants (Entra ID)
- Display assistants (User Profiles)
- Display assistants (Excel/CSV)
- Display vacancies
Filter and order boxes
Customize boxes and styles
- Format boxes conditionally
- Customize box HTML template and CSS styles
- Display awards and conditionally format Org Chart
- Create an Org Chart with two root managers
- Change Org Chart skin
- Localize Org Chart
Show specific user on load
- Drill down to specific box using URL parameter
- Drill down to current user by default
- Drill down to manager of user from URL by default
Manage web part size and scale
- Open Org Chart in full-screen mode on load
- Make Org Chart use full page width
- Automatically scale boxes to fit visible area
Other examples
Format Org Chart boxes conditionally in SharePoint and Microsoft Teams
Org Chart allows to create custom style rules depending on certain properties in its data source. In this article, you can find sample rules for the most frequent cases and modify them according to your needs.
Box style rules
To create a box style rule, open an Org Chart configuration wizard and switch to a Design step. Then click an Add rule button. Name the new rule and apply one of the configurations suggested below depending on a required condition.
Format boxes by department
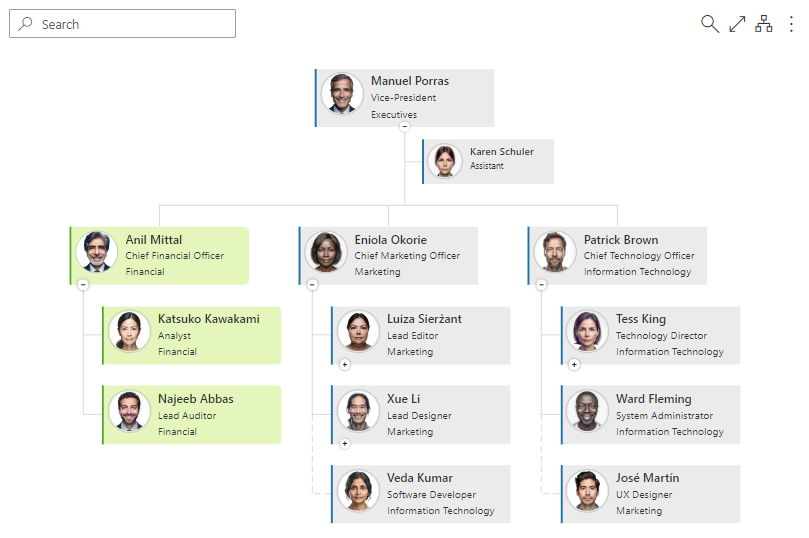
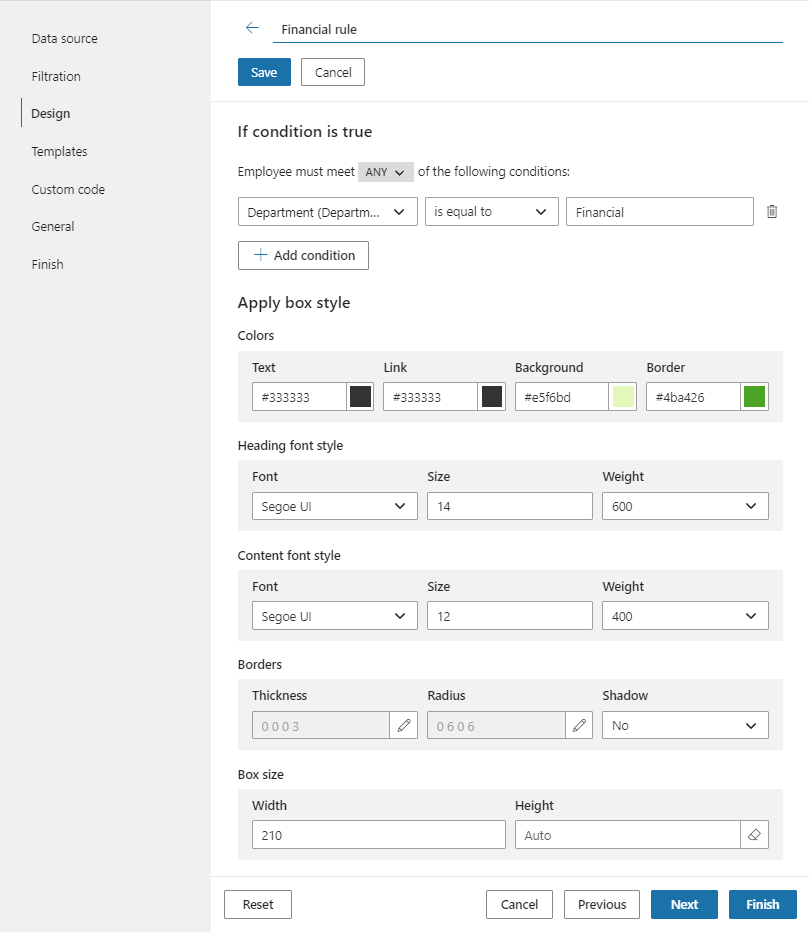
In the Condition section click an Add condition button and set a Department field equal to the required value.
In this case, it is Financial.
Then modify styles and save the rule.
Format boxes by job title
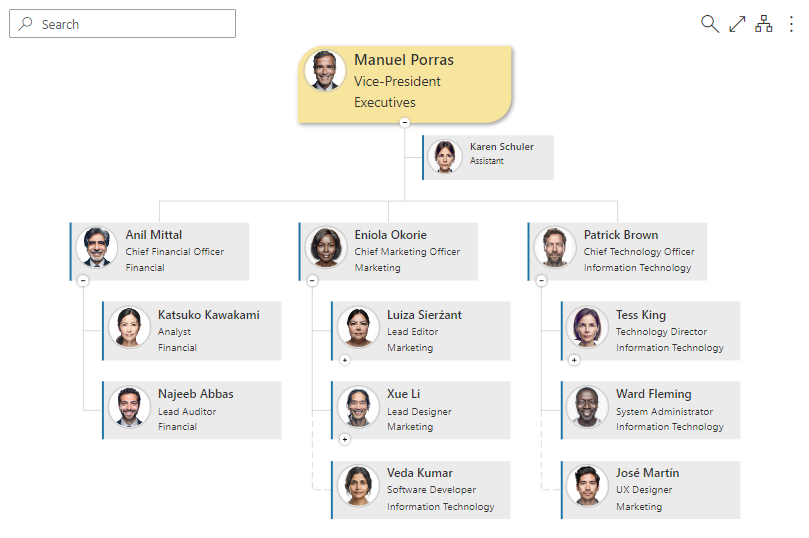
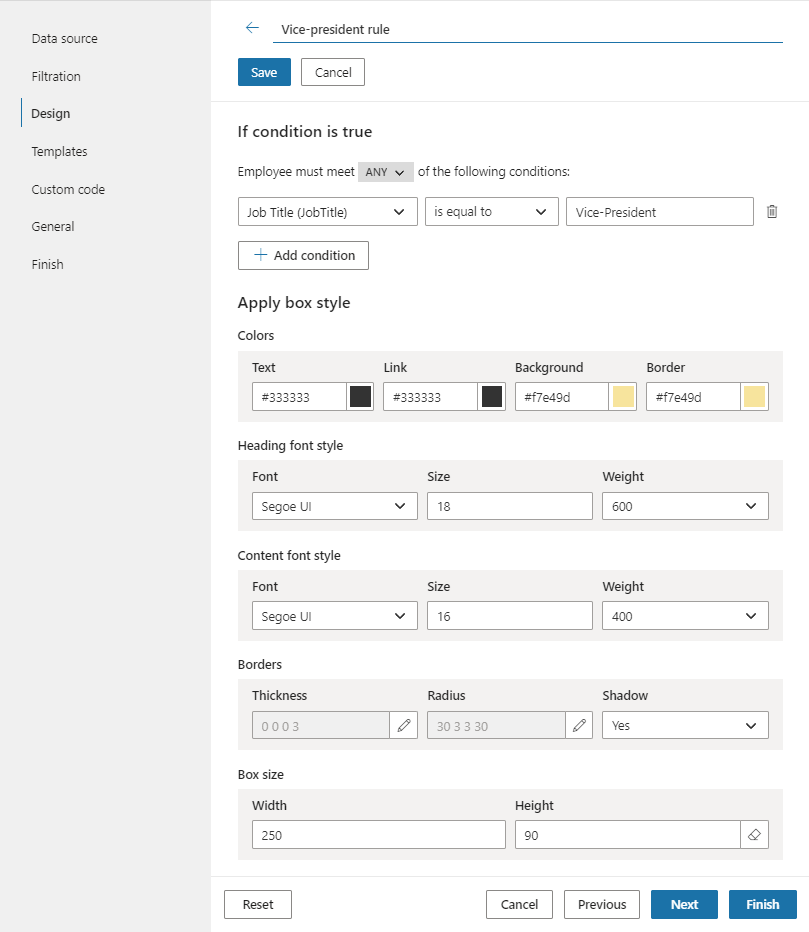
In the Condition section click an Add condition button and set a Job title field equal to the required value.
In this case, it is Vice-President.
Then modify styles and save the rule.
Format boxes by type
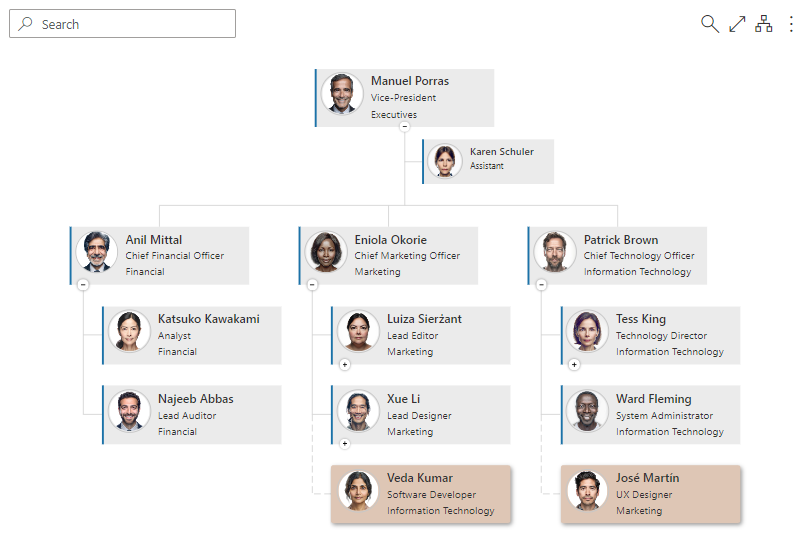
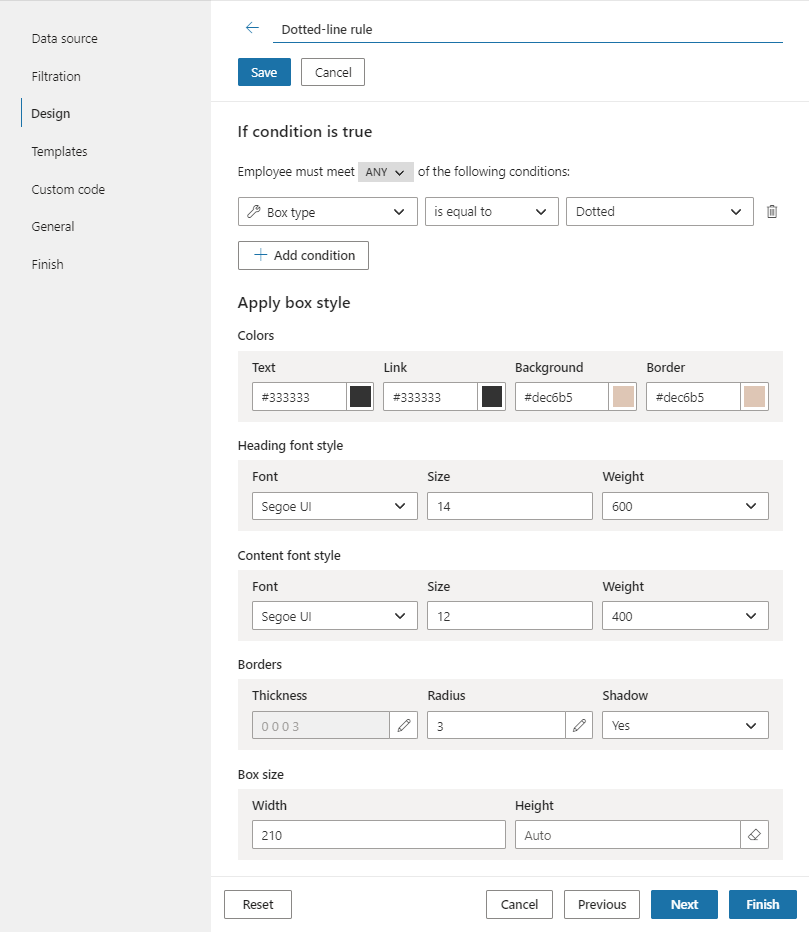
In the Condition section click an Add condition button and set a Box type field equal to the required value.
In this case, it is Dotted.
Then modify styles and save the rule.
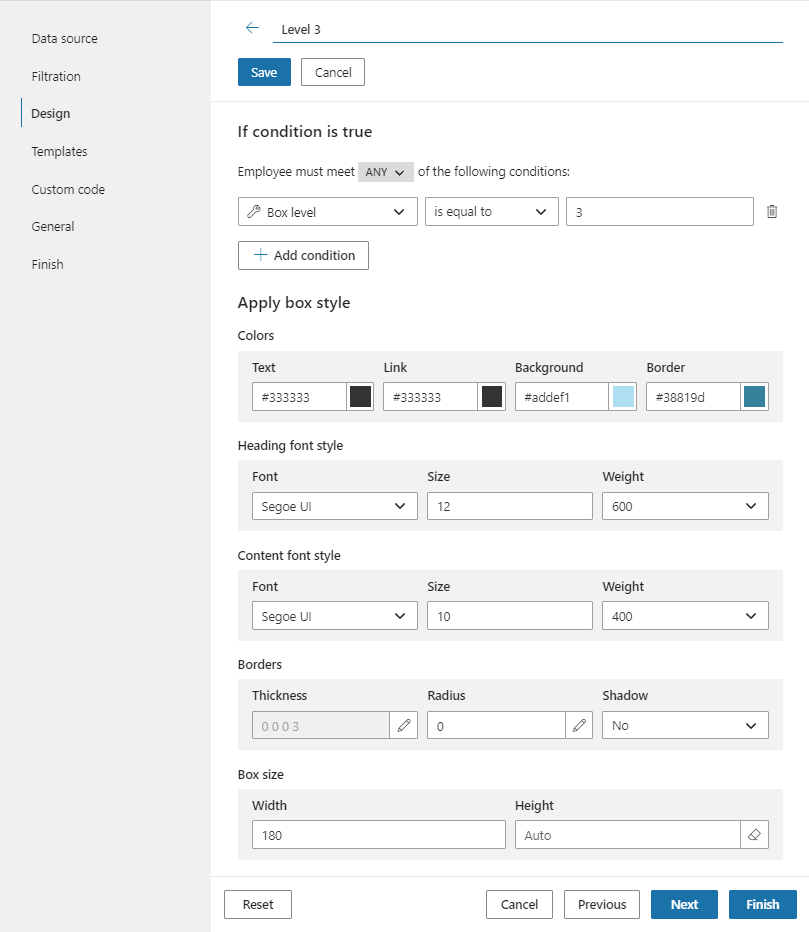
Format boxes by level
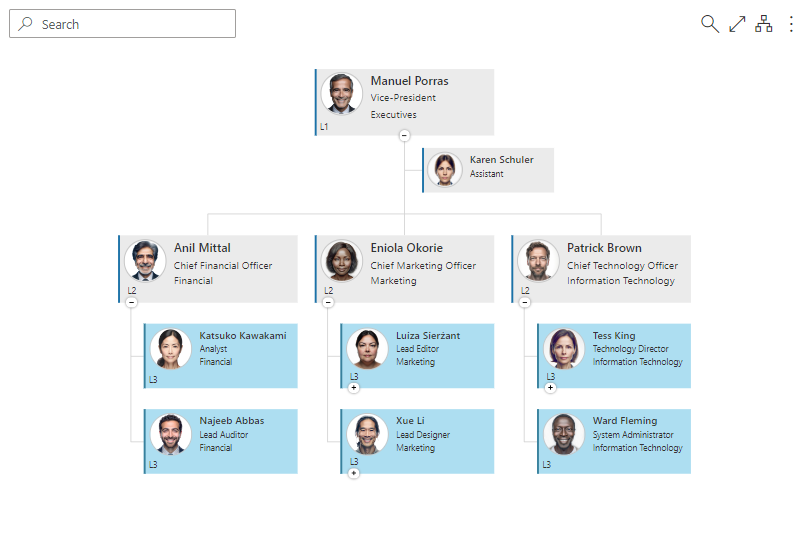
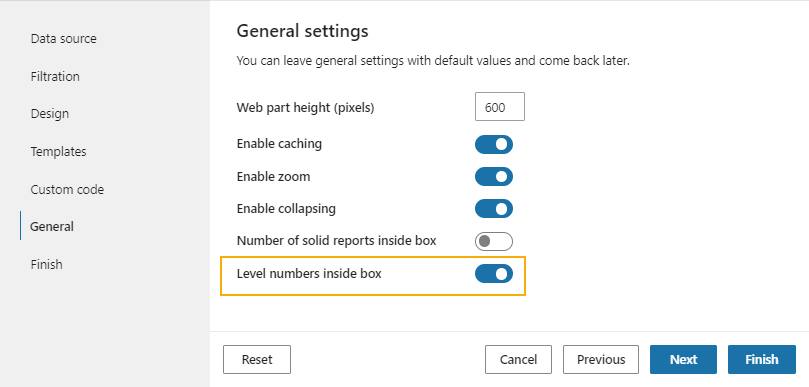
Before creating a rule, open General settings and enable level numbers. Save it and re-open the configuration wizard for adding a rule.
In the Condition section click an Add condition button and set a Box level field equal to the required value.
In this case, it is 3.
Then modify styles and save the rule.
Format boxes of external user (contractors)
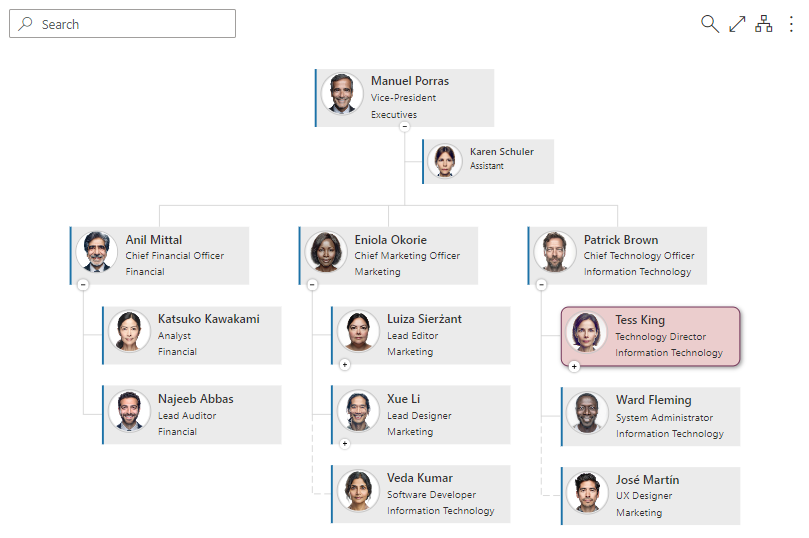
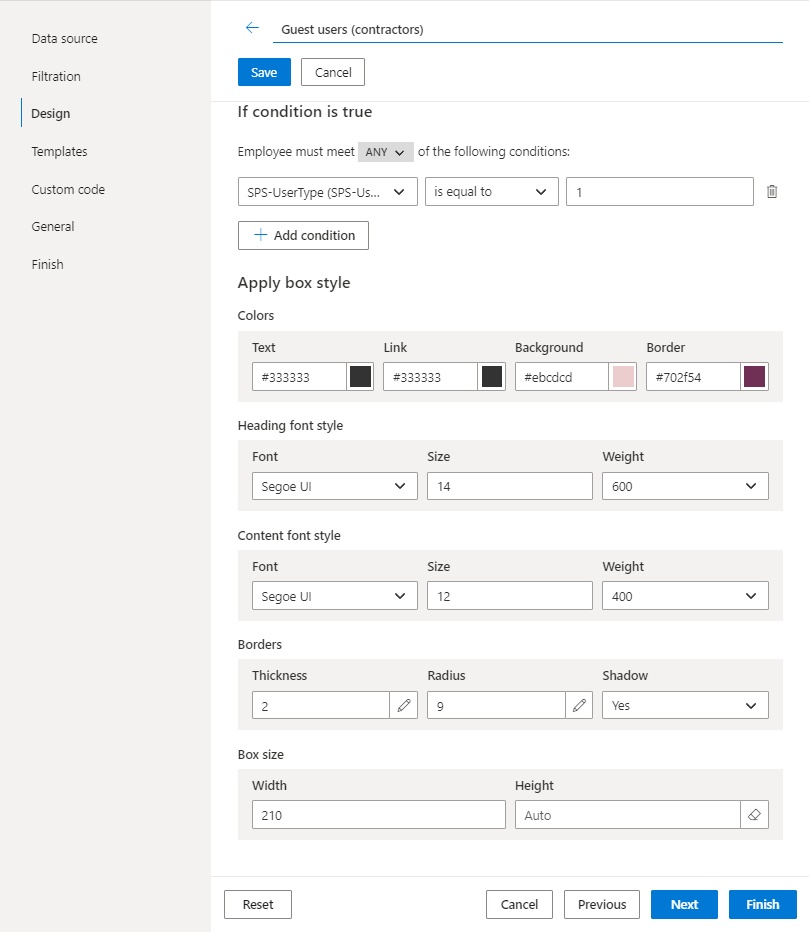
In the Condition section click an Add condition button.
What field to use in the condition expression depends on the data source of Org Chart.
For SharePoint user profiles, set an SPS-UserType field equal to 1.
Then modify styles and save the rule.
For Entra ID, select a User type field and set it equal to Guest.

Styles for individual boxes
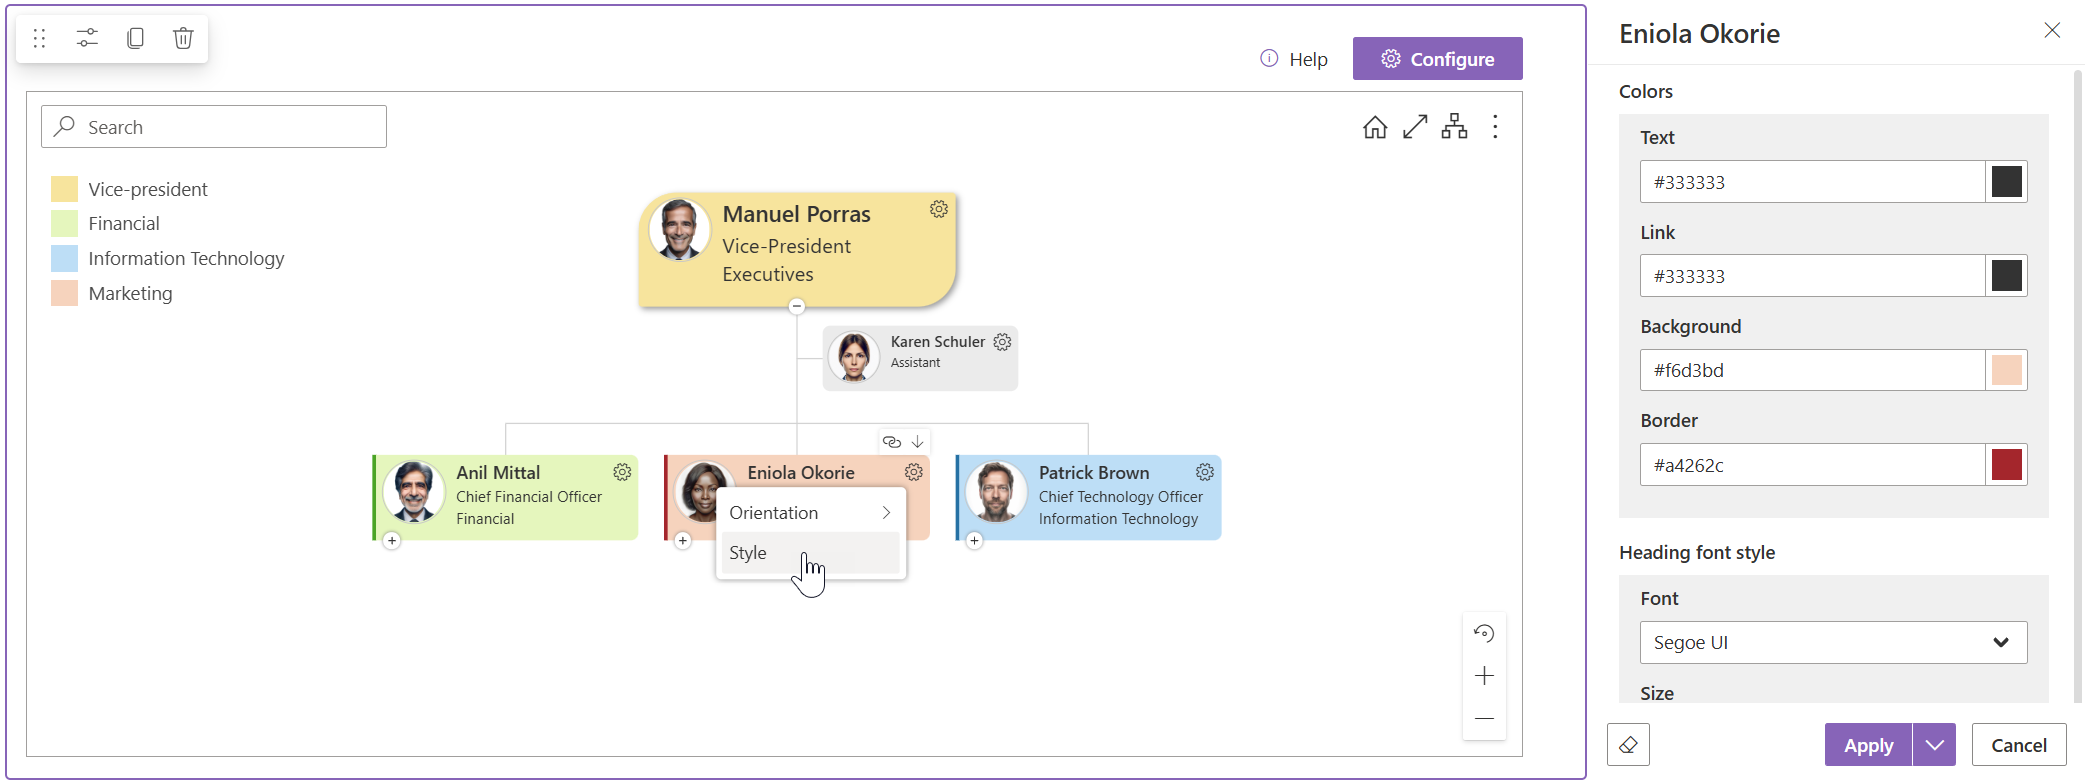
There is an alternative way to create box style rules. You can customise styles of an individual box and then apply them to others with the same department, job title, or box type using the menu of the Apply button. It will apply the required condition automatically and move the individual styles to the new rule.
You can also refer to the blog post that cover all these scenarios in one place with examples and visuals.