Getting started
Configuration wizard
- Open configuration wizard
- Data source
- Views and filtration
- Design
- Templates
- Custom code
- General
- Reset configuration
HTML templates
JavaScript framework
Additional resources
- Video: Introducing Plumsail Org Chart
- Data caching
- How Org Chart pulls data from AD On-Premises
- Exclude disabled users in On-Premises
- Make sure that SharePoint has enough data
- Configuring profiles sync in On-Premises
- Exporting properties to a directory service
General
- Version history
- Licensing details
- Data protection and security
- Custom code security measures
- Billing and subscription management
Printing & Reports
- Printing organizational structure
- Generate multi-page PDF report
- Export to CSV and analyze in Excel
- Custom styles for printed Org Chart
Microsoft Teams
Display different types of employees
- Display dotted-line managers (SharePoint list)
- Display dotted-line managers (Entra ID)
- Display dotted-line managers (User Profiles)
- Display dotted-line managers (Excel/CSV)
- Display assistants (SharePoint list)
- Display assistants (Entra ID)
- Display assistants (User Profiles)
- Display assistants (Excel/CSV)
- Display vacancies
Filter and order boxes
Customize boxes and styles
- Format boxes conditionally
- Customize box HTML template and CSS styles
- Display awards and conditionally format Org Chart
- Create an Org Chart with two root managers
- Change Org Chart skin
- Localize Org Chart
Show specific user on load
- Drill down to specific box using URL parameter
- Drill down to current user by default
- Drill down to manager of user from URL by default
Manage web part size and scale
- Open Org Chart in full-screen mode on load
- Make Org Chart use full page width
- Automatically scale boxes to fit visible area
Other examples
Display vacancies for Org Chart in SharePoint and Microsoft Teams
Note
For the versions earlier than 4.x.x (including on-premises ones), please follow this instruction.
Did you know you can show vacancies beautifully inside your organization chart in SharePoint Online? You can do this easily with Plumsail Org Chart. In this article, I want to show you how to display vacancies in SharePoint Org Chart. It is very useful to organize vacancies inside of Org Chart and be able to visualize them within the organization structure.

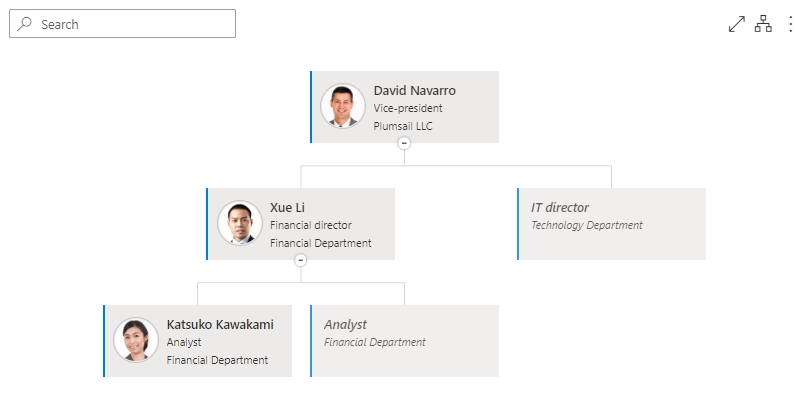
Vacancies are enabled inside of PlumsailOrg Chart’s settings and use a data source different than the chart itself. Org Chart will use a different list to pull data from and show vacancies which needs to be filled with data regarding open positions through the company. Let’s see how to do it step by step, inside our SharePoint page, just like the image above.
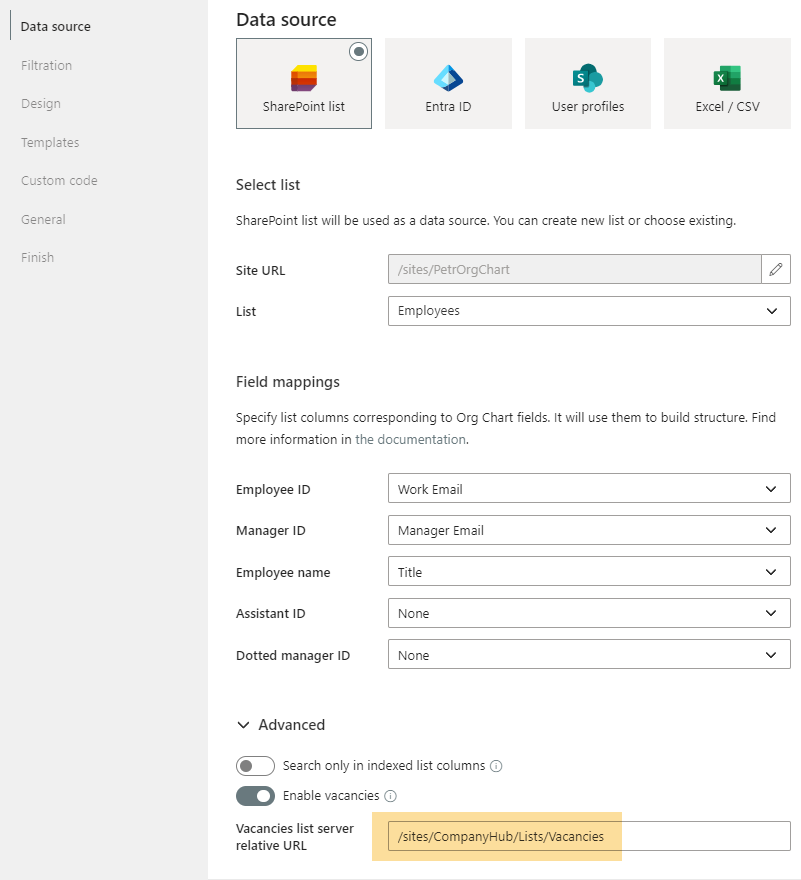
Go to the page where you inserted Org Chart and open the configuration wizard. On the Data source step, unfold the Advanced settings and enable vacancies.
Now, under that option, you’ll see a new text input, where you’ll have to write the URL of the list that Org Chart will use to pull data from.
Note that this is a server relative URL that you’re going to use.
In this example, I want Org Chart to use the list placed by /sites/CompanyHub/Lists/Vacancies.
If Org Chart identifies that the list already exists it will use it, otherwise it is going to create it automatically to handle vacancies.
Click Finish to save your new settings.

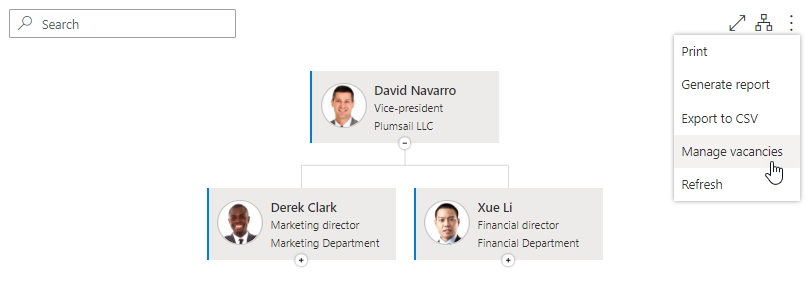
From now on, whenever you open the More menu, you’ll see a new option called Manage vacancies. It opens the vacancies list on a new tab. Click it and add some data to the list to fill our Org Chart properly.

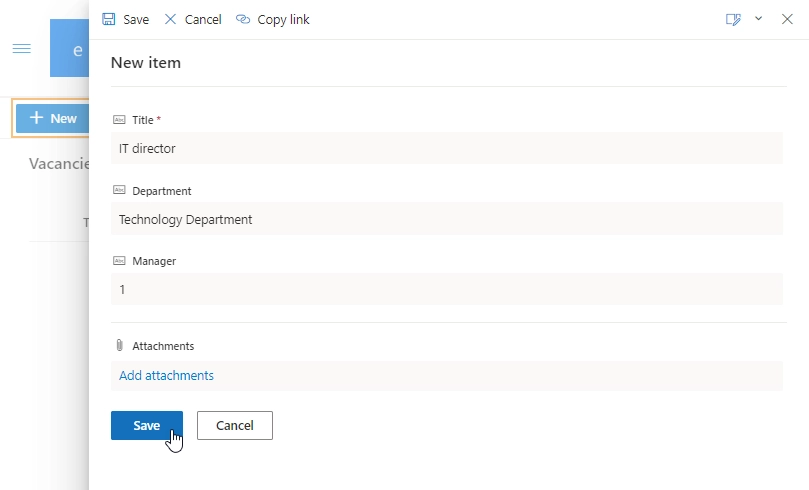
Click a “New” button, name the position and specify the department and manager information.

Note that the “Manager” field needs to be filled with the Employee ID of the corresponding manager. It is mapped according to the Org Chart data source configuration.
In the case of the User profiles data source, Org Chart will use one’s account name as the employee ID.
In SharePoint Online, the account name looks like user@tenant.onmicrosoft.com.
For Entra ID data source, you must use the UserPrincipleName attribute in the ‘Manager’ field. In most cases, the UPN is the user’s email address, for instance: user@tenant.onmicrosoft.com.
Otherwise, if you’re using a SharePoint list or Excel / CSV as the data source, you choose the column that will work as employee ID. It can be anything like title, email address, ID, etc. Use the values from that column to set the manager in the vacancies list.
That’s it. Now you can display vacancies in SharePoint Org Chart and manage them regarding company’s scenario.