Group employees boxes using custom field for Org Chart
Note
Applicable only to the Compact layout
You can group employee boxes dynamically by field value. To set this up, you’ll just need to either configure your view or apply some custom JavaScript and define a few specific properties.
Before starting
First, let’s make sure your chart is using the correct visual organization.
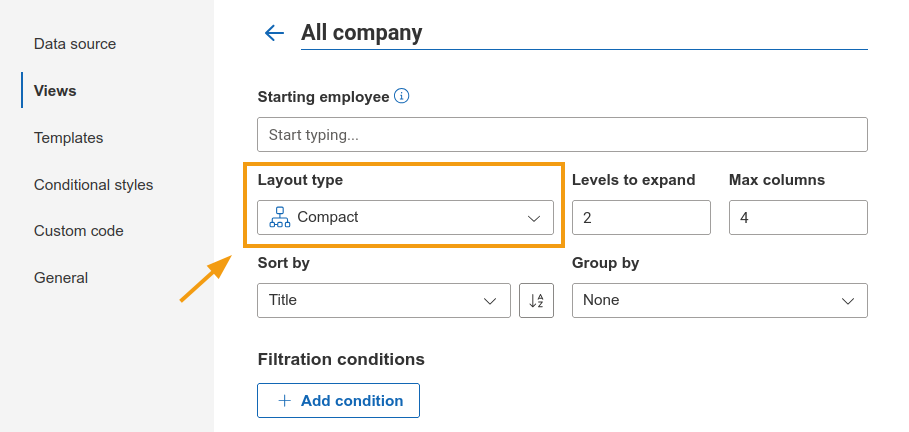
Open the Views panel and select the specific view you’d like to edit.
Under the layout options, choose Compact as your layout style.
If you’re considering using custom code, we recommend taking a quick look at the following documentation to get the most out of this feature:
To set up custom grouping, you’ll need to use a combination of the following methods and properties. You should review the details for each to ensure everything is configured correctly.
Methods
displayNodesGroupingForLevel(level, groupingFieldName, displayGroupingLabels, viewId)
displayNodesGroupingForLevels(levels, groupingFieldName, displayGroupingLabels, viewId)
setNodeGroupingById(id, localrootid, groupingFieldName, displayGroupingLabels, viewId)
Properties
View configuration
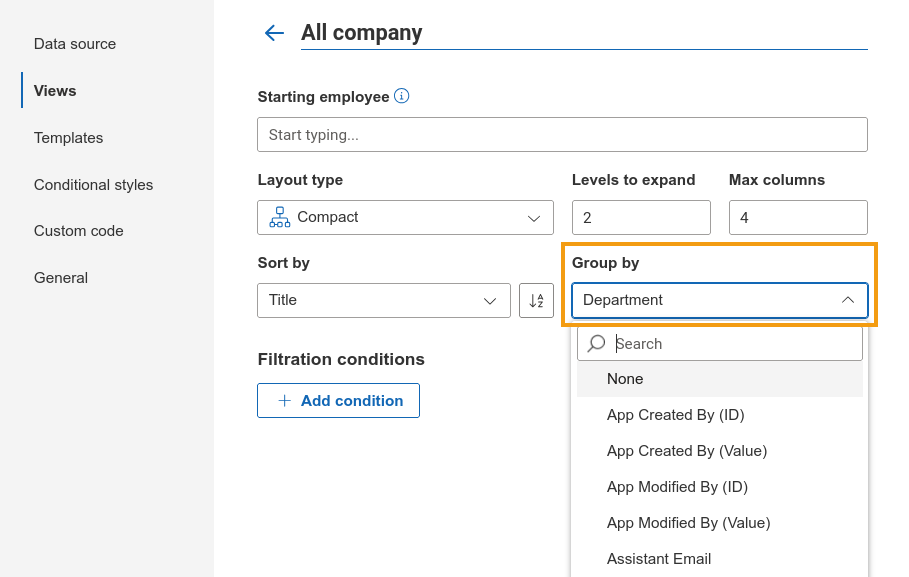
The most intuitive way to organize your chart is through the Views panel.
Navigate to the Views sidebar.
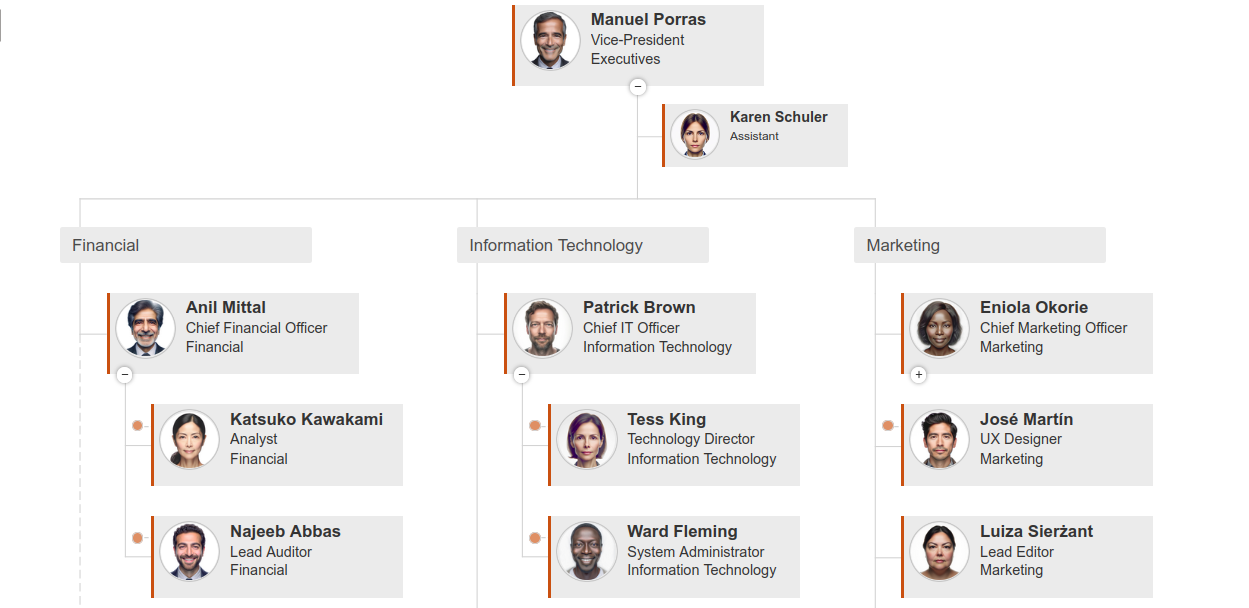
Use the Group by dropdown to select the specific data field (e.g.,Department) you wish to use. If no field is selected, the chart will display your employees based on the hierarchy defined in your data source.
Use custom code
Alternately, you can also implement your own grouping logic using a custom code.
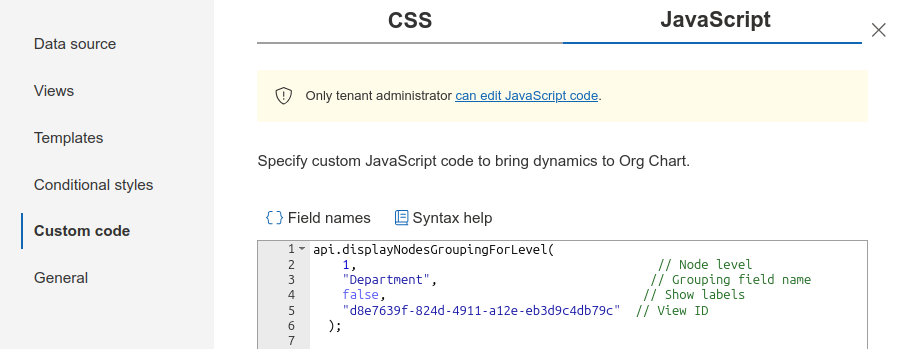
To implement the grouping, you will use the displayNodesGroupingForLevel method. To see this in action, let’s walk through an example on how to group the first level of the chart by the “Department” field:
api.displayNodesGroupingForLevel(
  1, // Node level
  "Department", // Grouping field name
  false, // Show labels
  "d8e7639f-824d-4911-a12e-eb3d9c4db79c" // View ID
);
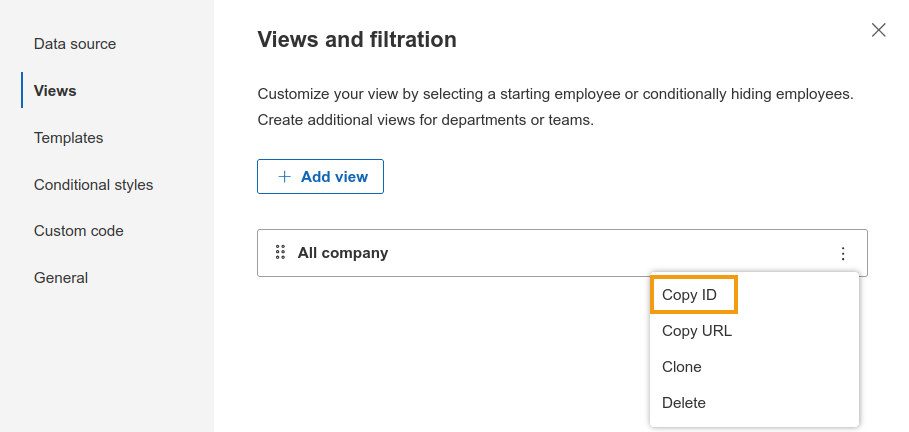
You can find the specific View ID in the Views panel by locating your desired option and copying its unique value.
Including the viewId parameter is optional; if you omit it or set it to null, the configuration will automatically apply to the first view in your list.
Once you have your parameters ready, navigate to the Custom Code panel and open the JavaScript tab to paste your code.
Note
Editing JavaScript is available only for Tenant Administrators (Global Administrators). Also, the Tenant Administrator can disable the Custom JavaScript feature globally.
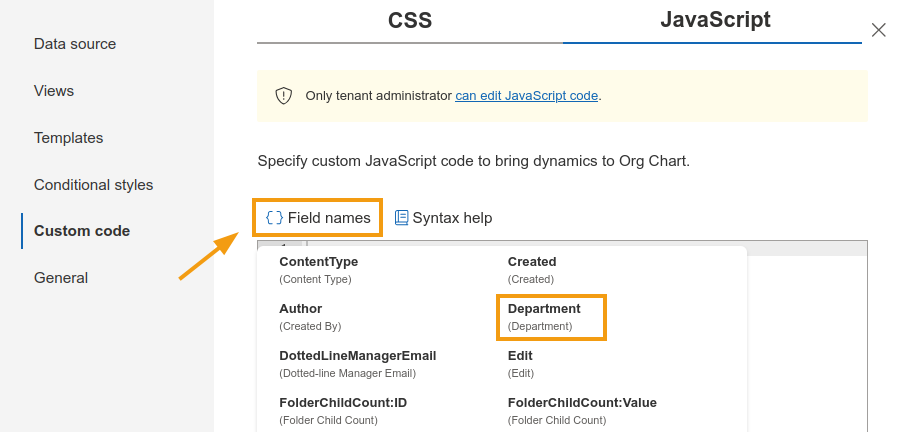
If you aren’t sure of the exact field name to use for grouping, you can find it under the Field names menu. In this example, we are using “Department”:
After you have updated the method with your specific values, simply save your changes in the editor.
To make the grouping labels visible later on, just switch the third parameter to true:
api.displayNodesGroupingForLevel(
  1, // Node level
  "Department", // Grouping field name
  true, // Show labels
  "d8e7639f-824d-4911-a12e-eb3d9c4db79c" // View ID
);
For more advanced styling, feel free to review our examples on how to customize label boxes.
Considerations
Keep these rules in mind when configuring grouping with custom code:
setNodeGroupingById has the highest priority.
It can override grouping settings defined by displayNodesGroupingForLevel or displayNodesGroupingForLevels for a specific node.
displayNodesGroupingLabels only shows or hides grouping labels. It does not change how employee boxes are grouped.