Conditional styles
Use conditional styles to change the appearance of boxes that match specific conditions, such as Job Title or Department. This is useful when you want to highlight executives, departments, assistants, or other groups without changing the appearance of the entire Org Chart.
Note
To avoid unexpected results, keep in mind the order in which styles are applied:
Themes → Custom CSS → Conditional styles → Individual styles
Each next level can override the previous one. Both custom CSS and conditional styles can override theme settings, and individual styles have the highest priority.
Add and manage rules
On the Conditional styles step, click Add rule to create a new rule.
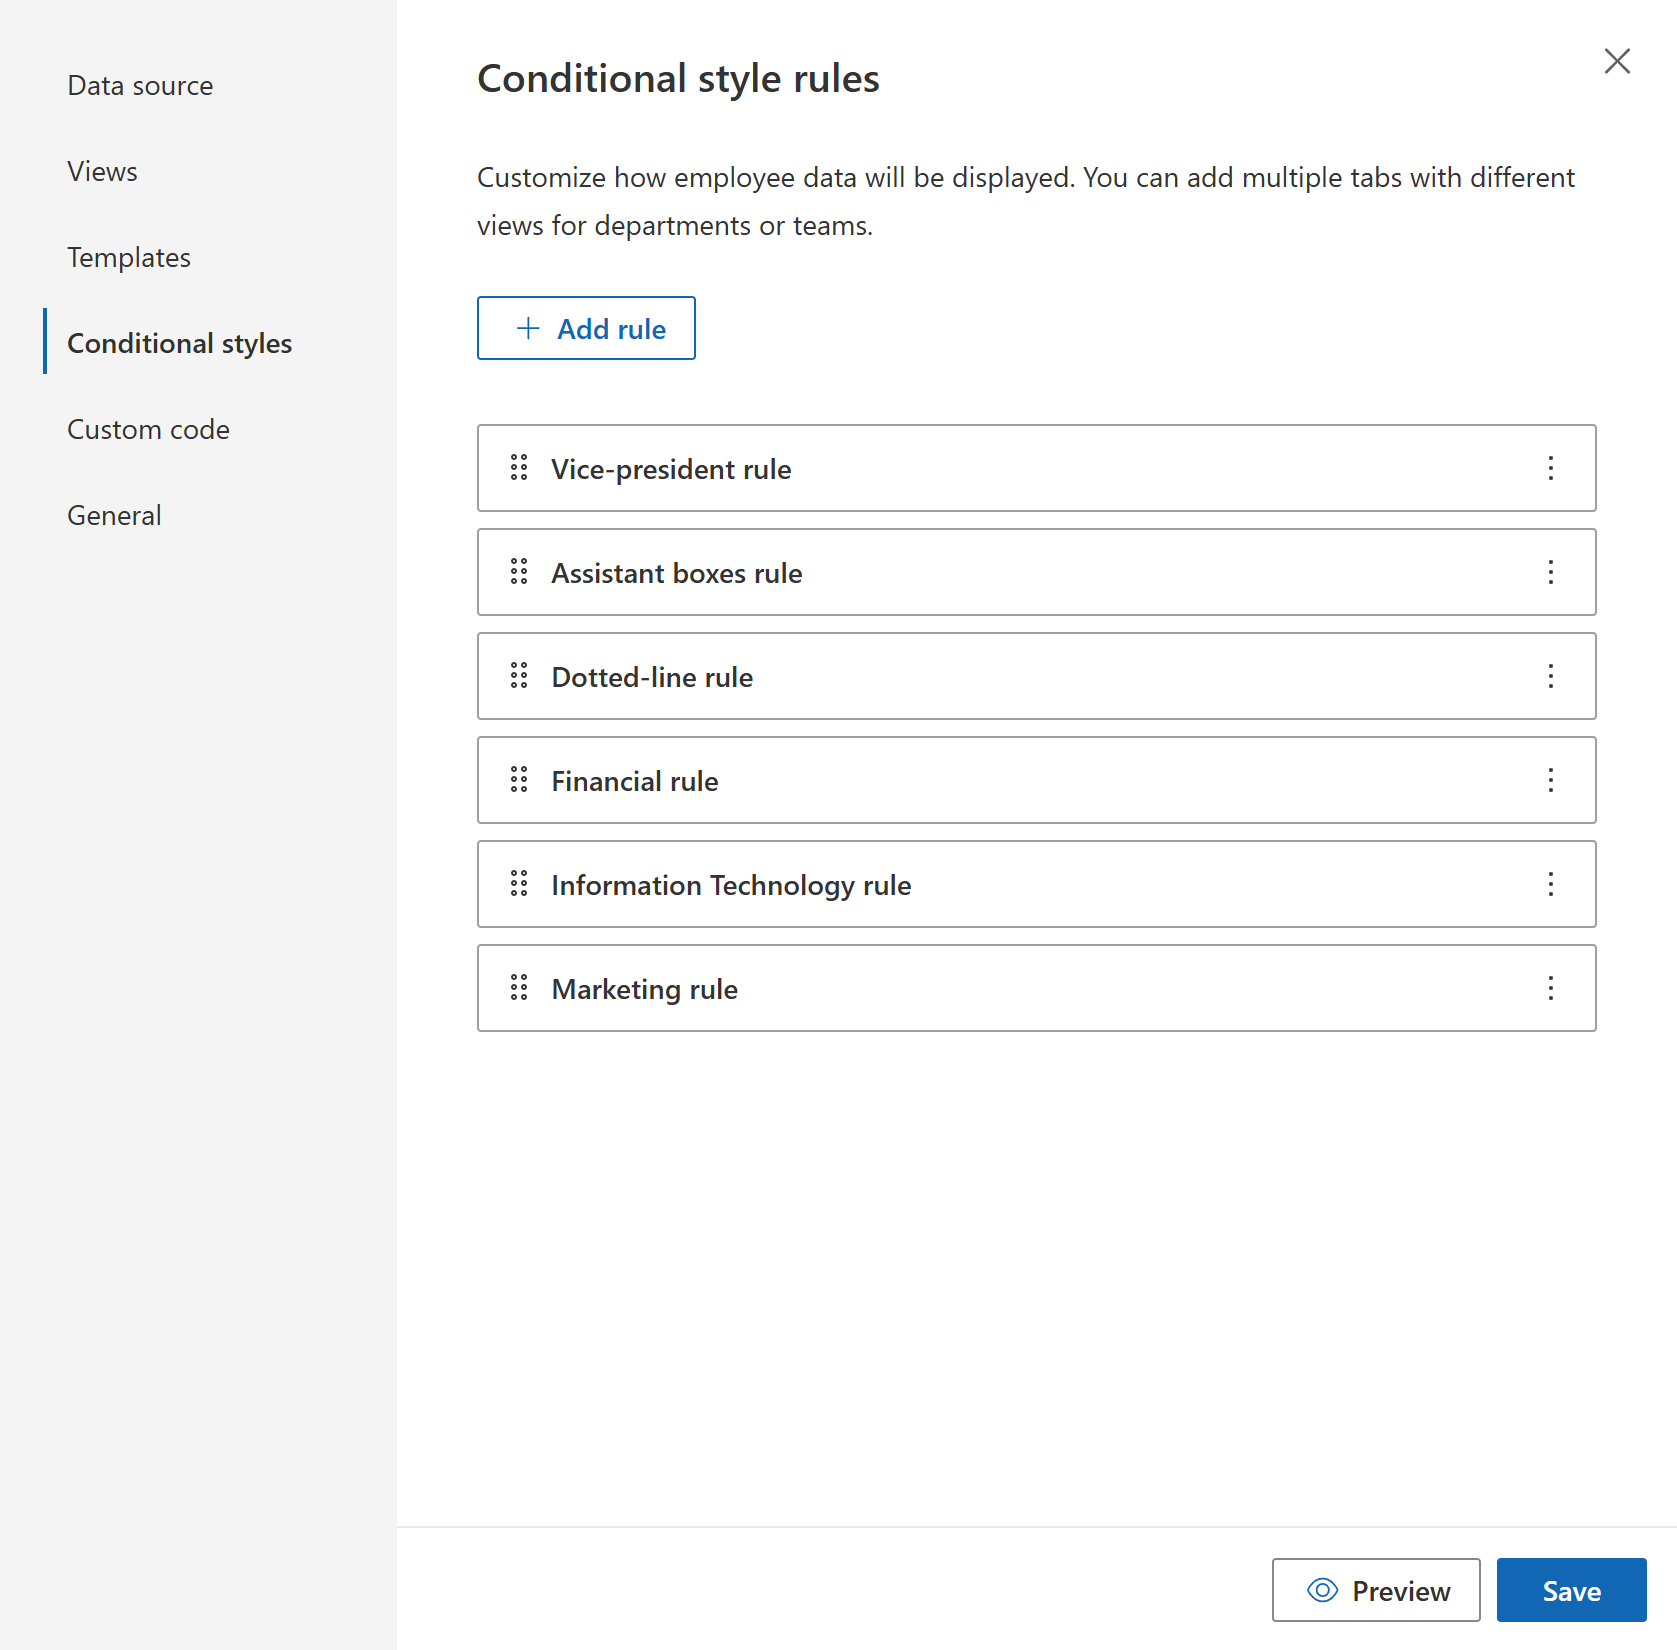
Each rule appears in the list. You can:
drag and drop rules to change their order,
open a rule by clicking it,
open the rule menu to manage it.
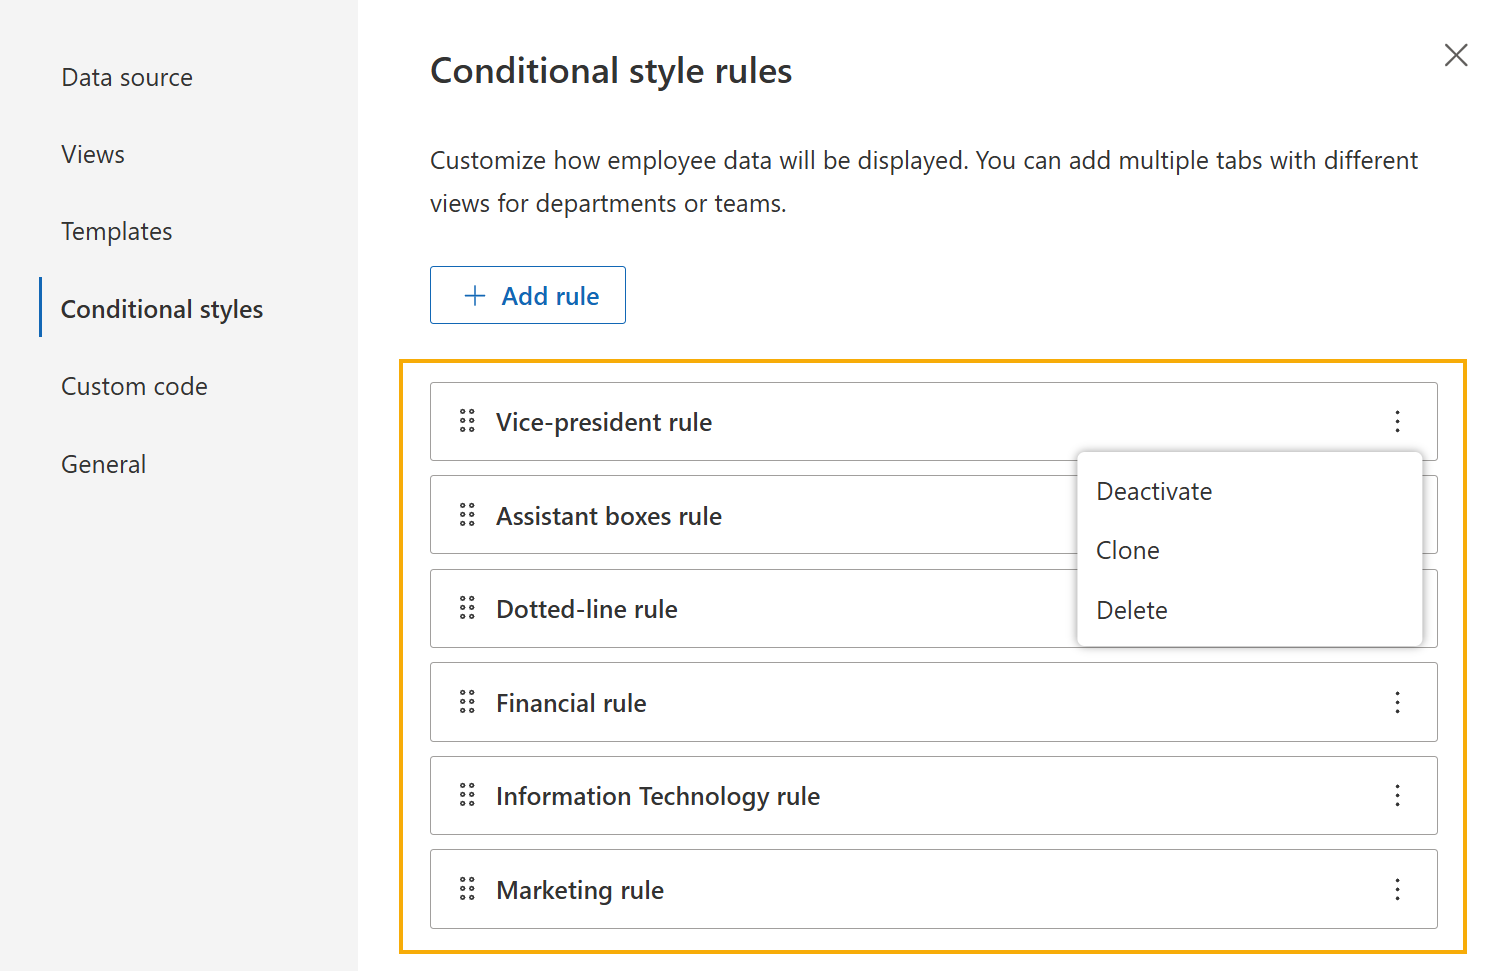
The rule menu includes the following actions:
Deactivate to disable the rule without deleting it,
Clone to duplicate the rule,
Delete to remove the rule.
Create a rule
When you open a rule, configure the following parts:
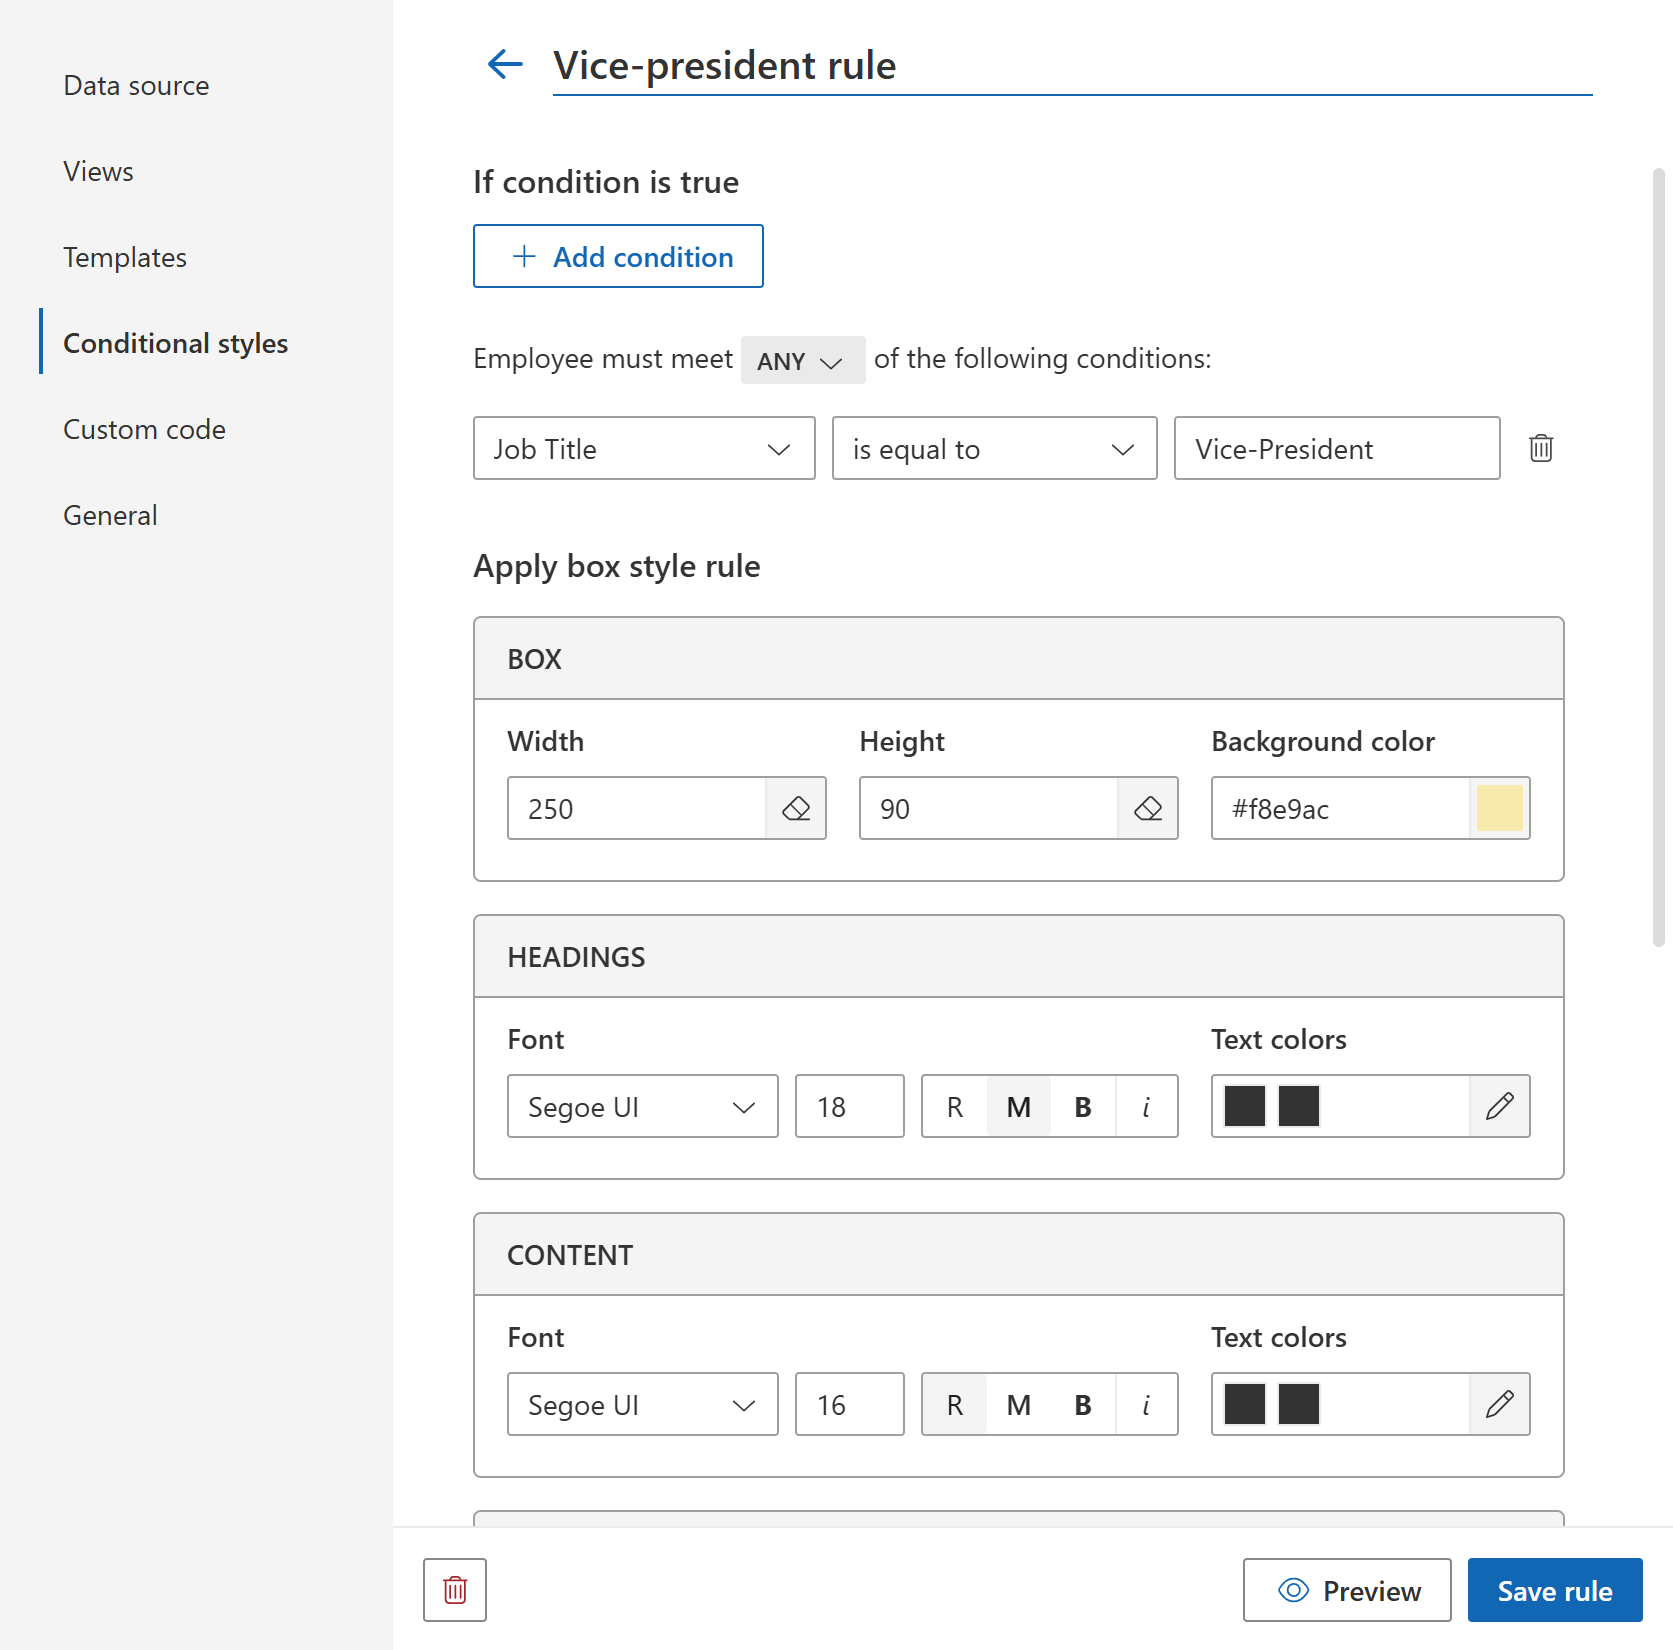
Condition
Use the condition editor to define when the rule should be applied.
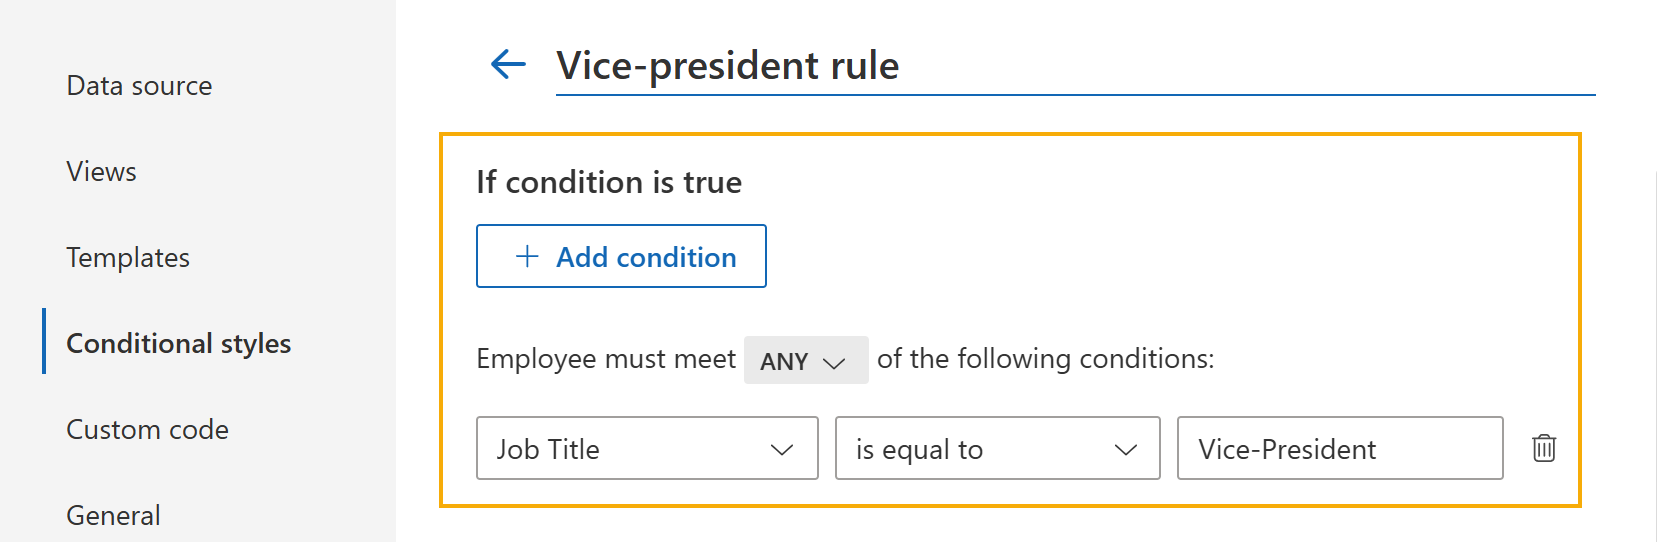
Each condition includes:
a field,
a comparison operator,
a value.
If a rule contains multiple conditions, choose whether the employee must meet ANY or ALL of them. You can create a universal rule for all boxes by leaving it empty.
You can use fields from your data source, for example Job Title, Department, or other available employee properties.
The condition editor works similarly to the filtering editor described in Views.
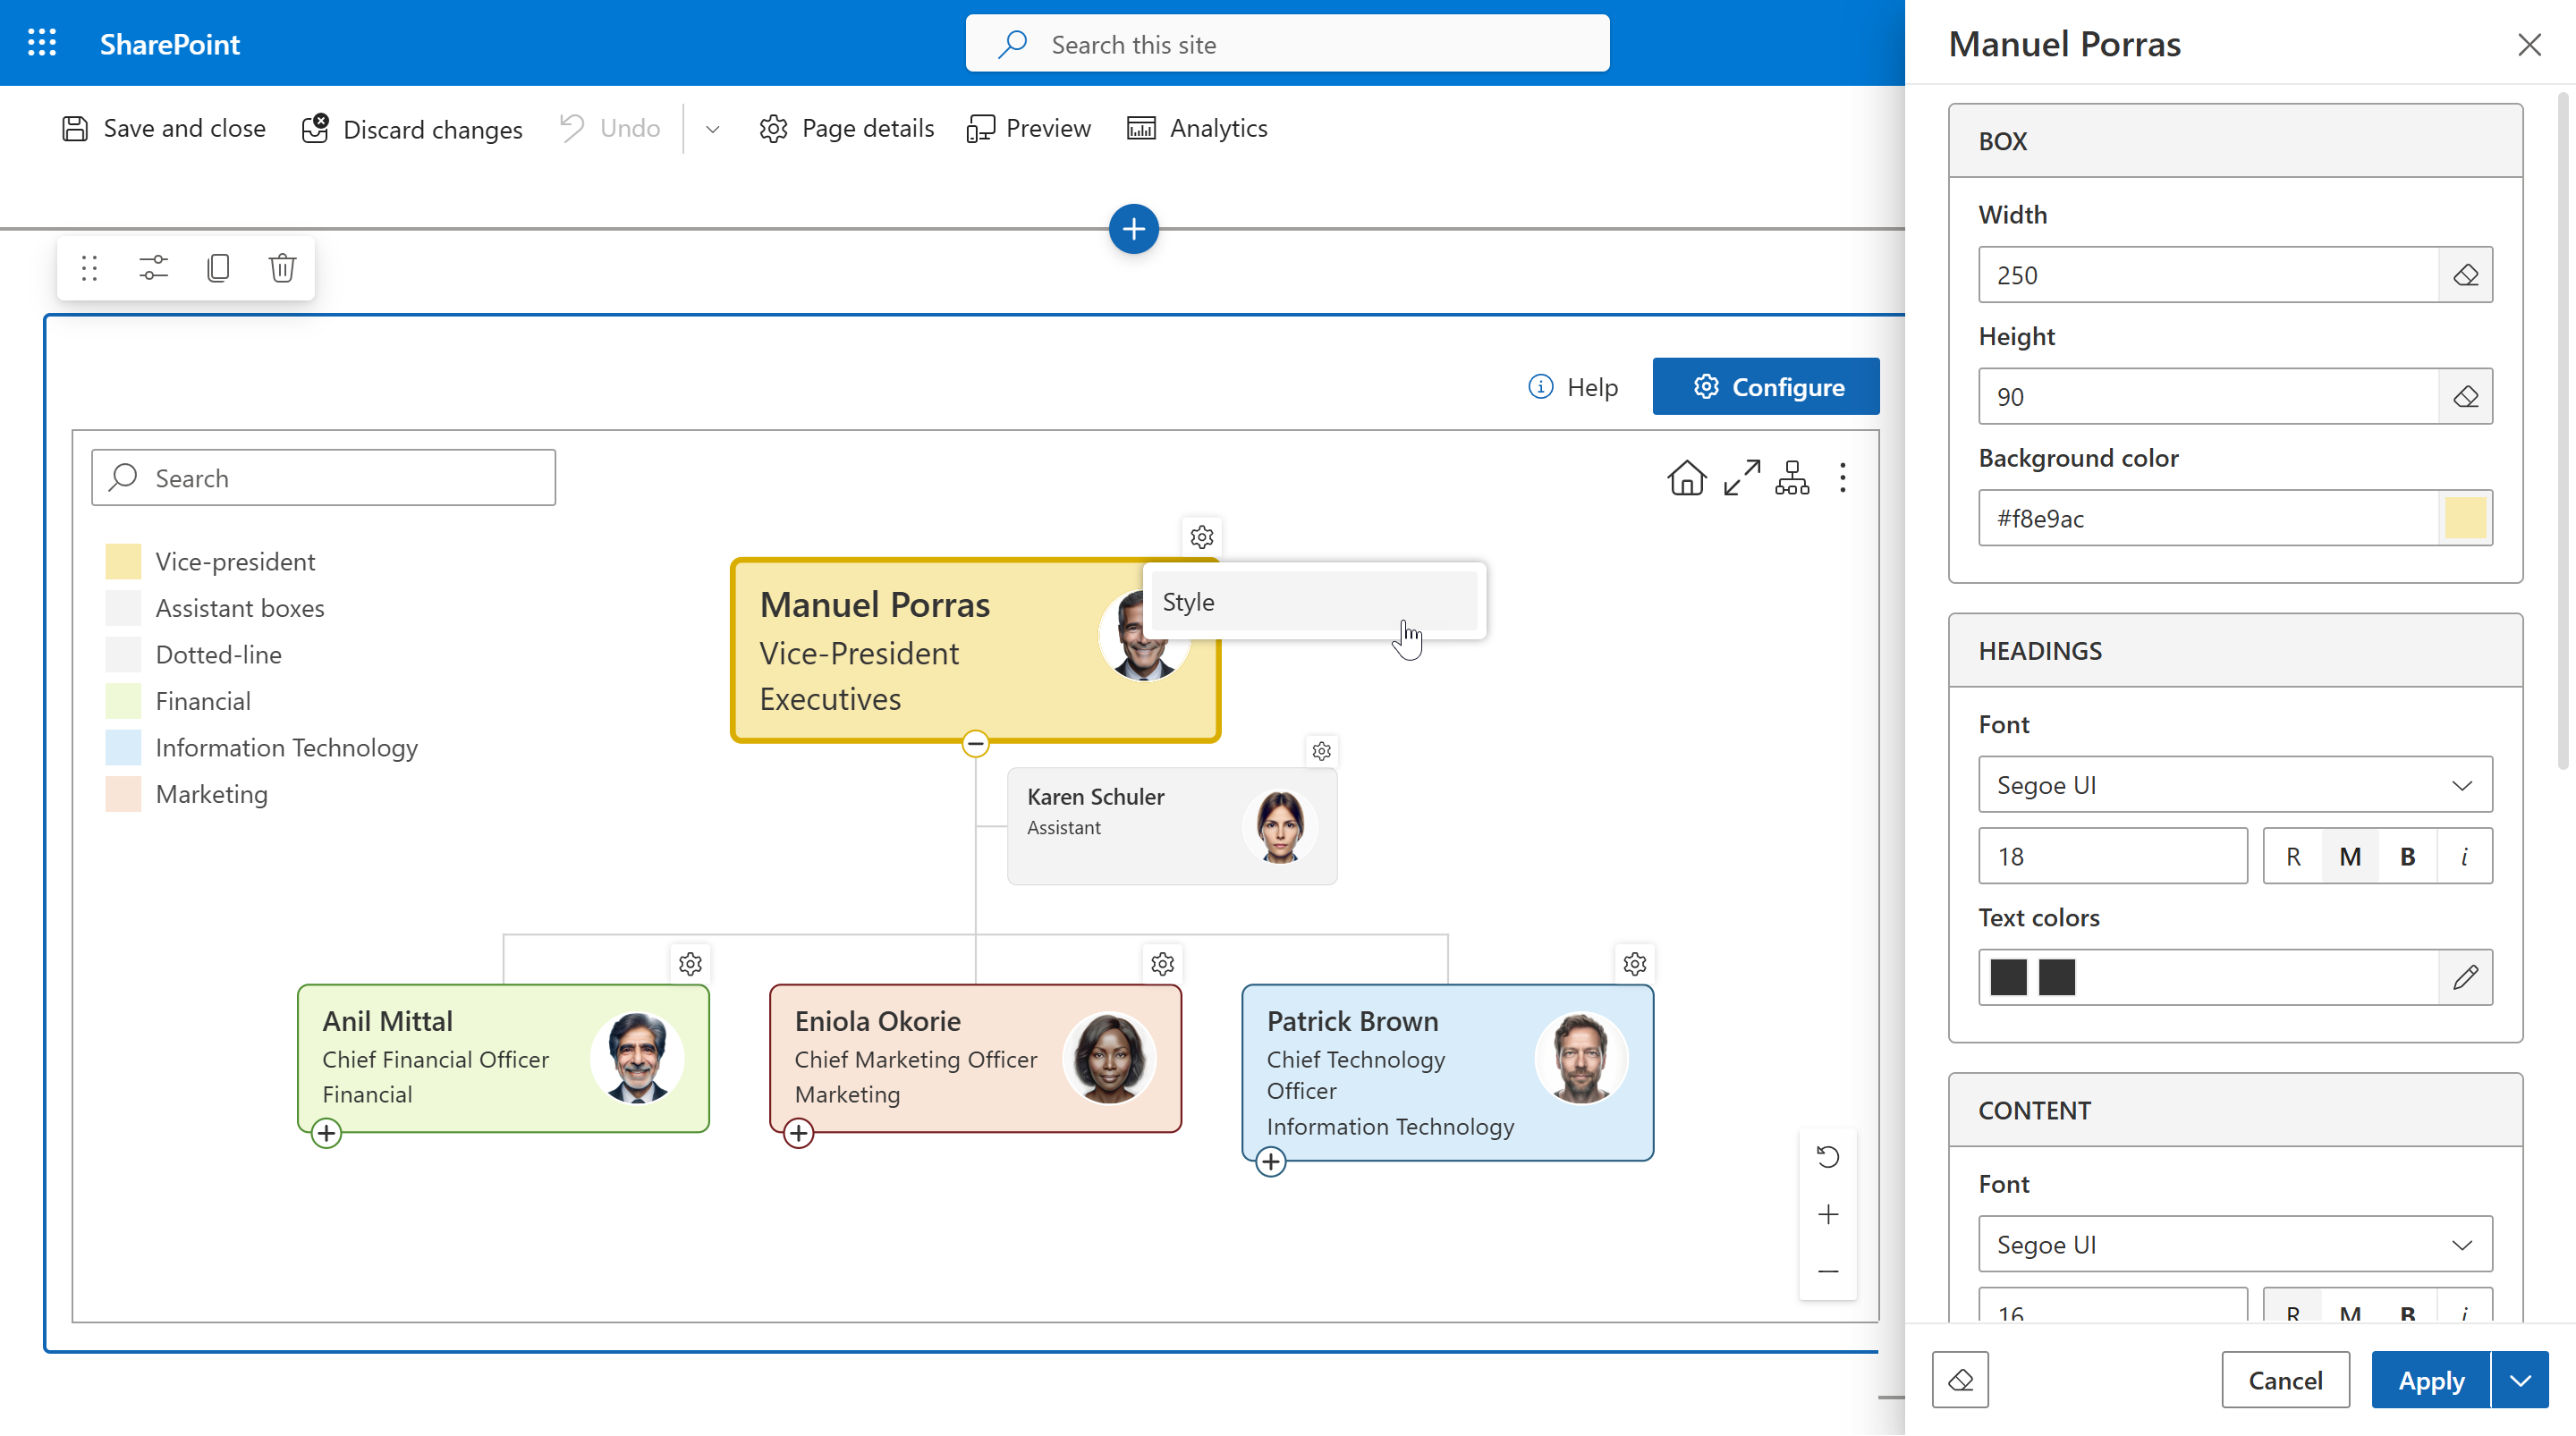
Style settings
After defining the condition, configure how matching boxes should look.
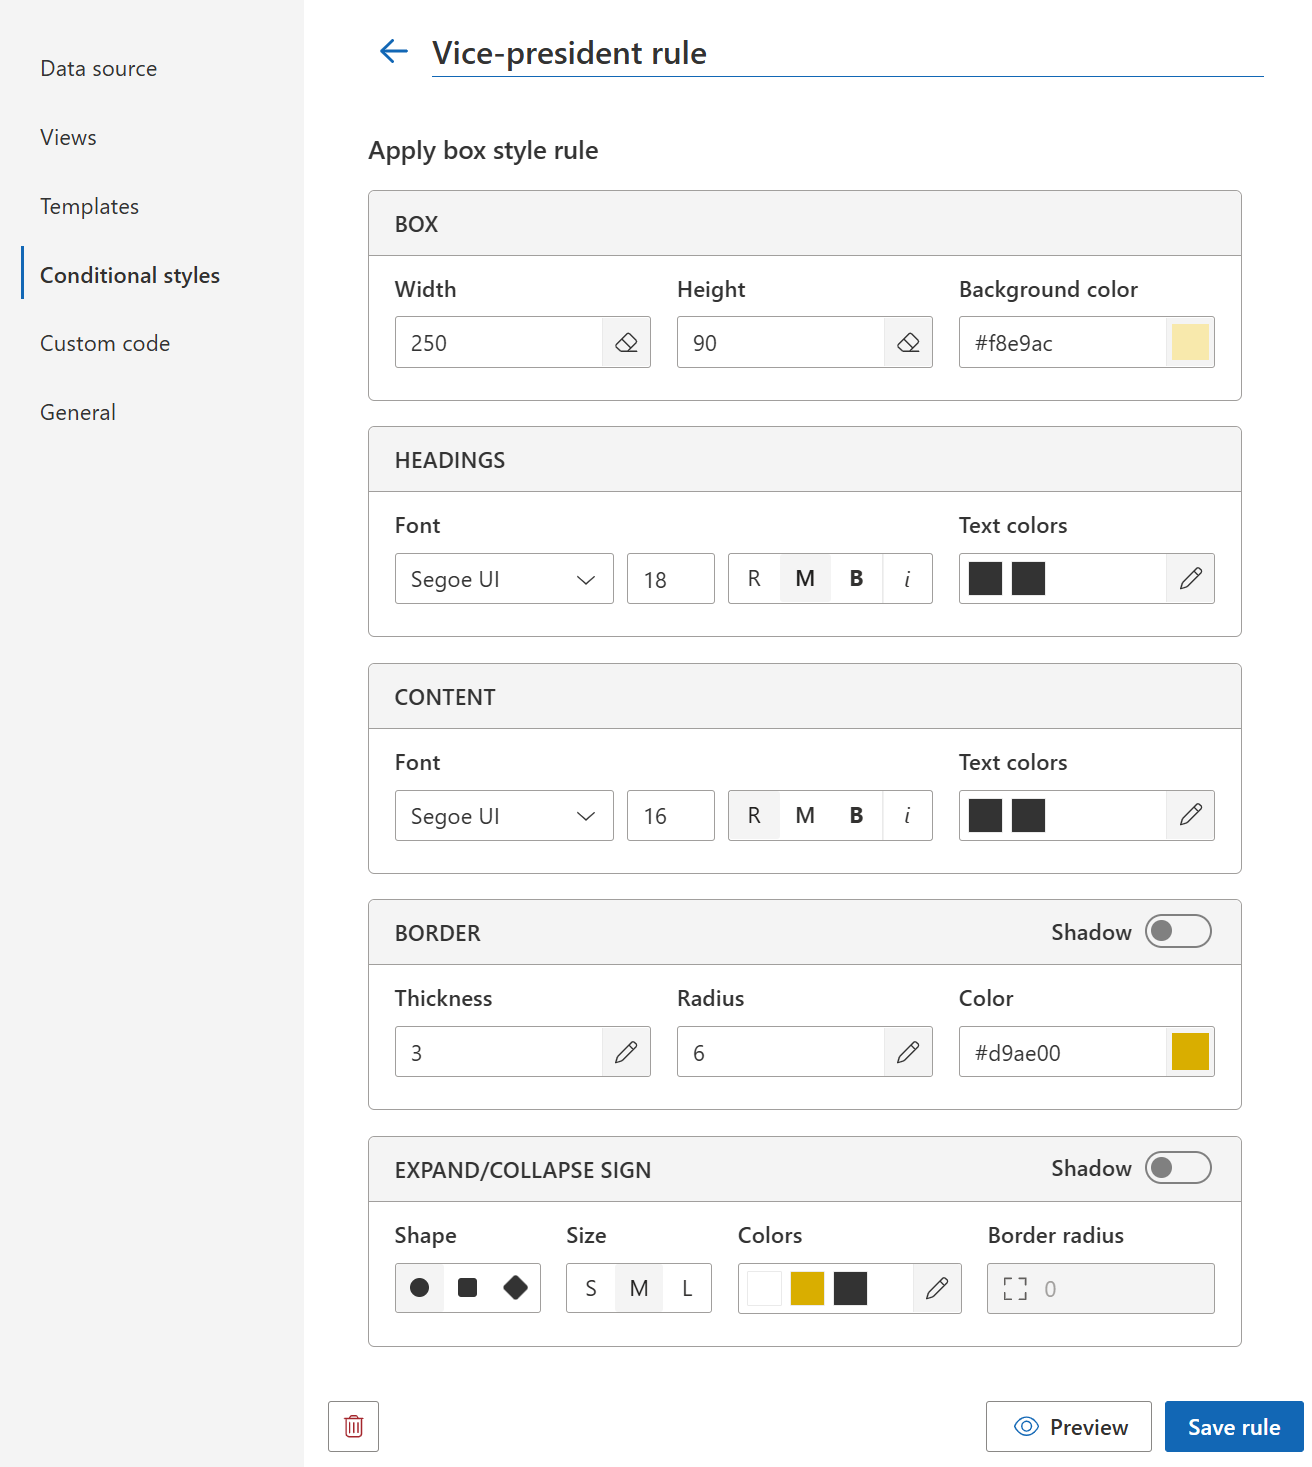
The rule editor includes the following style sections:
Box: width, height, background color
Headings: font, font size, text style, text colors
Content: font, font size, text style, text colors
Border: thickness, radius, color, shadow
Expand/Collapse sign: shape, size, colors, border radius, shadow
All numeric values are measured in pixels (px).
You can select colors using the color picker or enter a color value manually. Org Chart supports color color names and color codes in RGB, HEX, and HSL formats.
Use Preview to check the result before saving the rule.
Note
When you save a rule, Org Chart applies all style properties configured in that rule to matching boxes.
For more advanced customizations, use Custom CSS or JavaScript code.
Display in legend
To show a rule in the chart legend, turn on the Display in legend toggle.
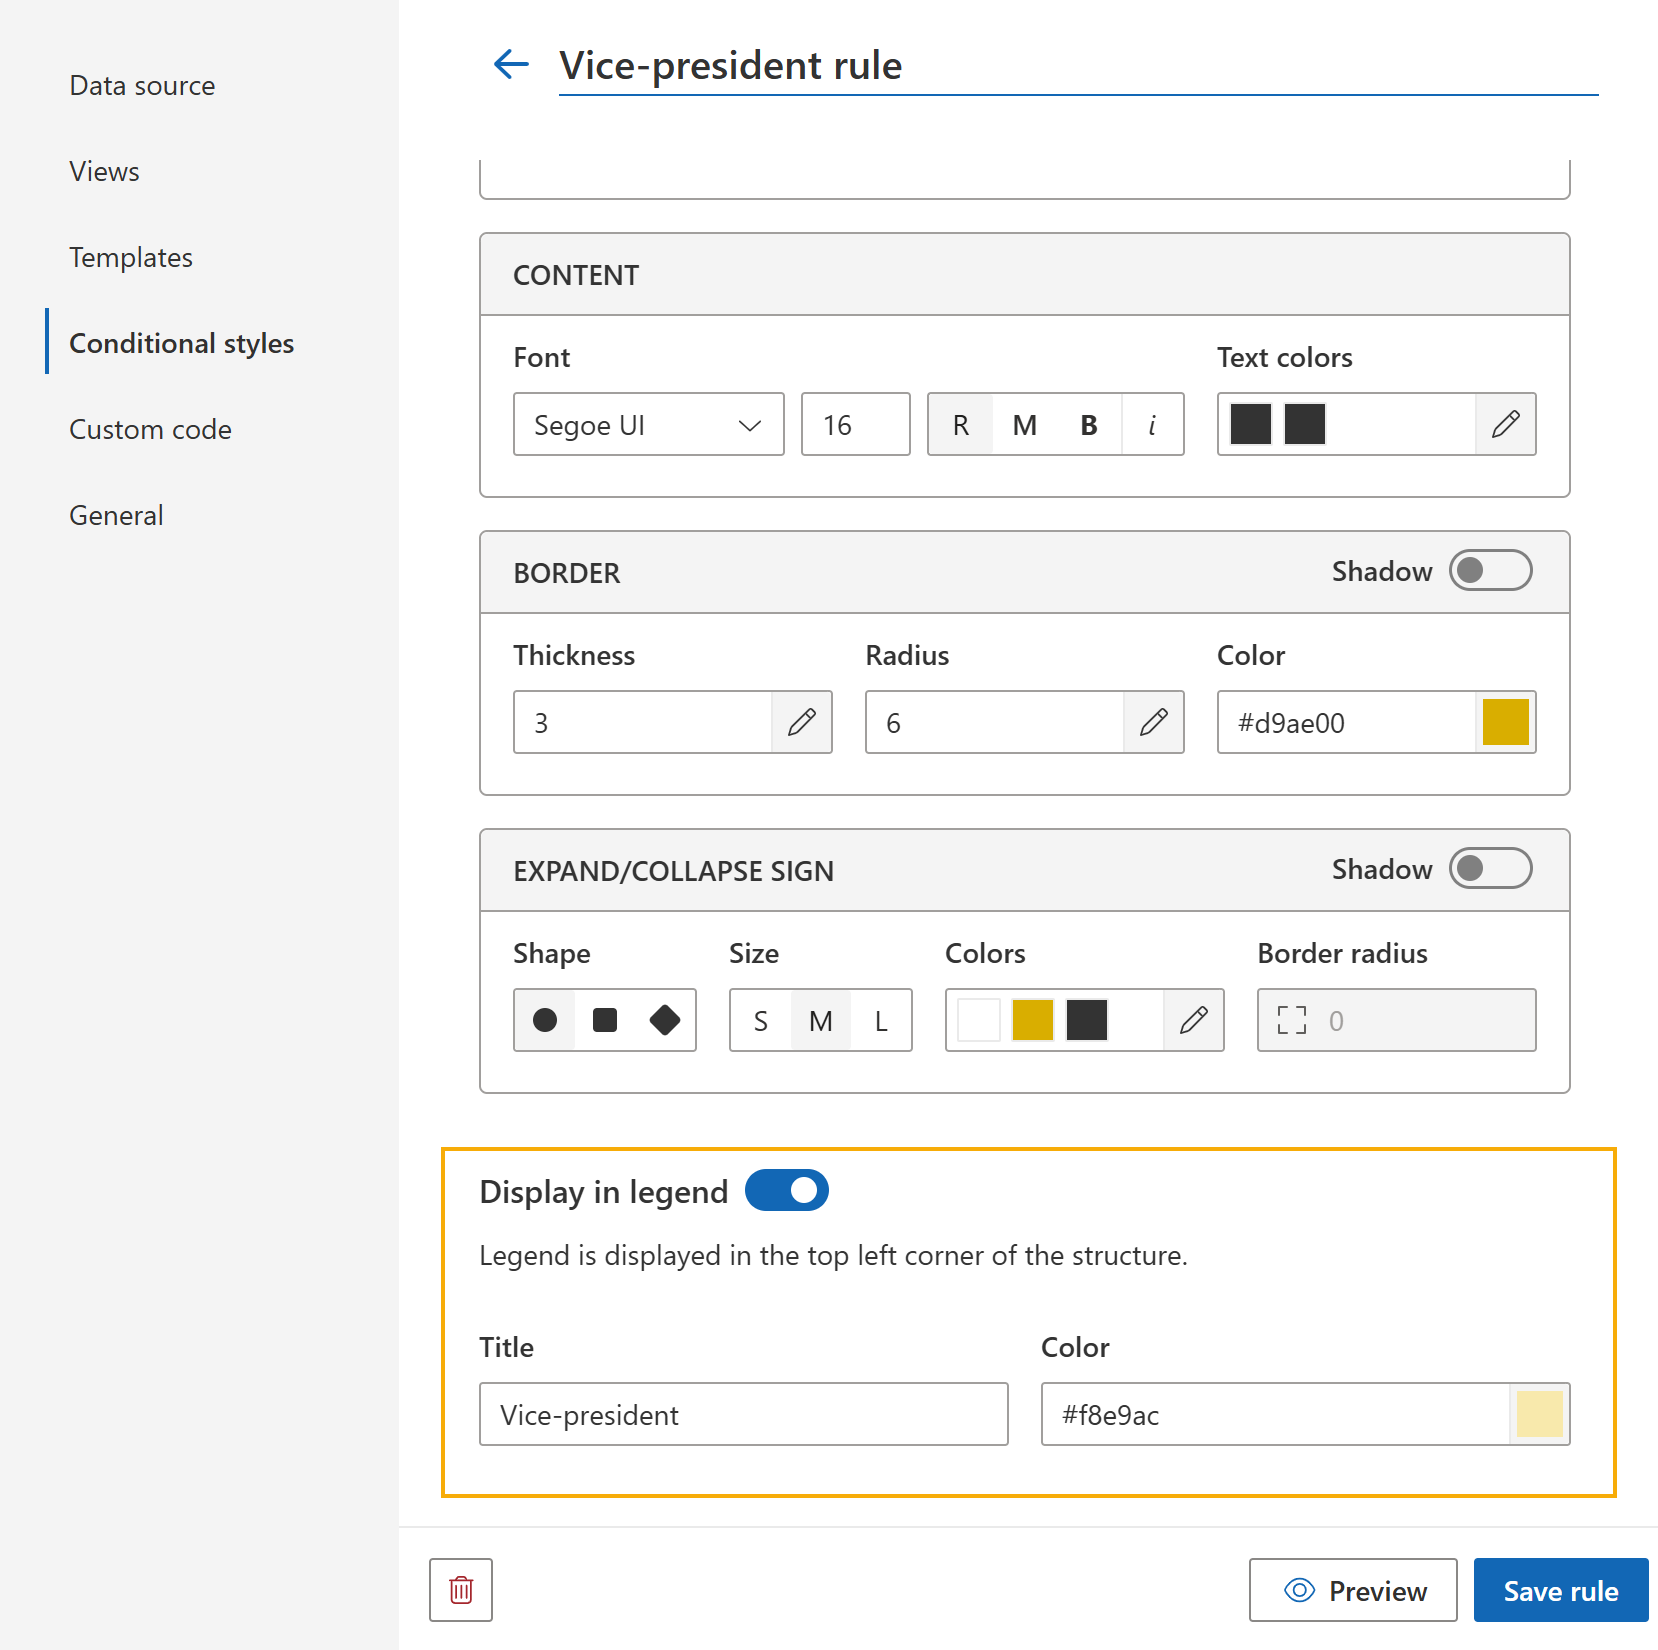
Then specify:
Title: the label shown in the legend,
Color: the legend color for the rule.
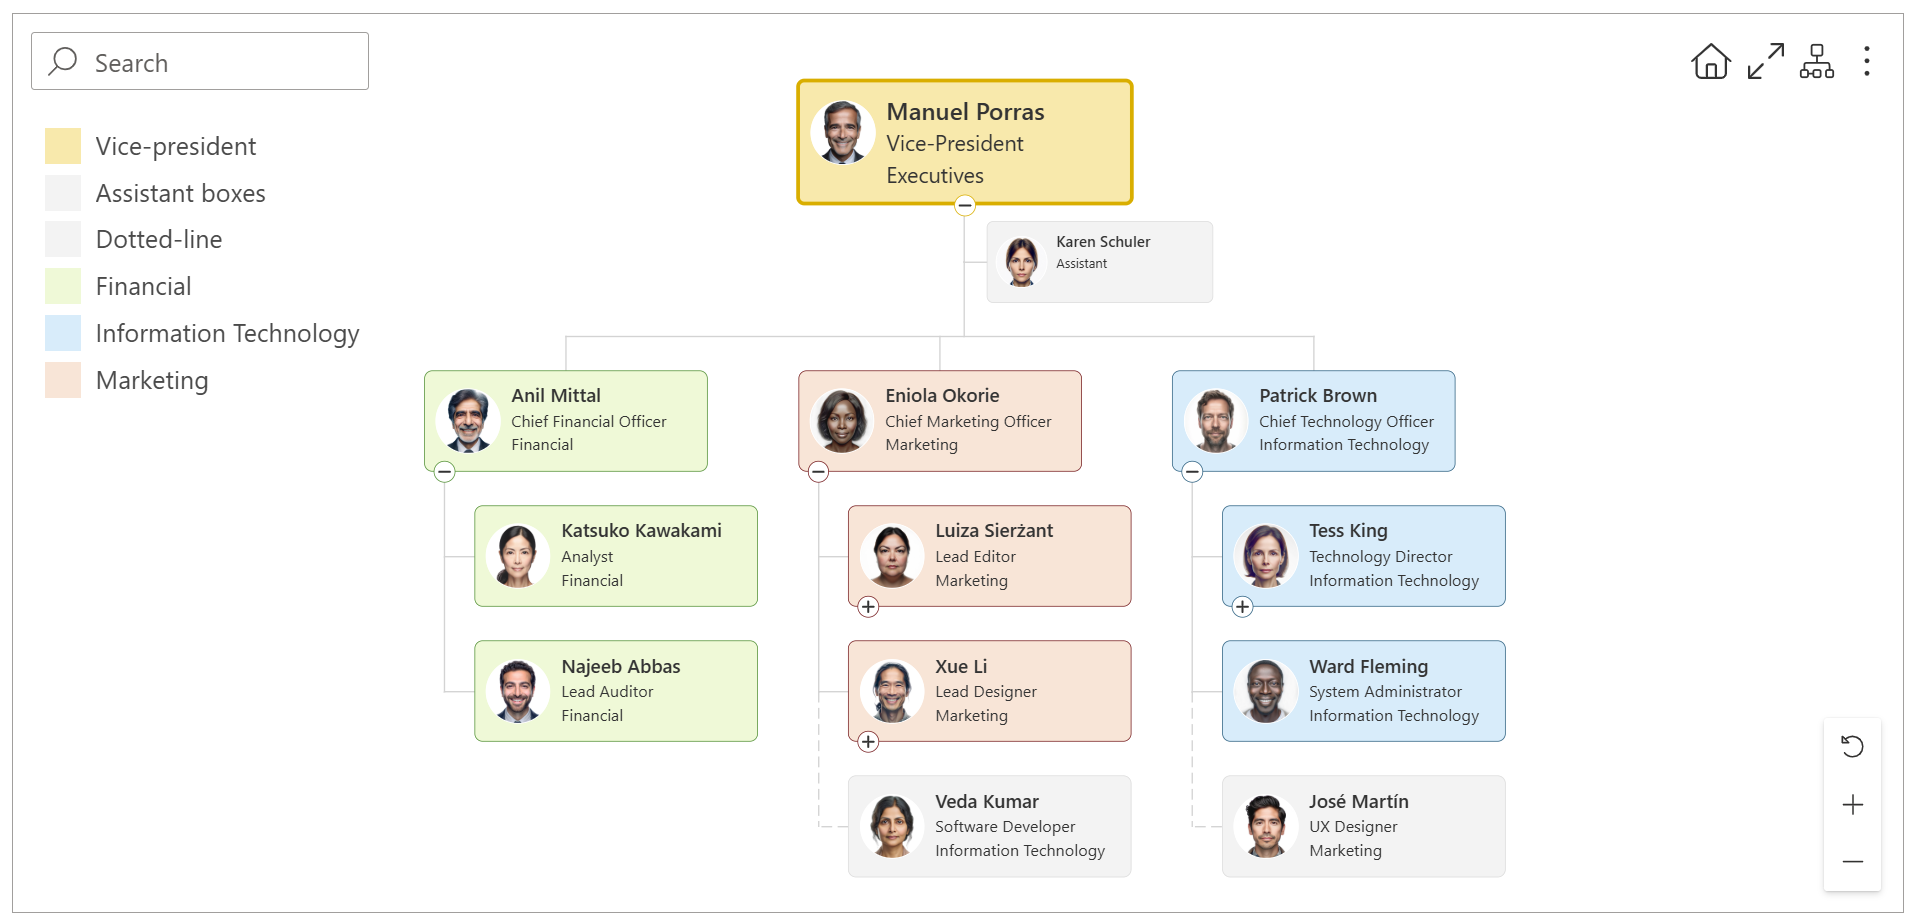
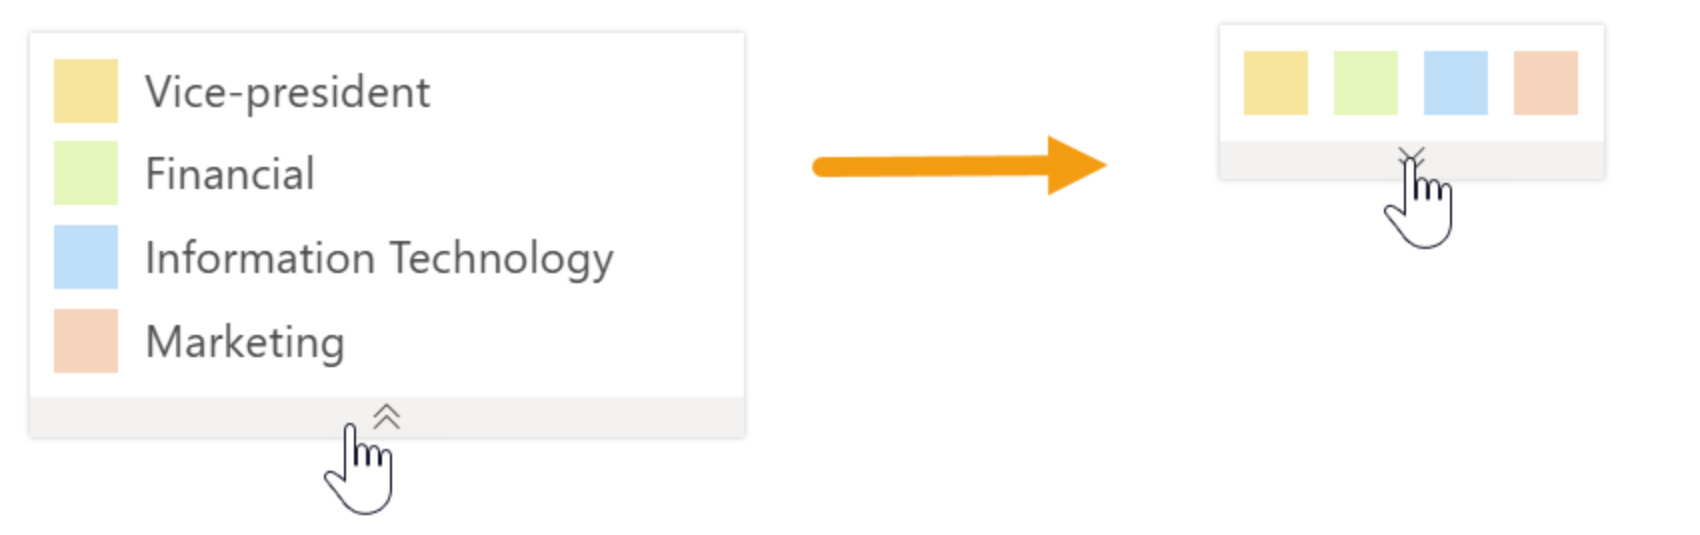
The legend is displayed in the top-left corner of the Org Chart and helps explain the meaning of highlighted boxes.
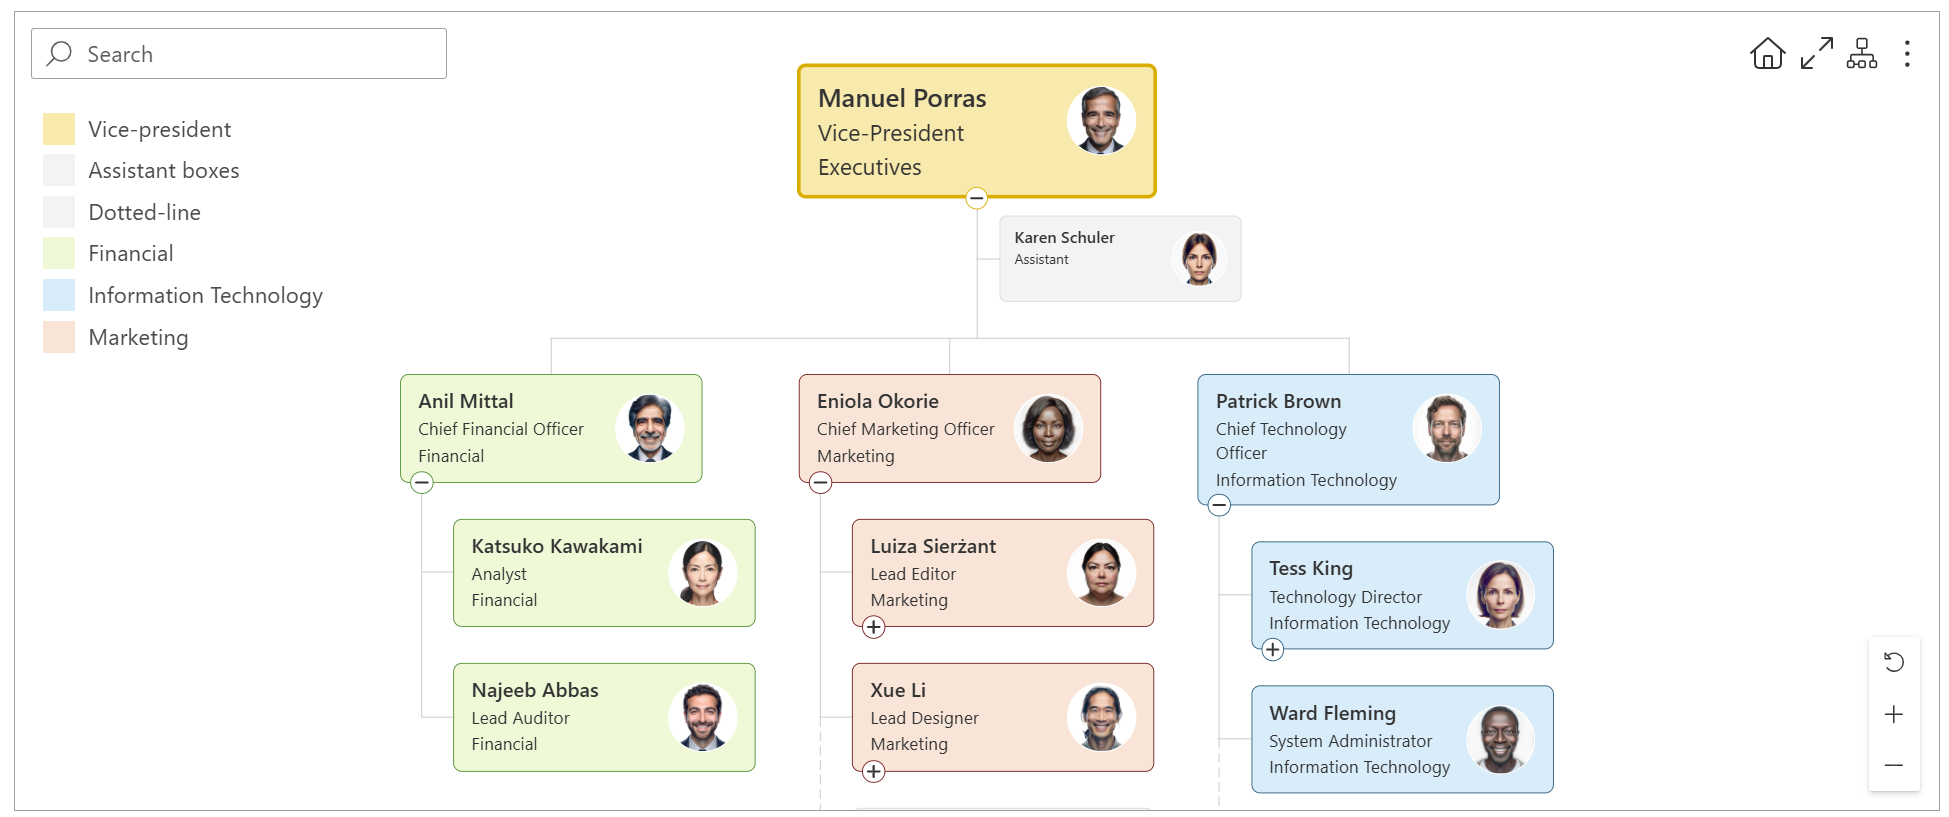
If multiple rules are added to the legend, users can quickly identify highlighted groups in the chart.
The legend supports two modes: full and compact. Click the arrow below the legend to switch between them.
Individual styles
If you need to customize only one specific employee box, you can customize styles of an individual box directly in the chart.
Use Conditional styles when you want to apply the same appearance to a group of employees based on conditions.
Note
Go to the next step of the configuration wizard, Custom code.