How to customize view of columns in List or Library control
Starting with version 2.0.4, Plumsail Forms supports column formatters in the List or Library control. Besides SharePoint formatting, you can add custom column formatting to customize how columns in List or Library control are displayed:
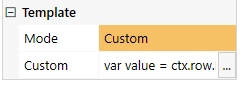
The possibilities of custom formatters are almost endless, in this article we’re going to show some of the possible customizations. Add a code snippet from this article to the Custom property and see how it works:

Display numeric fields as progress bars
One customization option is to turn numeric field into a progress bar, which can be useful for Task List as an example:
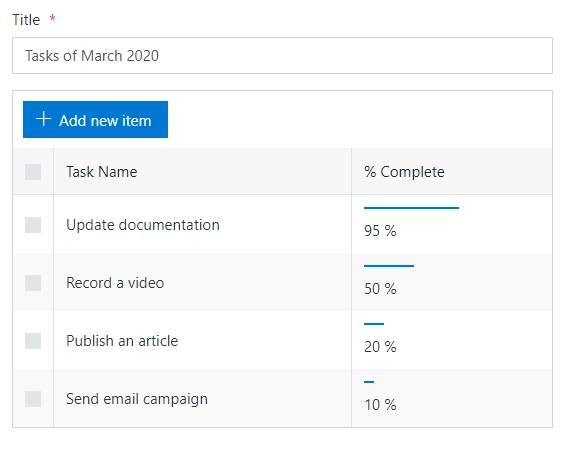
Use the following code, just replace PercentComplete with the Internal name of the number column:
let value = ctx.row.PercentComplete;
if (!value) {
    return '';
}

let width = value.replaceAll('%', '').replaceAll(' ', '');
return `
<span style="width:${width}px;text-align:center;padding: 5px 2px;display: block;border-top: 2px solid #0078d4;"></span>
<span style="left: 0;">${value}</span>`;
Send e-mail to a user specified in User field
You might want to be able to email users in List or Library. Customize column to add an email button to the usernames in the column:
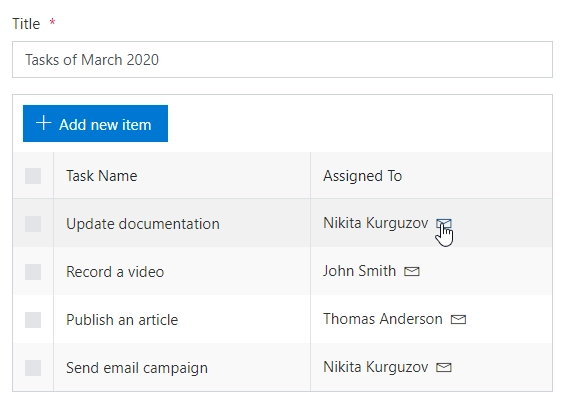
Use the following code, just replace AssignedTo with the Internal name of the User column:
let value = ctx.row.AssignedTo;
let {row, listId, webUrl} = ctx;
let baseUrl = `https://${window.location.host}${webUrl.length > 1 ? webUrl : ''}`;
let formUrl = `${baseUrl}/_layouts/15/listform.aspx?PageType=4&ListId=${listId}&ID=${row.ID}`;
if (!value) {
return '';
}
return value.map(v => {
return '<div style="white-space: nowrap;">' +
'<a target="_blank" style="padding-right:8px;"data-interception="off" href="/_layouts/15/userdisp.aspx?ID=' +
v.id + '">' + v.title + '</a>' + '<a href="mailto:' + v.email +
'?subject=Task status&body=Hey, how is your task coming along?.%0D%0A---%0D%0AClick this link for more info. ' +
encodeURIComponent(formUrl) + '" rel="noopener noreferrer " tabindex="0">' +
'<i data-icon-name="Mail" class="ms-Icon ms-Icon--Mail" style="vertical-align: middle;"></i>' +
'</a></div>';
}).join(', ');
Highlight overdue dates
Want to make sure that the tasks are completed on time? Highlight overdue dates like this:
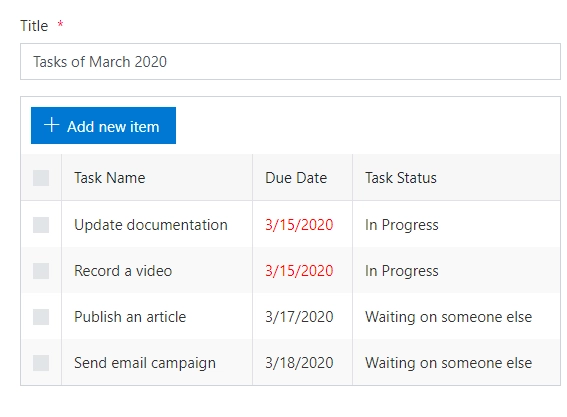
Use the following code, just replace TaskDueDate and Status with the Internal names of your columns:
let value = ctx.row.TaskDueDate;
if (!value) {
    return '';
}
return new Date(value) < new Date() && ctx.row.Status !== 'Completed'
    ? `<span style="color:red">${value}</span>`
    : `<span>${value}</span>`;
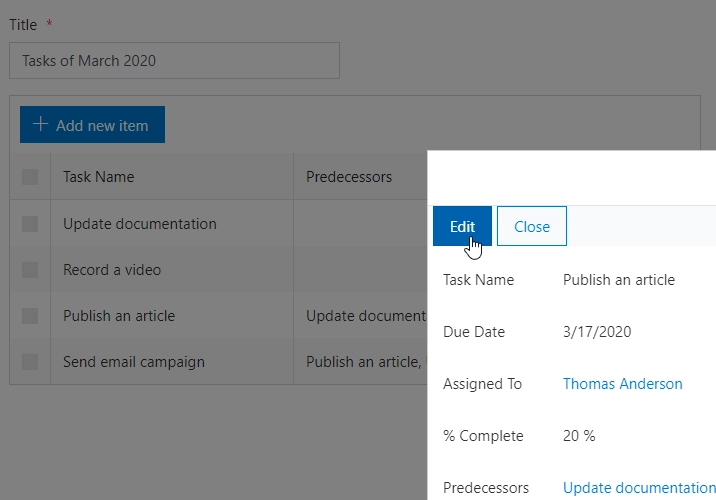
Open lookup fields in a dialog
You can also specify how to open the items linked in lookup fields, for example, open them in dialog:
Use the following code, just replace Predecessors with the Internal name of the Lookup column:
let value = ctx.row.Predecessors;
if (!value) {
    return '';
}
return value.map(v => {
    return '<a target="_blank" data-interception="off" ' +
        'onclick="window[\'' + ctx.openDialogFuncName + '\'](\'' + ctx.field.DispFormUrl +
        '&ID=' + v.lookupId + '\'); return false;" ' +
        'href="' + ctx.field.DispFormUrl + '&ID=' + v.lookupId + '">' + v.lookupValue + '</a>';
}).join(', ');
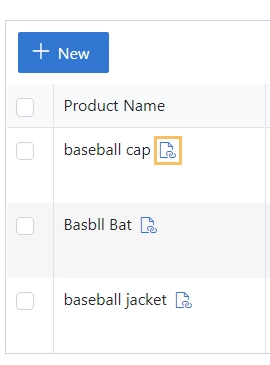
Copy item link to clipboard
Add a button next to the item title to copy the item link to the clipboard:
Use the following code, just replace Title with the Internal name of the column:
let value = ctx.row.Title;
let {row, listId, webUrl, rootFolder} = ctx;
let baseUrl = `https://${window.location.host}${webUrl.length > 1 ? webUrl : ''}`;
let formUrl = `${baseUrl}/_layouts/15/listform.aspx?PageType=4&ListId=${listId}&ID=${row.ID}`;

if (rootFolder) {
    formUrl += `&RootFolder=${encodeURIComponent(rootFolder)}`;
}
if (row.ContentTypeId) {
    formUrl += `&ContentTypeID=${row.ContentTypeId}`;
}
if (!value) {
    return '';
}

return `
<span>${row.Title}</span>
<a href="" data-interception="off" fd-data-interception="off"
    onclick="navigator.clipboard.writeText('${formUrl}'); alert('copied!'); return false;">
    <i data-icon-name="PageLink" class="ms-Icon ms-Icon--PageLink" style="vertical-align: middle;padding-left:8px;font-size: 14px;"></i>
</a>`;
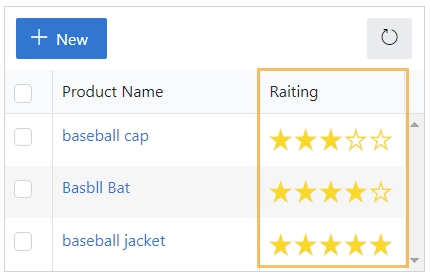
Star rating
Replace the value of a number column with a star rating. You can use any other icon instead of the star:
Use the following code, just replace Rating with the internal name of the Number column:
let value = ctx.row.Rating;
if (!value) {
    return '';
}

let starFill = '<i data-icon-name="FavoriteStarFill" class="ms-Icon ms-Icon--FavoriteStarFill" style="vertical-align: middle;padding-right:2px;color: gold;font-size: 20px;"></i>';
let star = '<i data-icon-name="FavoriteStar" class="ms-Icon ms-Icon--FavoriteStar" style="vertical-align: middle;padding-right:2px;color: gold;font-size: 20px;"></i>';
return starFill.repeat(value) + star.repeat(5 - value);
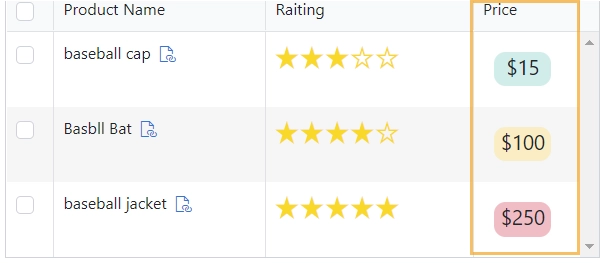
Change background color
Change the background color depending on the value of the number column:
Use the following code, just replace Price with the Internal name of the Number column:
let value = ctx.row.Price;
if (!value) {
    return '';
}

let color = value < 100 ? '#ceede9' : (value < 200 ? '#fcecc2' : '#f5bcc4');
return `<div style="display: flex; border-block-color: grey; margin: 10px; font-size:18px; width: 50px; height: 30px; background-color:${color}; border-radius: 10px; justify-content: center;">$${value}</div>`;
Apply customization to multiple columns
You don’t have to customize one column at a time. Mix and match, and customize multiple columns at the same time:
Use the following code in JavaScript editor to achieve the results for multiple columns at once:
fd.spRendered(() => {
    fd.control('Control1').templates = {
        // Template for PercentCompleted field
        PercentComplete: ctx => {
            // code of your template
            return 'html';
        },
        // Template for AssignedTo field
        AssignedTo: ctx => {
            // code of your template
            return 'html';
        },
        TaskDueDate: ctx => {
            // code of your template
            return 'html';
        },
        Predecessors: ctx => {
            // code of your template
            return 'html';
        }
    };
});