How to start flow from List or Library control and pass selected items
List or Library control allows selection of multiple items, which can then be manipulated in a variety of ways.
In this article, we’ll show you how you can add a new button to List or Library control which will start a new Flow, and use selected items to create a PDF invoice.
Design a flow for generating a document
In this section of the article, we will configure a Power Automate flow to create the PDF document and send it to a certain person via email.
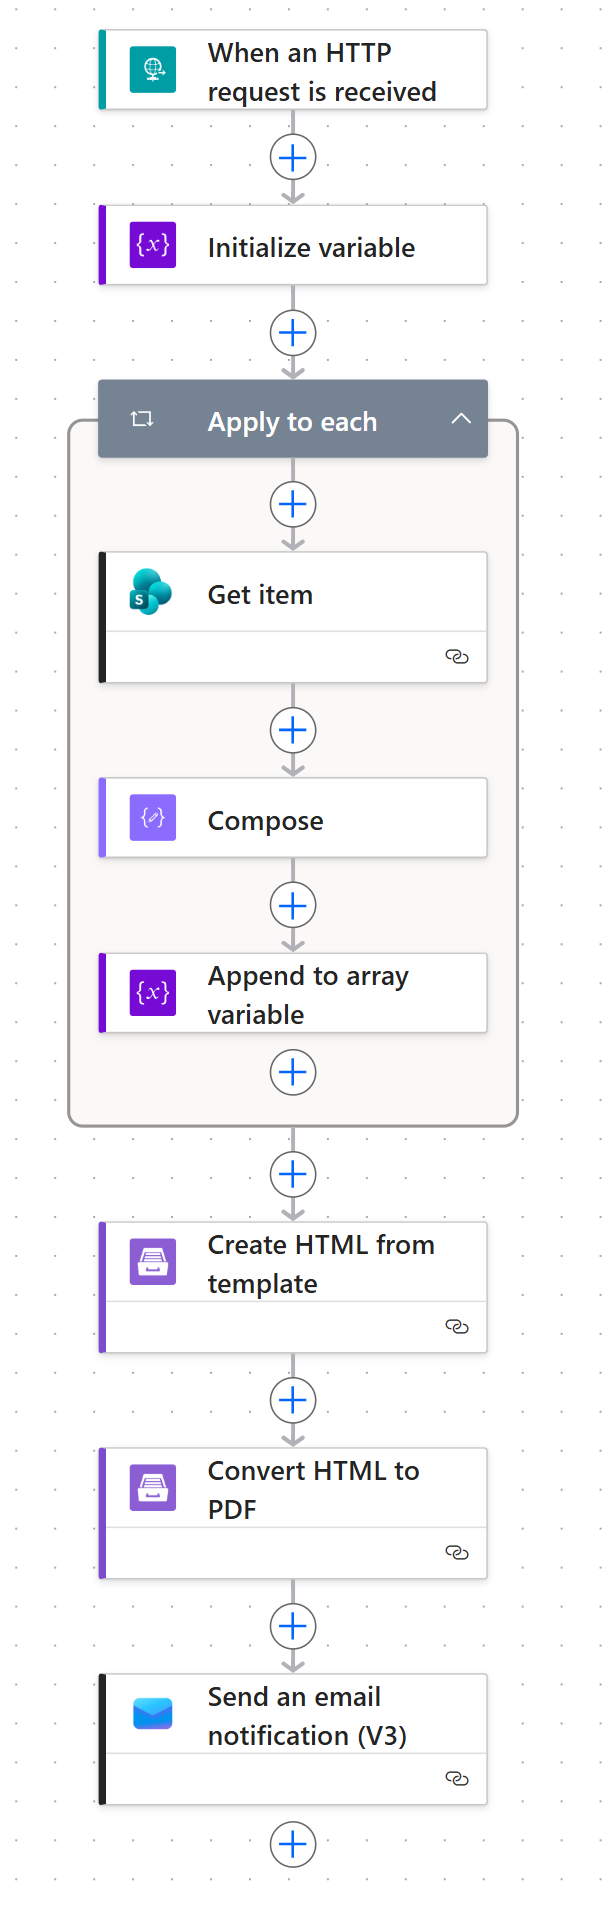
When an HTTP request is received
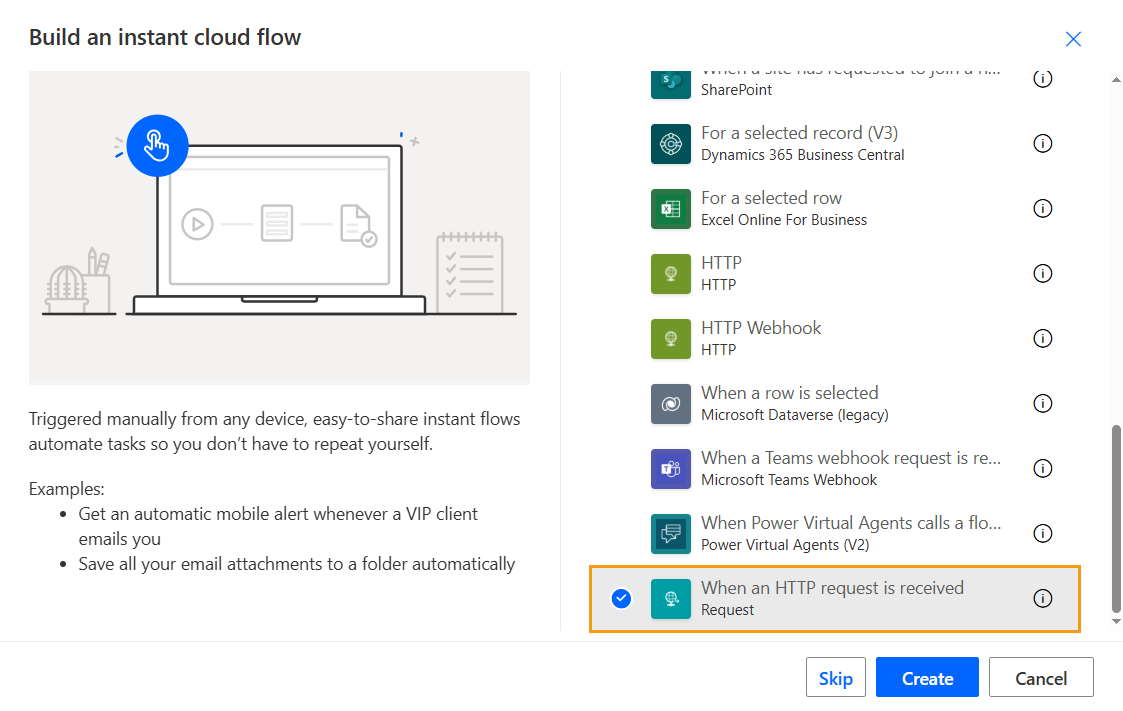
Open the Power Automate app and create a new Instant cloud flow. Search for the When an HTTP request is received trigger:
Use the following Request Body JSON schema:
{
   "type": "object",
   "properties": {
      "ids": {
         "type": "array",
         "items": {
            "type": "integer"
         }
      }
   }
}
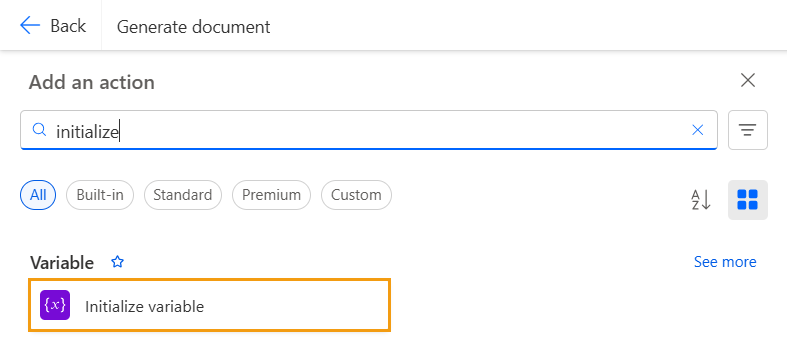
Initialize variable
Next, use the Initialize variable action to create an array variable that will store SharePoint Items.
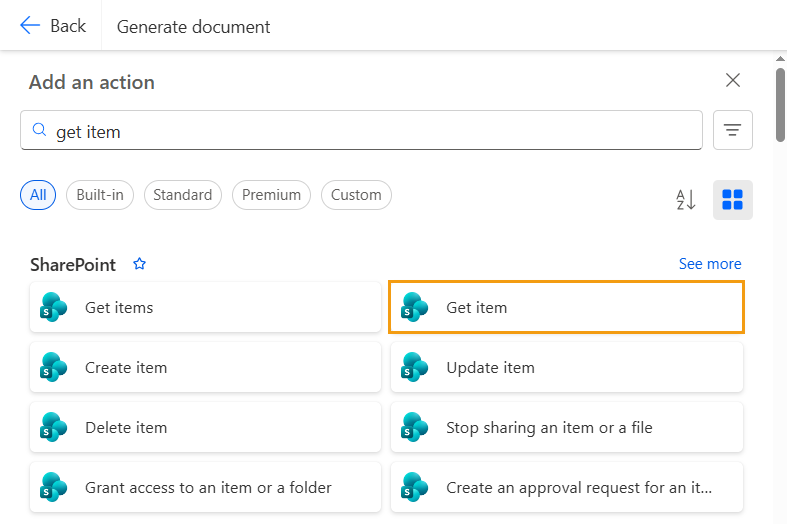
Get Item
To populate the array, add the Get Item action of the SharePoint connector. Note that Get Items won’t work.
Select the target SharePoint site and list, then use dynamic content to select Item as Item ID:
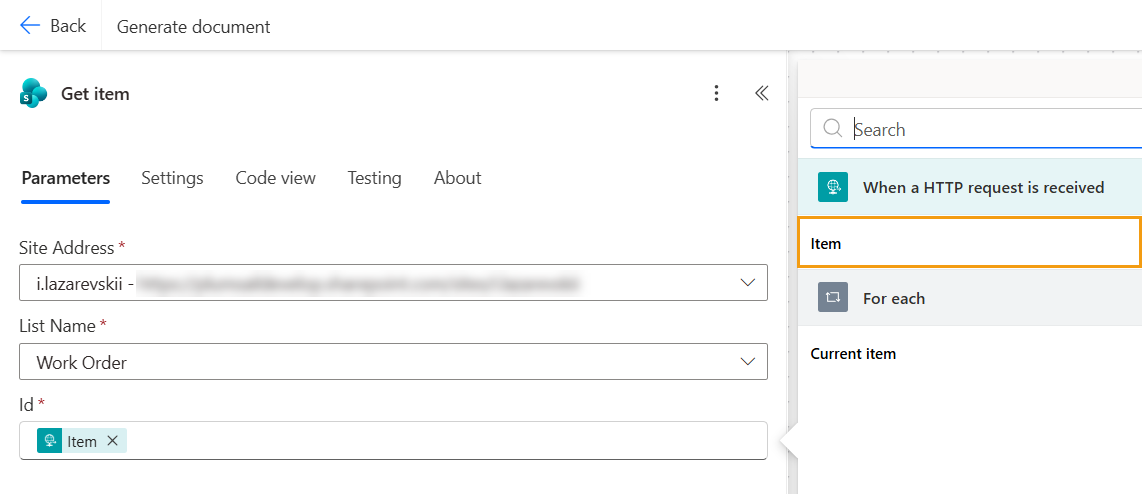
Since there might be several item IDs in the input of the flow trigger, this will automatically transform the SharePoint Get Item action into a part of an Apply to Each cycle.
Compose
Add a Compose action right after Get Item. In the Inputs field, define all necessary variables such as ID, Title, Price, Total, etc.
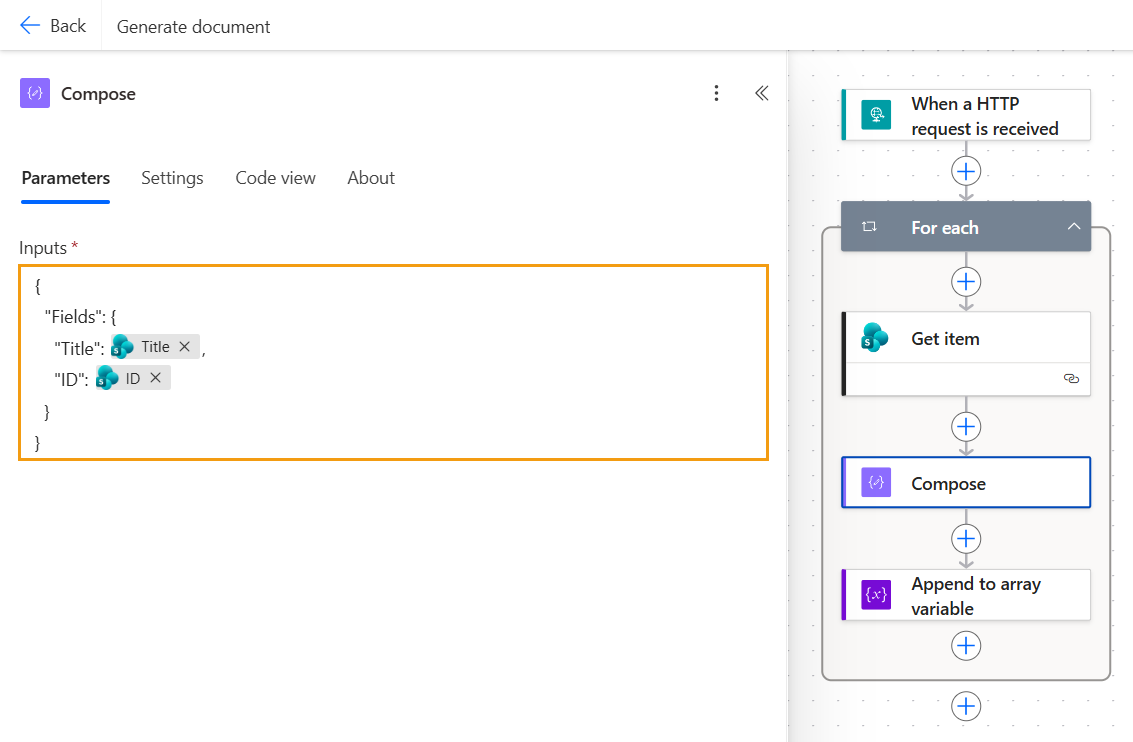
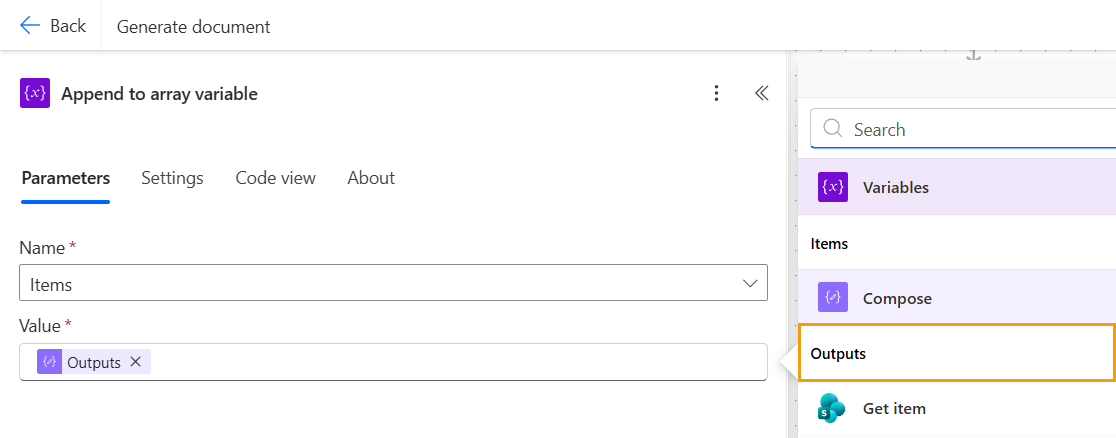
Append to array variable
In order to store the objects created by the Compose action, we need to add each one of them to the array we initialized earlier. This can be done with an Append to Array variable action:
Create HTML from template
After adding all the items to the array, you can use them in further actions. For example, you can create a document based on those values with Plumsail Documents.
We’ll use Create HTML from Template:
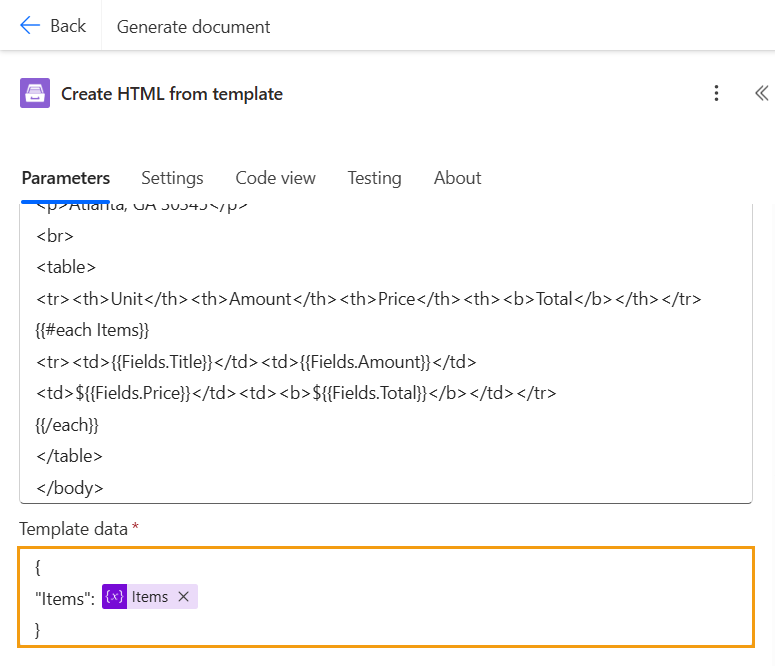
Create your own HTML template or use this sample:
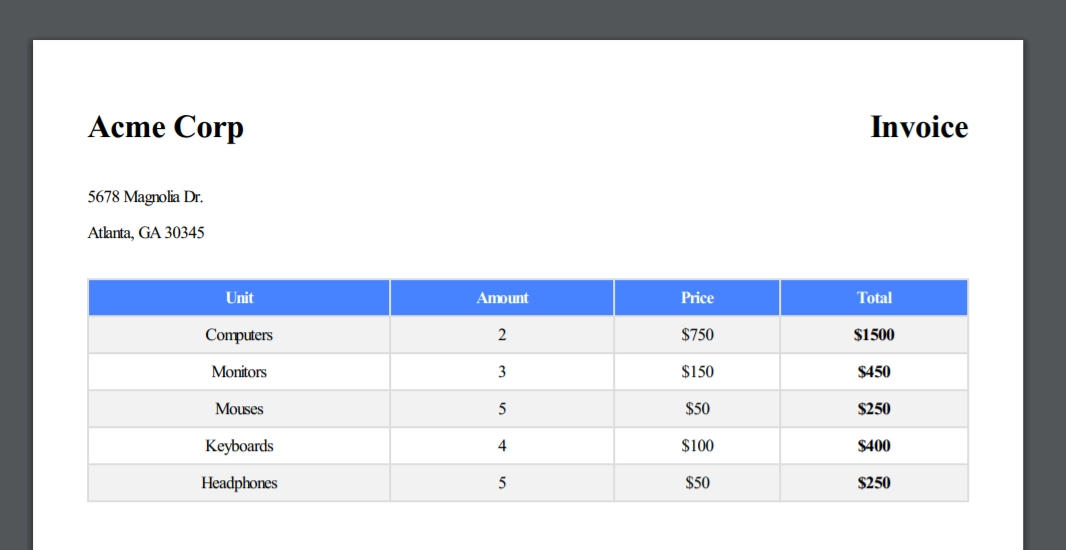
<head>
   <style>
      table { border-collapse: collapse; width: 100%; }
      td, th { border: 1px solid #ddd; padding: 8px; }
      tr { text-align:center; }
      tr:nth-child(even){background-color: #f2f2f2; }
      th { padding-top: 12px 0; background-color: #4783FD; color: white;}
   </style>
</head>
<body>
   <h1 style="float: left">Acme Corp</h1>
   <h1 style="float: right">Invoice</h1>
   <p style="padding-top:100px;">5678 Magnolia Dr.</p>
   <p>Atlanta, GA 30345</p>
   <br>
   <table>
      <tr><th>ID</th><th>Title</th></tr>
      {{#each Items}}
      <tr><td>{{Fields.ID}}</td><td>{{Fields.Title}}</td>
      {{/each}}
   </table>
</body>
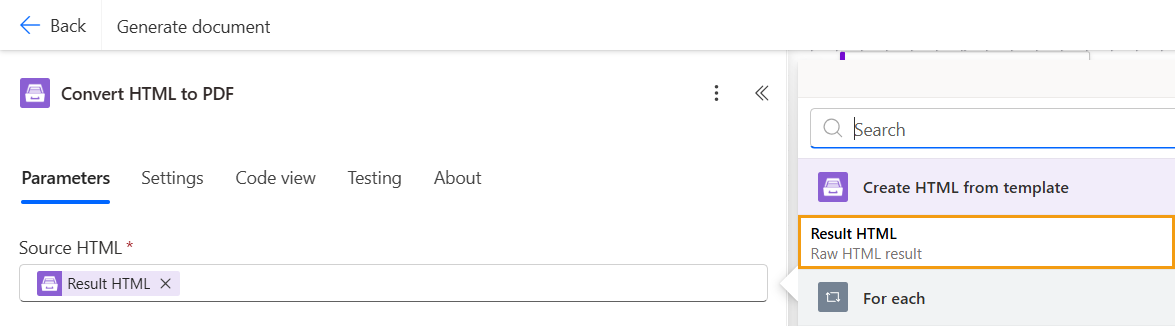
Convert HTML to PDF
Use Convert HTML to PDF to make the resulting file more accessible:
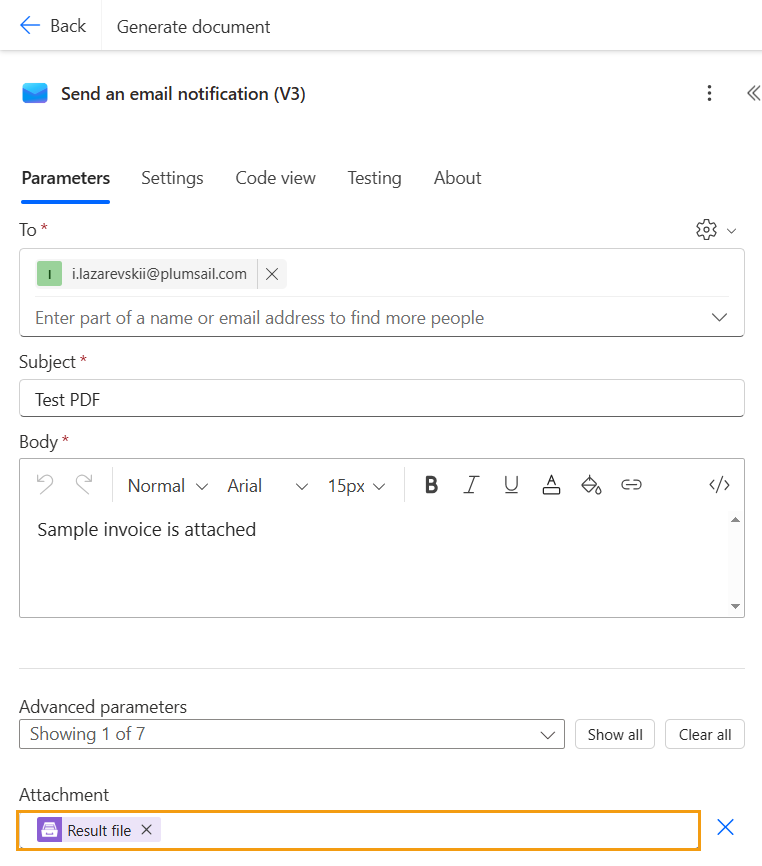
Send an email
Finally, we can use the resulting PDF file as an email attachment with the Send an email action:
The flow is complete. All we need to do now is save the flow and copy the URL from When a HTTP request is received for future use.
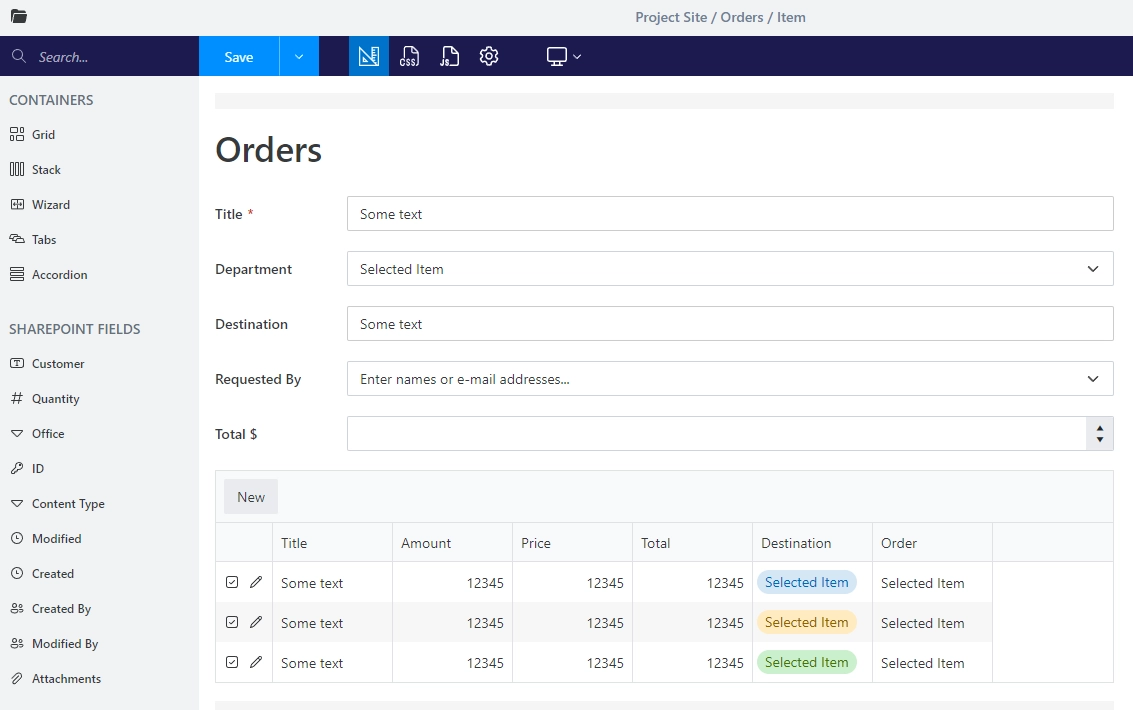
Add a toolbar button for List or Library
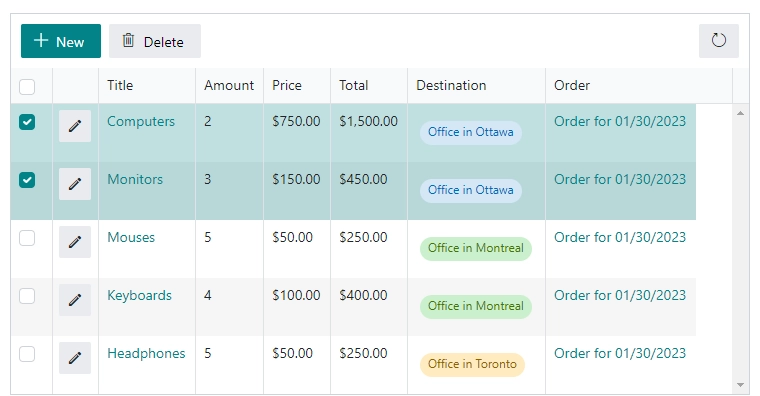
First, create a form and add a List or Library control. We’ll use Order form with Order items in List or Library:
Use JavaScript to add a new button:
// this url needs to be updated
let url = 'FLOW_URL';

fd.spRendered(() => {
    // new button
    let pdfButton = {
        text: 'Email PDF invoice',
        class: 'btn-secondary',
        visible: false,
        icon: 'PDF',
        iconType: 0,
        click: () => {
            // get item ids of selected items
            let itemIds = fd.control('ListOrLibrary1').selectedItems.map(item => parseInt(item.ID));

            // send a request to start flow
            fetch(url, {
                method: 'POST',
                body: JSON.stringify({ ids: itemIds }),
                headers: {
                    'Content-Type': 'application/json'
                }
            })
                .then(response => {
                    if (response.status !== 202) {
                        alert('Looks like there was a problem. Status Code: ' + response.status);
                    } else {
                        alert('Please, check your e-mail.');
                    }
                });
        }
    };

    fd.control('ListOrLibrary1').ready(dt => {
        // dt parameter is the same as fd.control('ListOrLibrary1')
        dt.buttons.push(pdfButton);

        dt.$watch('selectedItems', items => {
            pdfButton.visible = items && items.length > 0;
        });
    });
});
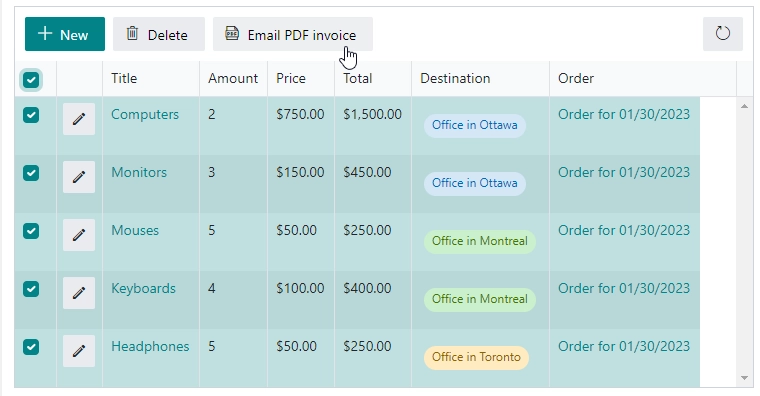
The code adds a button that appears only when a user selects an item. When clicked, this button sends a POST request to Power Automate containing the IDs of the selected items.
Replace FLOW_URL with the URL from the When a HTTP request is received action in your flow:

For more information on adding buttons to a List or Library control see Work with buttons on the toolbar of a List or Library article.
Trigger the flow
So, this is how the button looks on the form, when items are selected:
And here’s a preview of the PDF received in an email: