Getting started
User guide
- Settings
- Form sets
- Containers
- Controls
- SharePoint fields
- Common fields
- JavaScript
- CSS
- Display mode: panel, dialog, fullscreen
- SharePoint web parts
- Microsoft Teams tab
- Forms versioning
Provisioning forms
- Provisioning setup
- Provisioning API
- Provisioning forms (samples)
- Provisioning Form sets and display settings (samples)
Examples
- Ticket management system
- Dynamic form for a user group
- Conference room reservation system
- Discussion within a SharePoint form
- Version history within a SharePoint form
- Organize related docs in libraries and folders
- Duplicate item button for List or Library
- Move new form page to another location
General
- YouTube
- Licensing
- Manage subscription
- Billing and payments
- Privacy policy
- Data protection and security
- Version history (Microsoft 365)
- Version history (SharePoint 2019/SE)
Multilingual support
Navigation between forms
- Generate a link to a SharePoint form
- Redirect user after form submission
- Open edit form by default for a user group
- Open form in a dialog
Generating PDF documents
- Save SharePoint form as PDF
- Generate PDF from DOCX template with Plumsail Processes
- Generate PDF from DOCX template with Word Online (Business)
Integration with Power Automate
How to organize related files in folders and display documents from specific folder in a SharePoint form
In this article, I will show you how to create a folder in a document library automatically right after adding an item to a SharePoint list and how to display the content of this folder in Edit and Display forms of the list with the help of List or Library control.
Imagine, we have a list with general information about customers and suppliers. And there are two libraries for storing incoming and outgoing documents related to agents. Documents in those libraries are organized by folders. Each customer or supplier has the corresponding folder in each library.
Now, we want to create a folder in those libraries automatically after adding a new agent and display and upload related documents right from the Edit and Display forms.

Forms Overview
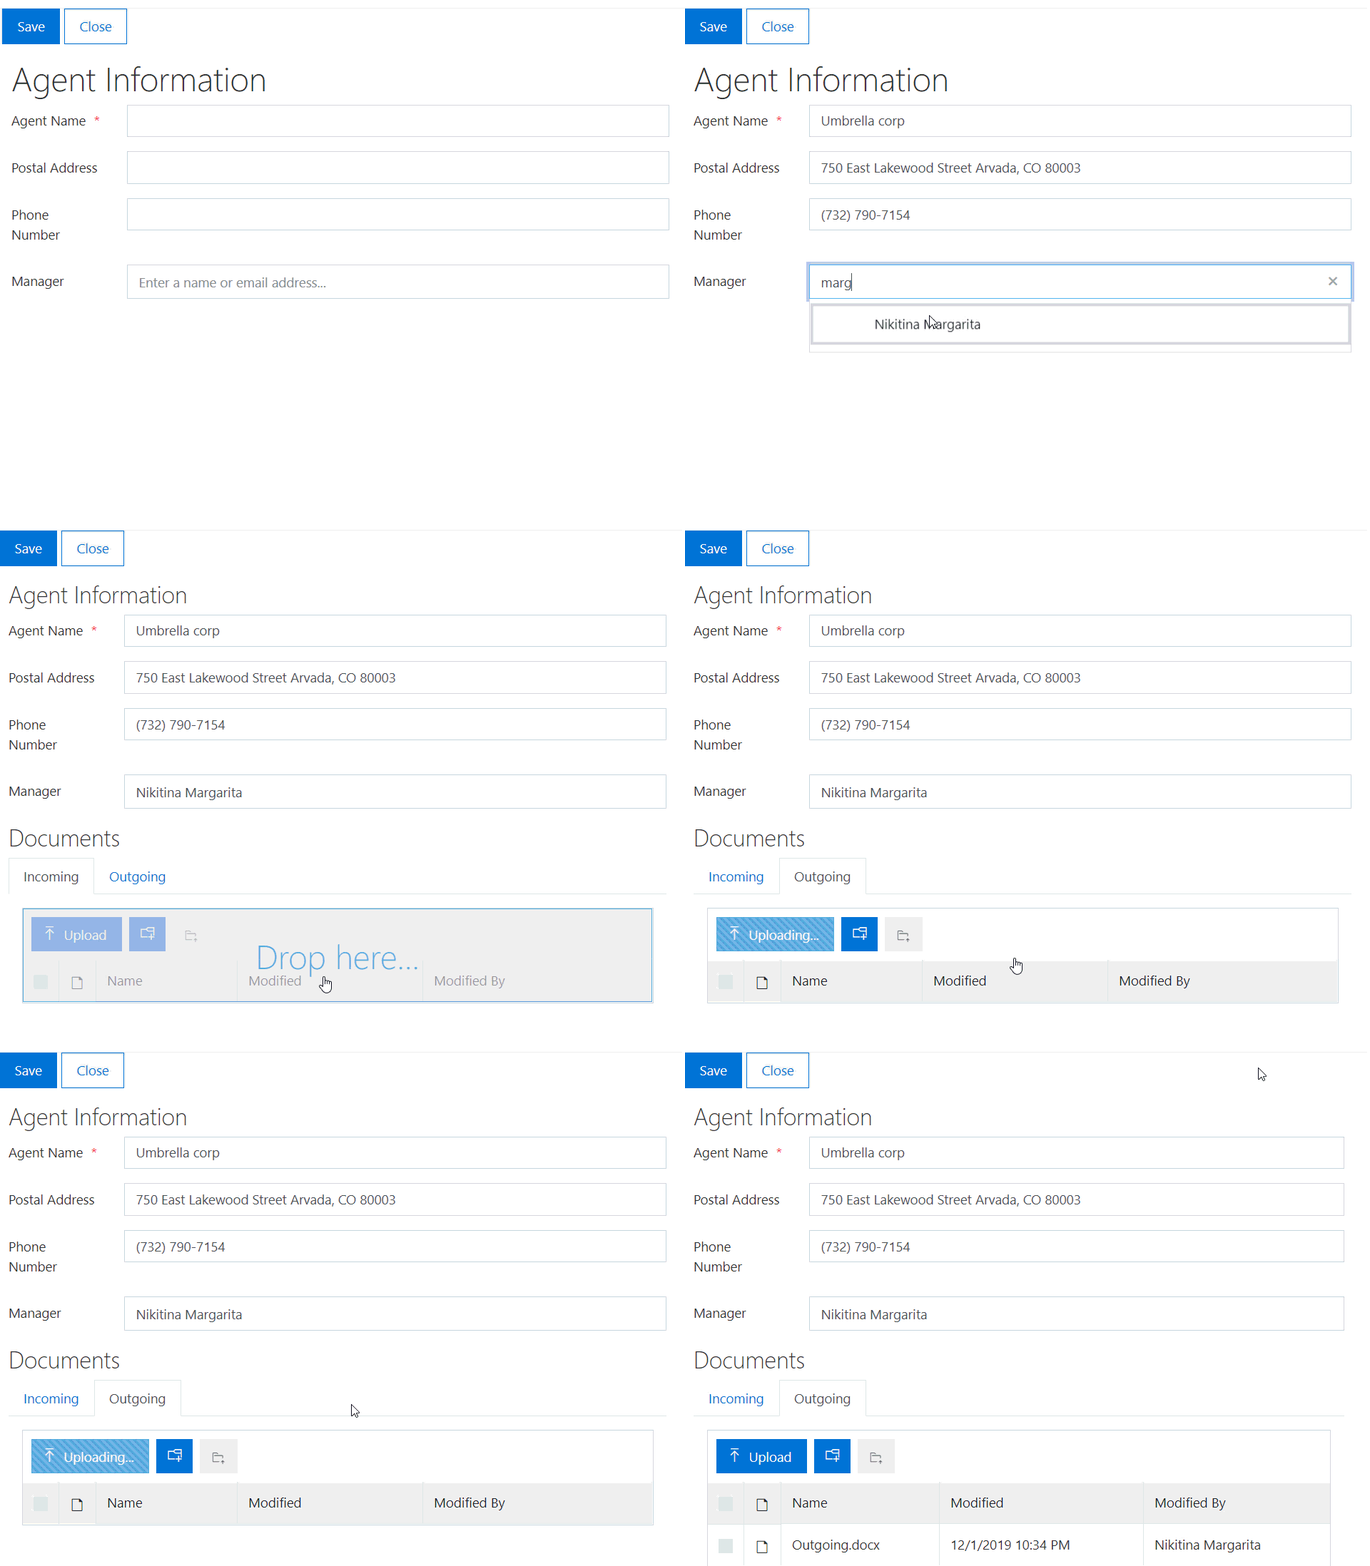
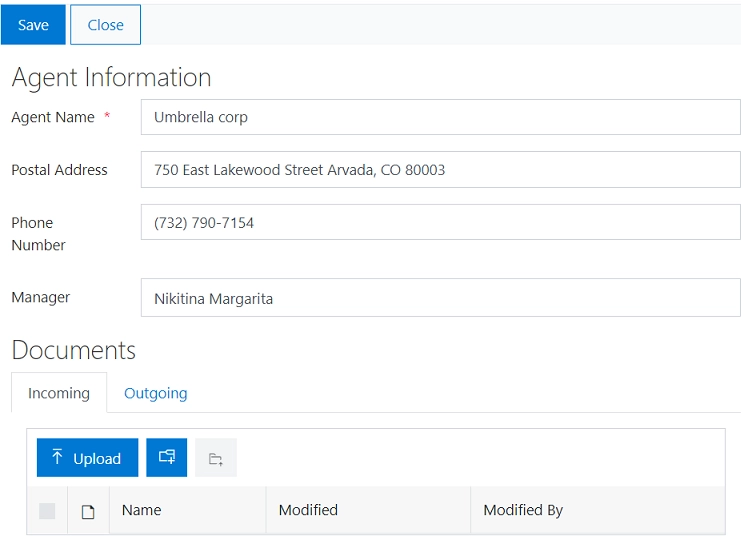
Agent Information form contains the following fields:
Agent Name (text field);
Postal Address (text field);
Phone Number (text field);
Manager Name (person or group field).
In Edit and Display forms, we also add a Tab control with two tabs: Incoming and Outgoing. Each tab contains a List or Library control associated with the corresponding document library.

Creating a folder
First, we add JavaScript code to the New form to create folders in both libraries for each new customer or supplier.
We use the PNP JS library to create folders in a document library. You can find more information about working with SharePoint items with PNP here.
fd.spBeforeSave(() => {
    // we'll create folders with the name of a customer or supplier
    let agentName = fd.field('Title').value;

    // create folder in Incoming document library
    let folder1 = pnp.sp.web.lists.getByTitle('Incoming').rootFolder.folders.add(agentName);

    // create folder in Outgoing document library
    let folder2 = pnp.sp.web.lists.getByTitle('Outgoing').rootFolder.folders.add(agentName);

    // waiting until the folders are created
    return Promise.all([folder1, folder2]);
});
Also, if you want to redirect users to the Edit form after creating a customer or supplier so they could add related documents to the new folders, take the code from the Redirect user after form submission in SharePoint article and insert it into the New form.
Root folder
In the Edit and Display forms, we have two List or Library controls for incoming and outgoing documents related to the current agent.
By default, List or Library control displays all items from the root folder of a document library. But with a bit of code, we can change the root folder and display documents from a specific folder only.
Use the code in the Edit and Display forms to display documents from a folder of the current customer or supplier:
function setRootFolder(dt) {
    let agentName = fd.field('Title').value;

    if (agentName) {
        dt.baseRootFolder = agentName;
        dt.rootFolder = agentName;
    }
}

fd.spRendered(ctx => {
    let dtIncoming = fd.control('Control1');

    // set root folder when the form loads
    dtIncoming.ready(dt => {
        setRootFolder(dt);
    })

    let dtOutgoing = fd.control('Control2');

    // set root folder when the form loads
    dtOutgoing.ready(dt => {
        setRootFolder(dt);
    })
});