Generate and sign invoices in Make using Airtable and Zoho Sign
This article describes how to automatically populate Word invoices from Airtable data, convert them to PDF, and send for signing to Zoho Sign. The automation uses Make and Plumsail Documents processes via Make integration for document generation and can be easily modified for creating other documents such as contracts, proposals, presentations, etc.
Airtable is a spreadsheet-like database for team collaboration and tracking of projects, orders, contacts, and more. With the help of the Plumsail Documents extension for Airtable, we’ll pull data from an Airtable Database and pass it to the document generation and signing process.
Let’s concentrate on each step individually.
Overview of Airtable base
For demonstration purposes, we will use the Product catalog Airtable template. It is necessary to make two additions:
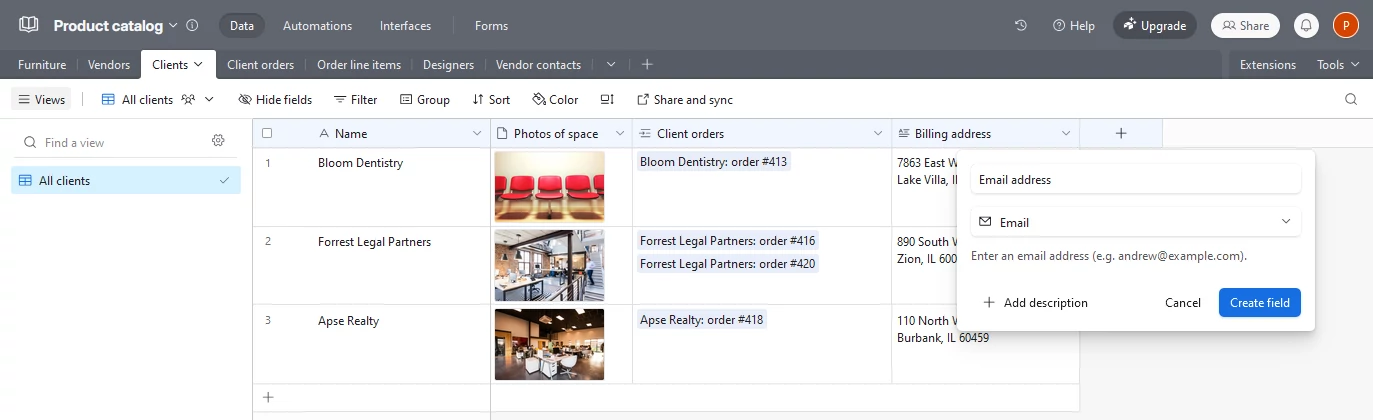
Add an “Email address” field to the Clients table. When we start the process via the document generation button in Airtable, the client will be asked, via email, to sign the document.
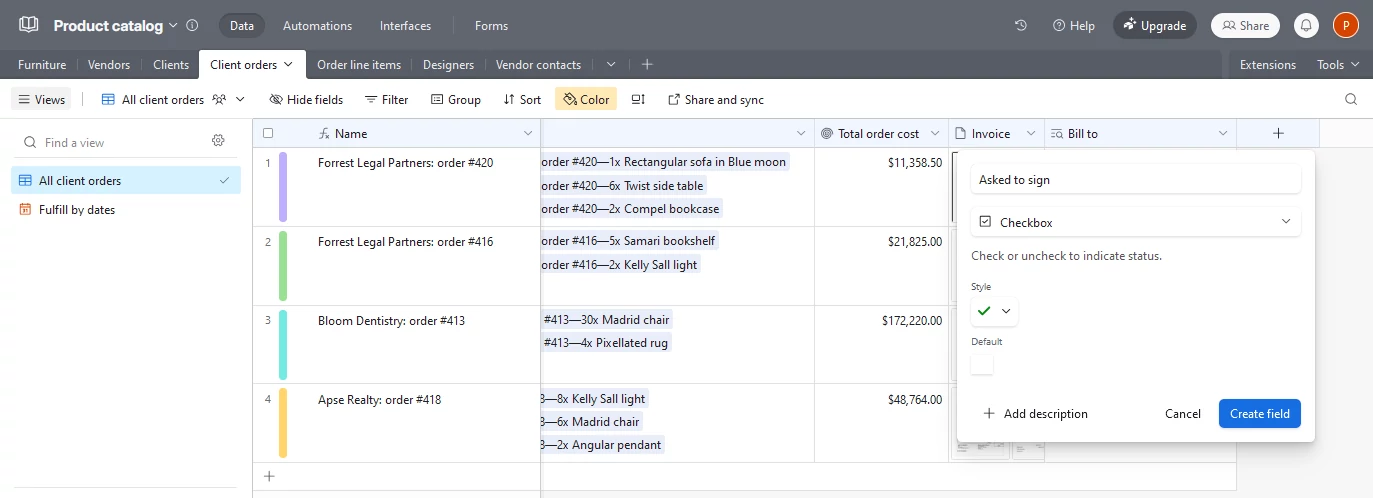
Add an “Asked to sign” checkbox field to the Client orders table. This field’s values will indicate whether the corresponding document has been dispatched for signing.
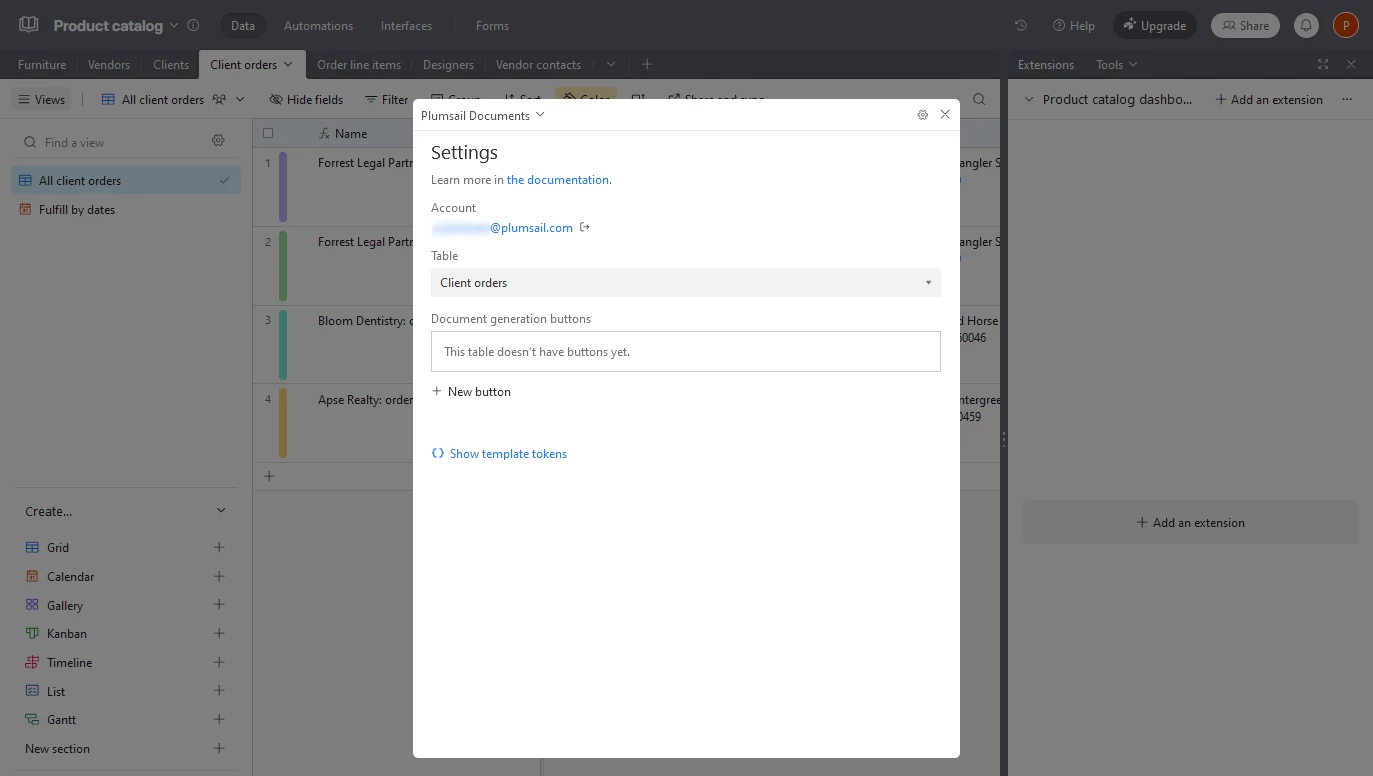
Next, we need to add the Documents extension to Airtable. You can find detailed instructions here: How to add a button and choose a process to run. We will add a document generation button after we create the process for the extension. The button will be used to start the process.
Configure document generation process
Before creating a scenario (an automated connection of apps in Make), we need to set up a process that will generate PDF documents from a DOCX template.
Create new process
First, register or log in to your Plumsail account.
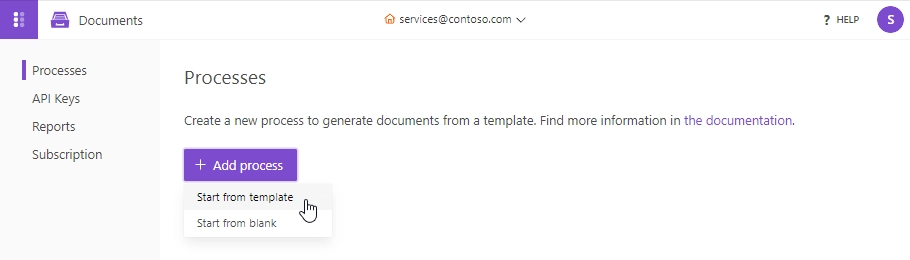
In the Processes section, click Add process button and select Start from template:
You’ll be redirected to the library of document templates. Select the Airtable invoice template.
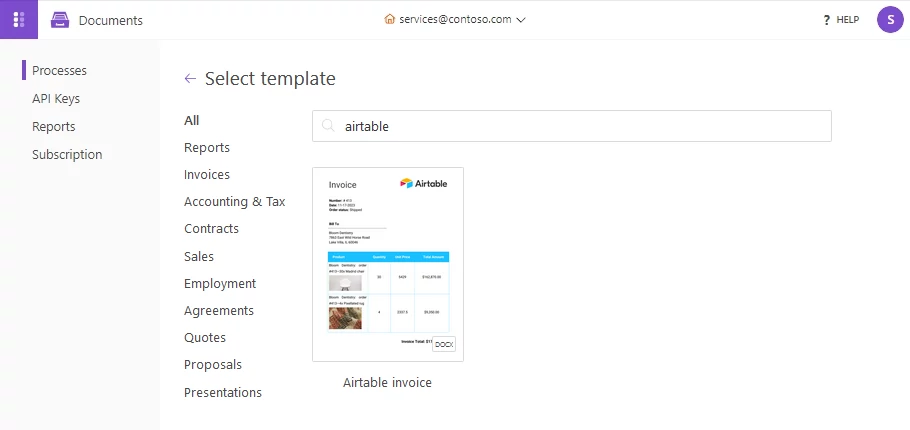
Name the process and click Next to proceed.
Configure template
This step has two substeps. In the Editor one, you can adjust the document template according to your needs. Everything in curly brackets will be replaced with Airtable data dynamically. You can add more placeholders. They work quite simply and even support some complex logic with tables, charts, conditions, and more. Learn how Word templates work in Plumsail Documents.
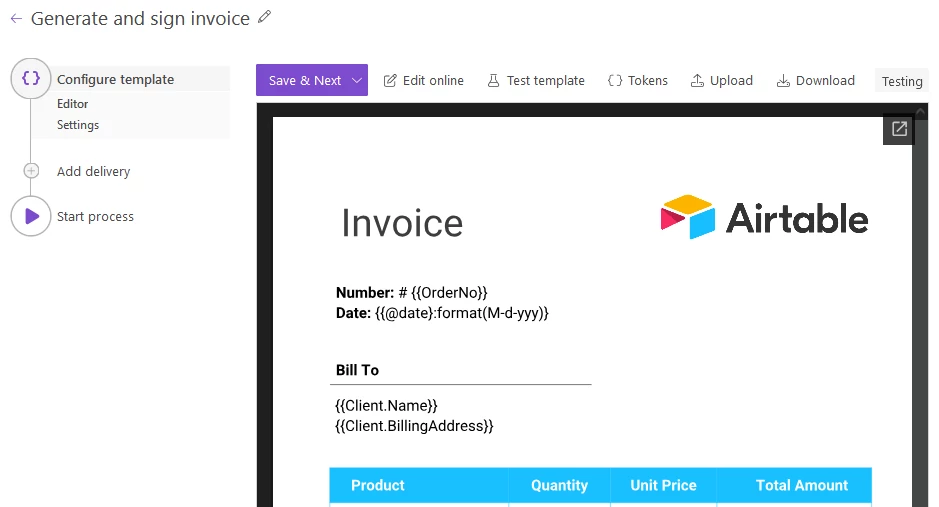
Click Edit online to modify the template. Add an extra token for the customer’s email address. We will use it later to send the document to the customer for signing.

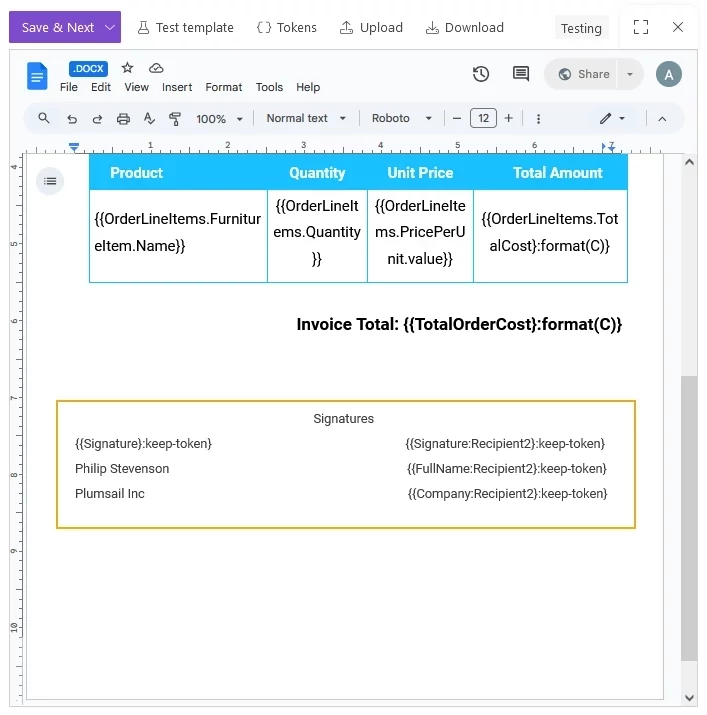
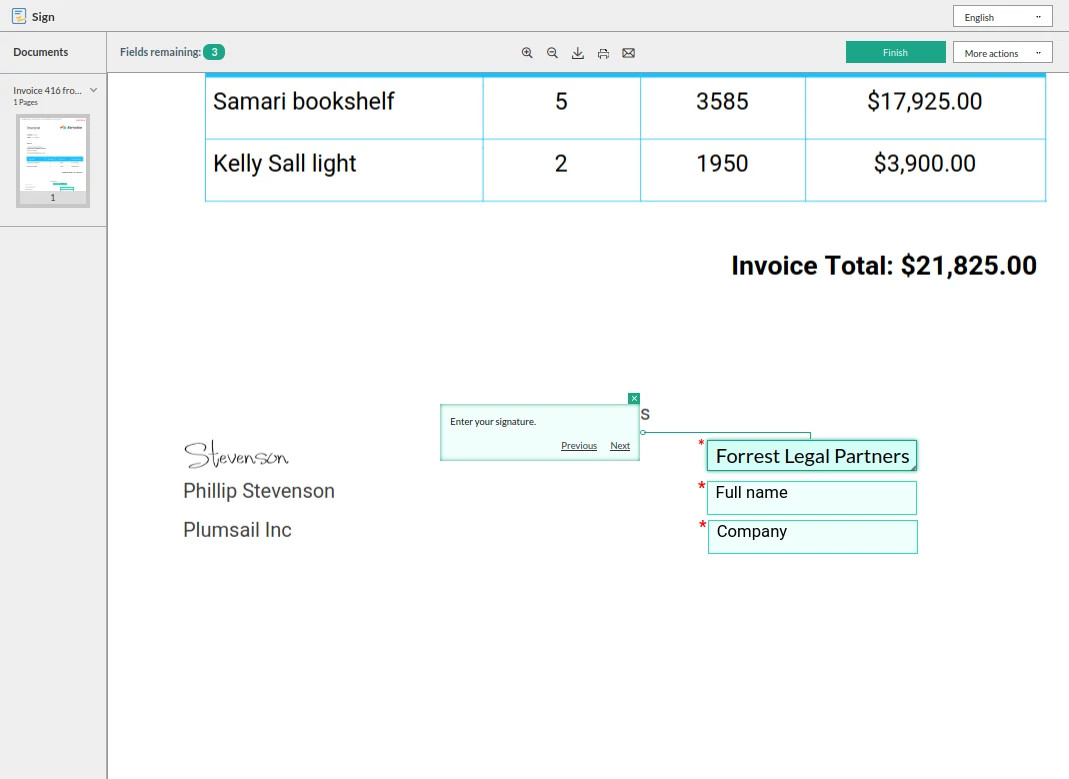
In addition to Plumsail placeholders, we need to use Zoho Sign tags. We added several for internal and external signing. You can change the color of Zoho Sign tags to white in case you want to hide them when Zoho Sign delivery isn’t being used.
To prevent the Plumsail templating engine from processing Zoho Sign tags, add a :keep-token formatter to each one.
Zoho Sign delivery is described in more detail in the following article: Zoho Sign delivery.
Click Save & Next to go to the Settings substep.
It contains the following parameters:
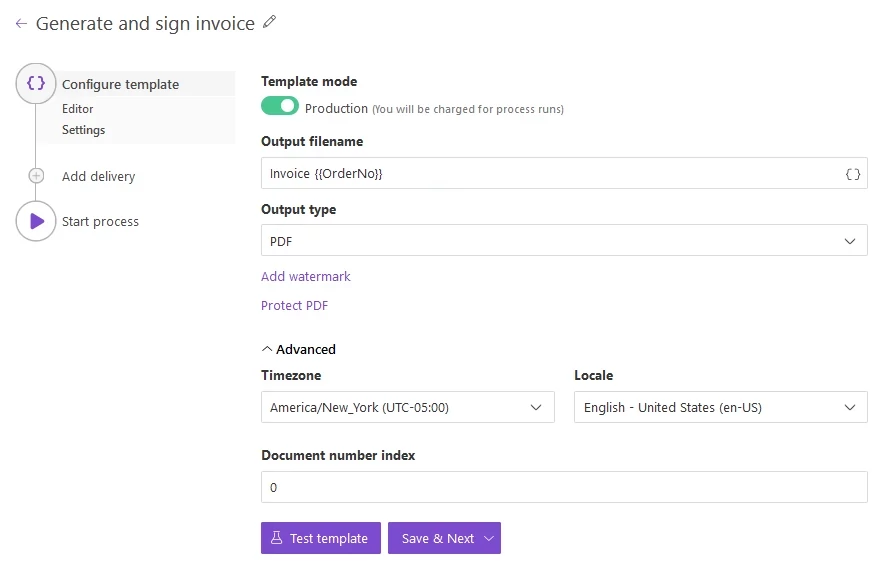
Template mode
It is set to Testing by default. This means you won’t be charged for this process runs, but result documents will have a Plumsail watermark. Change it to Production to remove the watermark.
Output filename
Use tokens to make personalize the filename.
They work the same way in this field as in the template.
For instance, if we use a {{OrderNo}} token and its value is 1234-5, the output file name will be Invoice 1234-5.
Output type
By default, it is the same as your template’s format. In this particular case, it’s DOCX. Change it to PDF to make the result document suitable for signing.
Hint
For more information about template settings, including PDF document protection by adding a watermark, setting a password, or disabling certain actions, see Configure output file format and other settings.
Test template
Once you have customized all the settings, you can test the template to see the result.
Click Save & Next to set up deliveries.
Add Zoho Sign delivery
The next step is delivery.
You can send the invoices for e-signing through different services. In this case, we will use Zoho Sign.
You need to connect to the service with your account credentials and fill in the existing fields.
To insert dynamic data that will be retrieved from Airtable, use tokens enclosed with double curly braces {{ }}.
In this example, we will first send the invoice for signing to our manager and then to the customer.
You can configure as many deliveries as you need.
Note
You need to have Zoho Sign credits available in your Zoho Sign account for this delivery to work. This is also a requirement for this delivery’s Test mode.

Start process
Once you’ve finished setting up the process, add a document generation button to your Airtable database. In configuration settings, select the process you created, disable the “Download result document” option, and enable “Attach result document to the record”. The Invoice field will be used to store the result document.

Create scenario in Make
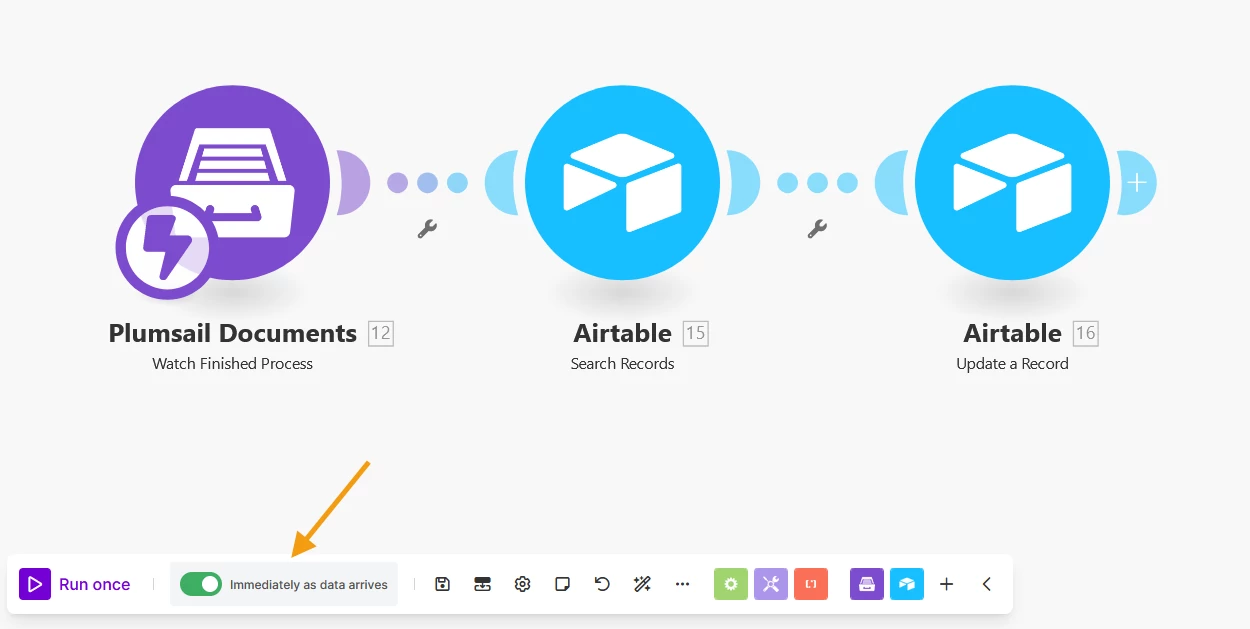
We will create a scenario to update the value in the “Asked to sign” field after sending the document for signing. A scenario is a workflow that connects apps together to perform tasks automatically. This is what our scenario will look like after configuration is completed:
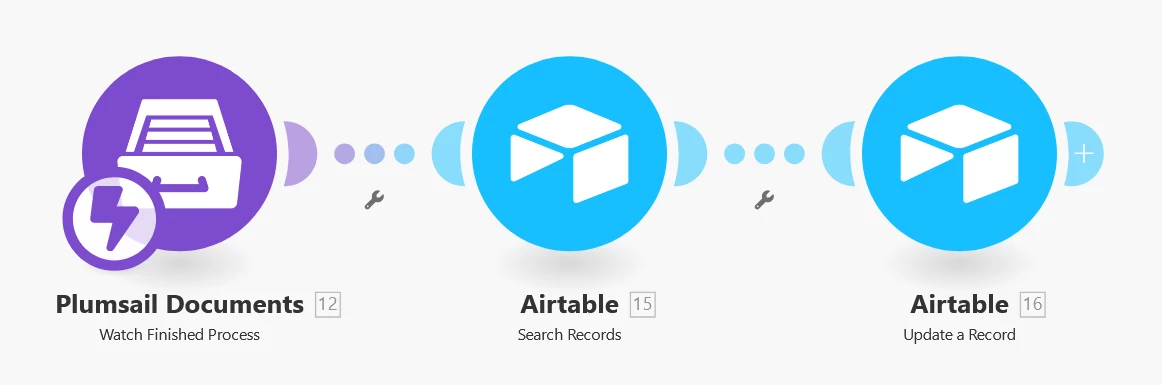
Watch finished process in Documents
We want to update the Airtable record once the document is created and sent for e-signature to our customer. So, the scenario should only be started when the Document process we created is finished. When the process is finished, it means the document has been generated and sent to all delivery locations, in our case, Zoho Sign.
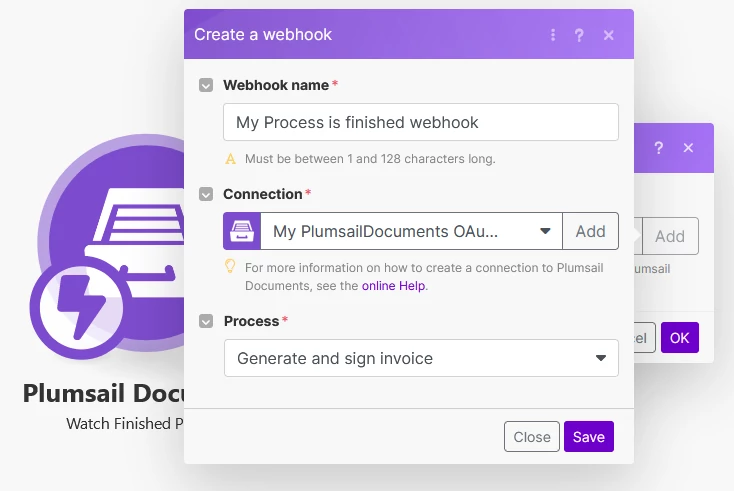
Search for Plumsail Documents and add a Watch Finished Process module. When creating the webhook, specify the Documents process you created.
In the next section, we will need to obtain the order number from the generated document. Make will become aware of the output’s data structure after the process runs once. Click the “Run once” button below the scenario diagram:
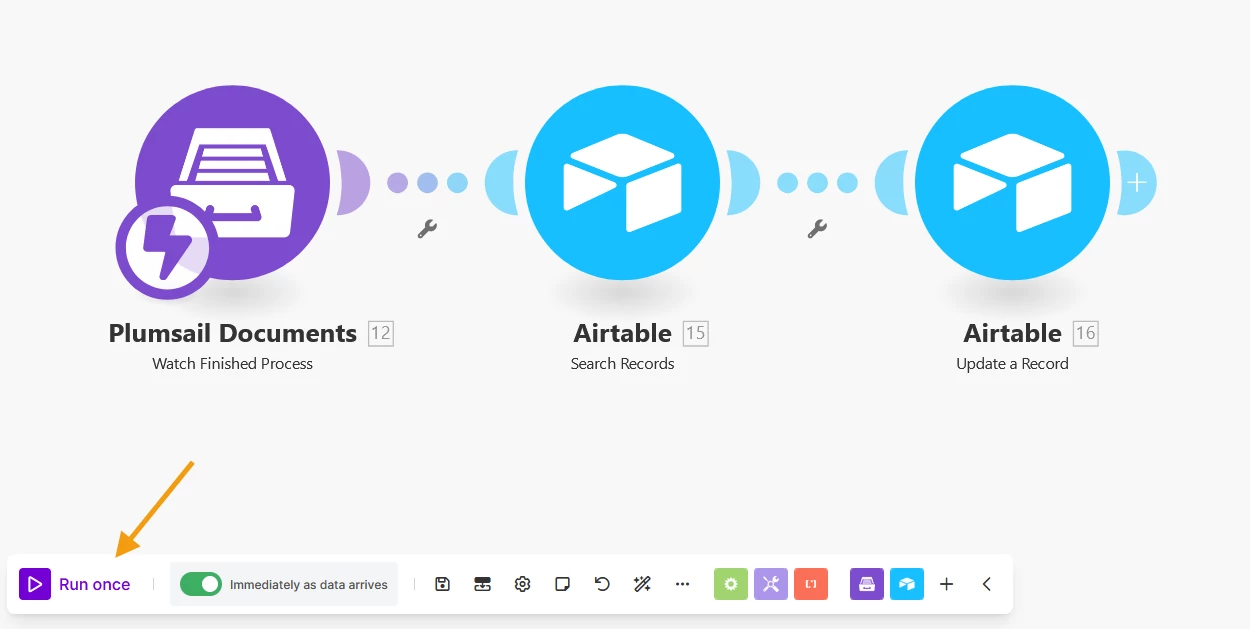
Then, start a document process run from the Documents web form as described here: Start using web form. Set the value for the order number token to a non-empty value. The rest can be left empty.
Search items in Airtable
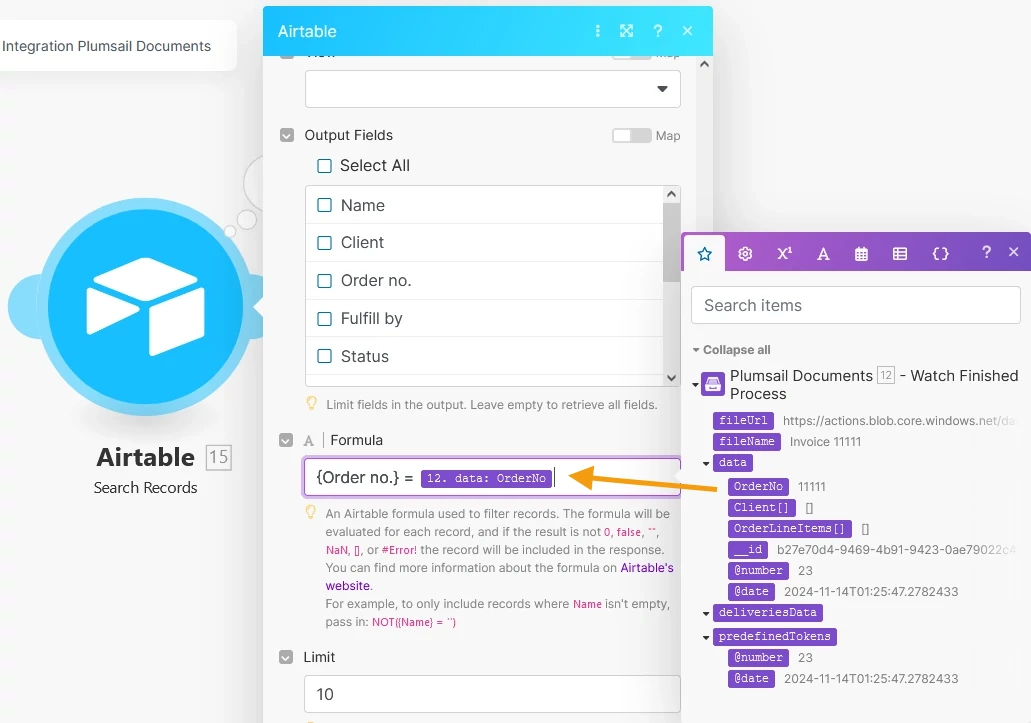
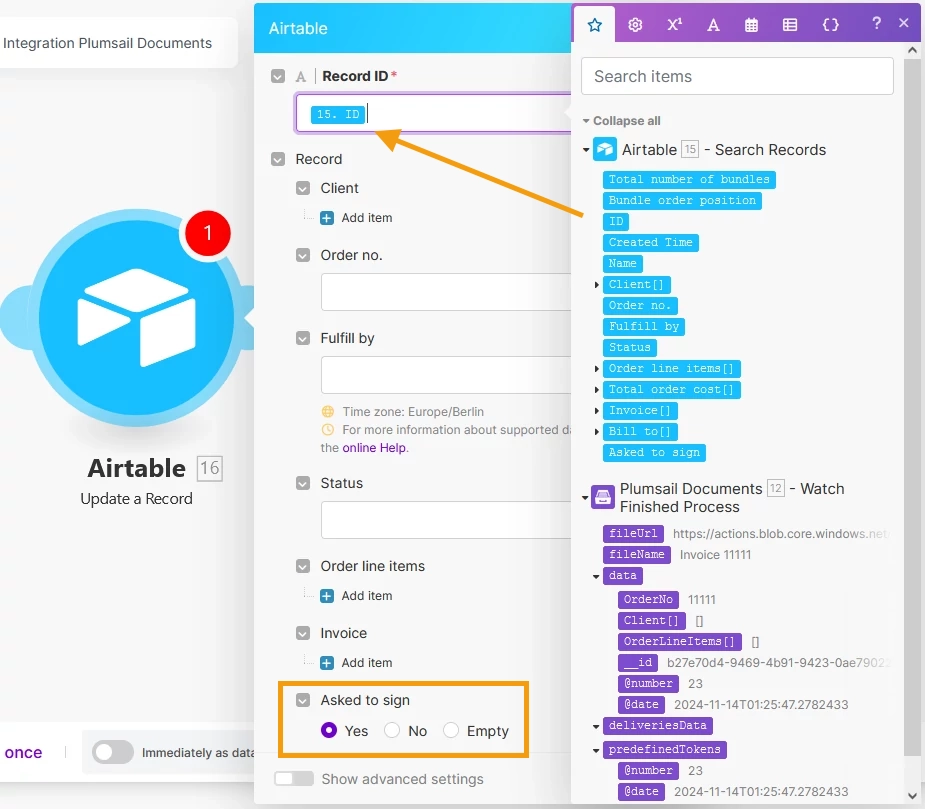
Add a Search Records module. We’re not just updating any random Airtable record, we need to update the specific one linked to the right customer, the one for whom we created and sent the document. So, we will use the module to retrieve the correct record’s ID from the Client orders table. We’ll search for the record by order number (each record’s order number should be unique). Use the value of OrderNo from the previous module and the value from the Airtable field “Order no.” in the Formula field:
General formula syntax is described in more detail here: Airtable formula syntax.
Mark invoices as sent in Airtable
The last thing to do is to mark the retrieved invoice as sent.
Add an Update a Record module, specify ID from the previous module, and set the Asked to sign field to Yes.
Final steps
Save the scenario’s configuration. To enable continuous processing, enable “Immediately as data arrives” below the scenario diagram.
Conclusion
Every time one or more records are selected in Airtable and the document generation button is clicked, a filled-out document will be sent for signing through Zoho Sign, and Airtable records will be updated accordingly.
Use this approach to create custom documents from Airtable and send them to your e-signature solution. You can also use different document formats like Excel, PowerPoint, PDF forms, and others, and even create a more complex workflow in Make.com.
If you’re new to Plumsail Documents, register an account to get a free 1-month trial.