Zoho Sign delivery
The Zoho Sign delivery sends documents generated by your process to Zoho Sign for signing.
Note
You need to have Zoho Sign credits available in your Zoho Sign account for this delivery to work. Credits are also required to use Test mode.
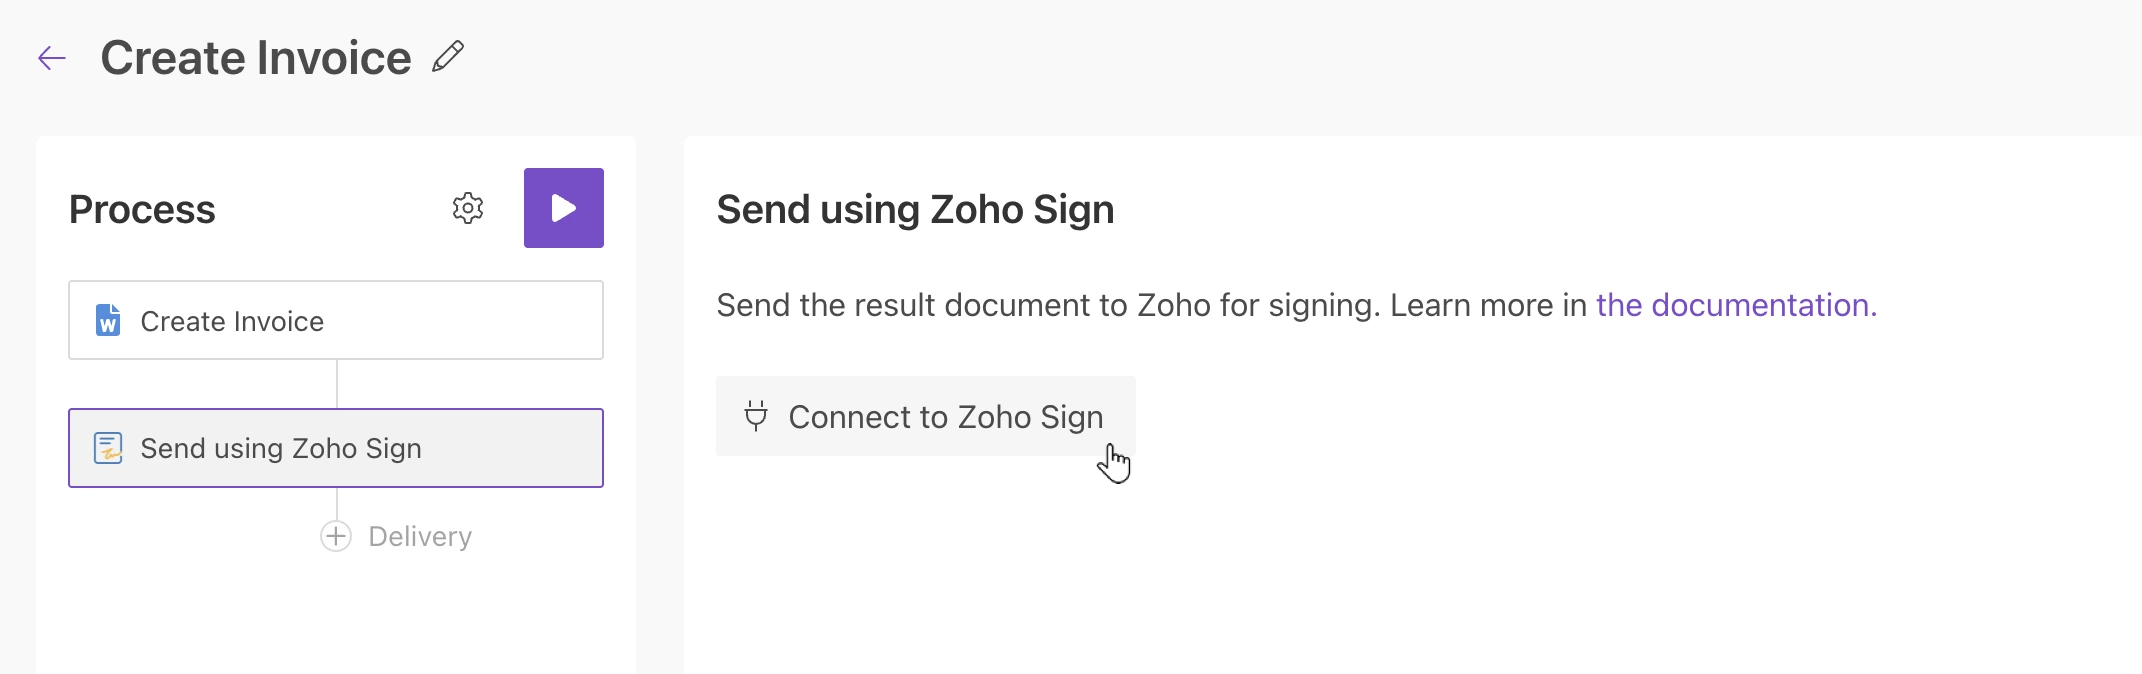
Before configuring the delivery, connect your Zoho Sign account in the process:
Once connected, configure the Zoho Sign delivery settings.
Main settings
Specify the email subject and body. See how to use tokens in these fields.
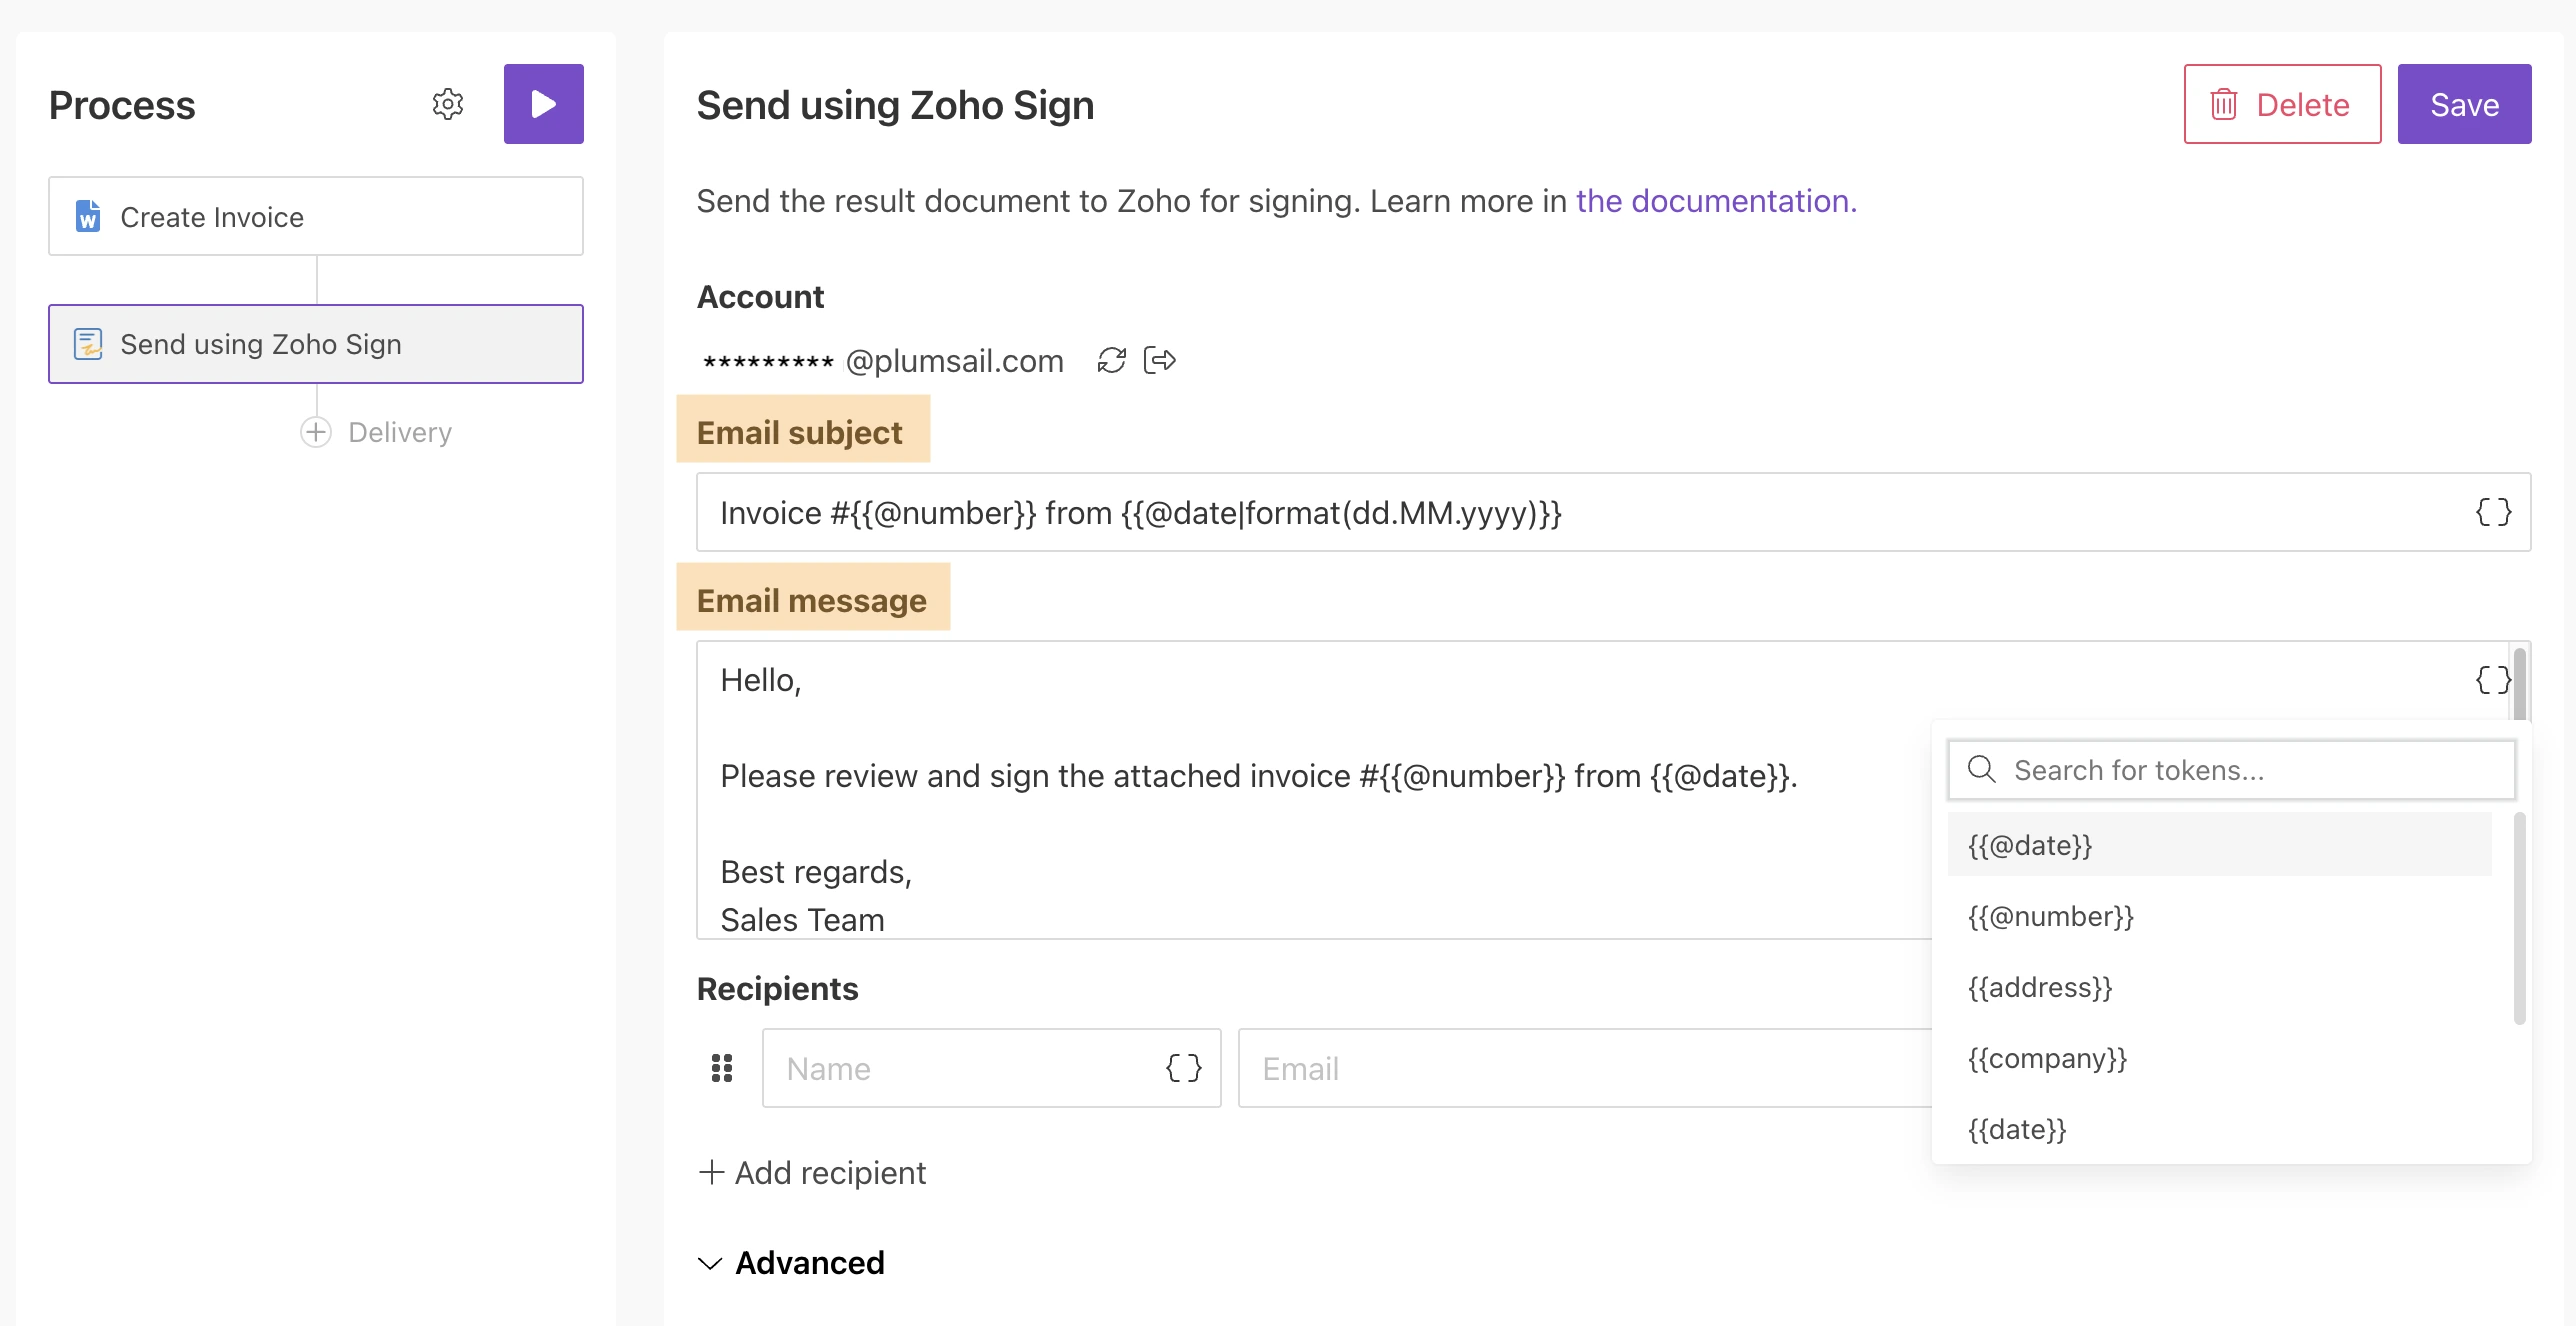
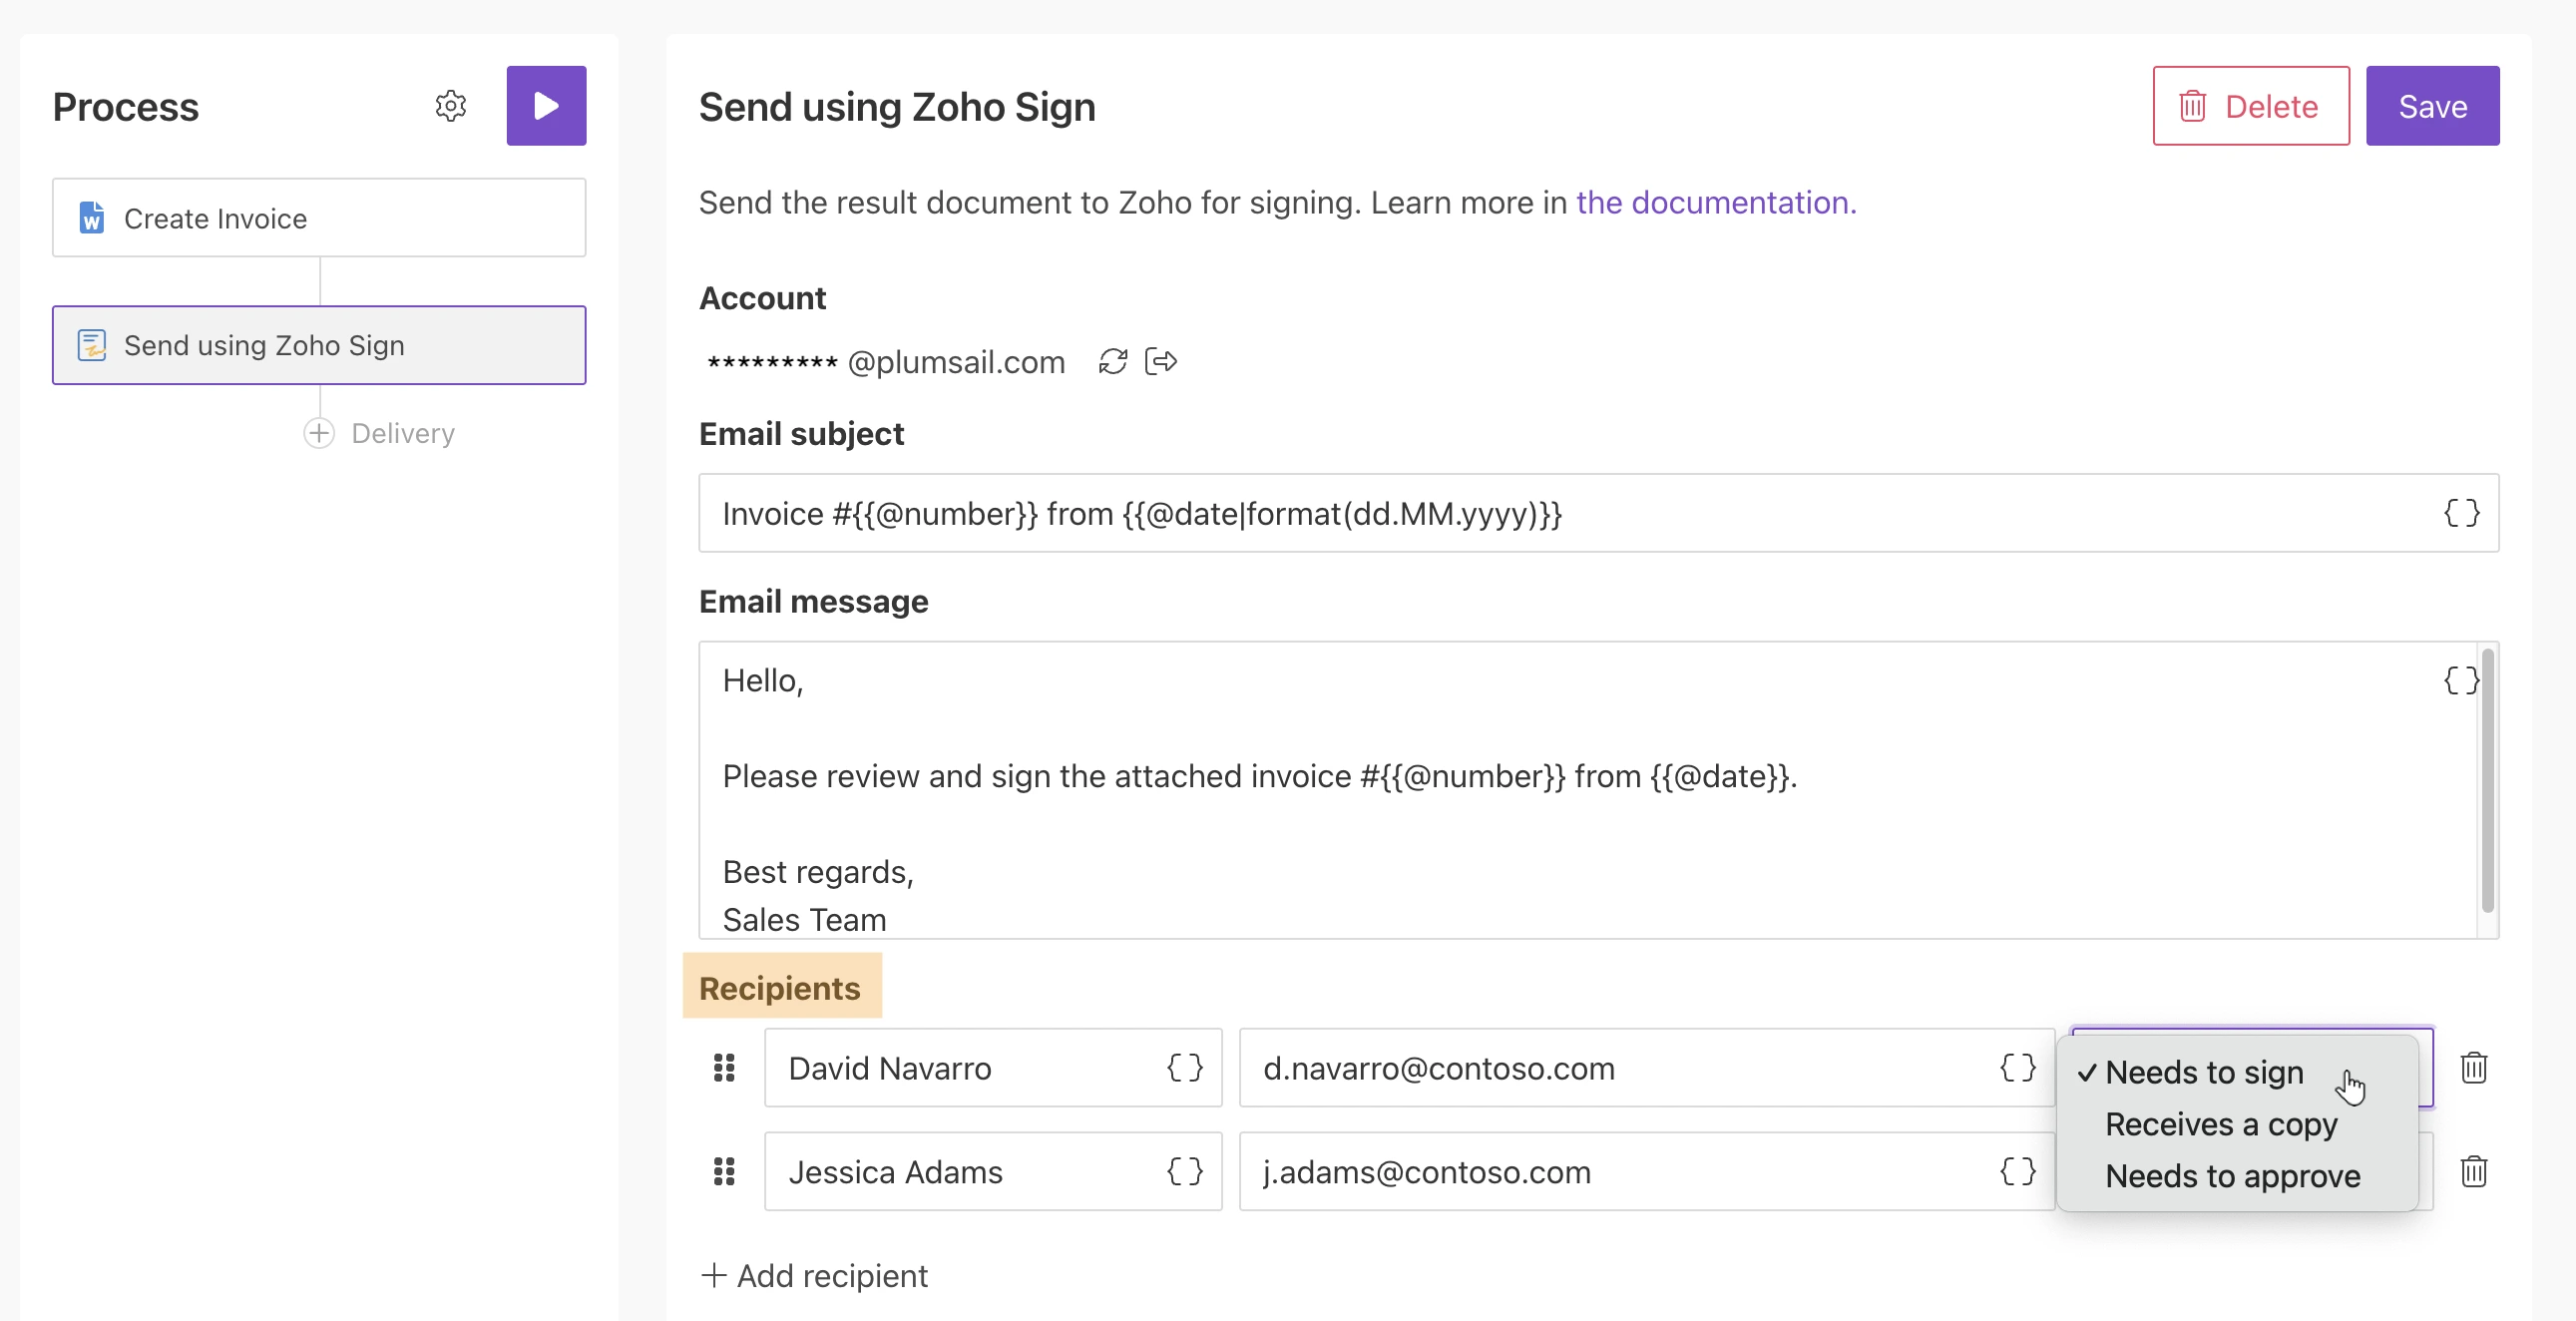
Add as many recipients as needed and assign roles to them. You can add them manually or dynamically using tokens. Check how to specify recipients dynamically based on your data.
Advanced settings
Expand the Advanced section to configure more settings:
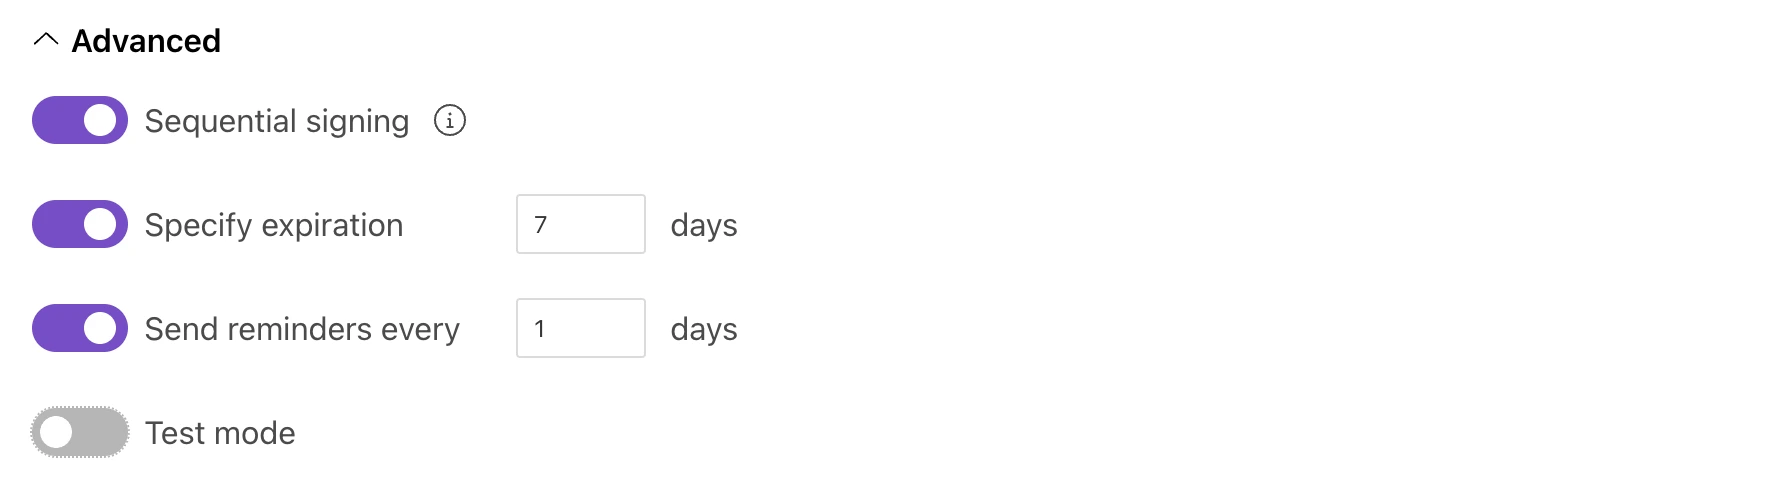
Enable Sequential signing to control the signing order. Drag and drop recipients to define the sequence in which they sign the document:

You can also configure the expiration period, reminder notifications, and Test mode.
When Test mode is enabled, Zoho Sign credits are not consumed. However, available credits are still required for Test mode to work. Otherwise, Test mode will not work.
Note
You’ll need to purchase one of the Zoho Sign API plans to access all delivery features.
Specify recipients dynamically based on your data
You can define recipients dynamically using tokens in the Name and Email fields. The data passed to the process determines who receives the document.
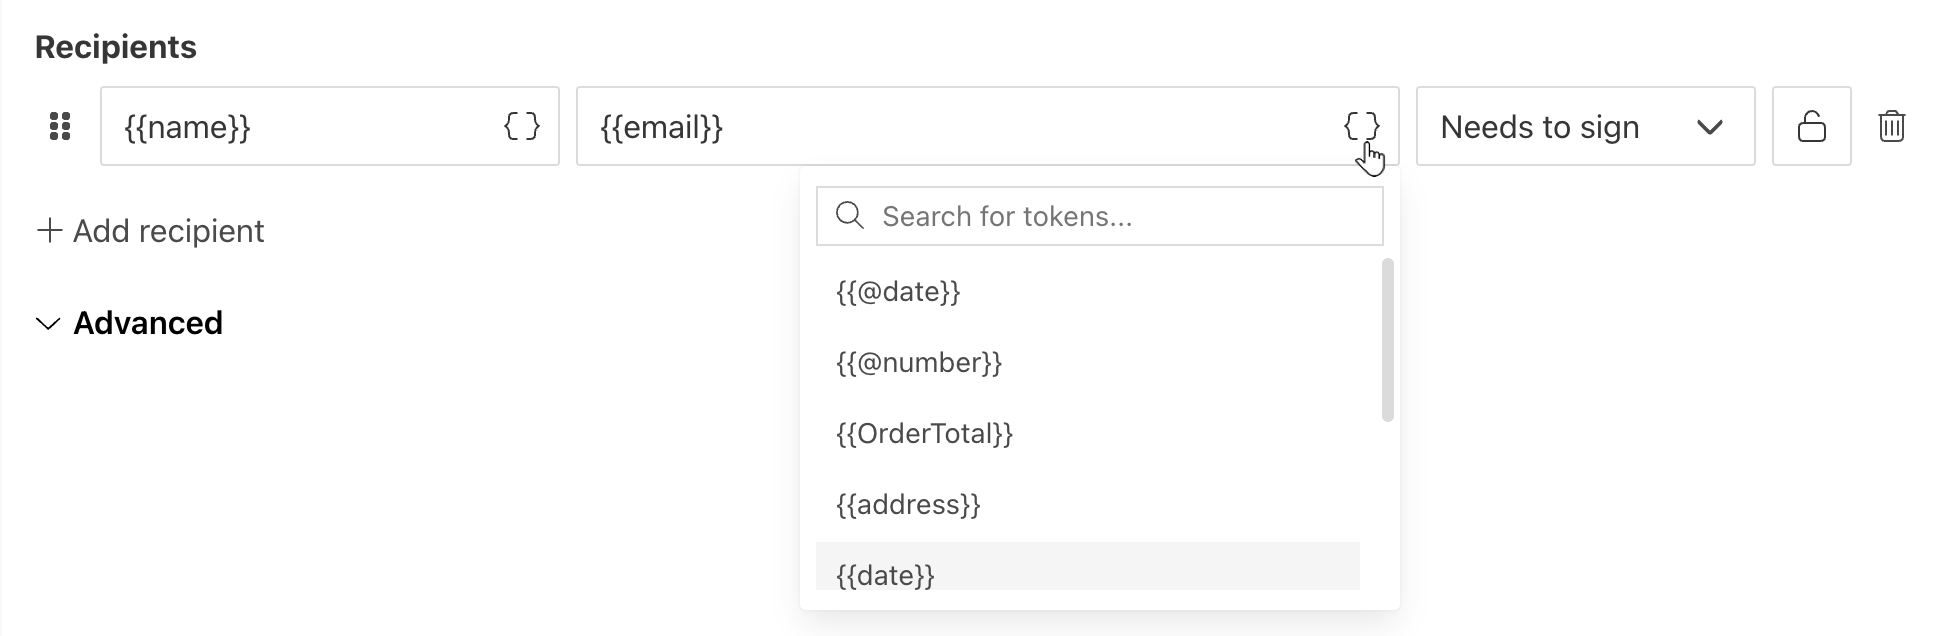
The Email field can contain a single address or a list of addresses separated by commas or semicolons:
{
    "email": "Derek Clark <d.clark@contoso.com>; Jessica Adams <j.adams@contoso.com>"
}
If you provide a list of recipients in the Email field, the Name field is ignored.
You can specify recipient names in the list by placing names before the email address:

Behavior details:
If no name is provided, the email address is used as the recipient name.
If Sequential signing is enabled, recipients receive the document in the order specified in the list.
If you add an Access code, all recipients in the list receive the same code. To assign different codes, add recipients individually in the Recipients section.
Use tokens inside email subject and body
You can insert values from your data using tokens.
Click { } to open the list of available tokens.
For example, if your data contains a property called address, insert it using the token {{address}}.
Tokens work the same way as in document templates and also support value functions.
You can also use predefined tokens:
{{@date}}- the current date and time{{@number}}- the current document number.
Zoho Sign tags
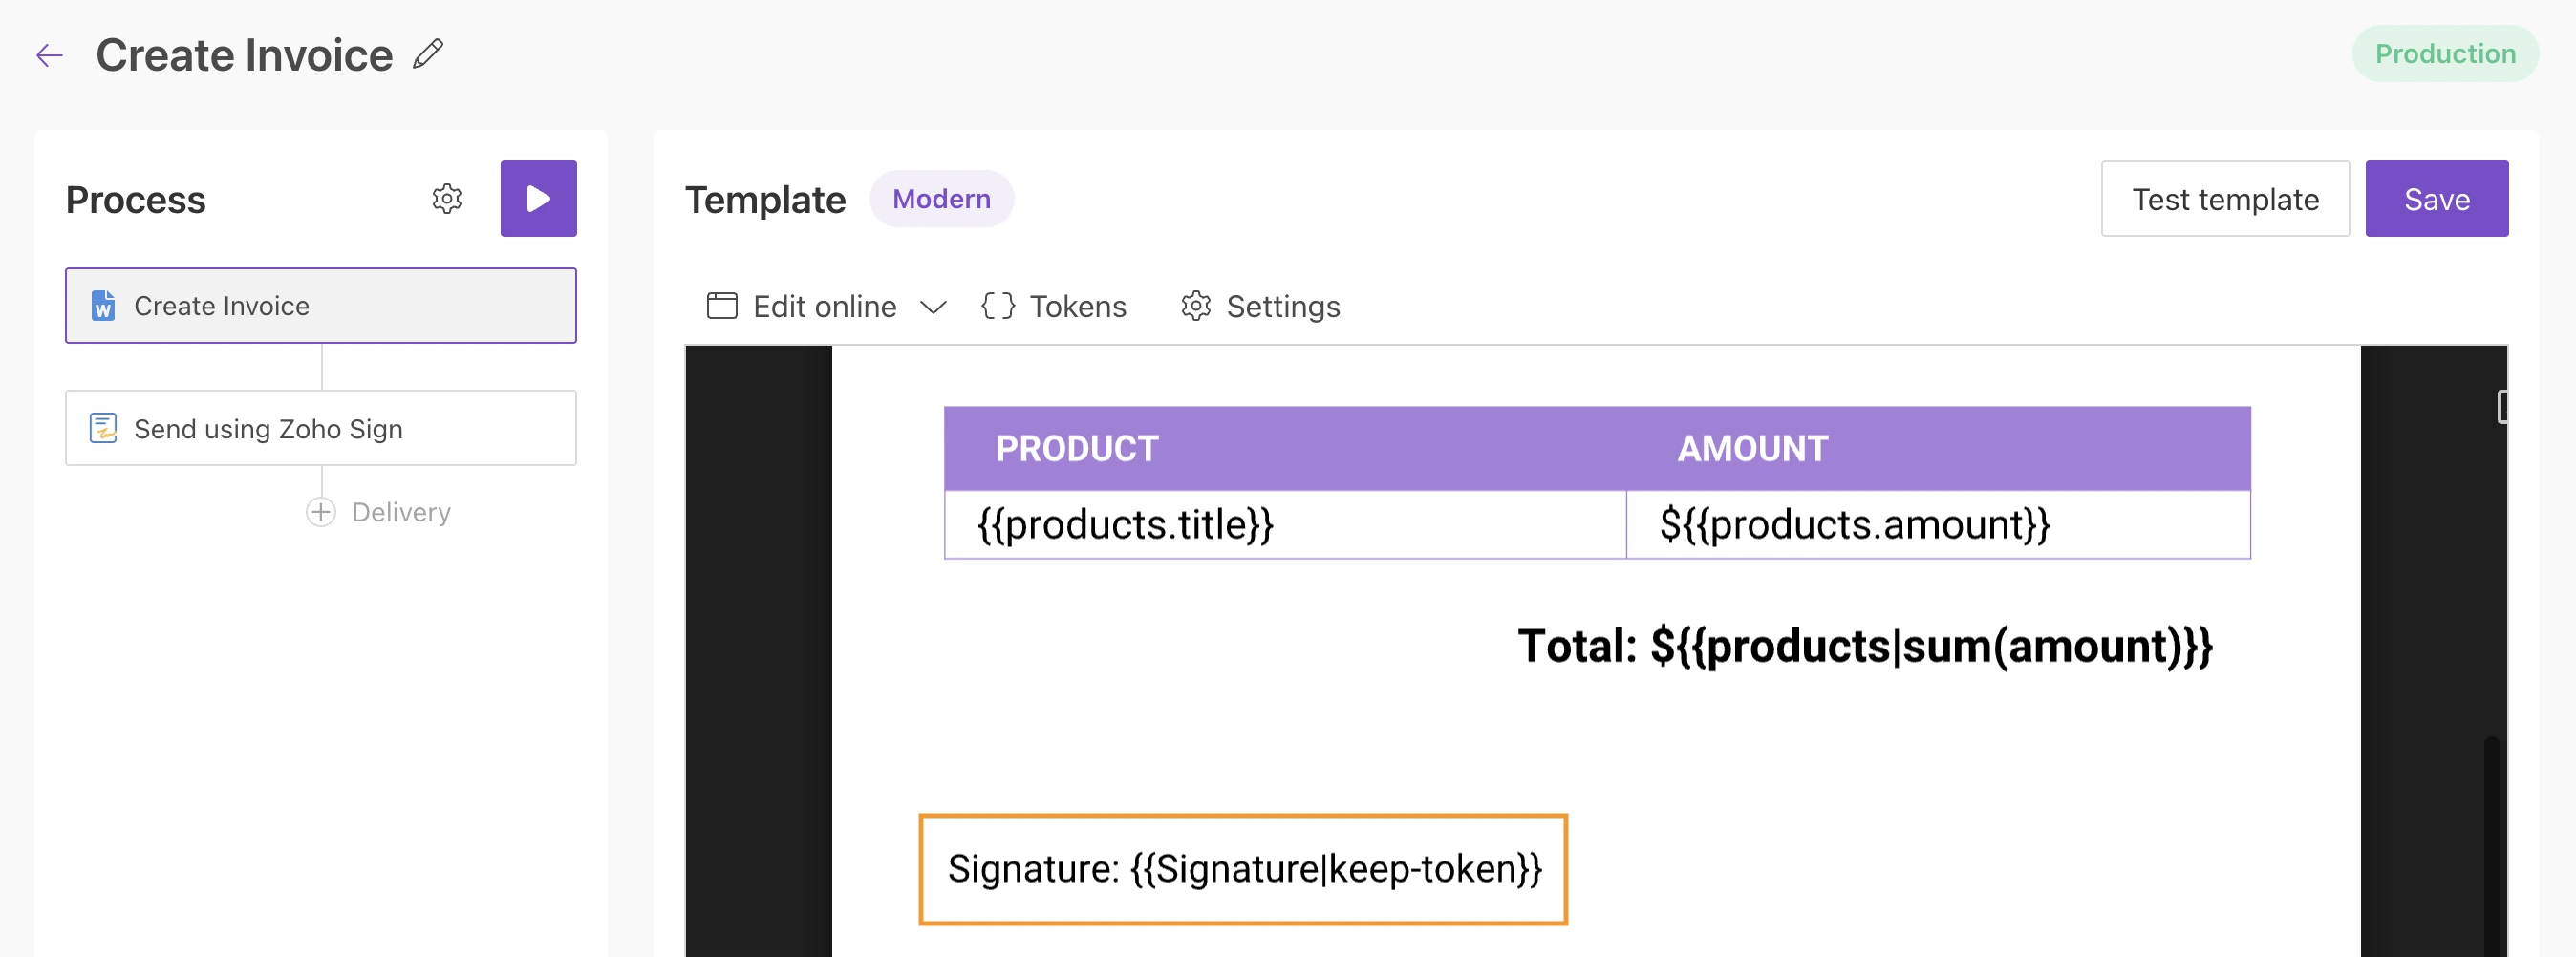
Zoho Sign delivery supports the Signature tag. This tag is needed to indicate signature locations. The following examples show how it works.
Add the {{Signature|keep-token}} tag to your template, and this will define the location of the signature for the first recipient/signer.
To specify signature locations for other signers, use the {{Signature:Recipient2|keep-token}} tag where Recipient2 refers to the second signer.
You can also use spaces in recipient names by enclosing the token in square brackets inside the curly braces: {{[Signature:FName LName]|keep-token}}.
The examples above use the Signature tag together with the keep-token function. The function tells the Plumsail Documents engine that this tag belongs to another system (Zoho Sign in this case), so the token is ignored during document generation.
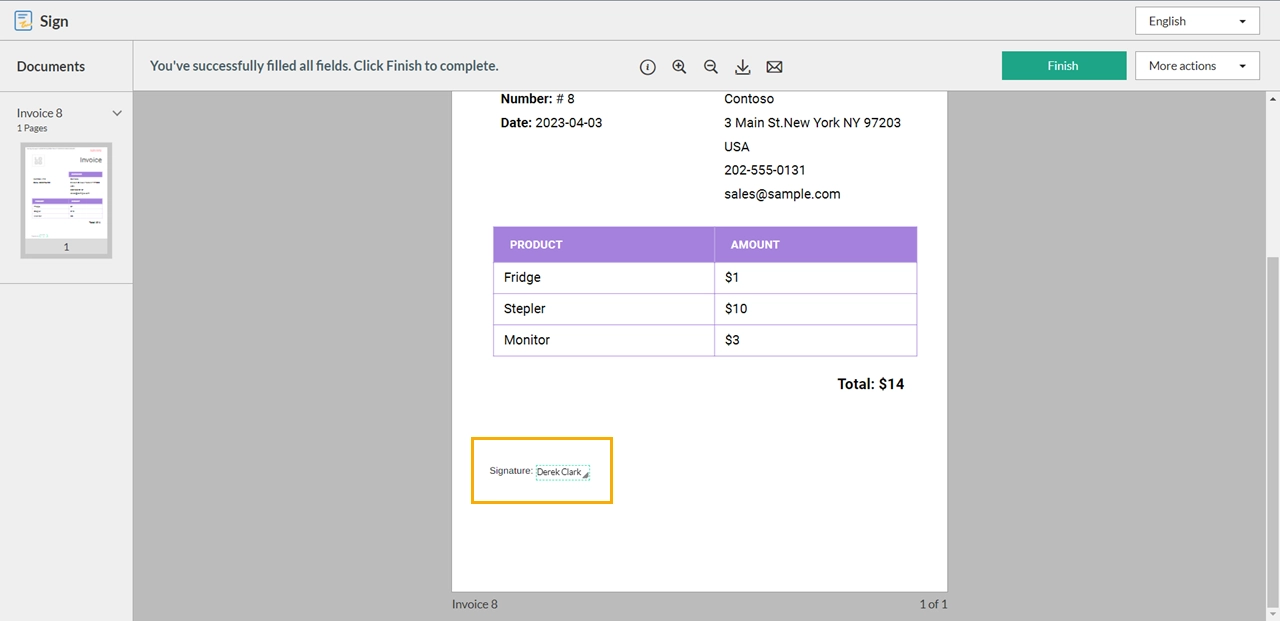
This is how the signature field appears in the Zoho Sign interface.
This is the signature field in the Zoho Sign interface.
To hide the tags in the generated document, set the font color of the Signature tag to white. When the document is sent for signing, recipients see only the required fields.
Note