Create Excel and PDF documents from Cognito Forms in Power Automate
This article shows how to create PDF documents from an XLSX template on a Cognito Form submission with the help of Processes in Power Automate (MS Flow). It may help you to automate the generation of different documents like applications, requests, orders, etc., in your company.
Processes are a Plumsail Documents feature with an intuitive interface for creating documents from templates.
Cognito Forms are an online form builder that allows you to create powerful forms for your website.
In this example, we will collect data from a Cognito Form, apply the data to our Excel template, and generate a new PDF document with the help of Processes in Power Automate (Microsoft Flow).
Create a Form
We have already prepared a Cognito form for ordering stationery and office supplies. We will use data from its submission to apply to our template. If you haven’t created any Cognito Forms before, you can learn how to do it in this documentation.
Below is a screenshot of our form:
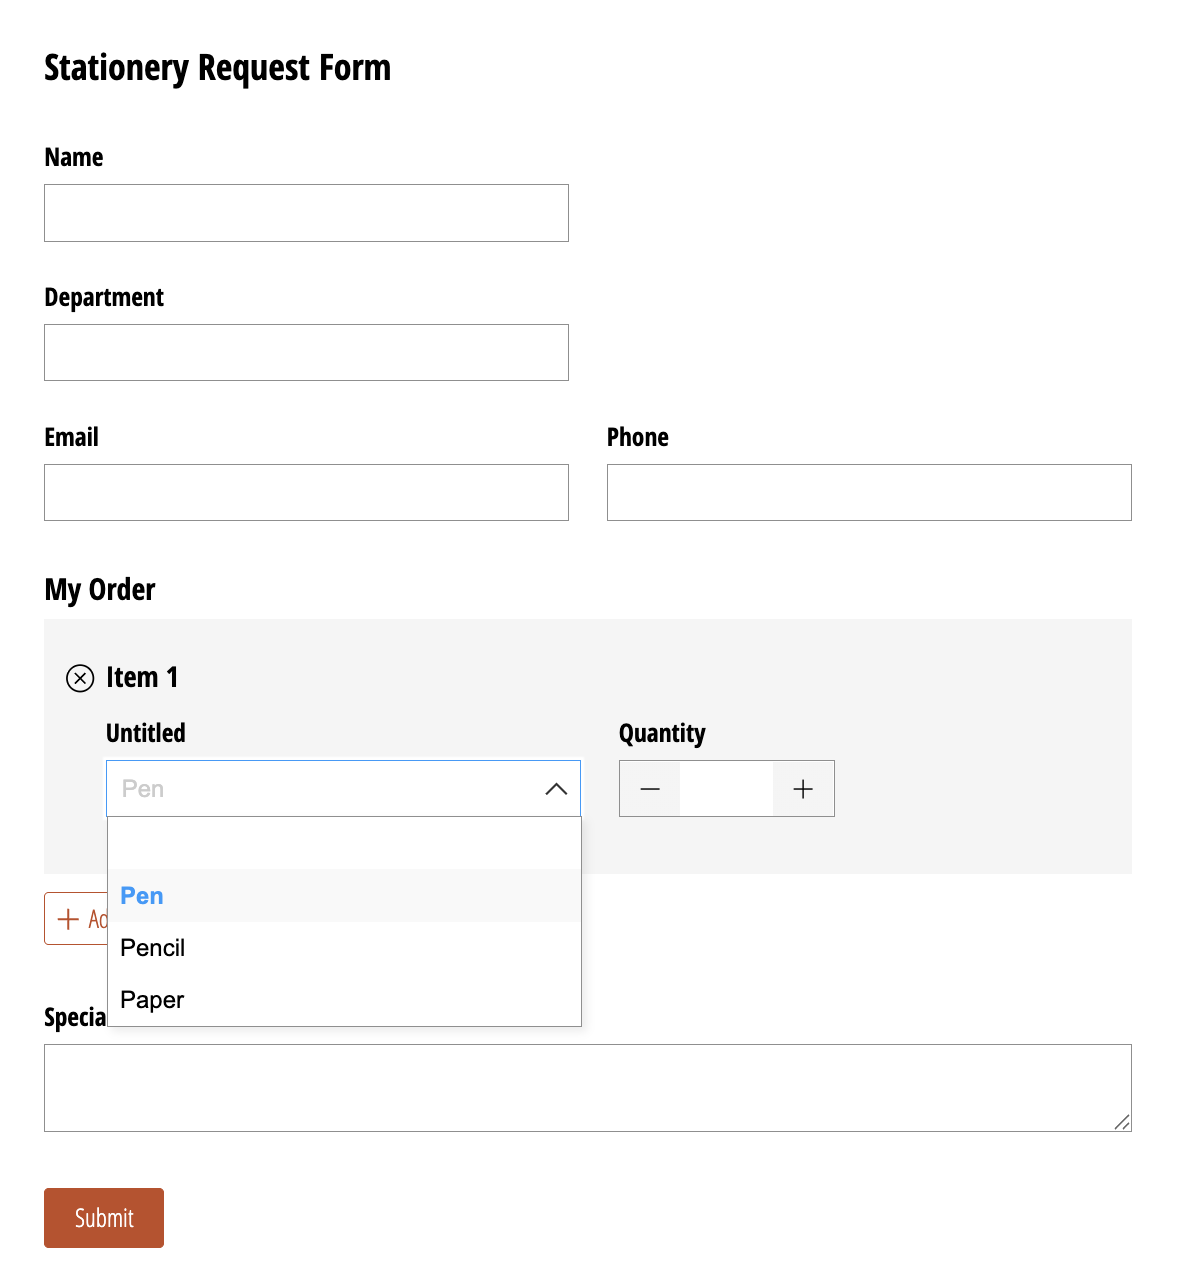
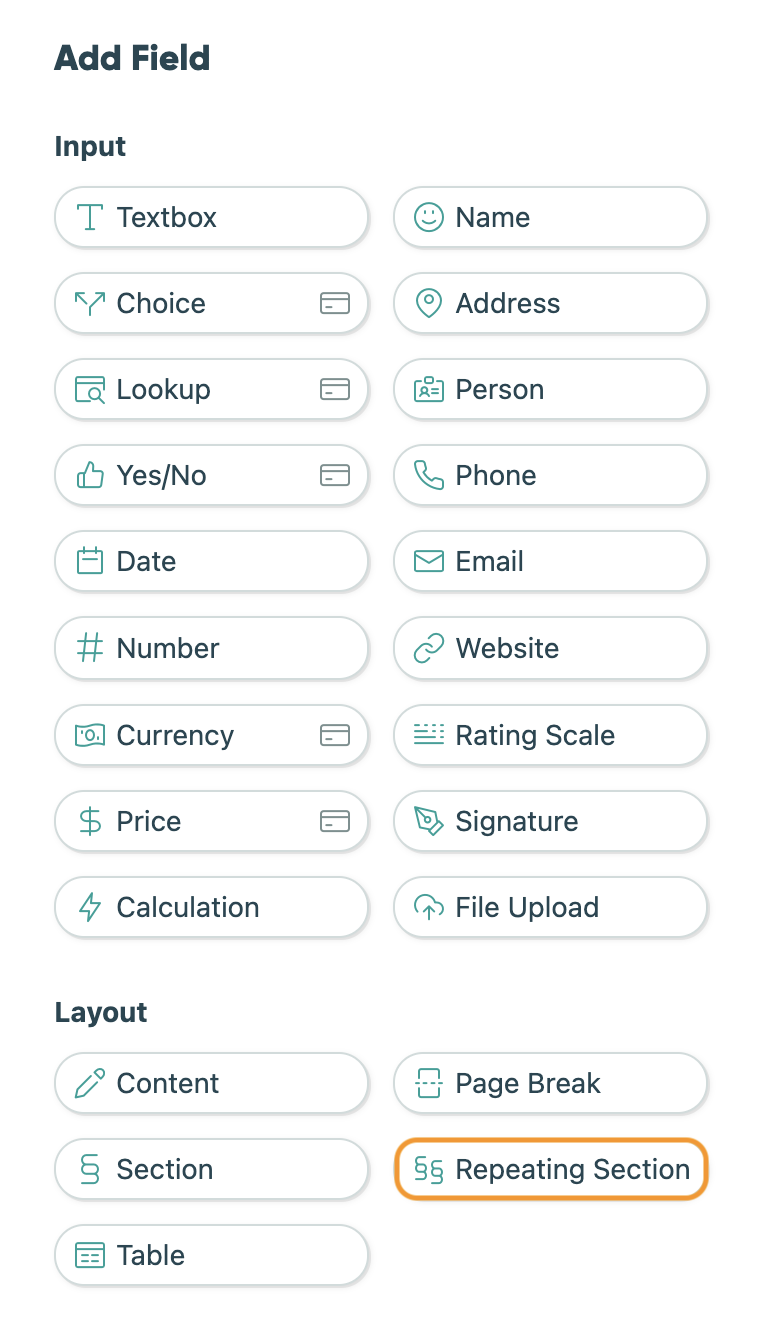
We used the Repeating Section layout to allow users to add more products. You may also use the Basic Sales Form template to add this functionality:
Configure the Process
Now we need to create and configure the Process which will generate stationery requests in PDF format based on data from our web form submission.
Create a new Process
Go to the Processes section in your Plumsail account.
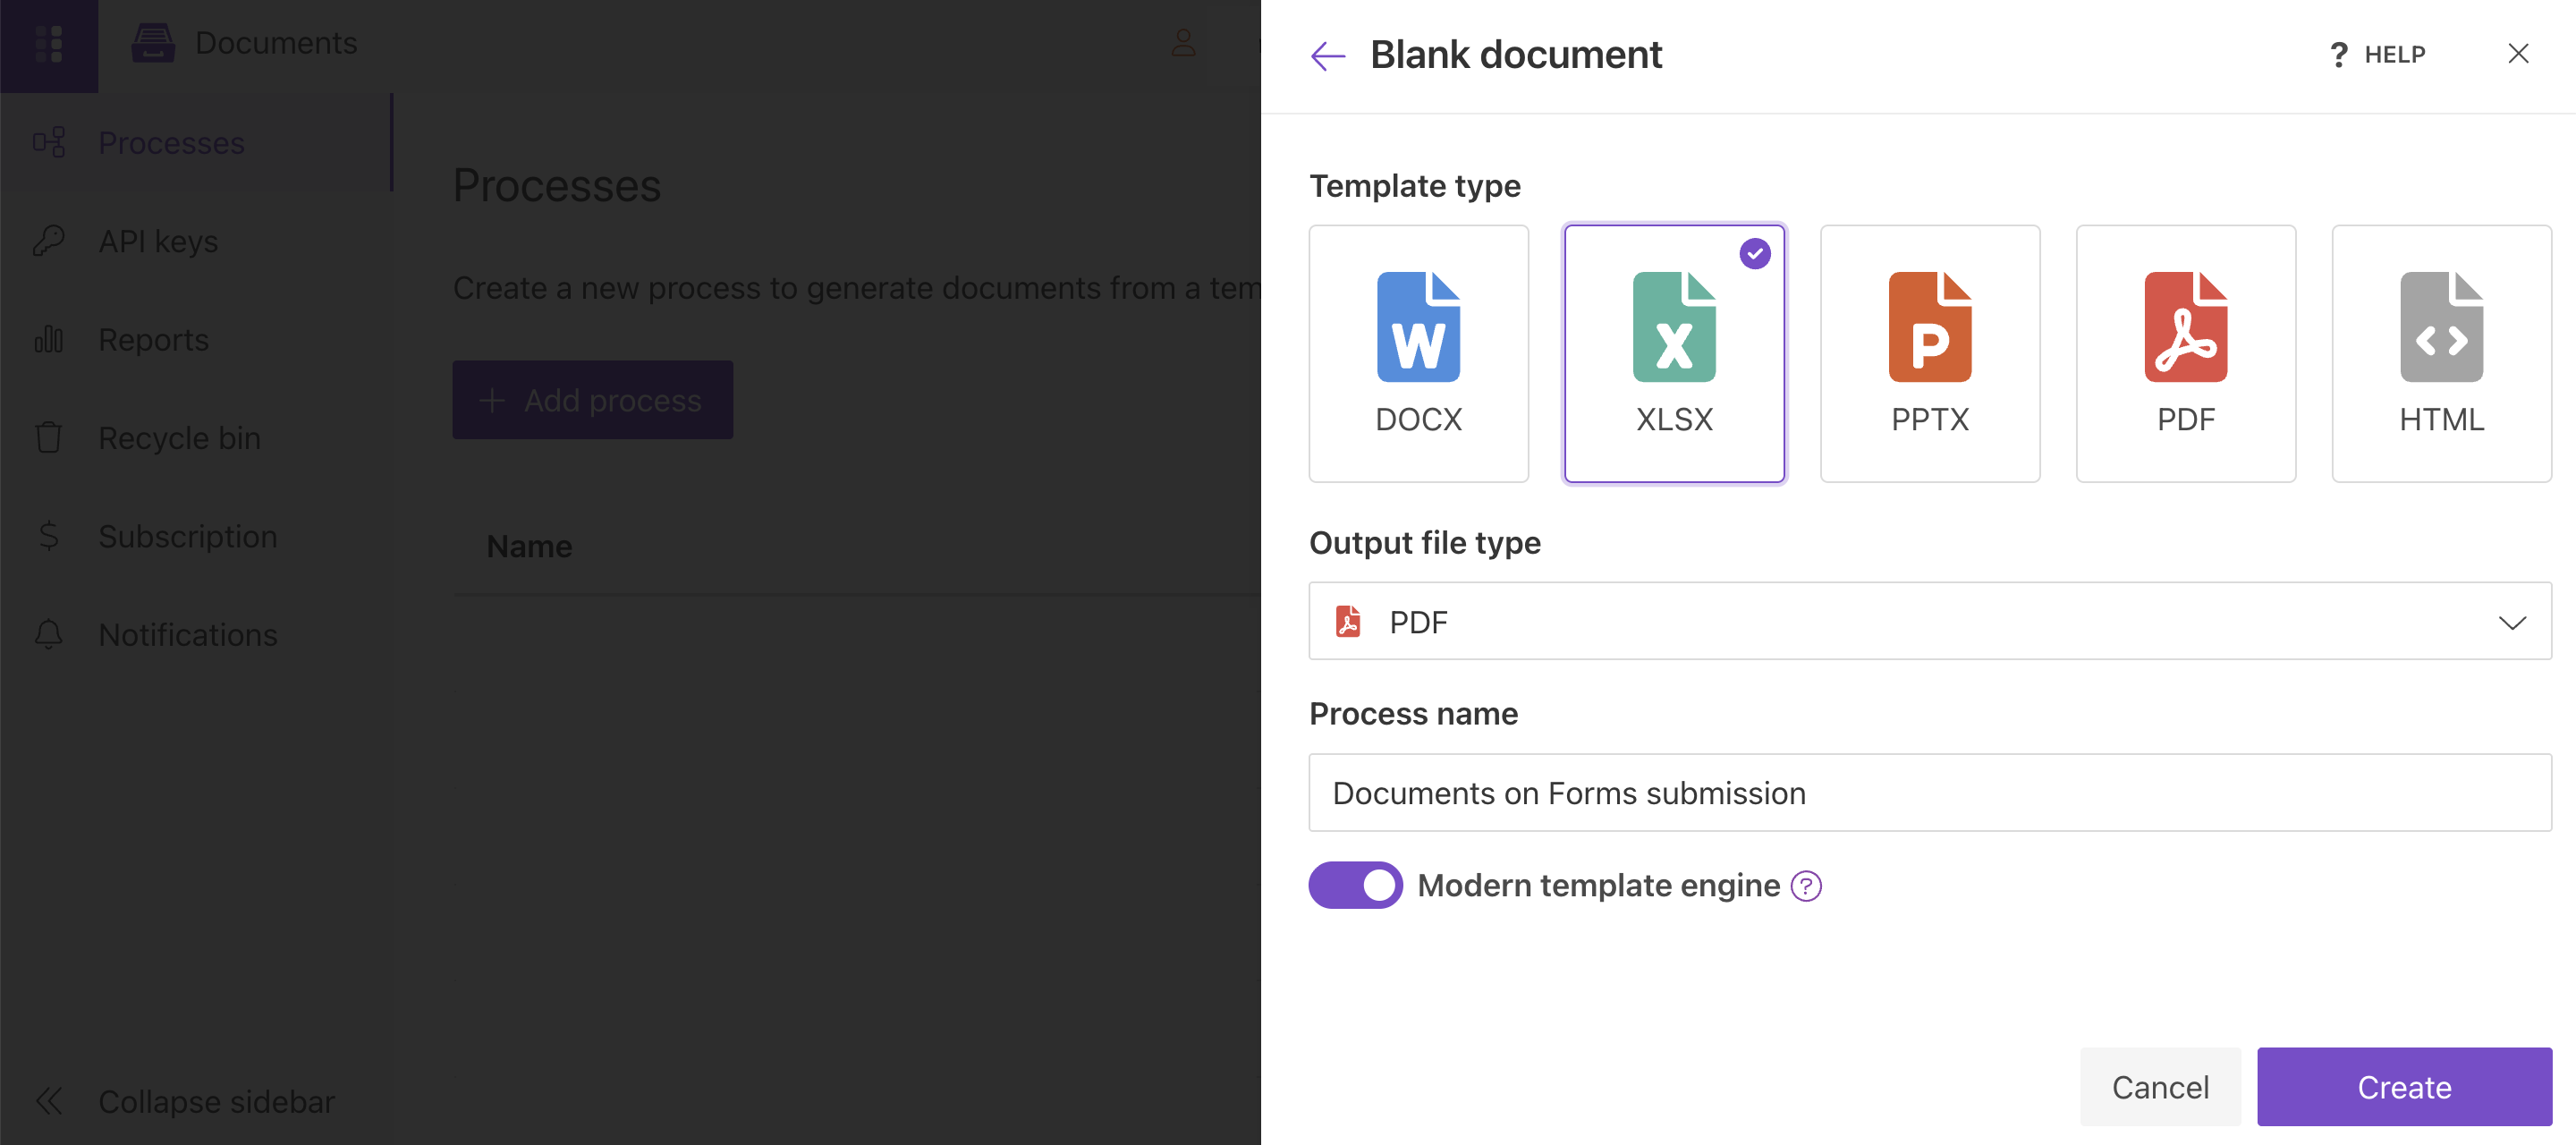
Click on the Add process button. Set the Process name and choose the template type.
As we’re going to generate PDF stationery orders from an Excel template, select XLSX for the template type.
Configure a template
After creating the process, you can proceed to configuring the template.
The template configuration includes the following sections:
Editor;
Settings.
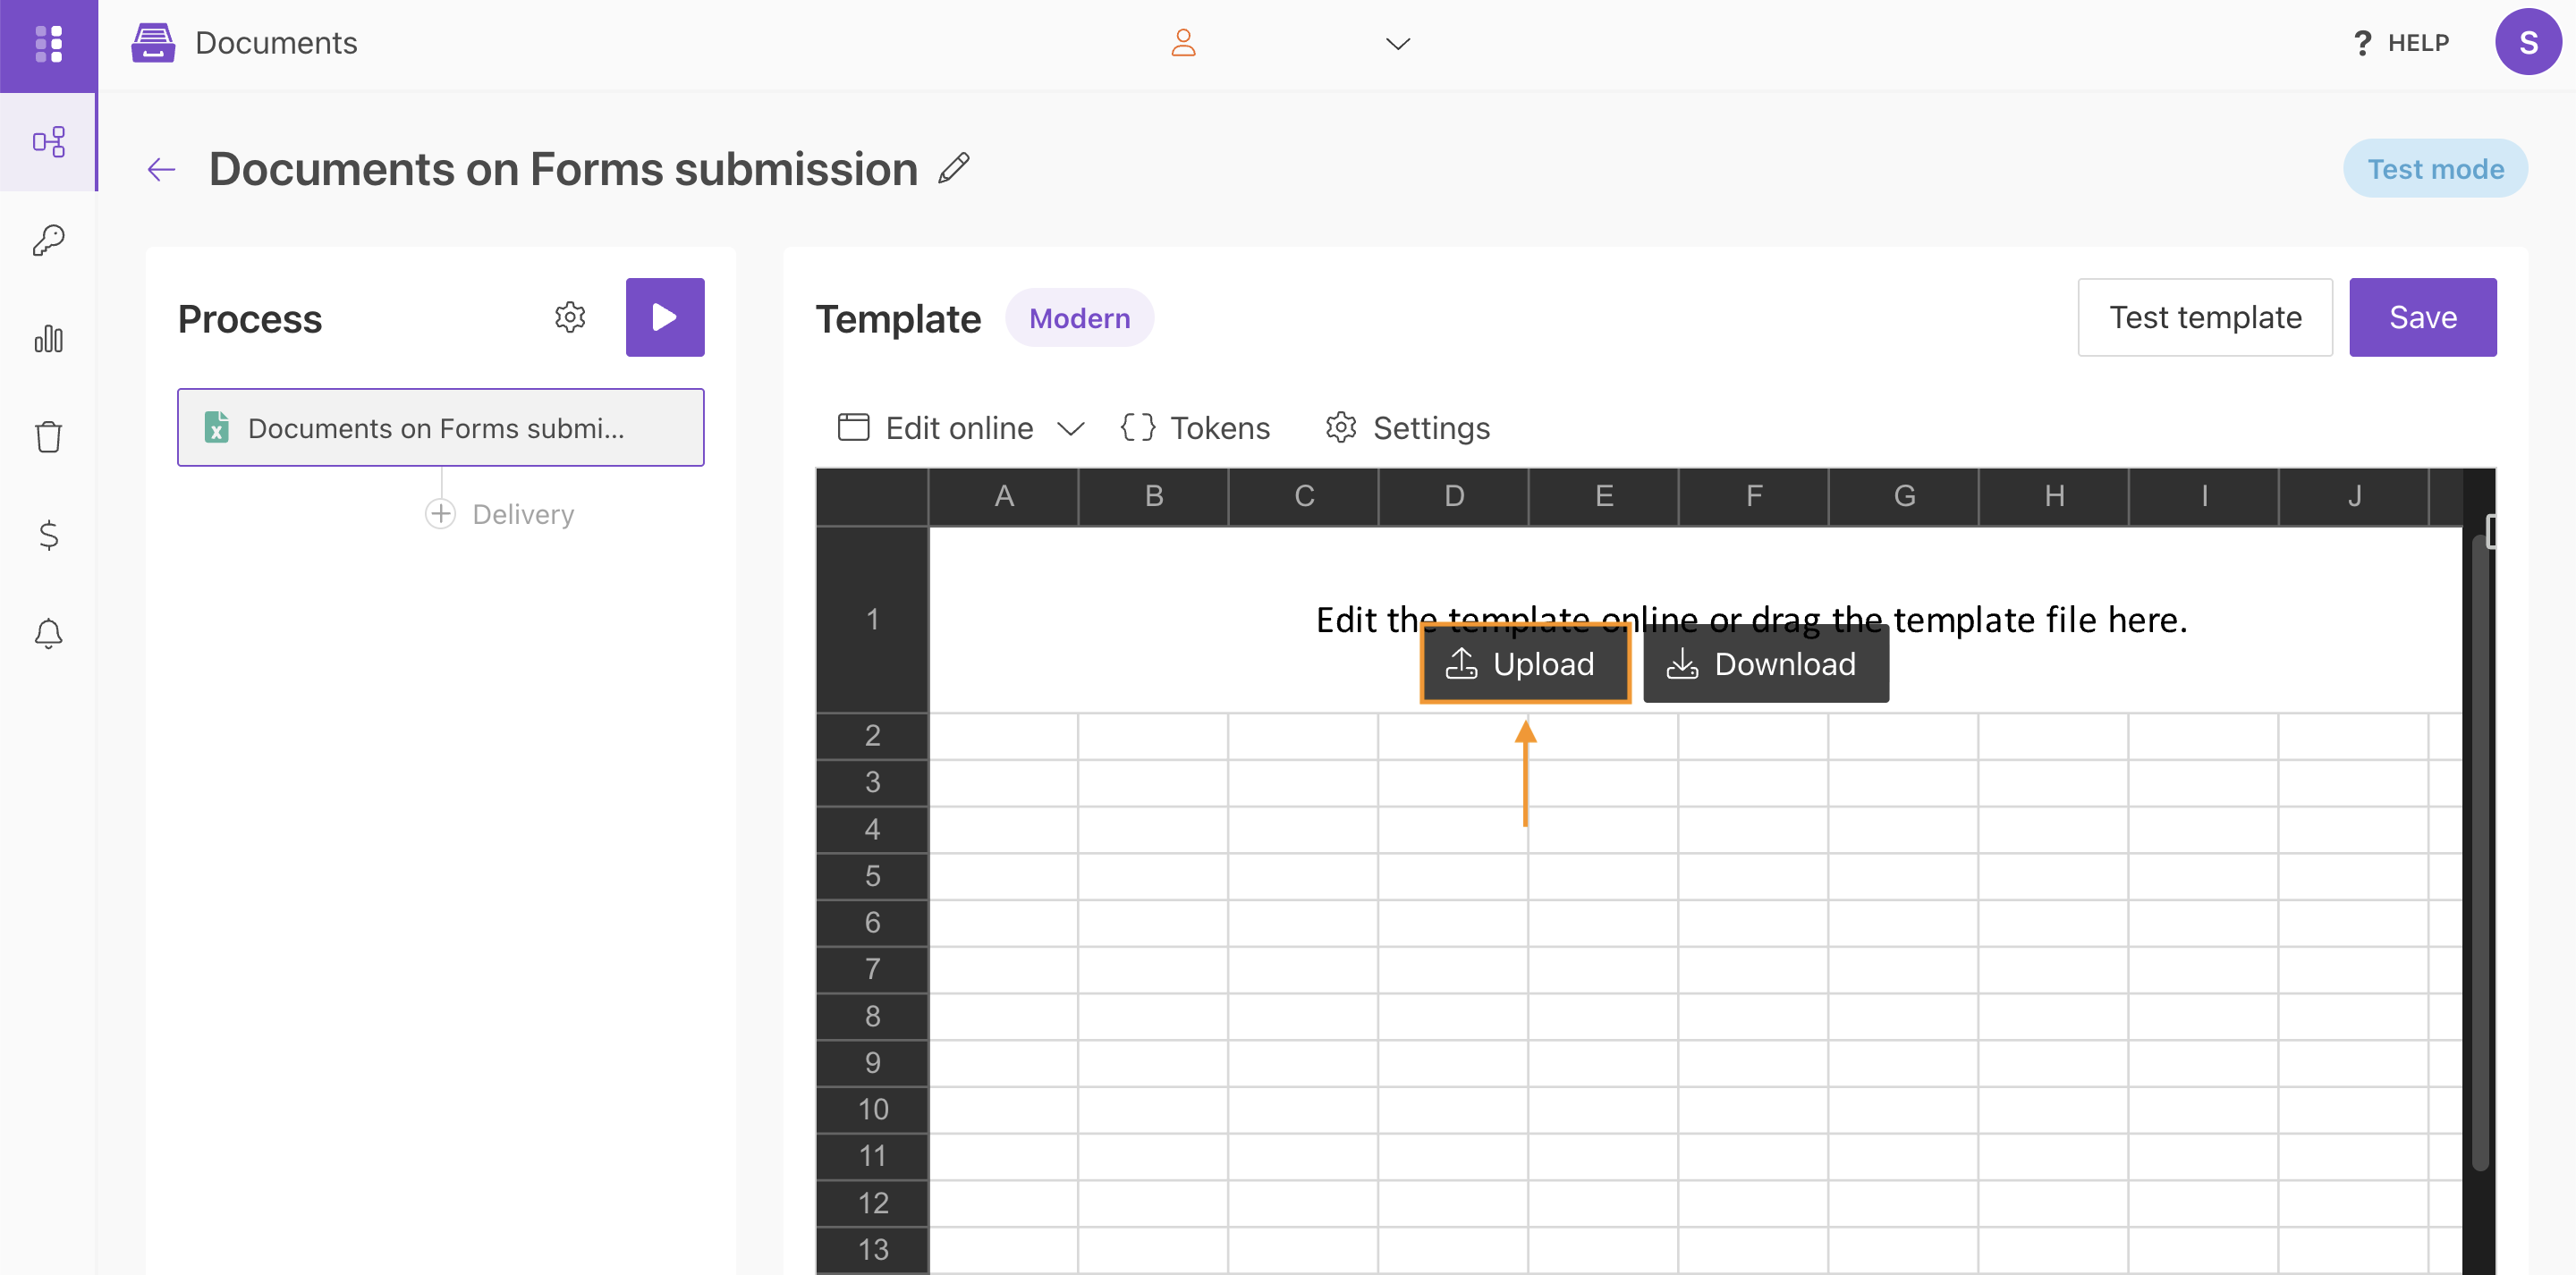
In Editor, you can compose the template from scratch or upload a pre-made one. It’s also possible to modify the uploaded template online.
Feel free to download an XLSX stationery order template that we have already prepared:
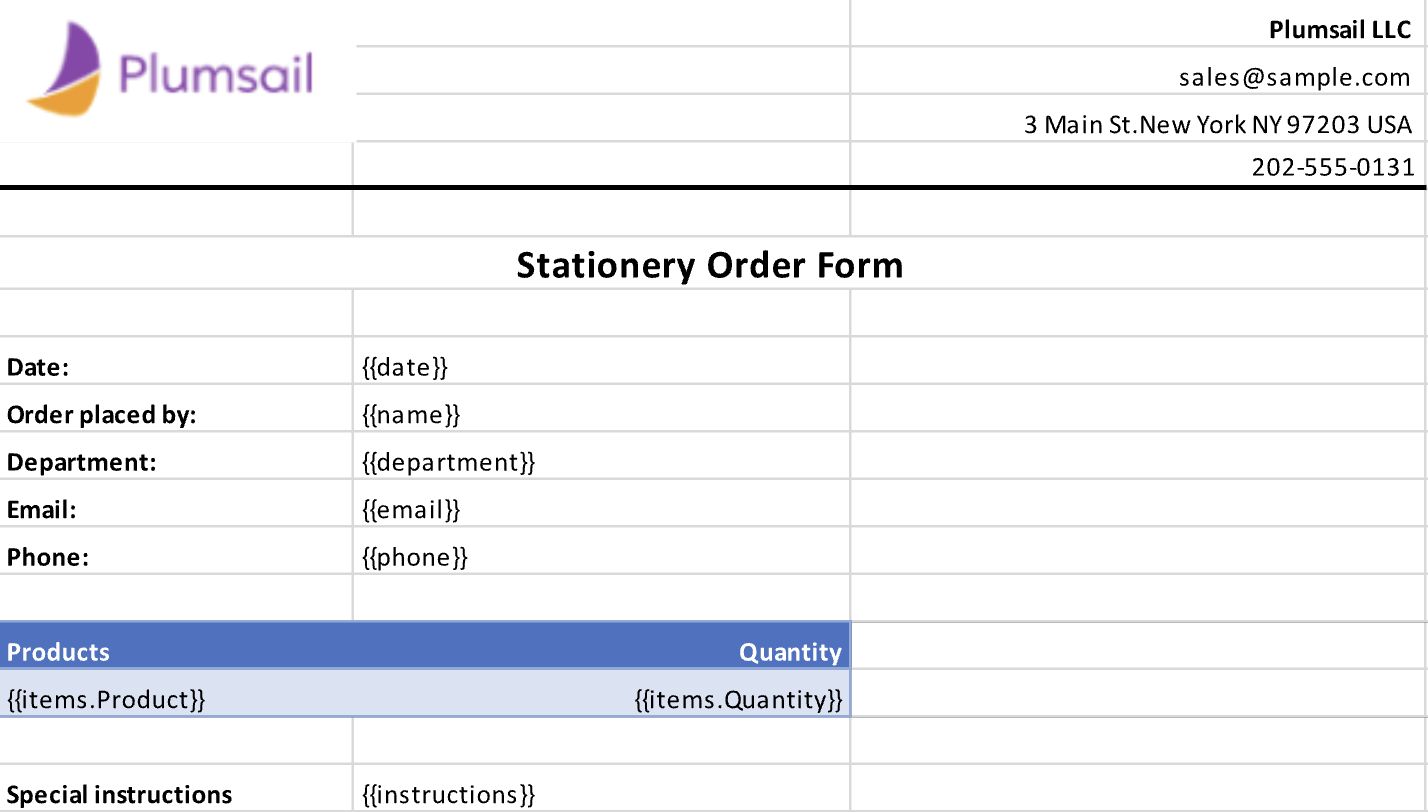
Then upload it to the process.
Templating syntax
If you’re creating your own template, familiarize yourself with the templating syntax. Plumsail Excel XLSX templates use a different approach than most other templating solutions. It uses a minimal amount of syntax to make your work done.
In short, the templating engine thinks that everything between curly {{ }} brackets is variables where it will apply your specified data.
Read this article to get familiar with the templating engine.
Test template
To preview the generated document, click on the Test template button.
You will see the dialog where you can fill in the auto-generated testing form. Form fields are created based on tokens from your document template. You can adjust the look of the testing form by changing token types.
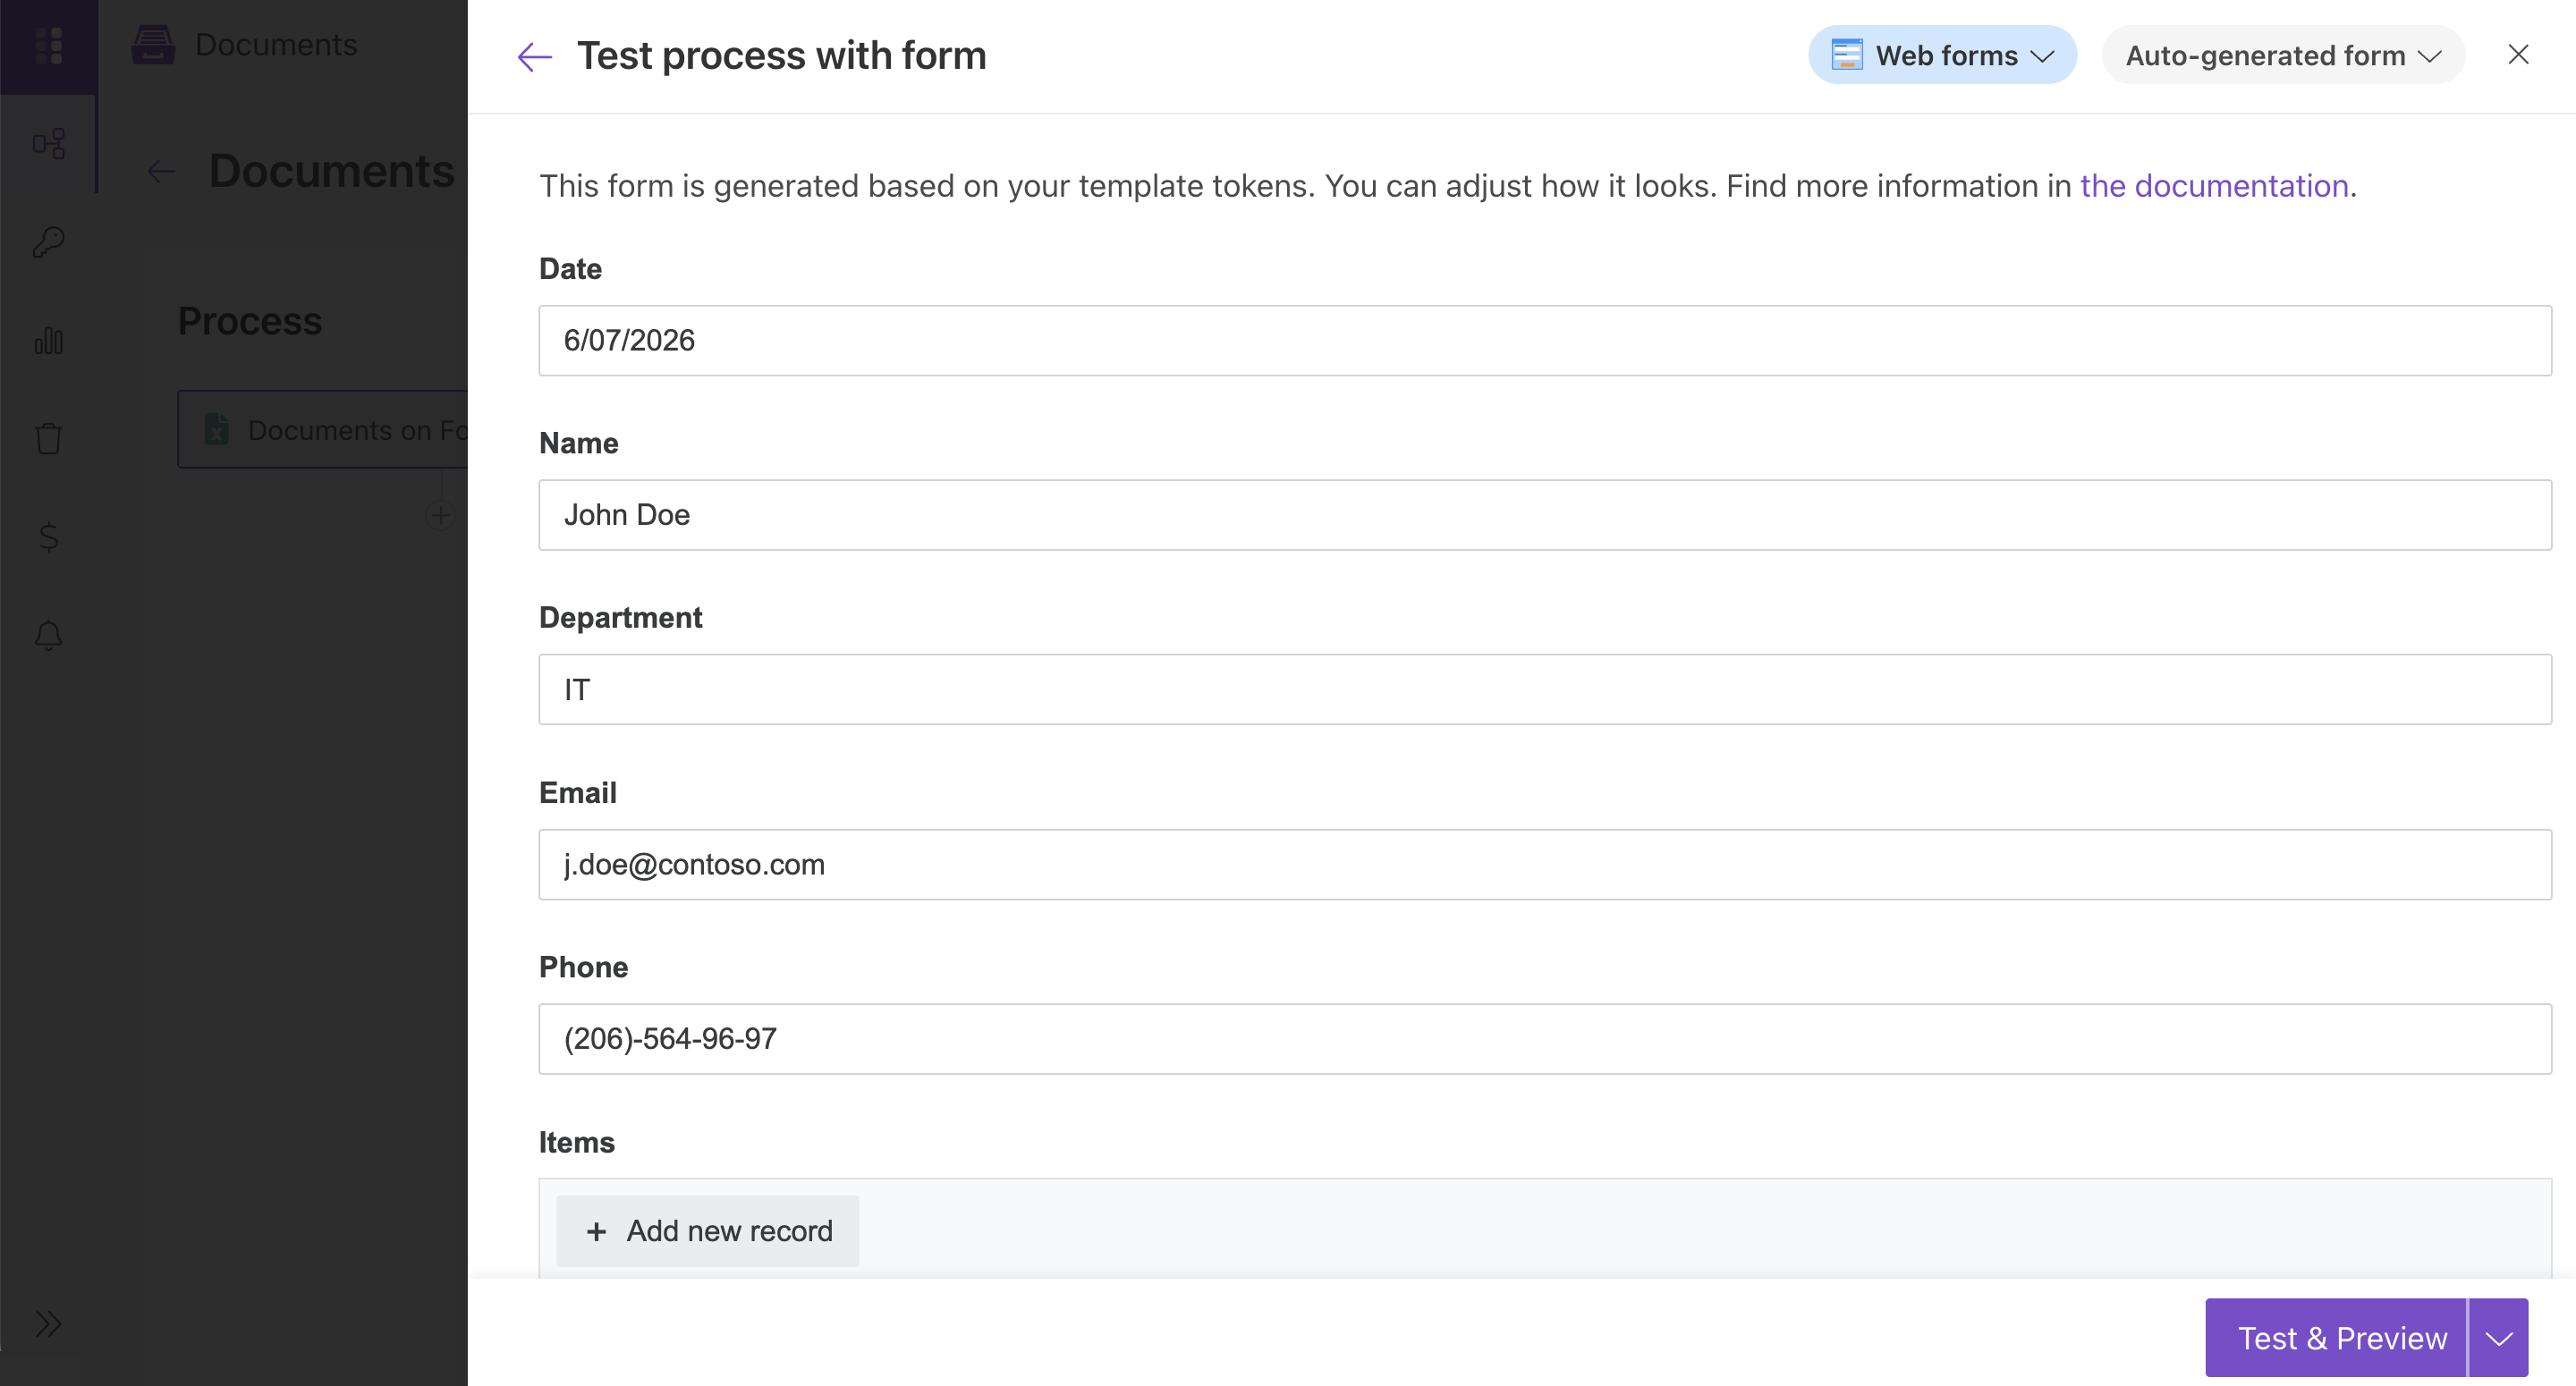
During testing, you’ll provide sample data using the generated test form.
Once you’ve tested the template, press Save to proceed further.
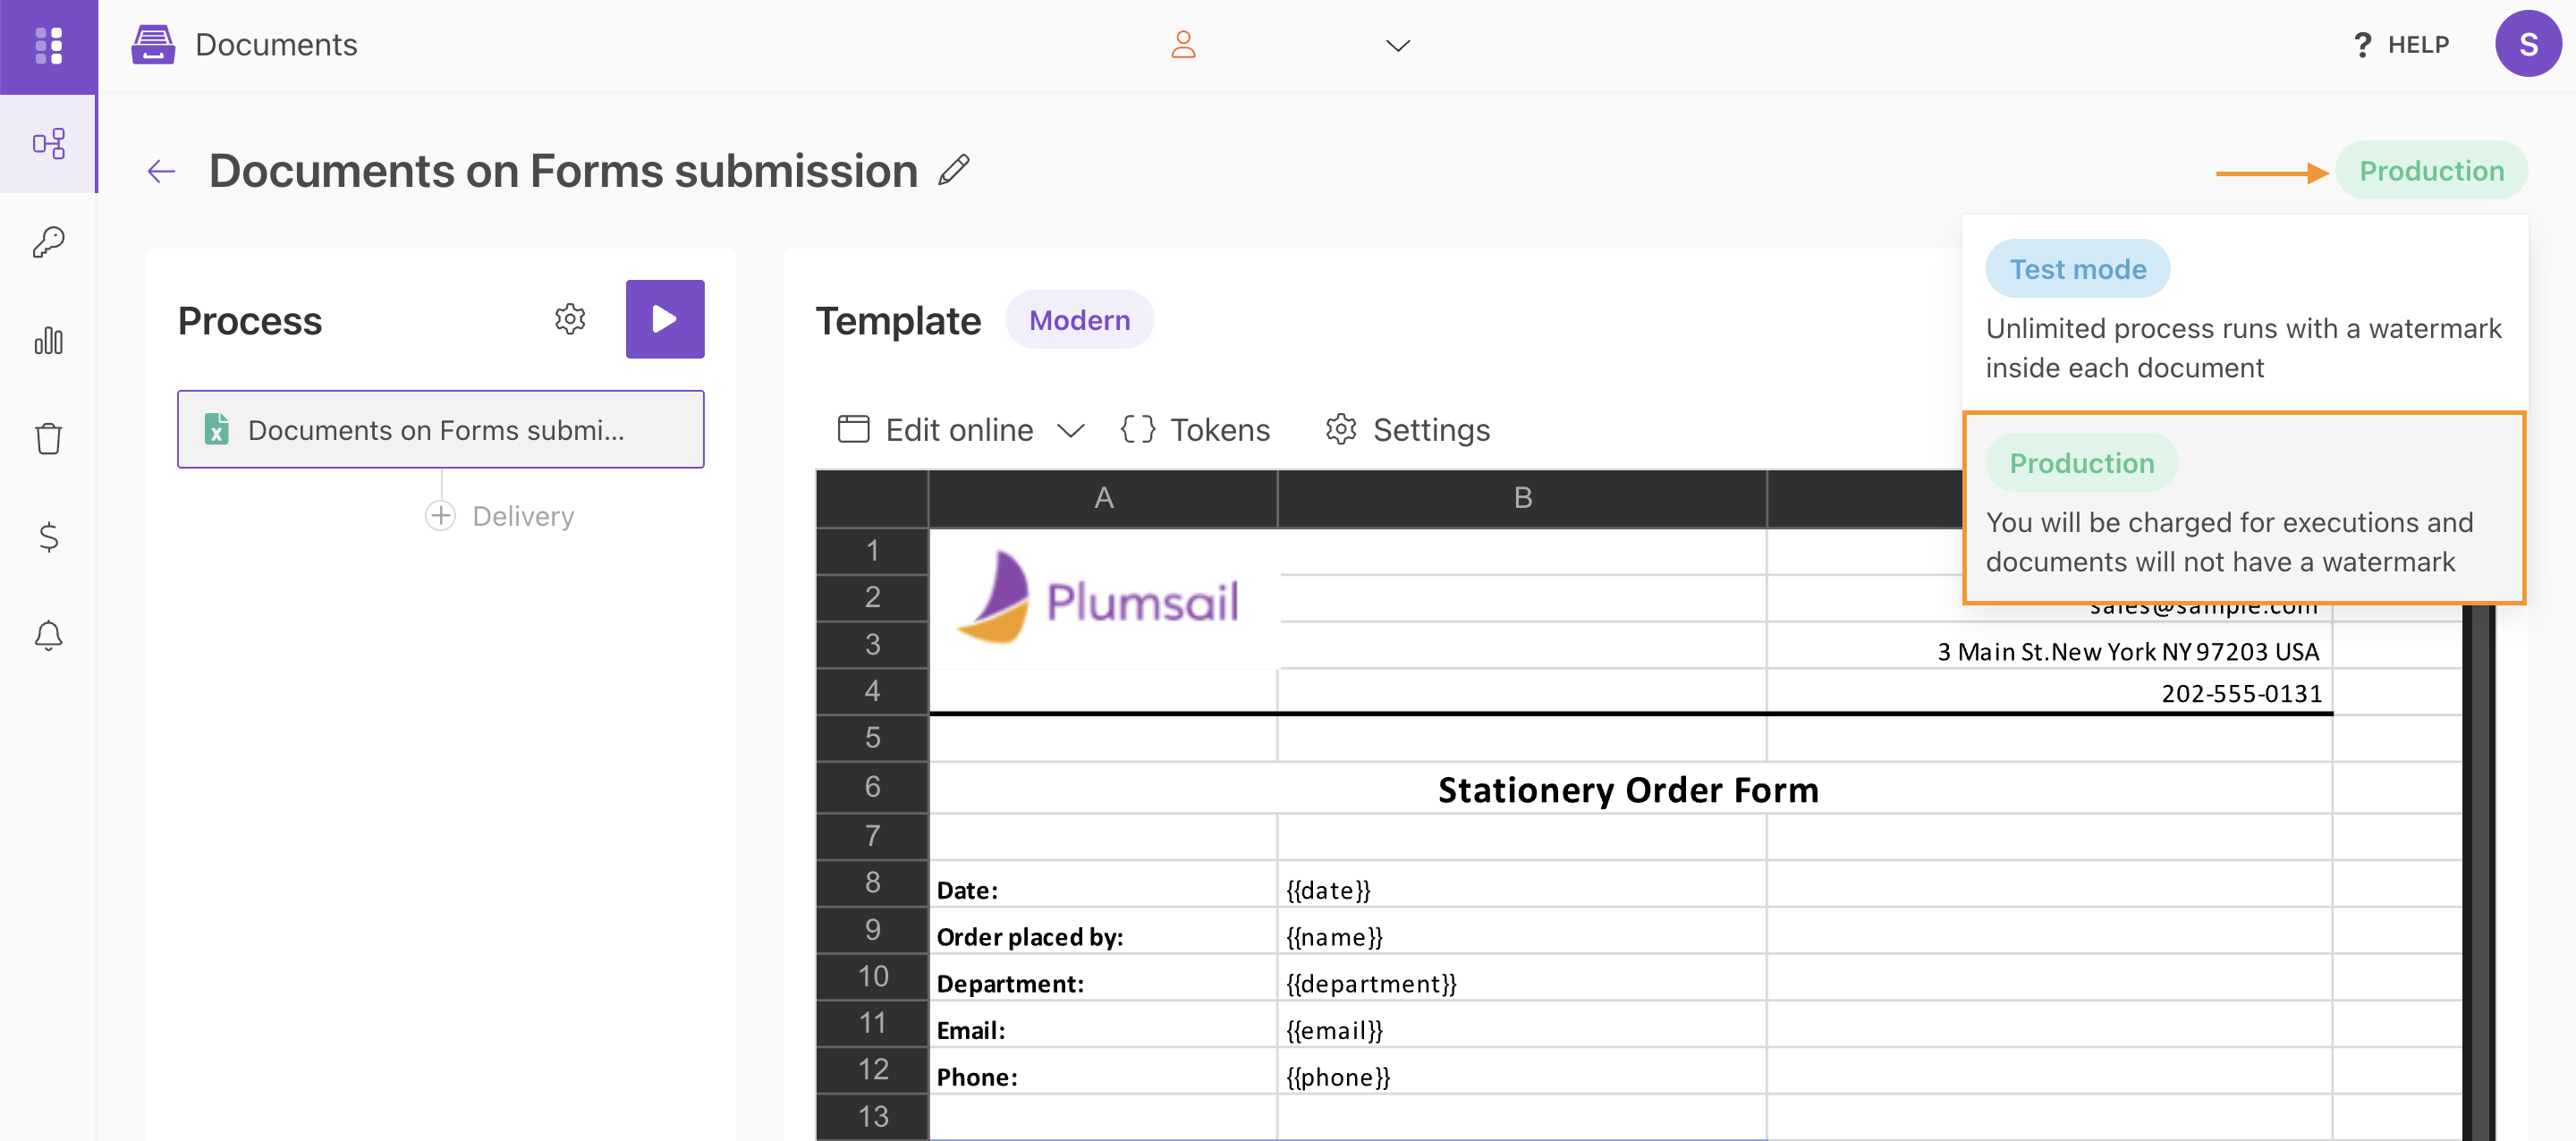
Switch the template mode to Production to remove Plumsail watermarks from the generated documents.
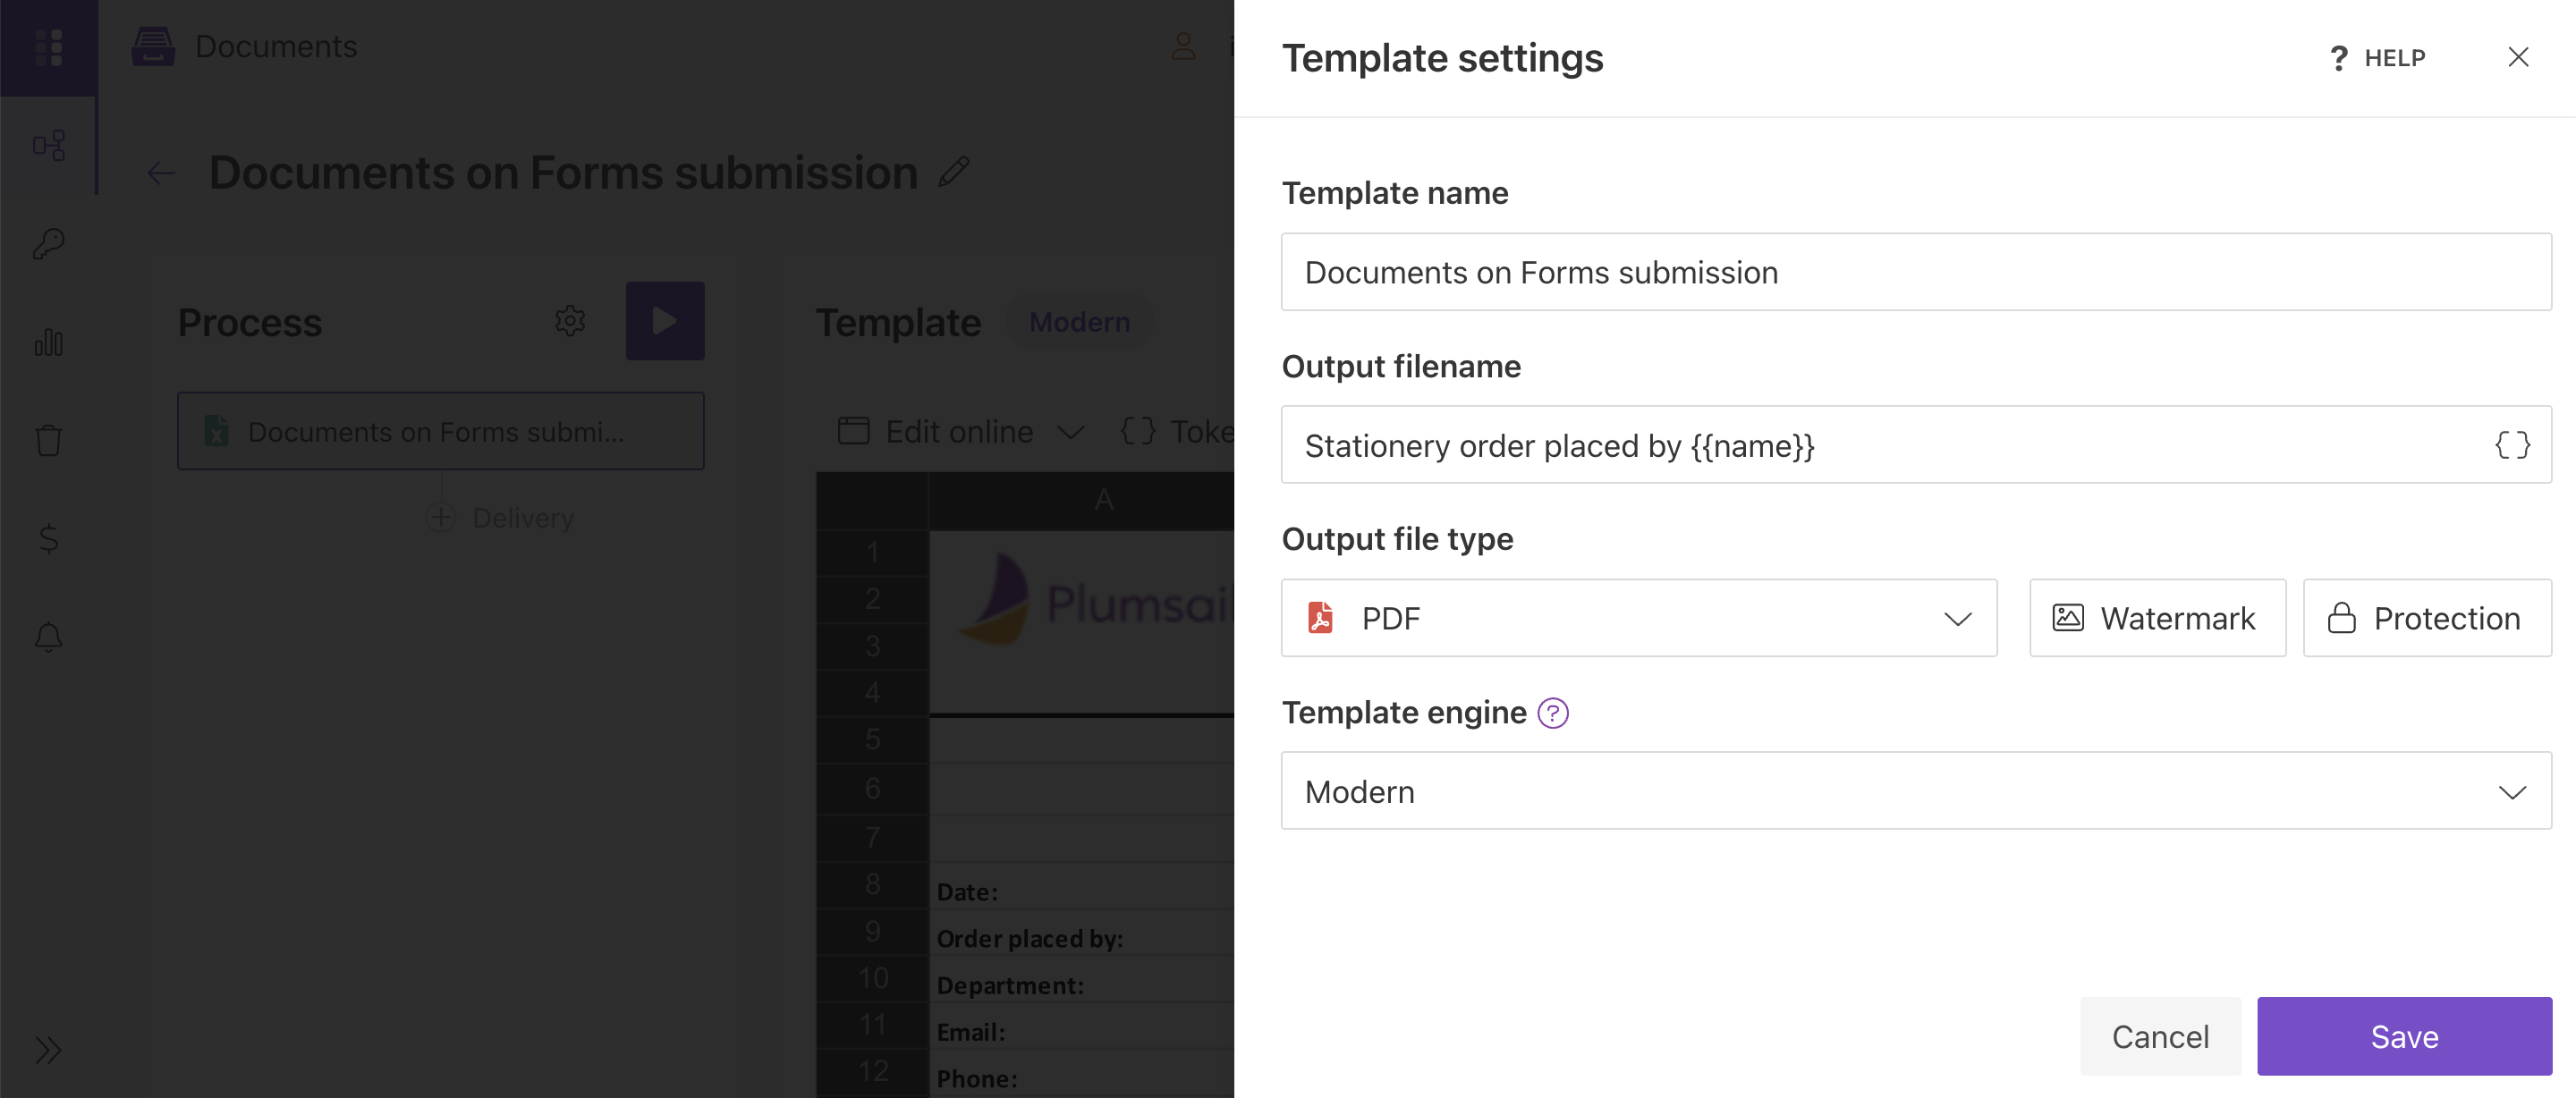
Go to the Settings.
Configure the following settings:
Fill in the name of the result file
Select PDF format for the output file
Protect the result PDF if you wish
After configuring the settings, test the template again to verify the output.
When everything is done here, click on Save.
Delivery
Finally, configure delivery. For demonstration purposes, we’ll store the result file in OneDrive. See the list of available deliveries for other options.
Specify the folder where the generated document will be saved.
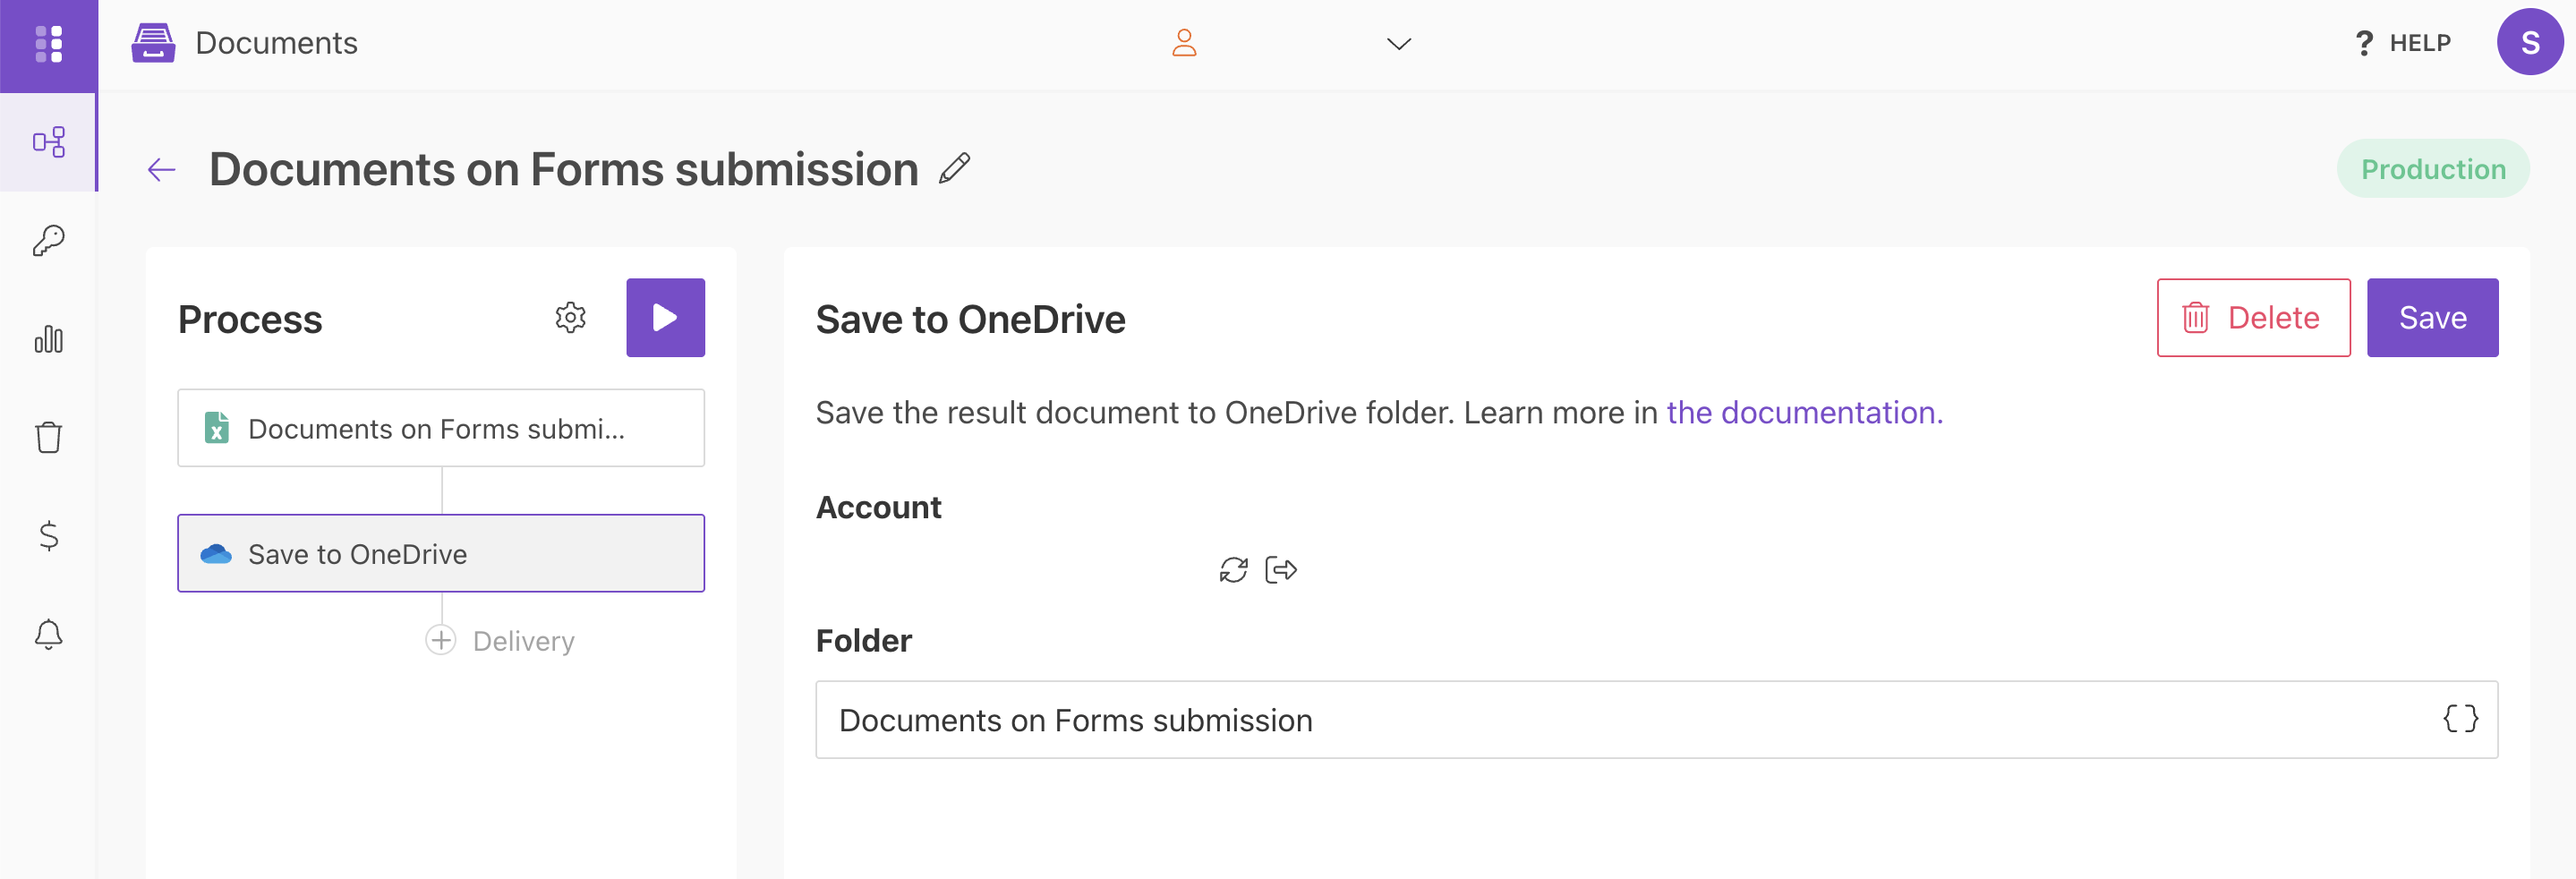
You can configure as many deliveries as you need.
Start the Process
We will start our Process from Power Automate (Microsoft Flow).
Create a Flow
This is how our Flow looks:
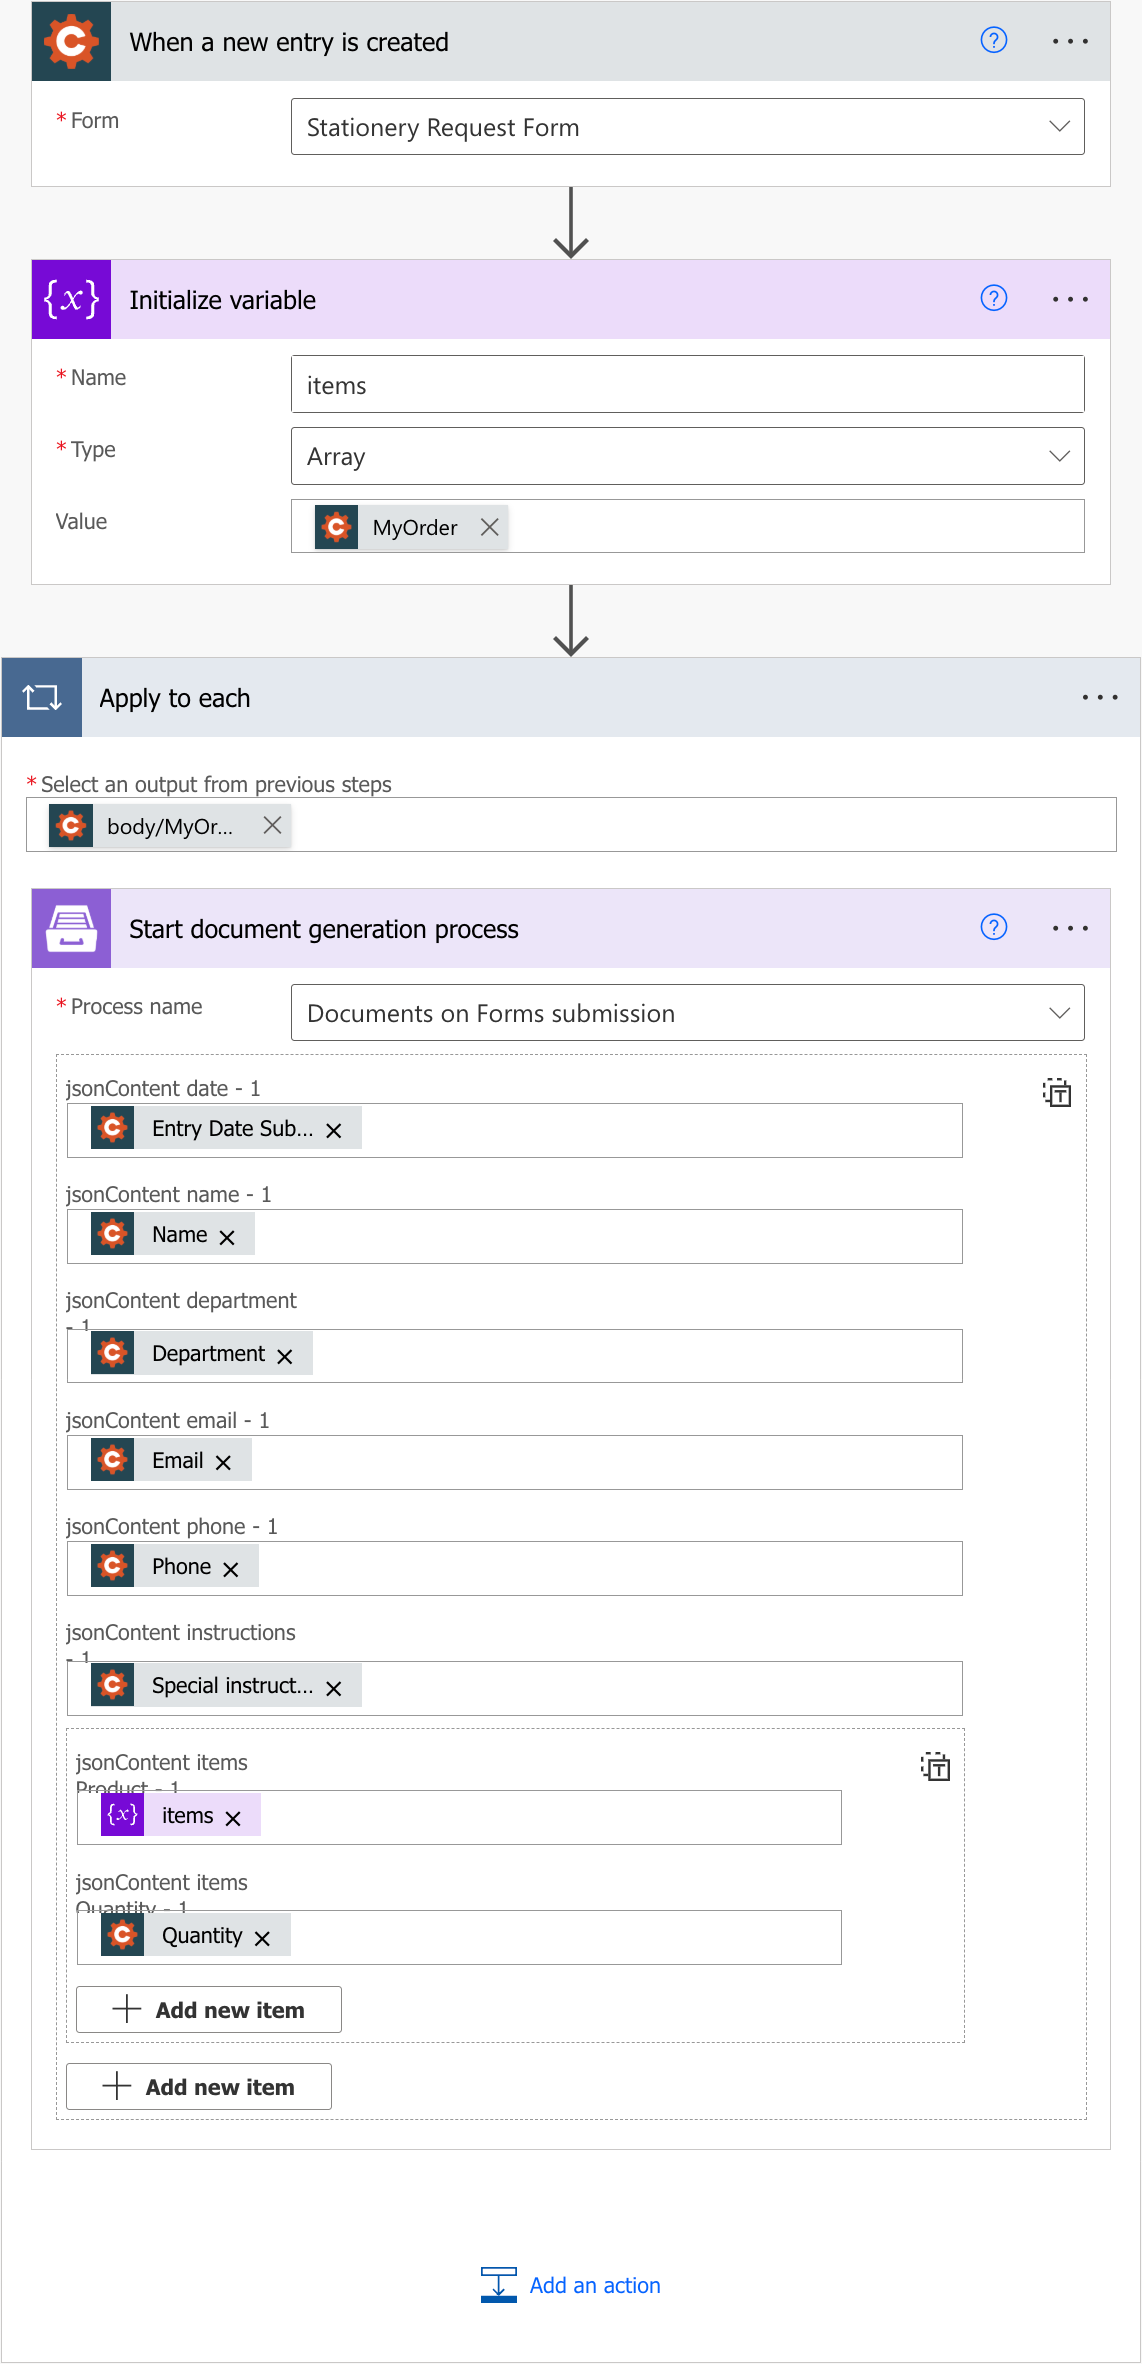
Check out the Flow steps described below.
Form is submitted
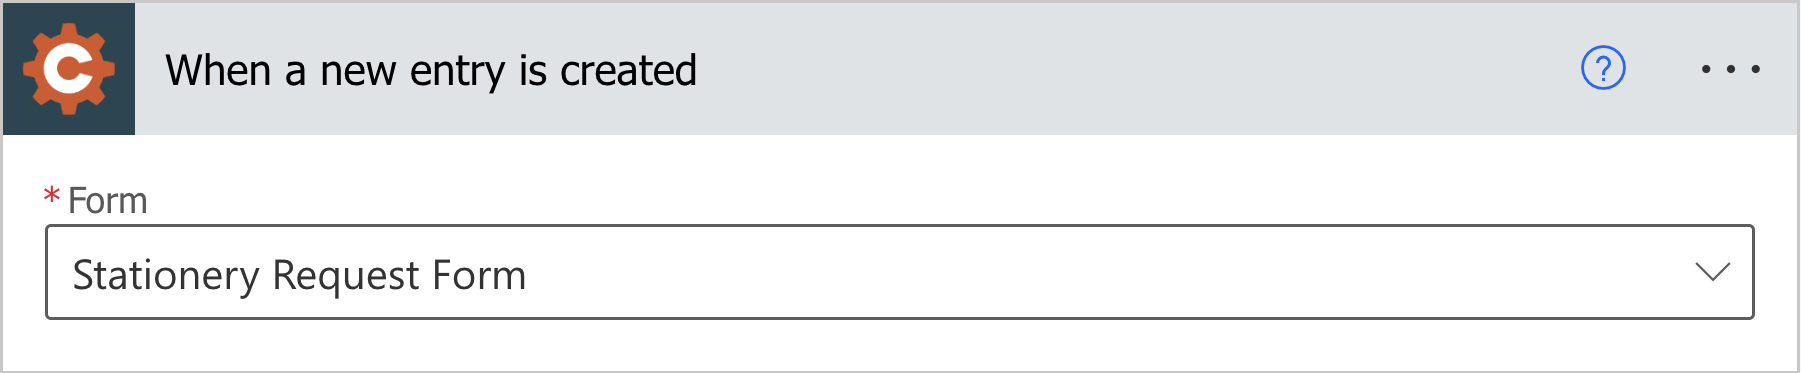
We need to start the Flow every time somebody submits our stationery request form. For that, search for Cognito Forms in Power Automate and add Cognito Forms - When a new entry is created as a trigger.
If this is your first Flow with Cognito Forms, on this step, sign in to your Cognito Account from MS Flow to use your forms inside Flows.
Then, you’ll need to pick the form you want to track in the dropdown.
Initialize variable
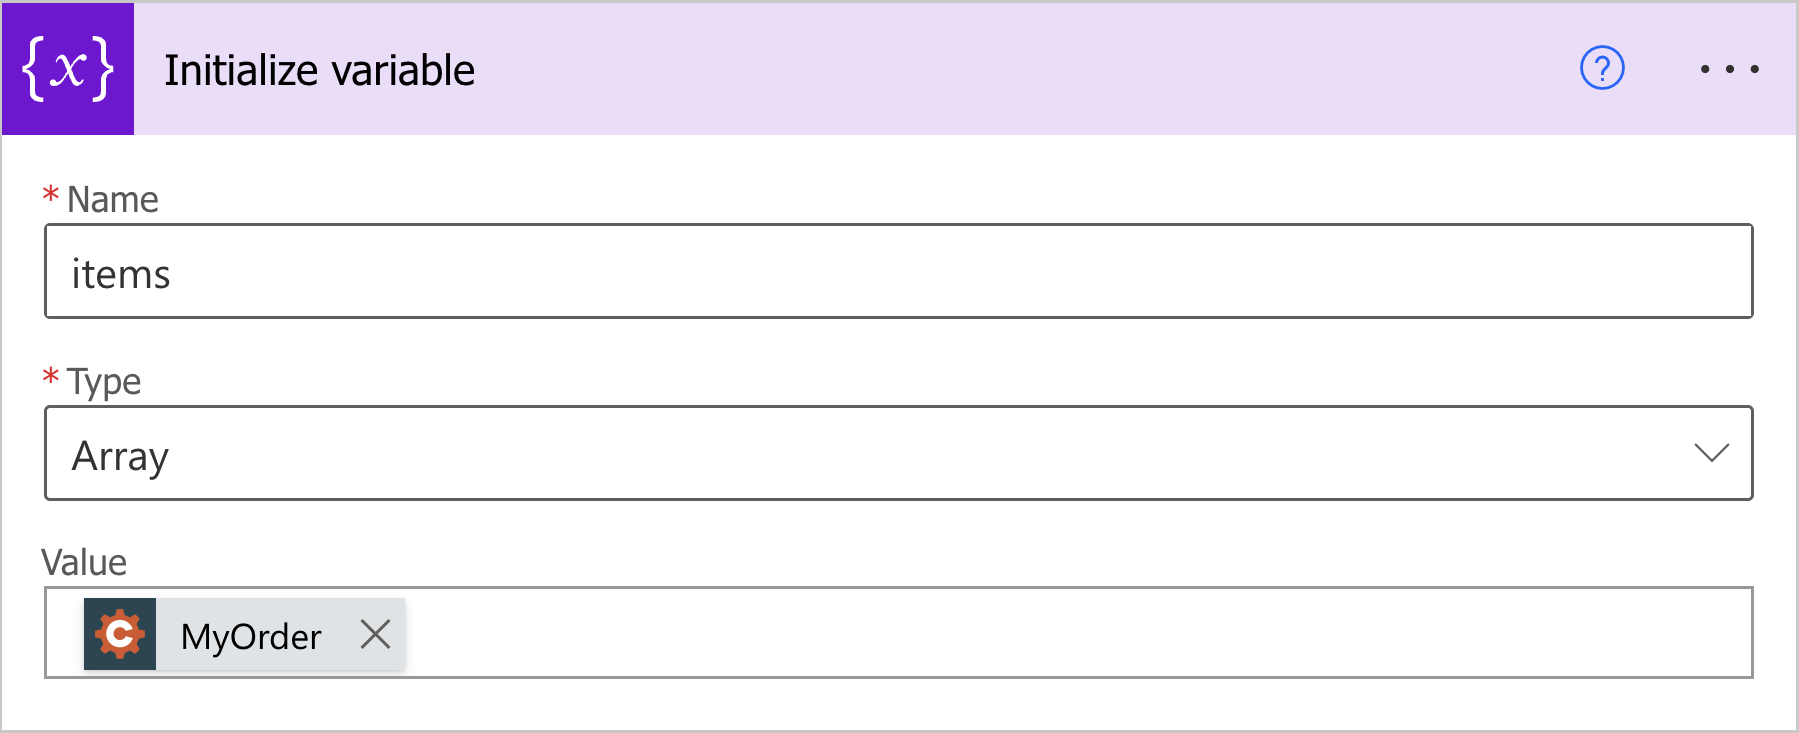
We need to build an array with the data from the Repeating Form’s Section to pass it to the Start document generation process action. So, we create an array variable items and set the MyOrder output of the trigger as its value.
Start document generation process
This is the action from Plumsail Documents connector. This action is suitable for starting the Process of generating documents from a template. You can find more information about this action by visiting this page.
Using the action for the first time, you’ll be asked for Connection name and API key.
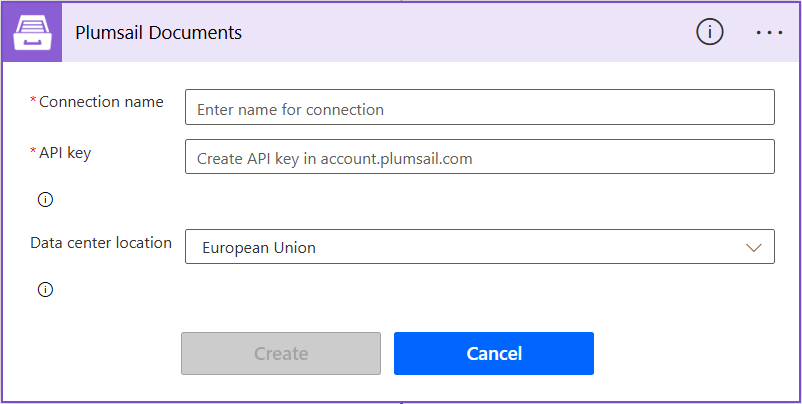
You can type any name for the connection. For example, Plumsail Documents.
Then create an API key in your Plumsail Account page, copy and paste it to the API key field.
Select the process in the Process name parameter. After that, the action reads the tokens of the template configured in this process and generates an input for each of them. Fill in these inputs with the dynamic content from the previous steps:
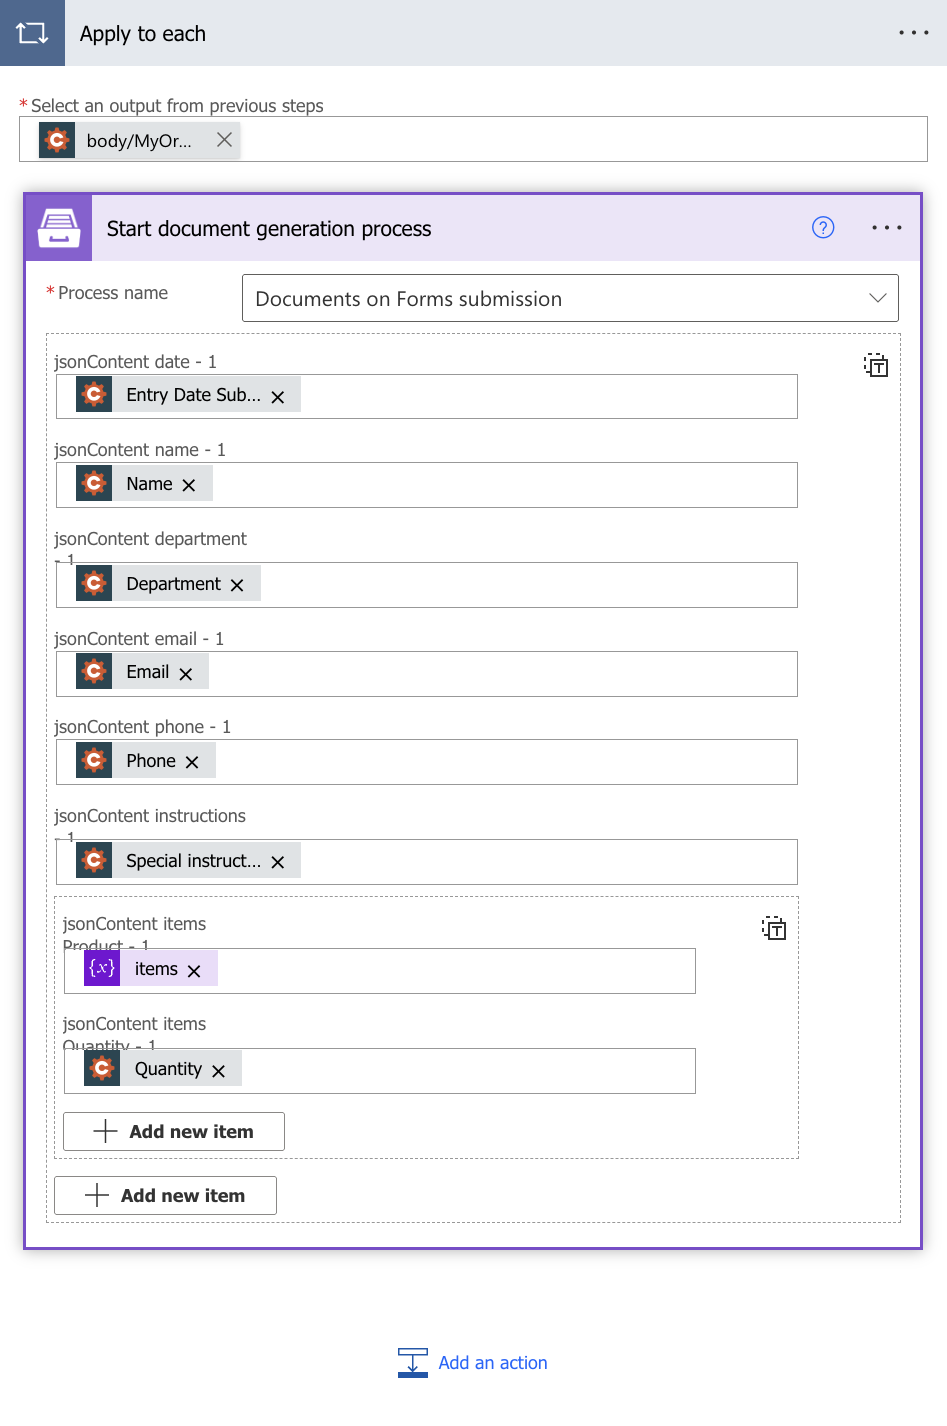
date, name, department, email, phone and instructions get the Entry Date Submitted, Name, Department, Email, Phone and Special instructions outputs of the Cognito Forms - When a new entry is created trigger.
items Product and items Quantity get the items variable from the Initialize variable step and the Quantity output of the trigger.
Here is the dynamic content available for these inputs:
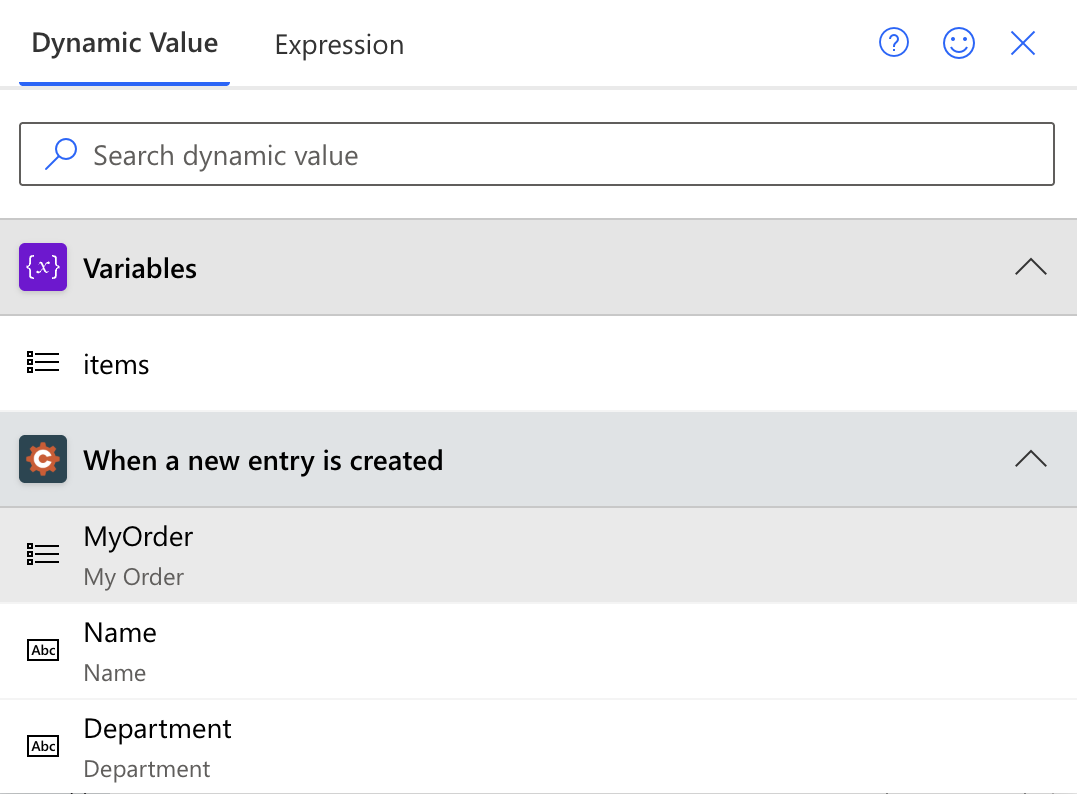
Depending on the dynamic content you select, Power Automate may automatically wrap the Start document generation process action in an Apply to each loop. This is expected behavior when the selected value is returned as an array. In this scenario, keep the action inside the loop and continue configuring.
Pass the data as JSON
If the generated inputs don’t cover all the tokens of your template — for example, when the tokens are deeply nested — use the Start document generation process with JSON action instead. It has two parameters:
Process name. Select the process you need from available ones.
Template data. Specify source data in JSON format:
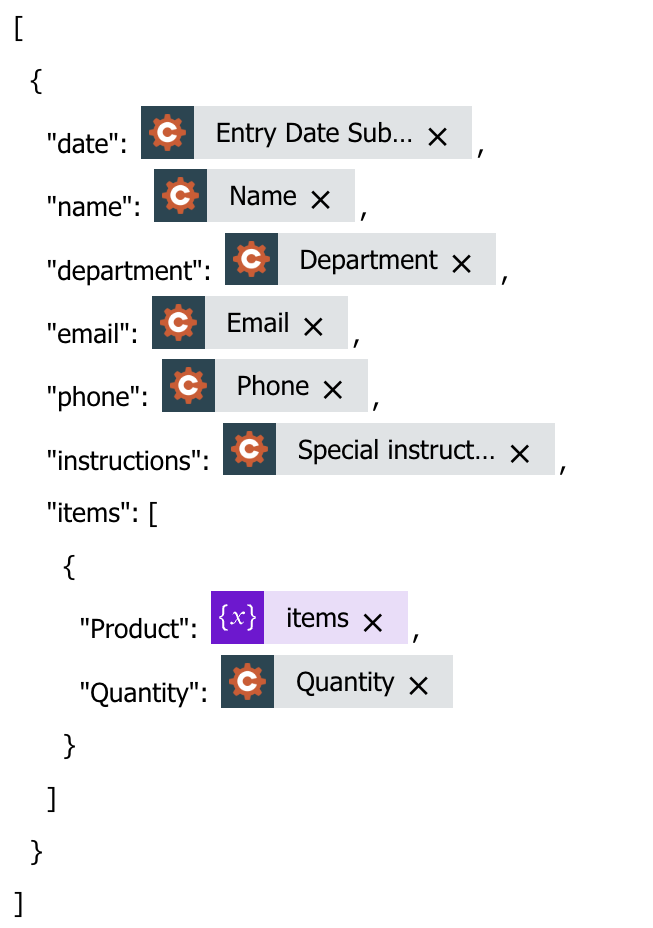
This object contains information from our form. We selected the dynamic content from the output of the Cognito Forms - When a new entry is created trigger and from the Initialize variable step.
Use the ready document in Flow
You can stop on the step Start document generation process.
Steps described above are enough for generating PDFs from an XSLX template based on the Cognito Form submission. Your result file will be saved to OneDrive in this case. See how it will look:
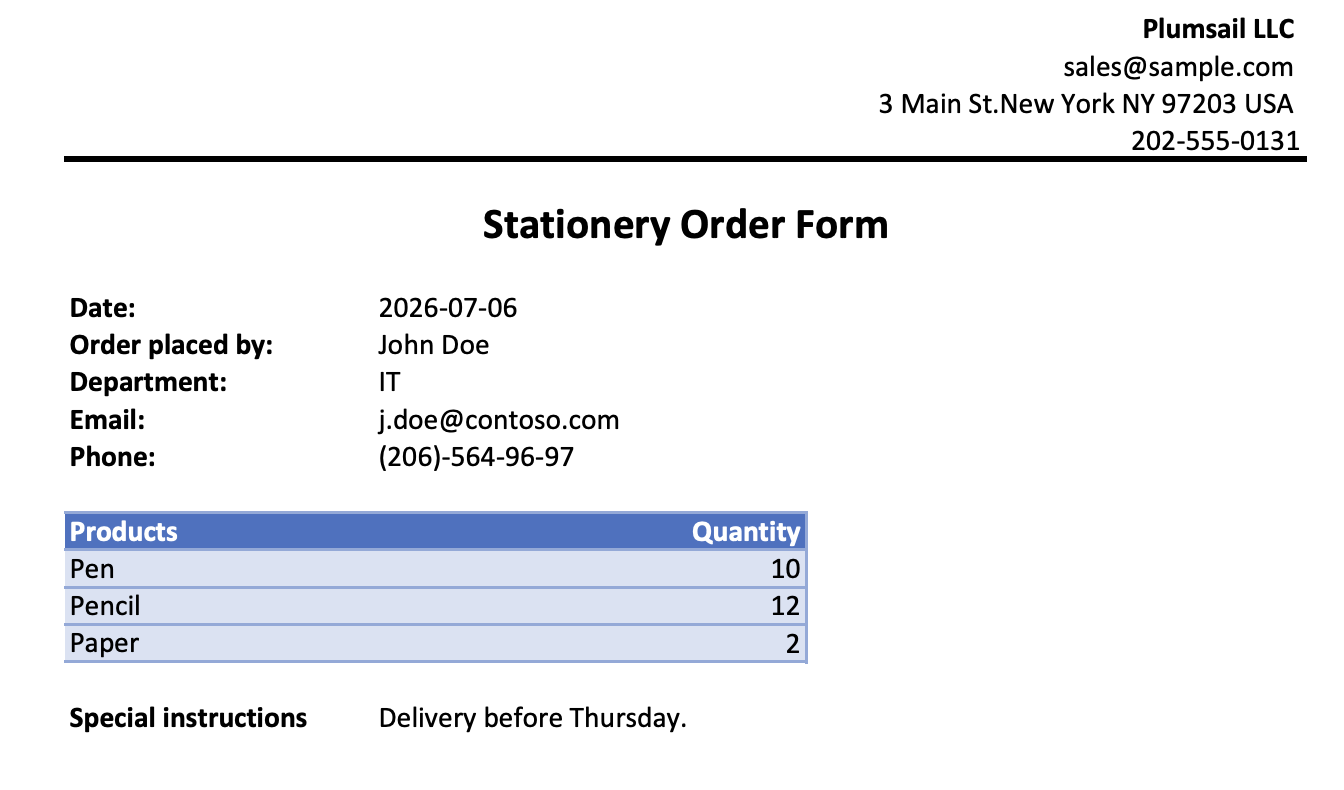
But if you need an advanced logic, it’s possible to work with the result file right in the Flow.
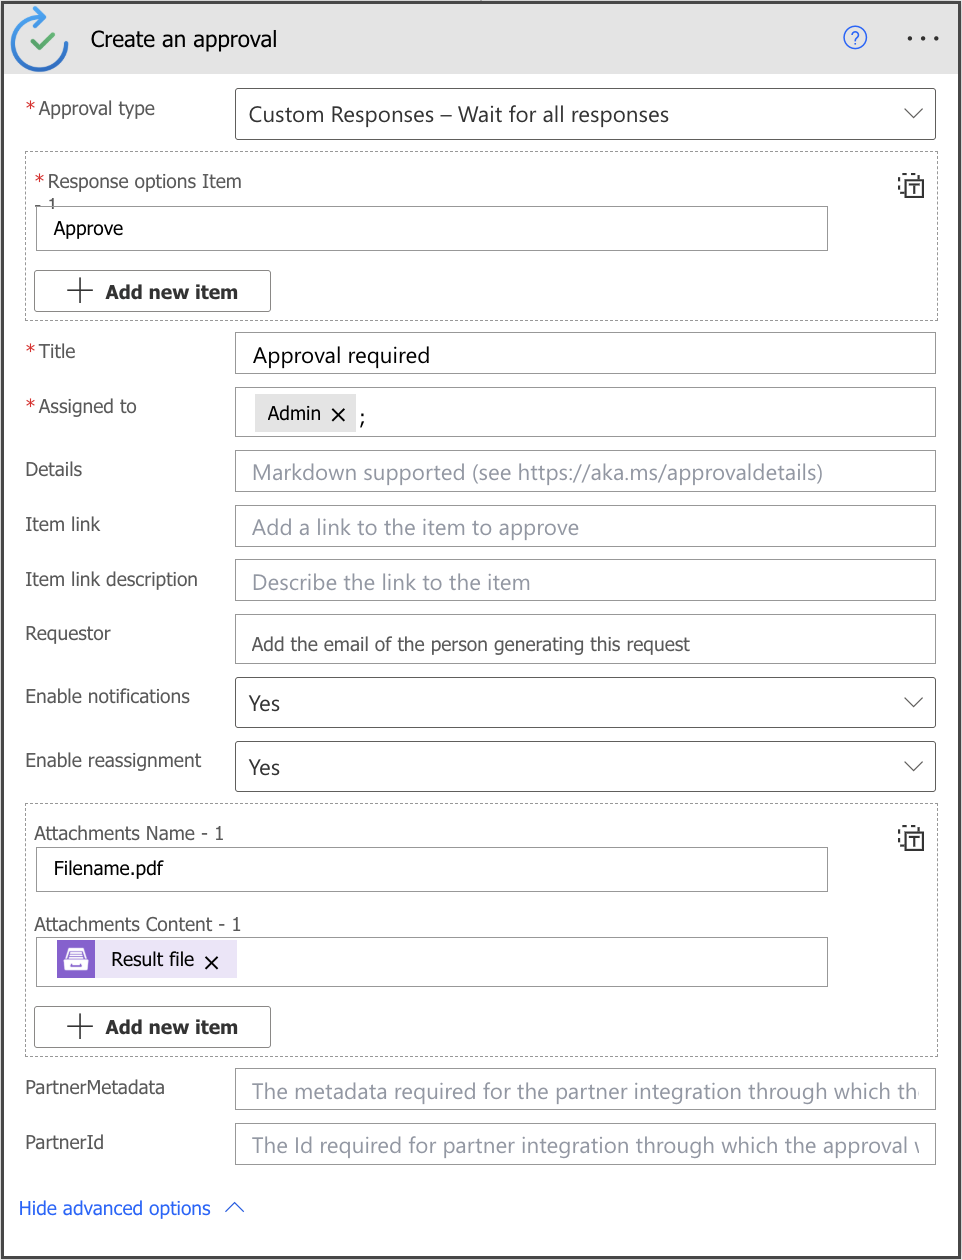
Here is an example of how you can send the ready document for approval.
Add an action Create an approval from the Approvals connector. Select an output of the previous step for an attachment.
Sign up for Plumsail Documents
As you can see, it’s simple to automize the generation of documents on Cognito Forms submission. If you’re new to Plumsail Documents, register an account and follow the steps described in the article to set the process for automatic creation of PDFs from Cognito Forms.