Filter Org Chart by department (version 3.x.x and on-premises)
This article will show you how to filter SharePoint Org Chart by department using filtration rules and root employee. This applies to SharePoint 2019 / SE and SharePoint Online.
At the end of this tutorial, you’ll be able to filter Org Chart to show only subordinates under someone, like this:
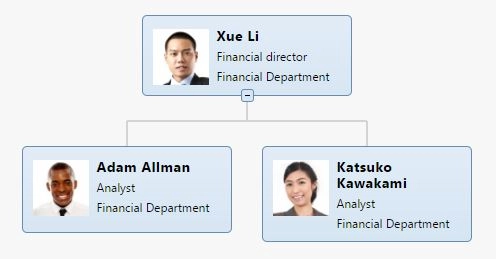
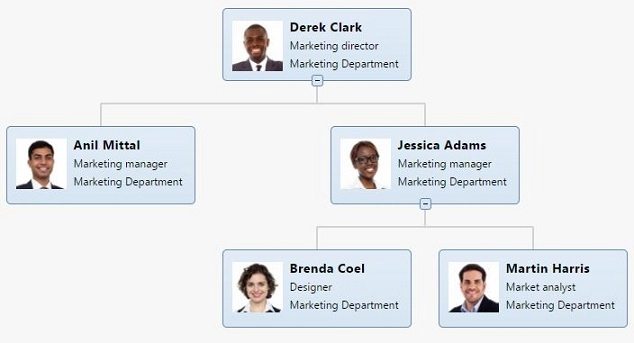
Or even filter your Org Chart to show only employees in a specific department, like this:
First, let’s filter items so the structure will be shown starting from the head of department. You should use the root employee field, inside the Filtration tab in Org Chart settings. After installing and setting up Org Chart properly, go to the page with OrgChart, edit the page and go to OrgChart settings.

Type the name of the root employee and OrgChart automatically find the person.

Note
You can learn more about what is Root employee here.
In this case, “Xue Li” will be the root employee of this tree so his account name will be in the root employee field. Here’s the result:

Similarly, you can set up Org Chart to show only employees in the “Marketing Department” of our company.
Inside of Org Chart settings, go to the Filtration tab. There you’ll find a couple fields you’ll have to fill if you want to filter your chart to specific results.
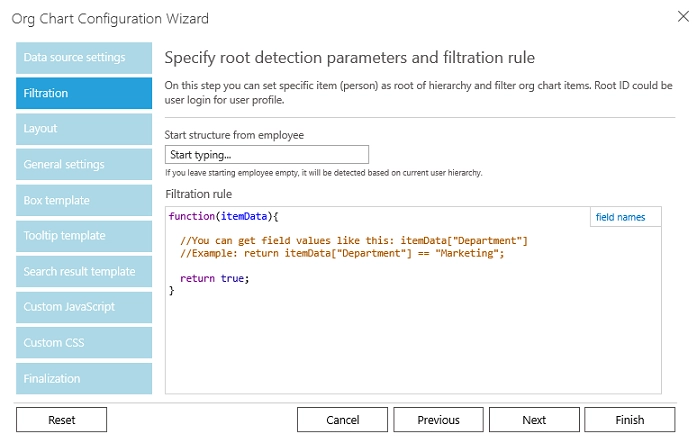
Org Chart uses a simple JavaScript function that will return whether or not an item should be shown. This function is inside of the Filtration rule field as seen above. It will use the object itemData to access and deal with data stored in each item. In fact, each item will have a property that you can find inside of field names popup, just like below.
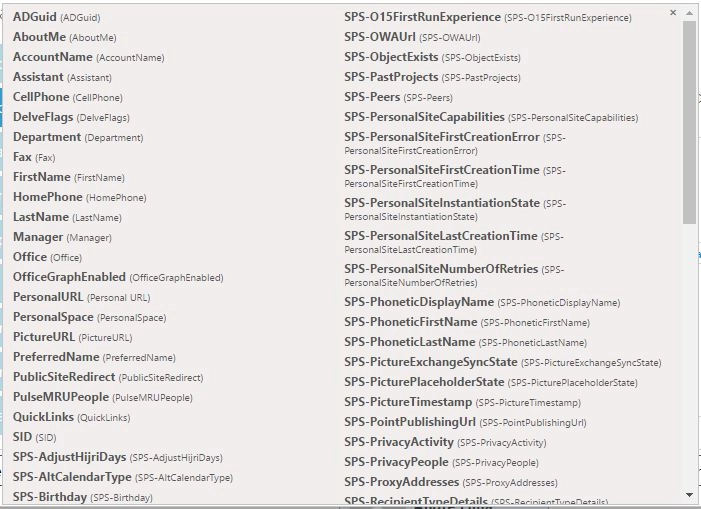
So, you can use all these properties to filter items accordingly. In this article items will be filtered using the Department property of itemData object to filter and show only employees in the “Marketing Department”.
Then, it is needed to write a code that will make the function return only items that have “Marketing Department” inside of their Department property. The relational operator == will be used to compare the property with the value written after it. So the code will look like this:

Then if you click finish and refresh your page, your Org Chart should like something like this:
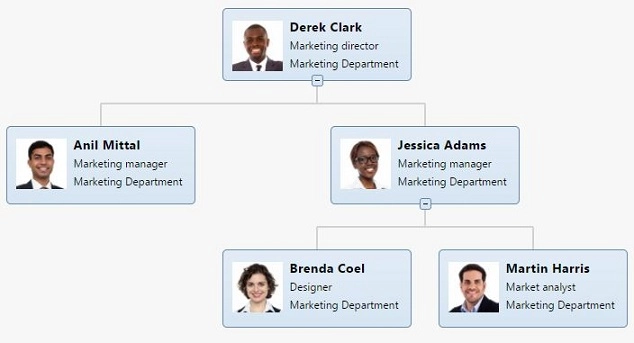
As stated before, you can use other properties and values to filter the items to be shown according to your needs and requirements.
You can also combine conditions using || and && operators. For example:
function(itemData){
  return !(itemData["AccountName"].contains("gmail") || itemData["Department"].contains("Marketing"));
}
That’s it. You’re now able to filter Org Chart according to your needs. This is really useful to maintain a clean chart to everyone which will be easier to visualize the structure and find employees quickly in the tree.