 Note
Note
The Note field is used to collect detailed information, such as feedbacks, requests, questions or open-ended comments.
This page contains a detailed description of the field properties and JavaScript samples which you can use with this field.
Common Properties
Note Properties
Here you can find properties specifically related to Note field.
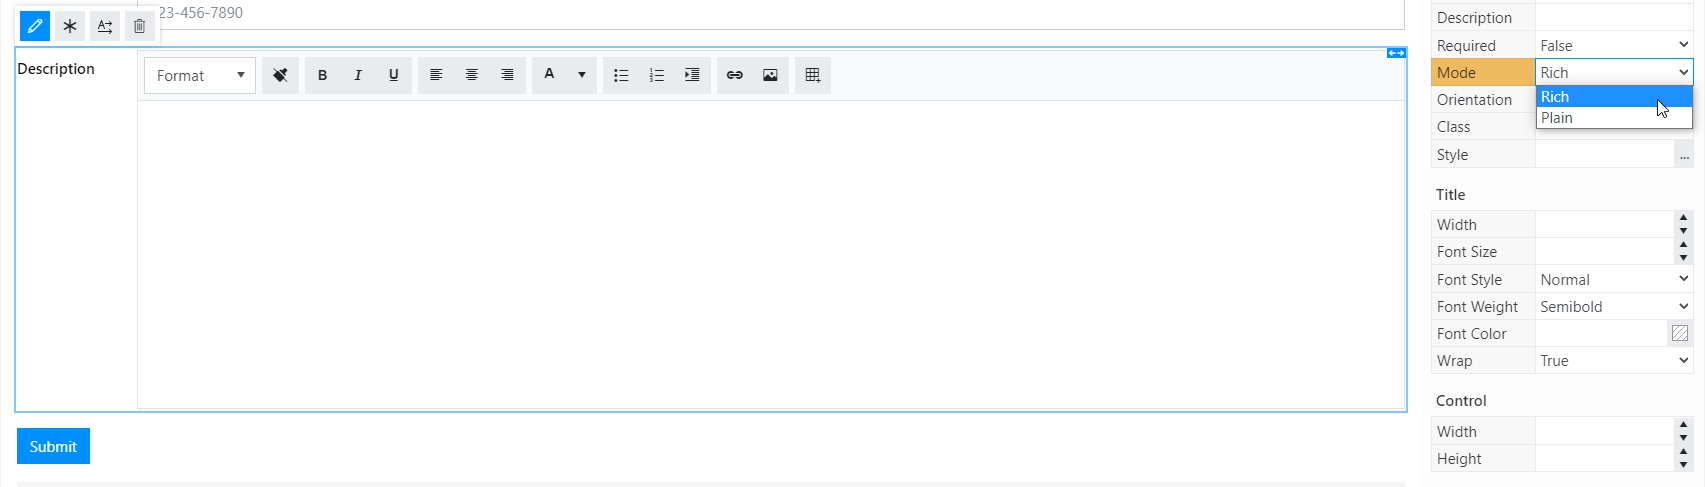
Mode
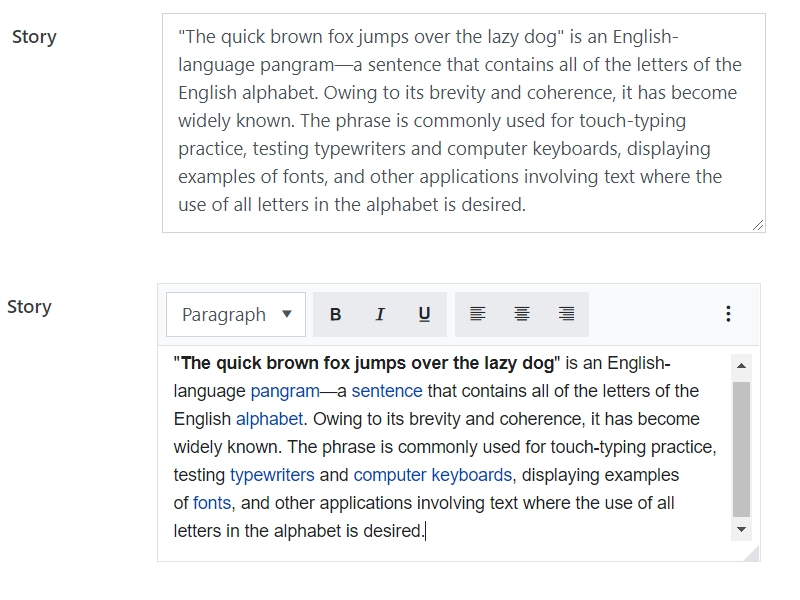
The field works in plain text and rich text modes, this property allows to switch between the two.
In the plain text mode, the field accepts unformatted text:

In the rich text mode, a user can enter formatted text, images, and links:
JavaScript framework
In this section, you can find basic examples of how to work with the field using JavaScript.
For more examples, check out Working with form fields in JavaScript article. If you are not familiar with the JavaScript framework, get started with the JavaScript basics.
Note
The field is only accessible once the form is rendered, so all calls to the field must be inside fd.rendered event:
fd.rendered(() => {
    // make field required
    fd.field('Field1').required = true;
});
Get or set field value
Access and change field value with the following property:
// get field value
let text = fd.field('Field1').value;

// set field value for Plain text, use \n to start new line
fd.field('Field1').value = 'Some text \nNew line of text';

// set field value for Rich text, use HTML formatting
fd.field('Field1').value = 'Tenerife is the largest of the eight <a href="https://en.wikipedia.org/wiki/Canary_Islands" rel="nofollow">Canary Islands</a>.';
Handle change event
Execute a function when a field value has been changed:
fd.field('Field1').$on('change', value => {
    // log changes to browser's console
    console.log('New value: ' + value);
});
Make field required
Make a field required or optional:
// make field required
fd.field('Field1').required = true;

// make field not required
fd.field('Field1').required = false;
Disable field
Make a field non-editable. The field value can still be changed with JavaScript and saved:
// disabled field
fd.field('Field1').disabled = true;

// enable field
fd.field('Field1').disabled = false;
Get HTML element
Access HTML element inside the field in order to modify it, hide it, or do something else.
// access field's control
let htmlElement = fd.field('Field1').$el;

// access field's block, which includes title and control
let htmlParentElement = fd.field('Field1').$parent.$el;
Hide field
Hide a field from a user. The field value can still be accessed and changed with JavaScript:
// hide field
fd.field('Field1').hidden = true;

// show field
fd.field('Field1').hidden = false;
Configure widget
You can access the widget used by the field in Rich text mode. The widget is based on Kendo UI Editor.
// get the widget
fd.field('Field1').widget;

// change the widget's configuration
fd.field('Field1').widgetOptions = {
    placeholder: 'Enter your text here'
};
widgetOptions is the same as widget.setOptions({}) but can be defined before widget initialization.
Customize toolbar
The property contains settings for Kendo UI MultilineTextBox control and is applicable for Rich text mode only.
Customize the collection of tools that are used to interact with the text.
Tools may be switched on by specifying their names.
The available editor commands are:
Basic text formatting:
‘bold’, ‘italic’, ‘underline’, ‘strikethrough’, ‘subscript’, ‘superscript’
Font and color:
‘fontName’, ‘fontSize’, ‘foreColor’, ‘backColor’
Alignment:
‘justifyLeft’, ‘justifyCenter’, ‘justifyRight’, ‘justifyFull’
Lists:
‘insertUnorderedList’, ‘insertOrderedList’, ‘indent’, ‘outdent’
Links, images and files:
‘createLink’, ‘unlink’, ‘insertImage’, ‘insertFile’
Table editing:
‘tableWizard’, ‘createTable’, ‘addColumnLeft’, ‘addColumnRight’, ‘addRowAbove’, ‘addRowBelow’, ‘deleteRow’, ‘deleteColumn’
Structural markup and styles:
‘formatting’, ‘cleanFormatting’
HTML code view:
‘viewHtml’
Print edited field:
‘print’
Custom:
Add a custom button to the tools pane which will run the JavaScript function.
Example:
fd.rendered(() => {
    fd.field('Field1').ready(field => {
        field.widgetOptions = {
            tools: [
                { name: 'italic' },
                { name: 'underline' },
                { name: 'justifyLeft' },
                { name: 'justifyCenter' },
                { name: 'justifyRight' },
                {
                    name: 'custom',
                    tooltip: 'Insert profile template',
                    exec: function(e) {
                        let editor = $(this).data('kendoEditor');
                        editor.exec('inserthtml', {
                            value: '<strong>Name: </strong><br/><strong>Age: </strong><br/><strong>Gender: </strong><br/><strong>Email: </strong><br />'
                        });
                    }
                }
            ]
        }
    });
});