Add validation for fields and controls
You can add validation for web forms to ensure that a user provides necessary and properly formatted information. In this article, we will explore different types of validation available out-of-the-box and with JavaScript.
Require field
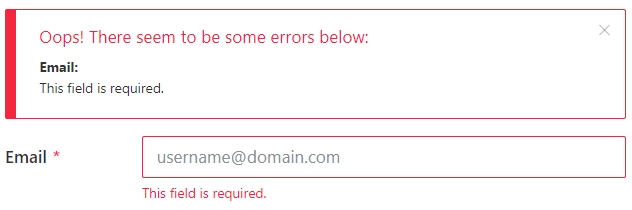
Make a field required to ensure that a user provides all the necessary information. Required fields are marked with an asterisk (*). If the required field is left blank, a user will not be able to submit the form and will get the error message:
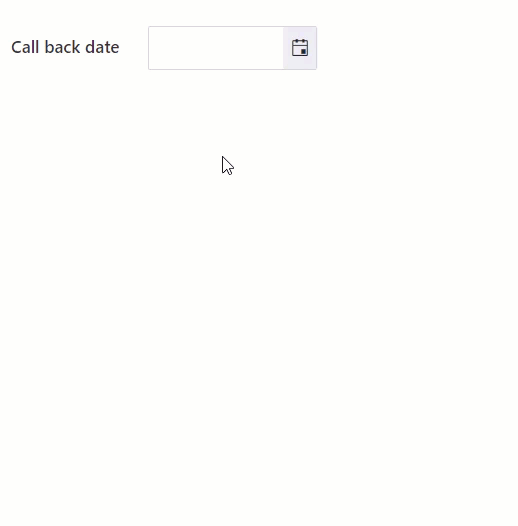
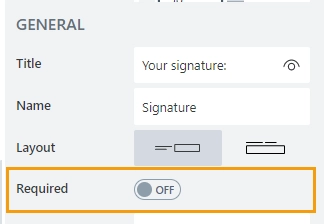
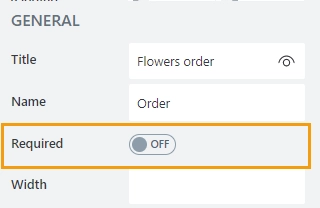
Require field by default
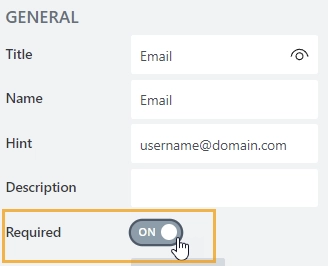
You can make a field required right in the web designer:
Require field dynamically
Another option is to make the field required dynamically using JavaScript code. For instance, to make a field optional/required based on another field value:

Update the field names in the code to make the code work on your form:
fd.rendered(() => {
    fd.field('ContactBy').$on('change', value => {
        // when users select SMS
        if (value === 'SMS') {
            // make Phone field required and
            fd.field('Phone').required = true;
            // Email field is optional
            fd.field('Email').required = false;
        }
        // when users select Email
        if (value === 'Email') {
            // make Phone field optional and
            fd.field('Phone').required = false;
            // Email field required.
            fd.field('Email').required = true;
        }
    });
});
Validate input
Various types of information, such as email addresses, phone numbers, postal addresses, and others, must be provided in the correct format. There are several ways to validate the field value:
configure pattern for the Text field
configure Masked input
add custom field validation using JavaScript
Below we will share which approach is best for a particular situation.
Validate email address
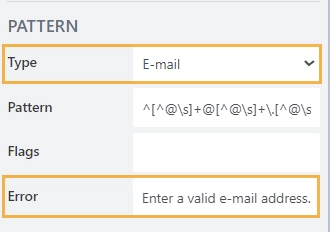
Every email address consists of 3 elements: username, @ symbol, and domain name. The username and domain name can be of any length and contain alphabetic and numeric characters. But the email address must always contain the @ symbol and the dot. Checking the input against the RegExp pattern would be the best choice here.
Add the Text field and select the Email as the pattern type. You can also change the error message which is displayed when the input is invalid.
Thus, users will get an error message if the email address is in an invalid format:

Validate phone number
The format and length of the phone number differ for each region. Depending on your target audience and preferences, you can choose between:
using the predefined RegExp pattern for the Phone number:
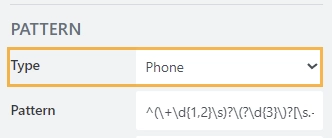
Validate an 11-digit phone number with a + sign and spaces:

creating a custom pattern. For instance, validate a 10-digit phone number with no spaces and special characters:
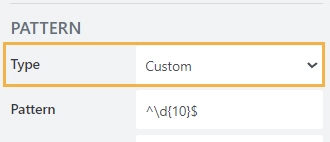
This is the valid phone number format:

adding the Masked input field type. Thus users must follow a certain pattern and won’t be able to enter anything that doesn’t match the mask.


Validate ZIP code
As with a phone number, the ZIP code format differs for each country. Depending on the country, you can configure different RegExp patterns or masks.
Validate the 5-digit ZIP code used in the U.S. using masked input as shown below:

And this is how the mask works for the United States ZIP code:

Or validate postcode used in the United Kingdom with the custom RegExp pattern:
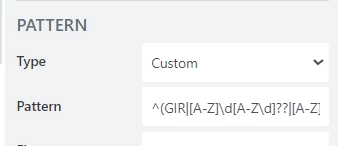
^(GIR|[A-Z]\d[A-Z\d]??|[A-Z]{2}\d[A-Z\d]??)[ ]??(\d[A-Z]{2})$
This is how validation works for the postcodes:

Validate text length
When collecting reviews, comments, and descriptions from users, you might want to limit the length of the text. That way, you can gather more relevant and higher quality data, and it’s also one way to filter out spammers.
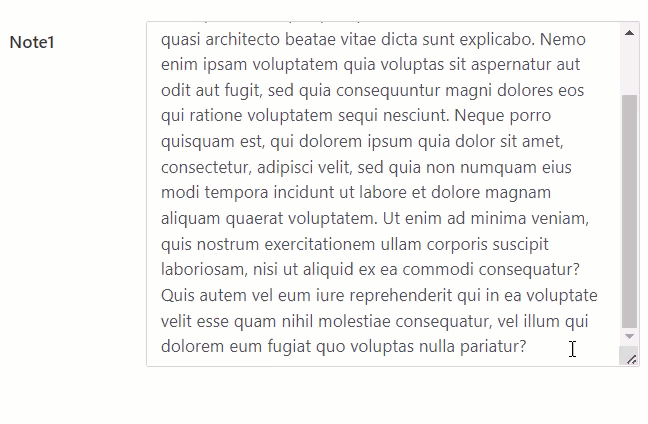
Add a custom validator for the Note field to set a text length limit above 60 characters and below 1000. In the code, you can specify an error message for each condition individually:
fd.rendered(() => {
    fd.field('Note1').addValidator({
        name: 'Text validation',
        error: 'Please enter text',
        validate: function(value) {
            if (value.length < 60) {
                this.error = 'Text is too short. Please use at least 60 characters.';
                return false;
            }
            if (value.length > 1000) {
                this.error = 'Text is too long. Please keep your text under 1000 characters.';
                return false;
            }
            return true;
        }
    });
});
This is how custom validation behaves on a form:
Validate date
In some cases, you might want to limit the range of dates that users can select on the calendar.
You can set the Start and End dates within the field properties. The dates can be:
Fixed: Static dates selected from calendar.
Relative: Dates calculated based on the current date or another date field on the form. For instance, allow users to select a date only in the future within 30 days.
Thereby, users are not able to select or enter a date outside of the date range:
Tip
You can also define date range with JavaScript.
Cross Field Validation
You can add a validation rule that checks another field to validate the current field, for instance, for email confirmation or a date range.
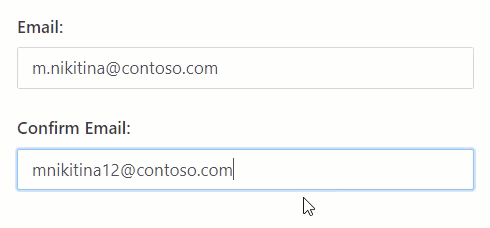
Validate two fields are equal
Make sure that values of two fields are equal:
fd.rendered(() => {
    fd.field('ConfirmEmail').addValidator({
        name: 'Confirm email',
        error: 'E-mail addresses do not match',
        validate: value => {
            if (fd.field('Email').value !== value) {
                return false;
            }
            return true;
        }
    });
});
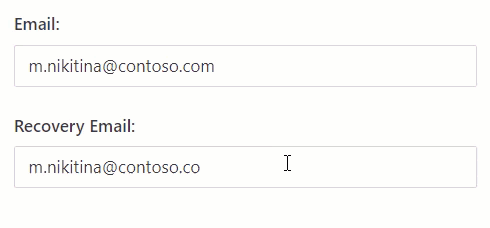
Validate two fields are not equal
Make sure that values of two fields are not equal:
fd.rendered(() => {
    fd.field('RecoveryEmail').addValidator({
        name: 'Recovery email',
        error: 'The recovery email must be different from the main email',
        validate: value => {
            if (fd.field('Email').value === value) {
                return false;
            }
            return true;
        }
    });
});
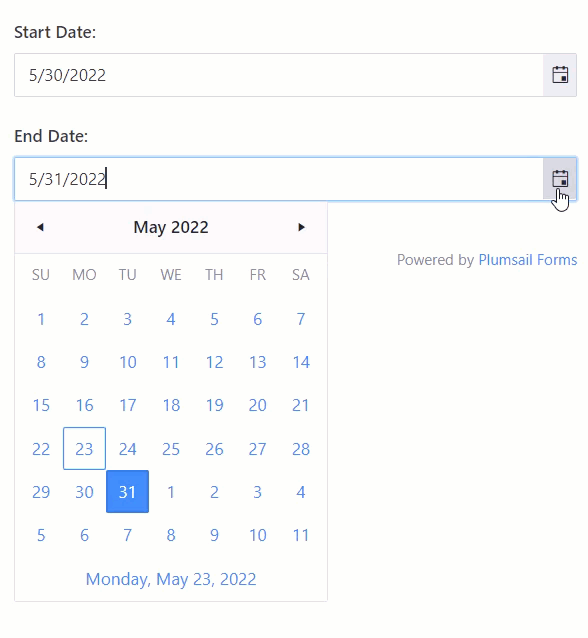
Validate date range
You can add validation to date fields to ensure that the date range is valid:
fd.rendered(() => {
    // add validation to the start date
    fd.field('StartDate').addValidator({
        name: 'Start Date validation',
        error: 'Enter valid date',
        validate: function(value) {
            let startDate = value;
            let endDate = fd.field('EndDate').value;

            if (endDate && startDate >= endDate) {
                this.error = 'The start date must be before the ' + endDate;
                return false;
            }
            return true;
        }
    });
    // add validation to the end date
    fd.field('EndDate').addValidator({
        name: 'End Date validation',
        error: 'Enter valid date',
        validate: function(value) {
            let startDate = fd.field('StartDate').value;
            let endDate = value;

            if (startDate && startDate >= endDate) {
                this.error = 'The end date must be after the ' + startDate;
                return false;
            }
            return true;
        }
    });
});
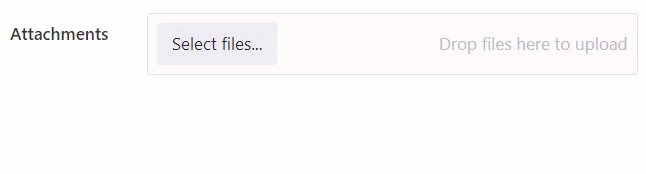
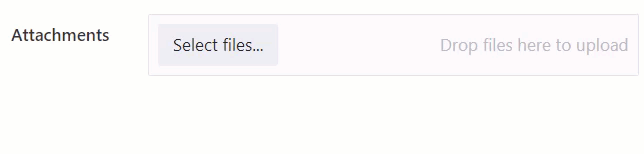
Validate attachments
You can configure the verification of files uploaded by users using the Attachments field properties and custom code.
Validate file size
You can define the maximum possible file size in Kb that users can upload in the Max Size property:

If the file size exceeds the allowed value, a user will not be able to upload the file and will get an error message:
Validate file type
You can limit the file types that users are permitted to upload. List the allowed file extensions in the Allowed Ext property:

If the file type does not match any on the list, the user will not be able to upload the file and will get an error message:
Validate count of files
You can also require users to upload a certain number of files. To do this, you need to add a custom validation for the field:
fd.rendered(() => {
    fd.field('Attachments').addValidator({
        name: 'Attachments validator',
        error: 'Do not attach more than 3 files',
        validate: value => {
            if (value.length > 3) {
                return false;
            }
            return true;
        }
    });
});
Validate controls
You can configure validation for controls too. Validate the content of the control, make it mandatory, etc.
Require Ink Sketch control
You can make the Ink Sketch control required right in the web designer:
Require DataTable control
You can make the DataTable control required right in the web designer:
Validate DataTable
You can add a validation for a DataTable to verify the control’s data.
For instance, to make sure that a user has not added more than 10 records to the DataTable:
fd.control('Control1').addValidator({
    name: 'Control1 validator',
    error: 'No more than 10 records are allowed',
    validate: value => {
        // change this number to allow more/less records
        if (value.length > 10) {
            return false;
        }

        return true;
    }
});
Note
You can adjust the number in the code to allow more records or add other conditions for a more complex validation.
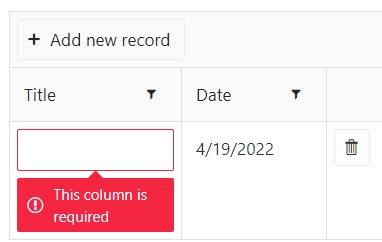
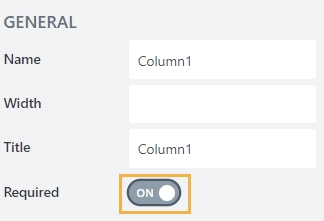
Require DataTable column
You can make the DataTable column mandatory directly in the designer. Select the column and set the Required property to true:
Thus, if the column is left blank, the user will get an error and will not be able to submit the form: