Connect Plumsail Web Form to SharePoint Online
SharePoint Online is a platform for creating and sharing documents in a collaborative environment. Plumsail web forms can connect directly to your SharePoint tenant to collect submissions from your company’s staff and anonymous users, with or without authentication, either embedded in your site or shared via a link.
Note
If you’re looking to customize forms inside your SharePoint tenant, use Plumsail Forms for SharePoint instead.
Connect form to SharePoint Online
In the form web editor, go to Settings → Connections and create a connection from your web form to your SharePoint Online list or library:

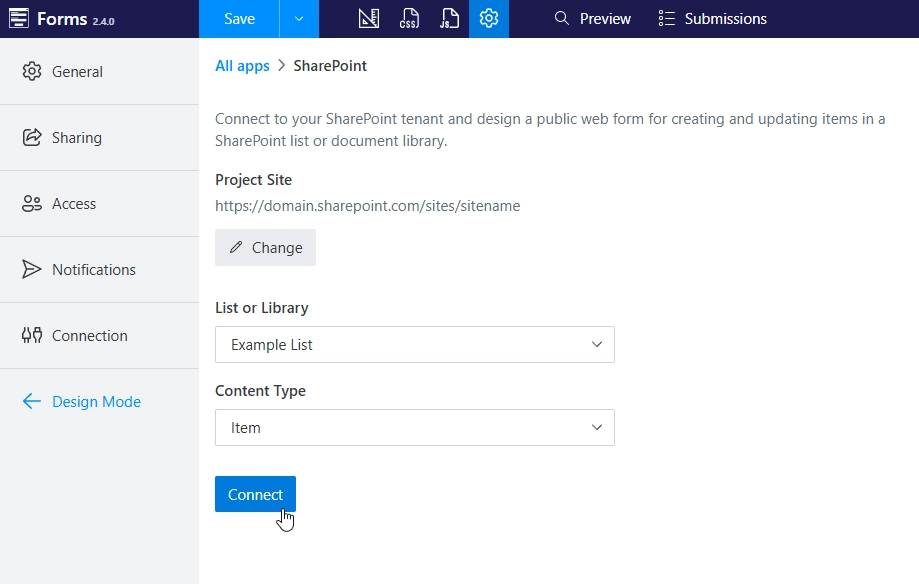
Select the right site for your form and connect to the list or library you want to populate:
Note
You need to grant access to your SharePoint tenant in order to connect to its list or library.
Once connected to a SharePoint list or library, you get access to its columns as SharePoint fields—add them to the form:
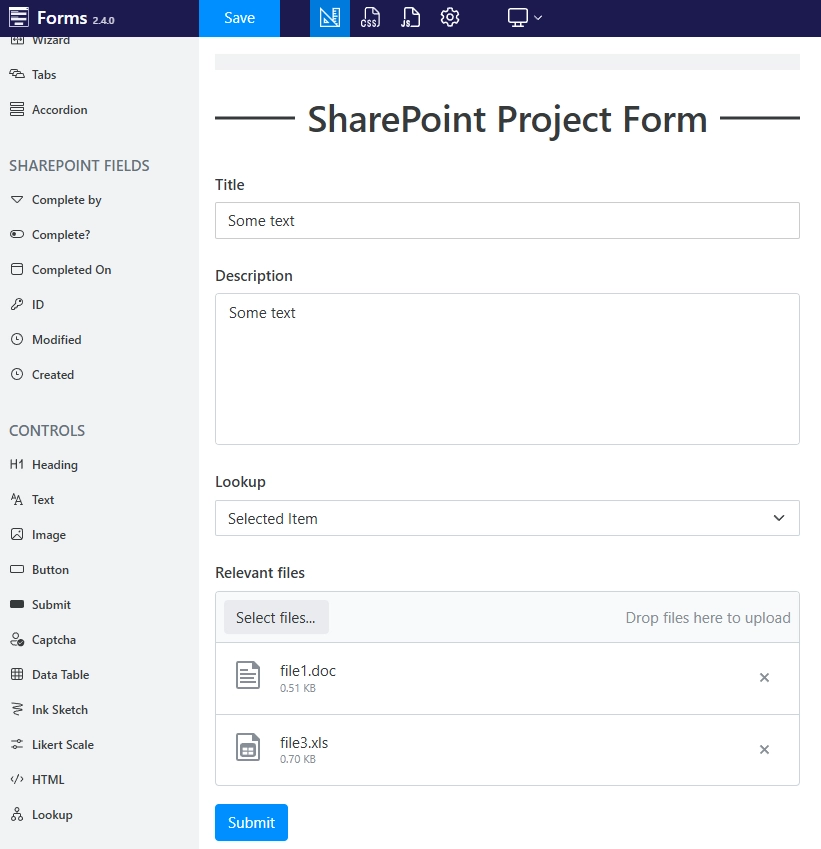
When the form is completed, you can share the form with others to fill out. Once users fill the fields and submit the form, data automatically populates in SharePoint.
Edit items in SharePoint
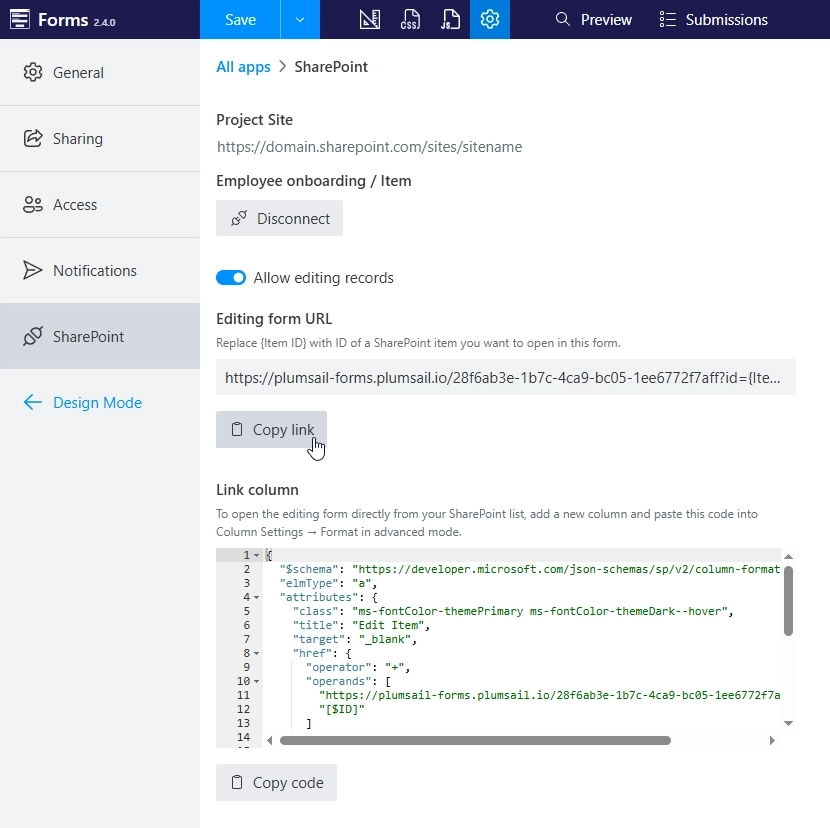
Plumsail Forms supports editing existing items and files in SharePoint:
Toggle the Allow editing records option in your form’s SharePoint settings:
Edit SharePoint items or files with your Plumsail form:
Share a form URL for a specific item or file: Copy the URL template with the Copy link button and replace
{Item ID}with the actual ID of the item or file.Add form links to your list or library: Click the Copy code button, create a new SharePoint column, and paste the code into the column formatter.
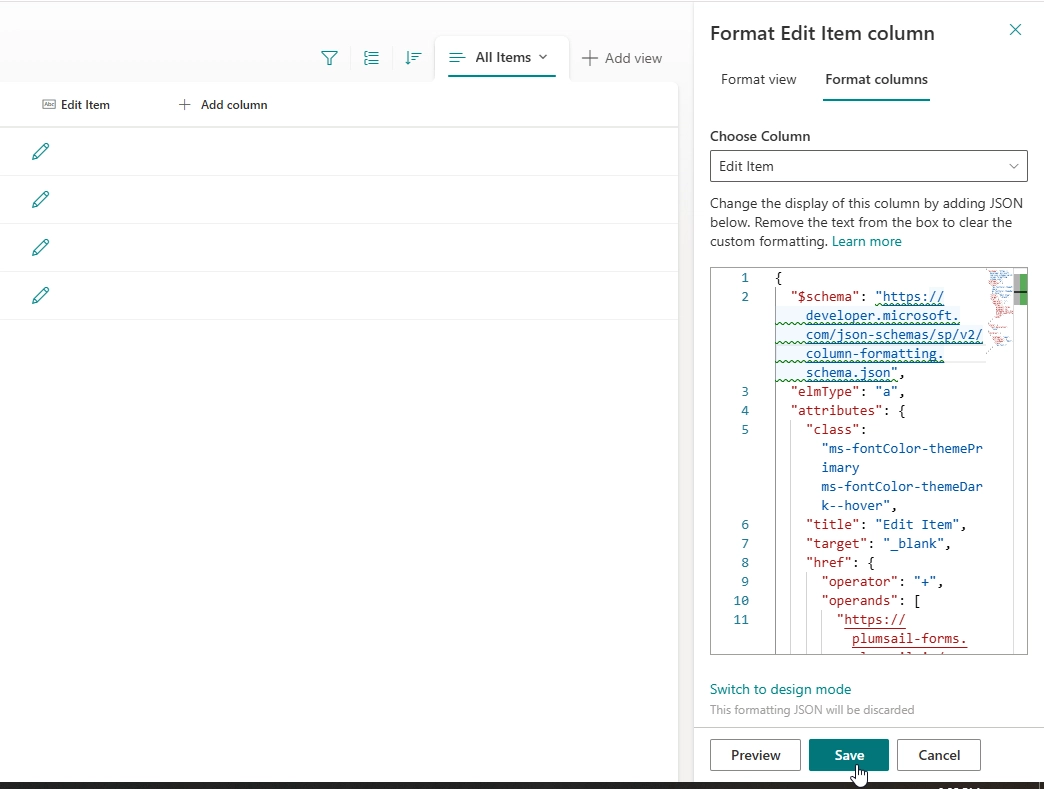
The form loads all the data and saves it back to SharePoint on submit.
Note
Each edit counts as a separate submit toward your monthly limit and adds a new submission to your Plumsail Account. Disable submission storage in form settings to avoid duplicate records.
Manage submissions of a connected form
View additional information about your SharePoint integration if submissions are saved to your Plumsail account.
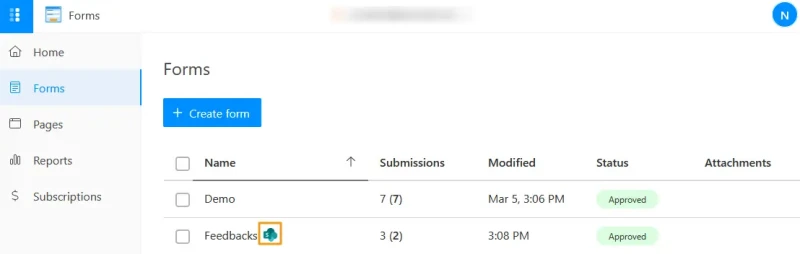
In the Forms overview, all forms connected to SharePoint have a matching icon.
See which submissions your SharePoint list successfully received in the submissions view.
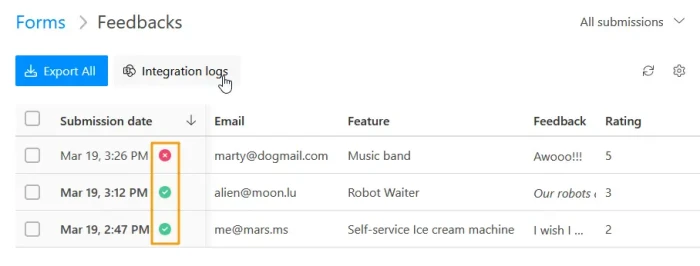
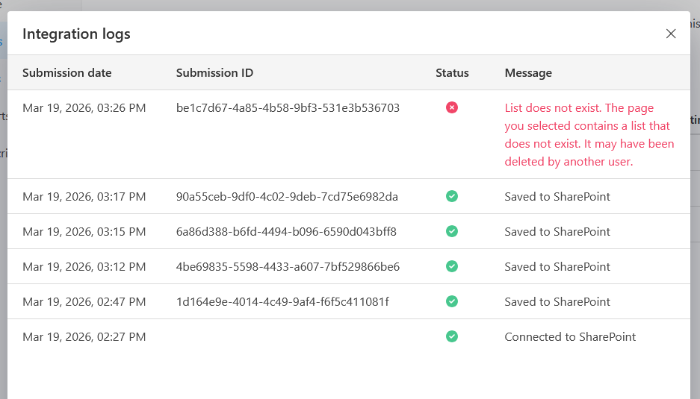
Use Integration logs to see more details about events related to SharePoint integration.