Automatically generate contracts from Kommo lead data in Zapier
Throughout this article, you will learn how to create PDF documents from a DOCX template based on the status of the lead in Kommo (formerly amoCRM) using Processes and Zapier. This approach is suitable for creating customized documents such as agreements, proposals, invoices from Kommo leads.
Processes are a Plumsail Documents feature with an intuitive interface for creating documents from templates.
Kommo is a cloud-based customer relationship management software designed to streamline the sales process and organize the marketing team’s tasks.
We’ll connect Processes and Kommo in Zapier to automatically collect data from an Kommo lead, apply the data to our template, and generate a PDF document.
Note
This example requires a ‘Starter’ or higher subscription plan in Zapier.
Configure the lead
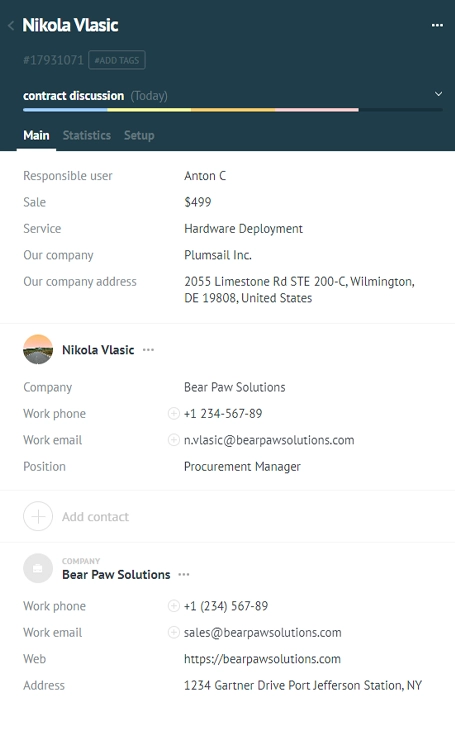
We recommend filling out the data for your lead using custom fields, as there may not be enough information in the default lead setup to fill out your document.
We created several custom fields in addition to the default ones. This is what our lead looks like:
Configure the Process
Once our lead is configured, we will also need to create a Process, which we will later connect to Zapier.
Use a pre-built template
Plumsail Documents offers dozens of templates to generate documents from. For this example, we’ll use the service contract template.
We will need to create a new process. First, register or log in to your Plumsail account. Once you’re in, go to the Processes section in your Plumsail account, click ‘Add process’, and select ‘Start from template’:
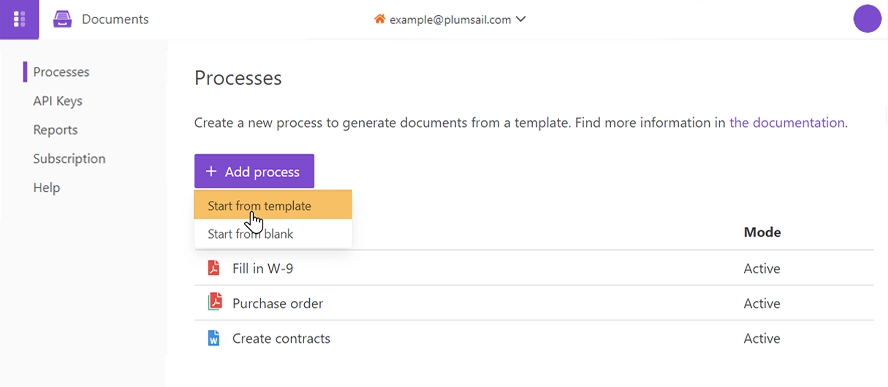
Alternatively, you can start with a blank process and upload your own document. As you proceed further with the article, you’ll have a chance to edit it and transform it into a reusable template by adding placeholders, also known as tokens.
If you decide to create a process from a template as shown in the picture, you’ll be redirected to the library of document templates. We will select the service contract template for our scenario:
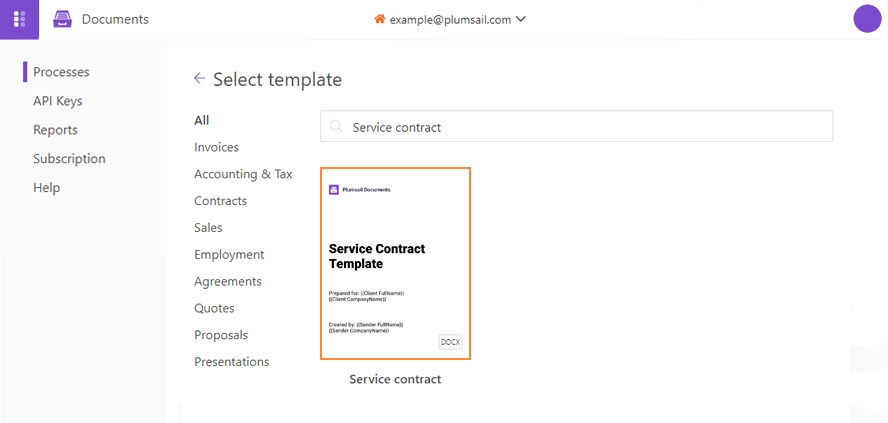
Name the process and click ‘Next’ to proceed. Then you’ll jump to the ‘Configure template’ step.
Configure the template
There are two internal steps that will guide you through the configuration:
Editor
Settings
In the Editor mode, you can adjust the document template to your needs. Everything in the curly brackets will be replaced with Kommo data dynamically. You can add more placeholders. It’s quite simple to use them and they support even some complex logic with tables, charts, conditions, and more. Learn how Plumsail Documents Word DOCX templates work here.
The service contract template requires a few tweaks before you can use it. Make sure you replace the logo with yours and read through the contents to ensure it is suitable for your workflow.
Click ‘Edit online’ to change the logo and make any other changes you desire:

Click Save & Next to go to the Settings substep.
Here you’ll see the following parameters:
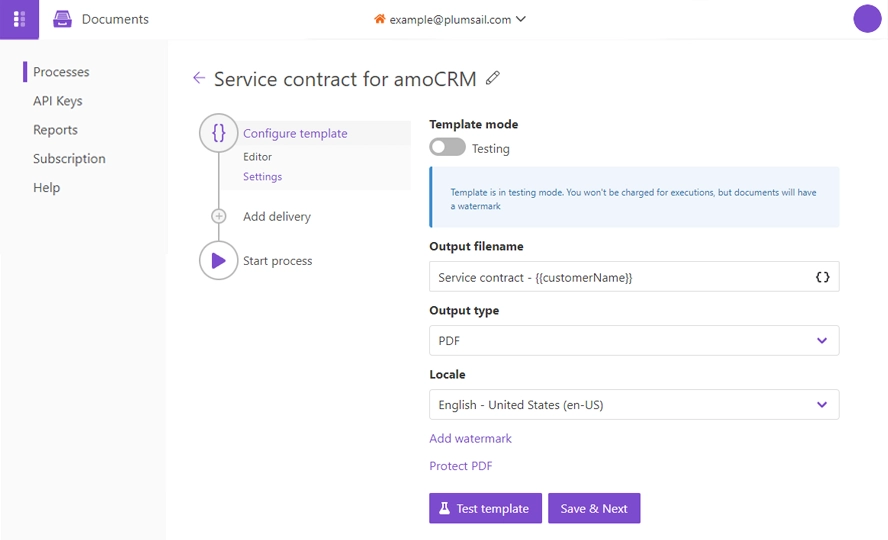
Template mode
It is Testing by default. It means you won’t be charged for this process runs, but result documents will have a Plumsail watermark. Change it to Active to remove the watermark.
Output filename
Use tokens to make it personalized. They work the same way as in the template. For instance, we’ll use the {{customerName}} token to define the output file name. Once the document is generated, we’ll receive a sales invoice with a name Service contract - Bear Paw Solutions (depending on the value of the token).
Output type
By default, it is the same as your template’s format. In this particular case, it’s DOCX. We’re changing it to PDF to generate PDF invoices from the Word template.
Hint
You can protect your final PDF document with a watermark, by setting a password, or disabling some actions.
Test template
Once you’ve customized all the settings, you can test the template to see the result.
When everything is done here, click on Save & Next to set up deliveries.
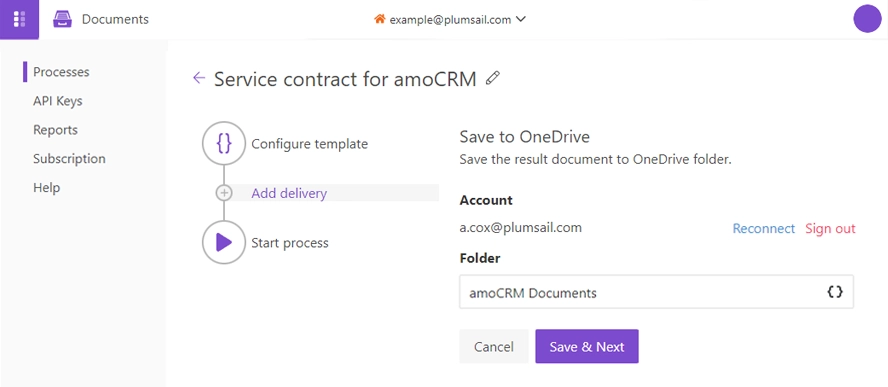
Delivery
As a matter of demonstration, we will deliver the result document to OneDrive. However, you can choose another delivery method.
You need to connect to your OneDrive from the Plumsail account. After that, select the folder where the output document will be saved.
You can configure as many deliveries as you need.
Start the Process
We will start our Process from Zapier.
Create a Zap
Zap is an automated connection between web services in Zapier. Below is a step-by-step explanation of how to create it from scratch.
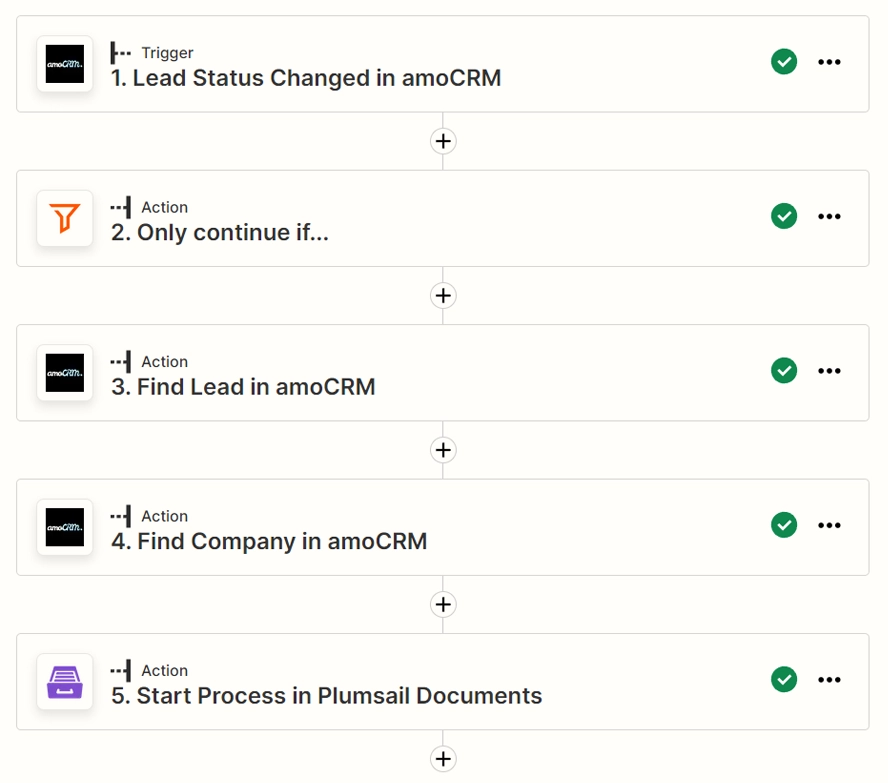
This is how our Zap looks:
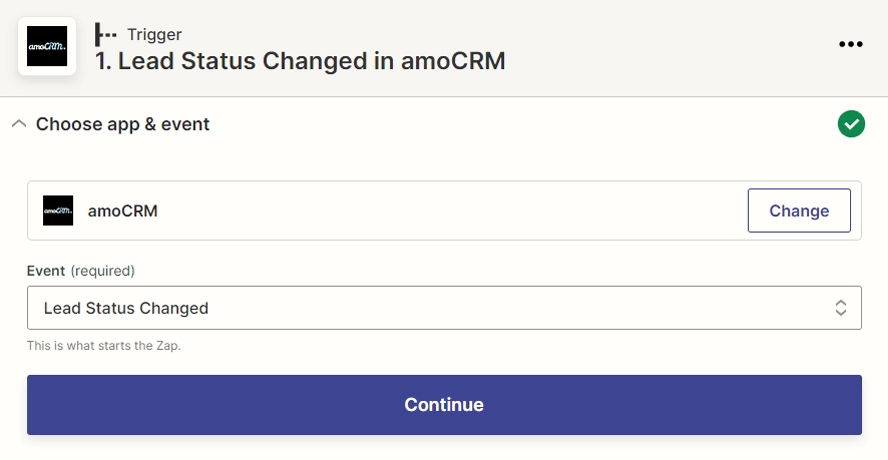
Lead Status Changed in Kommo
We need our Zap to be triggered every time a lead moves through the sales funnel. Search for Kommo in Zapier and set the ‘Event’ to Lead Status Changed:
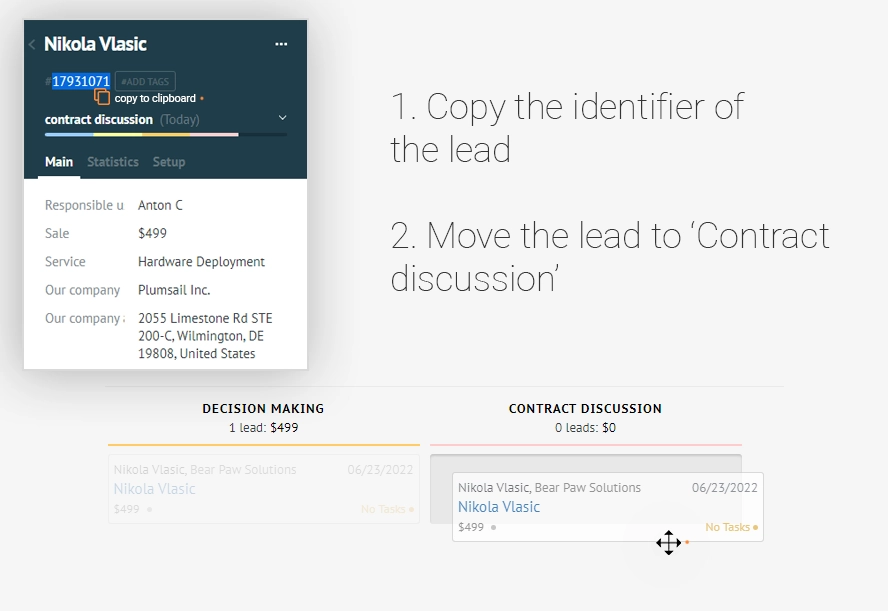
As the status identifiers are unique for each account, we will need to know which identifier belongs to what status. To do this, copy the identifier of the lead and move the lead to Contract discussion:
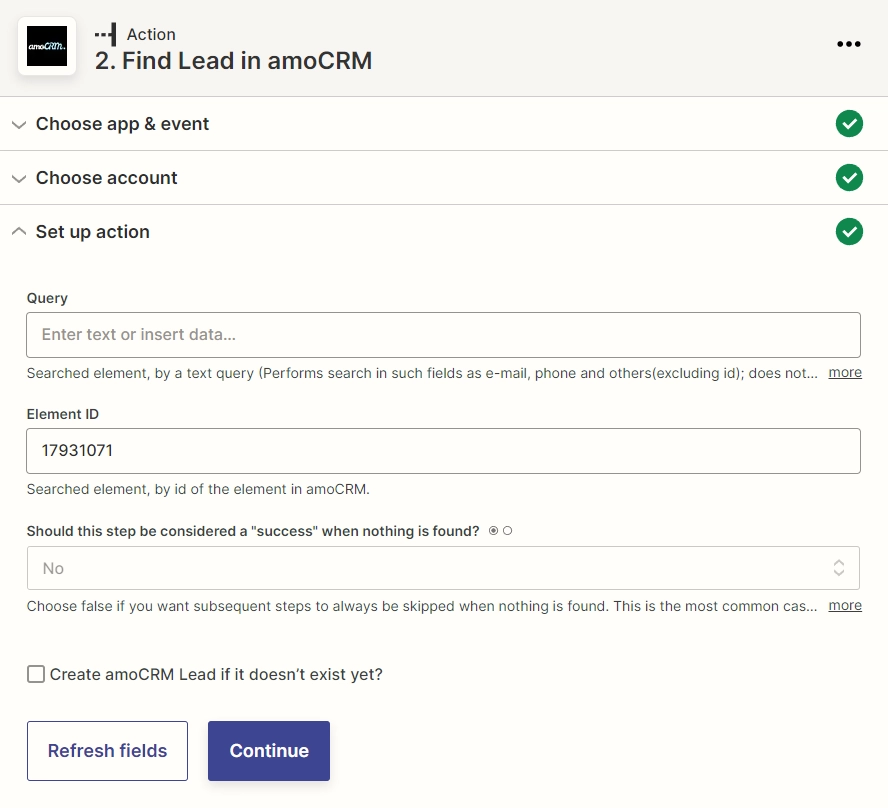
Set up action
Once you got the lead identifier and moved the lead to the status you want to generate documents for, proceed to ‘Set up action’ and paste the copied status into the ‘Element ID’ field:
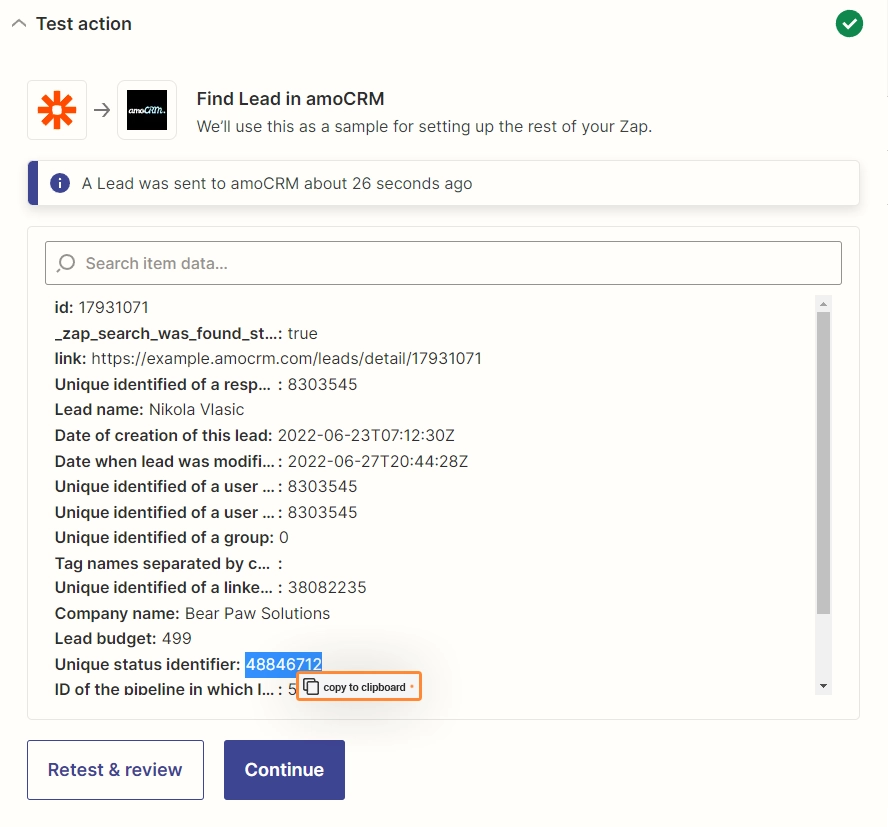
Great! Now let’s find out the status ID by clicking ‘Continue’ and selecting ‘Test & Review’. Find the ‘Unique status identifier’ line in the output data and copy its value:
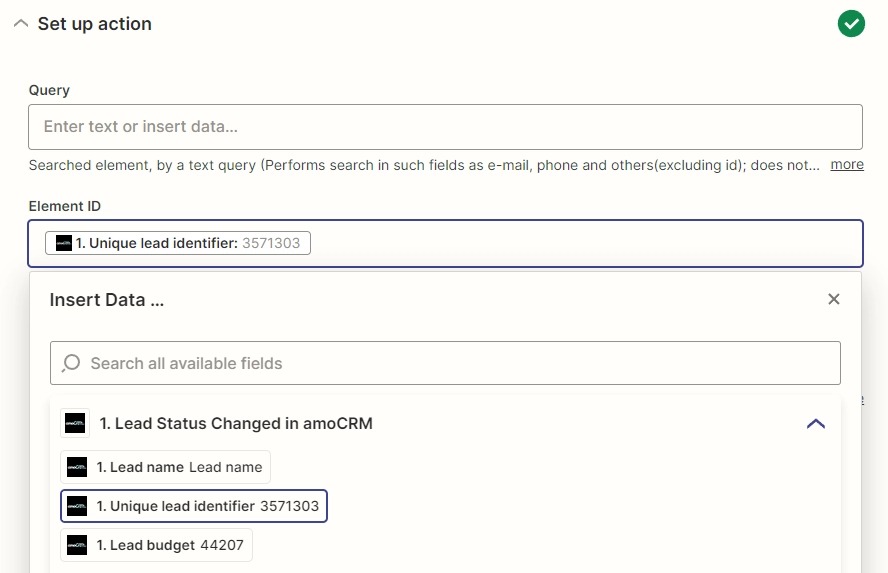
Next, go back to the ‘Set up action’ step and replace the ‘Element ID’ value with the Unique lead identifier from the trigger:
Filter
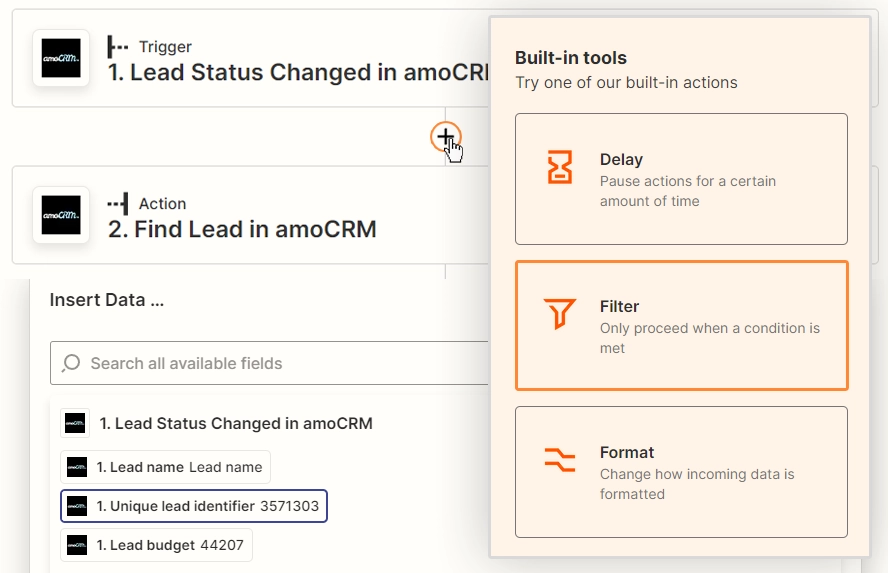
Now that we have the status ID, we can add filter out the unnecessary Zap runs. We will use the built-in Filter action in Zapier.
Click on the button with a plus icon above the ‘Find lead’ action and select ‘Filter’ in the Built-in tools section:
Filter setup & testing
Set the first value to Unique status identifier, the second to (Text) Exactly matches, and paste the copied status identifier into the third:

Good job! Click ‘Continue’ and proceed to the next step.
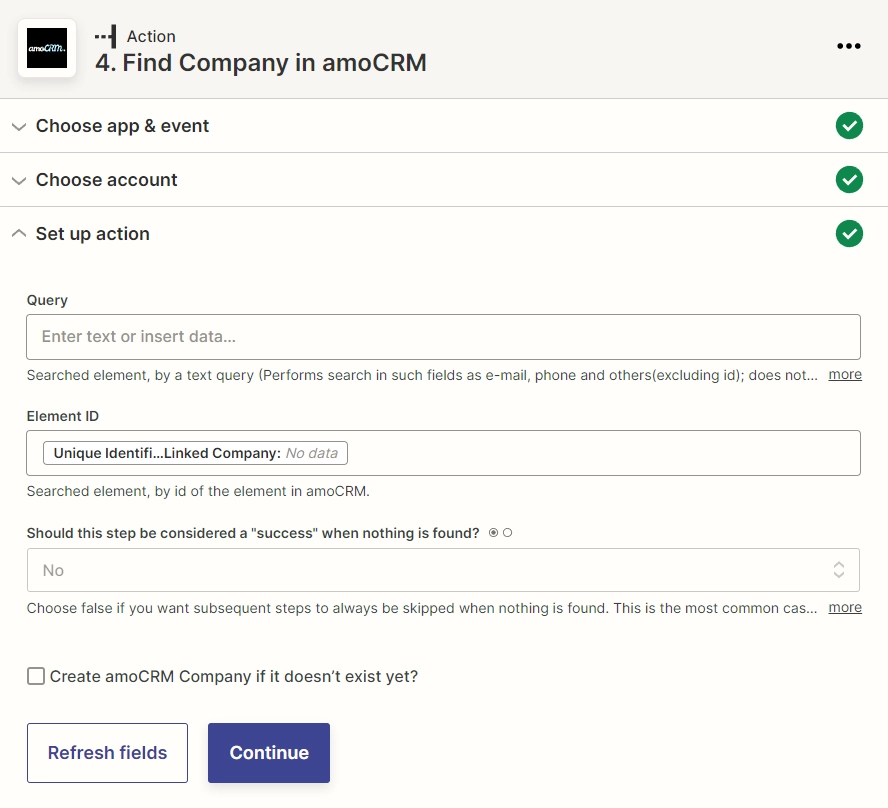
Find company in Kommo
We will use this action to obtain information about our client’s company. Later, we will use it in our document. Add the Find company action right after the Find lead action.
Going to the ‘Set up action’ step, insert Unique identifier of a linked company into the ‘Element ID’ field:
Start Process in Plumsail Documents
Once we have the data we need for document generation, search for Plumsail Documents and set the event to ‘Start Process’:

Likewise, if this is your first Zap with Plumsail Documents, sign in to your Plumsail Account from Zapier.
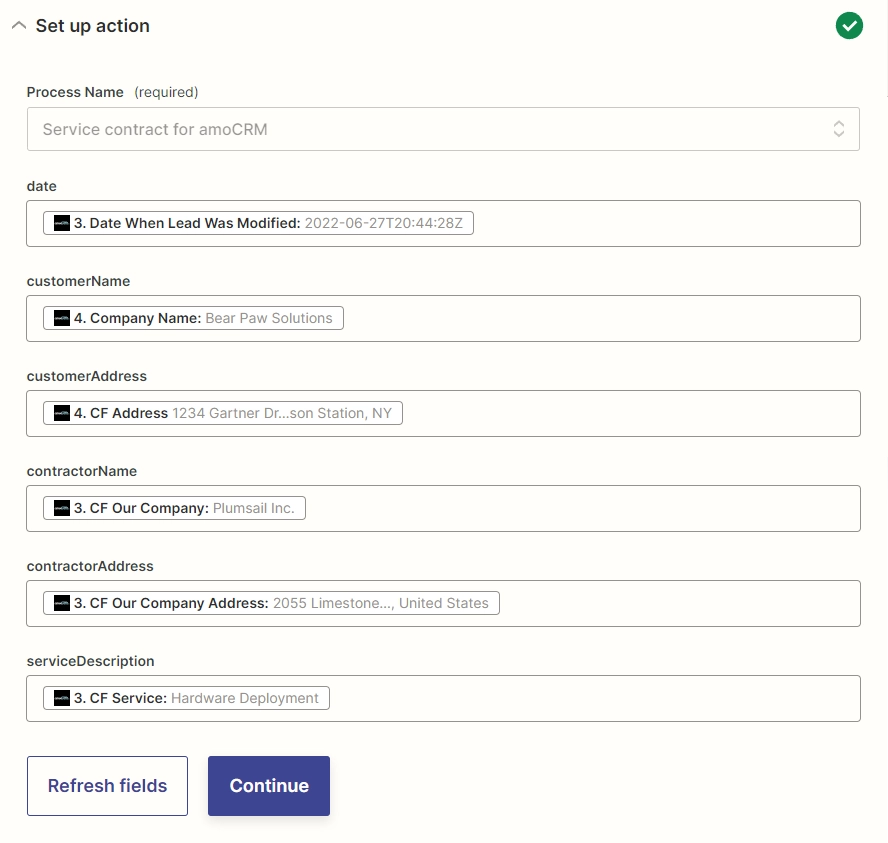
Set up action
Select the process you want to start with this Zap from the dropdown. You will see fields to fill out — they have the same names as the tokens from the template.
Use the results of the previous actions to fill them out:
Our Zap is ready 🎉 Every time a lead goes to ‘Contract discussion’ status, a contract will automatically be generated, saving you a ton of time.
You can use the same approach for each status using the built-in Path action in Zapier.
Conclusion
Though it may be quite tricky to grasp the way Kommo interacts with Zapier, it will save you a lot of time and optimize the productivity of your sales team in the long run.
If you’re new to Plumsail Documents, sign up to get a free 30-day trial.