General settings (version 3.x.x and on-premises)
This step of the configuration wizard allows you to:
This is how it looks:
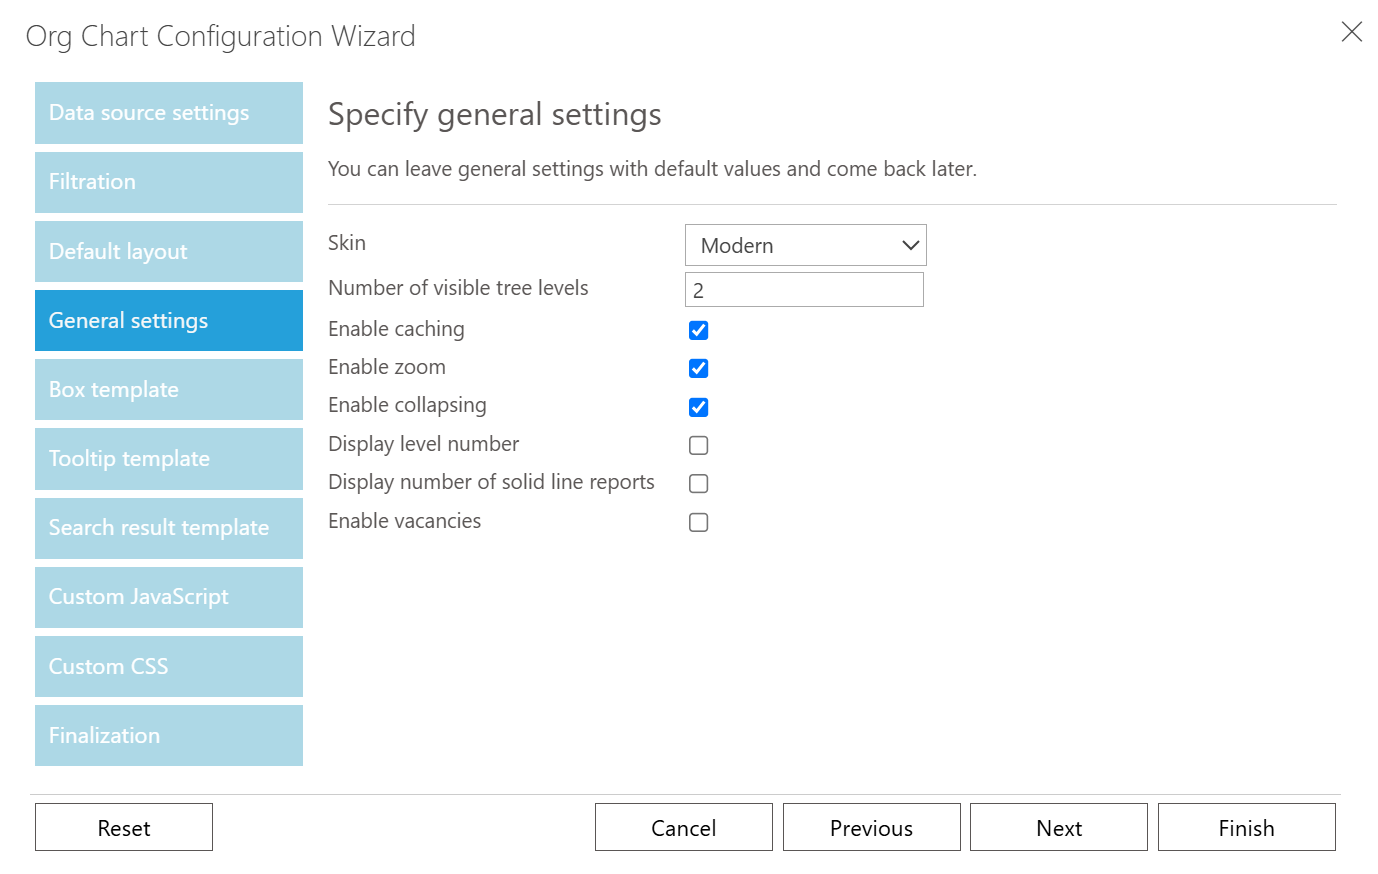
Choose predefined skin
To change the skin of the Organization Chart choose it from combo box. There are two skins adopted for mobile devices BlackMetroTouch and MetroTouch, they have large expand buttons to simplify touch navigation, all skins support dragging of the visible area with touch.
List of available skins:
Modern
Forest
Office
Sunset
Black
Glow
Office Black
Vista
BlackMetroTouch
Hay
Office Blue
Web 2.0
Light Gray
Metro
Outlook
Web Blue
Silver
MetroTouch
Simple
Windows 7
Silk
Set number of visible tree levels
You can also control a number of levels visible by default. Use input Number of visible tree levels to change it. You may expand all hierarchy tree by default, just set a value large enough in the input, for example 1000.
Note
this can affect performance of Org Chart on large structures.
Enable / disable zoom
You can use mouse wheel to zoom in and zoom out in the Org Chart web part. To disable/enable this functionality use Enable zoom checkbook.
Display employee level number
Also, you can display the level number in your hierarchy tree for each user by checking Display level number.
Display number of solid line reports
You can enable the feature for displaying the number of solid line reports for all users in your structure by checking Display number of solid line reports.
Configure vacancies
Note
If vacancies don’t appear in your web part try to clear cache. Also, vacancies are not supported in SharePoint 2010 version.
Vacancies are stored in a separate SharePoint list. A list will be created automatically at specified Vacancies list URL. Once you enabled vacancies Manage vacancies menu item will appear:
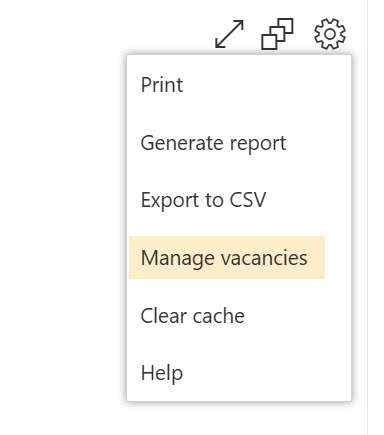
This menu item redirects a user to vacancies list. To create new vacancies, create new list item and specify Manager. It can be account name for User Profiles data source and list item ID for SharePoint list data source:

Note
Go to the next step of the configuration wizard – Box template.