Automatically generate receipts from FreshBooks payments in Zapier
FreshBooks is a cloud-based accounting software that helps you manage your invoices and expenses effectively.
Suppose you’d like to automatically send personalized receipts to your customers once they pay their invoices. We’ll connect Plumsail Documents and FreshBooks in Zapier to automatically export data from FreshBooks, apply the data to our receipt template, and generate a PDF document.
As a result of this article, you’ll learn how to automatically create receipts, purchase orders, invoices, and other documents based on FreshBooks data.
Configure the Process
Our first step will be to create and configure a Plumsail Documents process. Processes are a Plumsail Documents feature with an intuitive interface for creating documents from templates.
Use a pre-built template
Plumsail Documents offers dozens of templates to generate documents from. For our scenario, we’ll use the payment receipt template.
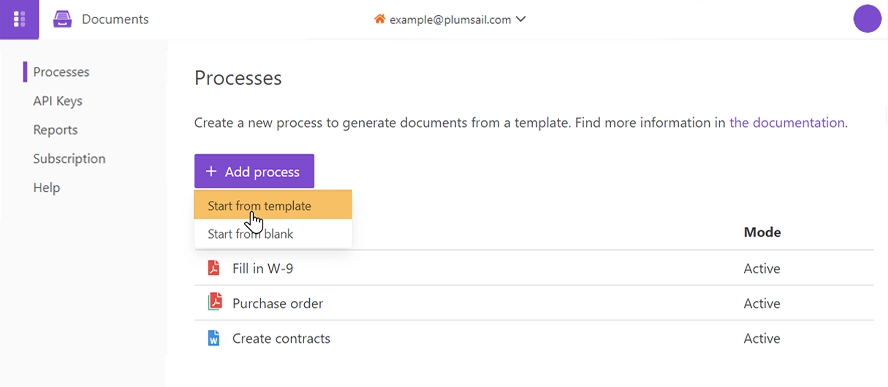
We will need to create a new process. First, register or log in to your Plumsail account. Once you’re in, go to the Processes section in your Plumsail account, click ‘Add process’, and select ‘Start from template’:
Alternatively, you can start with a blank process and upload your own document. As you proceed further with the article, you’ll have a chance to edit it and transform it into a reusable template by adding placeholders, also known as tokens.
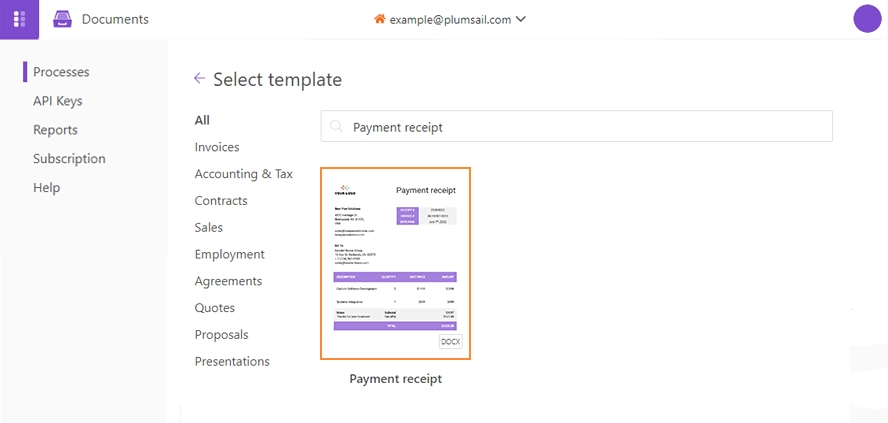
If you decide to create a process from a template as shown in the picture, you’ll be redirected to the library of document templates. We will select the payment receipt template for our scenario:
Name the process and click ‘Next’ to proceed. Then you’ll jump to the ‘Configure template’ step.
Configure the template
There are two internal steps that will guide you through the configuration:
Editor
Settings
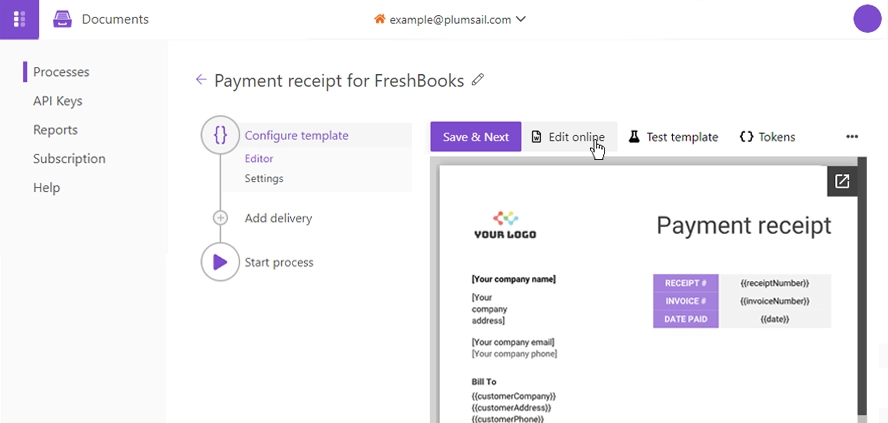
In the Editor mode, you can adjust the document template to fit your needs. The templating engine will replace everything in the curly brackets with FreshBooks data dynamically.
Learn how Plumsail Documents Word DOCX templates work here.
The payment receipt template requires a few tweaks before you can use it. Make sure you replace the logo and company credentials with yours.
Click ‘Edit online’ to change the logo and make any other changes you desire:
Click Save & Next to go to the ‘Settings’ step.
Let’s take a brief look at all the parameters:
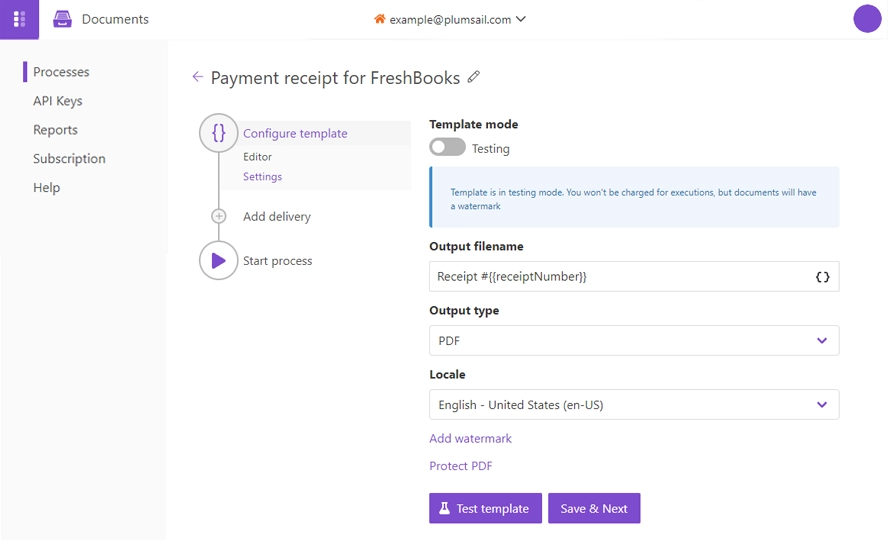
Template mode
Testing is the default setting. The result documents will have a Plumsail watermark, but you won’t be charged for running this process. Switch it to ‘Active’ to remove the watermark.
Output filename
You can give each generated file a unique name using placeholders. We’ll use the {{receiptNumber}} token to define the output name of the file. Upon generating the document, we’ll receive a payment receipt with the name Receipt #1001-1401 (based on the value of the placeholder).
Output type
Default format is that of your template. For the receipt template, it’s DOCX. We’re changing it to PDF to generate PDF receipts from the Word template.
Hint
You can protect your final PDF document by setting a password, adding a watermark, or disabling some actions.
Test template
Once you’ve customized all the settings, you can test your template to see the result.
Once everything is done, click ‘Save & Next’ to set up a delivery.
Delivery
We will deliver the result document as an attachment using Outlook. Feel free to set up any other delivery method.
Sign into your Outlook account, set the recipient email address and configure the message. As with the file name setting, you can use tokens to set up your delivery to make it dynamic. For example, you can use the customer’s email address in the “To” field, and their receipt number in the subject field:
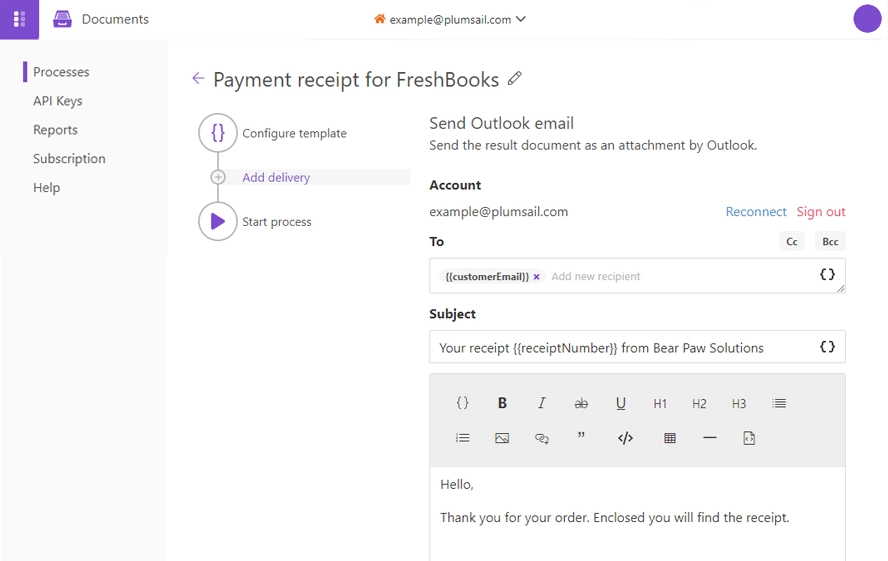
That way, once you receive a new payment in FreshBooks, an email will be automatically sent to your customer’s email with their receipt number in the subject line, and the generated receipt attached to the email.
Start the Process
We will start our Process from Zapier.
Create a Zap
Zap is an automated connection between web services in Zapier. Below is a step-by-step explanation of how to create it from scratch.
This is how our Zap looks:
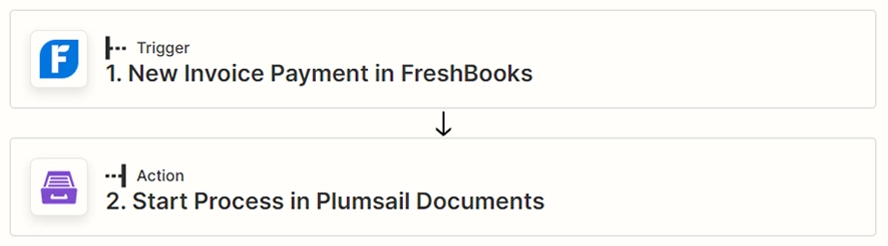
New Invoice Payment in FreshBooks
We need our Zap to be triggered every time a customer pays an invoice in FreshBooks. Search for FreshBooks in Zapier and set the Event to New Invoice Payment:
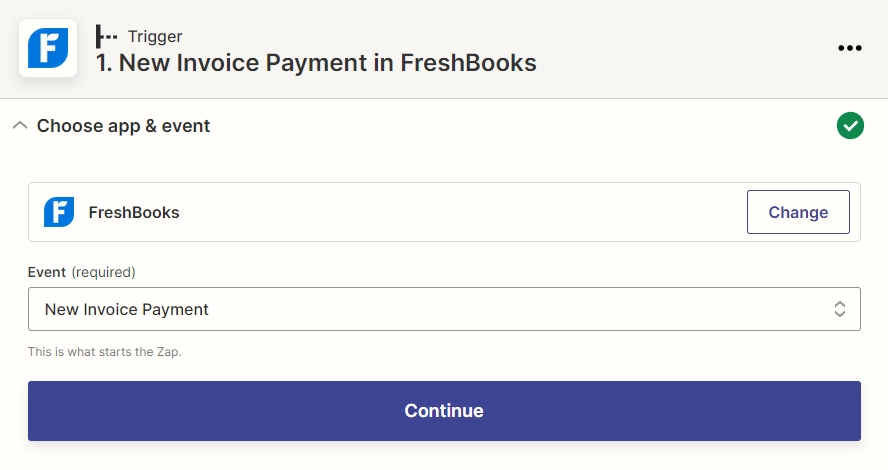
Sign in to your Plumsail Account from Zapier if this is your first Zap with FreshBooks.
Start Process in Plumsail Documents
Once we have the data we need for document generation, search for Plumsail Documents and set the event to ‘Start Process’:
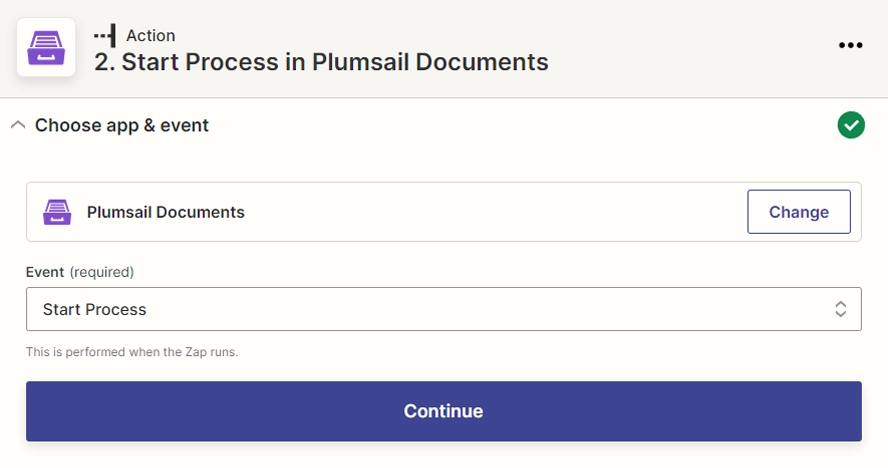
Likewise, in case this is your first Zap with Plumsail Documents, sign in to your Plumsail Account.
Set up action
Select the process we created from the dropdown. The fields to fill out will have the same names as the tokens in the template. Use the results of the previous actions to fill them out:

Our Zap is ready 🎉 Whenever your customer pays an invoice, a receipt will be automatically generated and sent to them via Outlook.
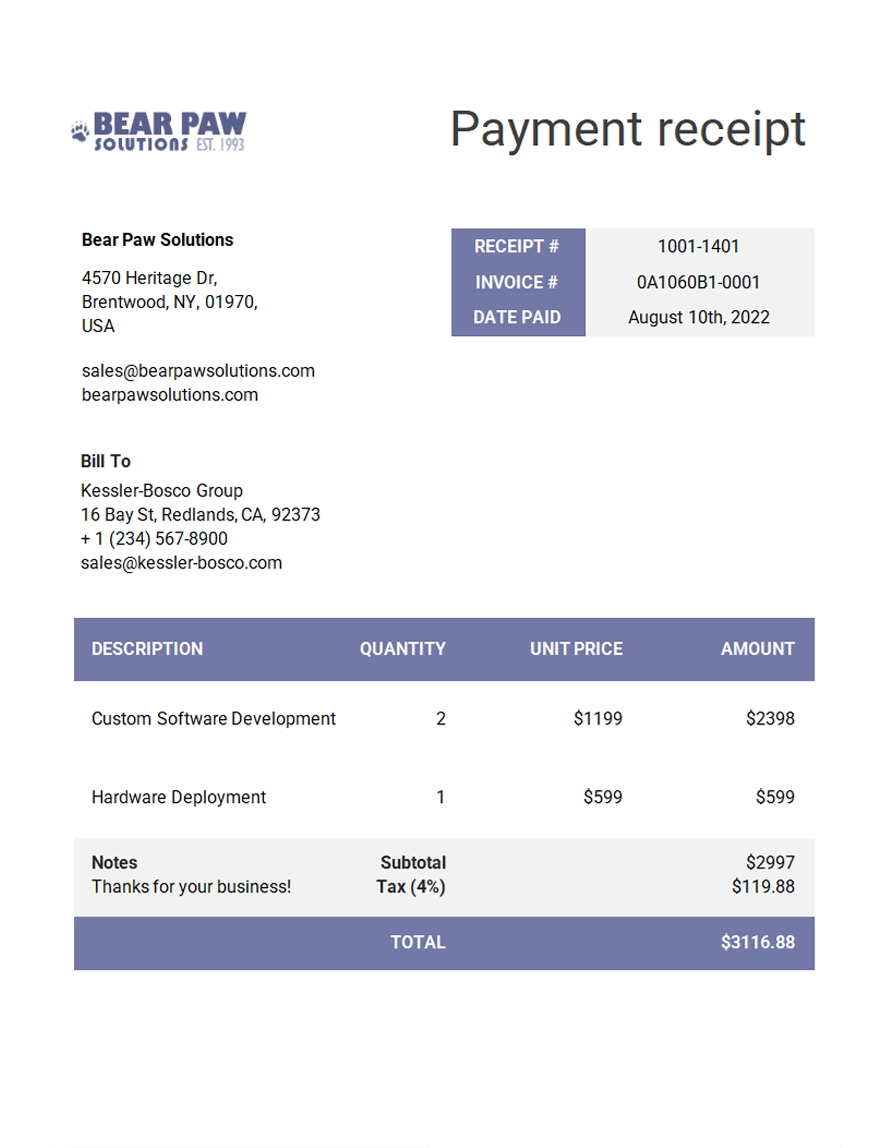
See how the resulting file looks like:
Conclusion
As you can see, it’s easy to automate the generation of documents based on FreshBooks data. If you’re new to Plumsail Documents, sign up to get a free 30-day trial.
Hint
Use Plumsail Documents zap templates to start documents generation processes. Click here to see all available Zap templates.