How to generate an invoice from Stripe after a successful payment
After a successful payment in Stripe, you may want to automatically generate and send an invoice. For example, customers may request an invoice after checkout because the payment receipt does not contain all the required details. You may also want to automatically send invoices to colleagues, cloud storage, CRM systems, or other services.
We will show you how to automatically generate a Stripe invoice after successful payment using Plumsail Documents and Zapier.
Services used in this example:
In this article:
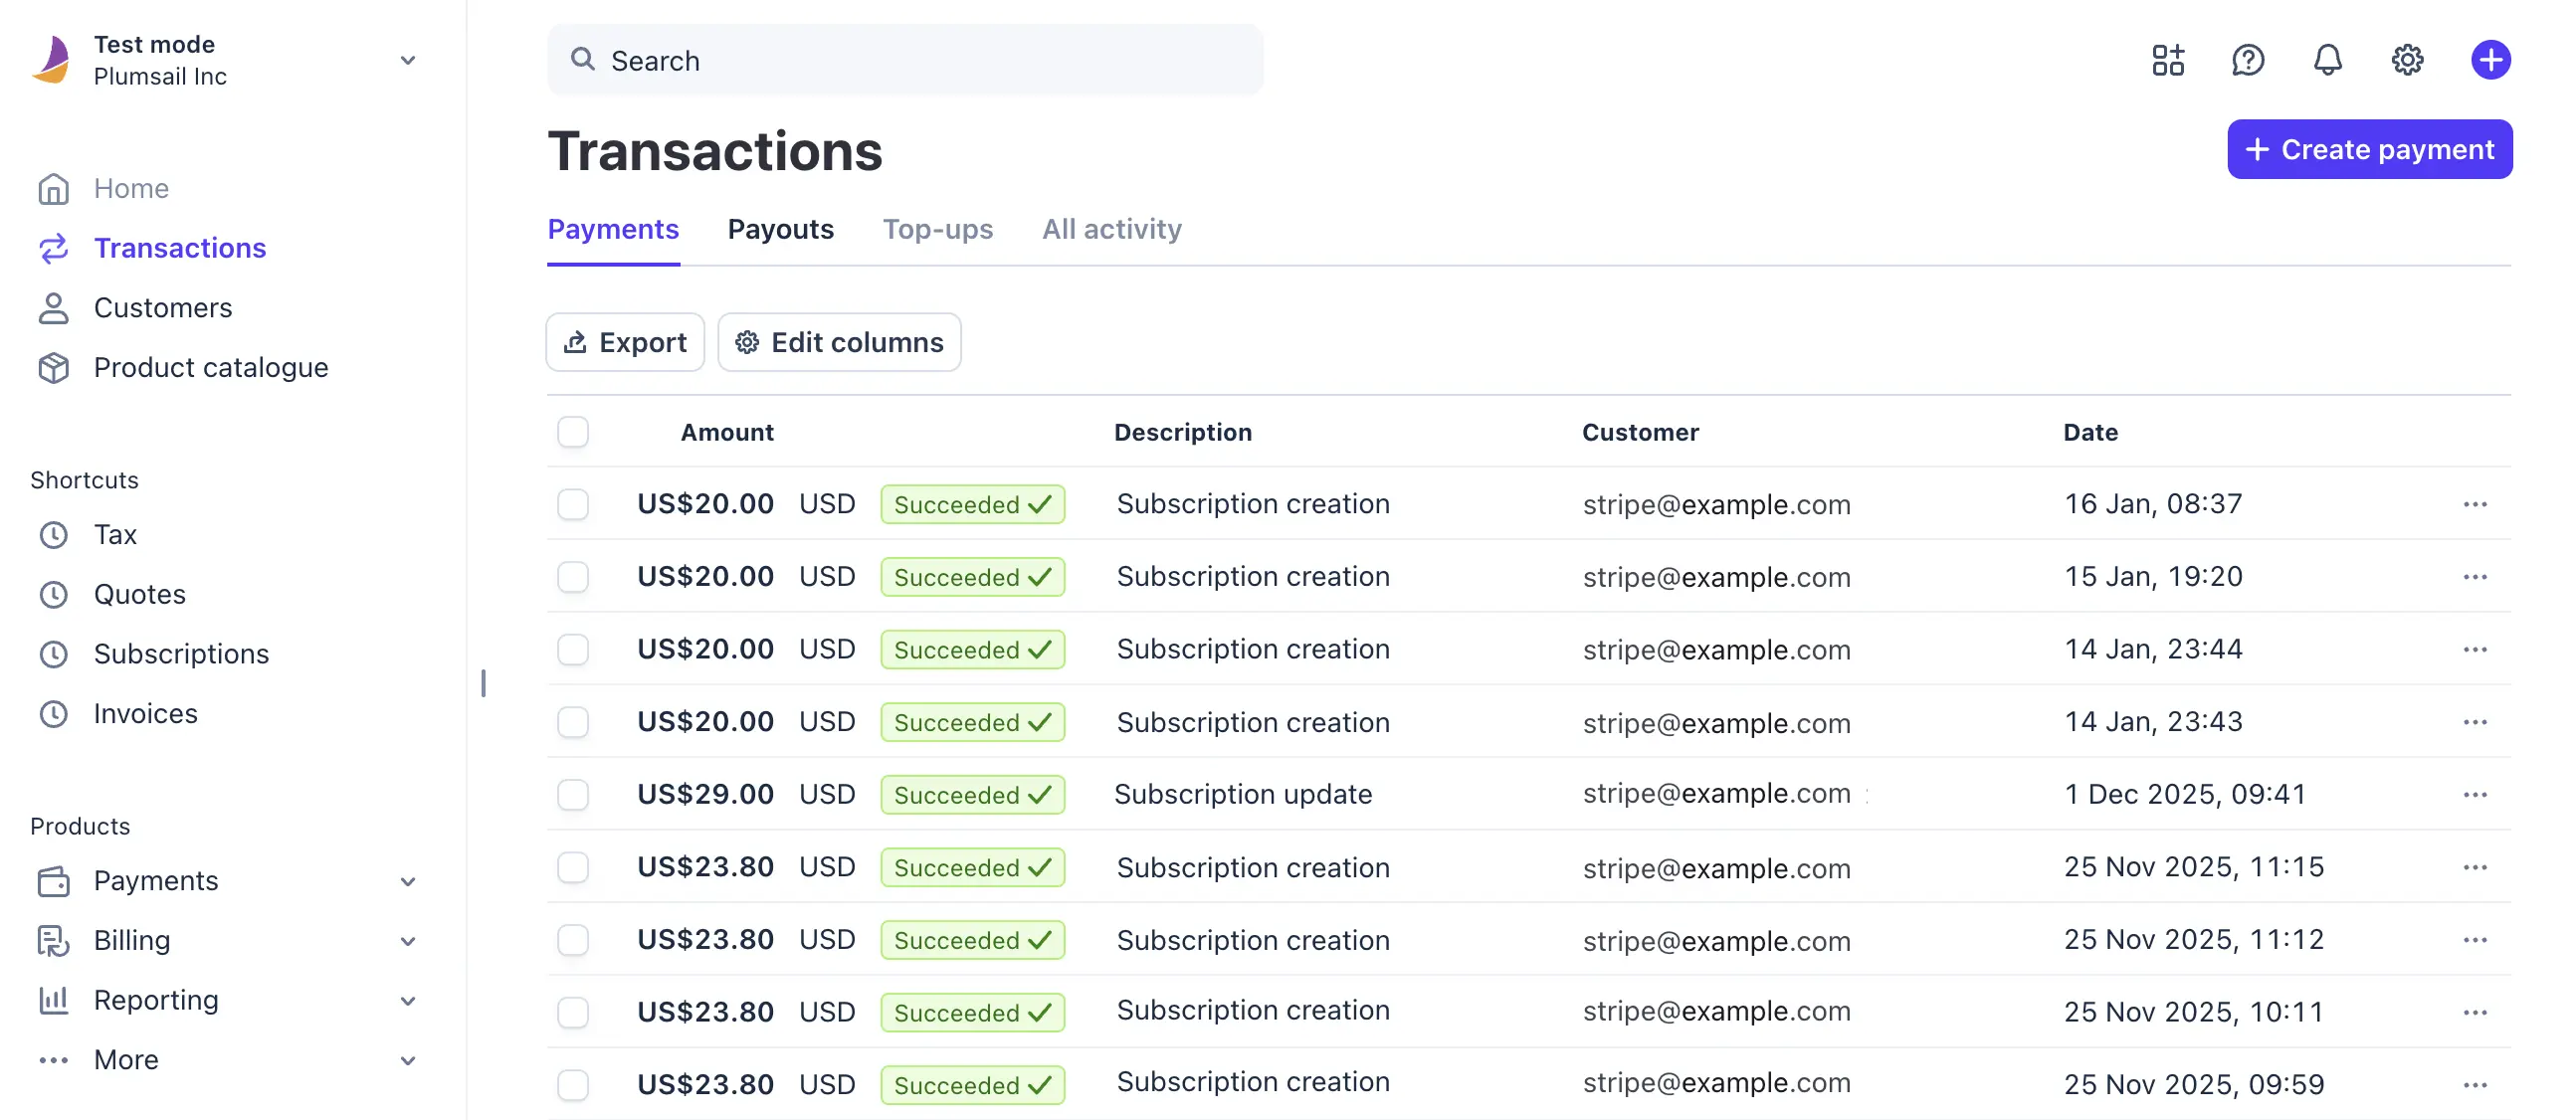
Receive payment in Stripe
For example, imagine you receive a payment in Stripe for services or products. You want to automatically generate and email an invoice after the payment is completed.
To automate this process, Zapier transfers payment data from Stripe to Plumsail Documents. The next step is to create a process in Plumsail Documents.
Set up document generation in Plumsail Documents
In this step, we need to create a process in Plumsail Documents.
Create invoice generation process
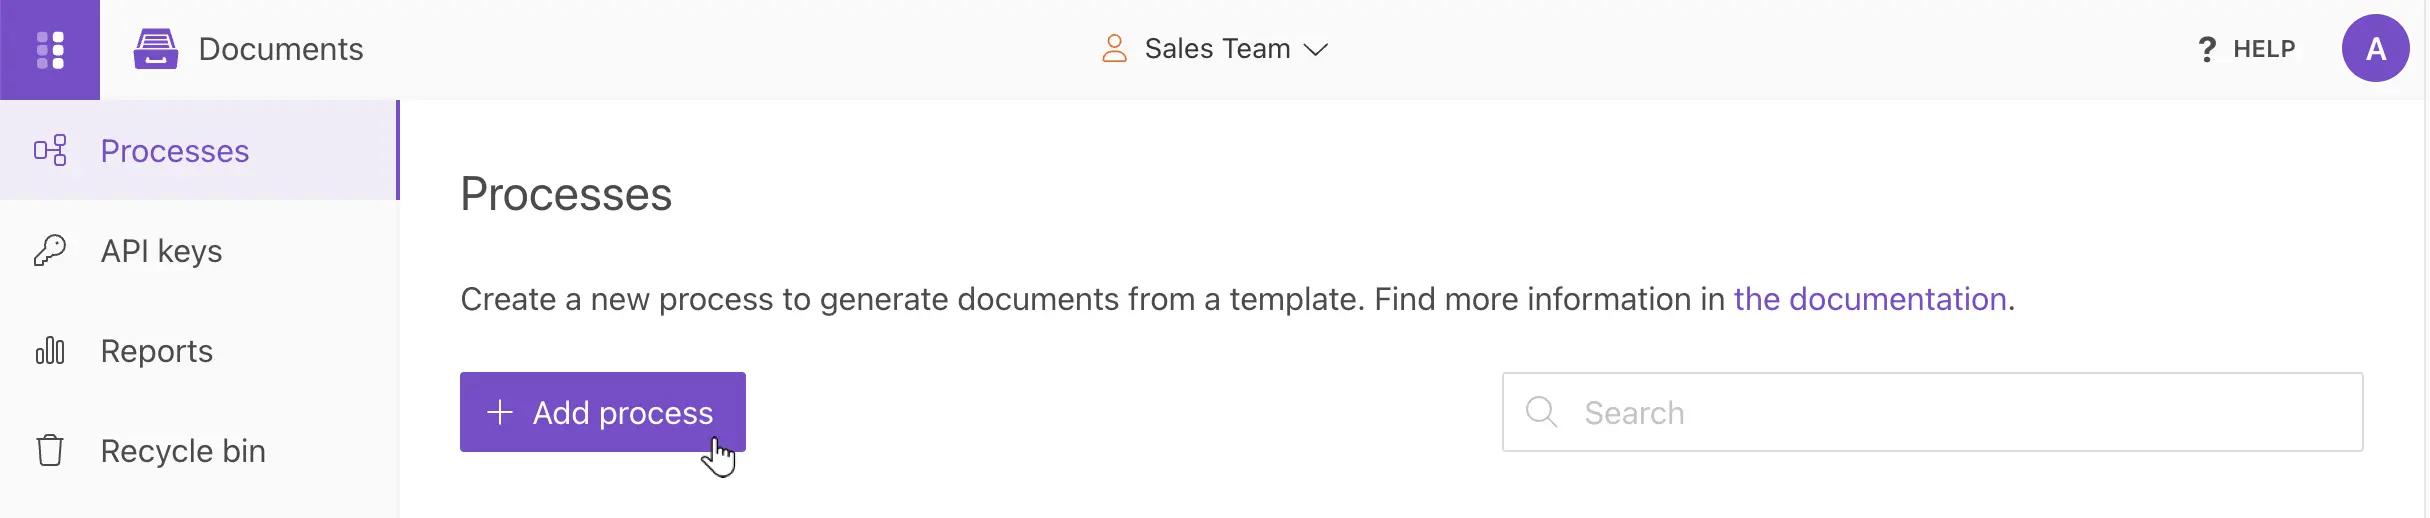
Go to Processes in your Plumsail account and click the Add process button.
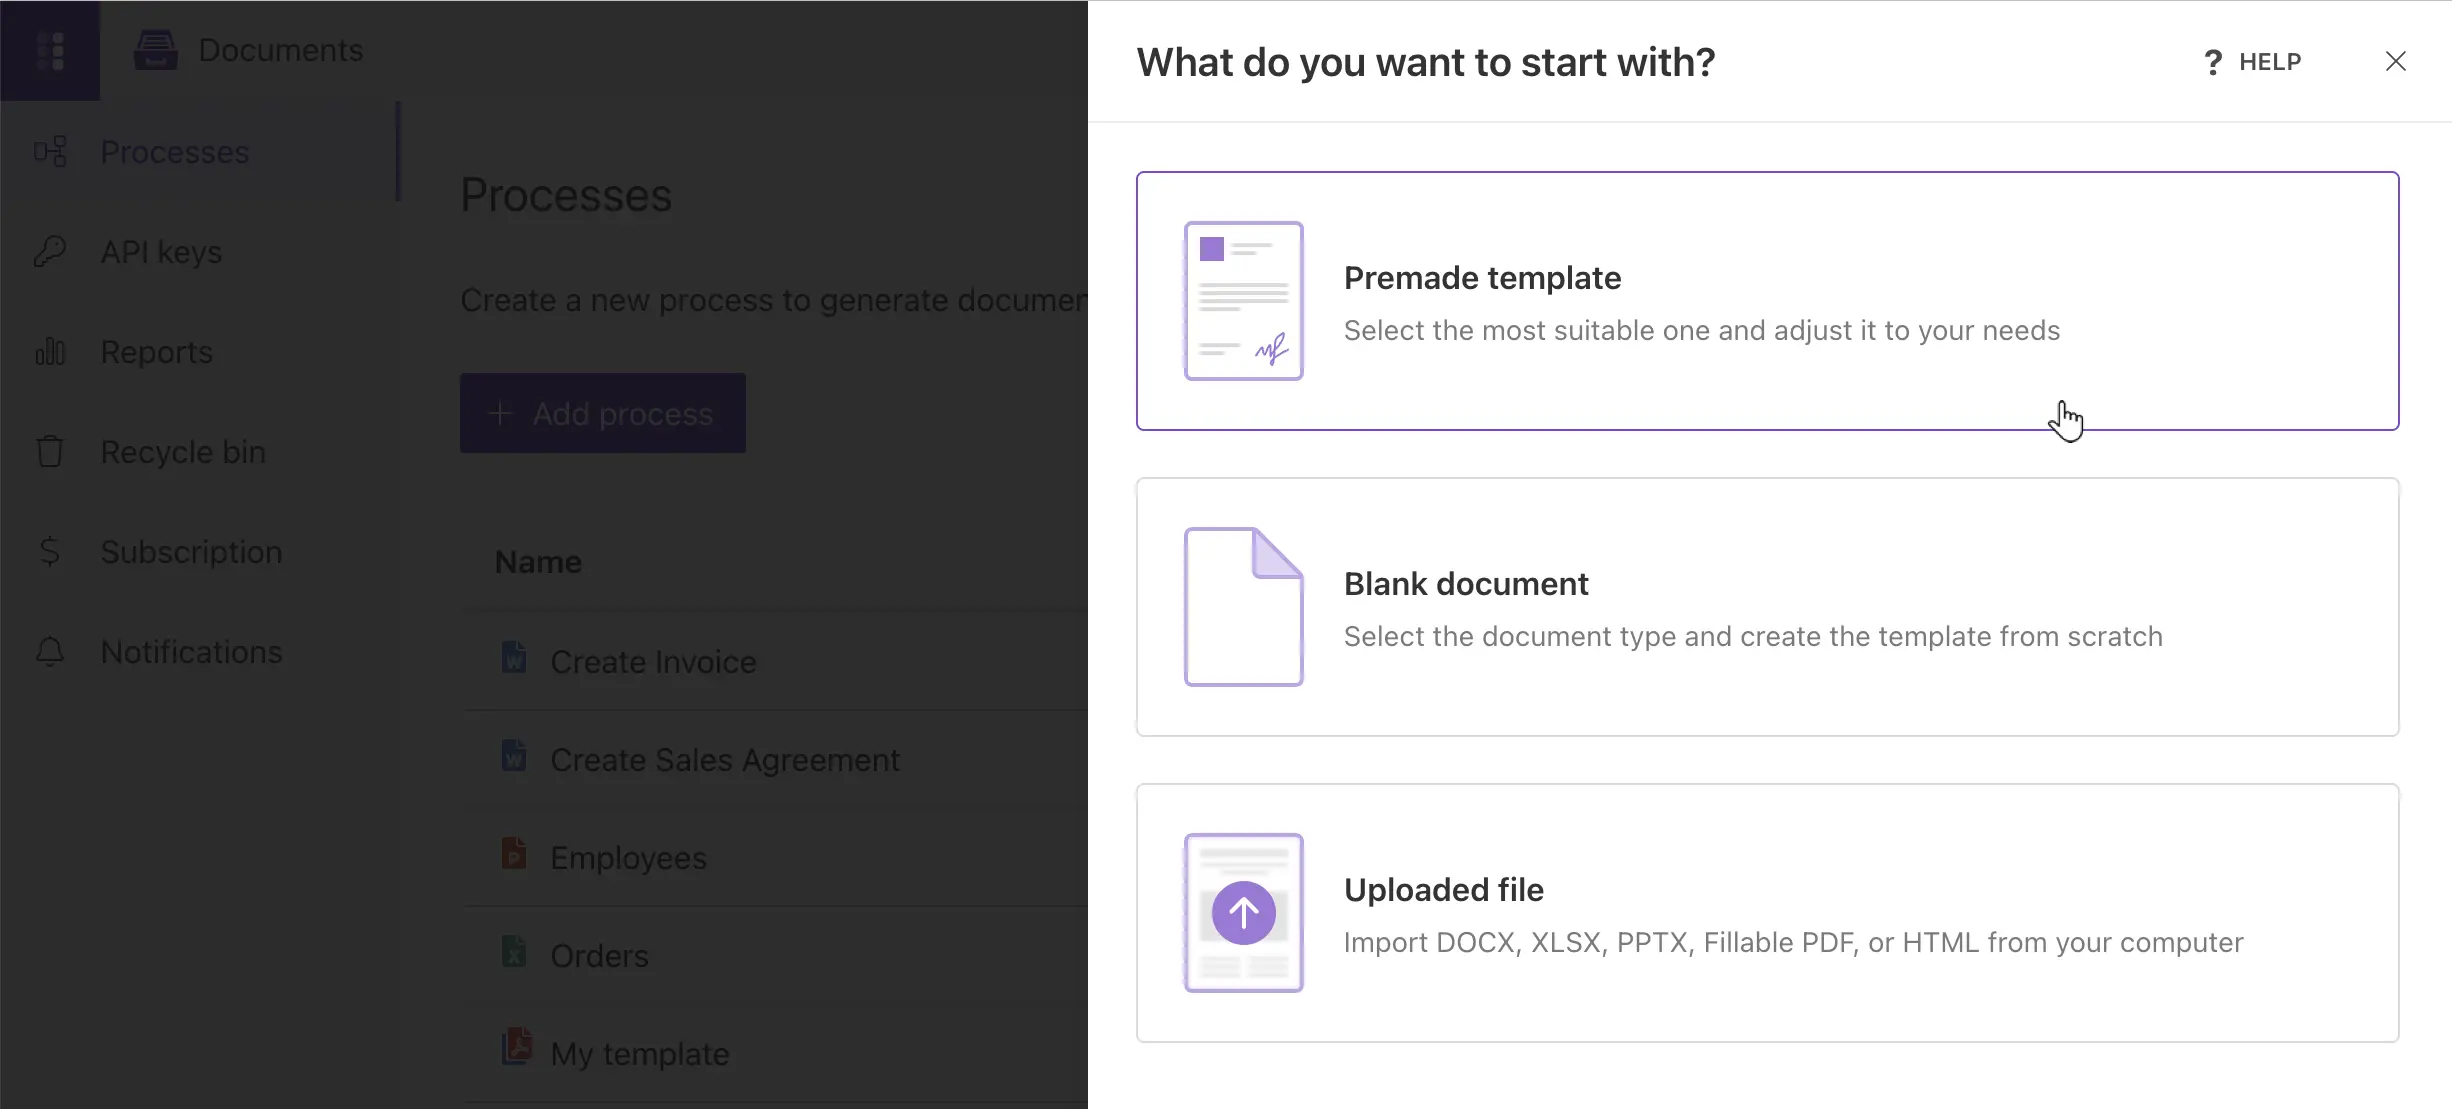
Then, select Premade template.
In this example, we will use the Sales Invoice template.
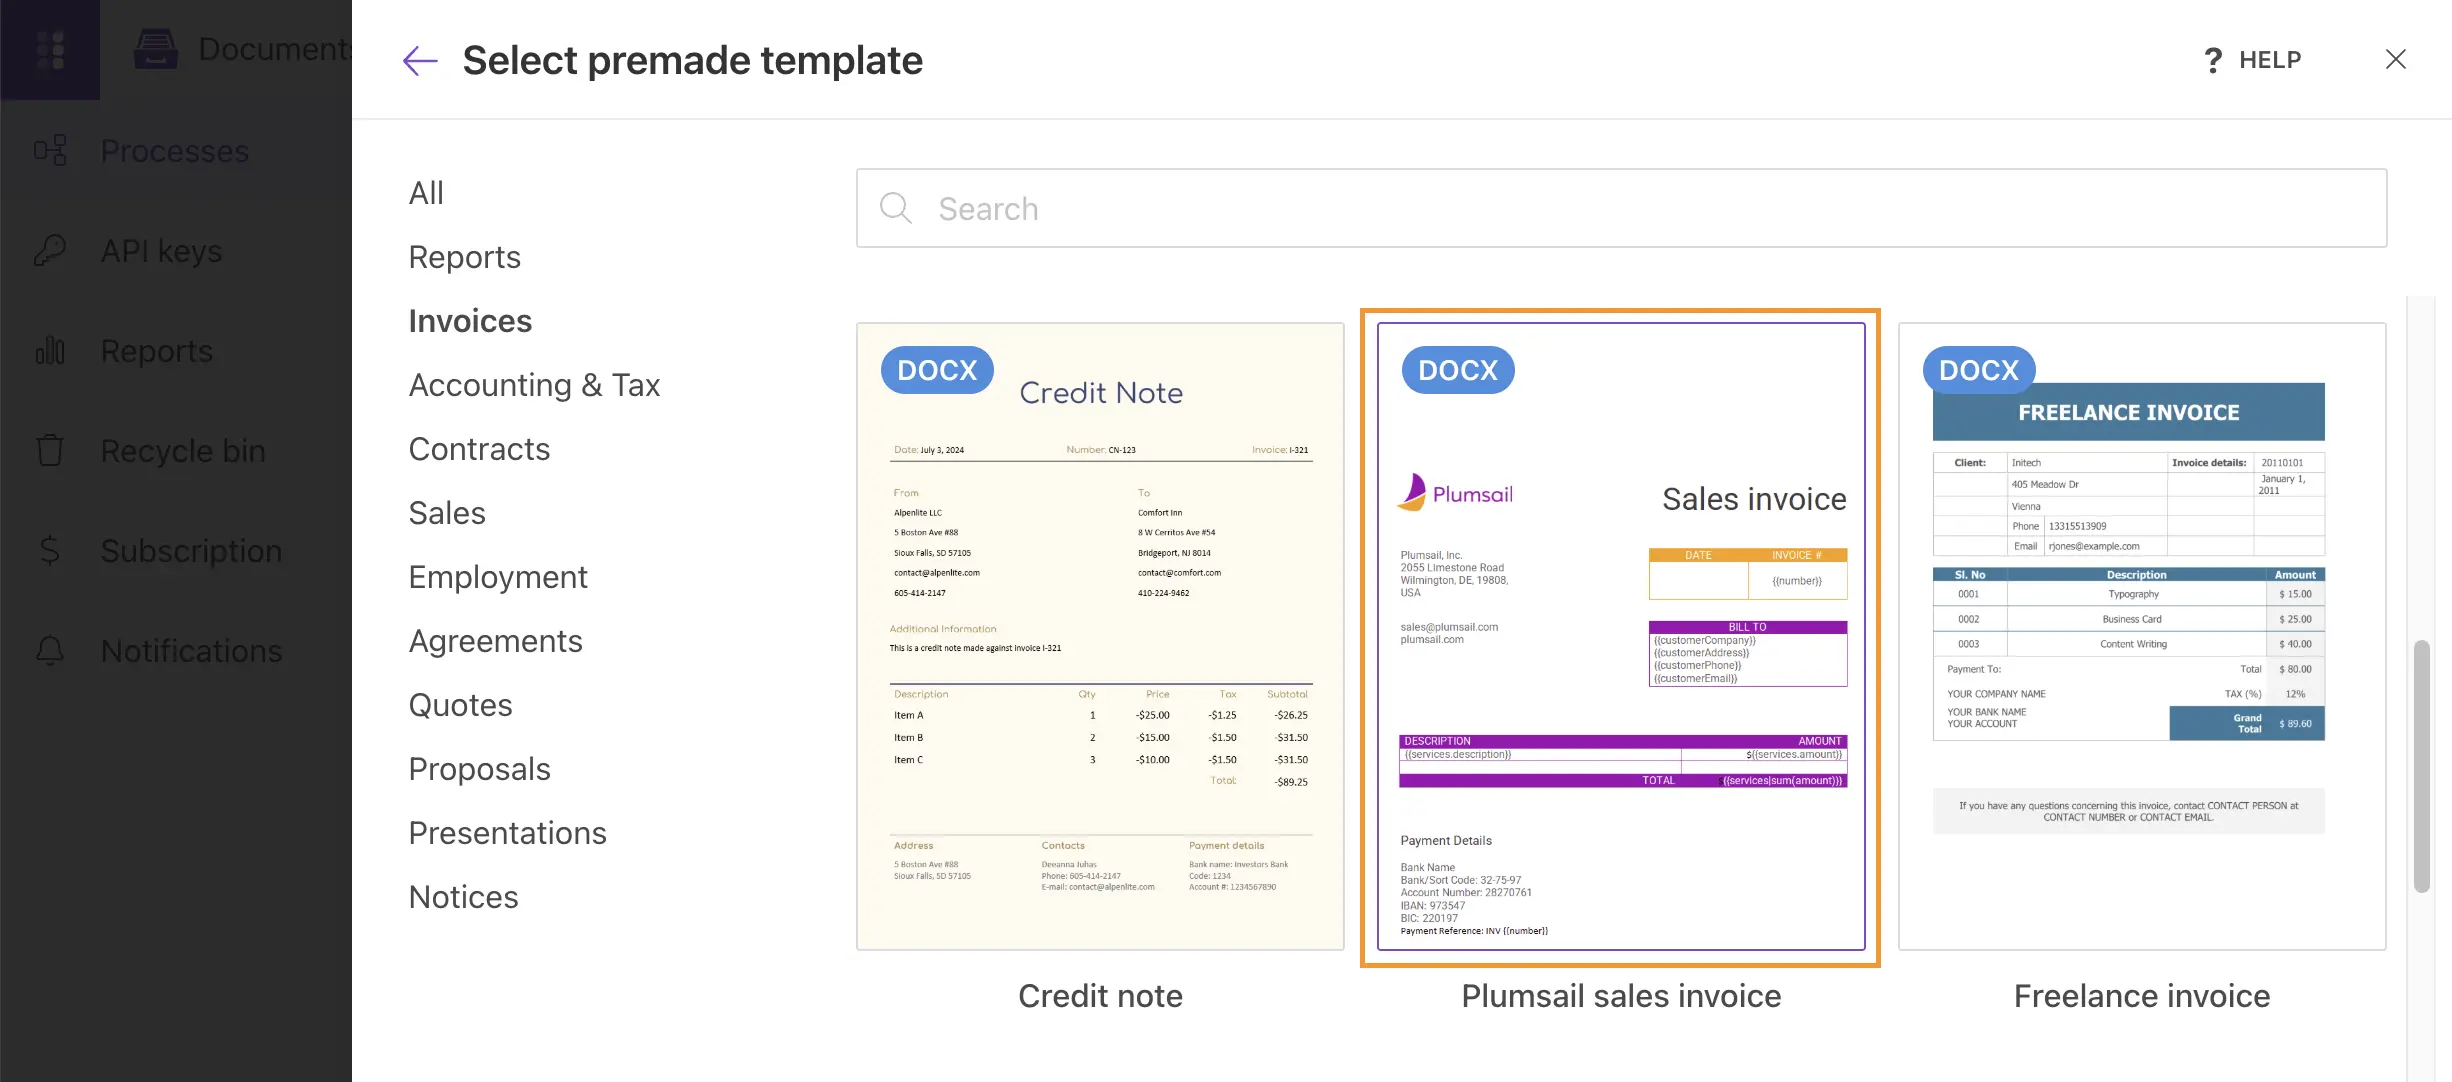
You can also choose from other available invoice templates from the list.
If you already have your own Stripe invoice design, you can upload it as a custom template instead of using a premade one. To do this, select Blank template when creating the process. The remaining steps will be the same.
Specify the Process name and Output file type, then click Create.
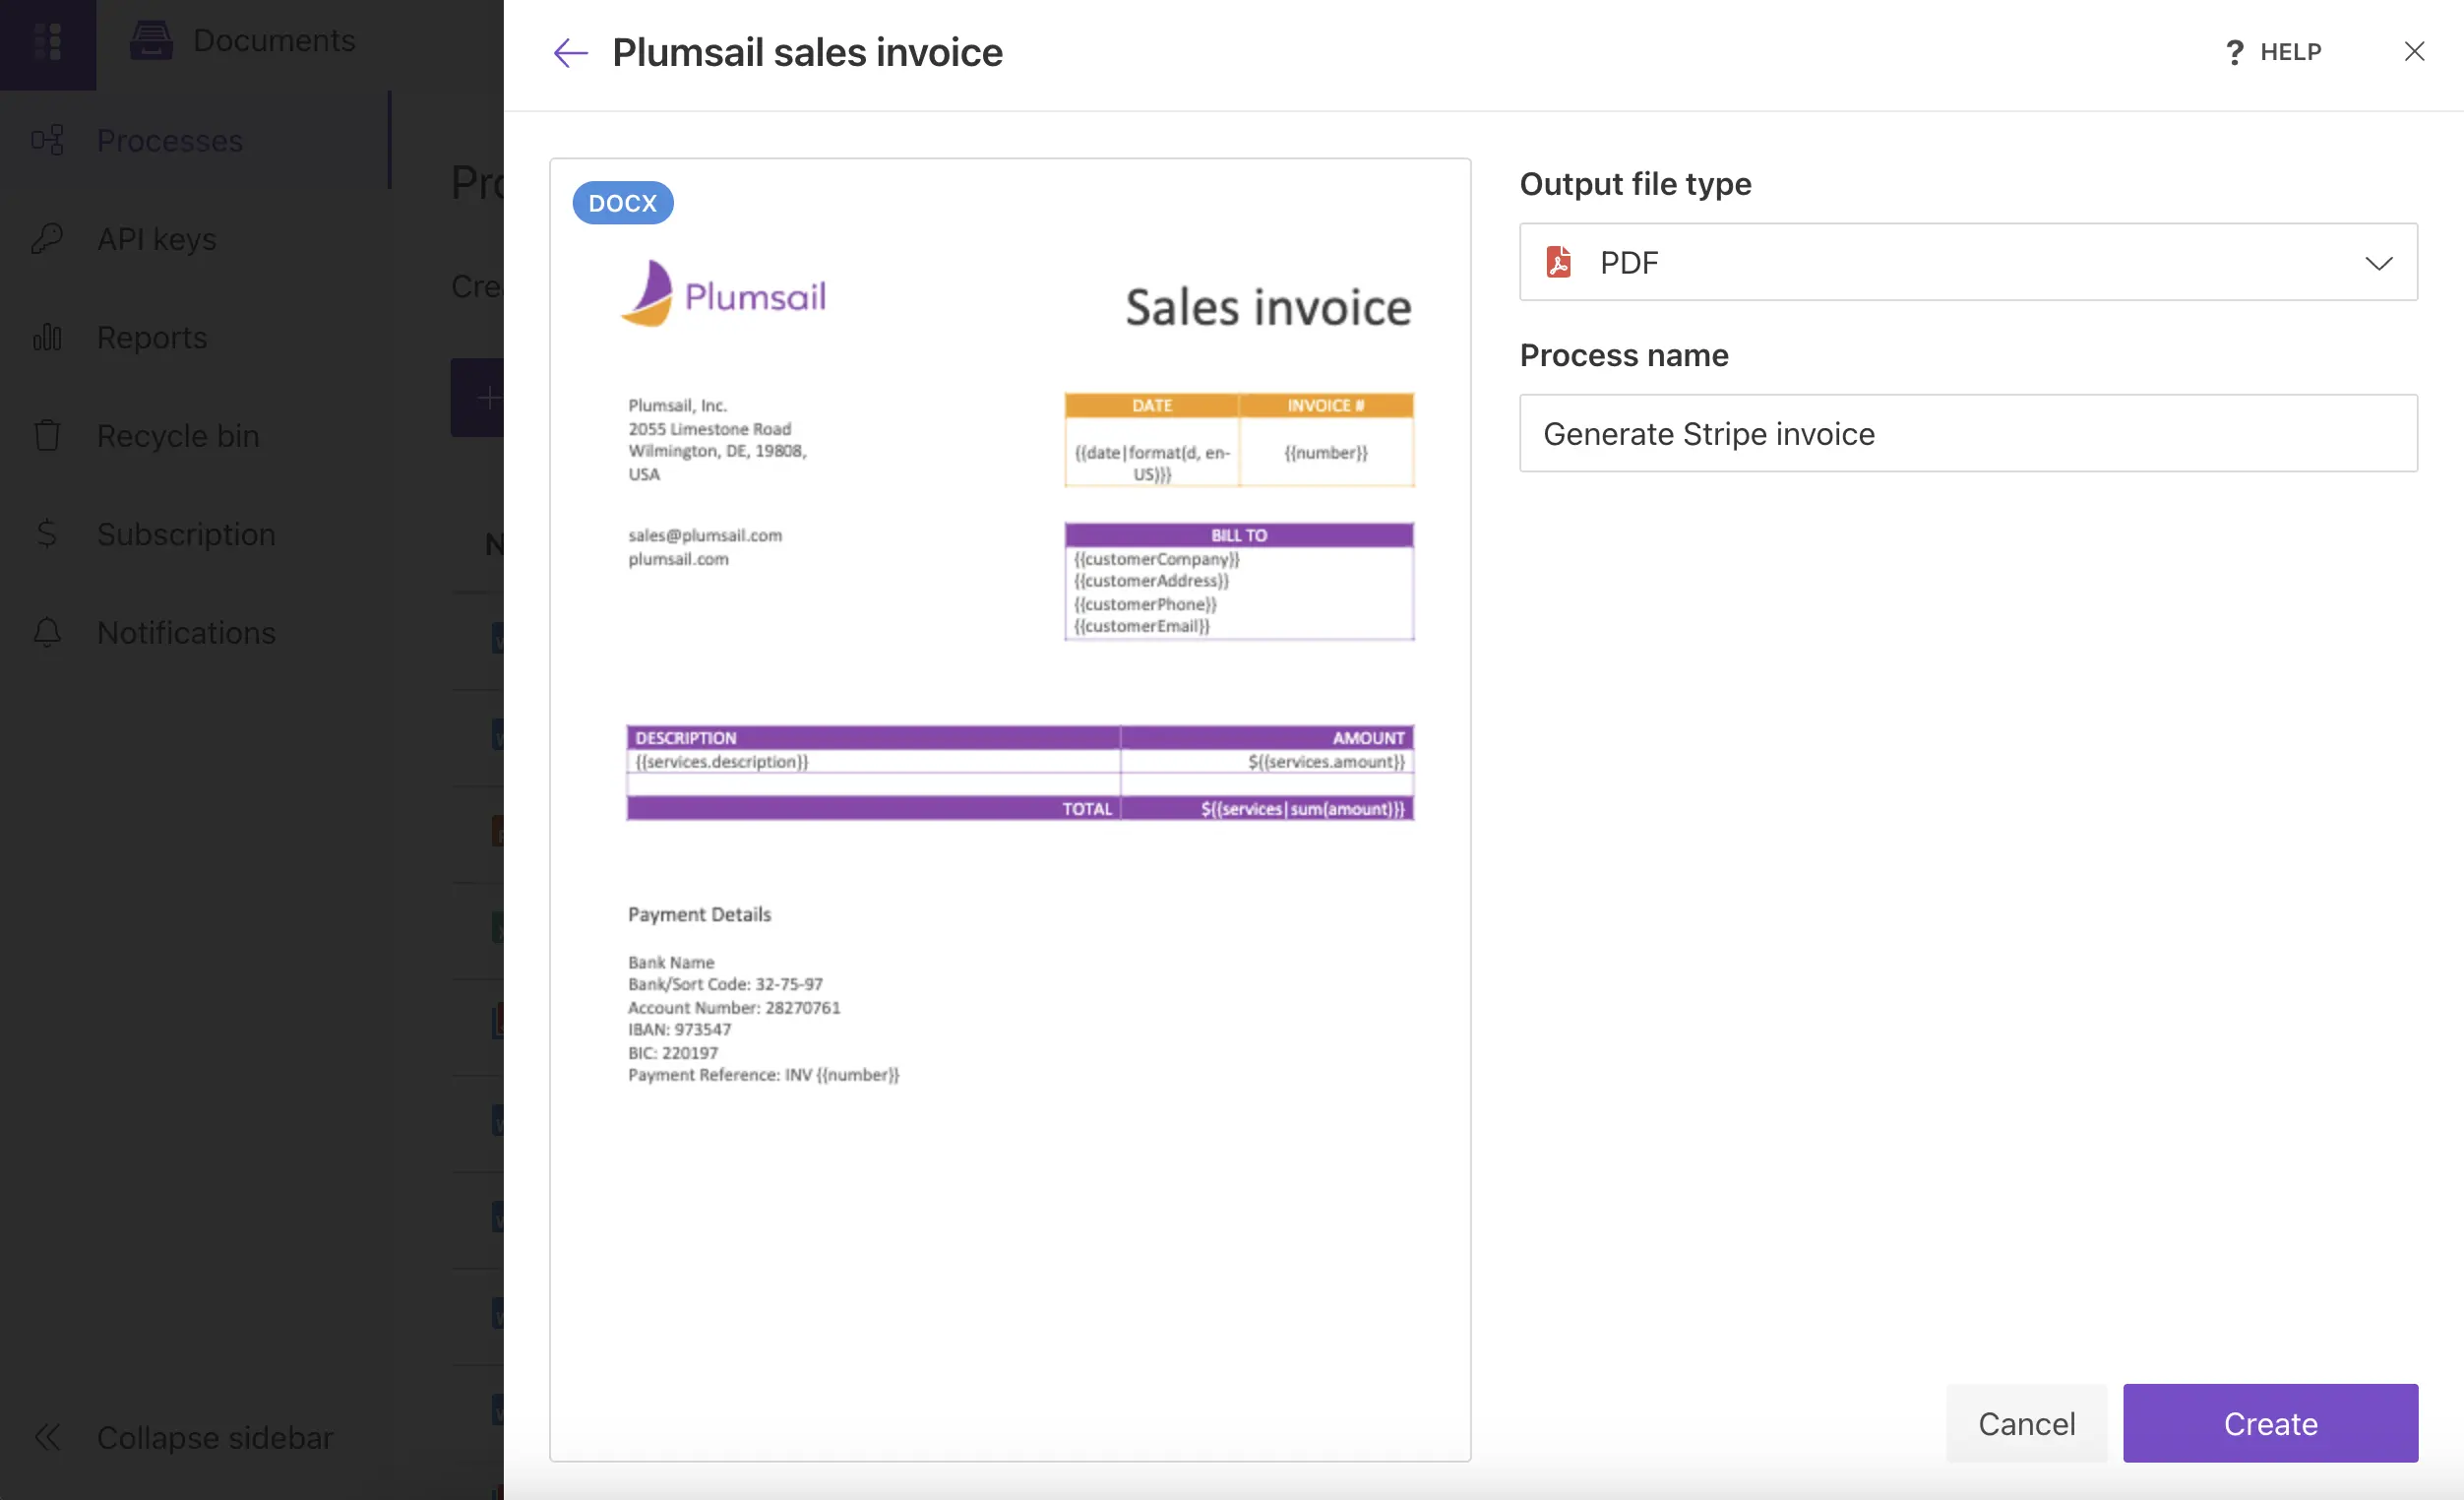
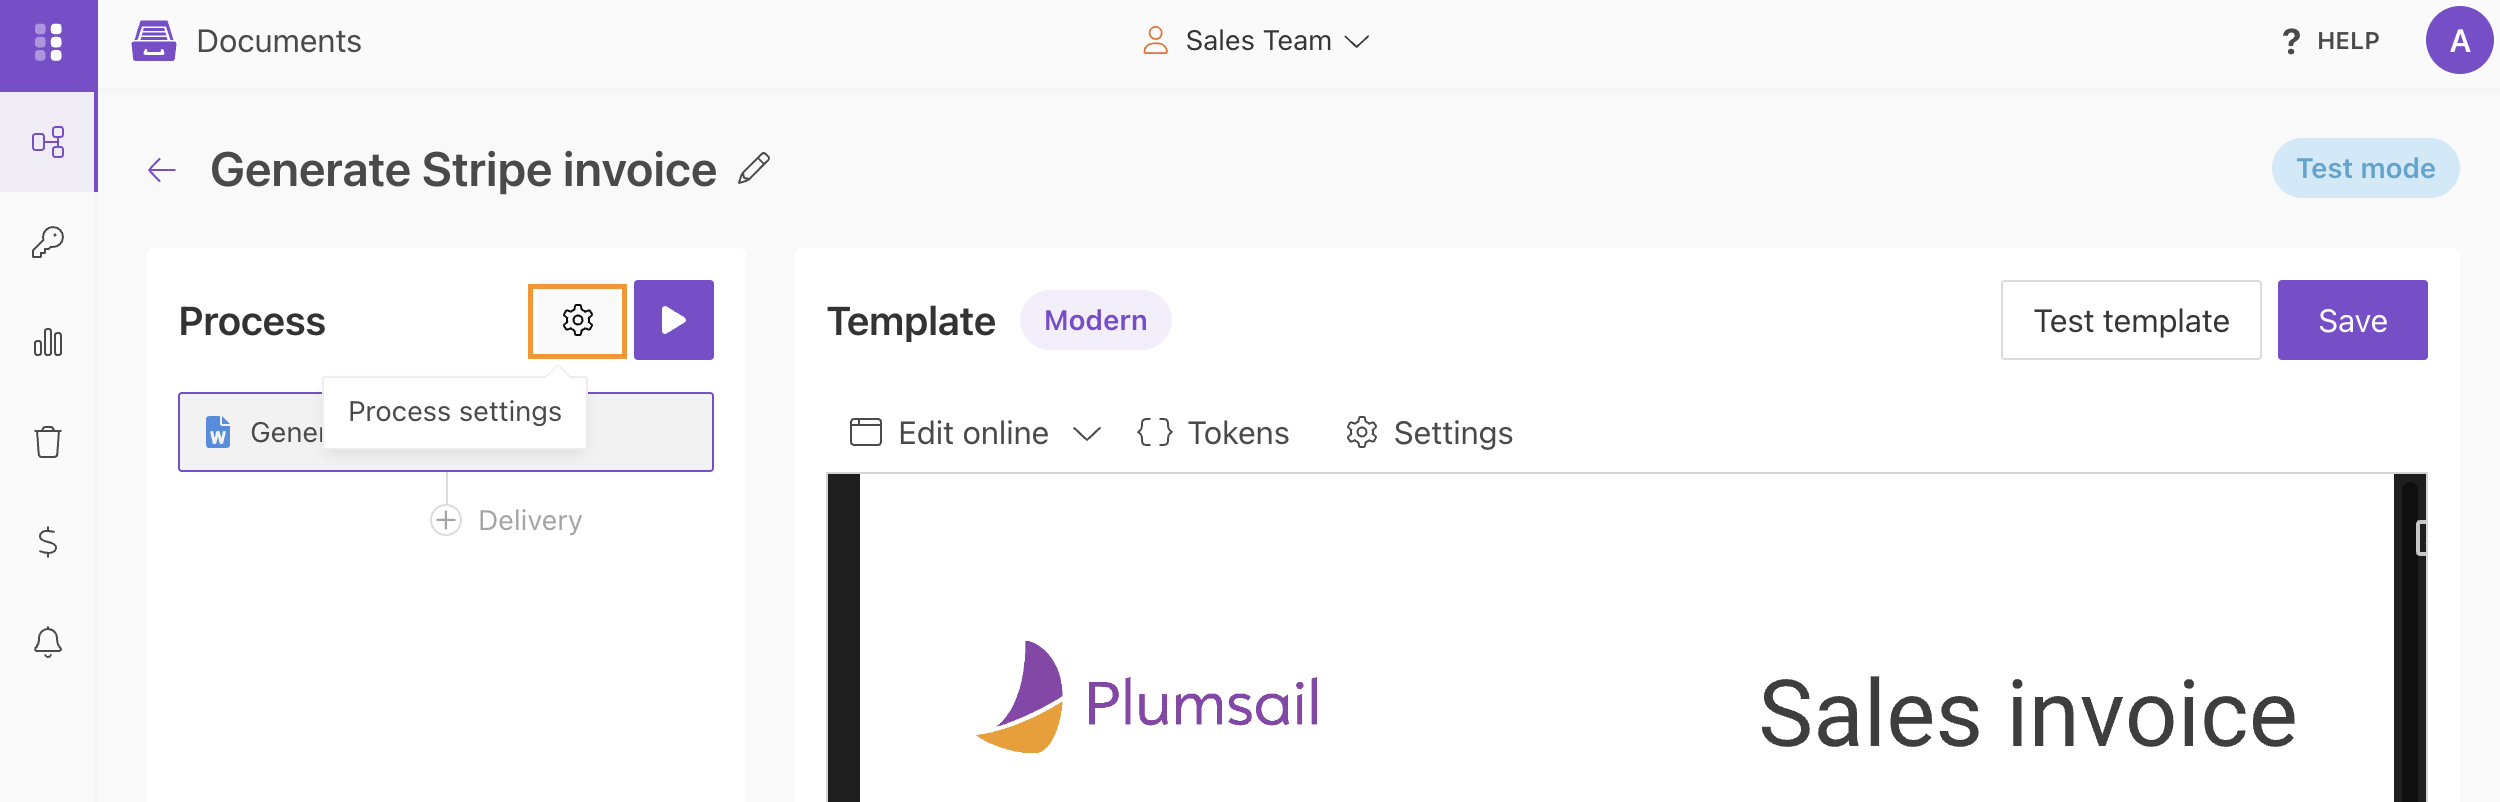
As shown in the screenshot below, the template contains special placeholders called {{tokens}}.
Tokens define where Stripe payment data should appear in the generated invoice. During document generation, Plumsail Documents replaces these tokens with actual values from Stripe.
For example:
{{customerCompany}}inserts the customer name{{number}}inserts the invoice number
To display multiple line items automatically, the template uses collection tokens such as {{services.description}}.
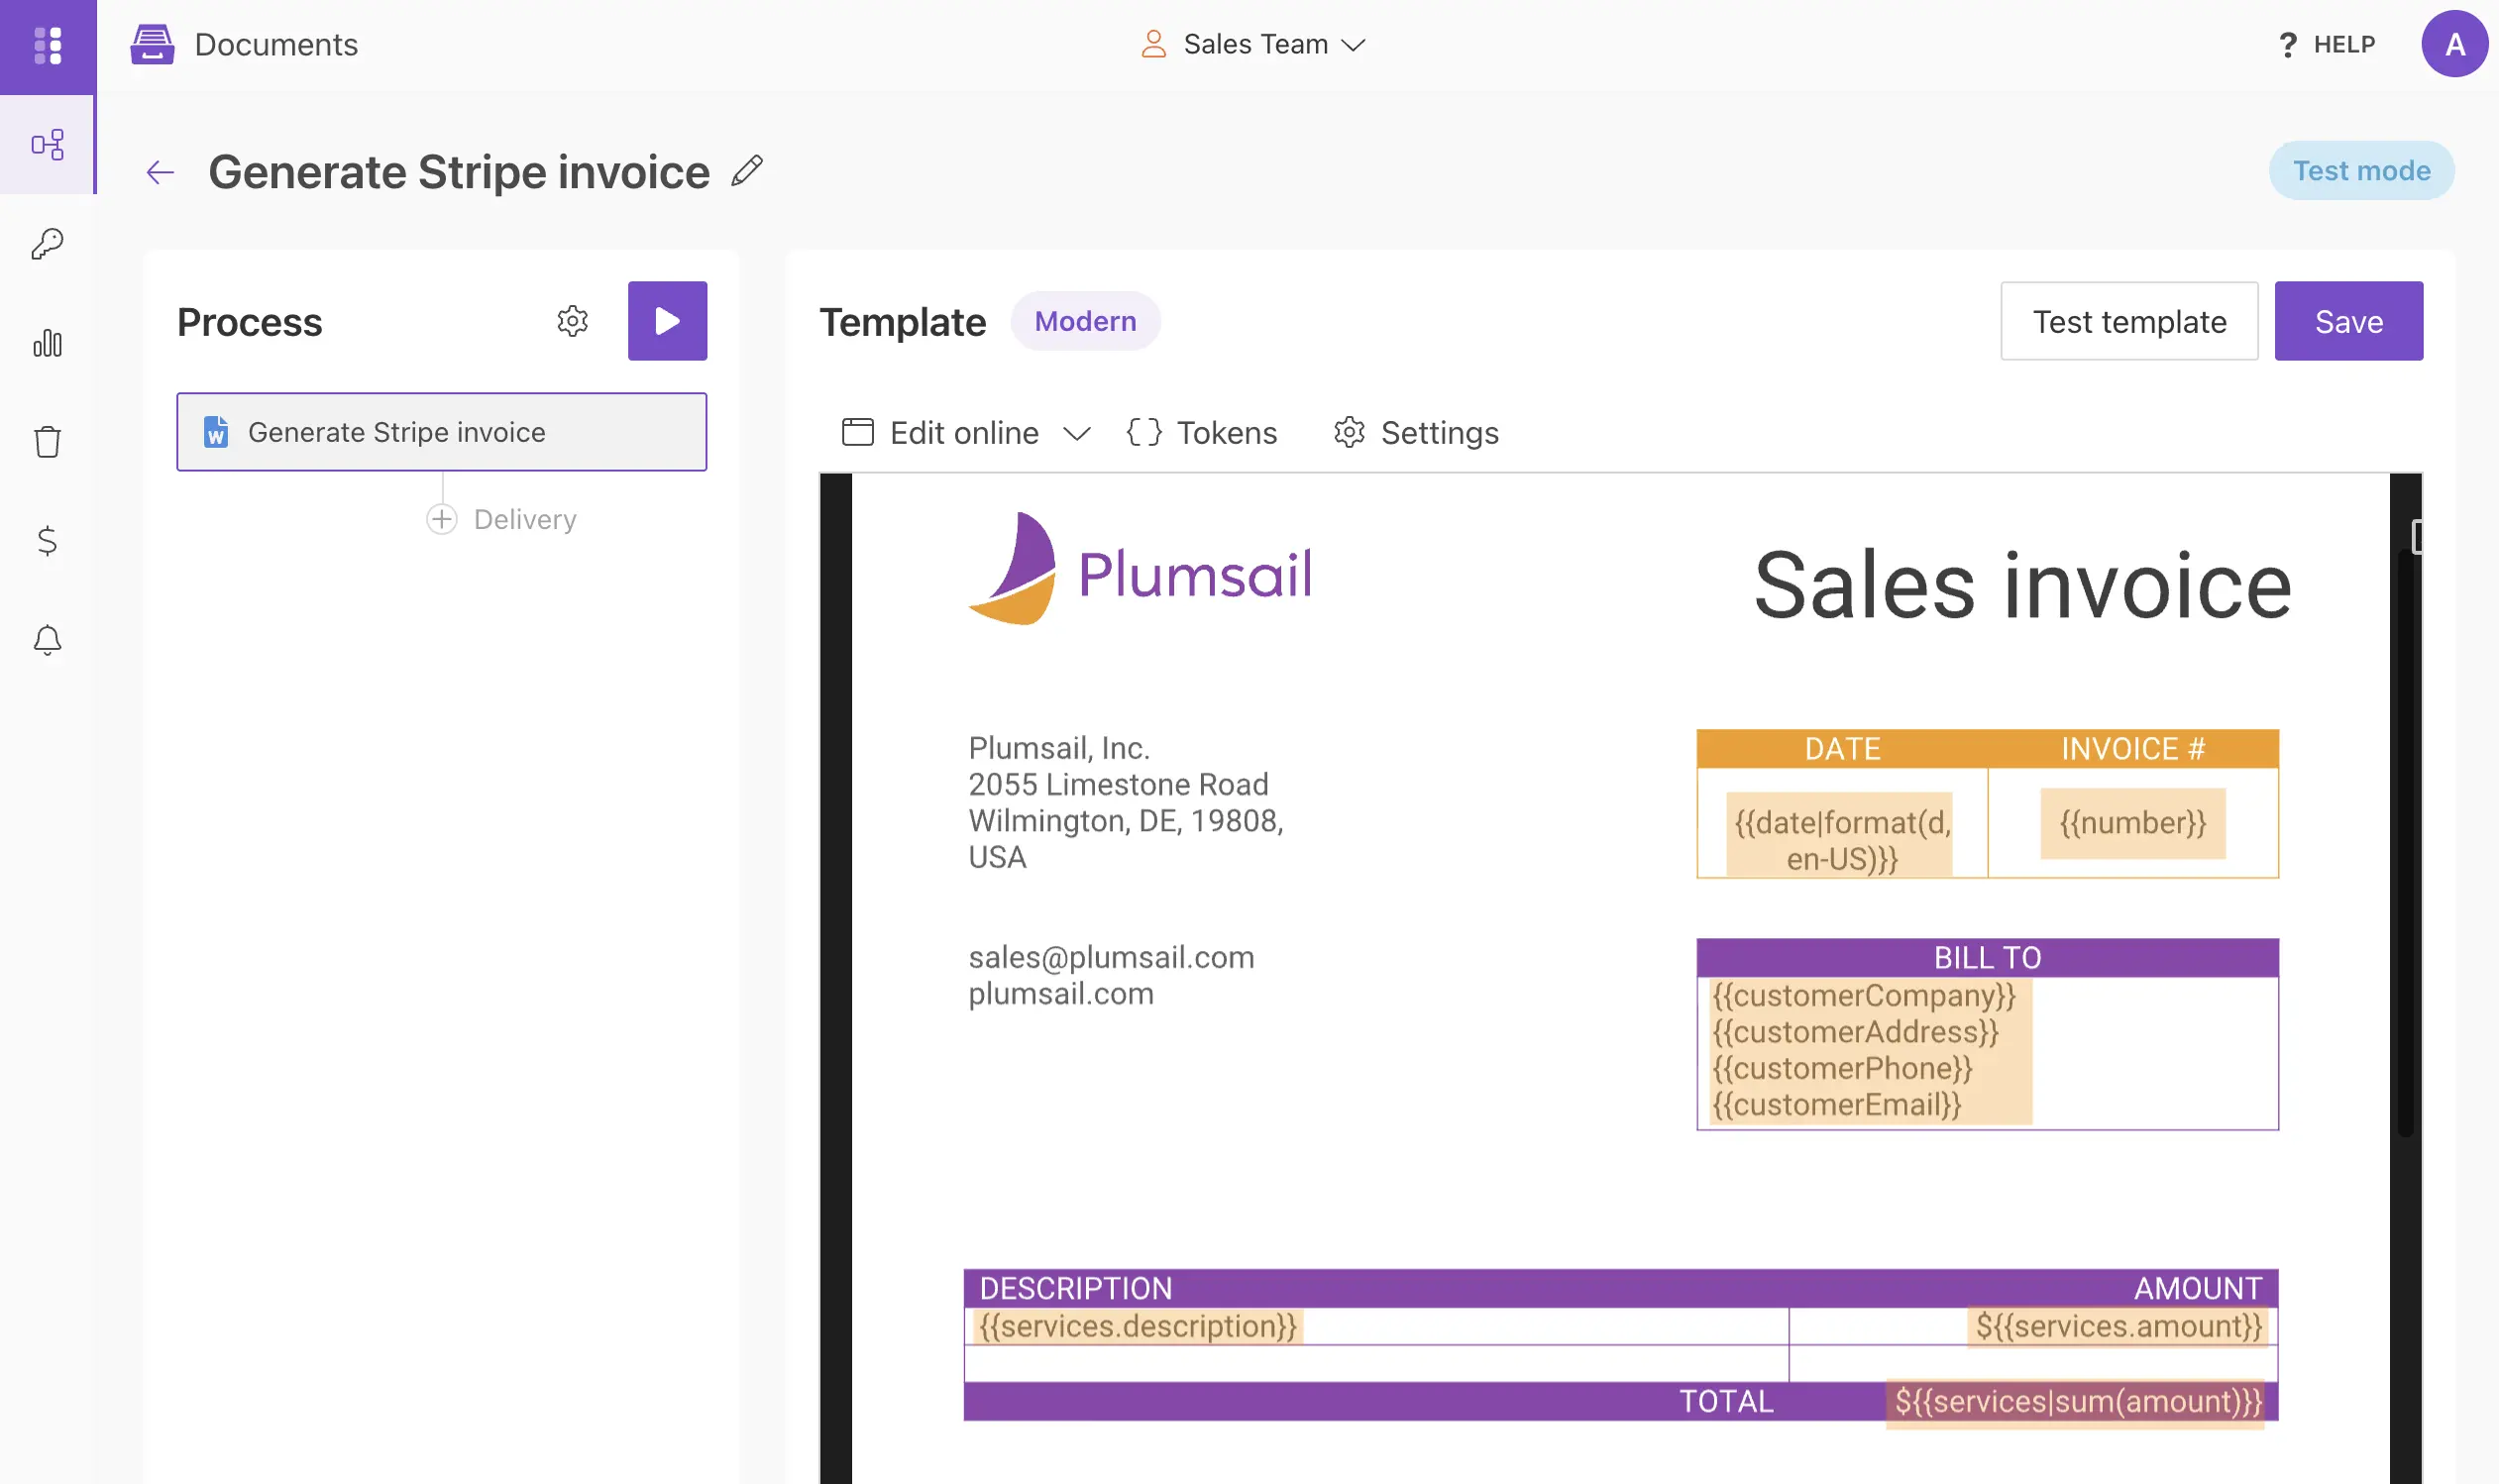
See the templating syntax documentation to learn more about Plumsail Documents templating syntax.
After configuring the template, the next step is to configure the output document settings.
Document template settings
Click the Settings button above the template to open the template settings.
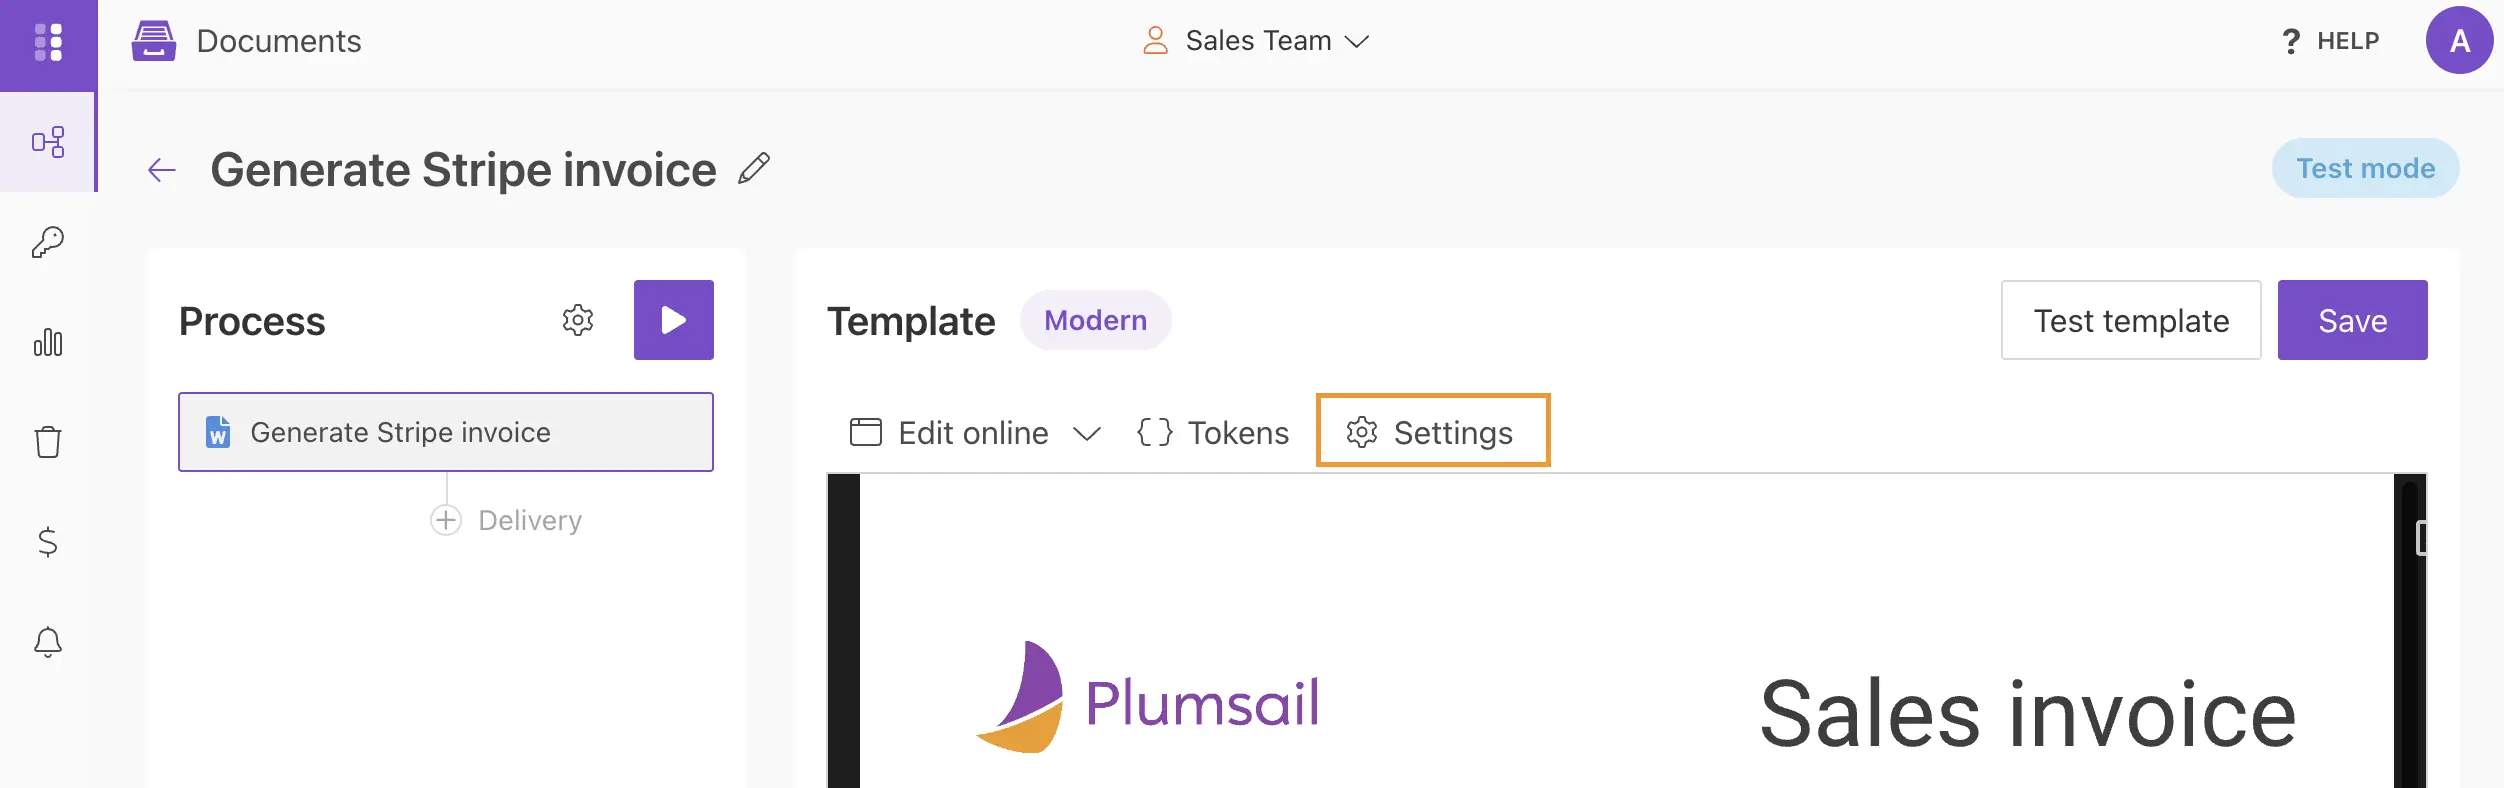
Here you can configure the output document settings. You can use {{tokens}} to generate dynamic file names and configure the output format.
For PDF files, you can also add watermarks and apply protection restrictions.
You can also rename the template and select the templating engine.
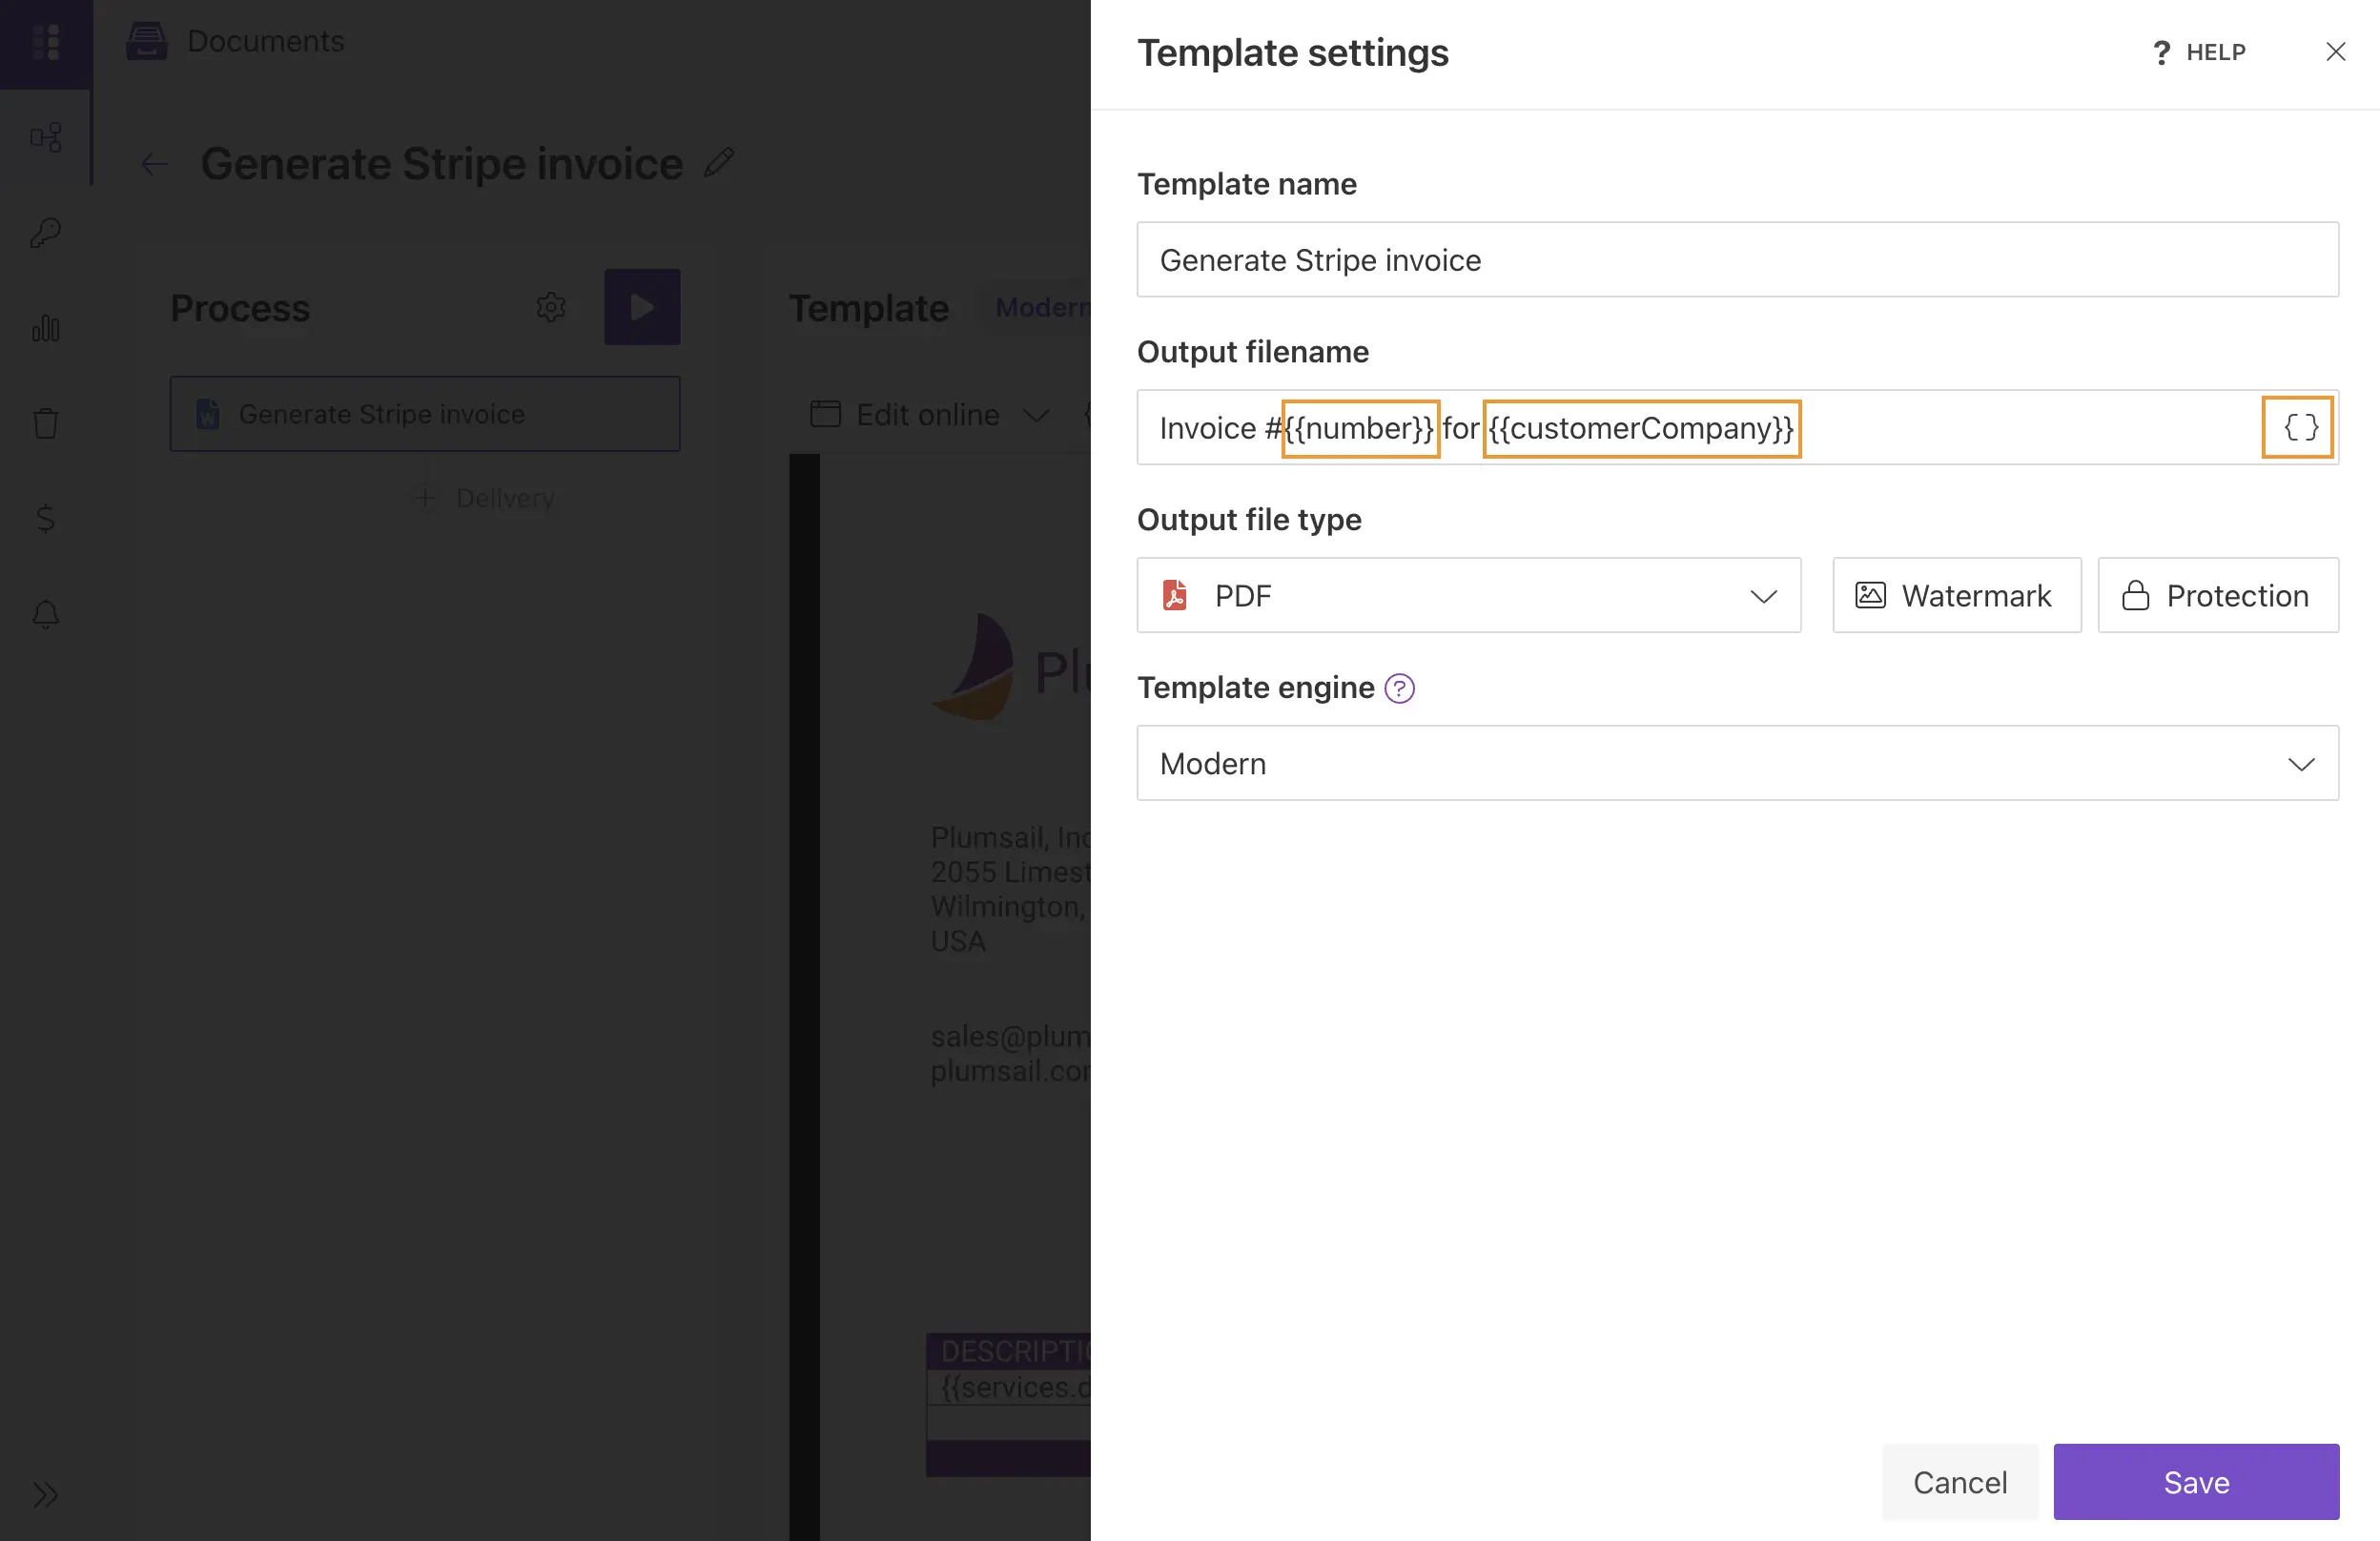
Click Save to apply the changes and continue to the next step.
Note
See Template settings article for more information.
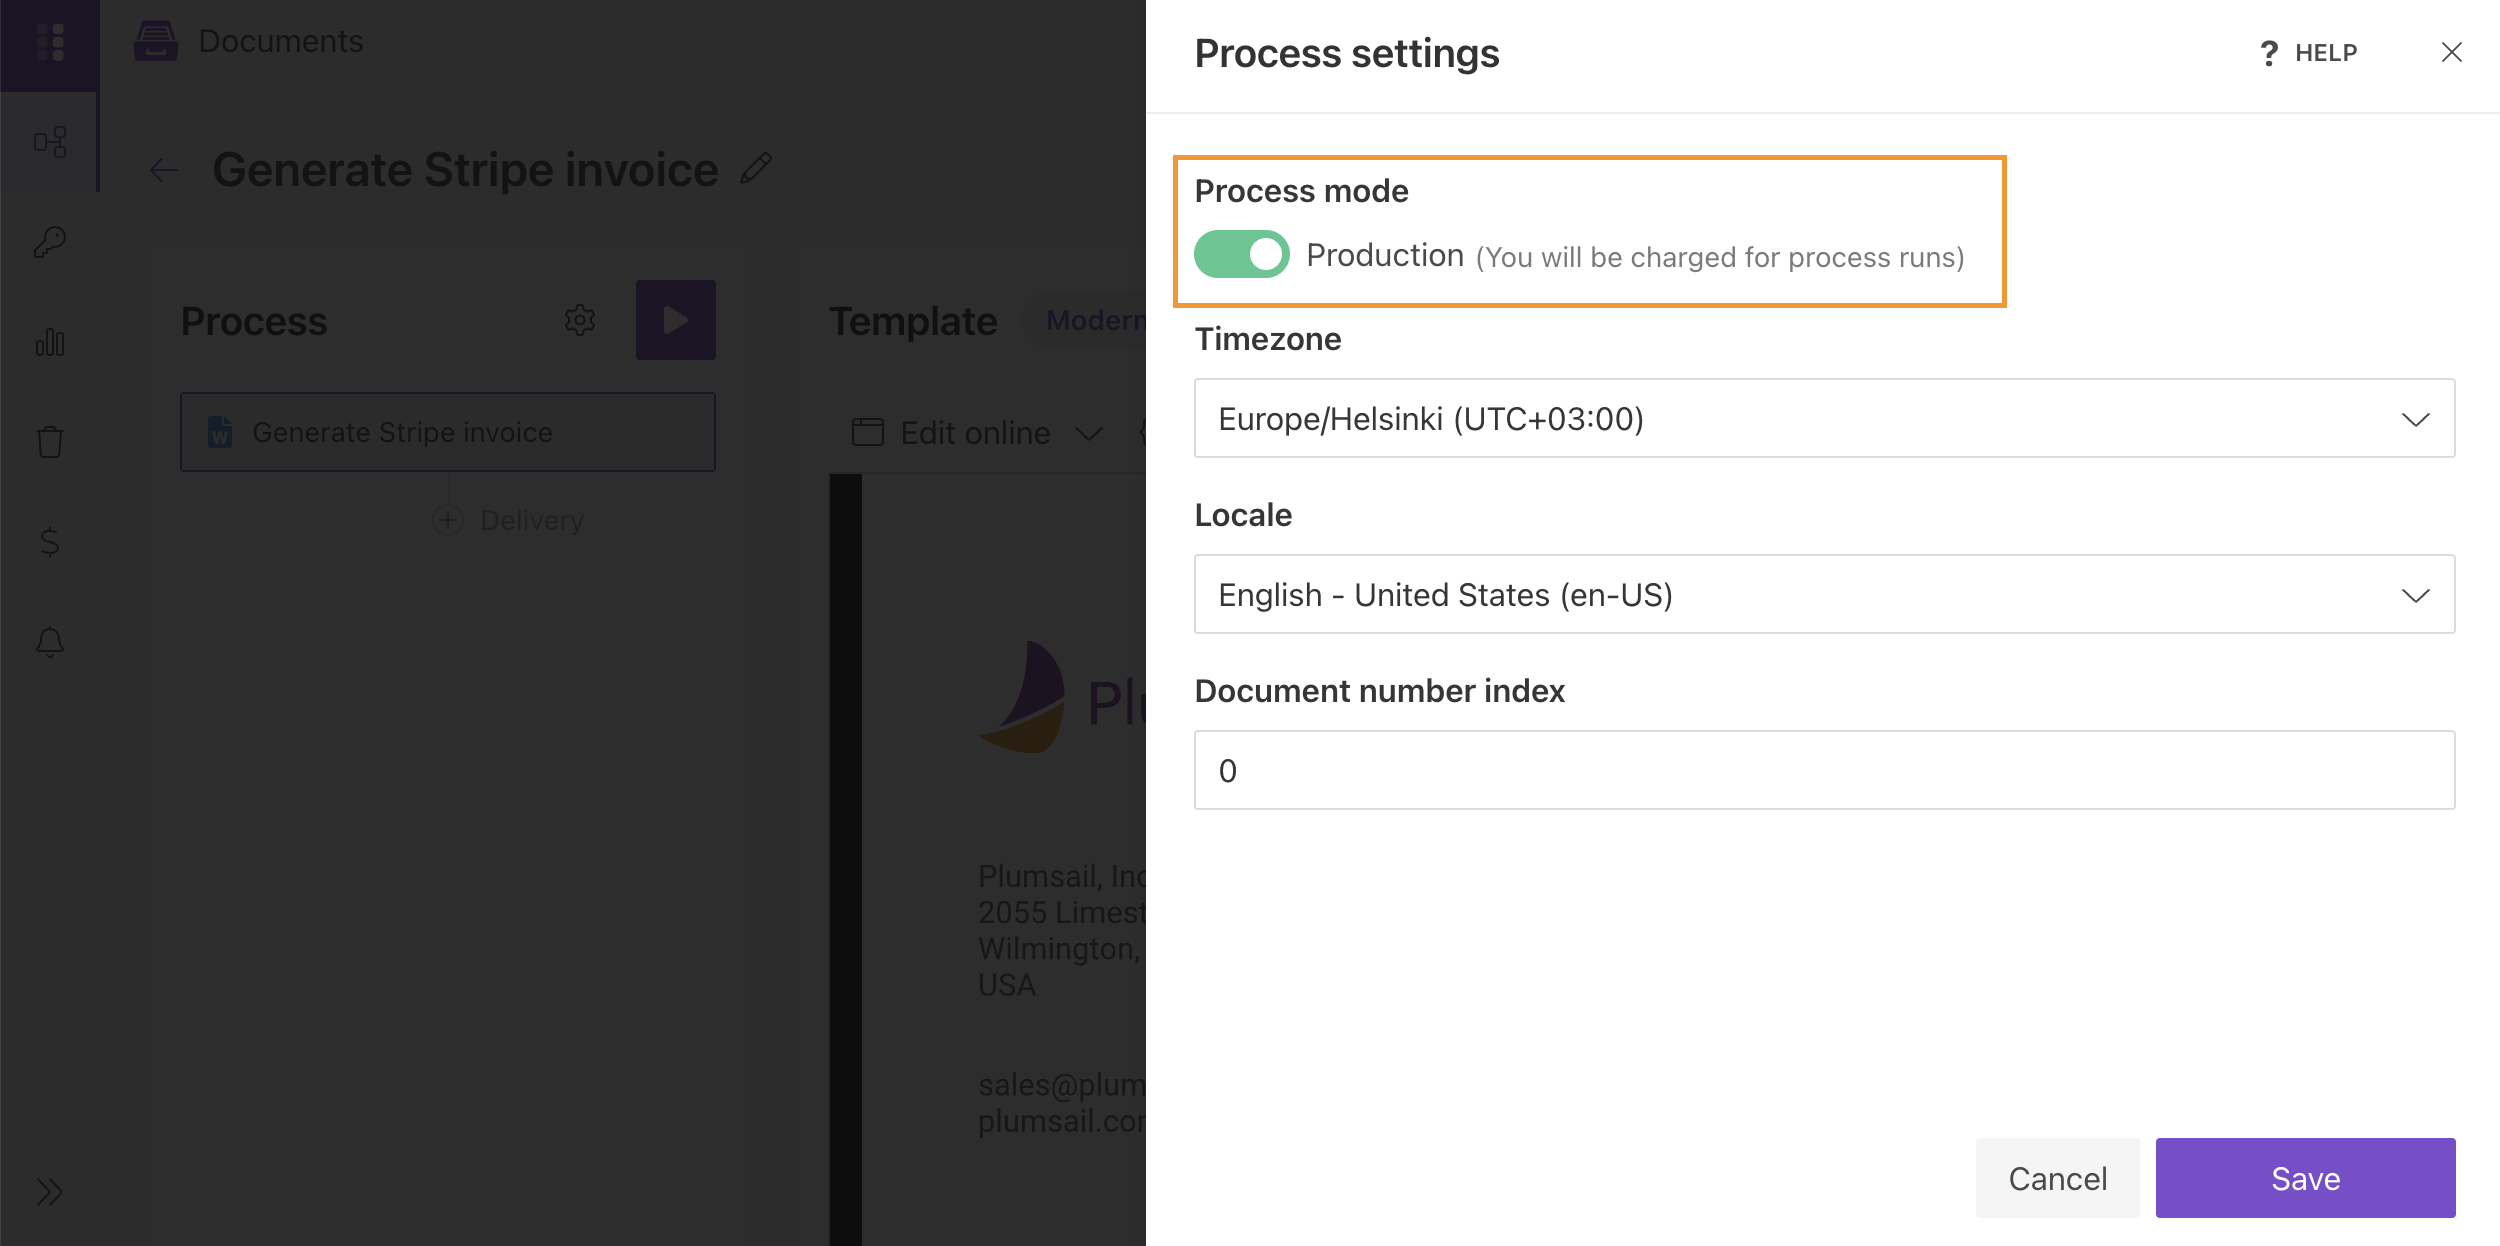
Process settings
Click the gear icon in the left sidebar to open the process settings.
Here you can switch the process mode from Testing to Production, set up timezone, locale and document index number.
Use Testing mode while configuring and testing the process. When you are ready to use the process in production, switch to Production mode.
Note
See Process settings article for more information.
Delivery options
In this step, configure deliveries - where generated documents should be sent or stored. You can add multiple deliveries to the same process. Available delivery options include email services, cloud storage, chats, e-signature platforms, and other integrations. See the full list of available deliveries.
In this example, we added an Gmail delivery to send invoices to both the customer and the manager.
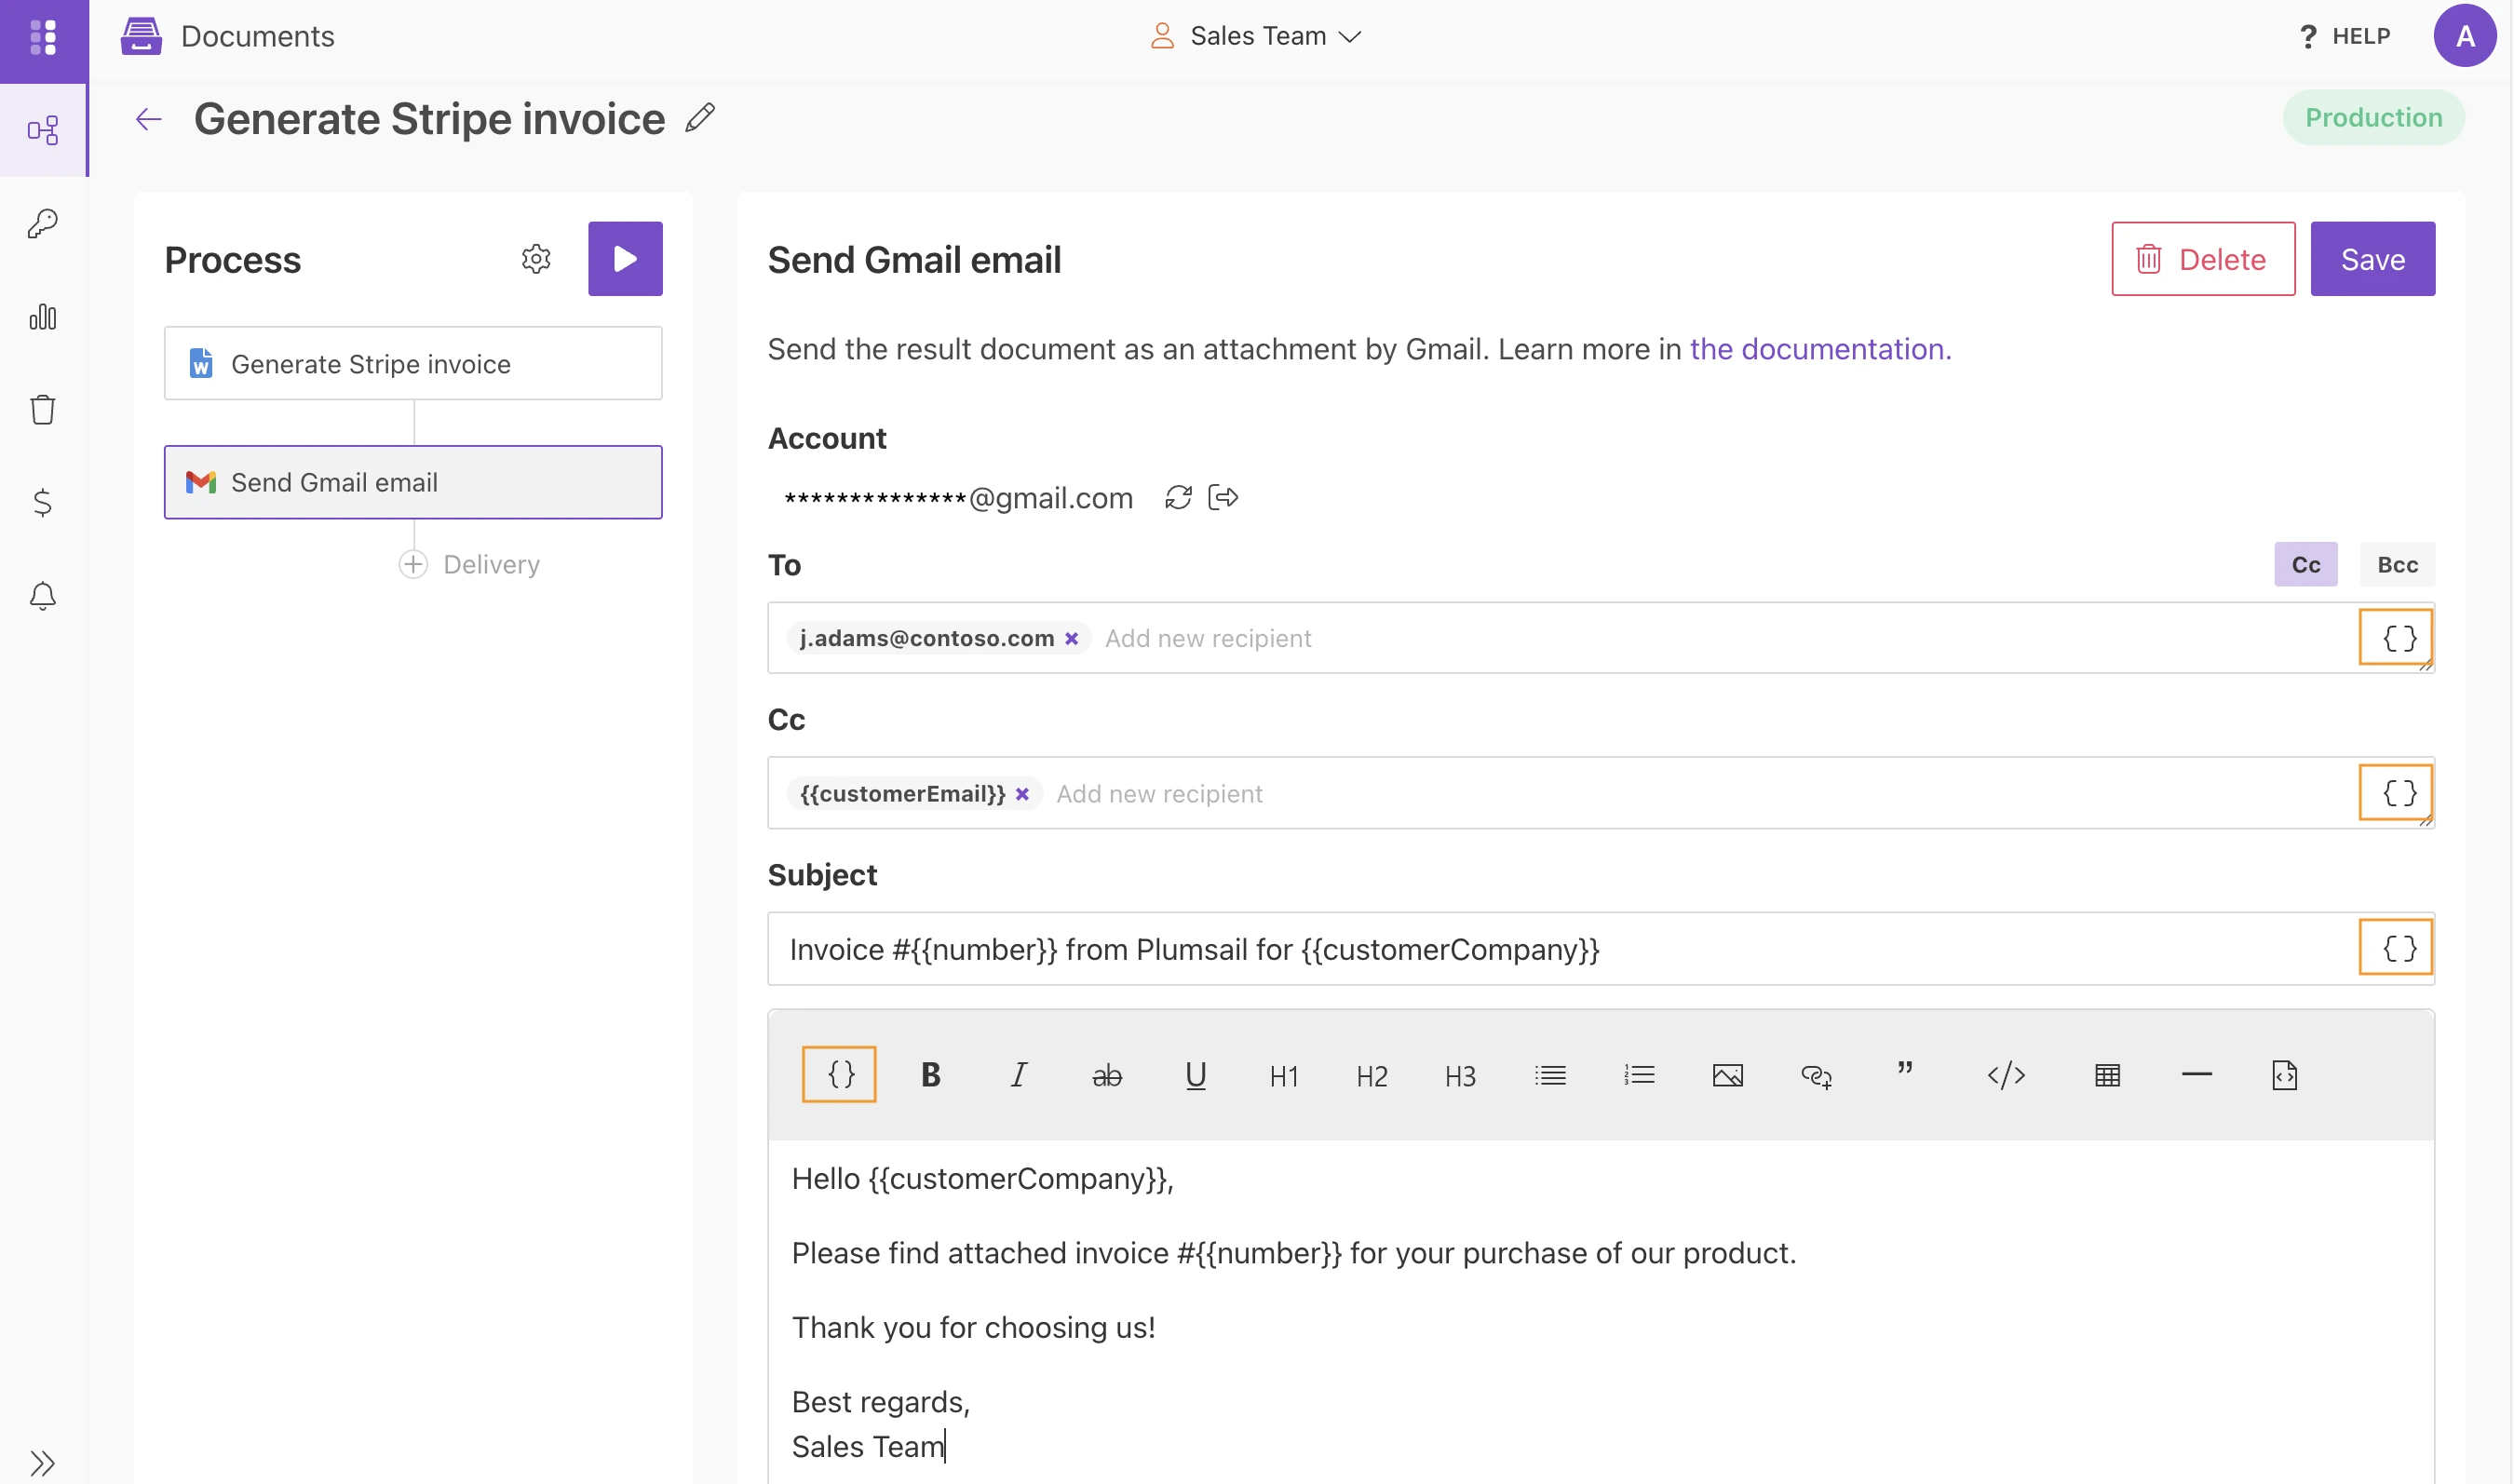
You can use tokens in delivery settings to insert dynamic data into messages or send documents to dynamic recipients.
For example, use the {{customerEmail}} token to send invoices to the customer’s email address automatically.
Click Save to apply the changes and continue to the Zapier setup.
Set up new Zap in Zapier
Go to Zapier and create an account if needed. Then create a new Zap.
You will see a default Zap that contains a trigger and an action. The trigger is an event that starts the Zap, and the action is what happens after the trigger event occurs.
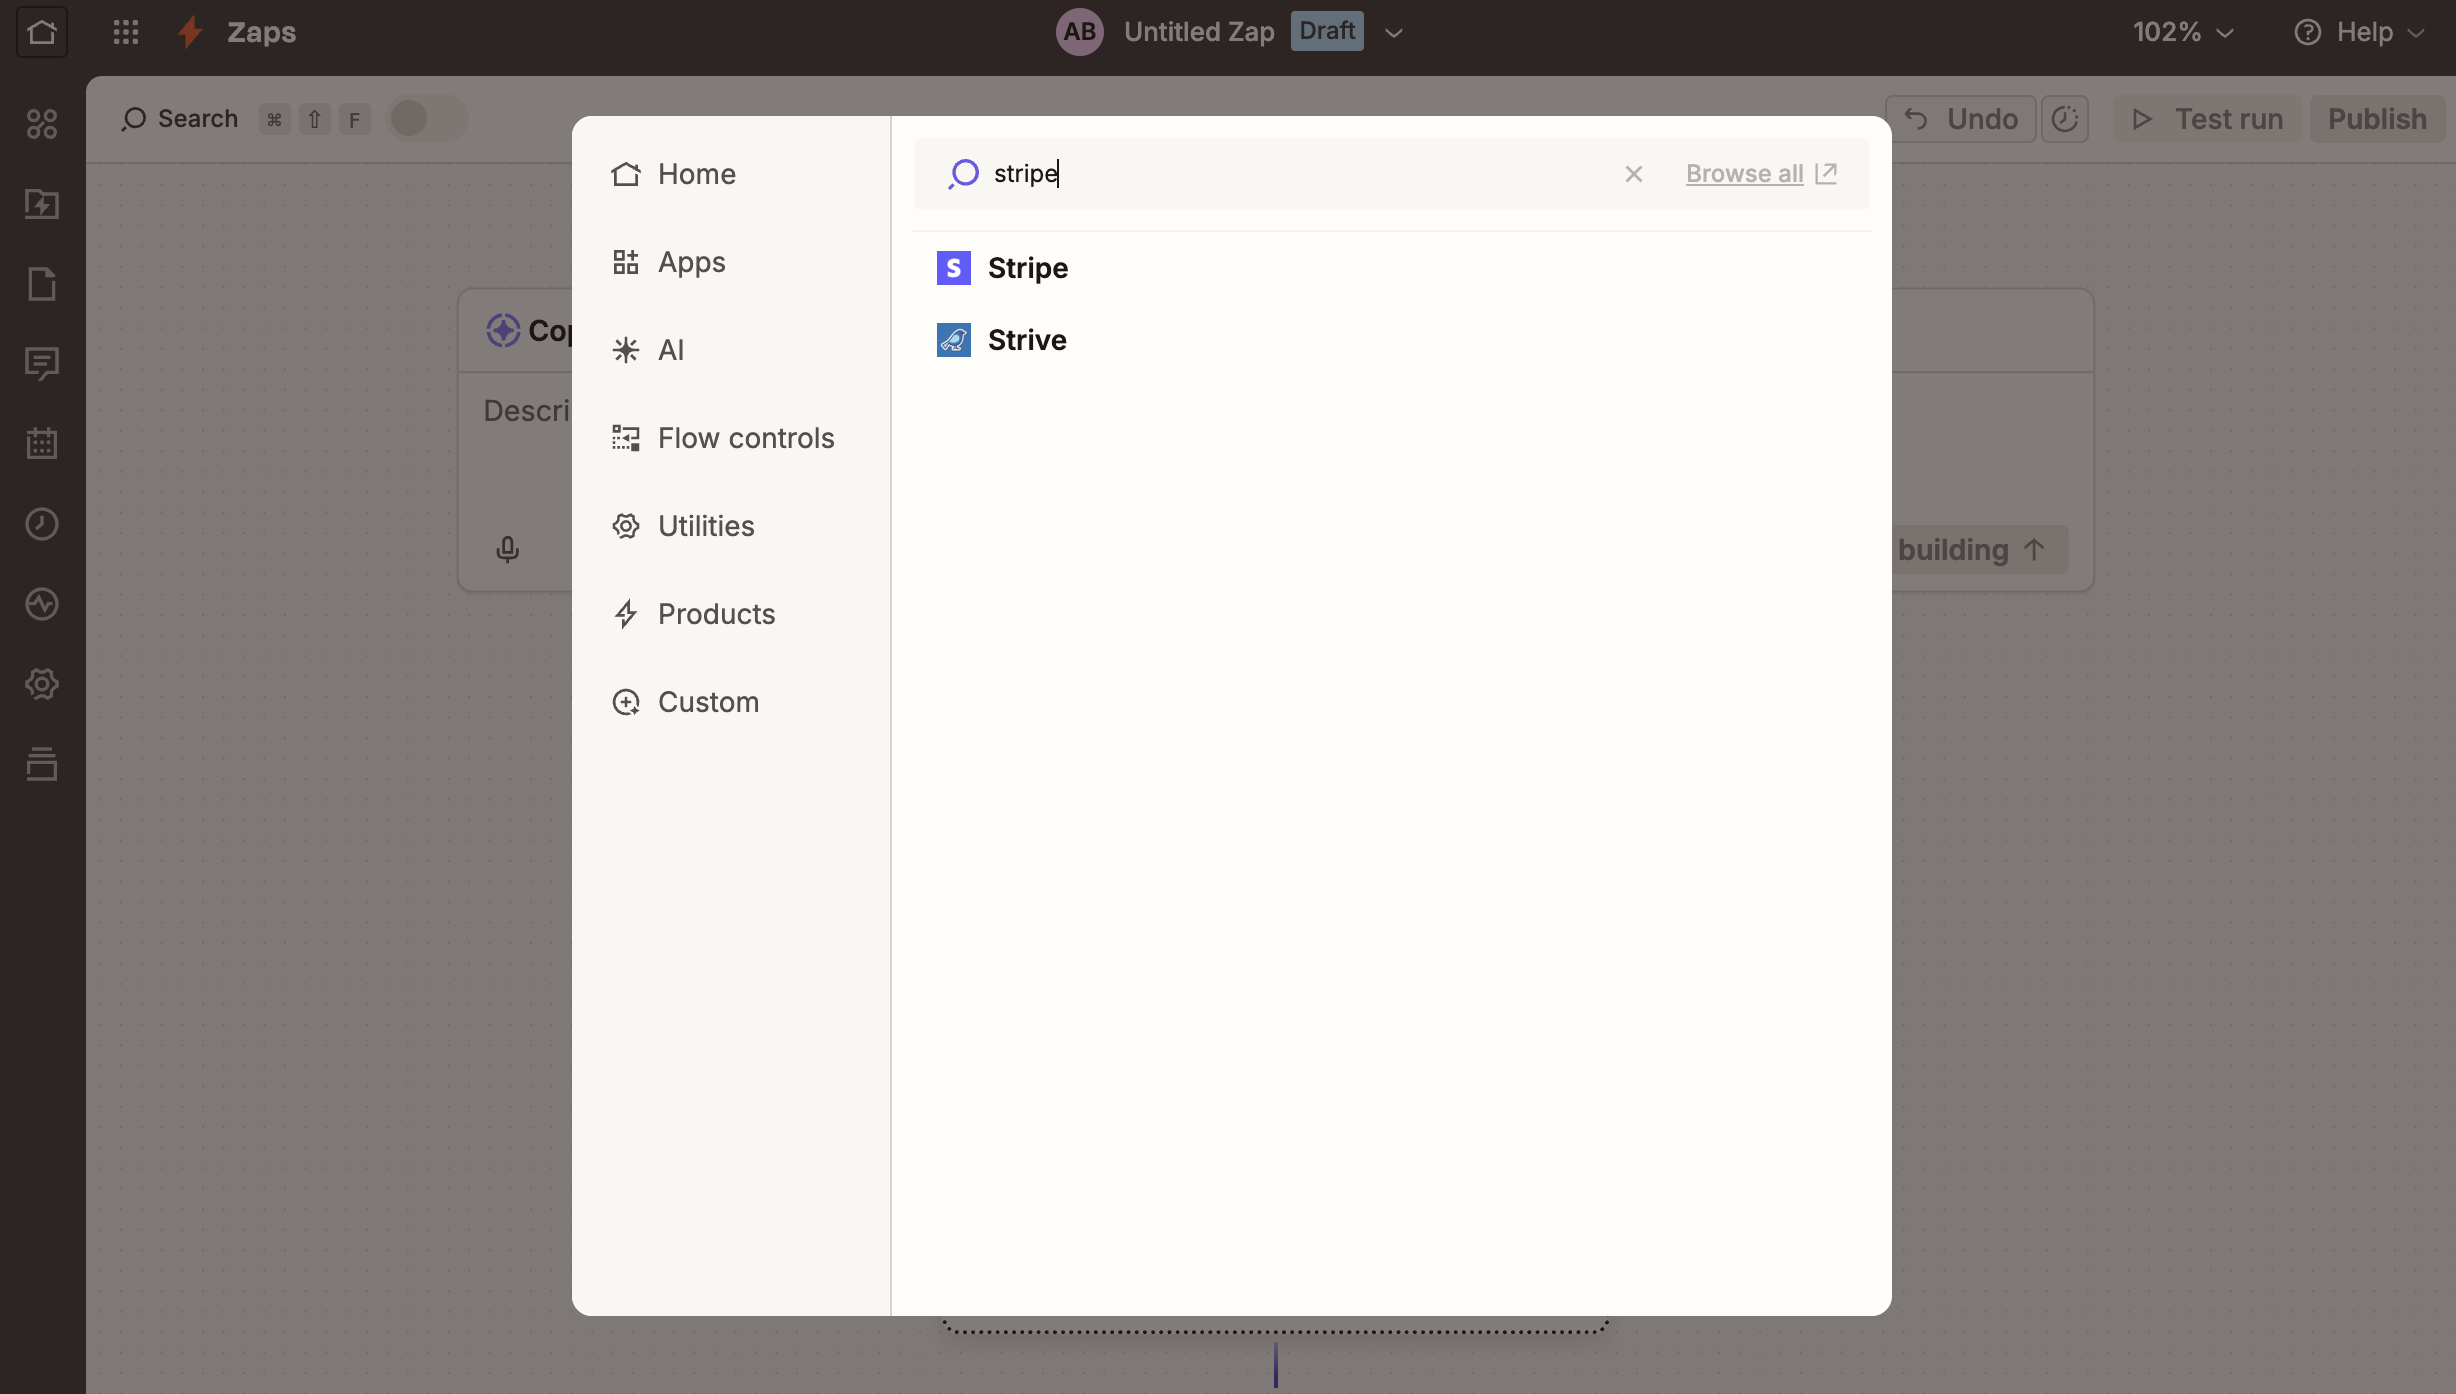
Create Stripe connection
Click the trigger block and search for Stripe.
Select the Stripe event type. In this example, we use the New Payment event.
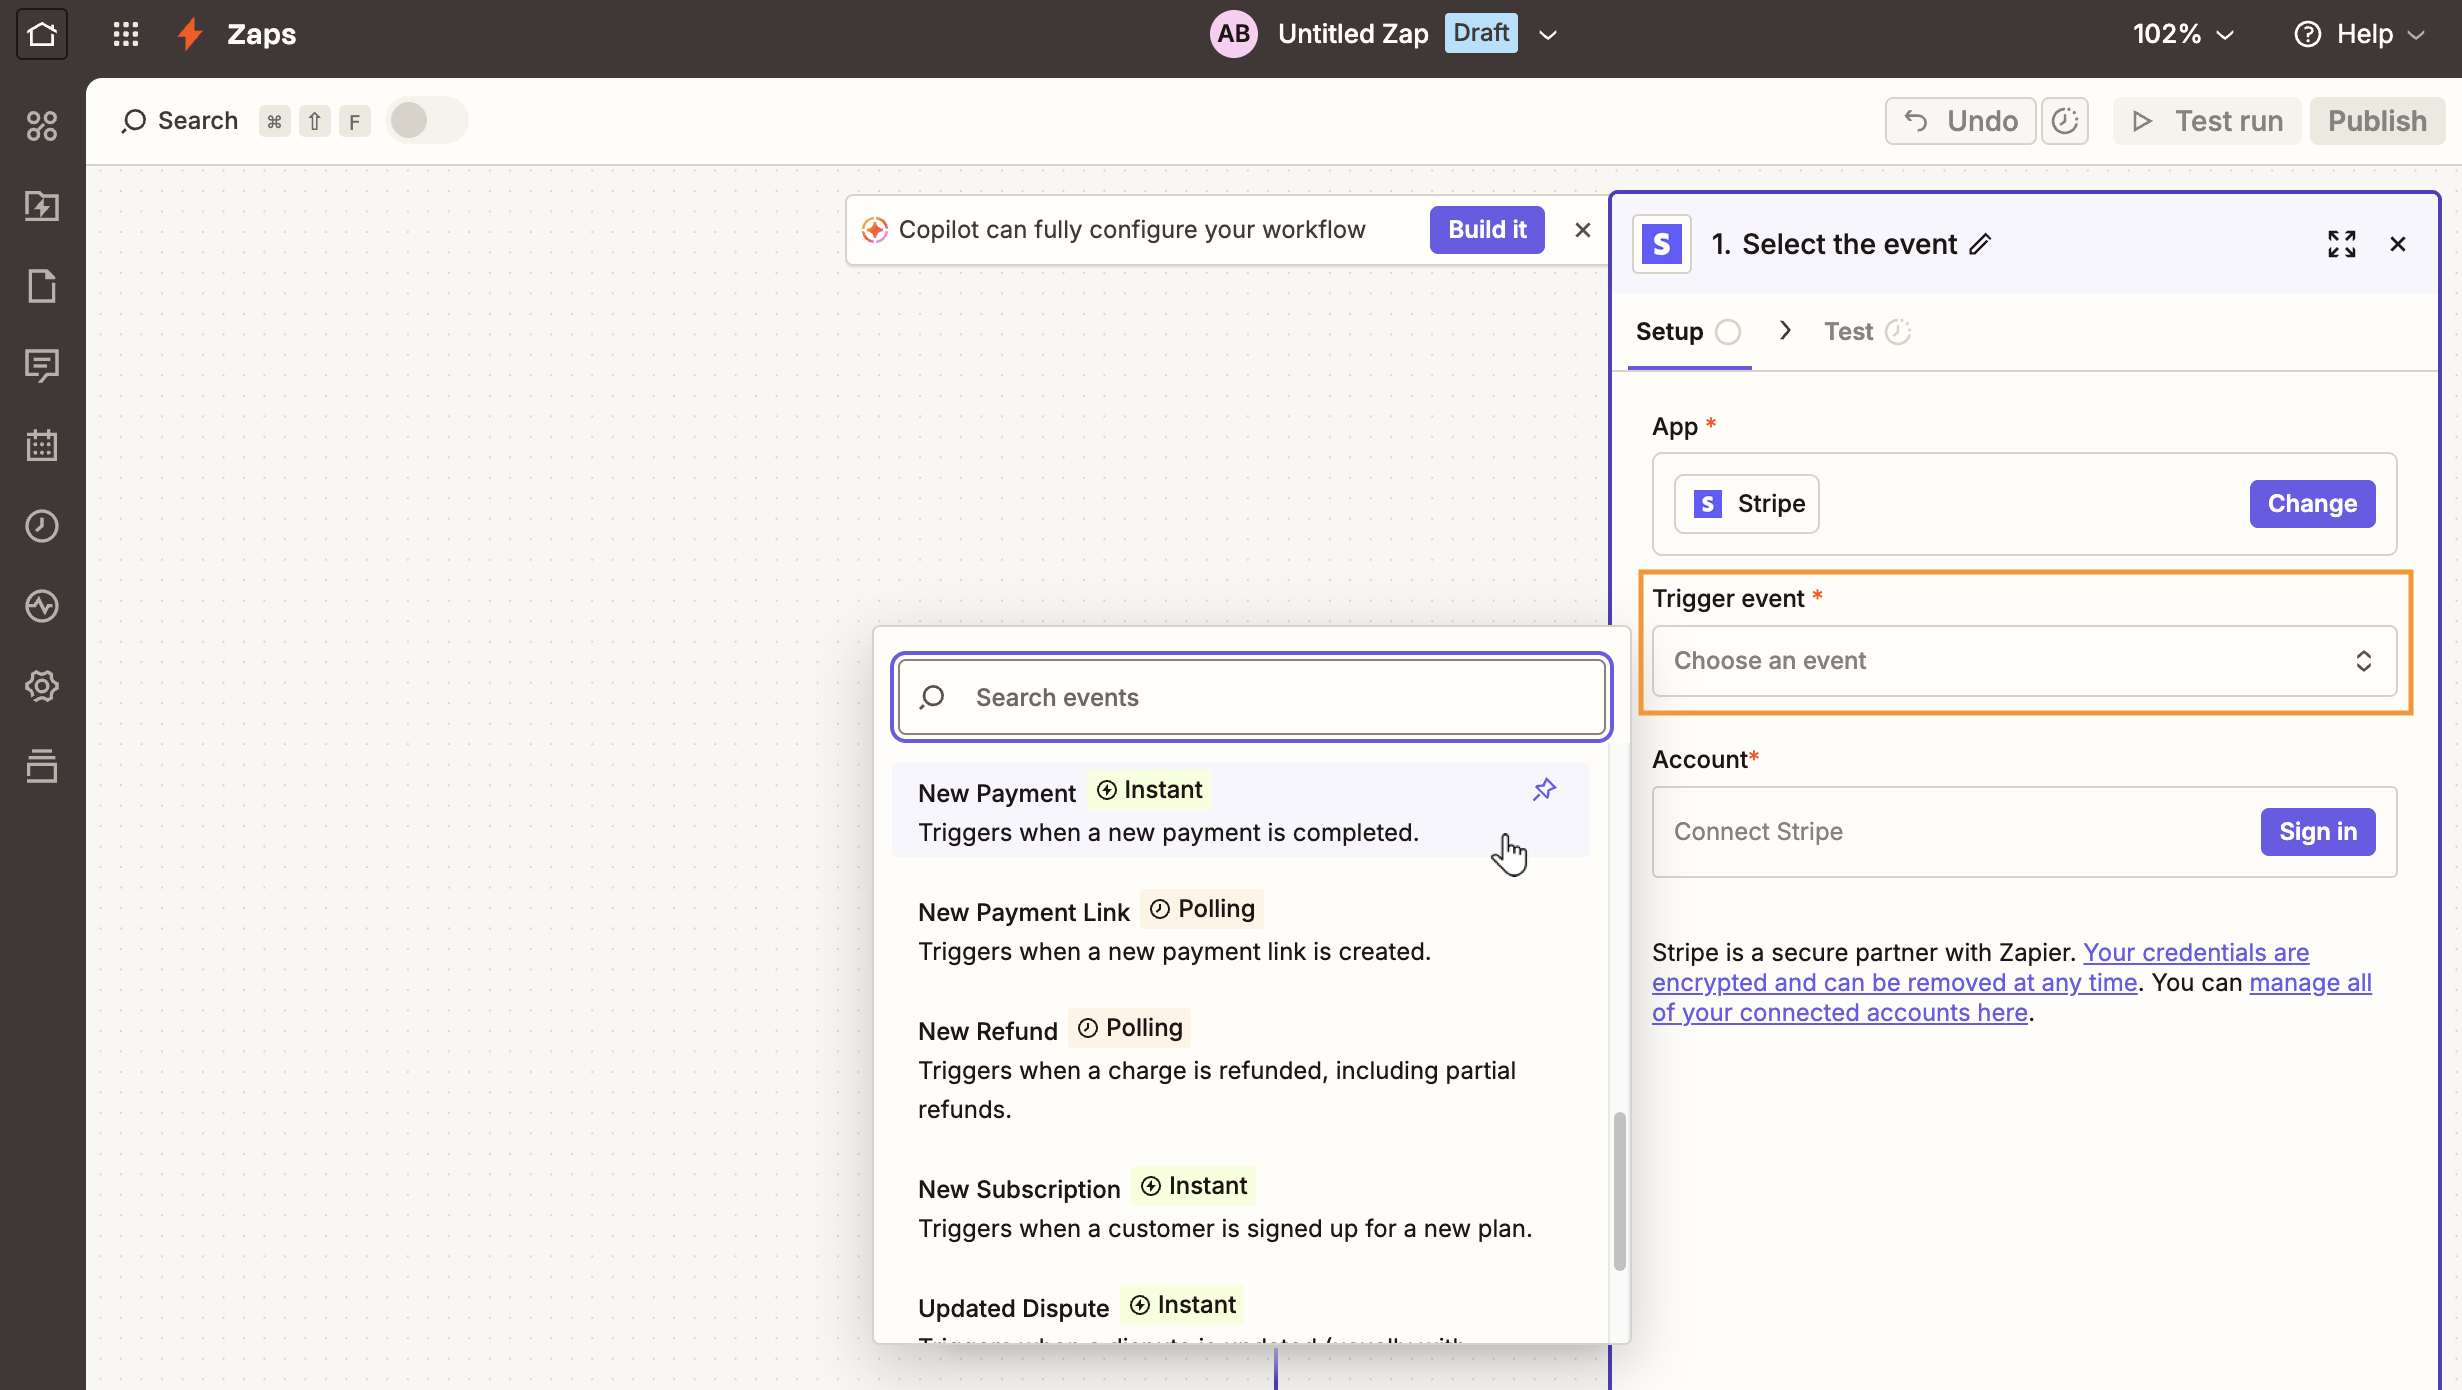
Zapier supports many different Stripe events. For example, if you want to generate invoices after subscription renewals, select New Event and configure the required subscription event.
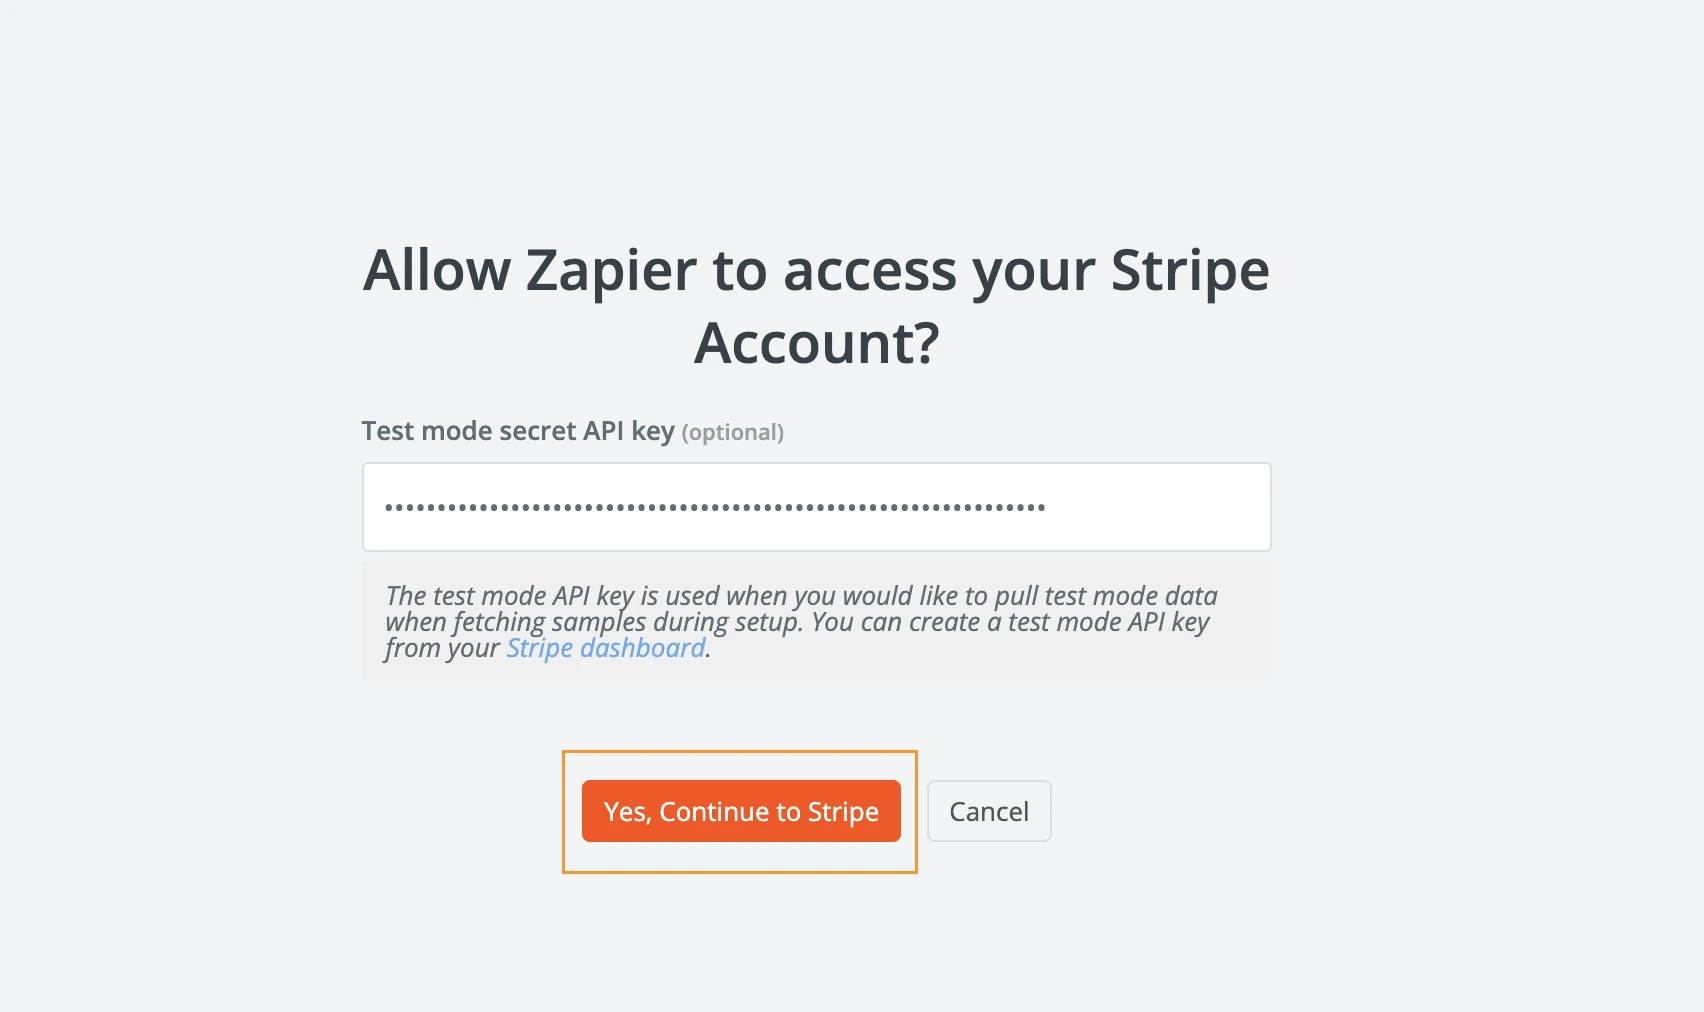
Next, create a connection between Zapier and your Stripe account. Click the Sign In button in the Account field. Zapier will ask you to authorize access to your Stripe account. In the pop-up window, click the Stripe Dashboard link.
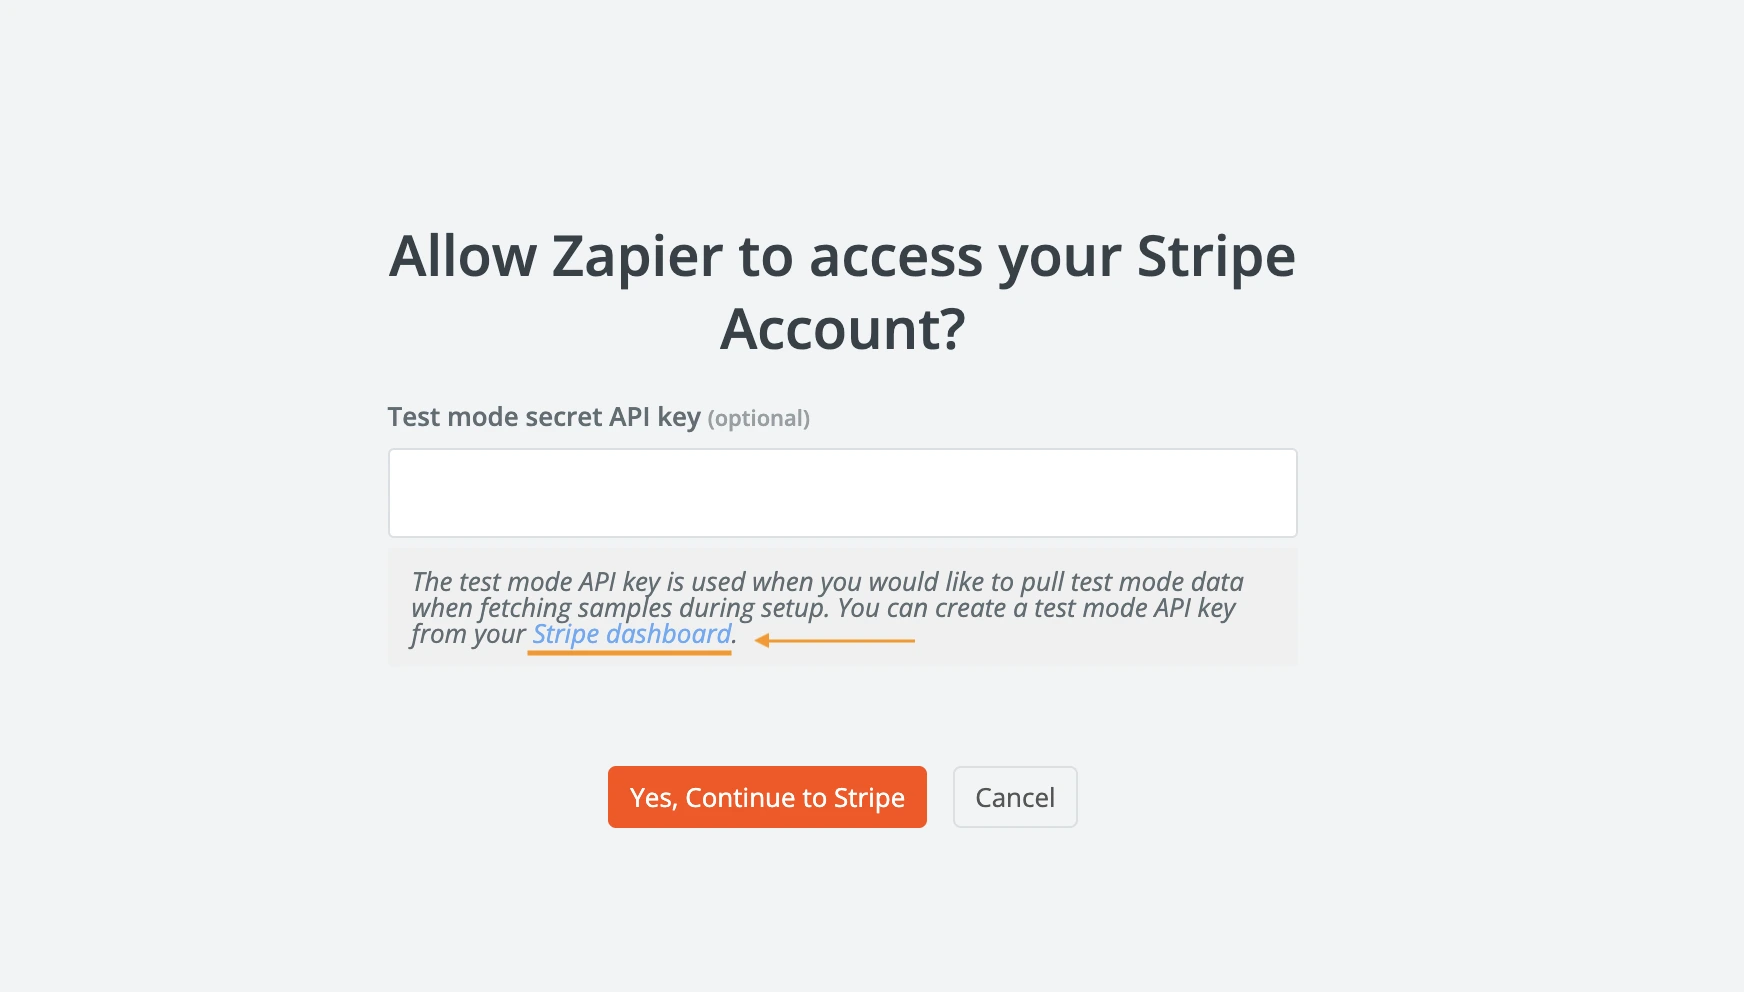
You will be redirected to Stripe to generate a secret key. Click the button and copy the generated key.
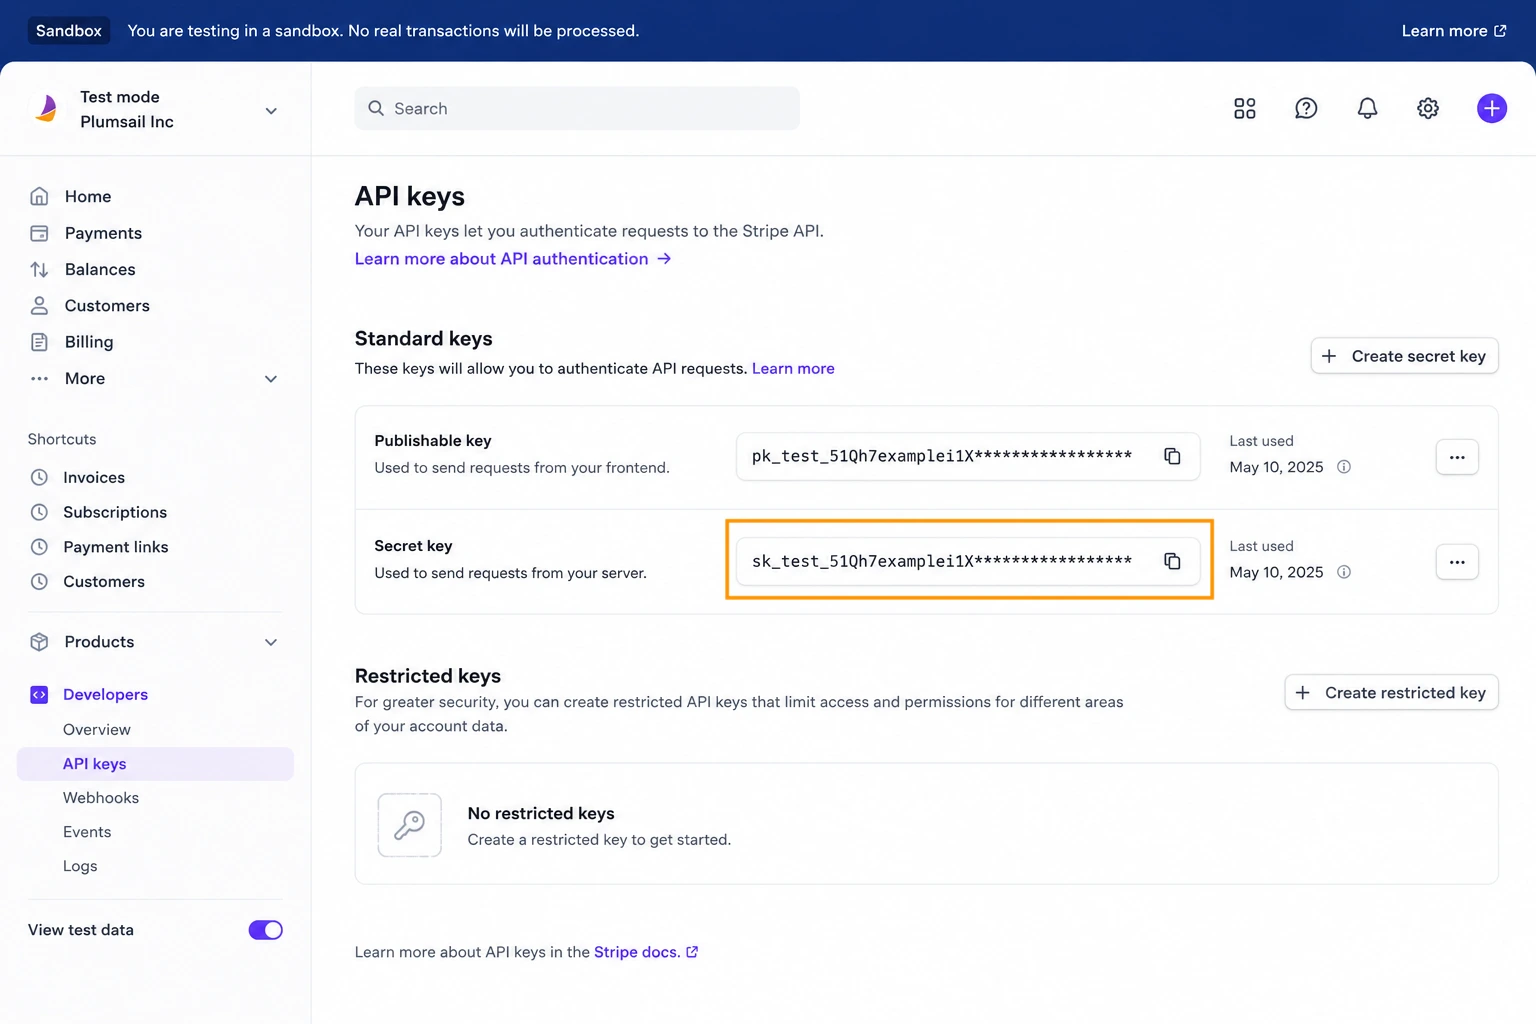
Return to the pop-up window and paste the secret key into the field. Then click Yes, Continue to Stripe. You will be redirected to Stripe to confirm the connection.
After that, continue configuring the trigger in Zapier. At the next step, click Test trigger to retrieve sample payment data from Stripe.
In this example, Zapier returned the following test data:
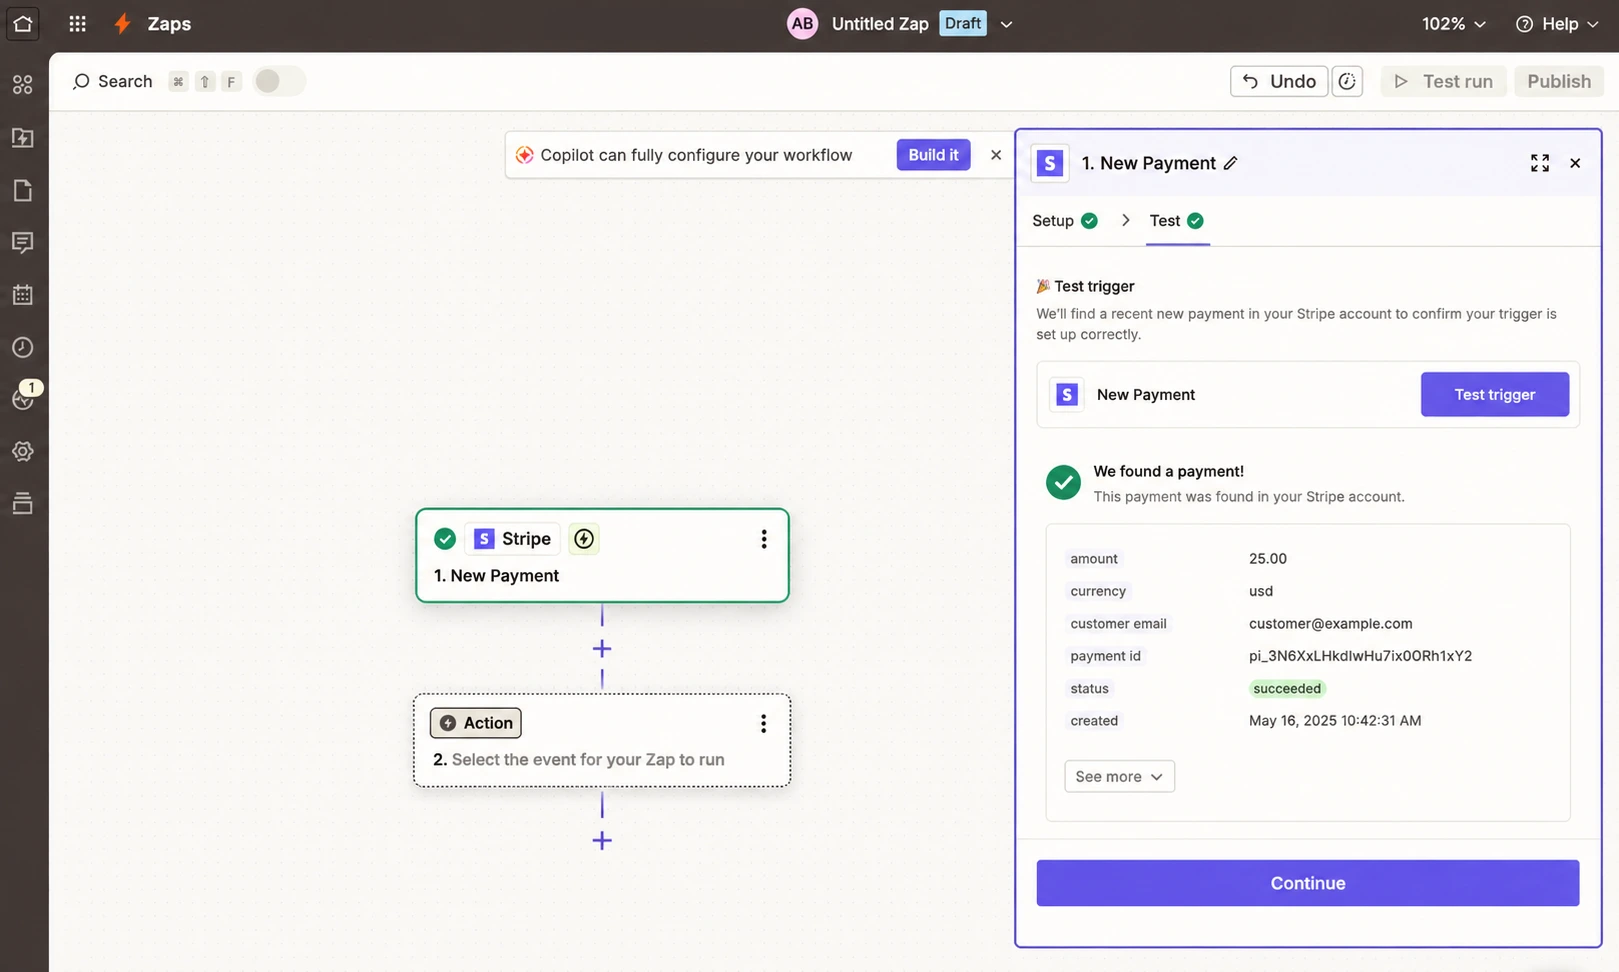
This data will be used to generate invoices automatically in Plumsail Documents.
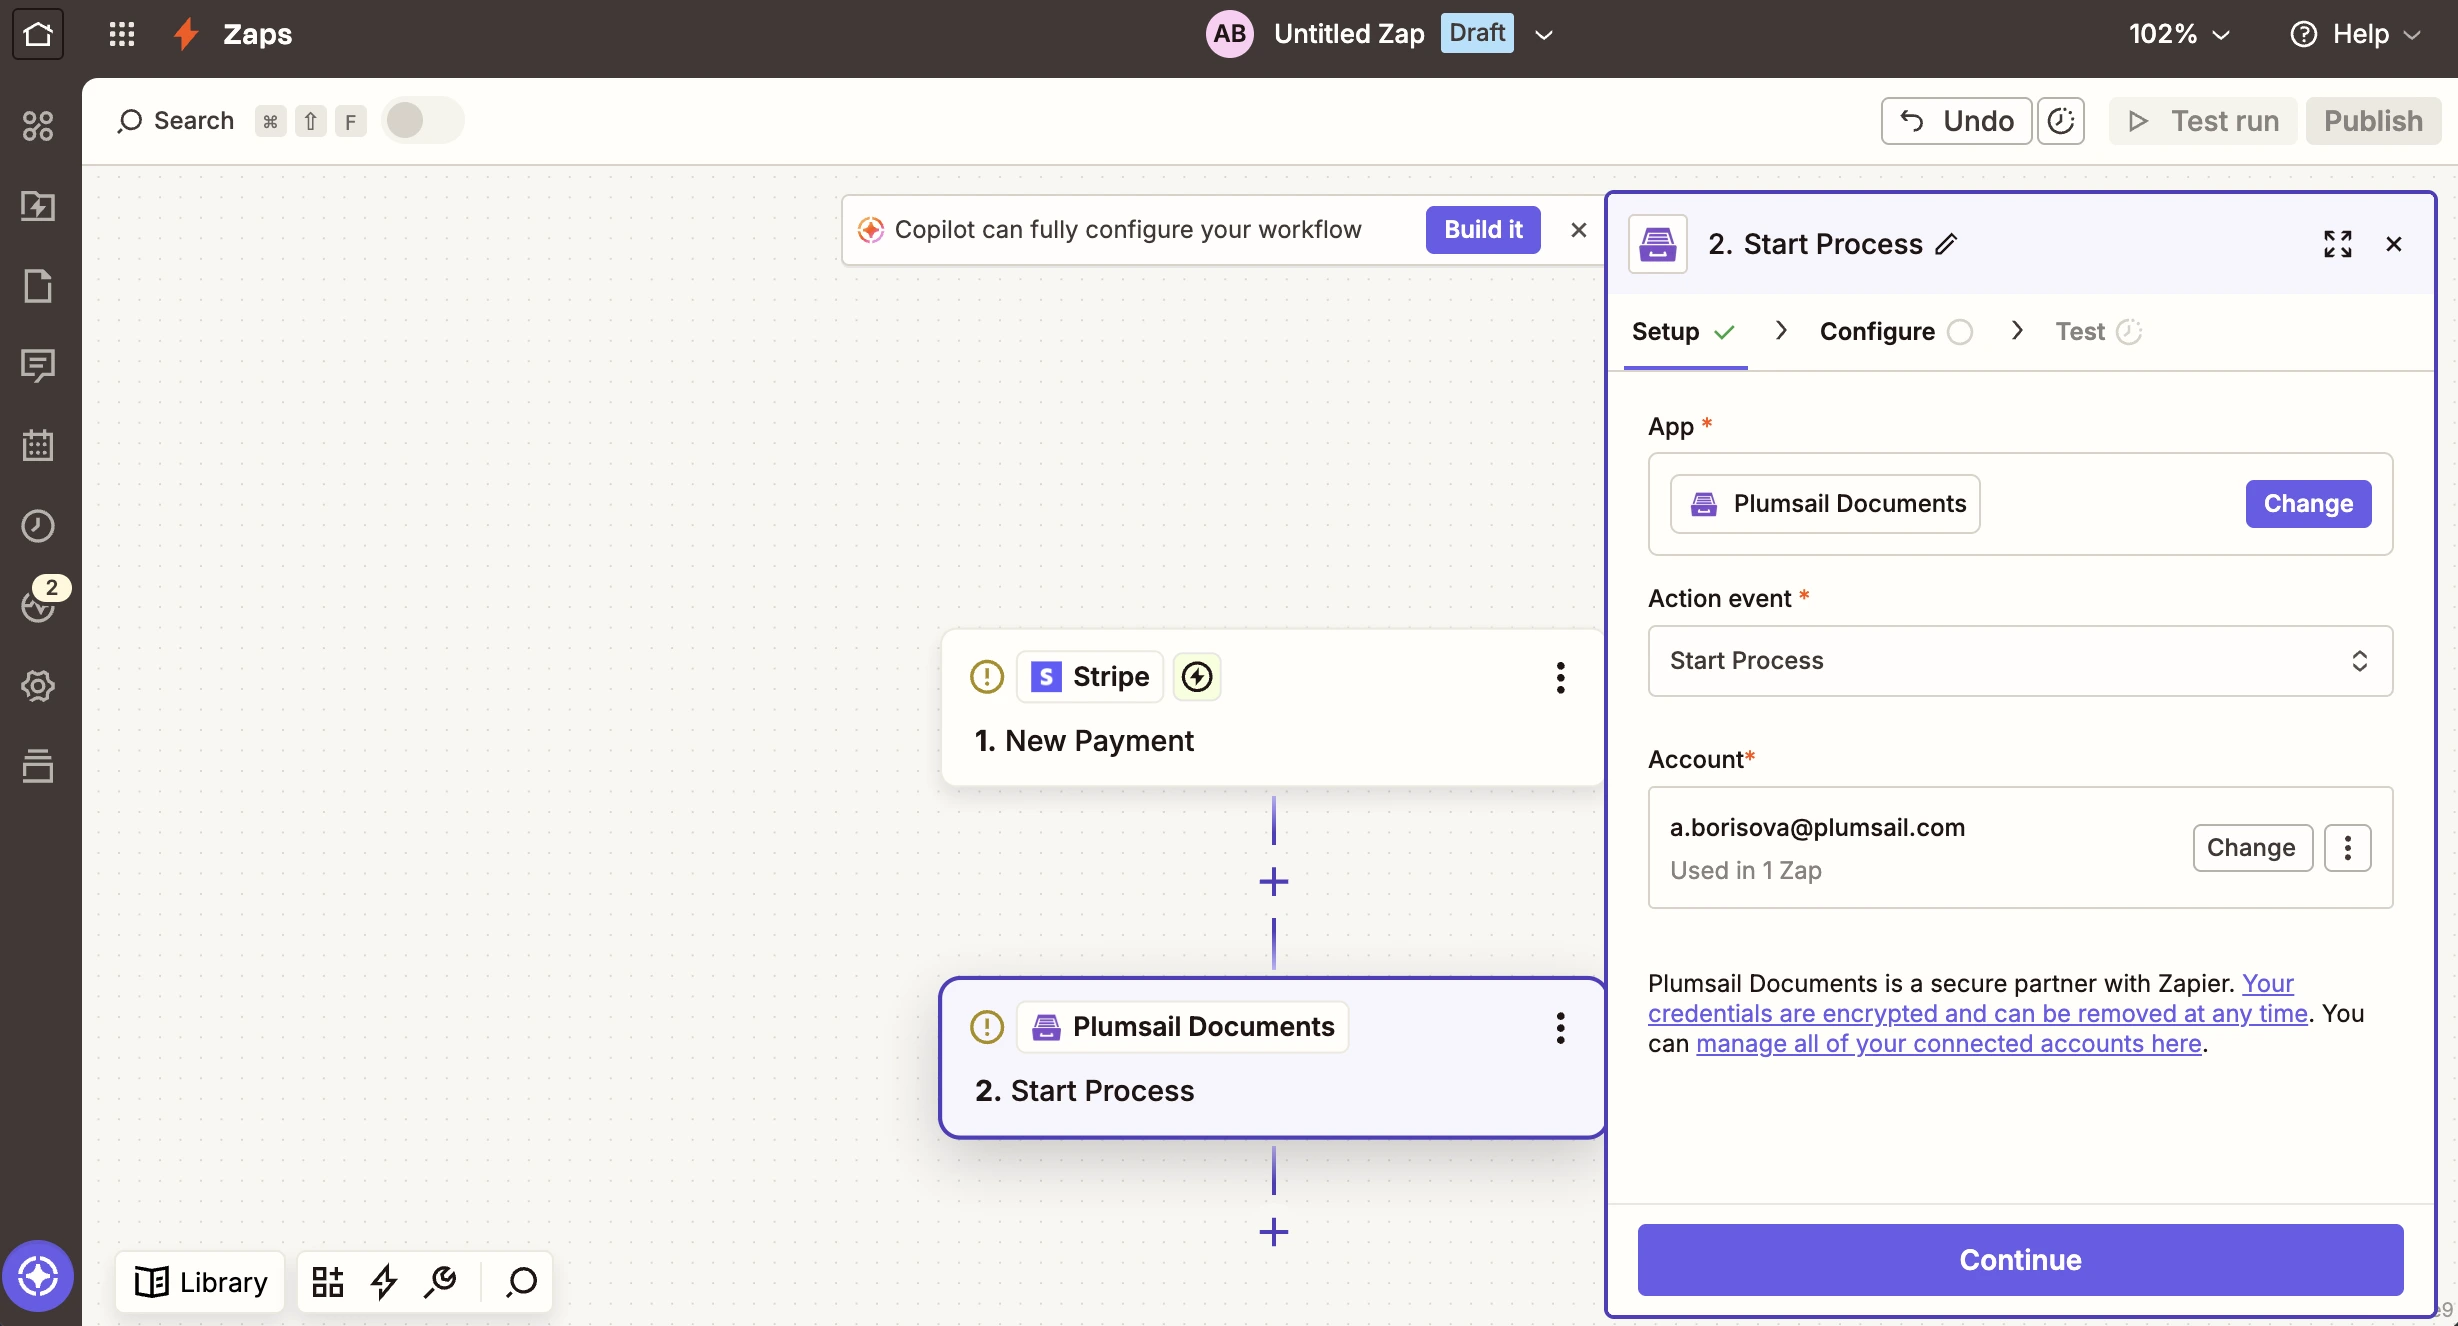
Create Plumsail Documetns connection
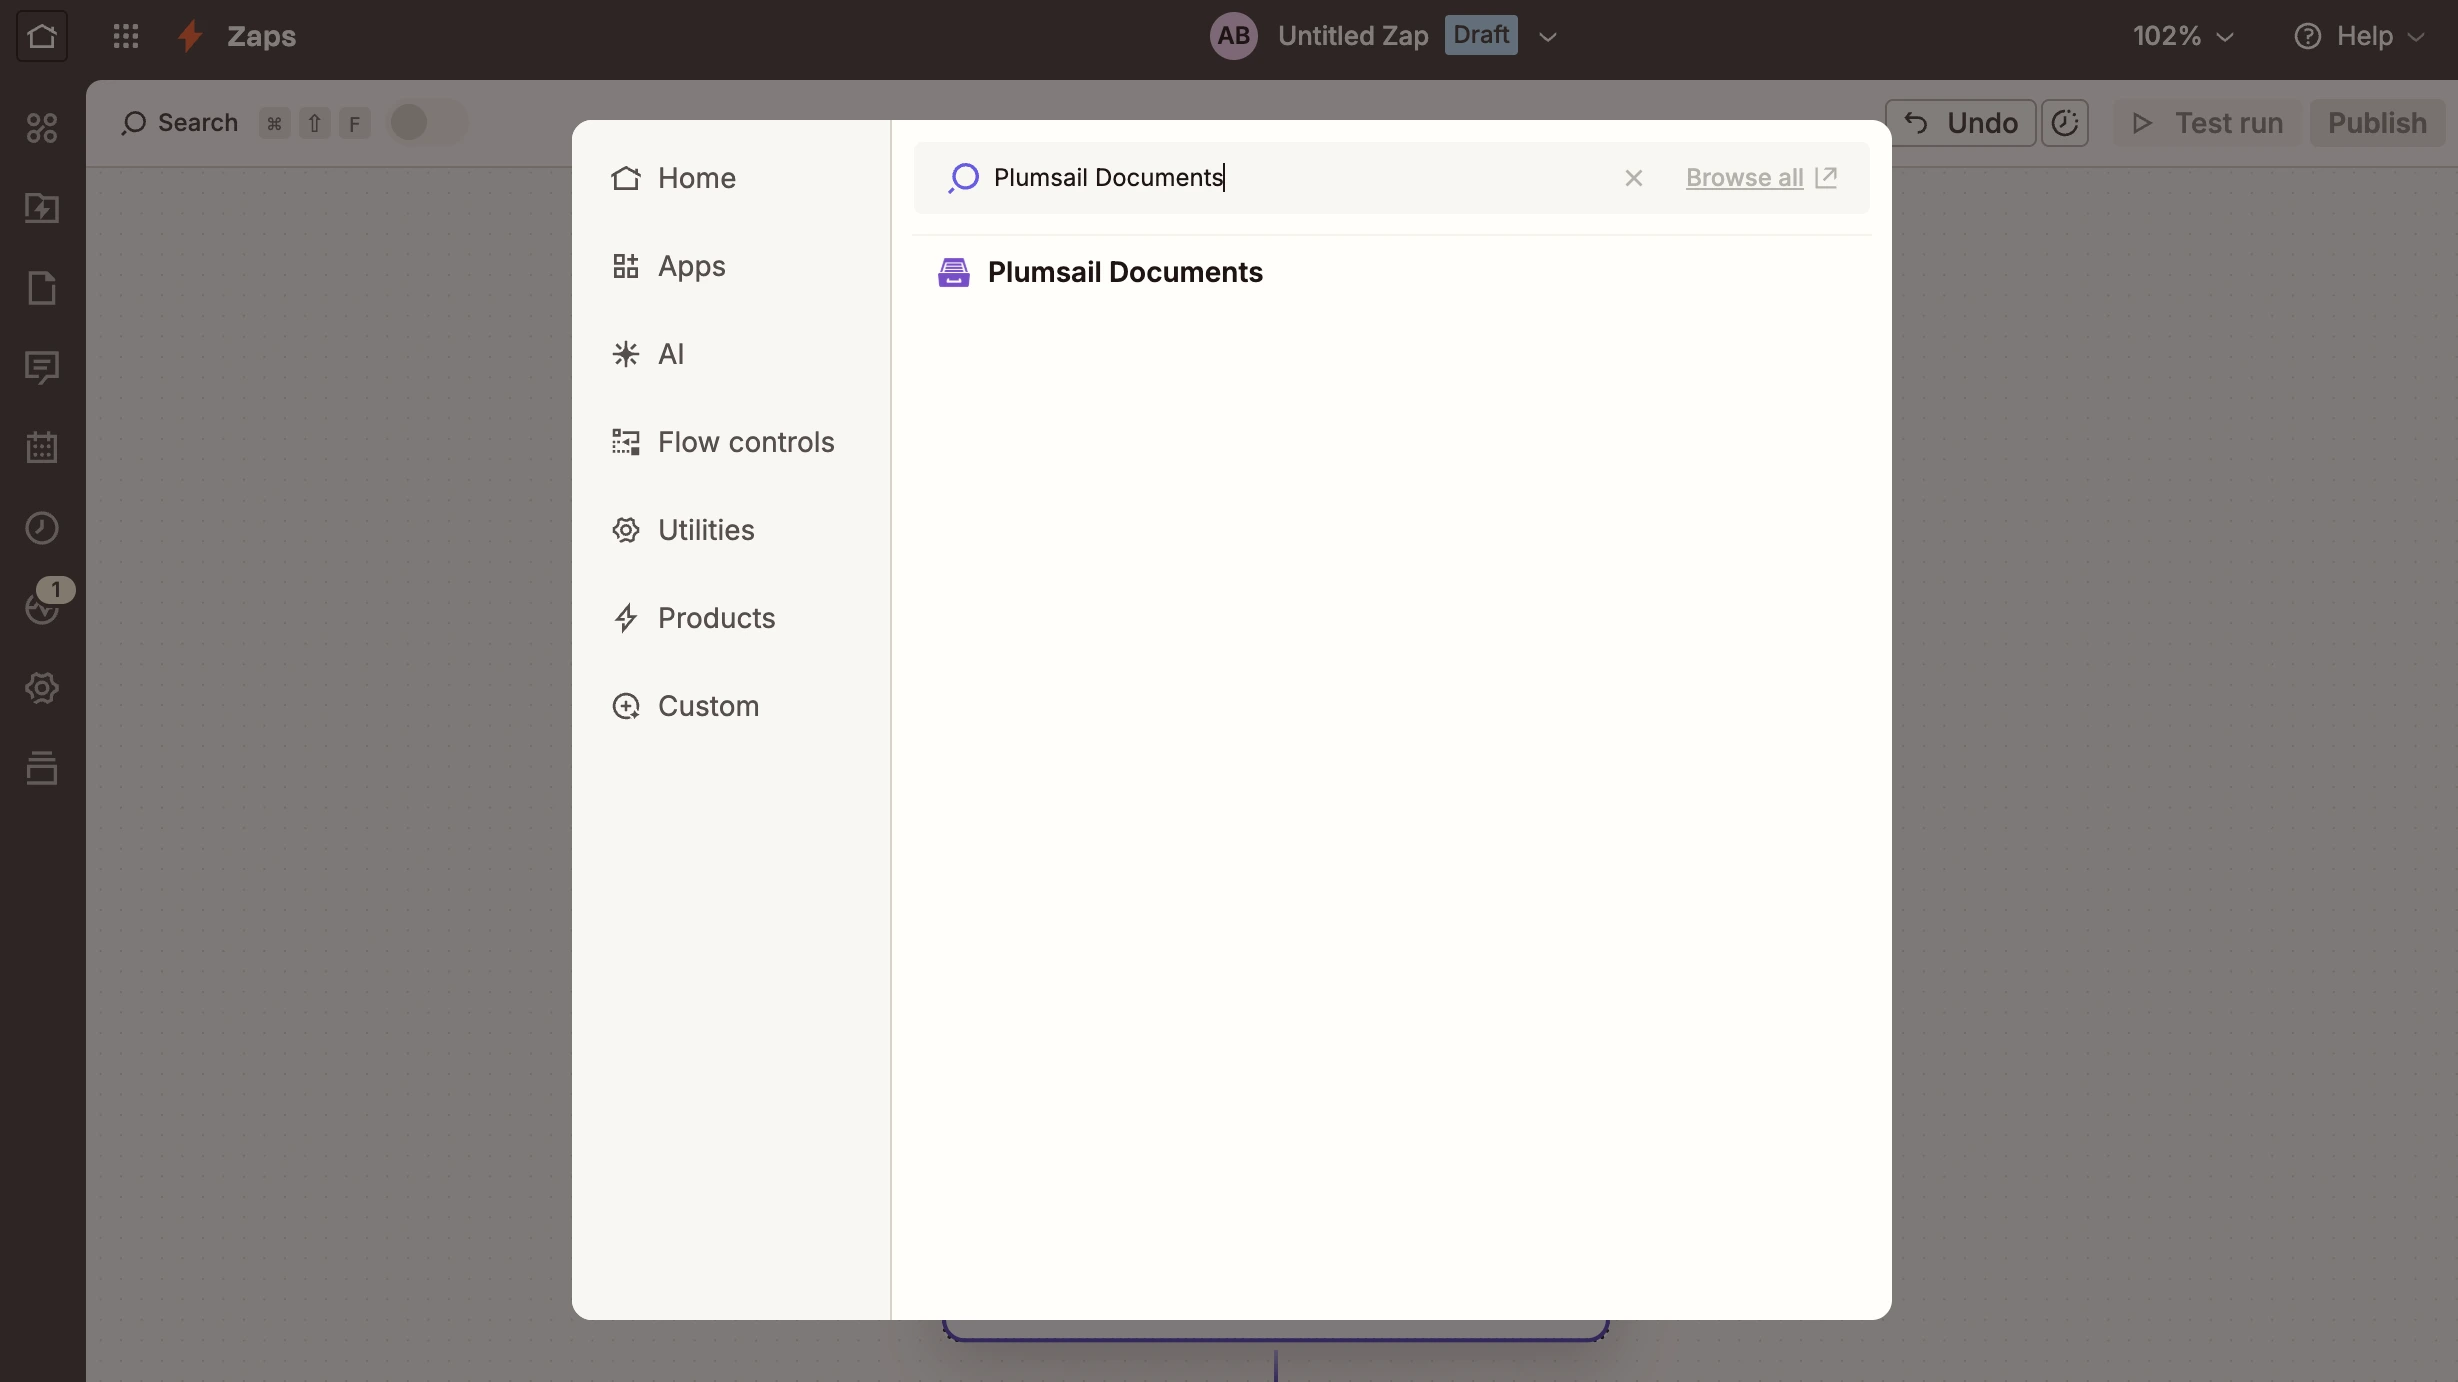
Click the action block and search for Plumsail Documents.
Select Start process as the action event and sign in to your Plumsail account to authorize Zapier access.
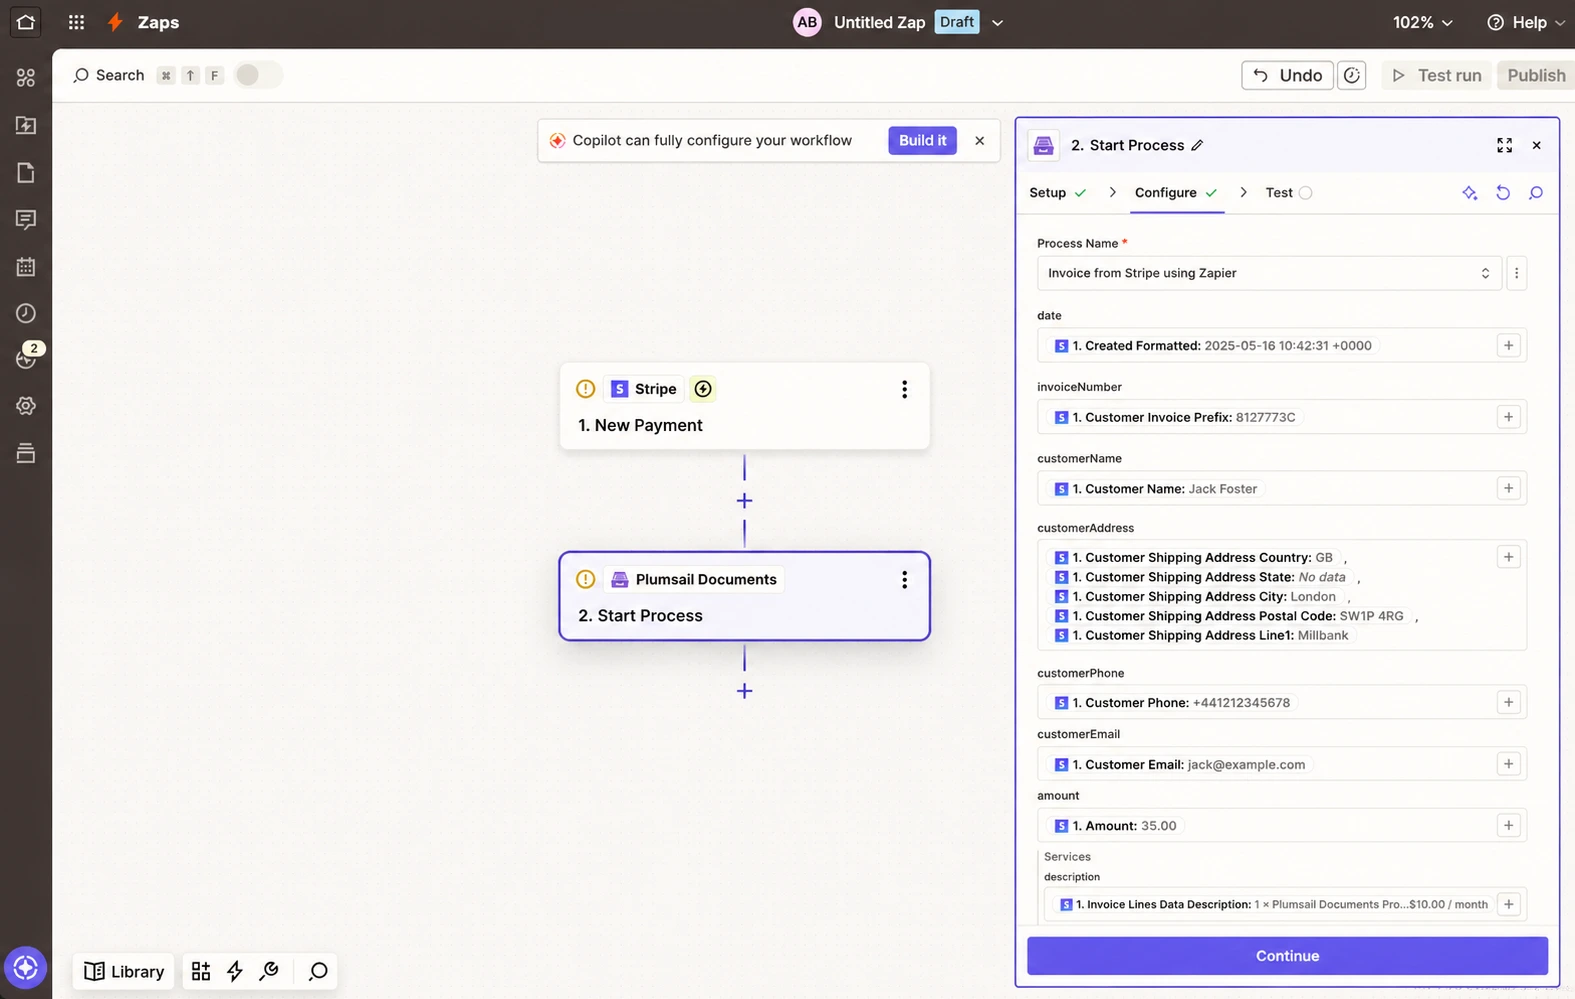
Next, select the process you created in Plumsail Documents. Then map the Stripe payment data to the tokens in your Plumsail template. In this example, we used the following mappings:
Process Name: Select created process in Plumsail Documents
{{date}}: Created Formatted{{invoiceNumber}}: Customer Invoice Prefix{{customerName}}: Customer Name{{customerAddress}}: Included all customer address outputs. We did not list everything here{{customerPhone}}: Customer Phone{{customerEmail}}: Customer Email{{amount}}: Amount{{description}}: Invoice Lines Data Description. Here we select line items from the invoice
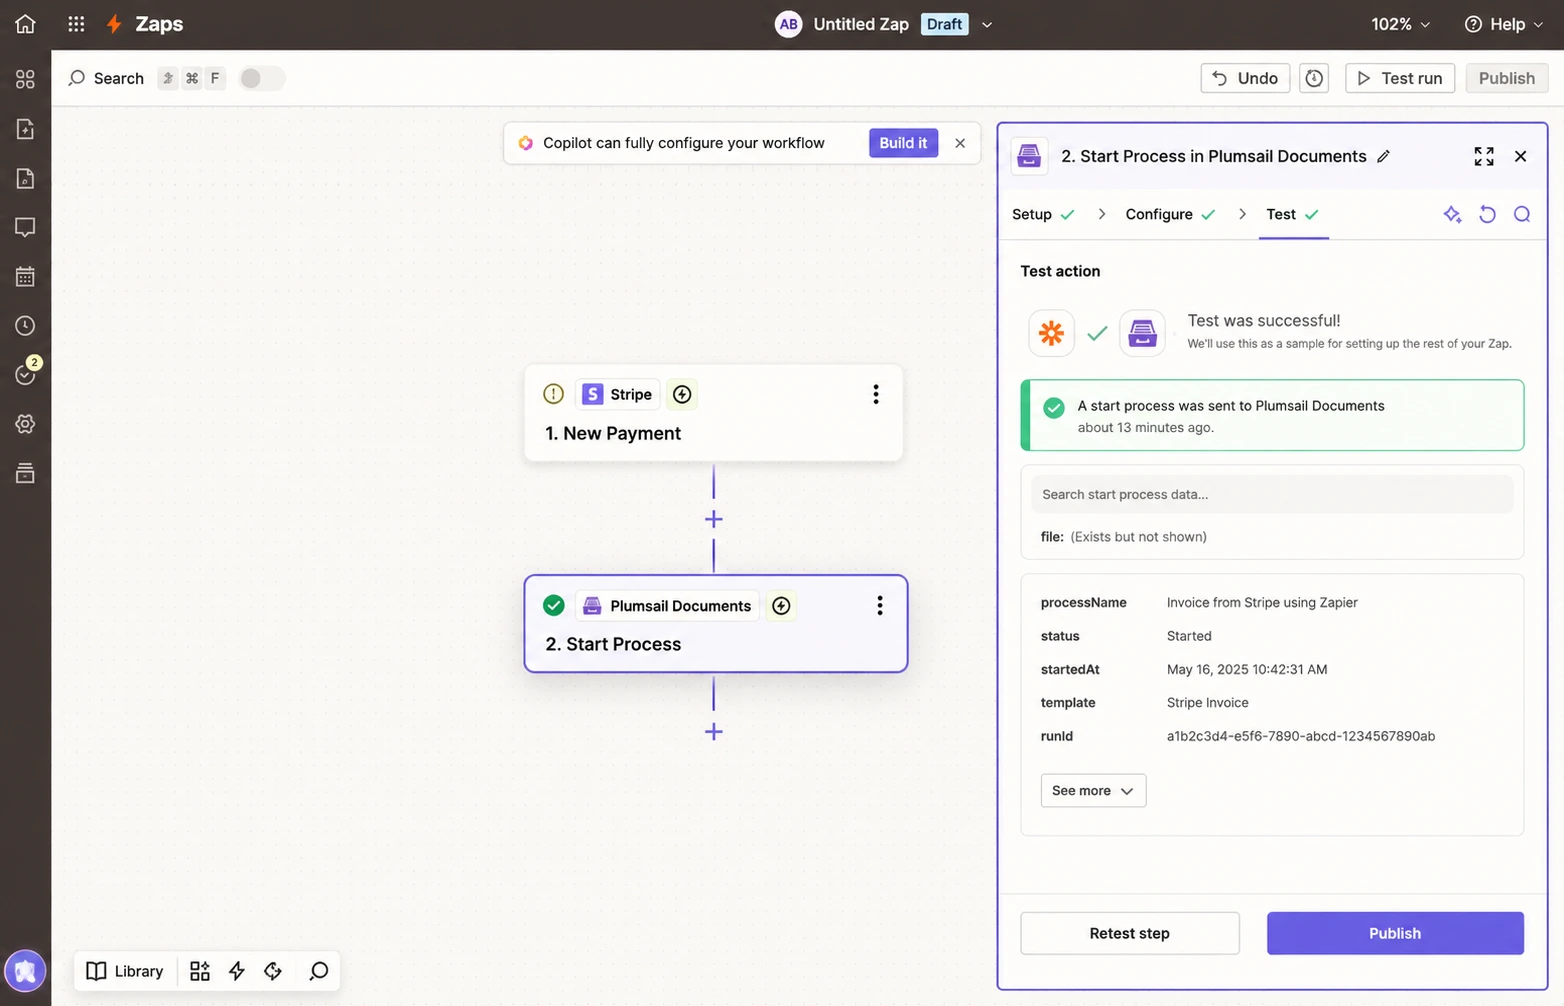
Click Continue, run a test, and turn the Zap on.
Result
After enabling the Zap, create a test payment in Stripe to verify the workflow. The generated invoice will be sent automatically by email.

The workflow now automatically generates invoices after successful Stripe payments and sends them to recipients by email.