How to convert web form with Data Table into PDF and send for approval with Power Automate
This article demonstrates how to convert any form with a Data Table control into a PDF document in MS Power Automate (MS Flow).
First, we create an HTML template from the submitted data and then transform the HTML into PDF with the Plumsail Documents action. We will then send the generated file by email.
Here are all the flow actions we will use:
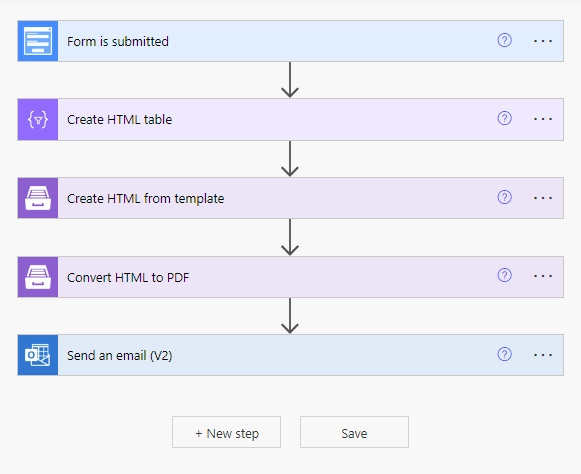
Flow trigger
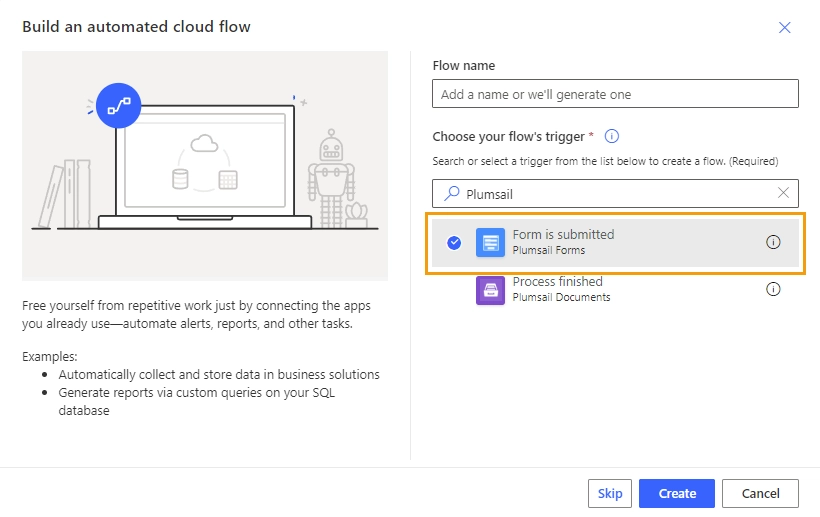
Open Microsoft Power Automate and create a new automated flow:

Search for Plumsail and select Form is submitted trigger, click Create:
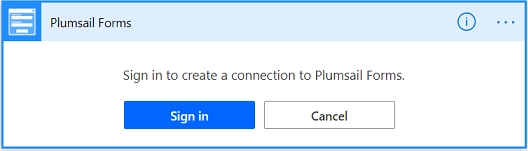
If this is the first time you are using Plumsail Forms connector, you will be asked to sign in to your Plumsail account to create a connection. Click Sign in and enter your account credentials:
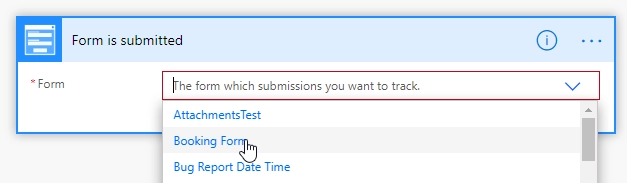
Select the public web form from the dropdown list:
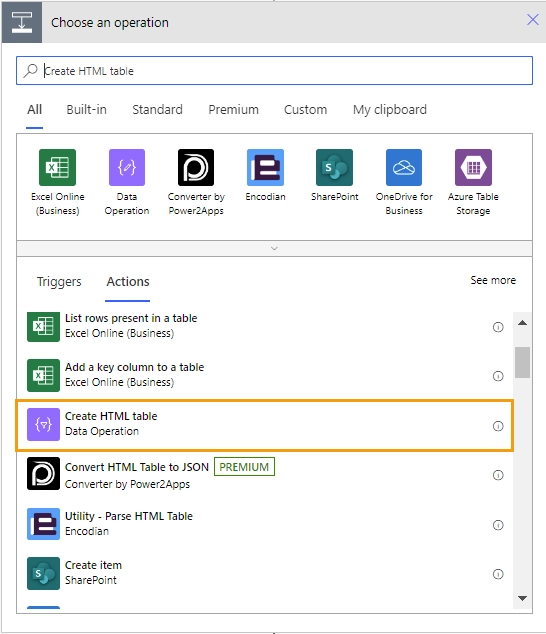
Create HTML table
Add Data Operations - Create HTML table action:
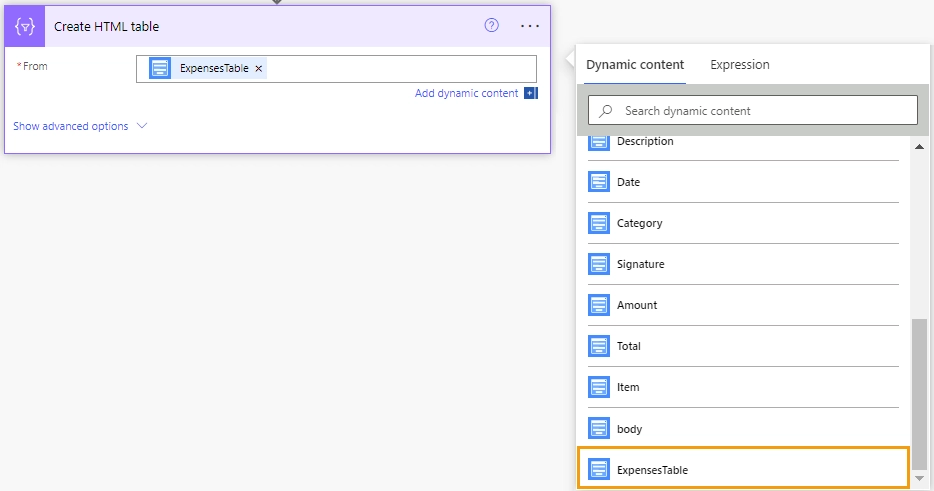
In the From box, add content of the Data Table control from the Dynamic content list. In this example it is ExpenseTable:
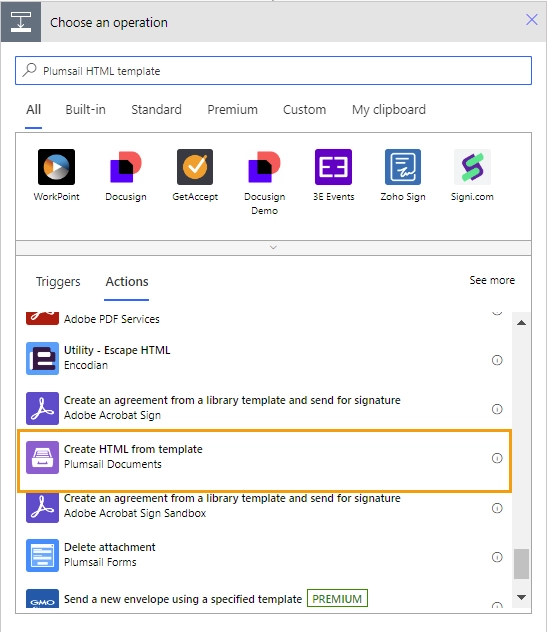
Create HTML from template
Now, we will use the Plumsail Documents connector. You can read about setting it up here.
Once the connector is set up, do the following:
Add the Plumsail Documents - Create HTML from template action:
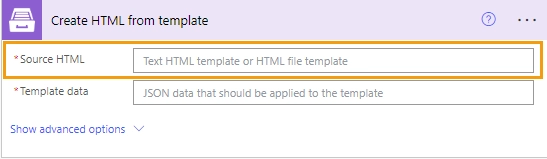
In the Source HTML box, specify the HTML content for the template:
You can include styles with it by either linking the HTML to a CSS file or including a <style> tag inside the HTML. This is the HTML we used in this example:
<!doctype html>
<html>
<head>
   <meta charset="utf-8">
   <title>Expense Reimbursement Request</title>
   <style>
         body {font-family:Arial, Helvetica, sans-serif;}
         table {border-collapse: collapse; width: 60%; }
         table, th, td {border: 1px solid slategray; margin: 5px;}
         .signature { display: inline; width: 30% }
   </style>
</head>
<body>
   <h1>Expense Reimbursement Request</h1>
   <p>Name: {{Form.Name}}</p>
   <p>Department: {{Form.Department}}</p>
   <p>Business Purpose: {{Form.Purpose}}</p>
   <p>From: {{From}} To: {{To}} </p>
   <h2>Table of expenses:</h2>
   {{Table}}
   <h3>Total: {{Form.Total}}</h3>
   <div class="signature">
         <h4>Signature:</h4>
         <img src="{{Form.Signature}}">
   </div>
</body>
</html>
In the Template data box, specify data to bind to the template in JSON format:
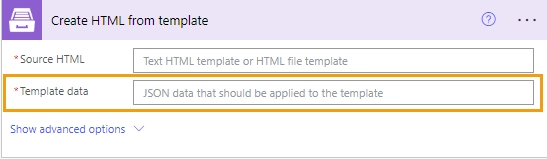
{
   "Form": FORM BODY,
   "Table": OUTPUT OF CREATE HTML TABLE,
   "From": DATE,
   "To": DATE
}
Replace FORM BODY, OUTPUT OF CREATE HTML TABLE and DATE with data from Dynamic content list:
Tip
Use formatDateTime() function to format date and time values to a specified format.
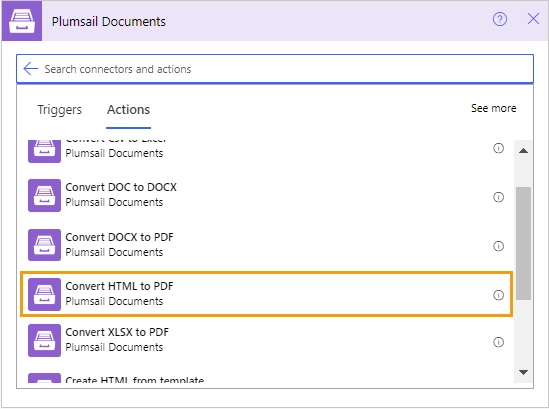
Convert HTML into PDF
Add the Plumsail Documents - Convert HTML to PDF action:
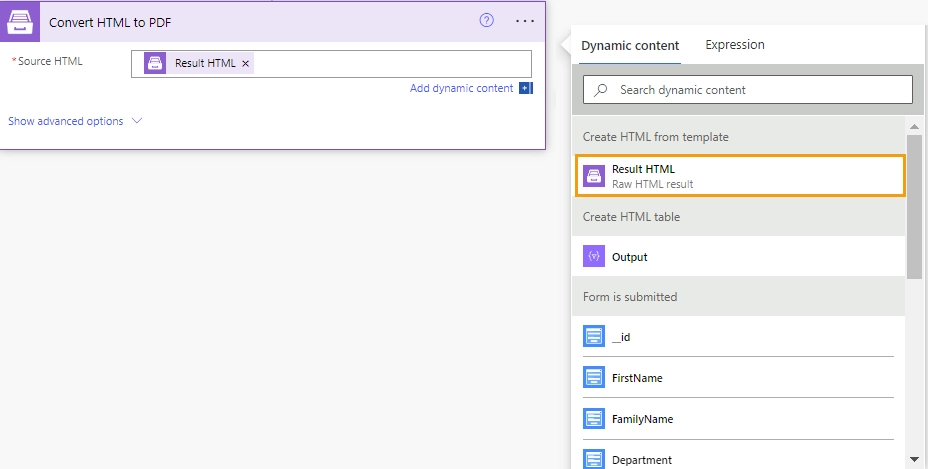
In the Source HTML box, add the Result HTML from the Dynamic content list:
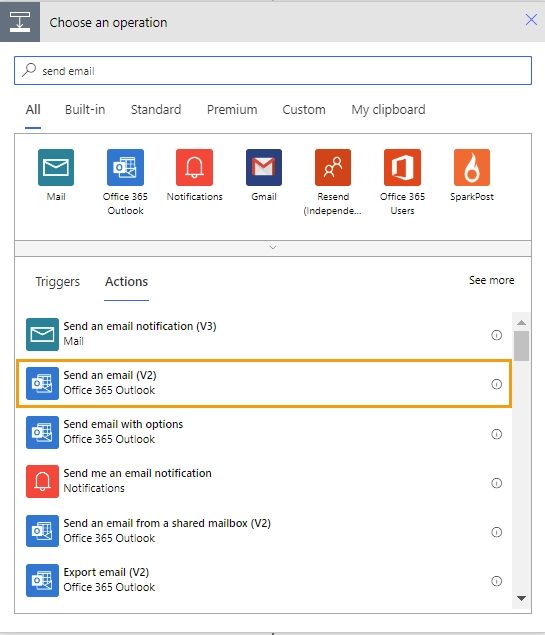
Send an email with PDF attachment
Add the Office 365 Outlook - Send an email (V2) action:
Fill in the information for the email.
Go to Advanced options to see the Attachments section.
In the Attachment Name box, enter the desired file name.
In the Attachment content box, add the Result file created using the Convert HTML into PDF action:

Result
Now, when we run the Flow, we receive an email with the PDF file:
