Add text watermark to PDF document using Power Automate
This is the second article in our “How to use Watermarks” series. We hope these articles will help you to get the best out of watermarking PDFs using Plumsail Documents in Power Automate (Microsoft Flow).
Before we dive in, here is where we are in our “How to use Watermarks” series:
How to use an image type watermark to automatically add a company logo to PDF files and save them in a new folder.
How to use a text type watermark to prevent documents dissemination.
How to use a PDF type watermark to add a watermark with a specific design to PDF documents generated on submitting a form.
Add watermark to PDF action supports a few types of watermarks — Text, Image, and PDF:
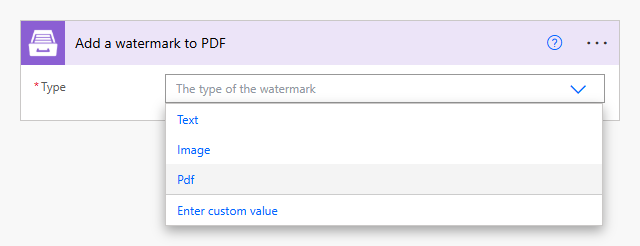
So, let us have a look at how to add a text watermark to a document.
Use custom text watermark
Classify your documents
A watermark that states “Confidential” or “For internal use only” can be a reminder to others about how they should be handling the document. For example, people who have access to a document may be more conscious of leaving it open on their computer screen while they walk away from it if it states “Confidential”.
Show the status of a document
You may also use the text type watermark to show the status of a document — such as Reviewed, Approved, or Draft — so that other users immediately recognize the status of the document you have shared.
Identify the perpetrator if the document is leaked
Imagine you need to send confidential documents outside of your organization. Adding a watermark that identifies the recipient can be an effective deterrent for people who might disseminate the information. Besides the email address, you may also use such information as the person’s name and the time/date to protect PDF document and identify the leak if copies of the protected documents suddenly start circulating.
Let’s have a look at an example.
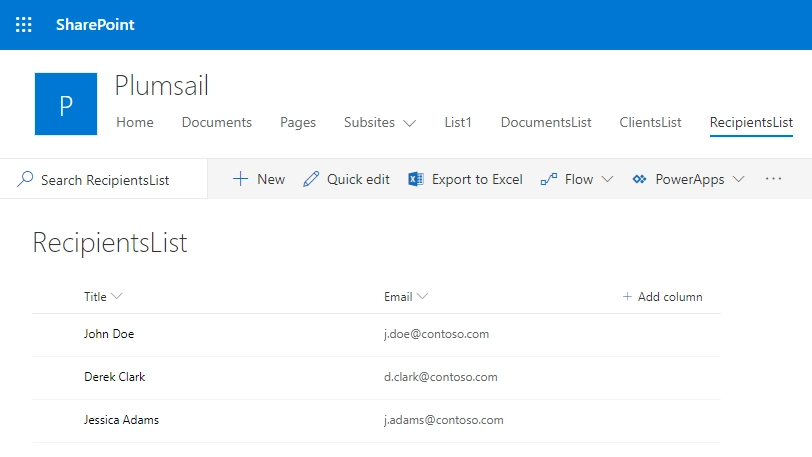
Let’s say you have a list of recipients in your SharePoint site:
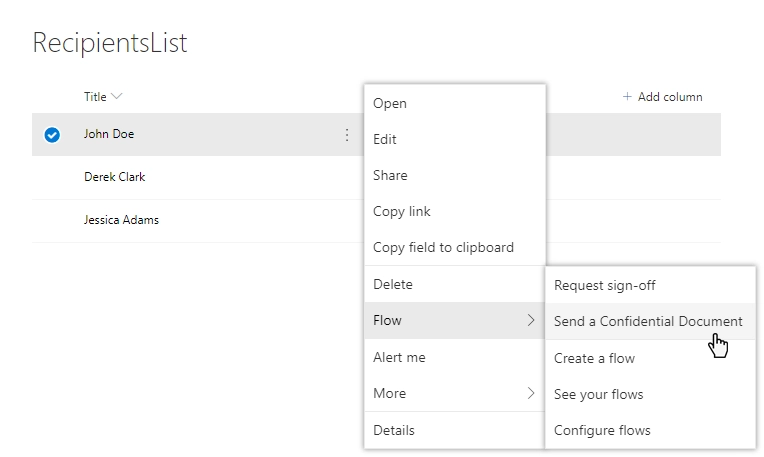
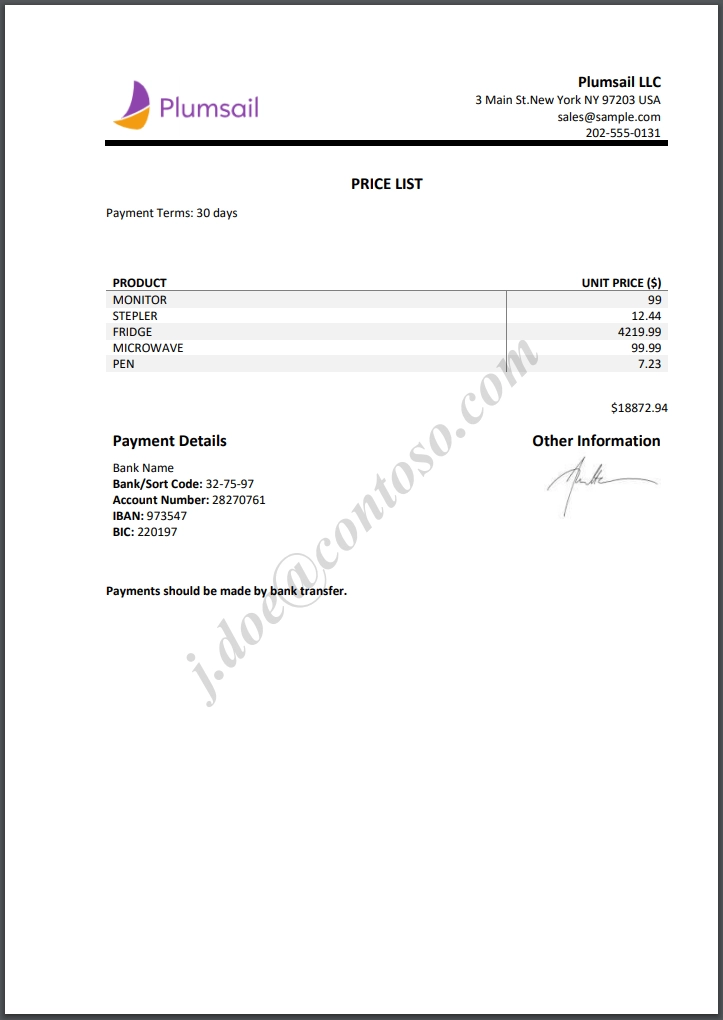
You need to send them a confidential document you would prefer not be spread around. For example, a price list.
You can create a flow that is started on a particular item from the list:
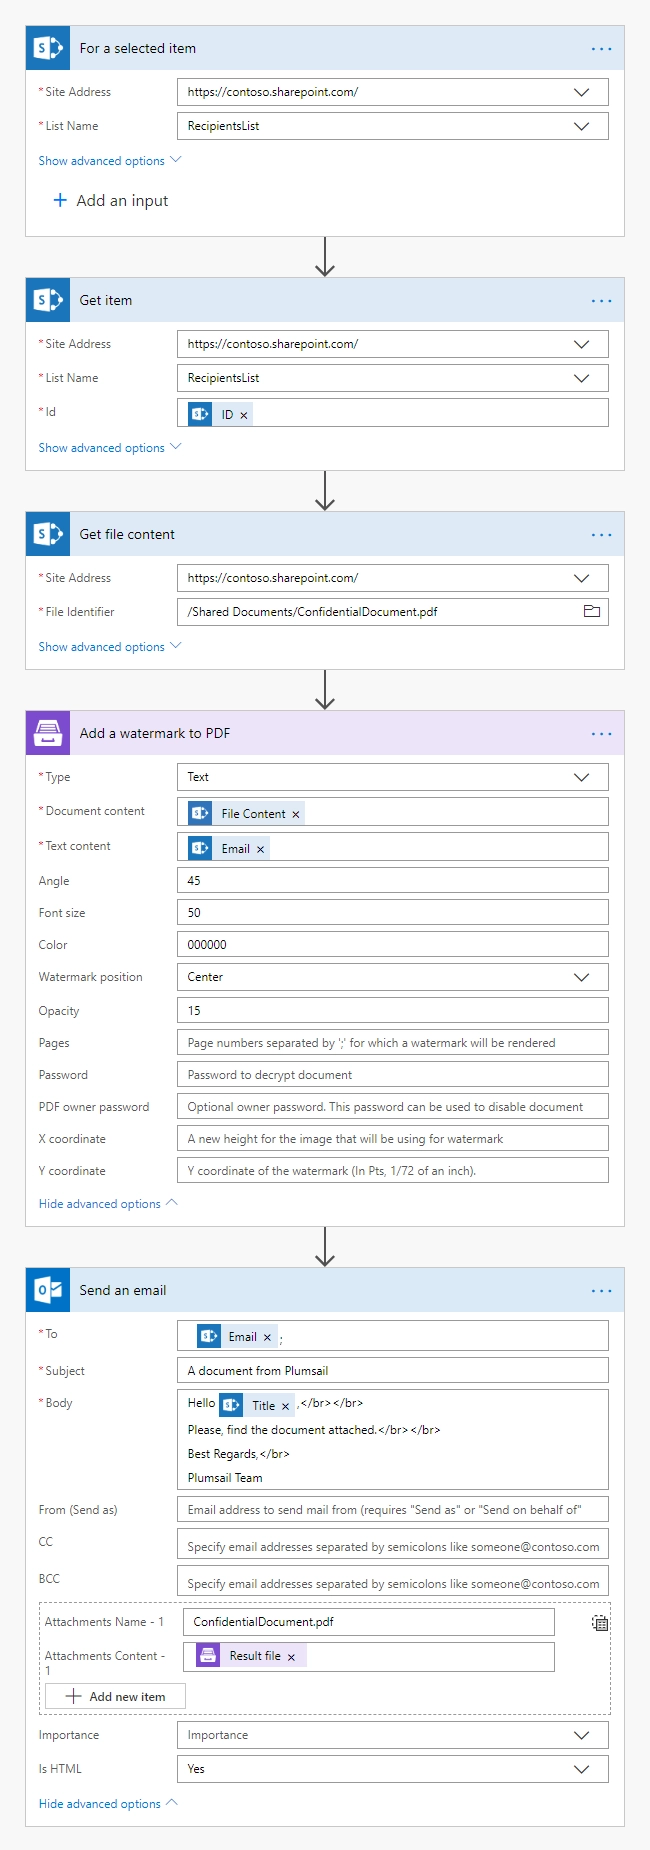
Here is how the entire flow looks like:
Create the flow
Let us have a look at each step of the flow.
Flow trigger
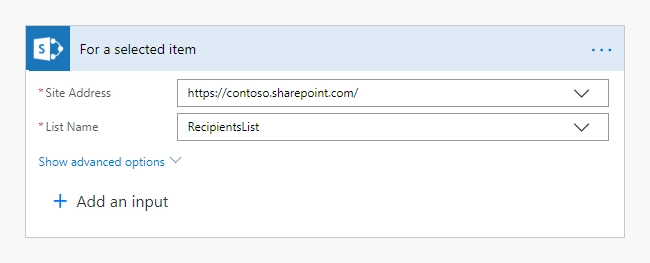
Please navigate to MS Flow, create a flow and find For a selected item action from the SharePoint connector. Using this trigger will allow you to start the flow on a selected item manually. Set your Site Address and the List name:
Get item
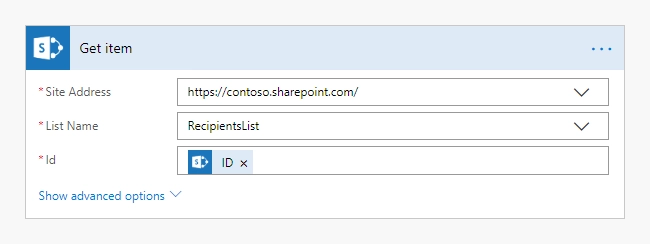
Get item data using Get item action from the SharePoint connector. Put here ID from the output of the For a selected item action:
Get file content
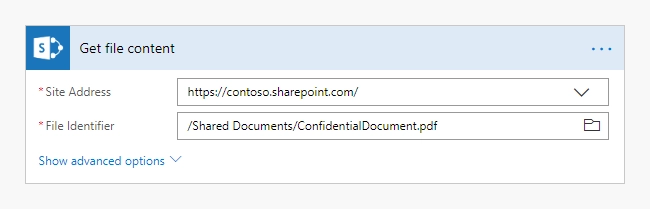
Get the file you are going to send with help of Get item action from SharePoint connector:
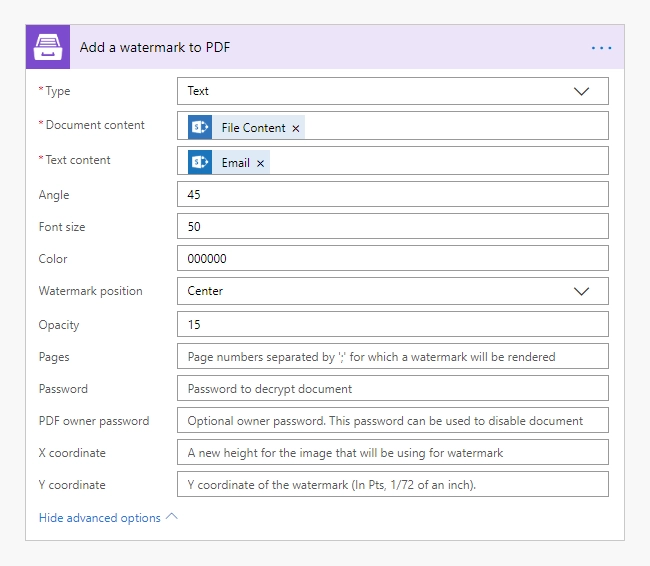
Add a watermark to PDF
This is an action from the Plumsail Documents connector.
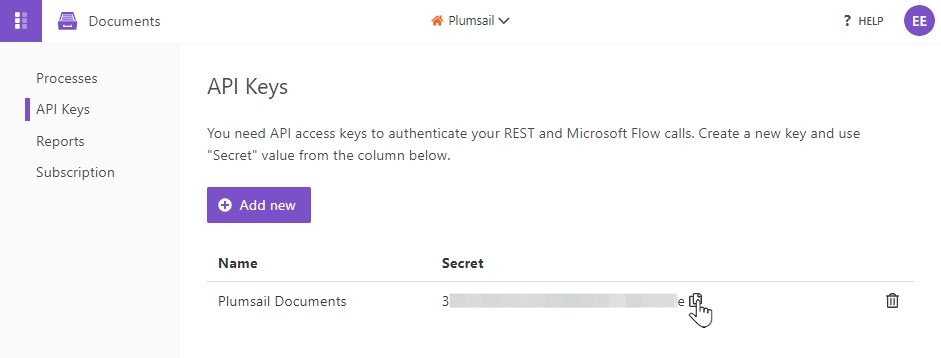
If this is your first time using the Plumsail Documents connector, Power Automate will request the Connection Name and API Key.
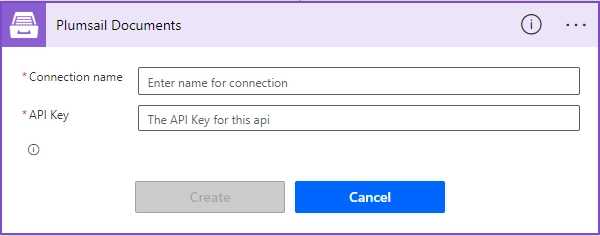
You can type any name for the connection, for example Plumsail Documents.
Once the connection name is filled out, create an API key in your Plumsail Account, copy and paste it into the Access Key field, and then click Create.
Choose Text type of the watermark. Put here File content from the output of the Get file content action and the recipient’s Email from the output of Get item action.
We set custom values for Angle, Font Size, Color, Watermark position, and Opacity. You may check detailed information on how to use these and other settings here.
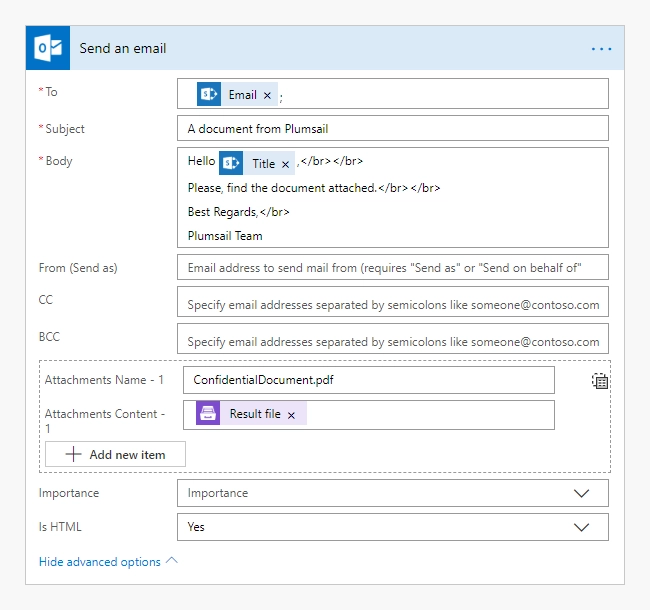
Send an email
We used Send an email action from Office 365 Outlook connector, but you can choose another one. Attachment content is the output of Add watermark to PDF action.
That is it. The recipient will receive the price list with their email address as the watermark. It will potentially discourage leaks by identifying the recipient.
Conclusion
We hope this series of articles on using Add watermark to PDF action will help you to ascertain the proper use of your PDF documents. If you haven’t used Plumsail Documents yet, registering an account would be the first step. It is quite easy to get started.