Split PDF files in Power Automate
This article demonstrates how to Split PDF files using Power Automate. We have created an example flow in Power Automate to Split PDF into multiple files.
Watch the video for a step-by-step guide, or skip it and continue reading.
The process looks like this: we will read a PDF file, split the PDF file to get a particular page, and send this page by email as an attachment.
This approach can be used to extract a page or a section of a PDF document. For example, you may extract specific pages from a contract and send it for approval to the responsible person.
Our source PDF file has to be stored somewhere. Power Automate (Microsoft Flow) has a lot of connectors for different systems.
Here are just a few of them:
SharePoint
Salesforce
Box
OneDrive
Google Drive
Dropbox
SFTP
File System
You can store your files anywhere. In this example, we will use SharePoint to save our PDF file, but you can choose from other offered cloud options.
This is how our flow looks:
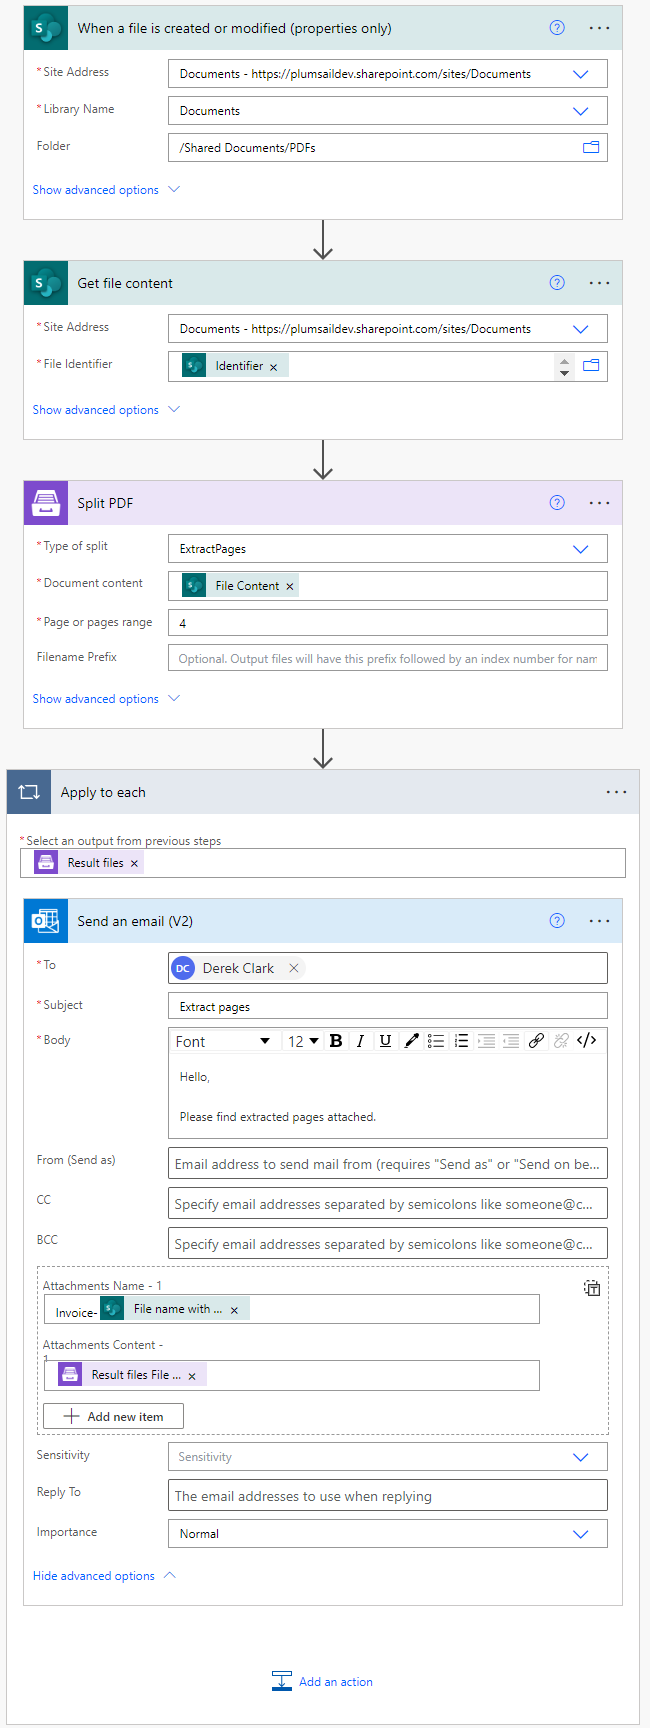
Setup the Flow in Power Automate to Split PDF files
The following steps will guide you through creating the flow step-by-step.
Flow trigger
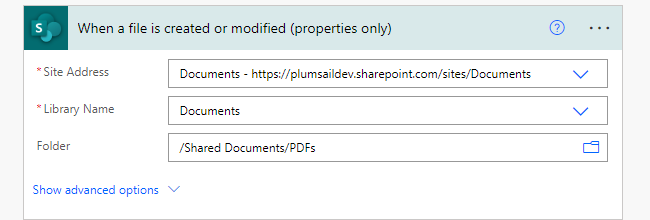
You can actually pick any trigger. We used Automated Cloud Flow trigger in this example, which means the flow will be triggered automatically by a designated event. That event will be When a file is created or modified (properties only) for SharePoint.
Once you save the file or modify it in the SharePoint Library in the folder which was chosen as Library name, the flow will automatically run.
Get file content
This action gets file content of the specified file from a SharePoint document library. You just specify SharePoint site URL and File identifier. We use this action to read files stored in our Library, as each document in SharePoint has ID that is unique to the document library.
You can use any other connectors to get files from your system, depending on which system you use to store files.
You may use this link to download our sample 4 pages PDF file.
Split PDF
Split PDF is an action from Plumsail Documents connector.
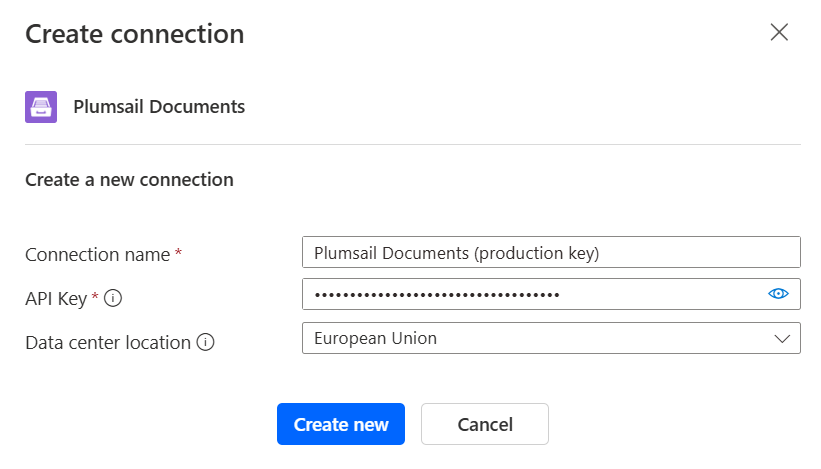
If this is your first time using the Plumsail Documents connector, Power Automate will request you to create a new connection. Provide the following details and then click Create new:
Connection name - you can type any name for the connection, for example Plumsail Documents (production key);
API Key - create an API key in your Plumsail Account, copy it, and paste it into the API Key field;
Data center location - make sure the selected data center location matches one of your account.
Insert the PDF file content from the output of the previous action into the Document content field.
In the Page or pages range field, specify the page or pages you want to extract. For example, to extract a single page, enter the page number. To extract a range of pages, enter it like this: 4-7. This will extract pages 4 through 7 (inclusive).
In our example, we extract just one page of the document, to do that we set the fields as shown in the screenshot below:
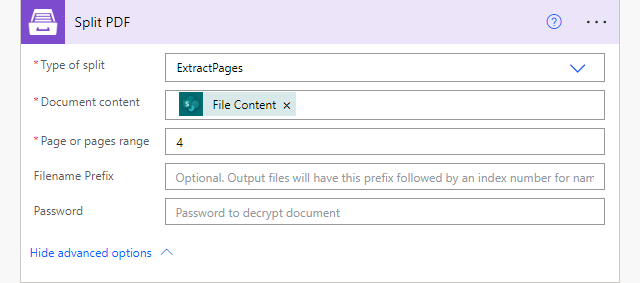
As an output of this action, we receive an array of result files. In our case, we have just one file in the array.
Send an email
Once the result file is generated, we can send an email using the Send an email action from Office 365 Outlook connector.
Search for Send an email action from Microsoft Outlook.
Now we have to fill out email fields; specify receivers email address, subject and email body. In the advanced options section, we will give our result file a name in the Attachments name field. For the Attachment content we select to collect Dynamic content values and choose option Result file FIle content.
This will automatically transform this action into repeating one which will be performed for each result file. Please note that in our case, there is just one file.
Conclusion
We have described how to efficiently split PDF files using Power Automate and send an email with a PDF attachment.
In case you would like to test this flow and the Split PDF action in Power Automate, you can register an account with Plumsail and get a 30-day free trial to explore endless possibilities.