Ticket management
A ticket holds the whole conversation with a requester, along with the fields that describe the request. This article covers how to view and edit tickets, add replies and private notes, create tickets manually, assign tickets to yourself, and work with ticket statuses and mentions.
View ticket
You can open a ticket by clicking its title. The ticket form looks like this:
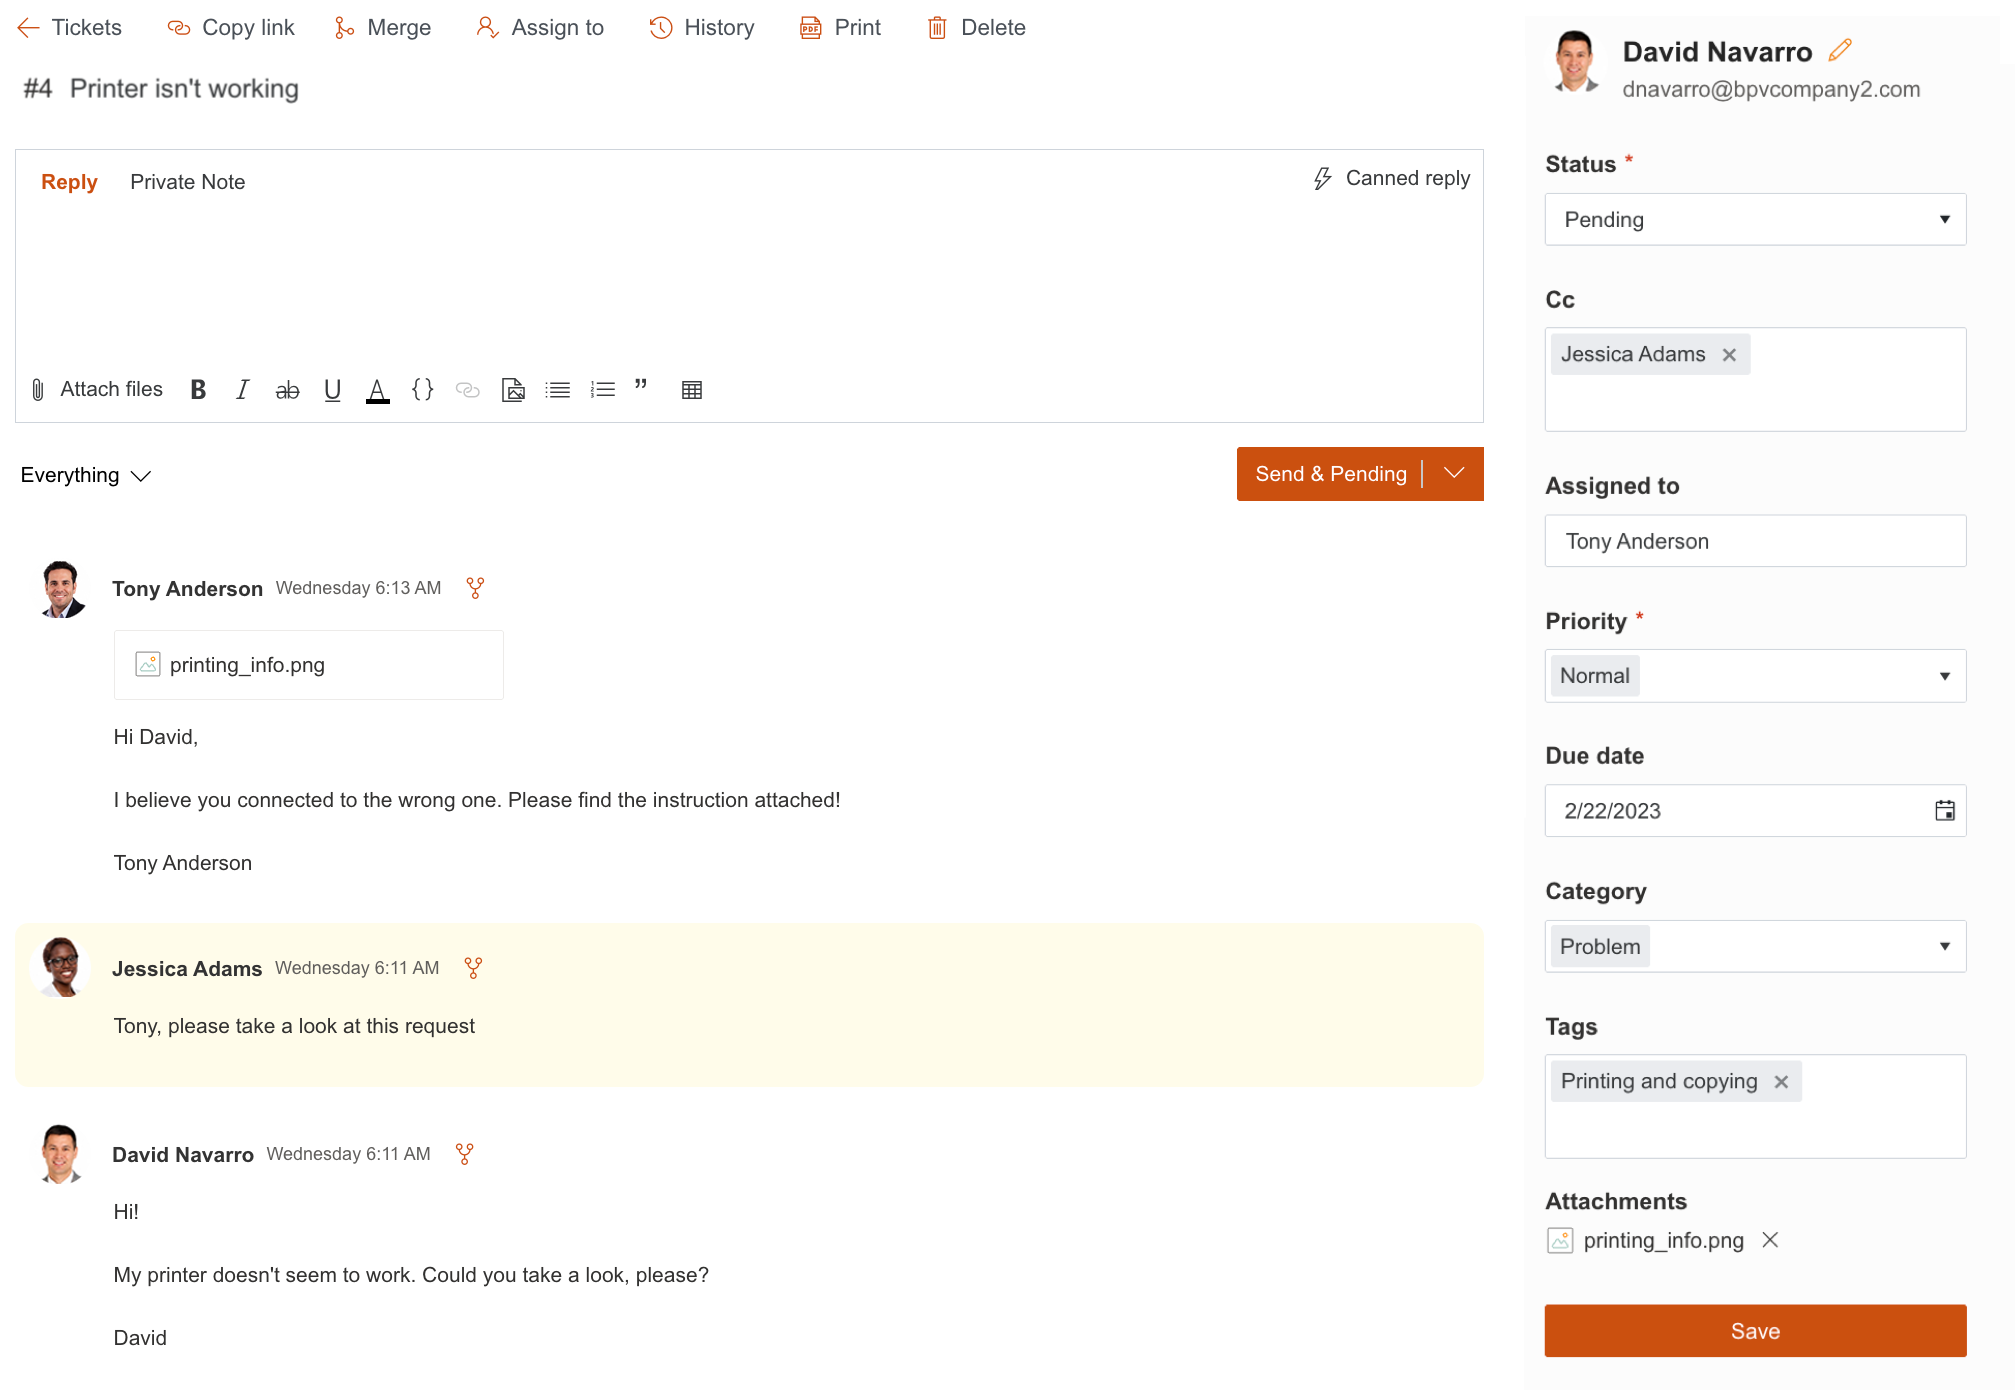
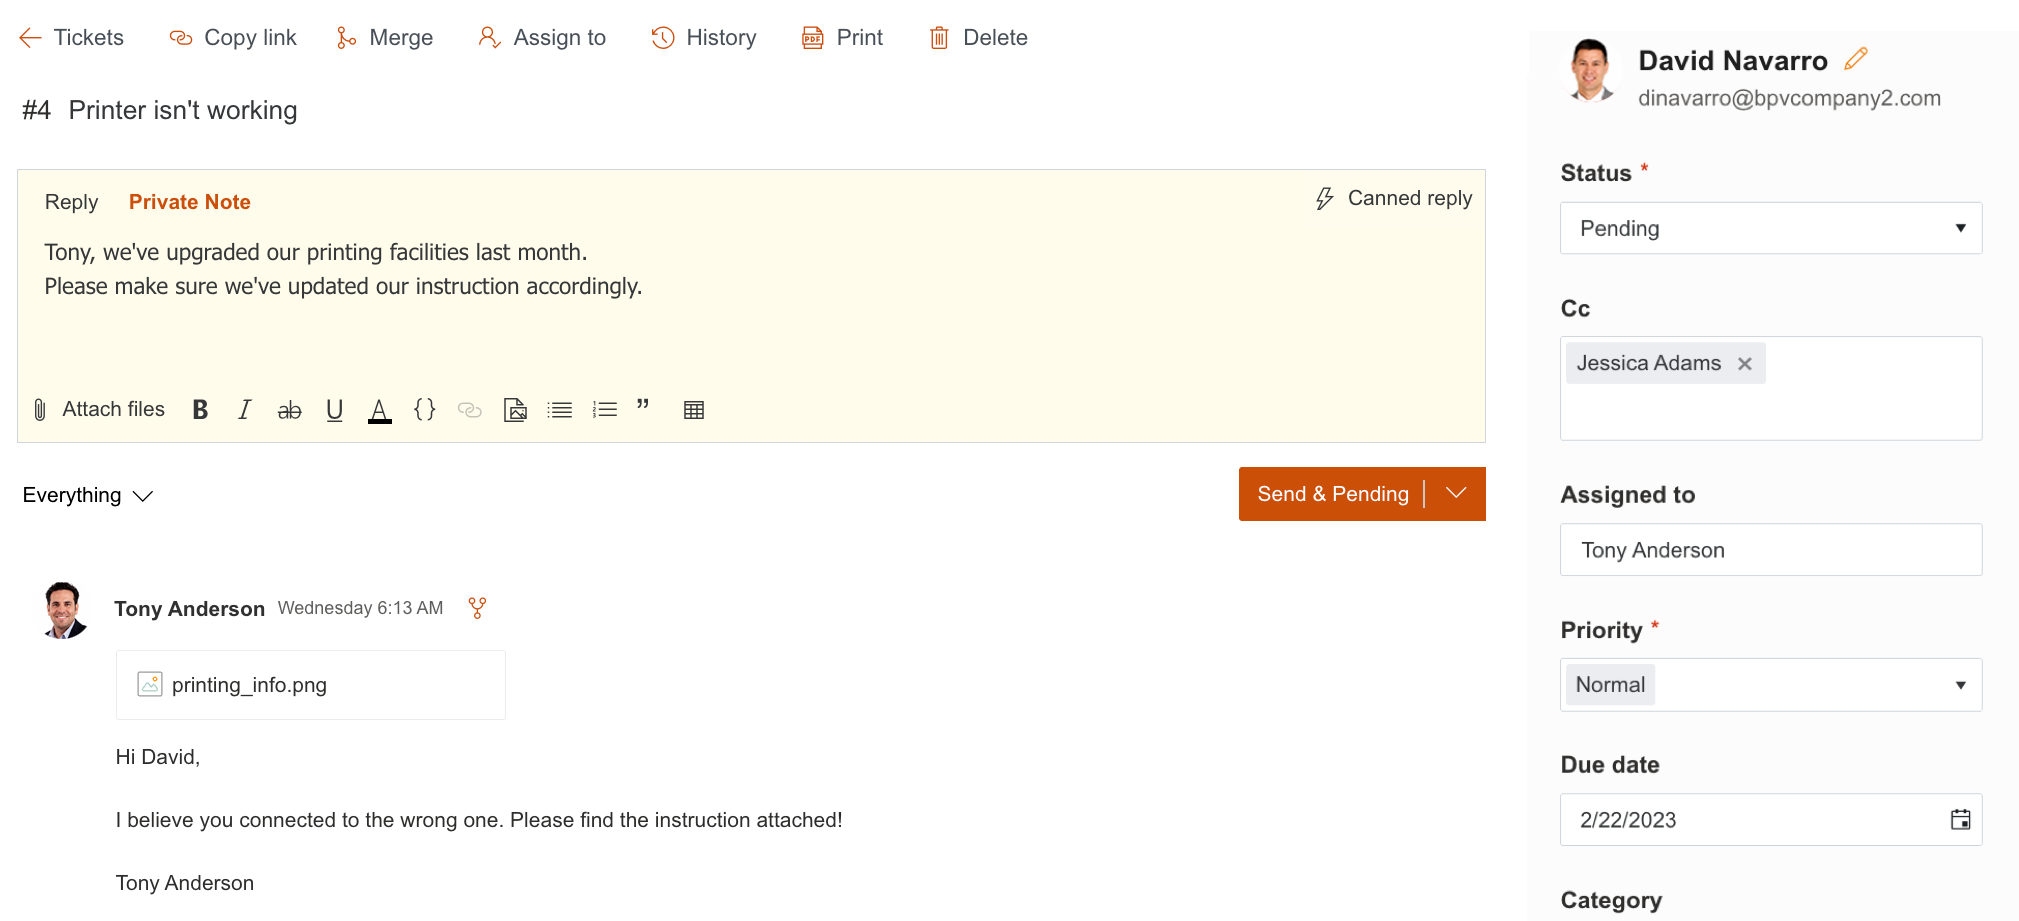
The ticket form shows the conversation between the agent and the requester, the editor window and fields with information about the ticket.
You may notice some messages are yellow. This indicates that these messages are private notes that are visible to agents only and not to the requester. The requester will not receive any notifications about it and will not be able to read it.
Also, there is a list of attachments on the right side of the view, below Tags.
The ticket’s change history can be opened by clicking the History button:
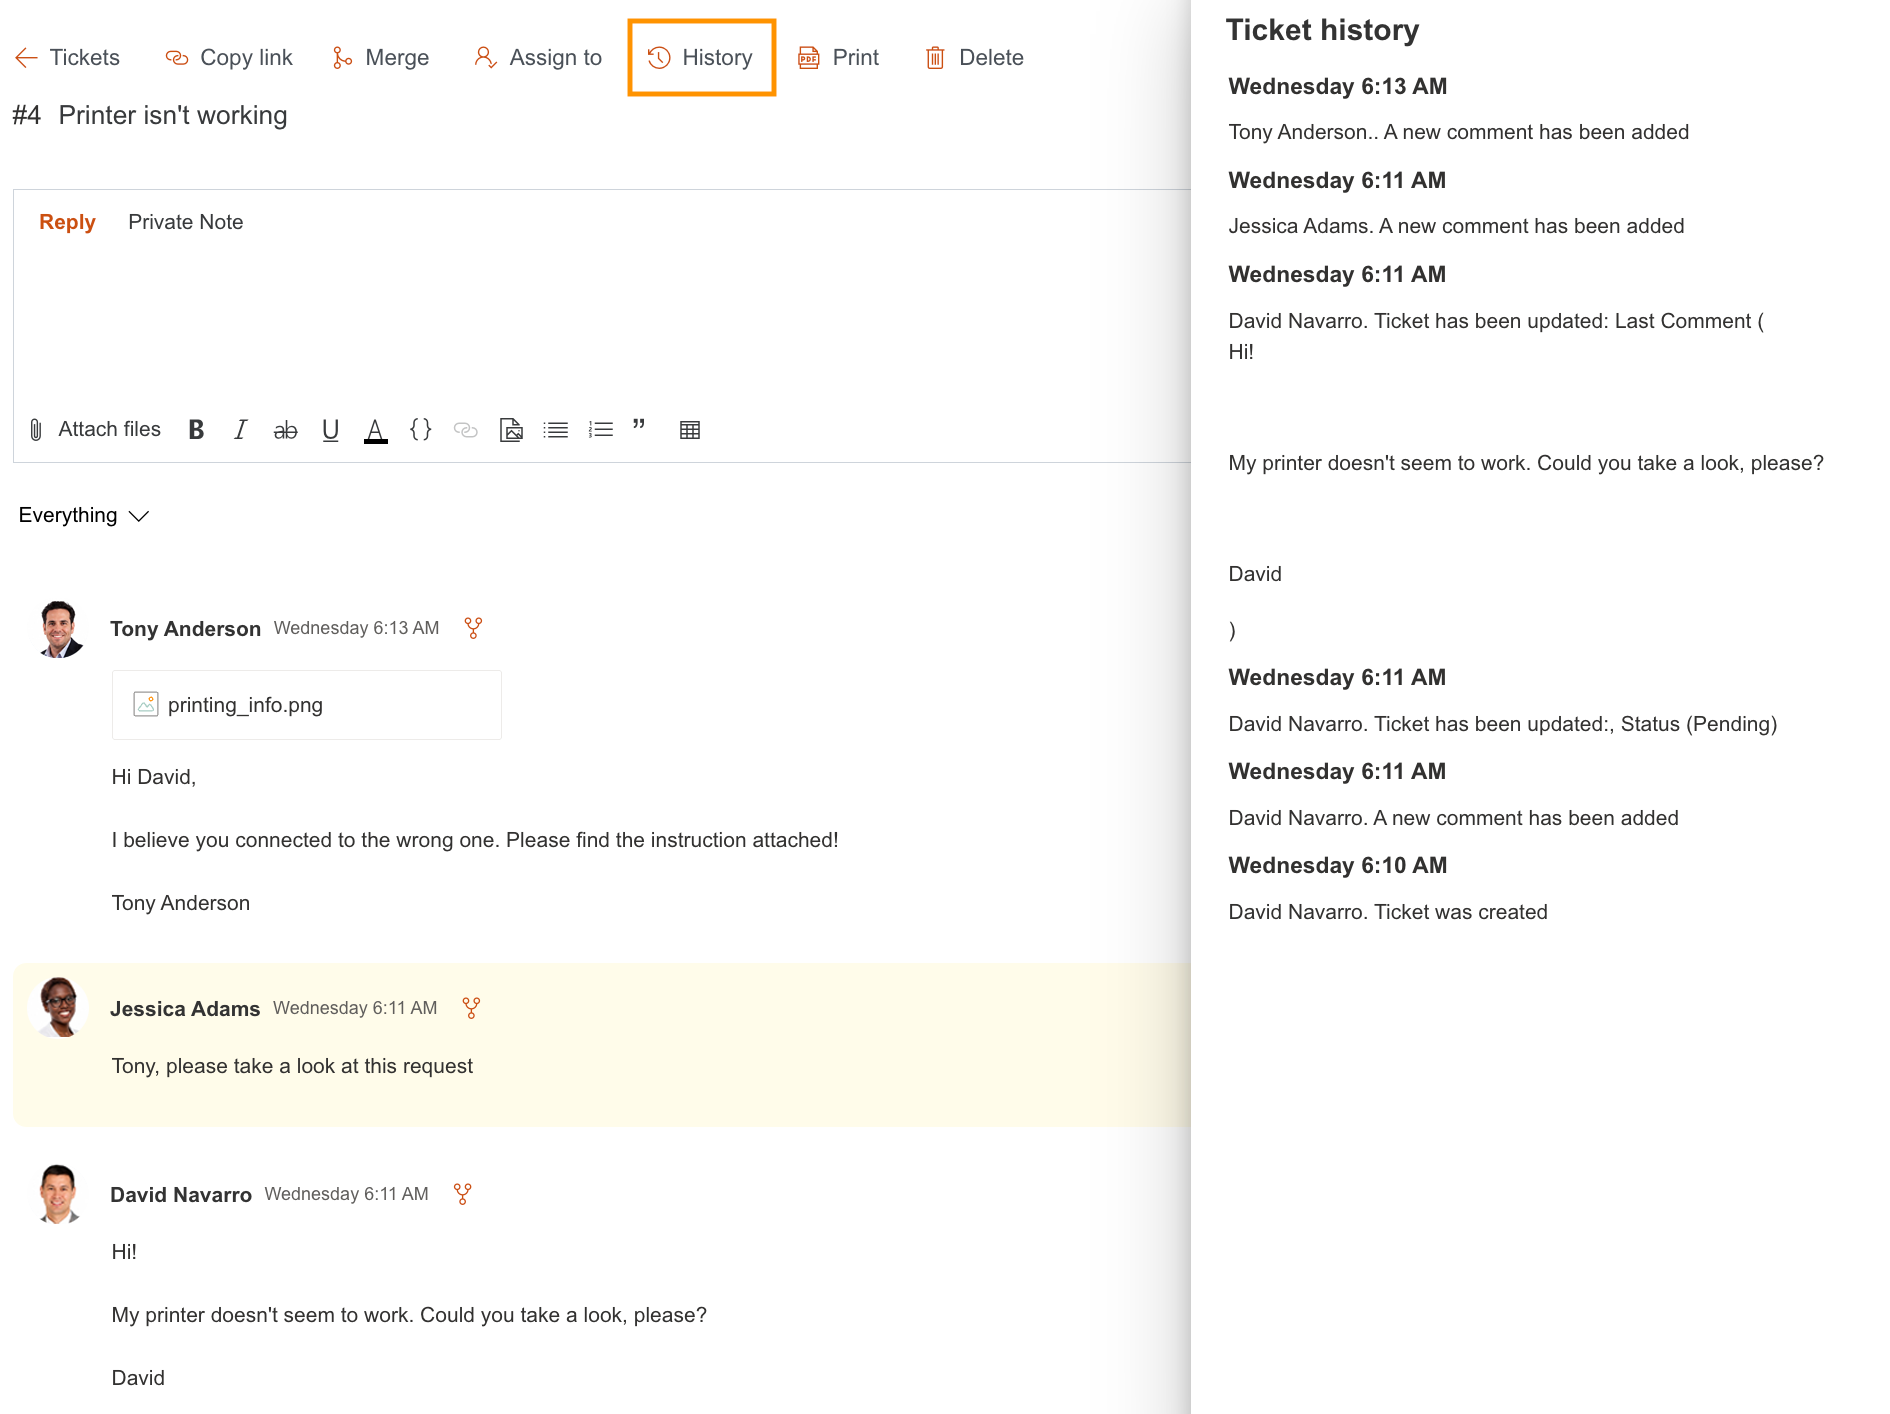
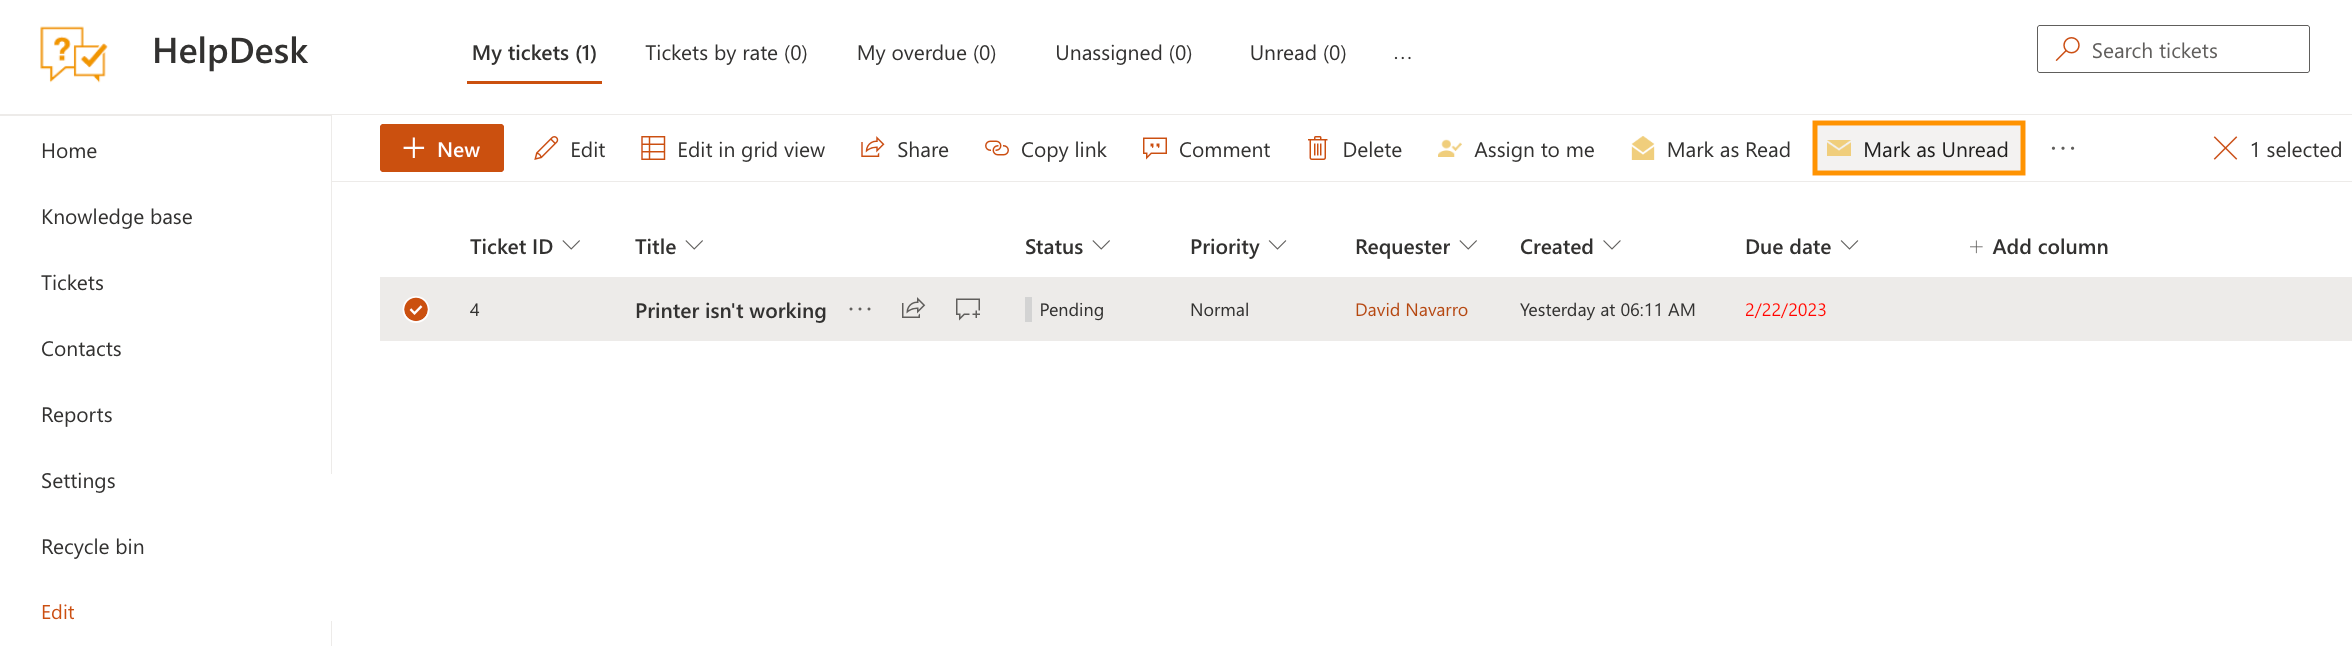
Once you open the ticket form as the assignee, the ticket is marked as read. You can mark it as unread again. To do this, select the ticket and click the Mark as Unread button. Note that only the ticket assignee can mark a ticket as unread.
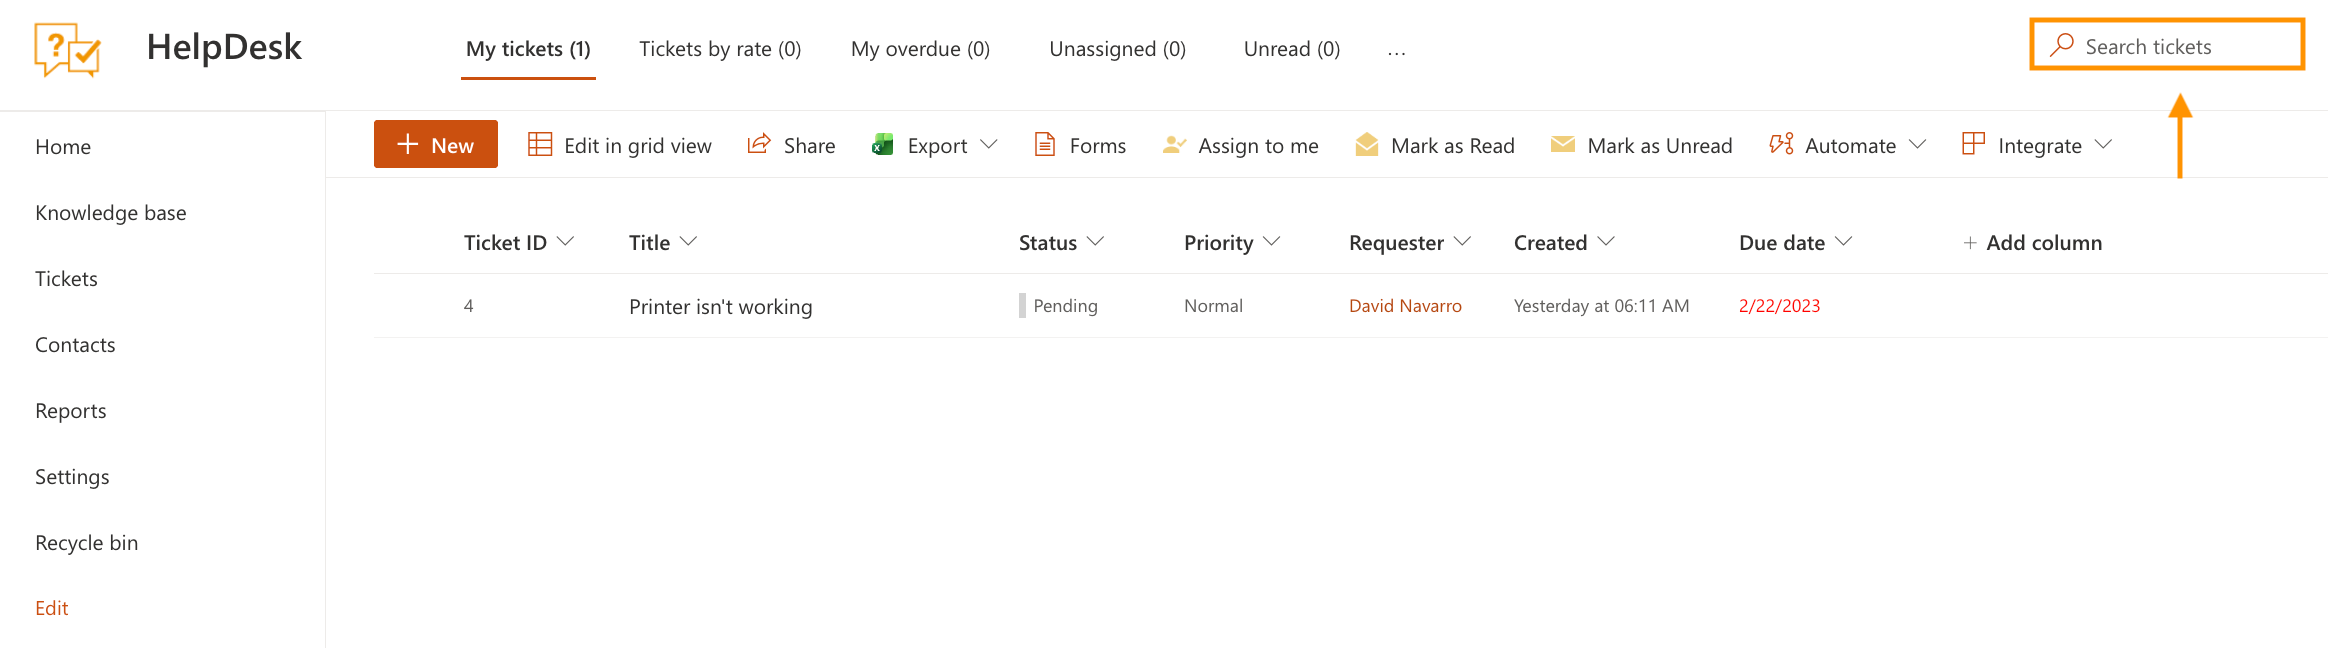
To search for a ticket with a given ID, enter the ID in the Search tickets field and press Enter.
Note
Please refer to the article for further information on the ticket search.
Most of the ticket fields are displayed in the table on the right-hand side of the screen:
- Requester
The person from the Contacts list who requested the ticket (if the contact has their organization specified, you’ll see it next to their name).
- Status
The ticket status. There are four statuses by default: New, In progress, Pending and Solved. You can also add your own custom statuses.
- Cc
Contacts specified in this field will receive the same notifications as the requester.
- Assigned to
The SharePoint user who is currently working on the ticket.
- Priority
Relative ticket priority (Low, Normal, High, Urgent).
- Due date
The date when the ticket has to be resolved by.
- Category
The type of the ticket (Question, Incident, Problem, Request). You can also create custom ticket categories to better match your workflow.
- Tags
Keywords used to classify and organize tickets.
Edit ticket and add comments
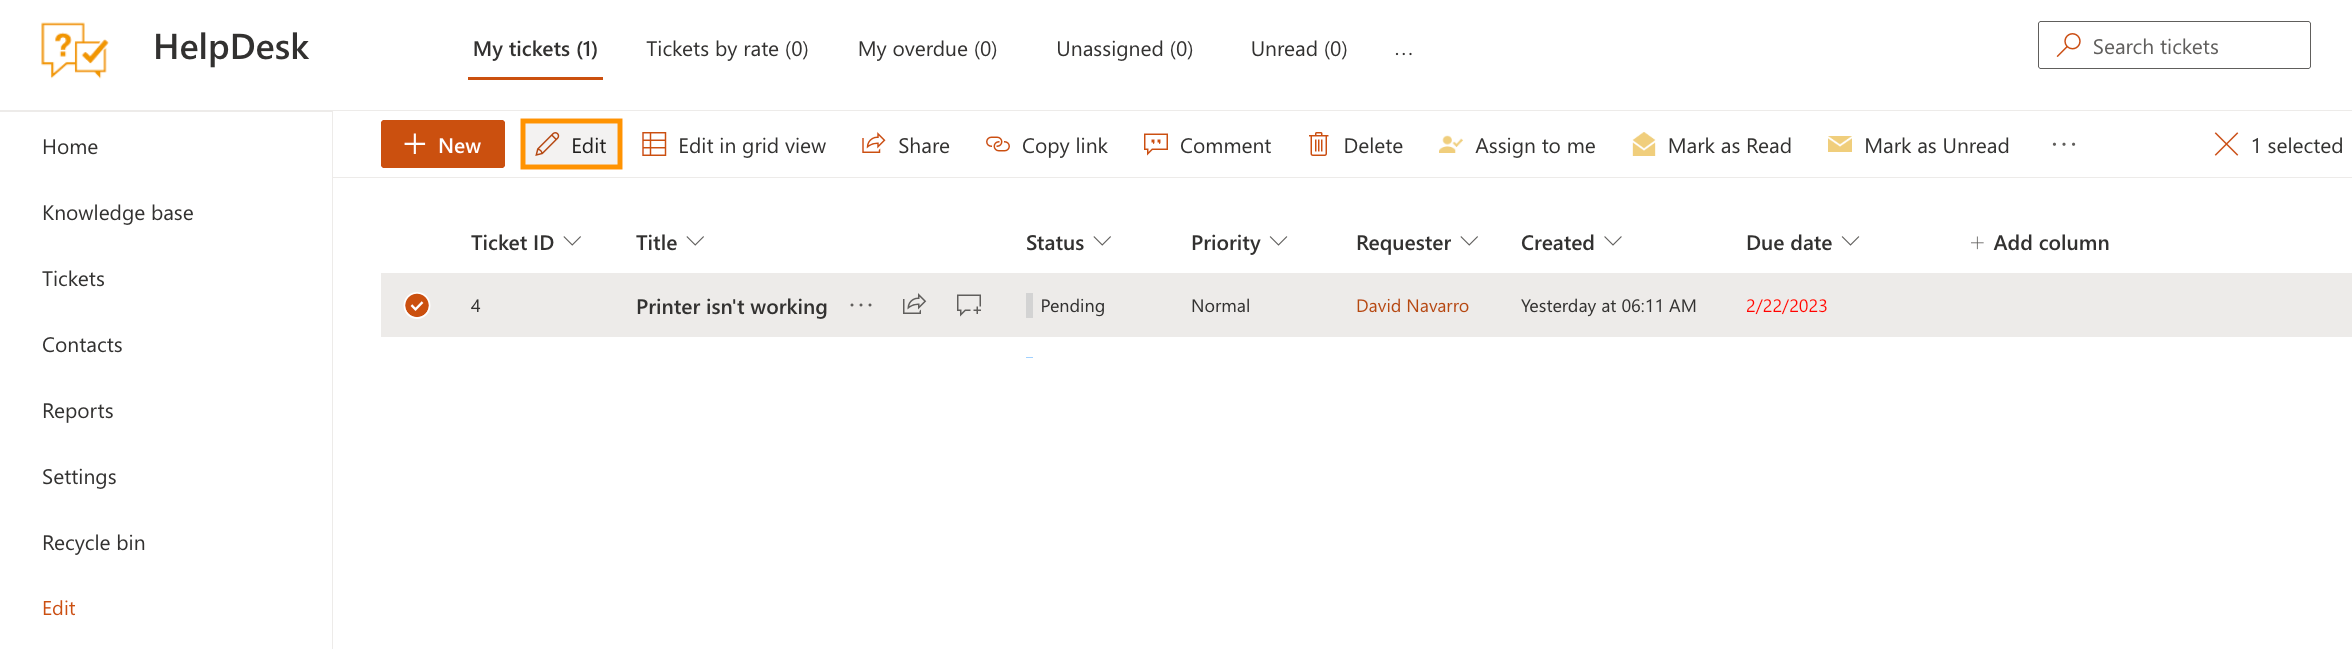
To edit a ticket, click its title.
Alternatively, you can open a ticket in edit mode from a list of tickets. Click the appropriate button in the context menu:
To add a reply or a private note, click the Reply or Private note button and enter your message. Then click the Send & … button and select the status. If you select the Private note option, the editor turns yellow.
Hint
You can also create private notes with Power Automate. Use the Create a comment action and set Comment Custom Fields to {"CommentType": "Private note"}.
Add new ticket
HelpDesk creates tickets from email messages, but you can also create tickets manually. Click the New button on top of the page:
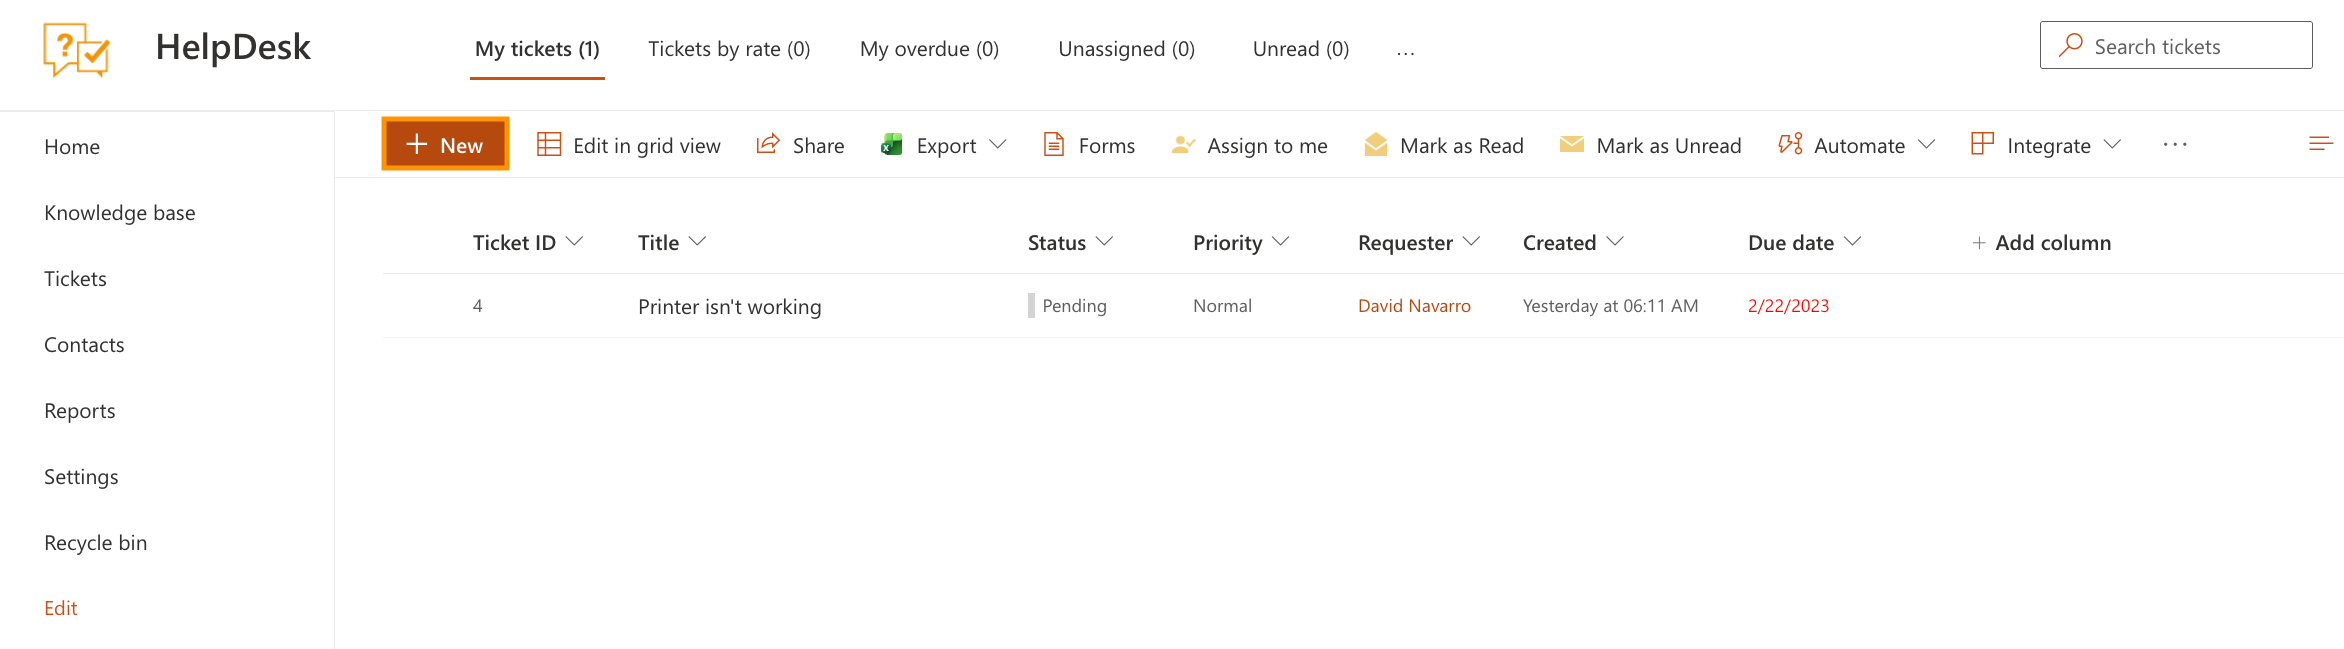
When creating a new ticket, the Title, Requester and Priority fields are required. The status of the ticket will be New by default.
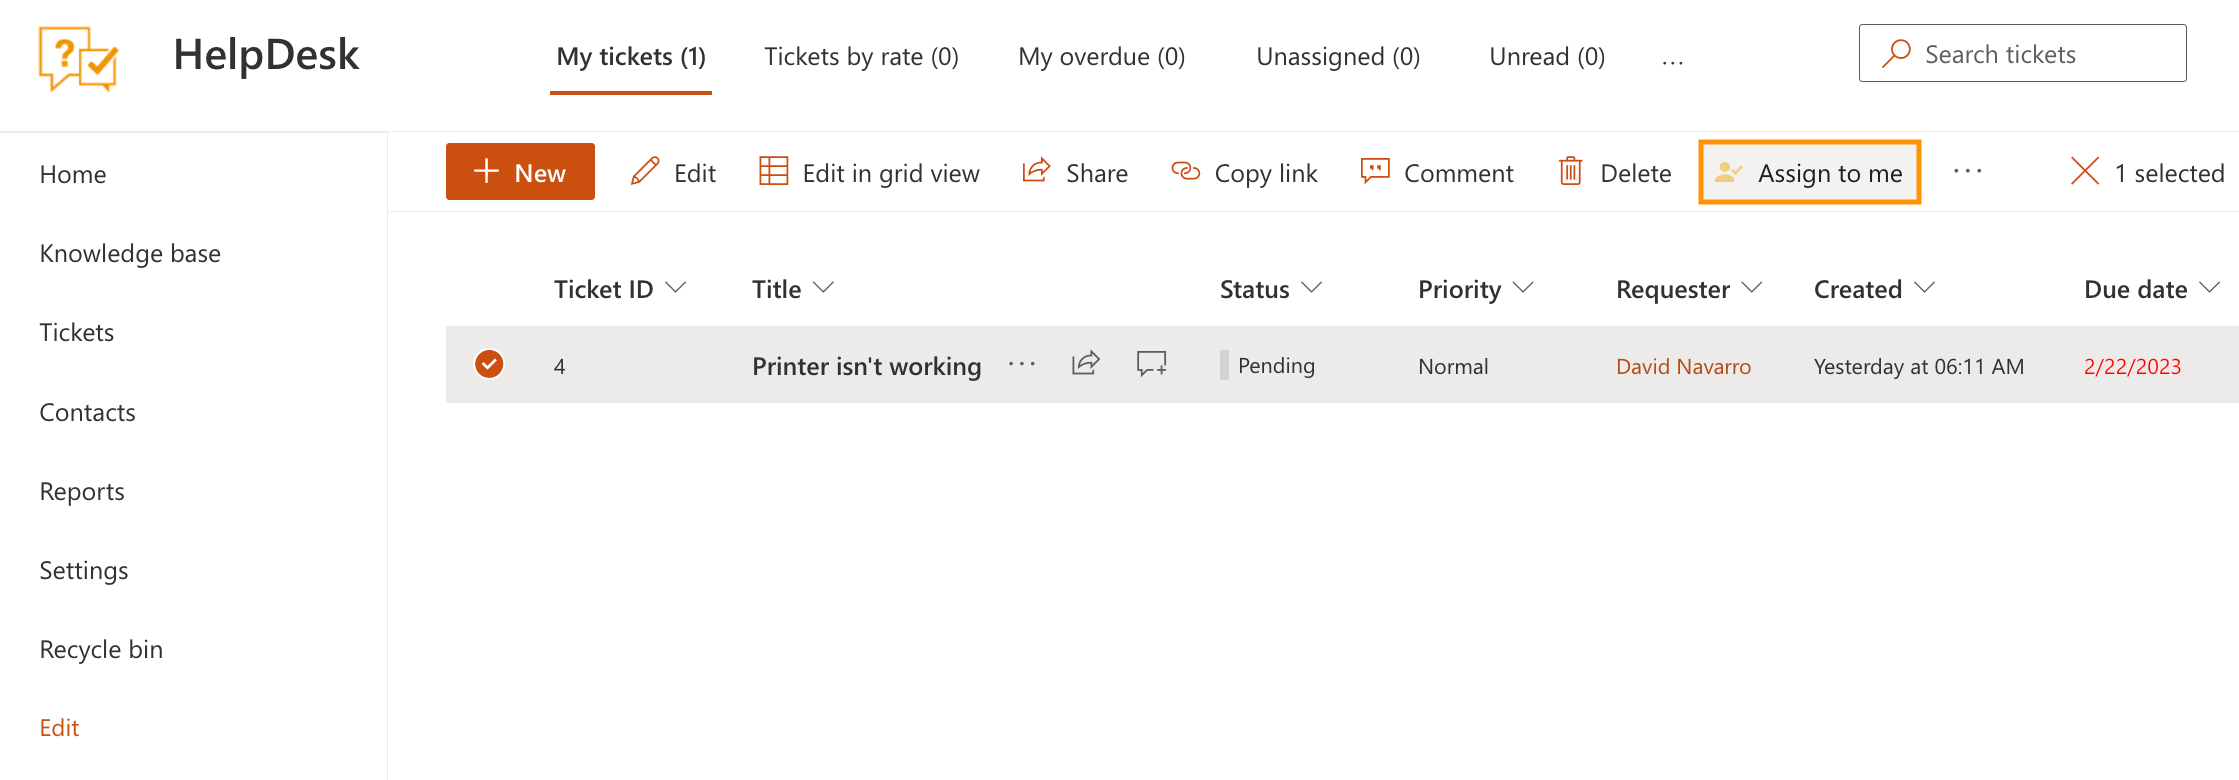
Assign to me button
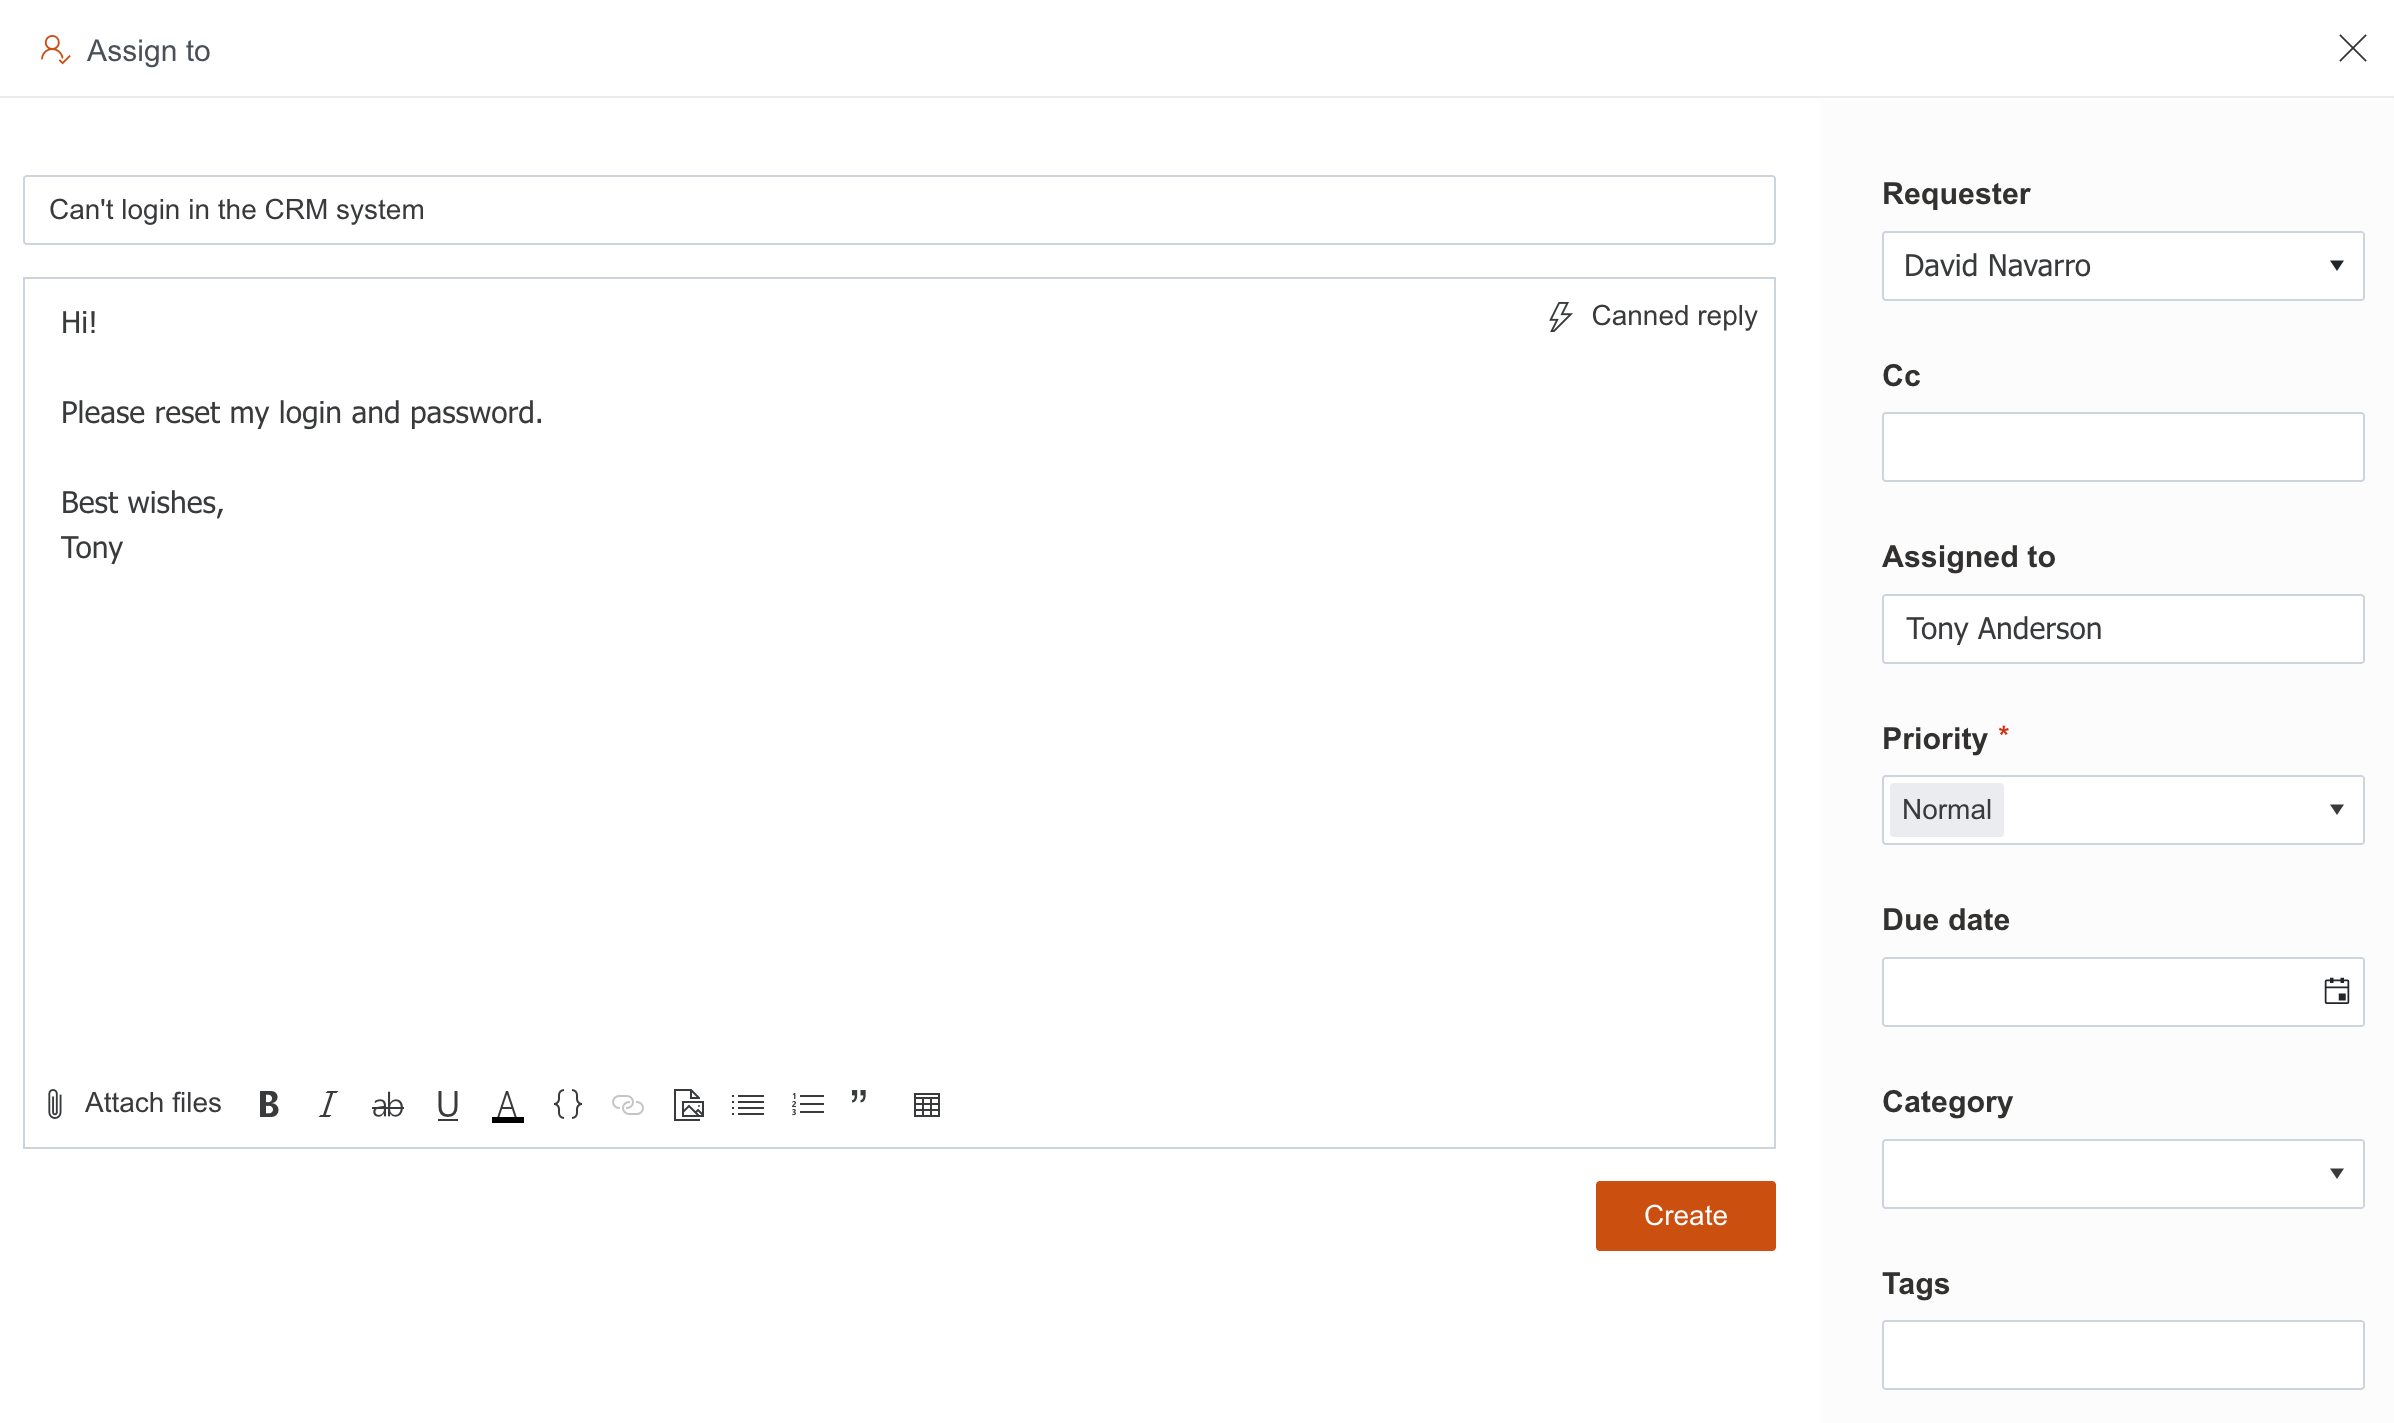
The Assign to me button lets you assign tickets to yourself with one click. To assign tickets, choose one or several unassigned tickets. Then click Assign to me.
After that, you will find the newly assigned tickets on the Home page. This action can be reverted. If the ticket has been assigned to somebody else, you can reassign it with Assign to me button as well.
Understanding ticket’s statuses
In HelpDesk you have four built-in statuses: New, In progress, Pending and Solved. Each status represents a stage of the ticket resolution process.
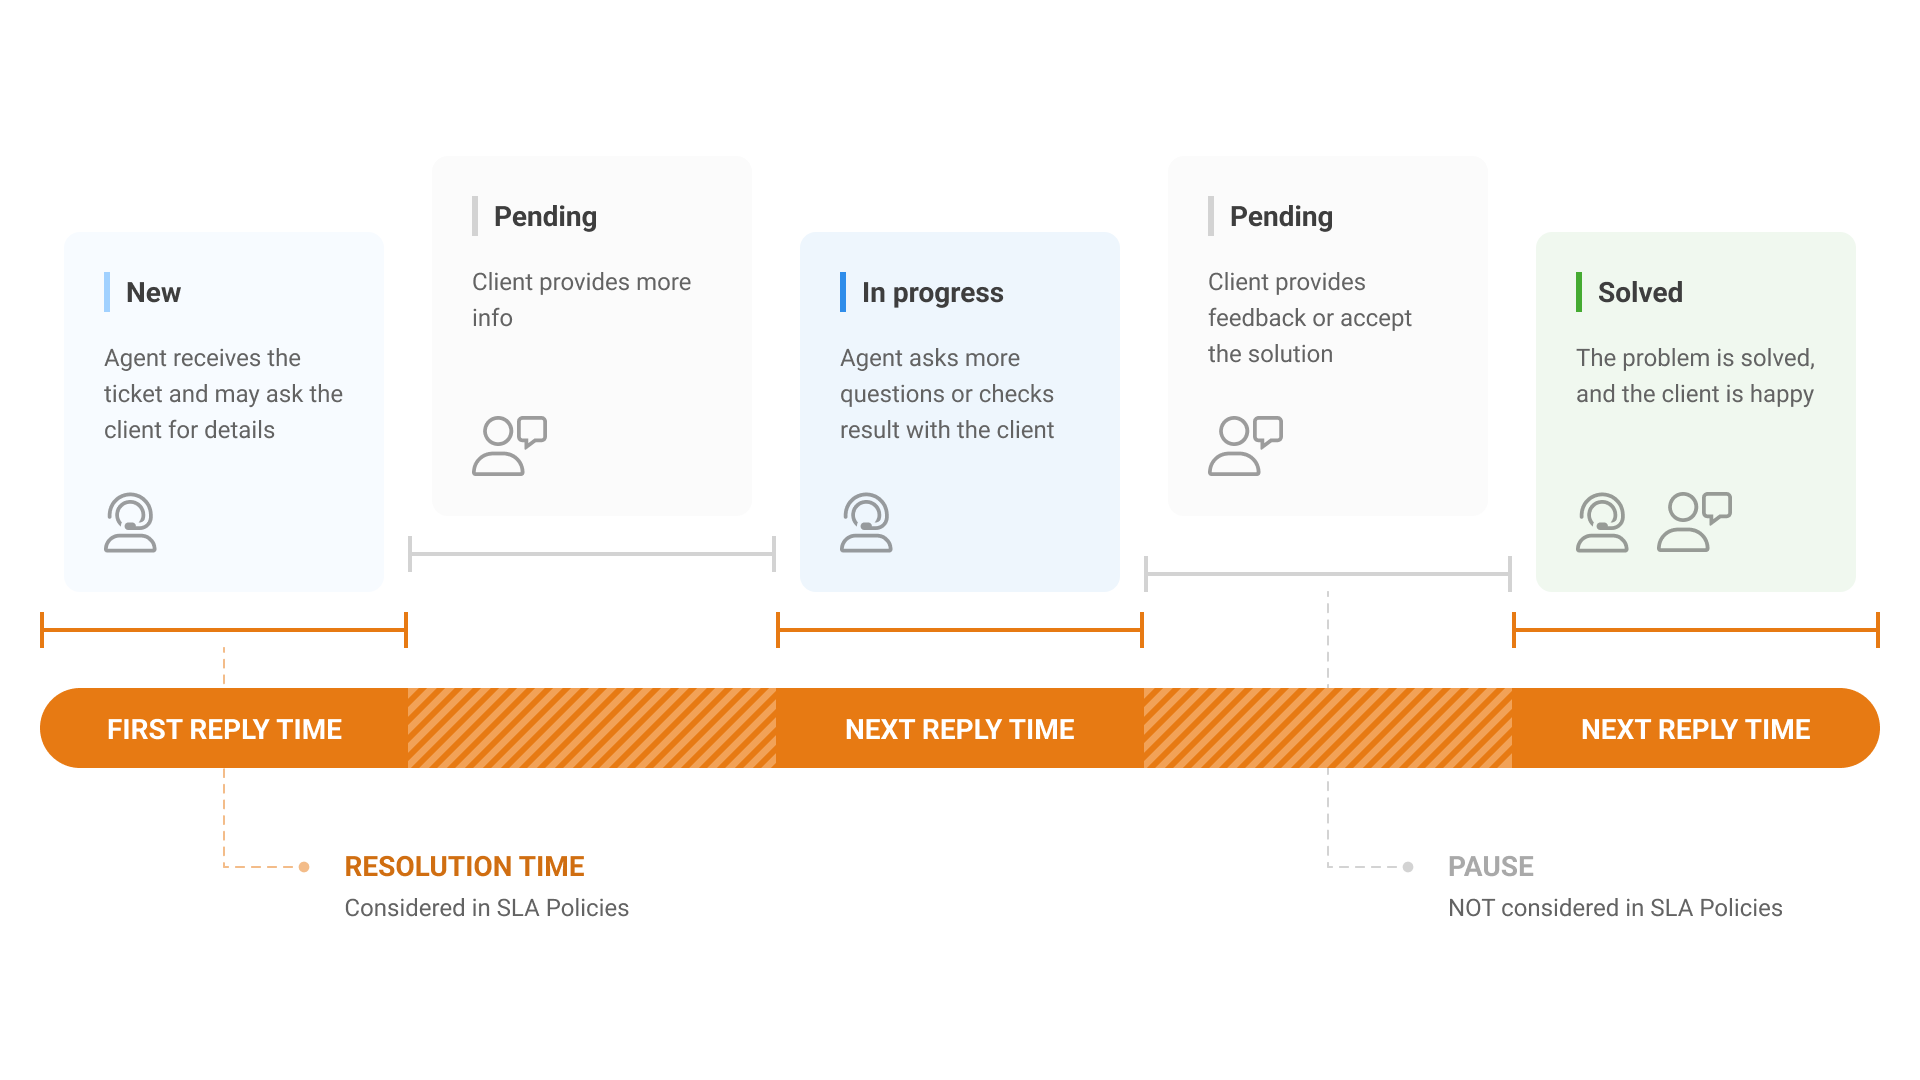
The New and In progress statuses are used to calculate the agent’s work time and the ticket’s resolution time. These calculations are needed for the First reply time and Next reply time metrics in SLA policies. SLA is always on pause when the ticket’s status is Pending.
When an end user submits a ticket, the ticket’s status will be New by default. This applies to tickets created by team members via the HelpDesk interface as well.
Then the agent should provide a reply and change the ticket’s status to Pending. After the end user has provided some feedback, the ticket’s status will automatically change to In progress. This cycle can repeat as many times as needed to resolve a ticket.
When the ticket is resolved, the agent should change its status to Solved.
Mentions
Note
Mentions work only in the light editor.
Mentions allow you to highlight specific comments to chosen contacts. Mentioned users will receive a direct email notification.
When writing your comment, type the @ symbol followed by the contact’s name.
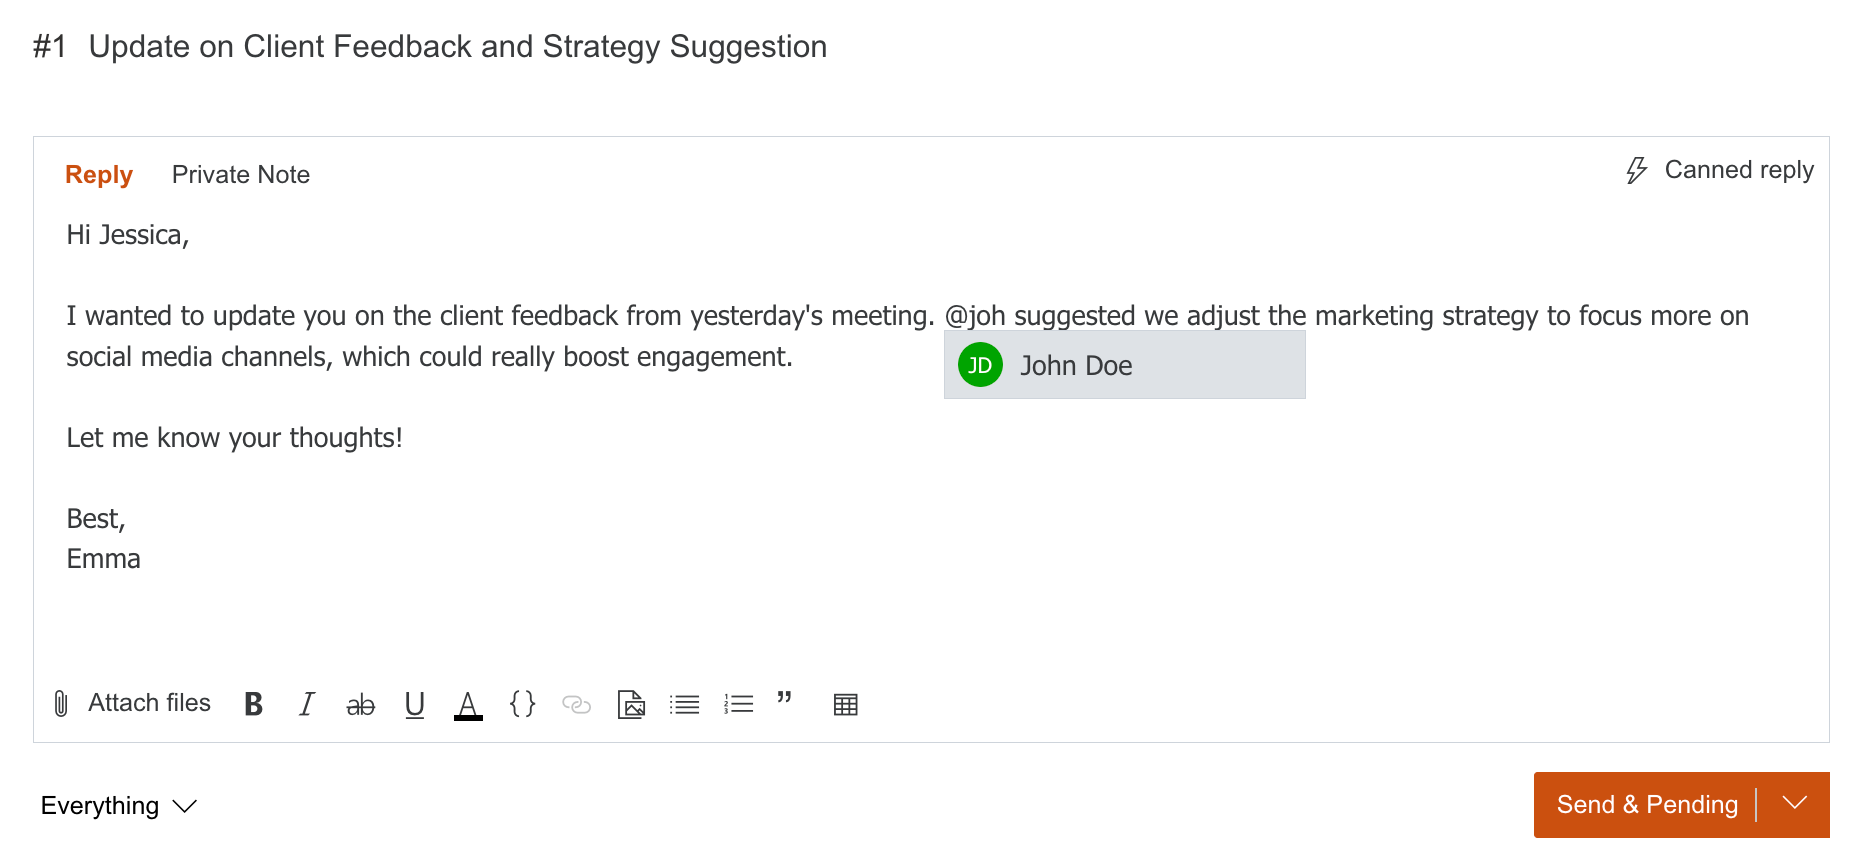
A dropdown list of matching contacts will appear. Select the desired contact from the list.
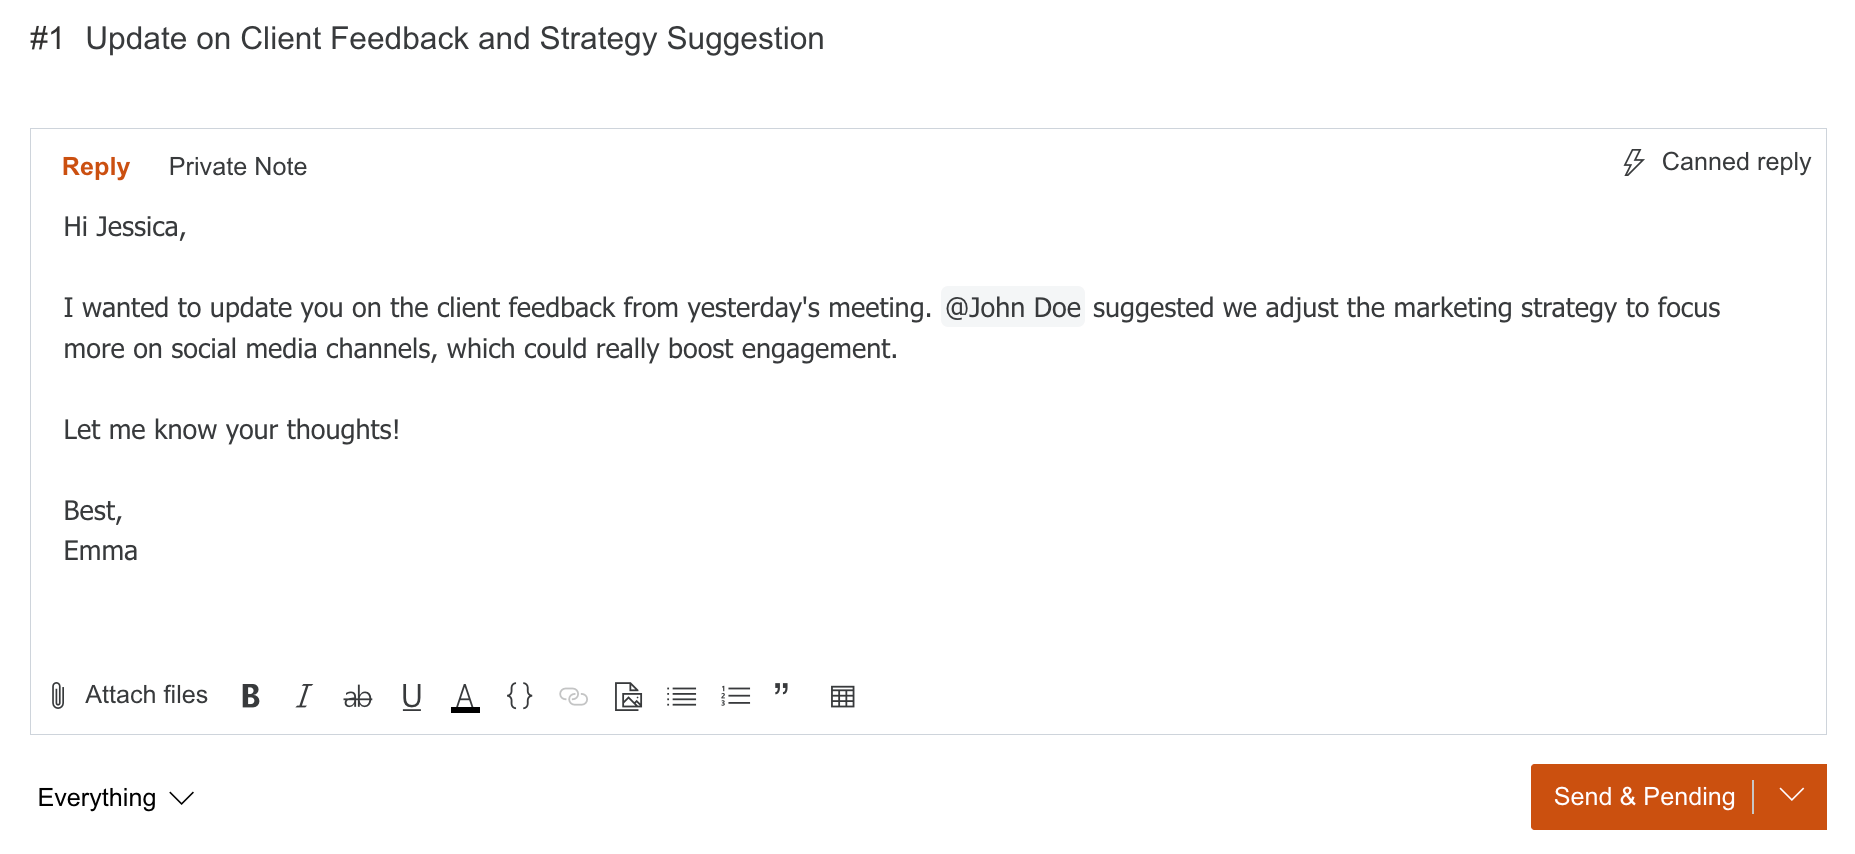
If you can’t find the contact you’re looking for, the dropdown will let you create a new HelpDesk contact for that user.
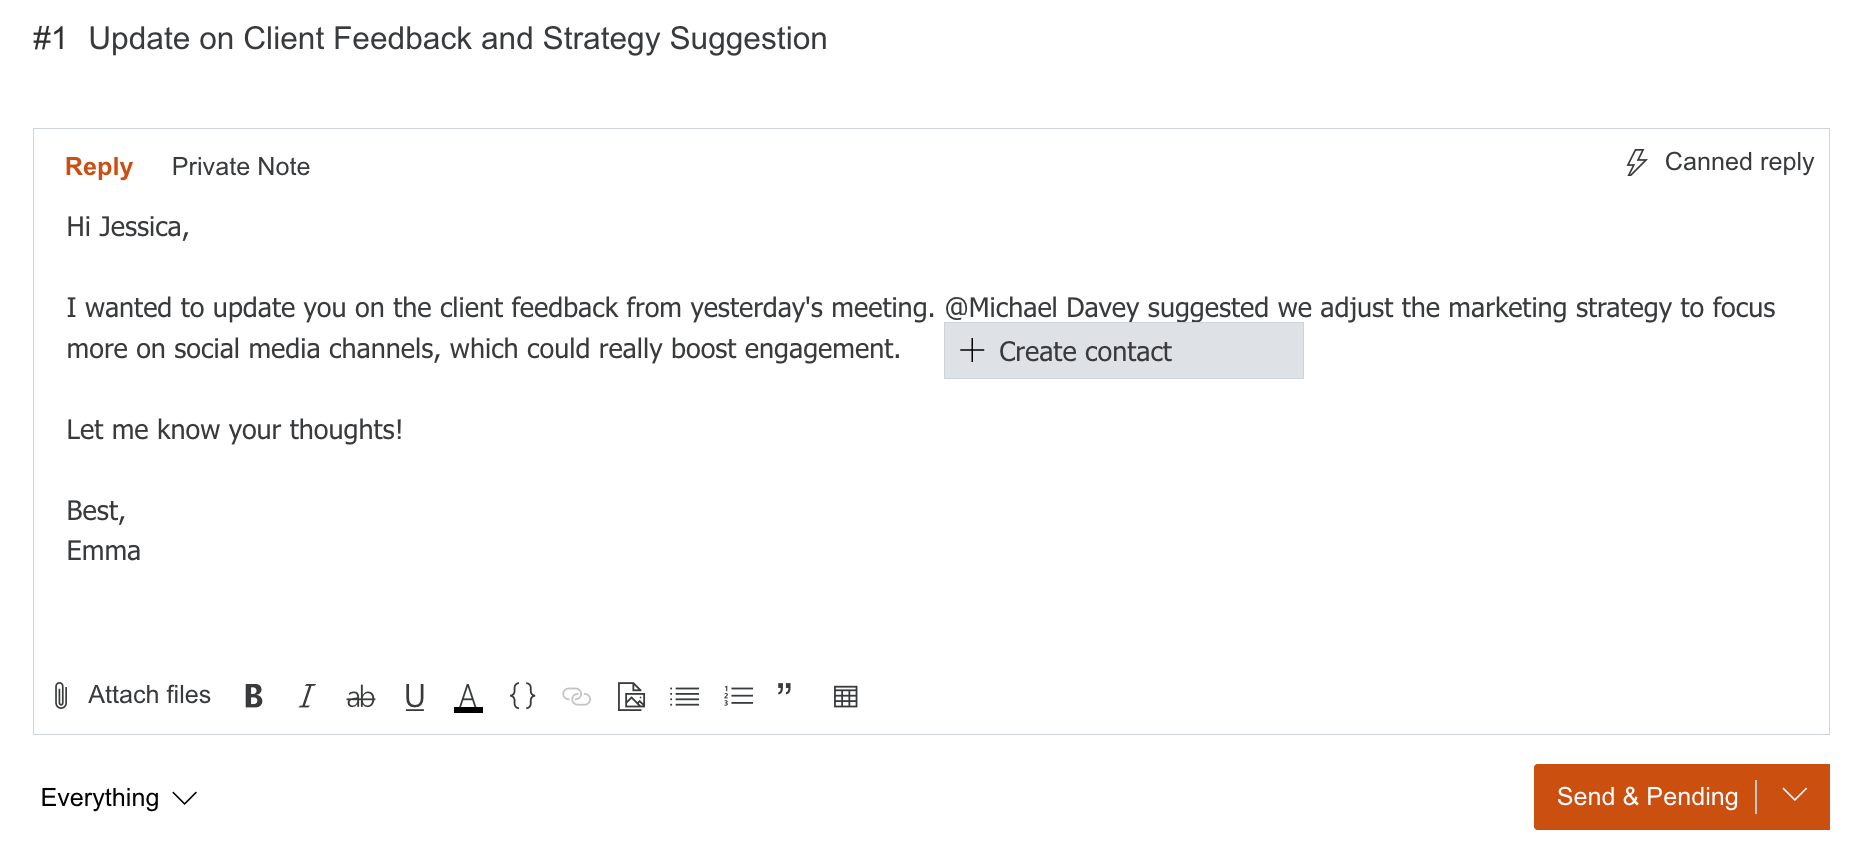
Once you’re done typing your comment, HelpDesk will email everyone included in the ticket and send an email notification to the mentioned contact.
Here’s how mentions work with different comment types:
Public comments: You can mention any contact you like in a public comment, and they’ll be notified via the Mentions - Public comment created trigger.
Private comments: You can only mention agents. If you switch the comment type from public to private, any mentions of non-agent contacts will be removed, leaving only their names in the message. Notifications are sent via the Mentions - Private note created trigger.
Hint
You can also customize mention notification recipients in triggers. For example, use All mentions (Agents) in the Send email action.
A couple of things to be aware of:
Mentions don’t add to CC: Mentioning someone doesn’t automatically add them to the ticket’s CC list. It only sends them a notification about the specific comment, and they won’t get any future updates unless you add them to CC separately.
HelpDesk UI only: Mentions are only available for comments created within the HelpDesk user interface. Email-based mentions are not processed.