Customize widget forms
To customize the new ticket and comment forms in the HelpDesk widget, you need to register an account on plumsail.com and use a web-based forms designer.
It is a separate Plumsail product with its own pricing.
With Plumsail Forms, you can modify the form markup and add custom fields, so requesters can fill them in when creating tickets.
Note
Only text, datetime, and choice fields are supported in the current version. If you need more complex field types, please contact us at support@plumsail.com.
You can find detailed information on how to use Plumsail Forms in the documentation.
Create custom widget form
Let’s look at a step-by-step example of how to add a custom field to the ticket creation form.
Note
We recommend trying widget form customization on a test HelpDesk instance first. If everything works as expected, apply the changes to production. If you accidentally break a HelpDesk form, you can always restore it.
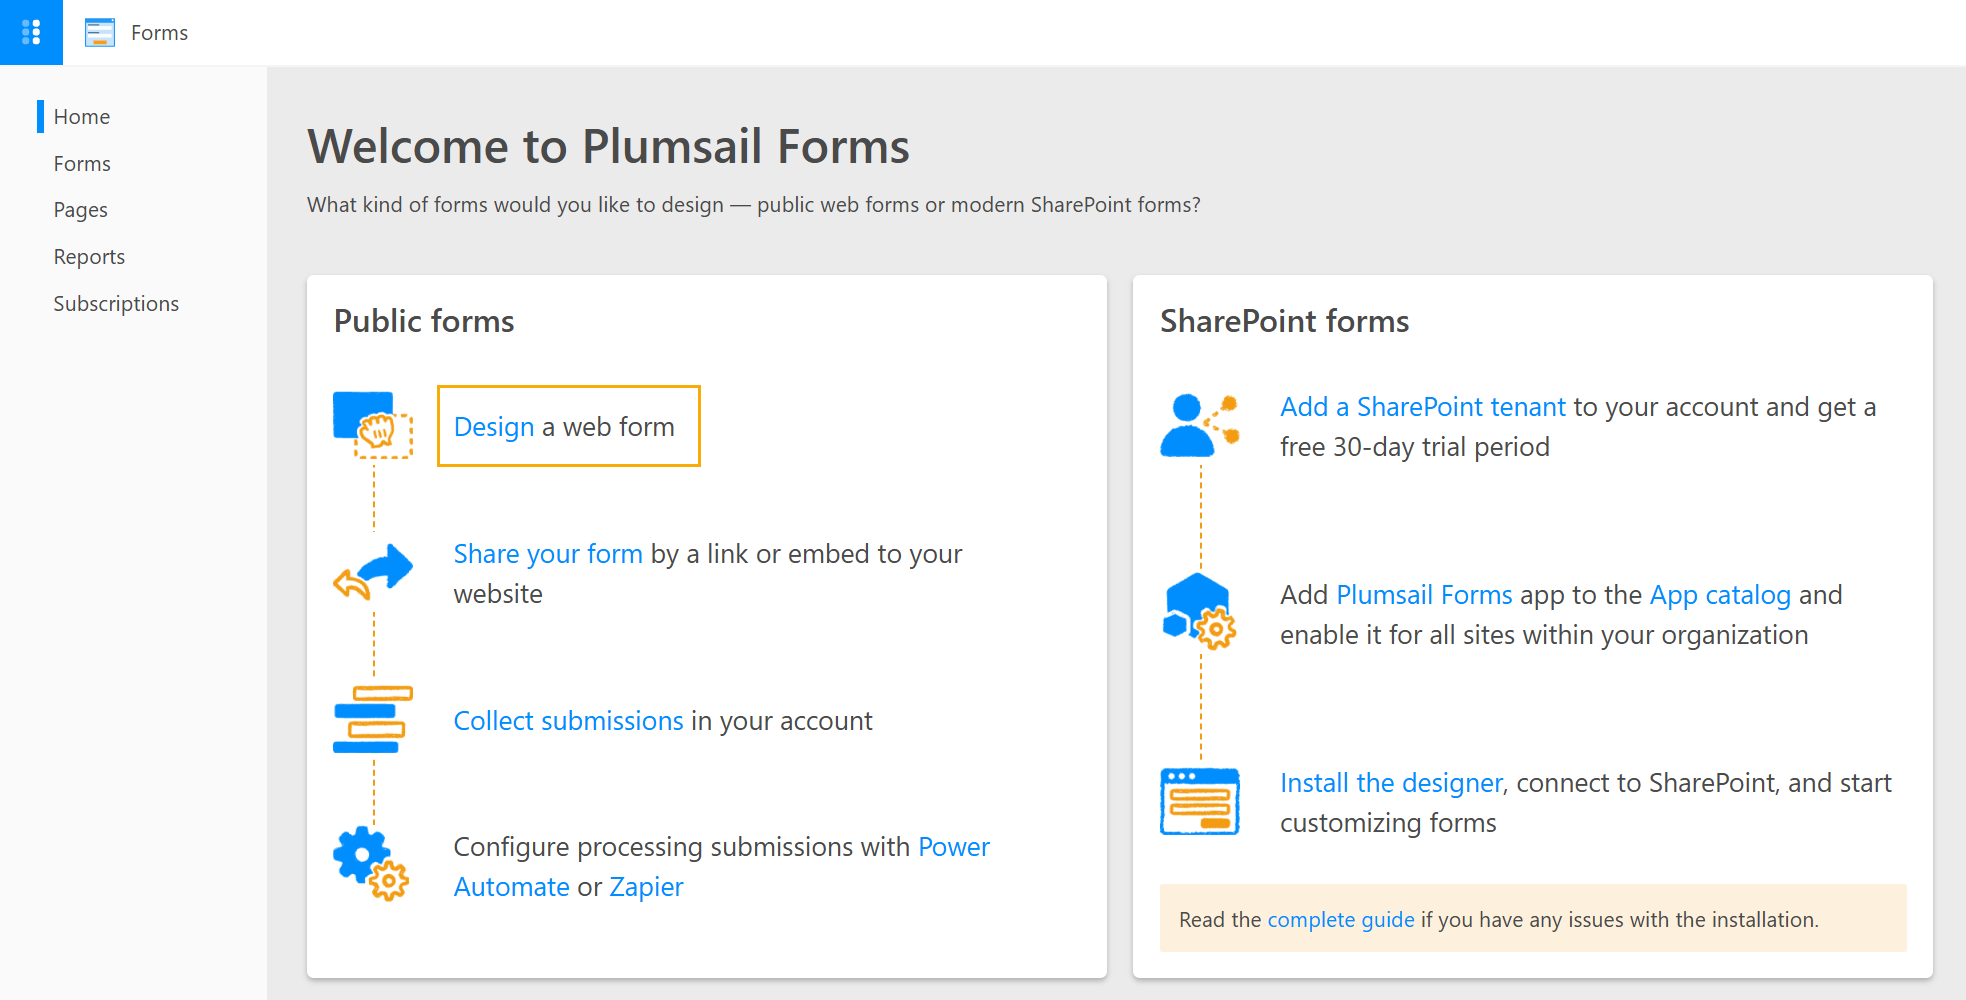
First, register an account on plumsail.com.
Open Plumsail Forms and select Design a web form.
Download the default widget forms below. If a file opens in a new tab, right-click the link and select Save link as.
- Create ticket form for authenticated users
- Create ticket form for external sites without registration
- Ticket comment form
Import a default ticket form from the downloaded file, give it a name, and save it.
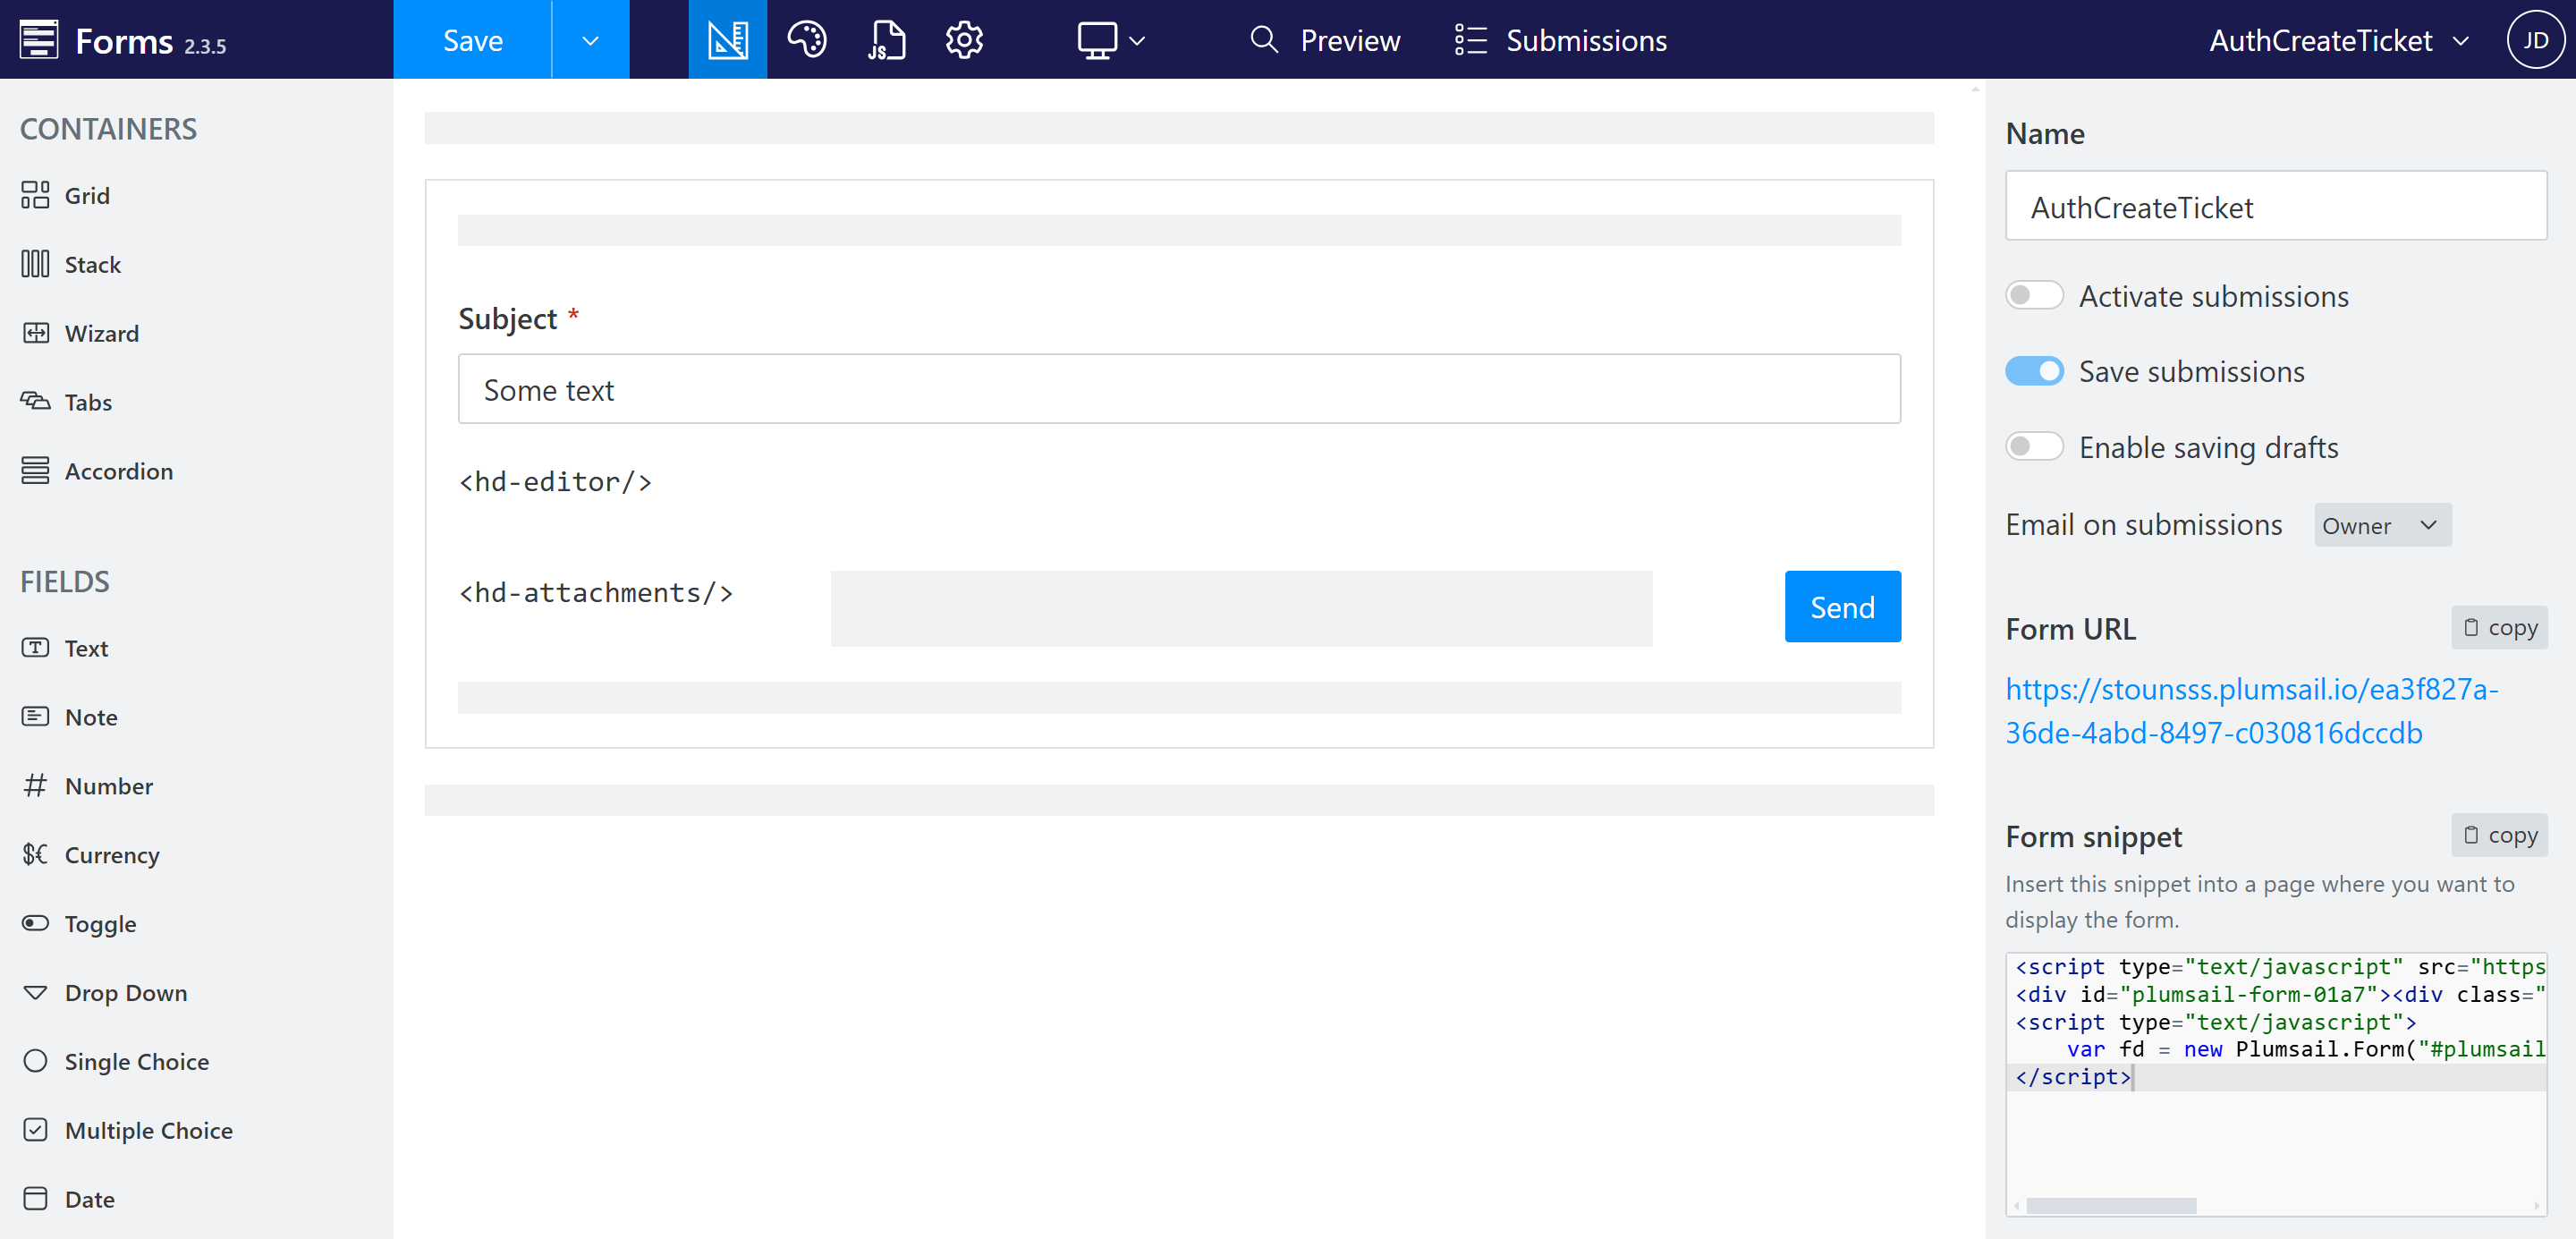
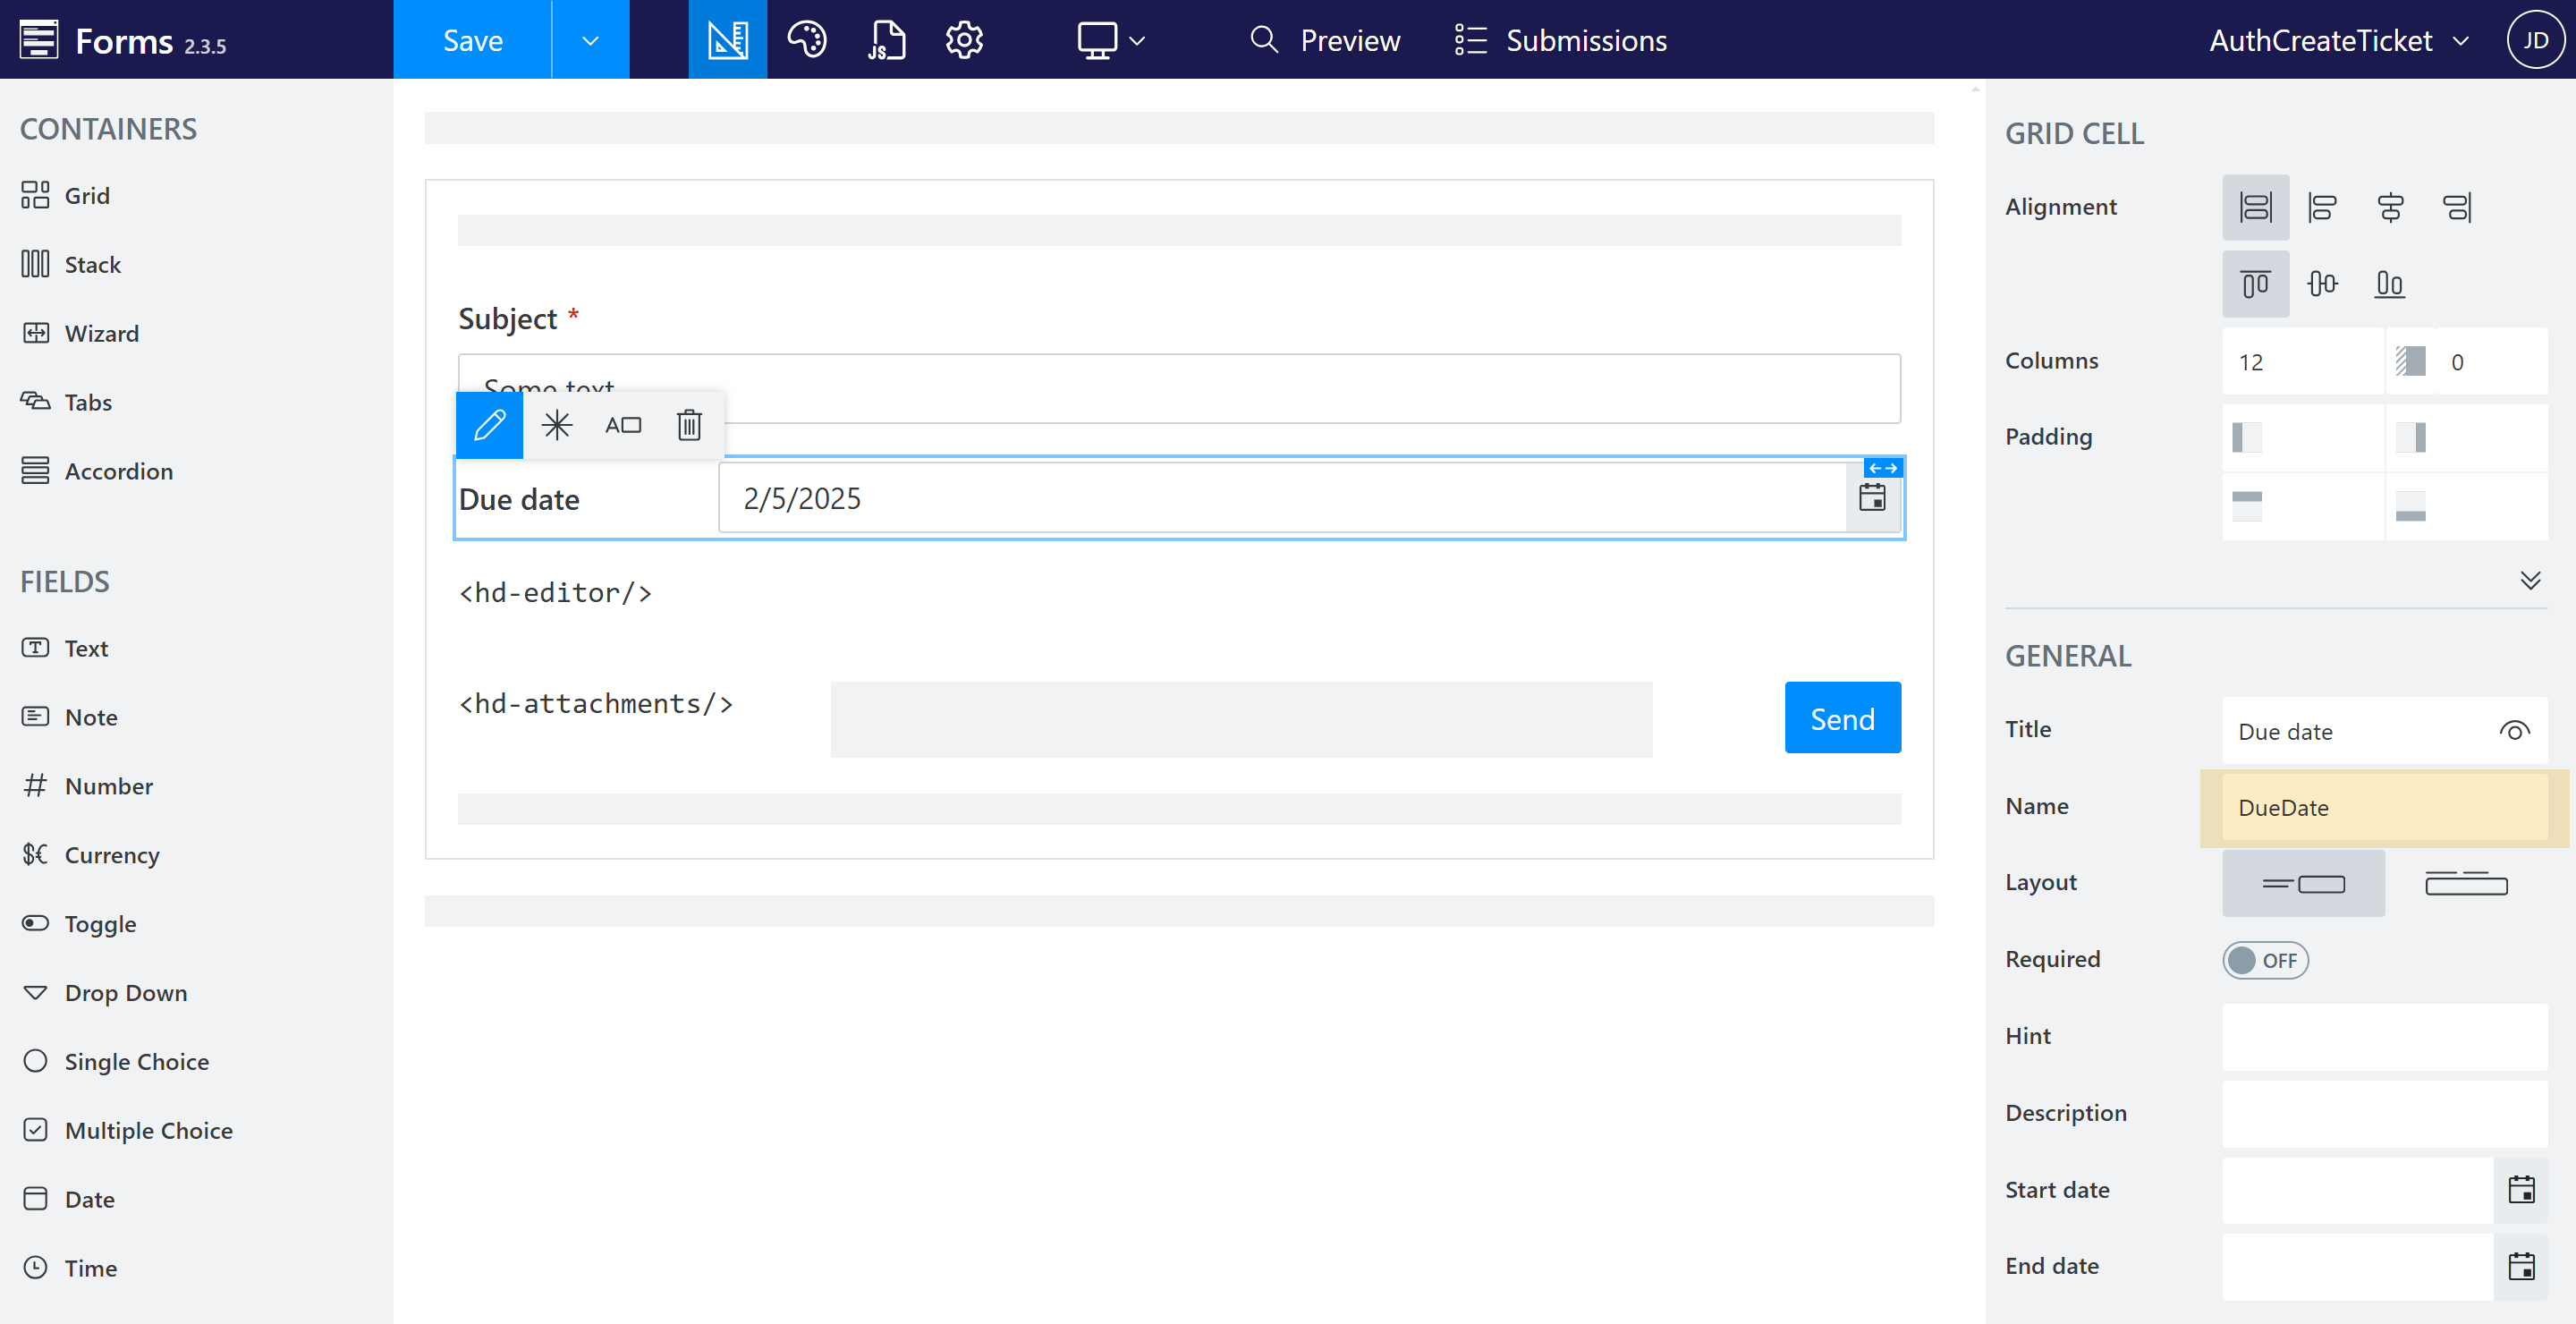
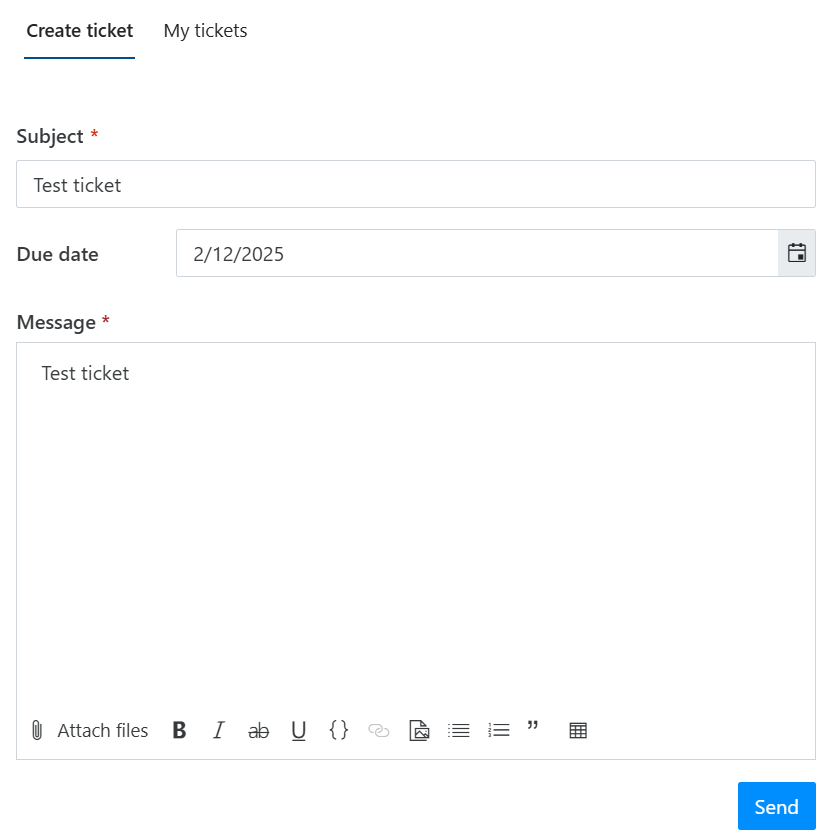
For example, you can add a Due Date field to the new ticket form. Drag the Date control from the Fields section and drop it onto the form.

When adding a custom field, make sure that the control internal name matches the internal name of the corresponding field in the SharePoint list. You can learn how to find a field internal name in this article.
In our case, we need to set the internal name of the Date1 control to DueDate. You can set the control’s Orientation property to Vertical to display the field title above the field.
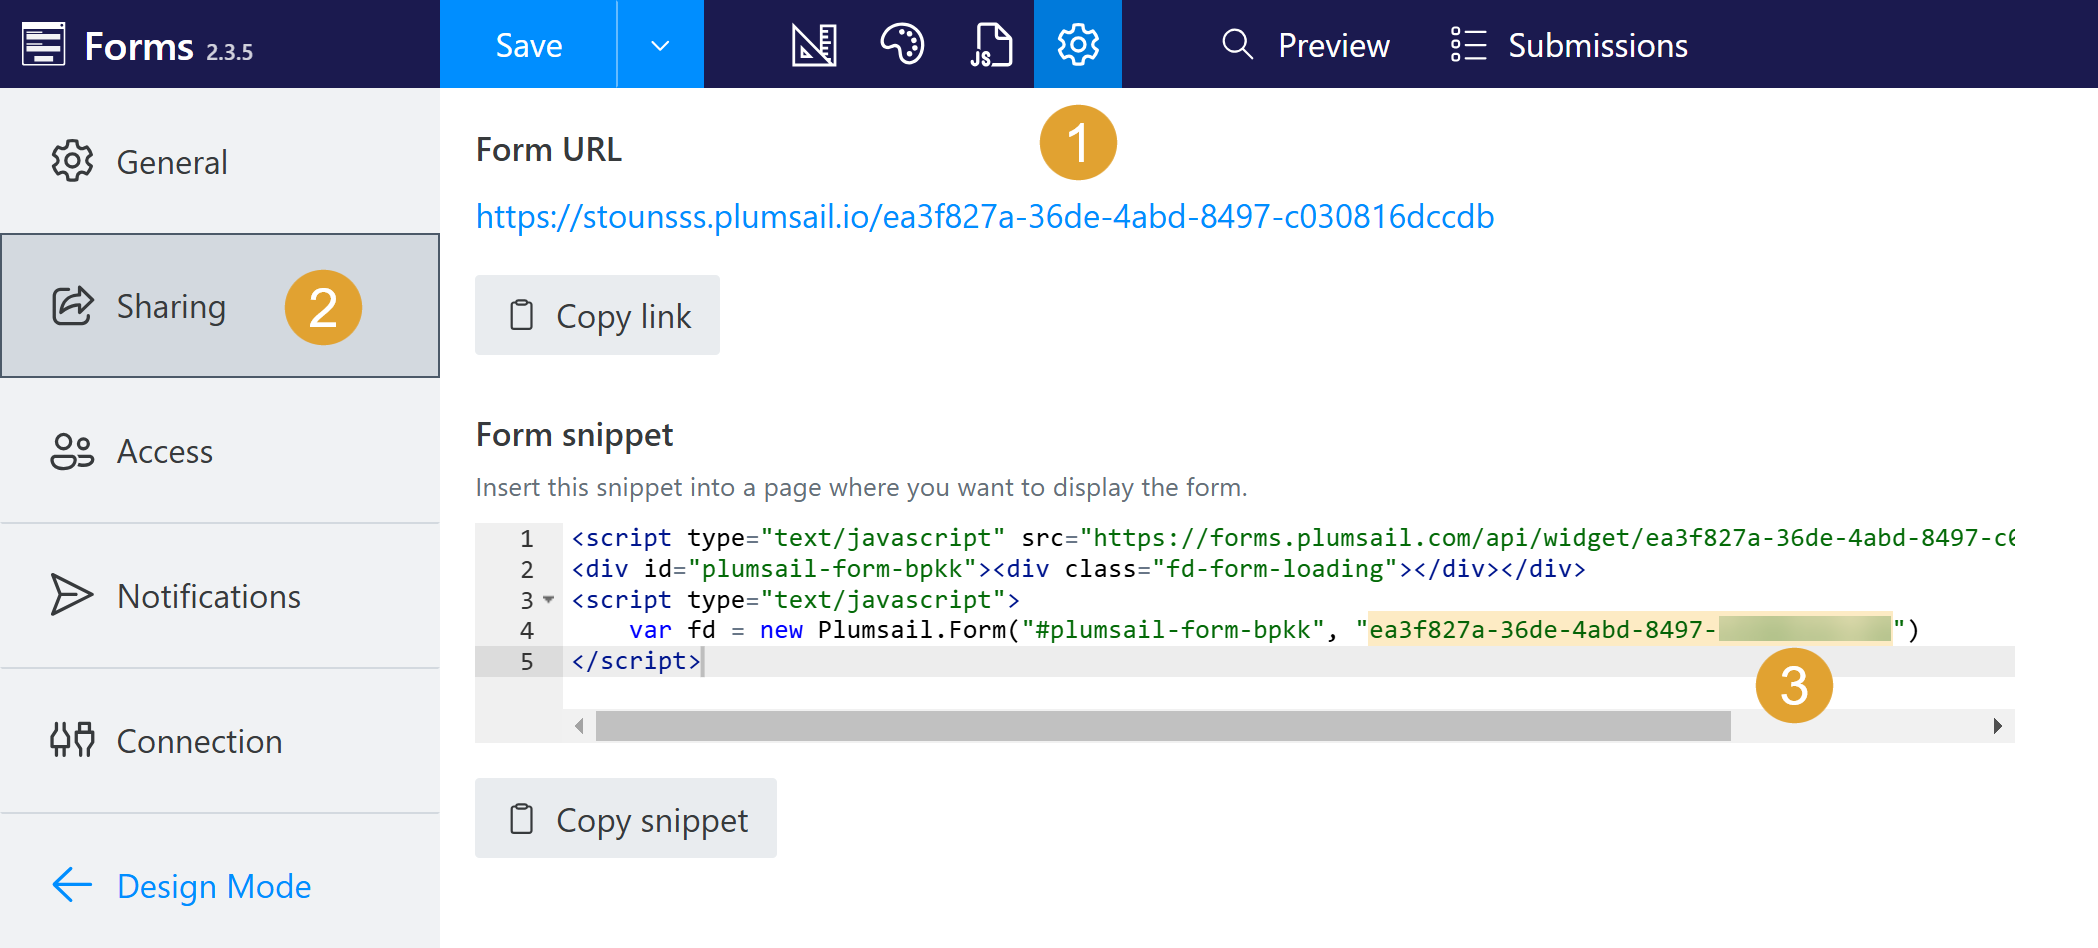
Save your changes. Now you need to configure the widget to use your custom form. Each Plumsail Form has a unique Form ID. You need to copy it to the widget configuration.
On the Plumsail Forms ribbon, select General, open the Sharing tab, and copy the Form ID from the Form snippet section.
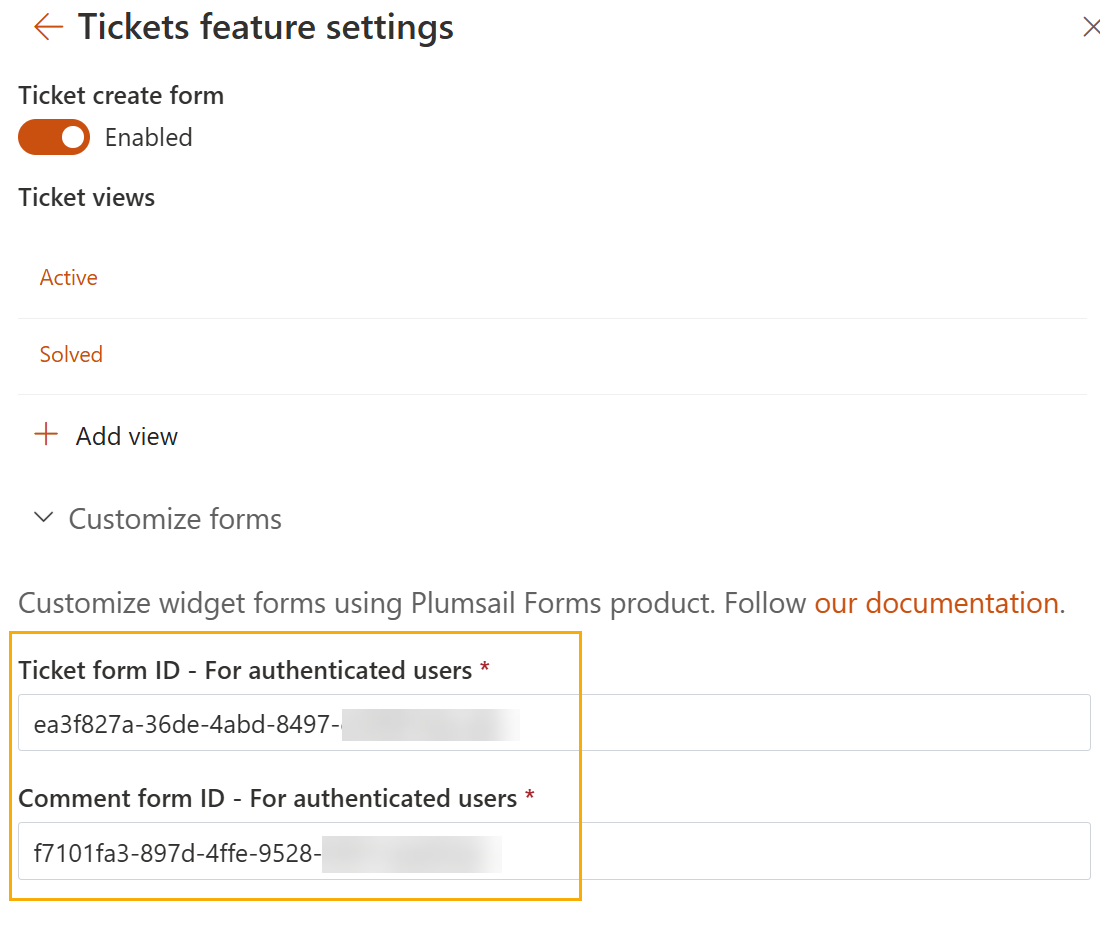
Navigate to the HelpDesk Widgets settings page.

Open an existing widget configuration or create a new one, then go to the Configure tickets feature section. It contains two fields: Ticket form ID - For authenticated users and Comment form ID - For authenticated users. By default, these fields contain the default form IDs. If you customize widget forms for an external site, there will also be a third field: Ticket form ID - For anonymous users.
Replace these values with your custom form IDs to make the widget use your forms. In our case, we will replace the Ticket form ID value with the one copied from the Plumsail Forms settings.
Note
Widget form IDs are cached for 30 minutes for optimization purposes. To apply your changes immediately, clear the browser cache.
Save the widget configuration and test the widget.
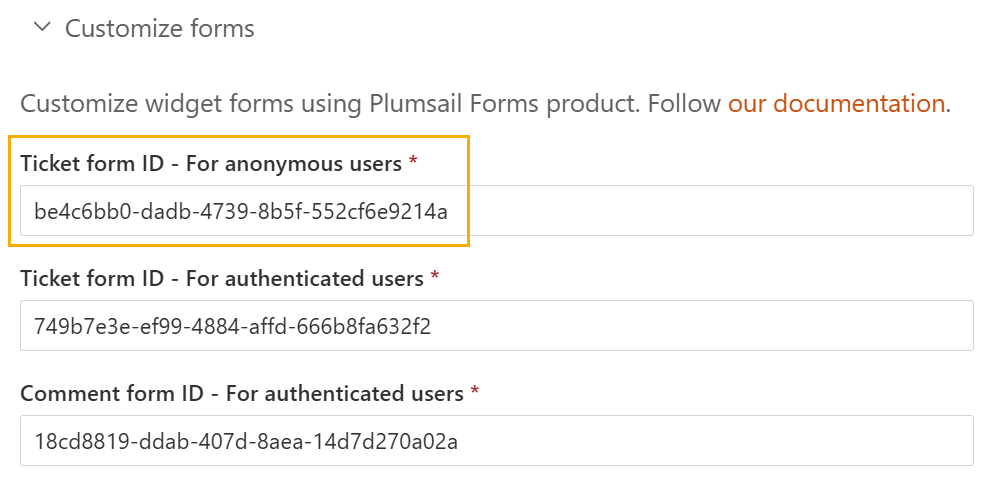
Restore default forms
You can easily restore the default widget forms. Navigate to the HelpDesk Widgets settings page, open the widget configuration, go to the Configure tickets feature section, and replace the custom form IDs with the default values:
be4c6bb0-dadb-4739-8b5f-552cf6e9214a (Default create ticket form ID for anonymous users)
749b7e3e-ef99-4884-affd-666b8fa632f2 (Default create ticket form ID for authenticated users)
18cd8819-ddab-407d-8aea-14d7d270a02a (Default comment form ID for authenticated users)