 Attachment field
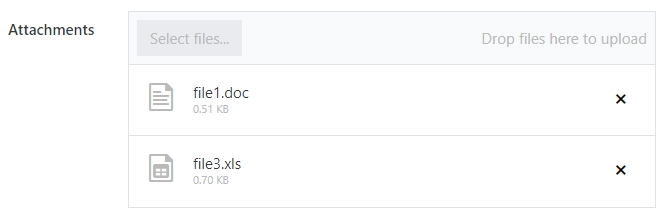
The Attachment field allows users to upload files to Airtable. It’s possible to do it by either uploading files manually or by dragging and dropping them into the field. Possible to drag and drop multiple files at once.
This page contains a detailed description of the field properties and JavaScript samples which you can use with this field.
Common Properties
Attachments Properties
Here you can find properties specifically related to the Attachments field.
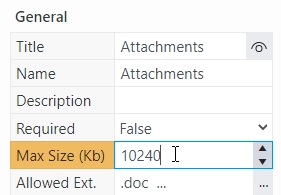
Max Size (Kb)
Select the max possible size of an individual attached file. Default max file size is 10240, but you can restrict it down, or increase it (if your subscription plan allows it).
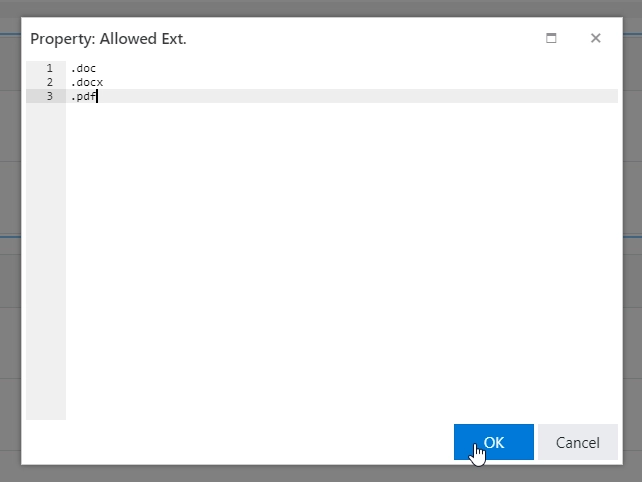
Allowed Ext.
Choose what files should be allowed to upload. Extensions should have a dot in front of them, should be placed on different lines. If empty, all extensions are allowed.
JavaScript framework
In this section, you can find basic examples of how to work with the field using JavaScript.
For more examples, check out Working with form fields in JavaScript article. If you are not familiar with the JavaScript framework, get started with the JavaScript basics.
Note
The field is only accessible once the form is rendered, so all calls to the field must be inside fd.rendered event:
fd.rendered(() => {
    // access the field's value and print in the browser's console
    console.log(fd.field('Field1').value);
});
Get field value
Access uploaded files with the following properties:
// get field value
fd.field('Field1').value;

// get first file name
fd.field('Field1').value[0].file;

// get first file size
fd.field('Field1').value[0].size;

// get first file URL
fd.field('Field1').value[0].url;

// loop through all files
fd.field('Field1').value.forEach(item => {
    console.log(item.file);
    console.log(item.url);
});
Upload status
The property indicates whether the field is uploading files.
fd.field('Field1').isUploading;
Handle change event
Execute a function when a field value has been changed:
fd.field('Field1').$on('change', value => {
    // log changes to browser's console
    console.log('New value: ' + value);
});
Make field required
Make a field required or optional:
// make field required
fd.field('Field1').required = true;

// make field not required
fd.field('Field1').required = false;
Disable field
Make a field non-editable. The field value can still be changed with JavaScript and saved:
// disabled field
fd.field('Field1').disabled = true;

// enable field
fd.field('Field1').disabled = false;
Get HTML element
Access HTML element inside the field in order to modify it, hide it, or do something else.
// access field's control
let htmlField = fd.field('Field1').$el;

// access field's block, which includes title and control
let htmlFullField = fd.field('Field1').$parent.$el;
Hide field
Hide a field from a user. The field value can still be accessed and changed with JavaScript:
// hide field
fd.field('Field1').hidden = true;

// show field
fd.field('Field1').hidden = false;
Configure widget
You can access the widget used by the field. The widget is based on Kendo UI Upload.
// get the widget
fd.field('Field1').widget

// change the widget's configuration
fd.field('Field1').widget.setOptions({
    multiple: false
});