Create PDF document from SharePoint form based on Word template with Power Automate and Plumsail Documents
From this article, you will learn how to populate a DOCX template with data from two linked SharePoint lists and convert it to PDF with the help of Plumsail Documents in Power Automate.
The article contains step-by-step instructions on setting up the SharePoint list and corresponding forms, creating a Plumsail process for document generation, and setting up a Power Automate flow.
Form
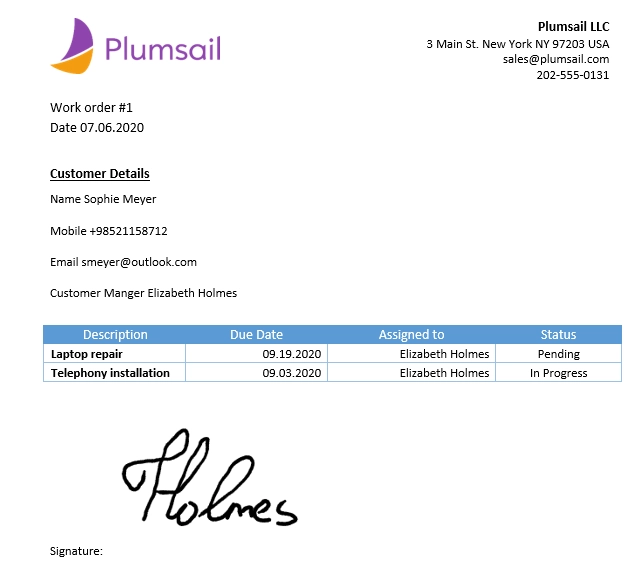
This is the work order form we will use for this example:
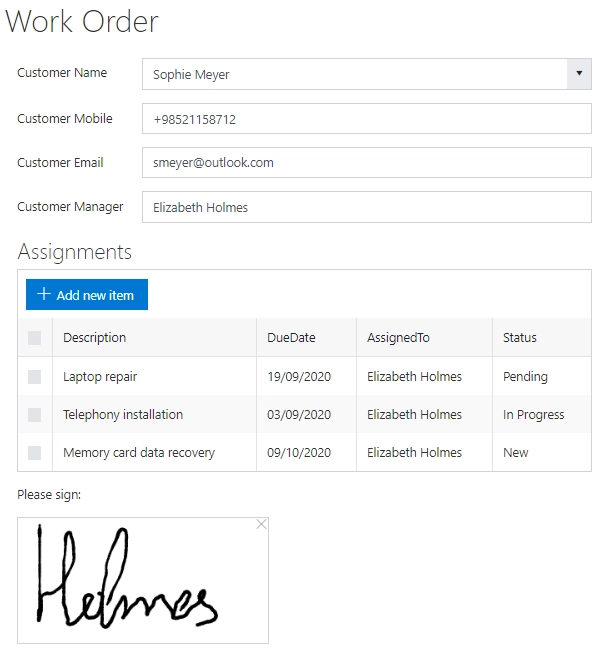
A work order can consist of one or more assignments; this is why we created two lists:
Work Order
Assignments
Work Order list stores primary information about customers and persons in charge. The list has the following fields:
CustomerName (Lookup field, points to the list of customers)
CustomerMobile (Single line text field)
CustomerEmail (Single line text field)
CustomerManager (Person or Group field)
Signature (Multiline Plain Text field, stores the data of an Ink Sketch control)
Assignments list stores individual tasks related to each Work Order. The list has the following fields:
Description (Single line text field)
AssignedTo (Person or Group field)
DueDate (Date and Time field)
Status (Choice field)
WorkOrder (Lookup field, points to the Work Order list)
To bind the Assignments list to the work order form, we utilized the List or Library control.
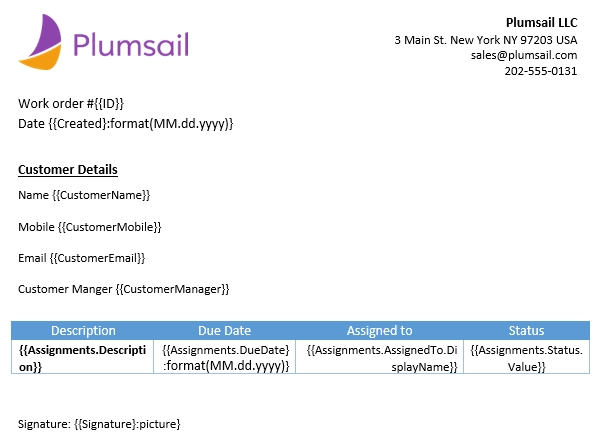
Template
A DOCX template is a document that includes special fields readable by the Plumsail Documents template engine. For an introduction to the Documents template engine, visit this documentation article. You can create the template from scratch or use our version as a start.
When the template is processed, everything between curly {{ }} brackets will be overwritten by data from the SharePoint list; replace the names inside curly brackets with the names of SharePoint fields you’d like to use.
Plumsail Documents process
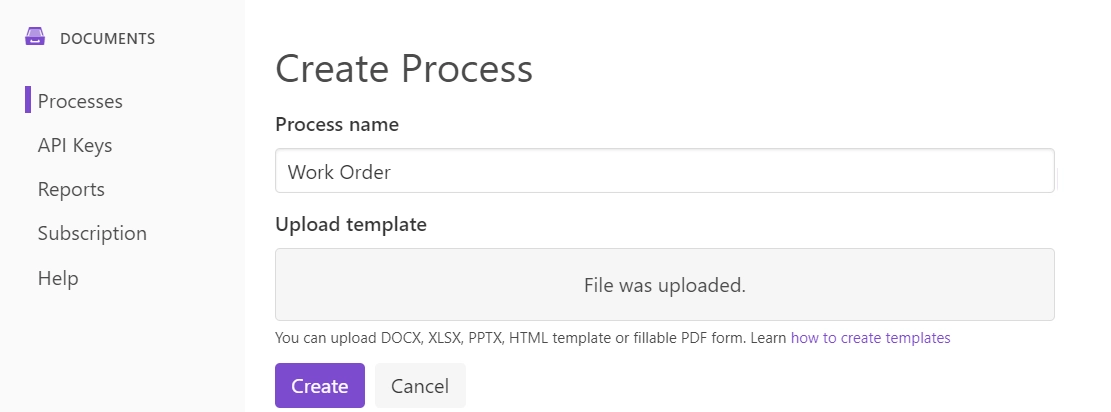
Go to the Processes section in your Plumsail account and create a new process.
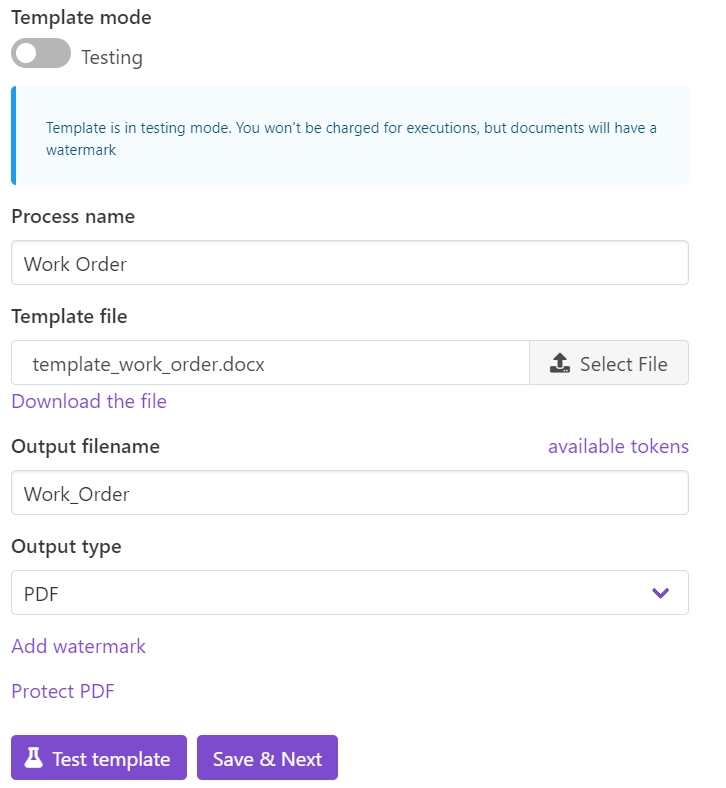
At the Configure Template stage, use the Upload button to add the DOCX template to the process.
In the Settings section, make sure the process is in Production mode. Then fill in Output filename and select PDF as the output type.
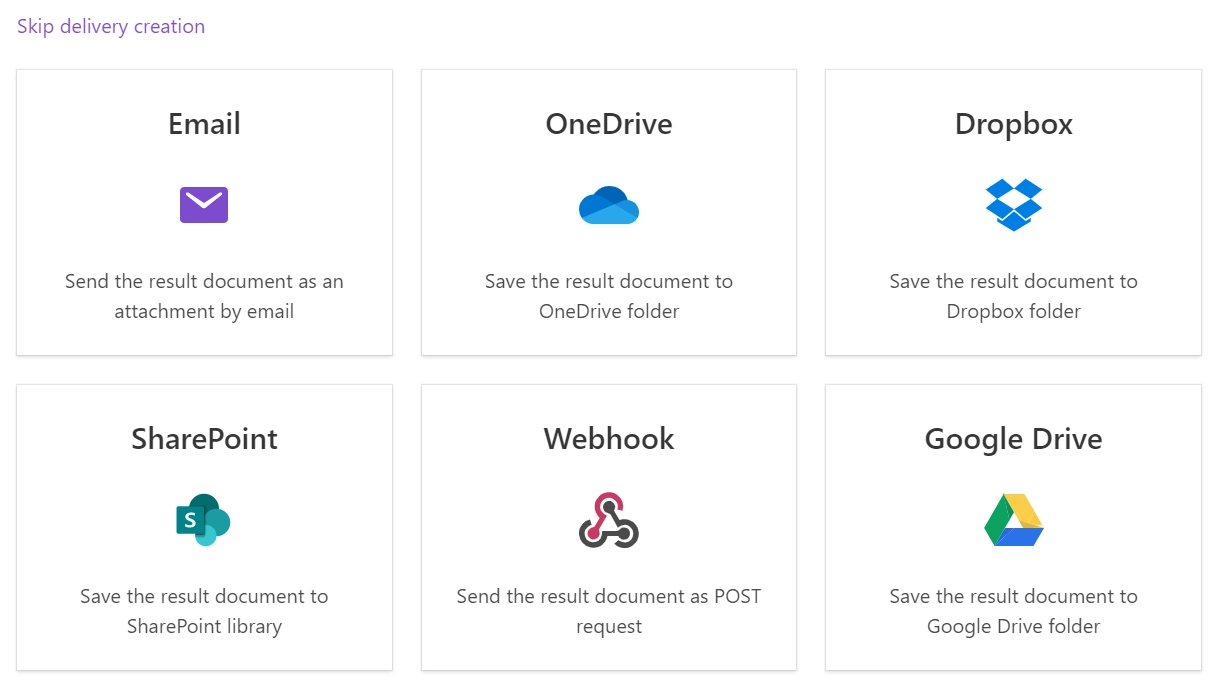
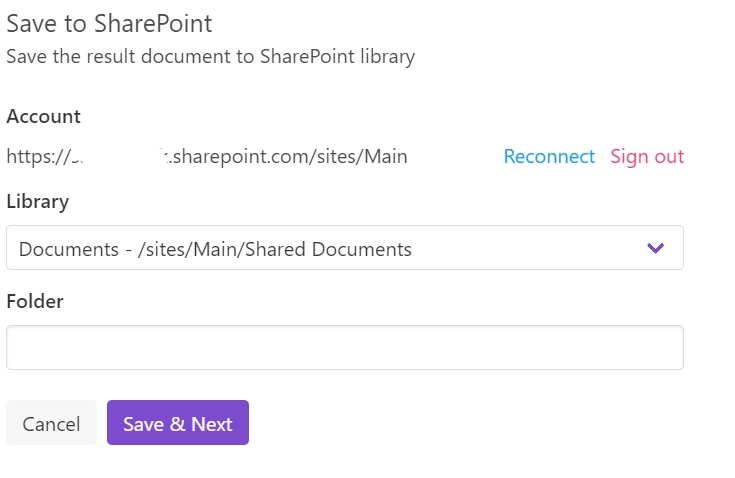
At the Delivery stage, choose SharePoint - Save the result documents to SharePoint library from the list of connectors. Specify your SharePoint site URL, press Connect, and select the library where you want to save the resulting document.

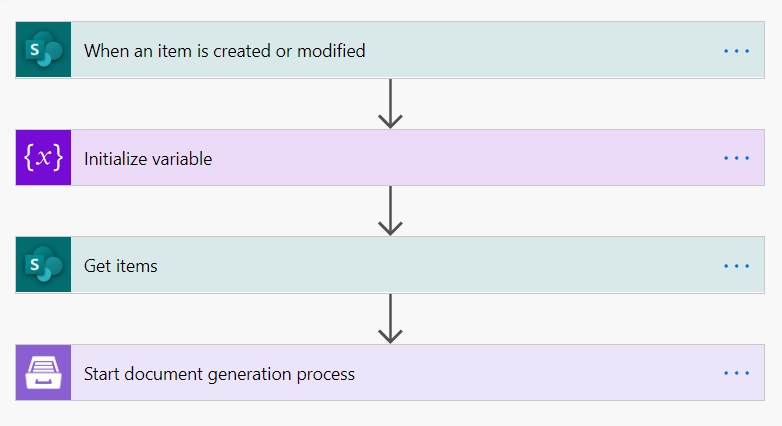
Power Automate Flow
In this section of the article, you’ll find step-by-step instructions for creating this PA flow:

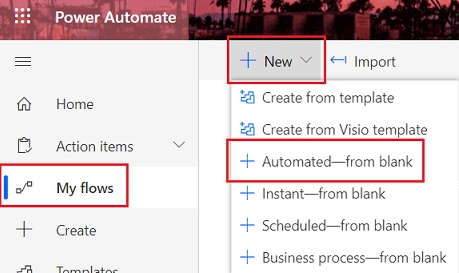
To recreate this flow, first go to My flows and click New flow → Automated cloud flow:
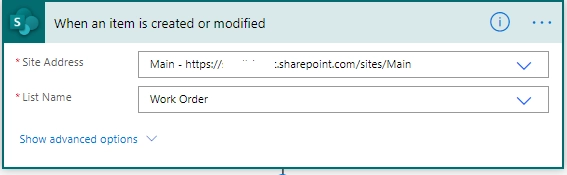
When an item is created or modified
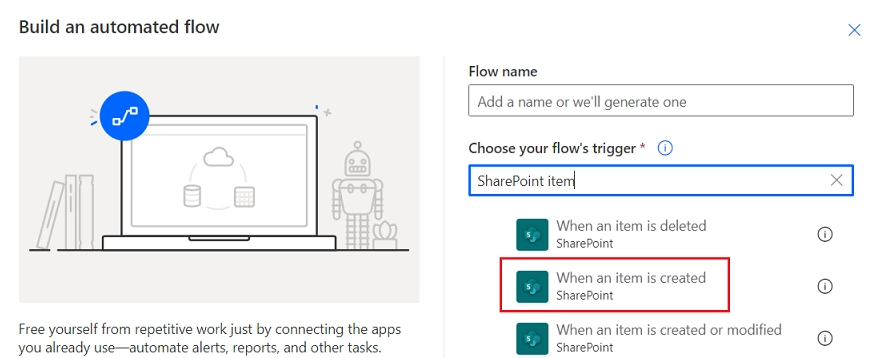
In the pop-up dialog, in Choose your flow’s trigger field, search for SharePoint item and add SharePoint Item - When an item is created:
Name the flow and click Create.
Note
The flow starts when an item is created in the WorkOrder list. You can use any other trigger instead, for example, When an Item is created or modified; this way, the flow will start each time an item in the target list is modified.
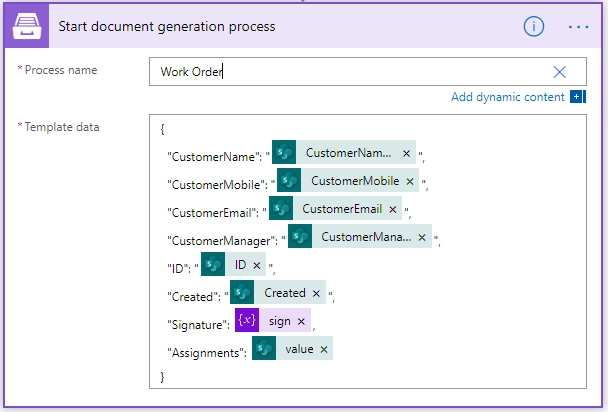
Start document generation process
The second step of the flow starts the Plumsail process. Find the instructions on how to use the Plumsail Documents connector in Power Automate here.
Use the Data/jsonContent parameter to bind SharePoint data to the template in JSON format. Visit this documentation page for more detailed instructions.
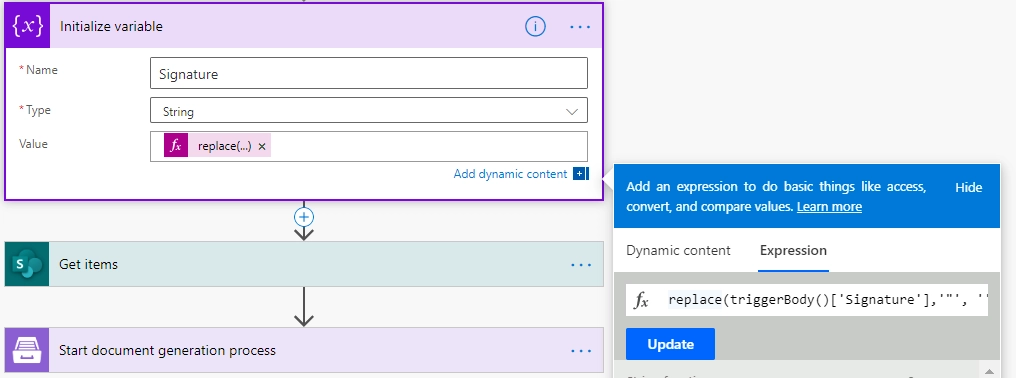
Ink Sketch control
The Ink Sketch control stores the data in quotation marks. To remove them, use the following expression: replace(triggerBody()[‘Signature’],’”’, ‘’)
Plumsail Documents template engine will automatically convert the field value to Image.
List or Library control
To add several items from the Assignments list to the document, use the Get items action before starting the document process. To obtain only the items that are related to the current work order, use a Filter Query to specify filtration by the ID of the Lookup field’s value: WorkOrder/Id eq @{triggerBody()?[‘ID’]}
Note
You can use other advanced parameters of the Get items action: use Top Count to limit the amount of retrieved items or Limit Entries to Folder to only allow items from a certain folder.
Lookup control
The value of a Lookup control is stored as plain text. In order to access the Value or ID of the lookup, use the Parse JSON action with the following schema:
{
   "type": "object",
   "properties": {
      "id": {
         "type": "integer"
      },
      "text": {
         "type": "string"
      }
   }
}
The result should look like this:
Lookup field
Using the value of a Lookup field in your flow doesn’t require any extra preparation. Note that Power Automate processes its ID and Value separately.
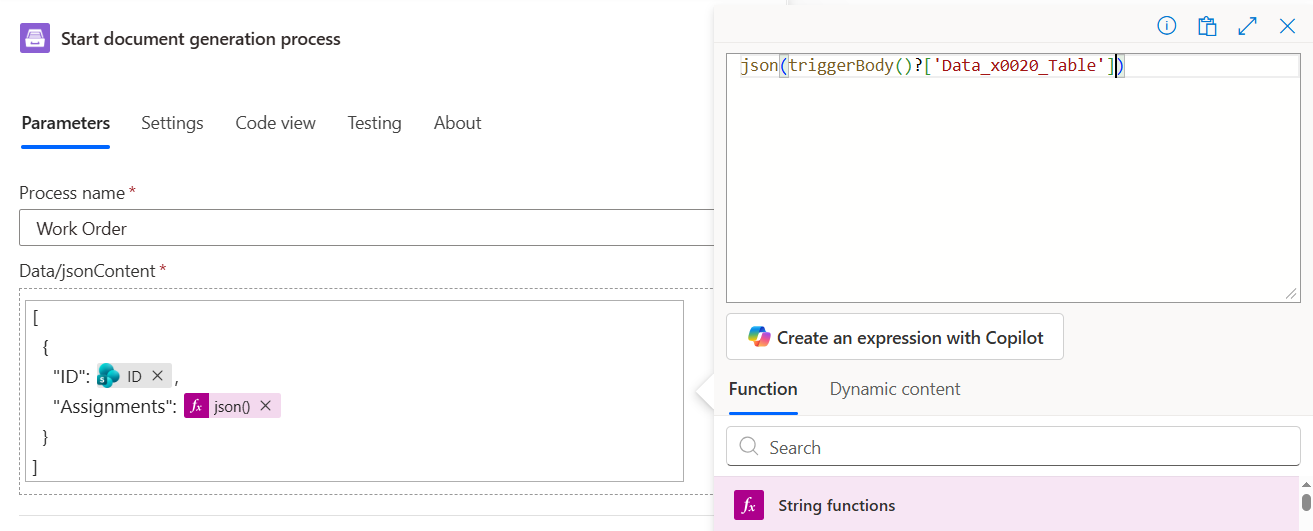
DataTable control
To use the DataTable control in your document, convert it to JSON with the json() method:
You can find the detailed instructions on this page.
Conclusion
This is the resulting document generated based on the DOCX template using the help of Plumsail Documents and MS Power Automate: