How to create an item in SharePoint list with Power Automate
This article will show how to create items and how to add attachments to the newly created items. We’ll use Plumsail Forms submission as a trigger, but the same approach is suitable for any other trigger in Power Automate.
Get started
This is my SharePoint List:

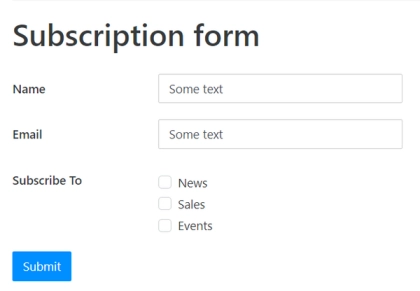
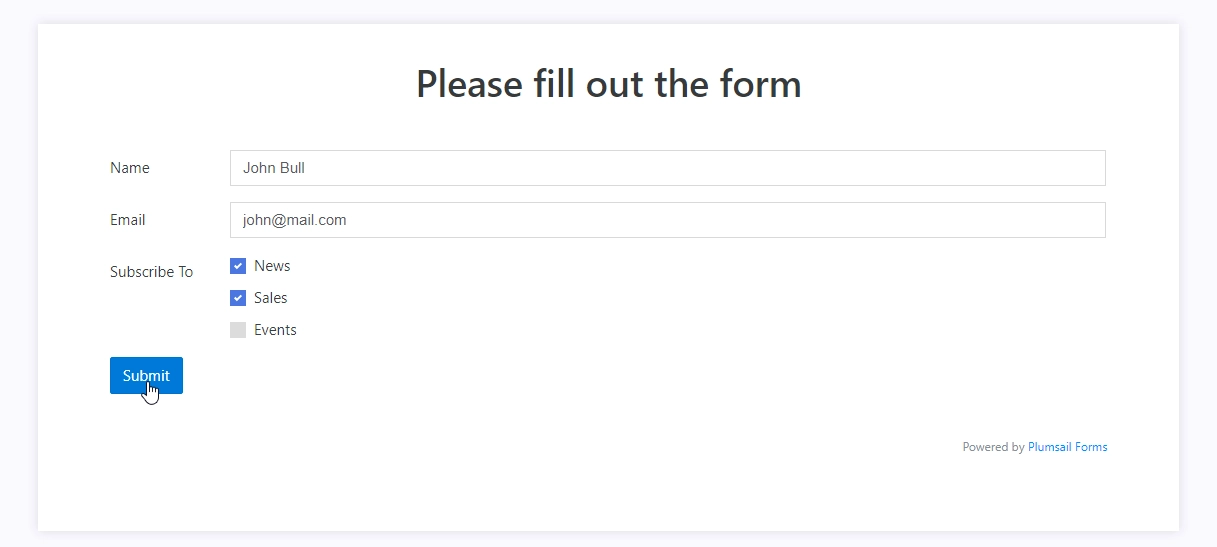
Here’s the form that I am using, we’ll use its fields to create a SharePoint item:
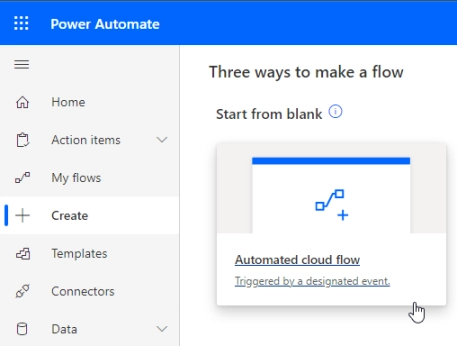
First, open Power Automate page and go to Create → Automated cloud flow:
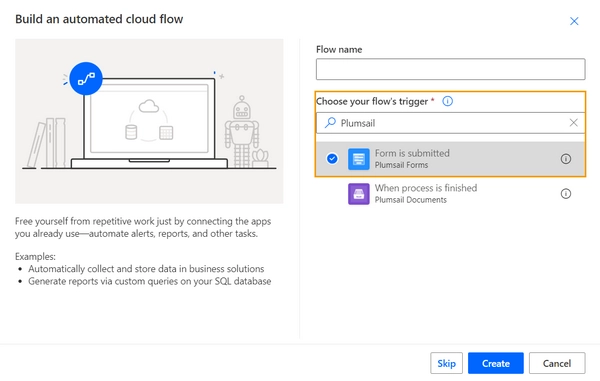
You’ll need to find the correct trigger for your case. We’ll use Plumsail Forms - Form is submitted in this example:
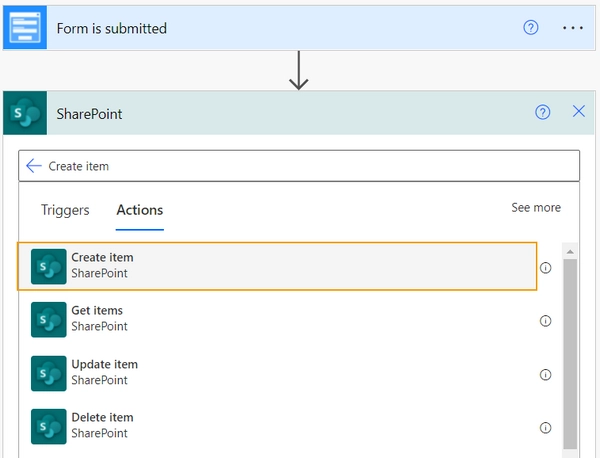
Create item
We’ll use Microsoft’s SharePoint - Create item action to create an item in a list. Select it:
You will need to add your site address. If it’s your first time configuring SharePoint action, select Enter custom value in dropdown menu and type in or copy and paste your site address, something like https://mydomain.sharepoint.com/sites/mysite
You will also need to select List in List Name field:
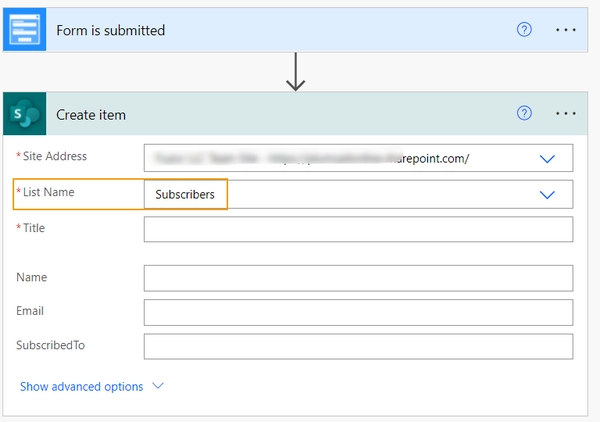
Now you will see a menu with all columns that can be filled with Flow. Some columns are an exception and cannot be filled using this action, for example, Choice column. We advice to use columns that can be filled.
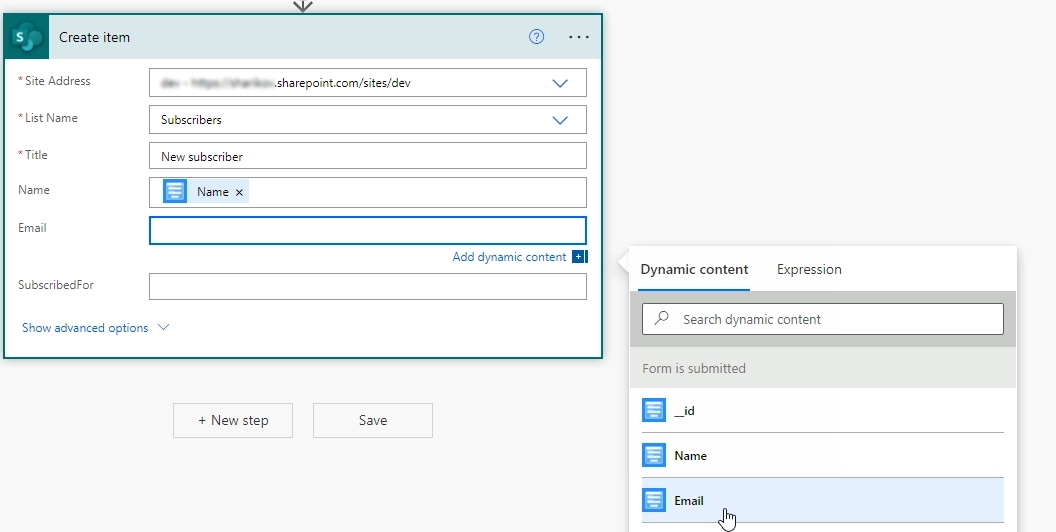
In our case, we have Title and three more Single line text columns, these can be easily filled. Select information from the form in menu on the right.
Note
You might have noticed that I’ve used Checkboxes on my form and they produce an array of strings as an output. If I were to simply add this value to any of the fields, it would result in multiple actions performed for each value in the array.
It’s not a bad option and might be useful in some situations, but if you have lots of Checkboxes on your form, it can quickly get out of hand.
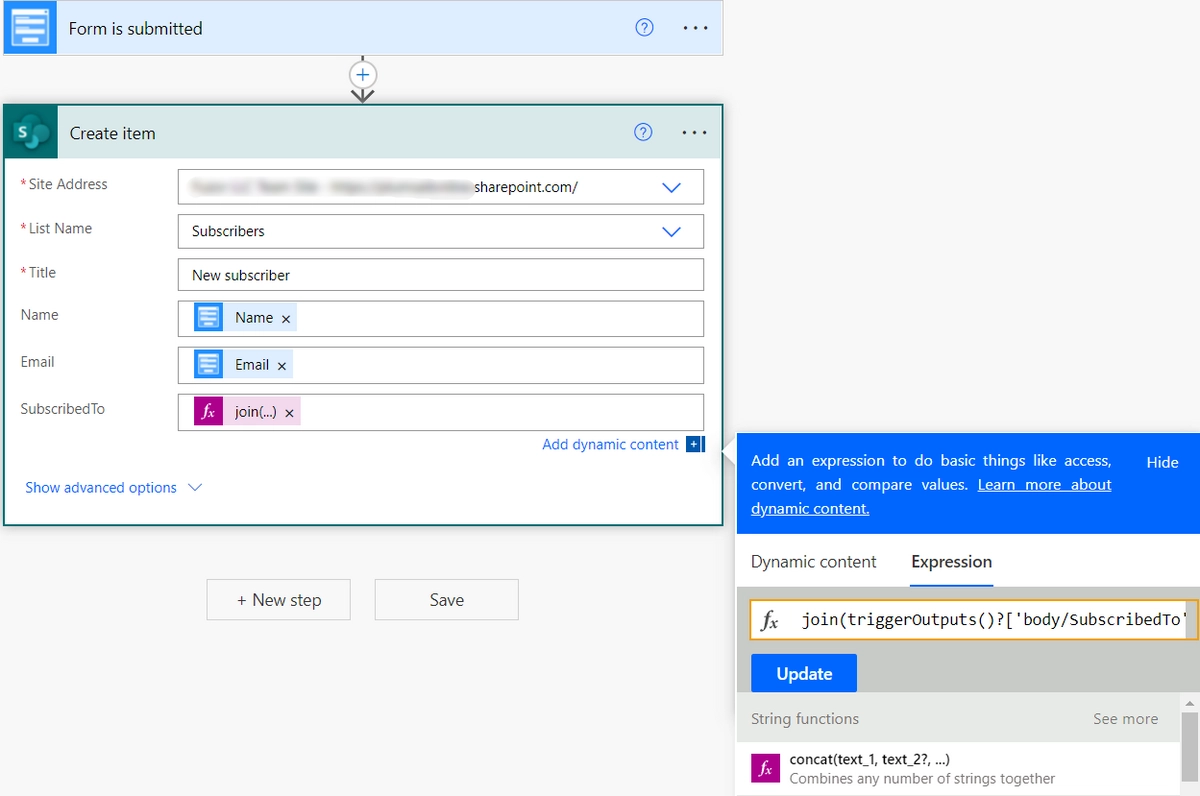
Here, I will use Expression of Workflow Definition Language to combine every value from the array into single string. In menu on the right, instead of clicking on the field, click Expression and type in join().
Now go back to Dynamic content tab, place the caret (a.k.a. the cursor) between the round brackets and click on field you want to join as a string.
You can also add a delimiter between each string, I’ve added ‘, ‘ as a delimiter.
My expression is join(triggerOutputs()?[‘body/SubscribedTo’]) where SubcribedTo is the name of my multichoice field.
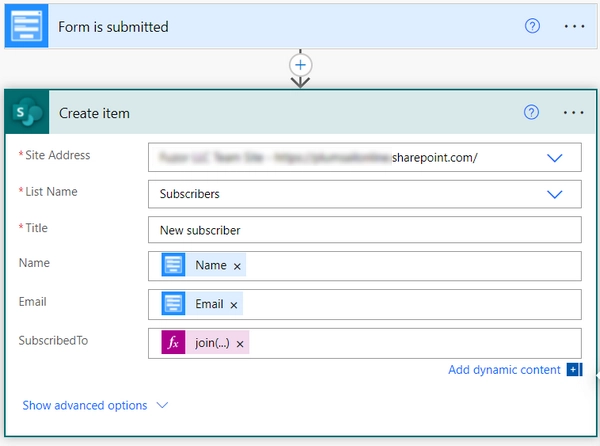
Here is how it looks in the Power Automate flow:
Finalized flow should look like this:
Now you can click Save Flow and Done.
Final result
Make sure that the Flow is active and open Form preview. I’ve filled mine with example data and clicked Submit:
Once the Form is submitted and processed with Flow, which can take some time, depending on how complex your form is, I get this result:

This example is simple, but you’ve seen how an item can be added to the list and how to convert array of strings into one string. This can be used in combination with any other Flow, for example, you can also send an email after form is submitted and item is created.
Note
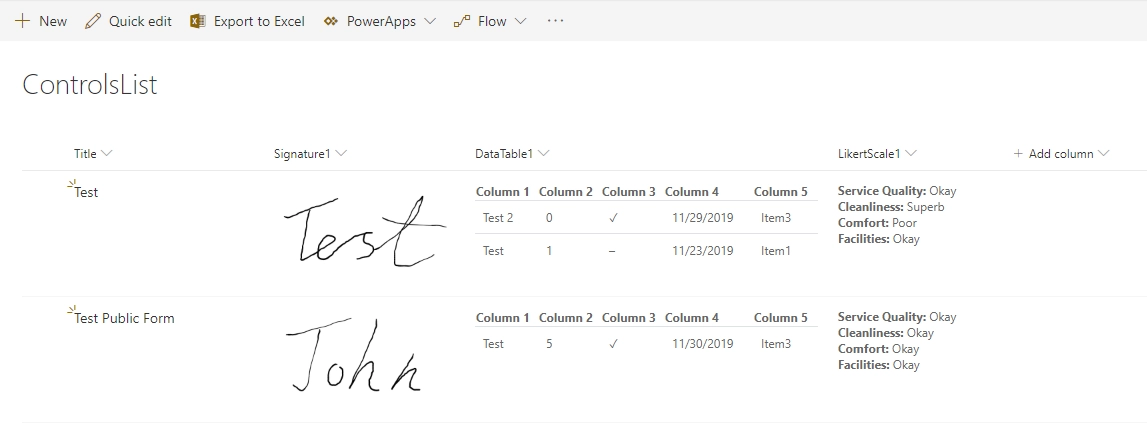
To find out how to save complex controls such as Ink Sketch, DataTable or Likert Scale to SharePoint, please, check the following article. These controls can also be rendered in SharePoint List View:
Adding attachments to the created items
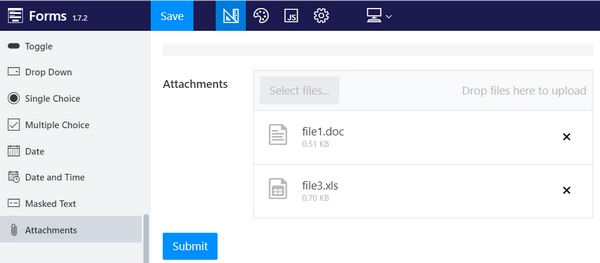
Another thing you can do is to upload attachments to newly created items. Make sure to include Attachments field on your form before creating the Flow:
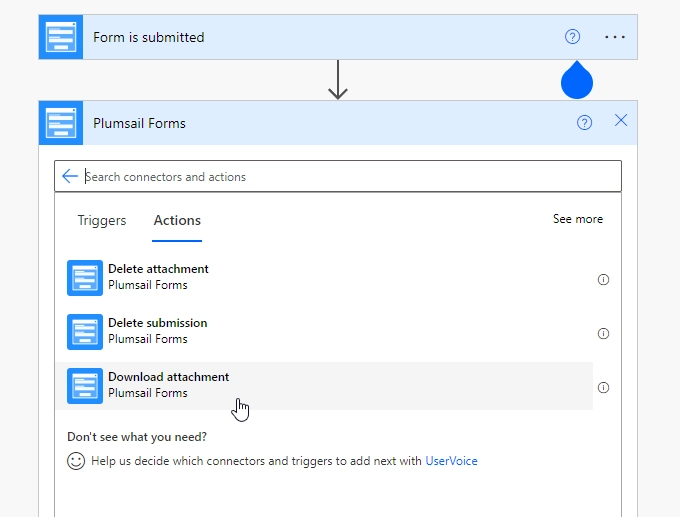
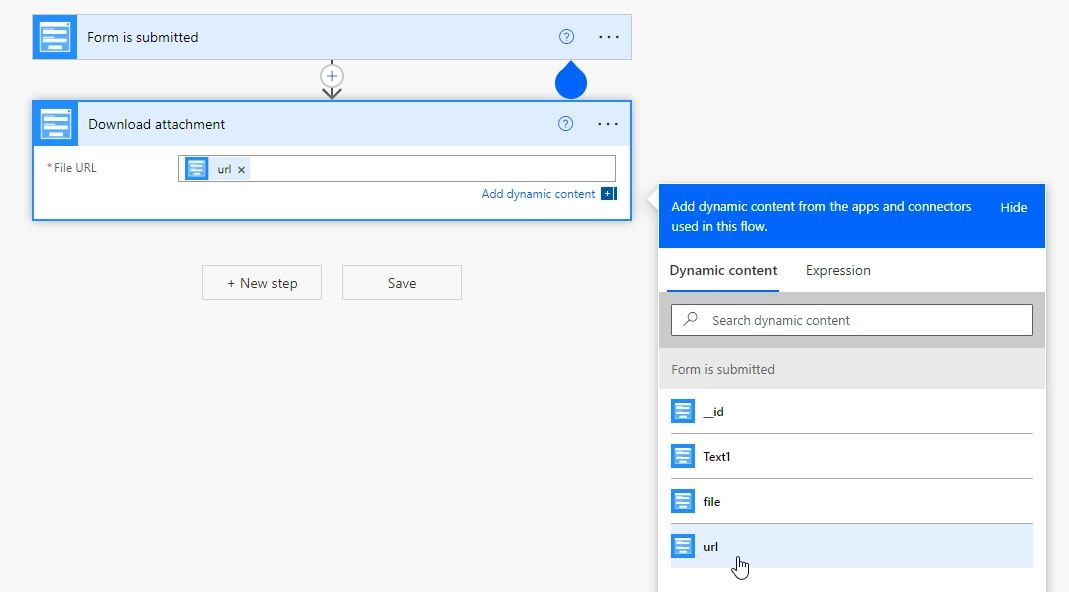
When you add all the actions previously described, click + New Step, search for Plumsail Forms and select Download attachment action:
Add the url to the File URL field. It should look like this as a result:
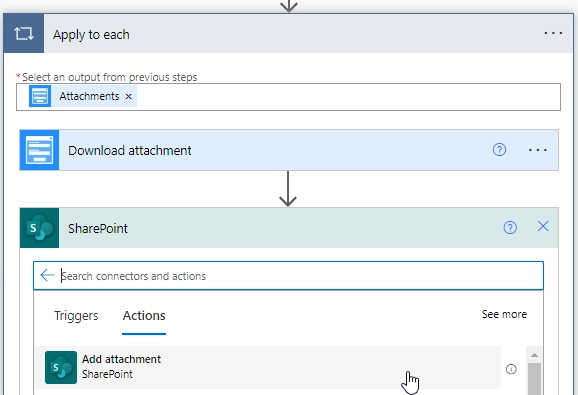
This will automatically transform this action into repeating one which will be performed for each file in Attachments.
Do not click + New Step”! Click *Add an action instead, search for SharePoint Attachment and select SharePoint - Add attachment action:
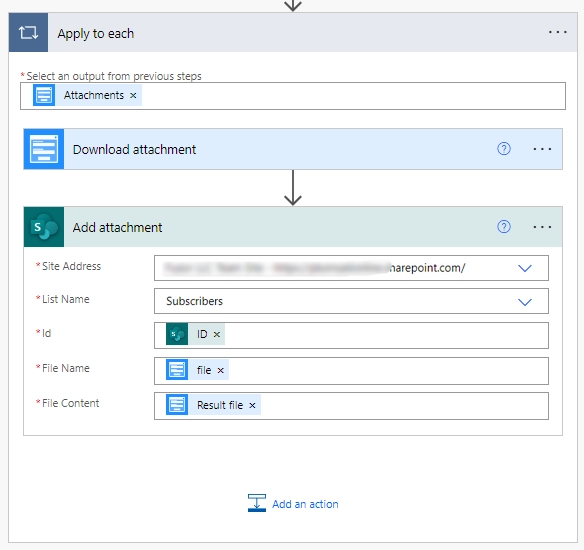
It should still be the same step, so in this next window you can fill the following data - your Site address, List name - select the same as before, File name - select file from the trigget output, File Content - select Result file from Download attachment:
Now, the Flow is ready and can be saved. Click Save Flow and Done.
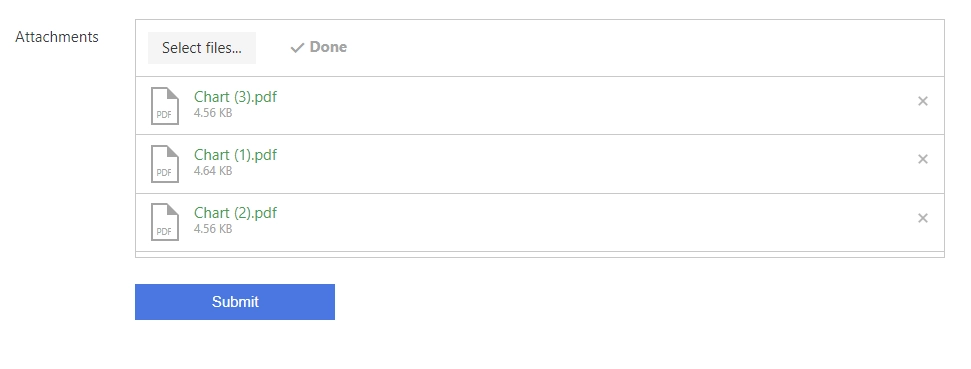
We can test how the Flow works with Form Preview:
And here are the attachments added to SharePoint via the Flow:
