Create custom connector
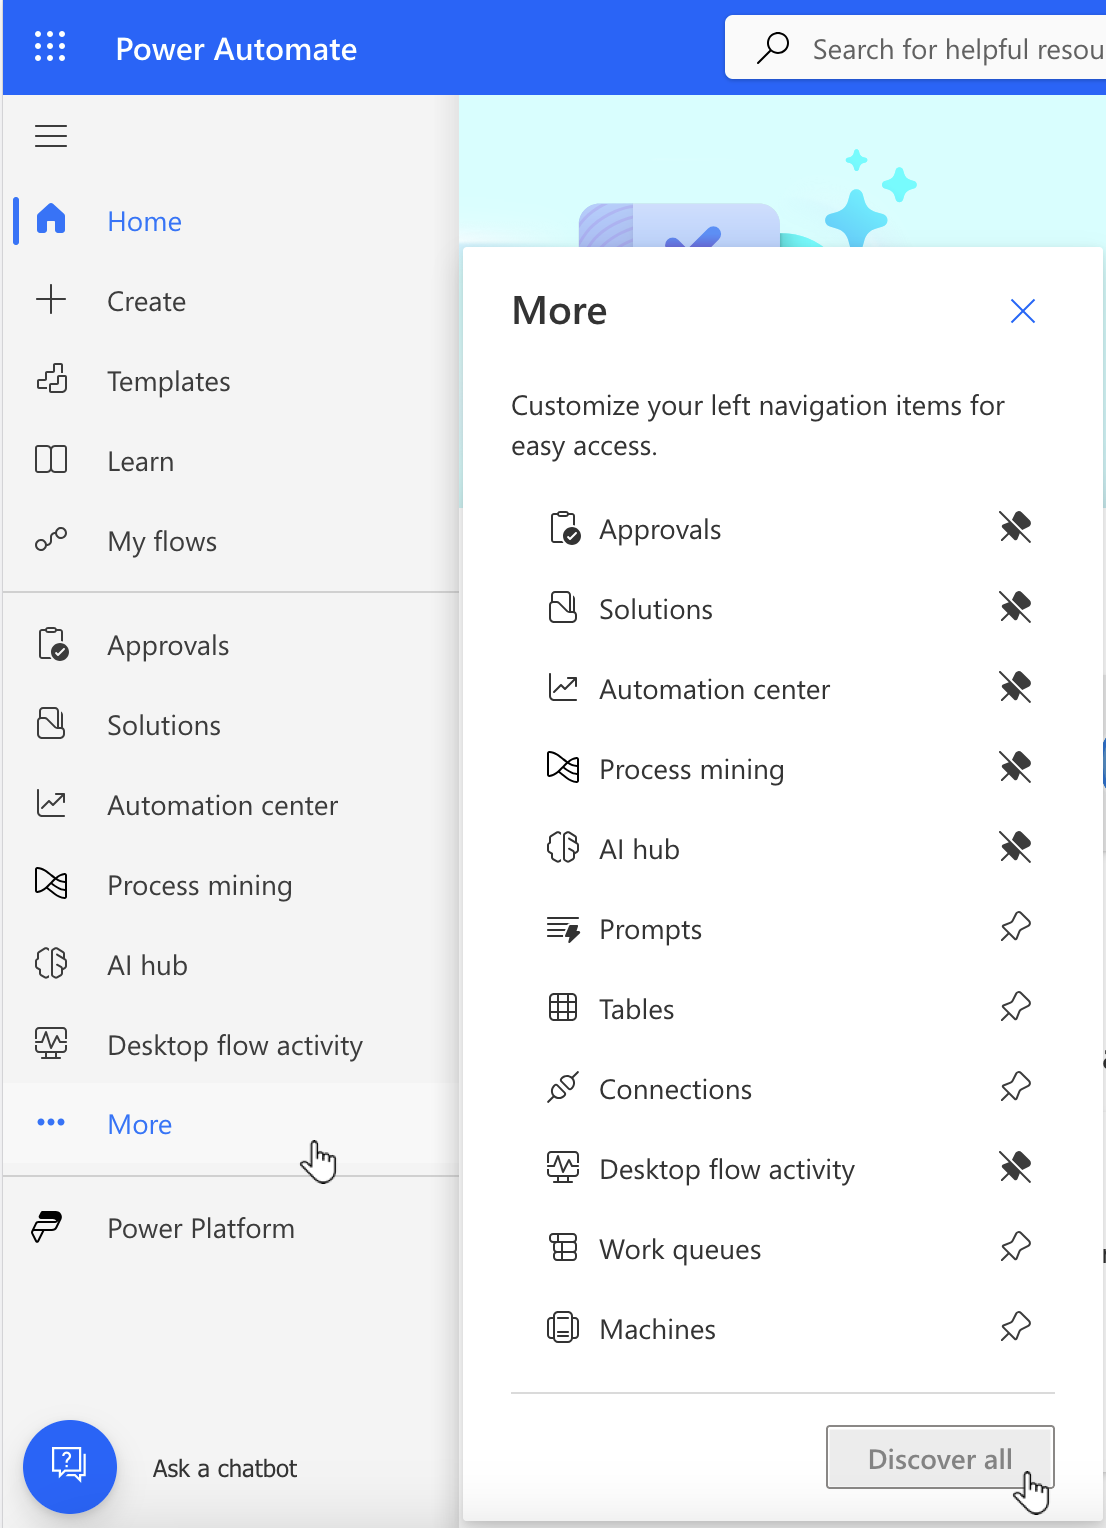
Open Power Automate (Microsoft Flow) account, then navigate to More options on the left menu and click Discover all:
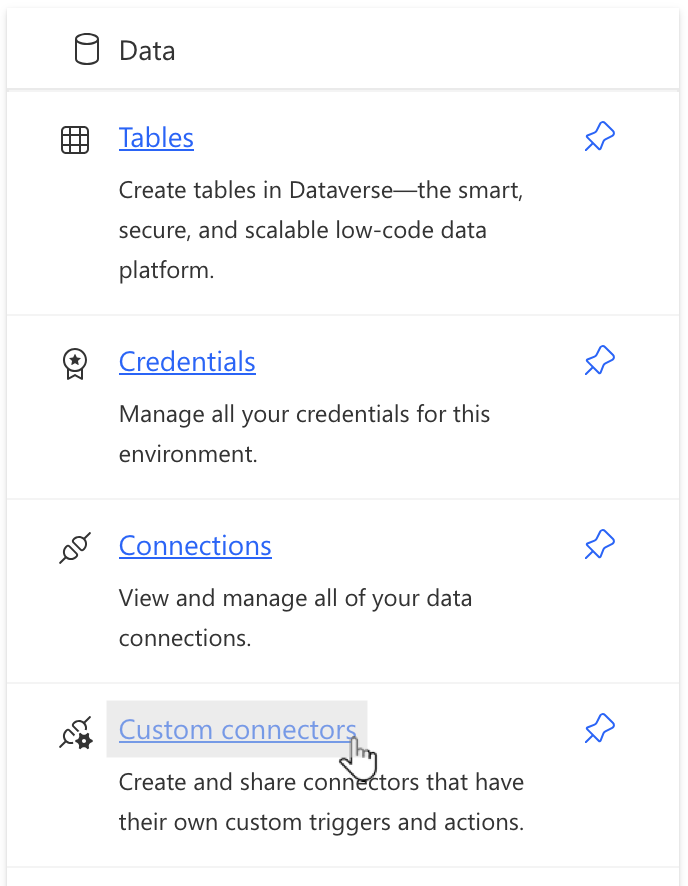
Scroll down to Data block and click Custom connectors (you also can pin it to the left menu for easier access in the future):
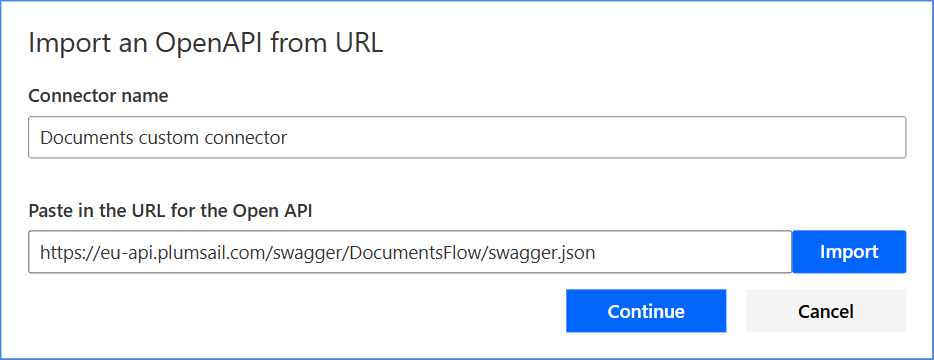
Click on the top menu New custom connector → Import an OpenAPI from URL:

Fill in the form and then click Import:
Connector name - for example ‘Documents custom connector’
Swagger definition URL depends on your data center location:
Once you clicked Continue you will see General step of connector configuration.

You may want to differentiate this connector from others. In this case, you can assign a custom icon and custom color for it. We suggest these icon and color:
Parameter |
Value |
Note |
|---|---|---|
Icon |
Please note that the icon must be in PNG or JPG format, convert it if necessary. Also, if you have difficulties loading the icon, read this discussion. |
|
Color |
#7d4bcd
|
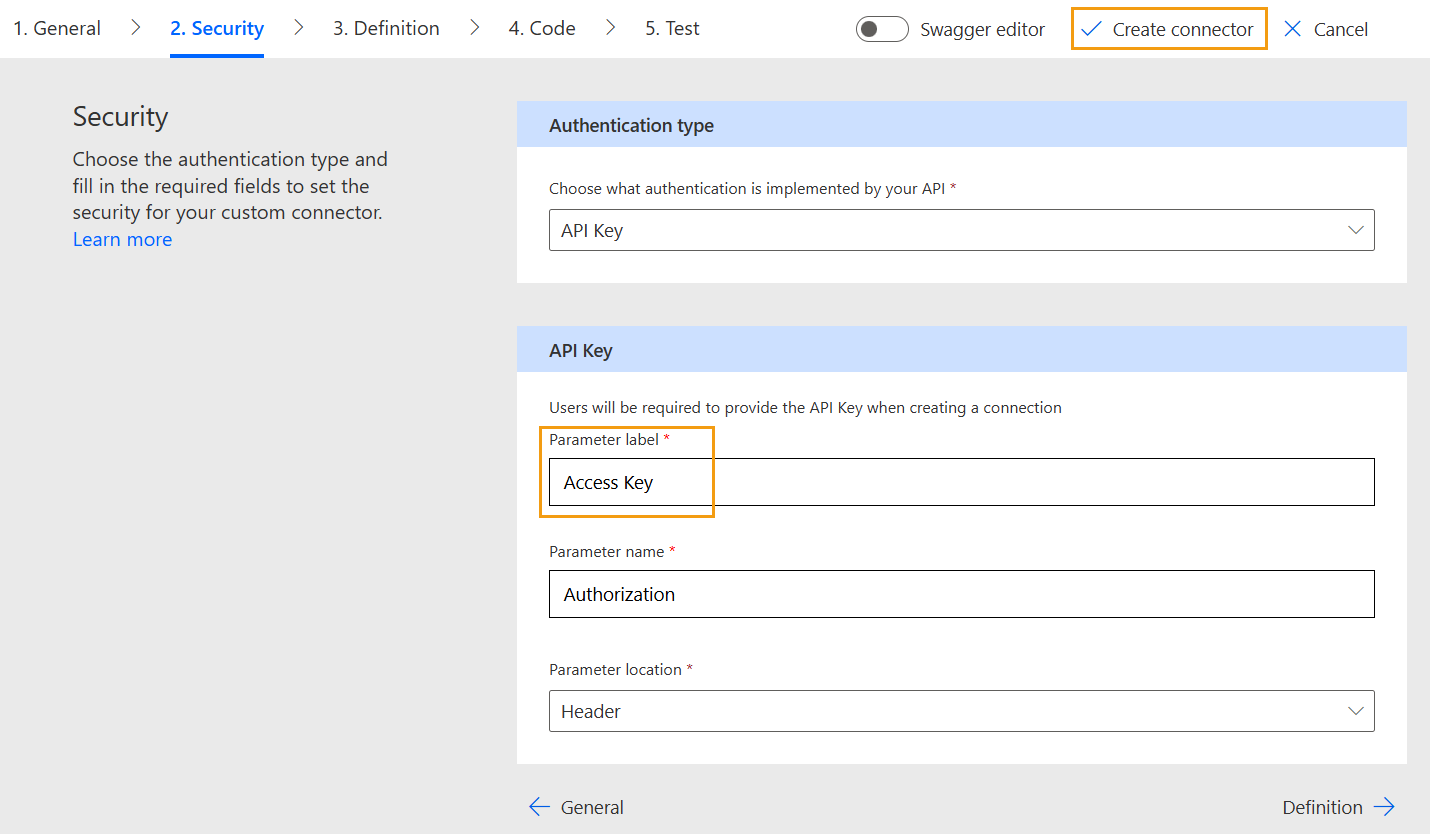
Then click Security and you’ll see Authentication type and API key settings. Fill in Parameter label with the value ‘Access Key’ and click Create connector on the top menu:
After successful saving you will see a message about it, this means that the connector is ready for use.